
1-) Ticket Menu
The Ticket Menu allows you to view customer requests from all your communication channels on a single screen, in an organized and categorized manner. Requests coming from different sources are gathered under this menu, helping you manage your support processes easily and quickly.
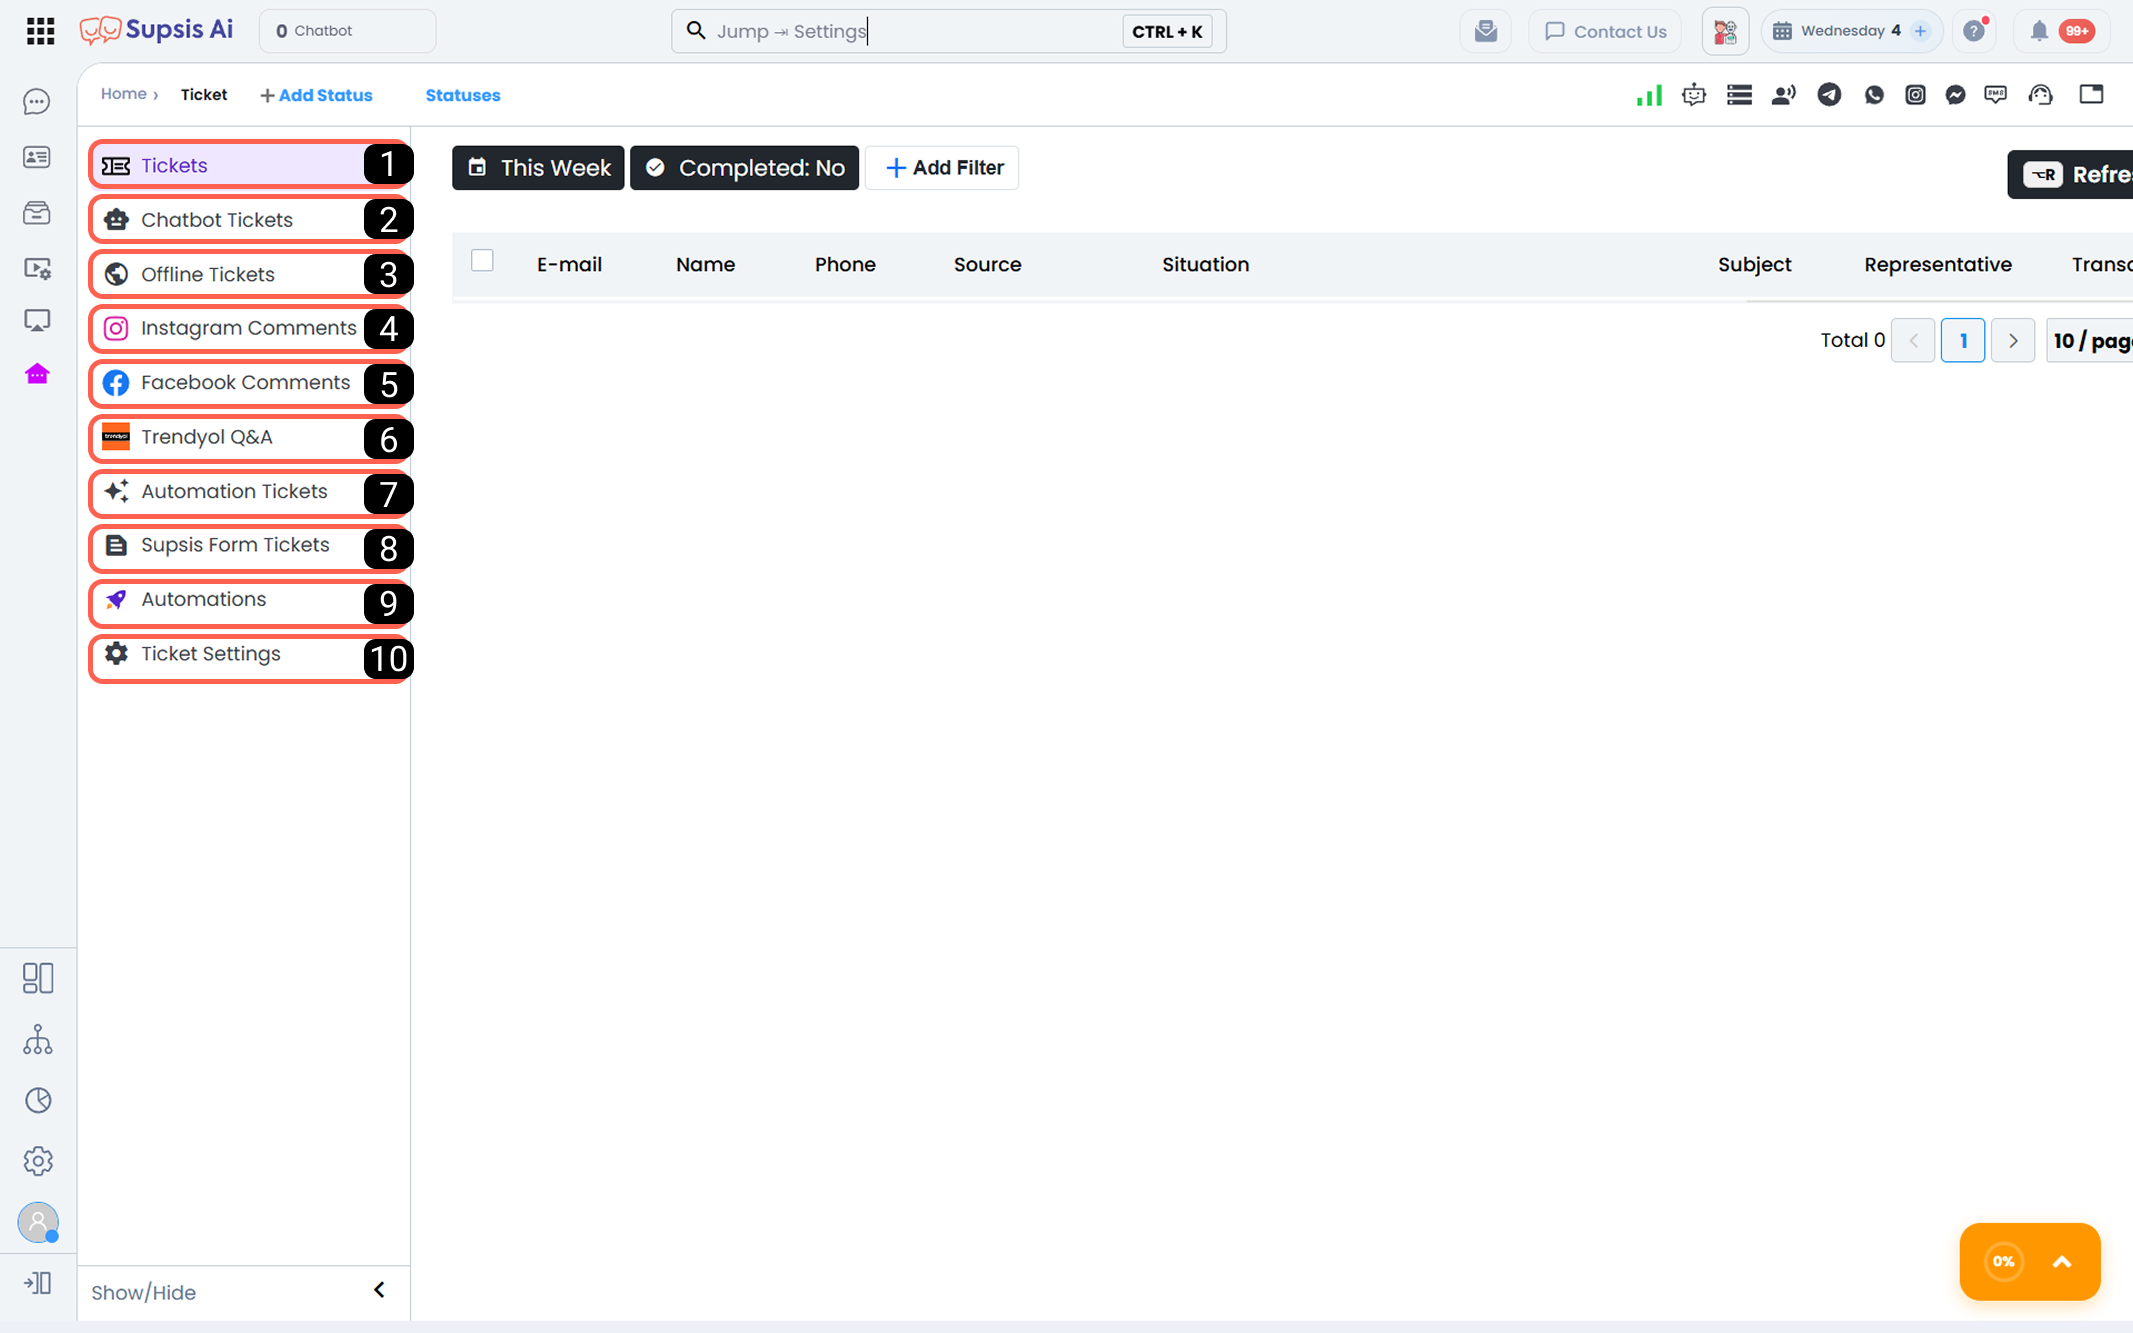
| No | Menu |
|---|---|
| 1 | Tickets |
| 2 | Chatbot Requests |
| 3 | Offline Requests |
| 4 | Instagram Comments |
| 5 | Facebook Comments |
| 6 | Trendyol Q&A |
| 7 | Automation Tickets |
| 8 | Supsis Form Tickets |
| 9 | Automations |
| 10 | Request Settings |
| --- |
1-) Tickets
You can collectively view all customer requests on this screen. Tickets under all other headings are also presented here as a single list, providing centralized control.
2-) Chatbot Requests
Requests created by users via chatbot through interaction with the “Create Ticket” block used in the chatbot scenario are listed under this heading.
3-) Offline Requests
Customer requests left through your website’s chat bubble while the panel is offline are listed in this section.
4-) Instagram Comments
Comments received on posts of your Instagram accounts integrated into your Supsis AI panel are automatically converted into tickets and displayed in this section.
5-) Facebook Comments
Comments received on your Facebook pages are listed under this menu and can be responded to directly.
6-) Trendyol Q&A
Customer questions received in your Trendyol store are collected under this category and can be answered from a single screen.
7-) Automation Tickets
Requests created by users through the automation module via interaction with the “Create Ticket” block in the automation diagram are listed under this heading.
8-) Supsis Form Tickets
When the “Route Form Responses” option is enabled in the Forms menu, forms filled out by users are automatically converted into tickets and displayed under this heading.
9-) Automations
You can access all event-based automations triggered by ticket activities from this section.
10-) Request Settings
Request Settings ensure that created tickets are automatically routed to designated email addresses according to defined rules. From this area, you can easily manage your email notification rules.