
The Team section is the area where agents’ basic information is displayed, where agents can create groups among themselves for communication purposes, and where department-based internal team communication is provided. The Team Conversation section facilitates interaction among team members while enabling centralized management and quick access to agents’ basic information and agent-based report shortcuts.
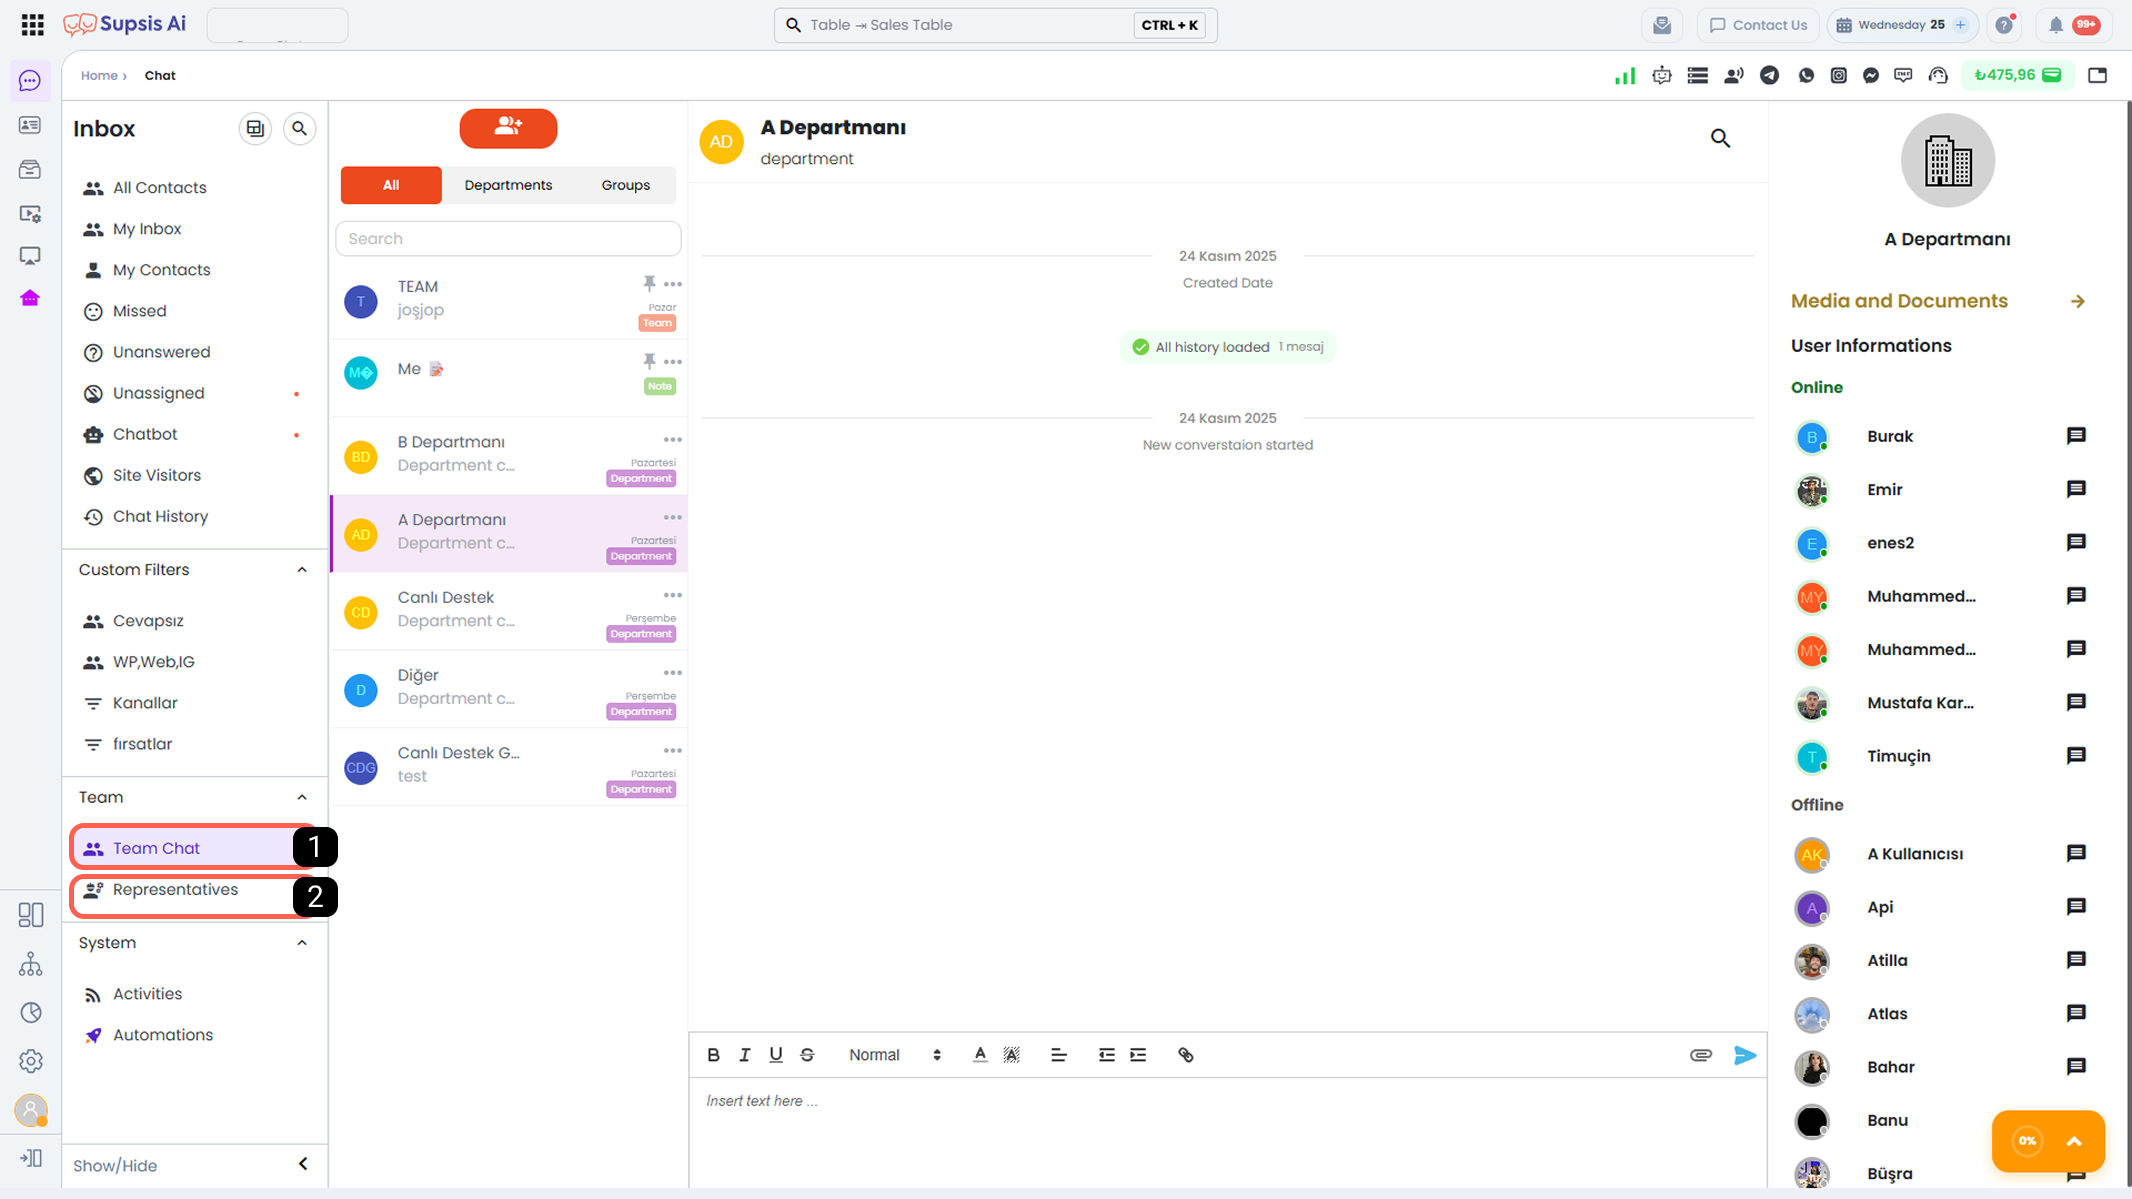
Team Conversation
The Team Conversation module is the area where communication is conducted between agents, within departments, and through created groups. While facilitating internal team communication, this module also enables managers to monitor communication processes and supervise them when necessary.
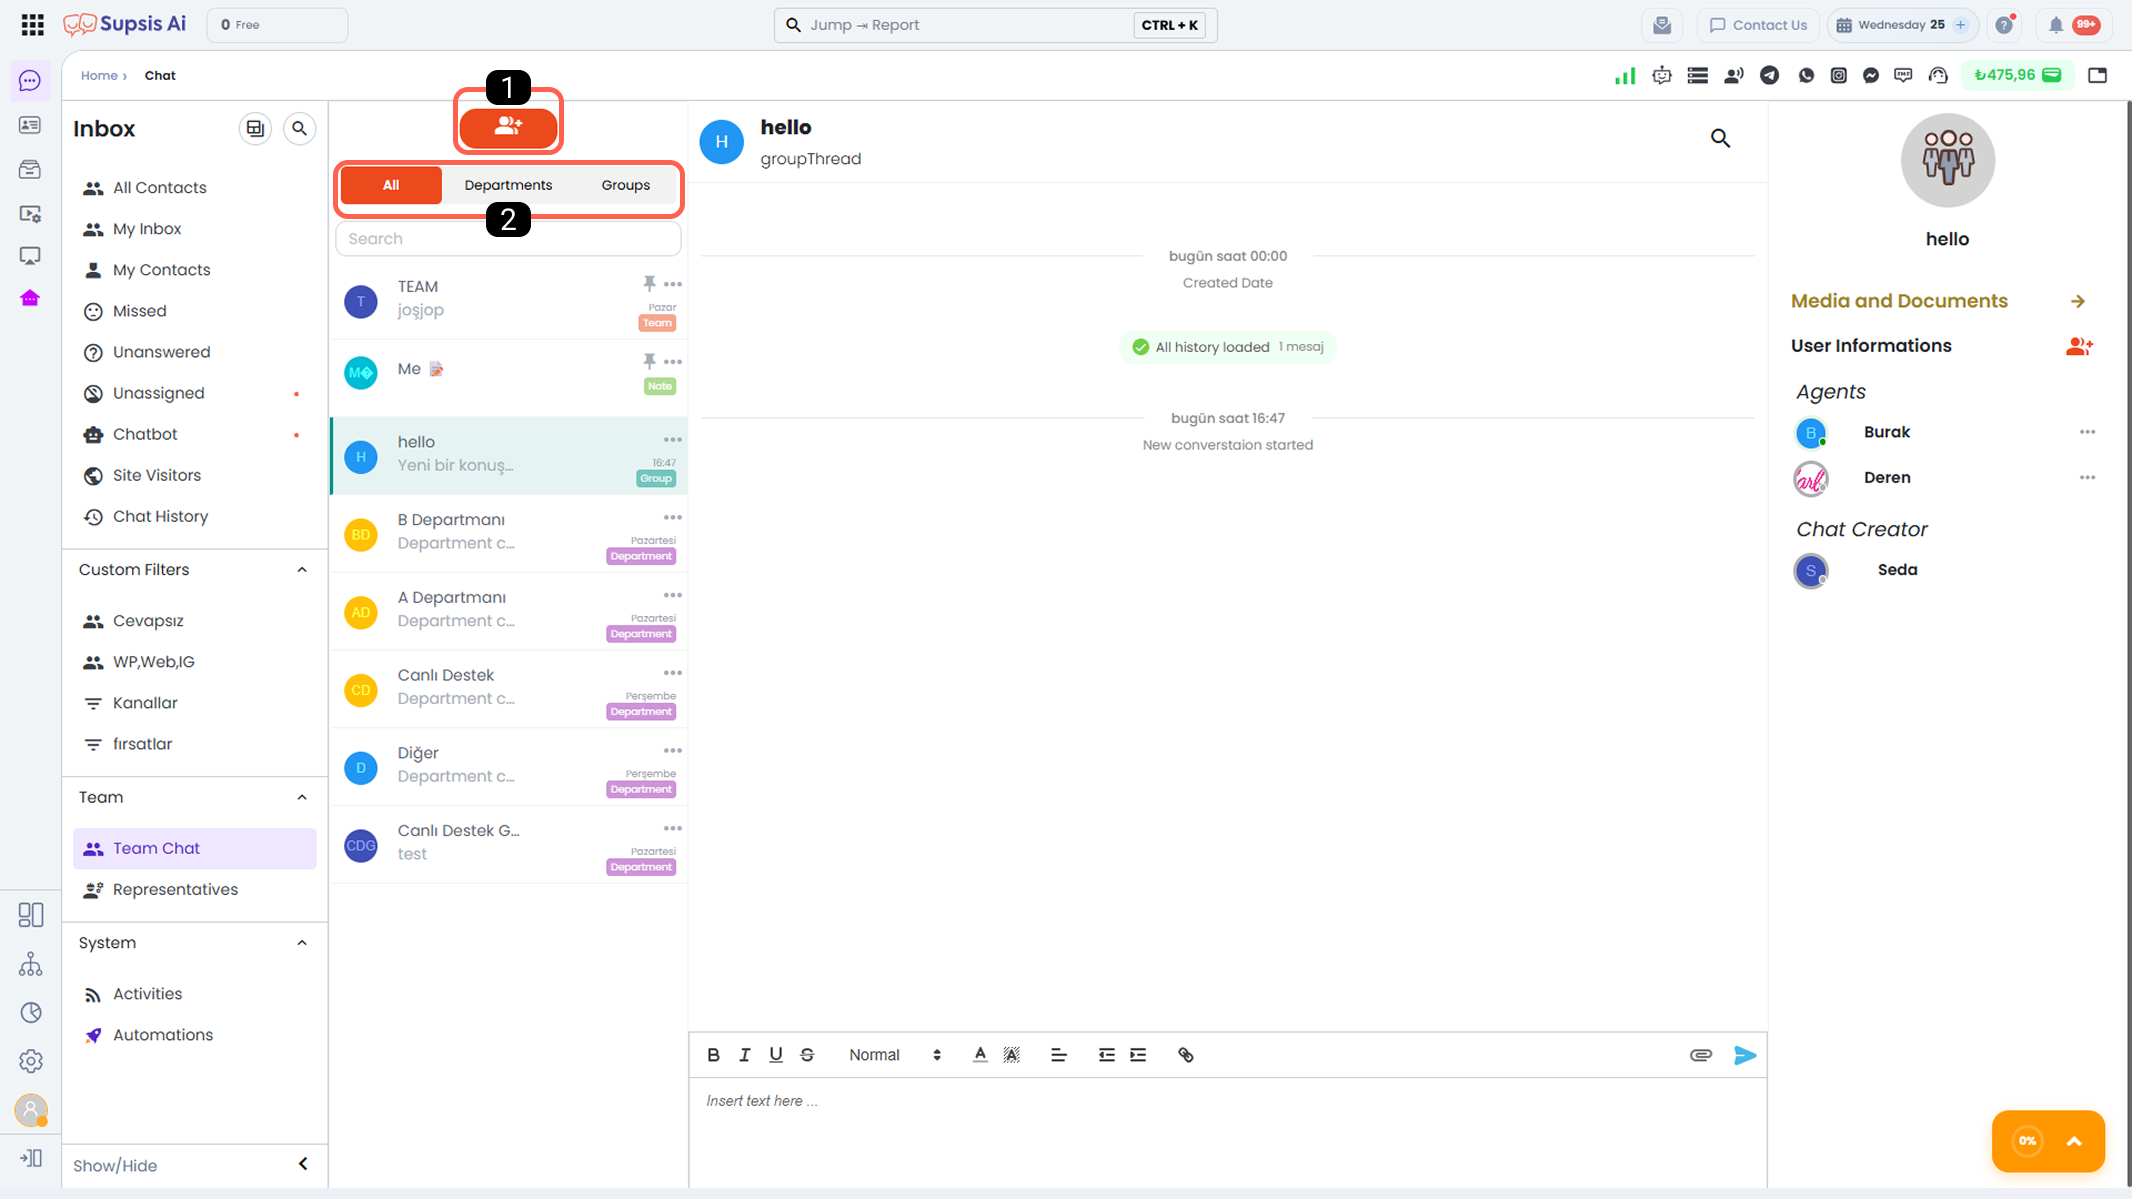
Create Group
1-) Create Group
You can use this button to create a group in order to ensure internal team communication.
-
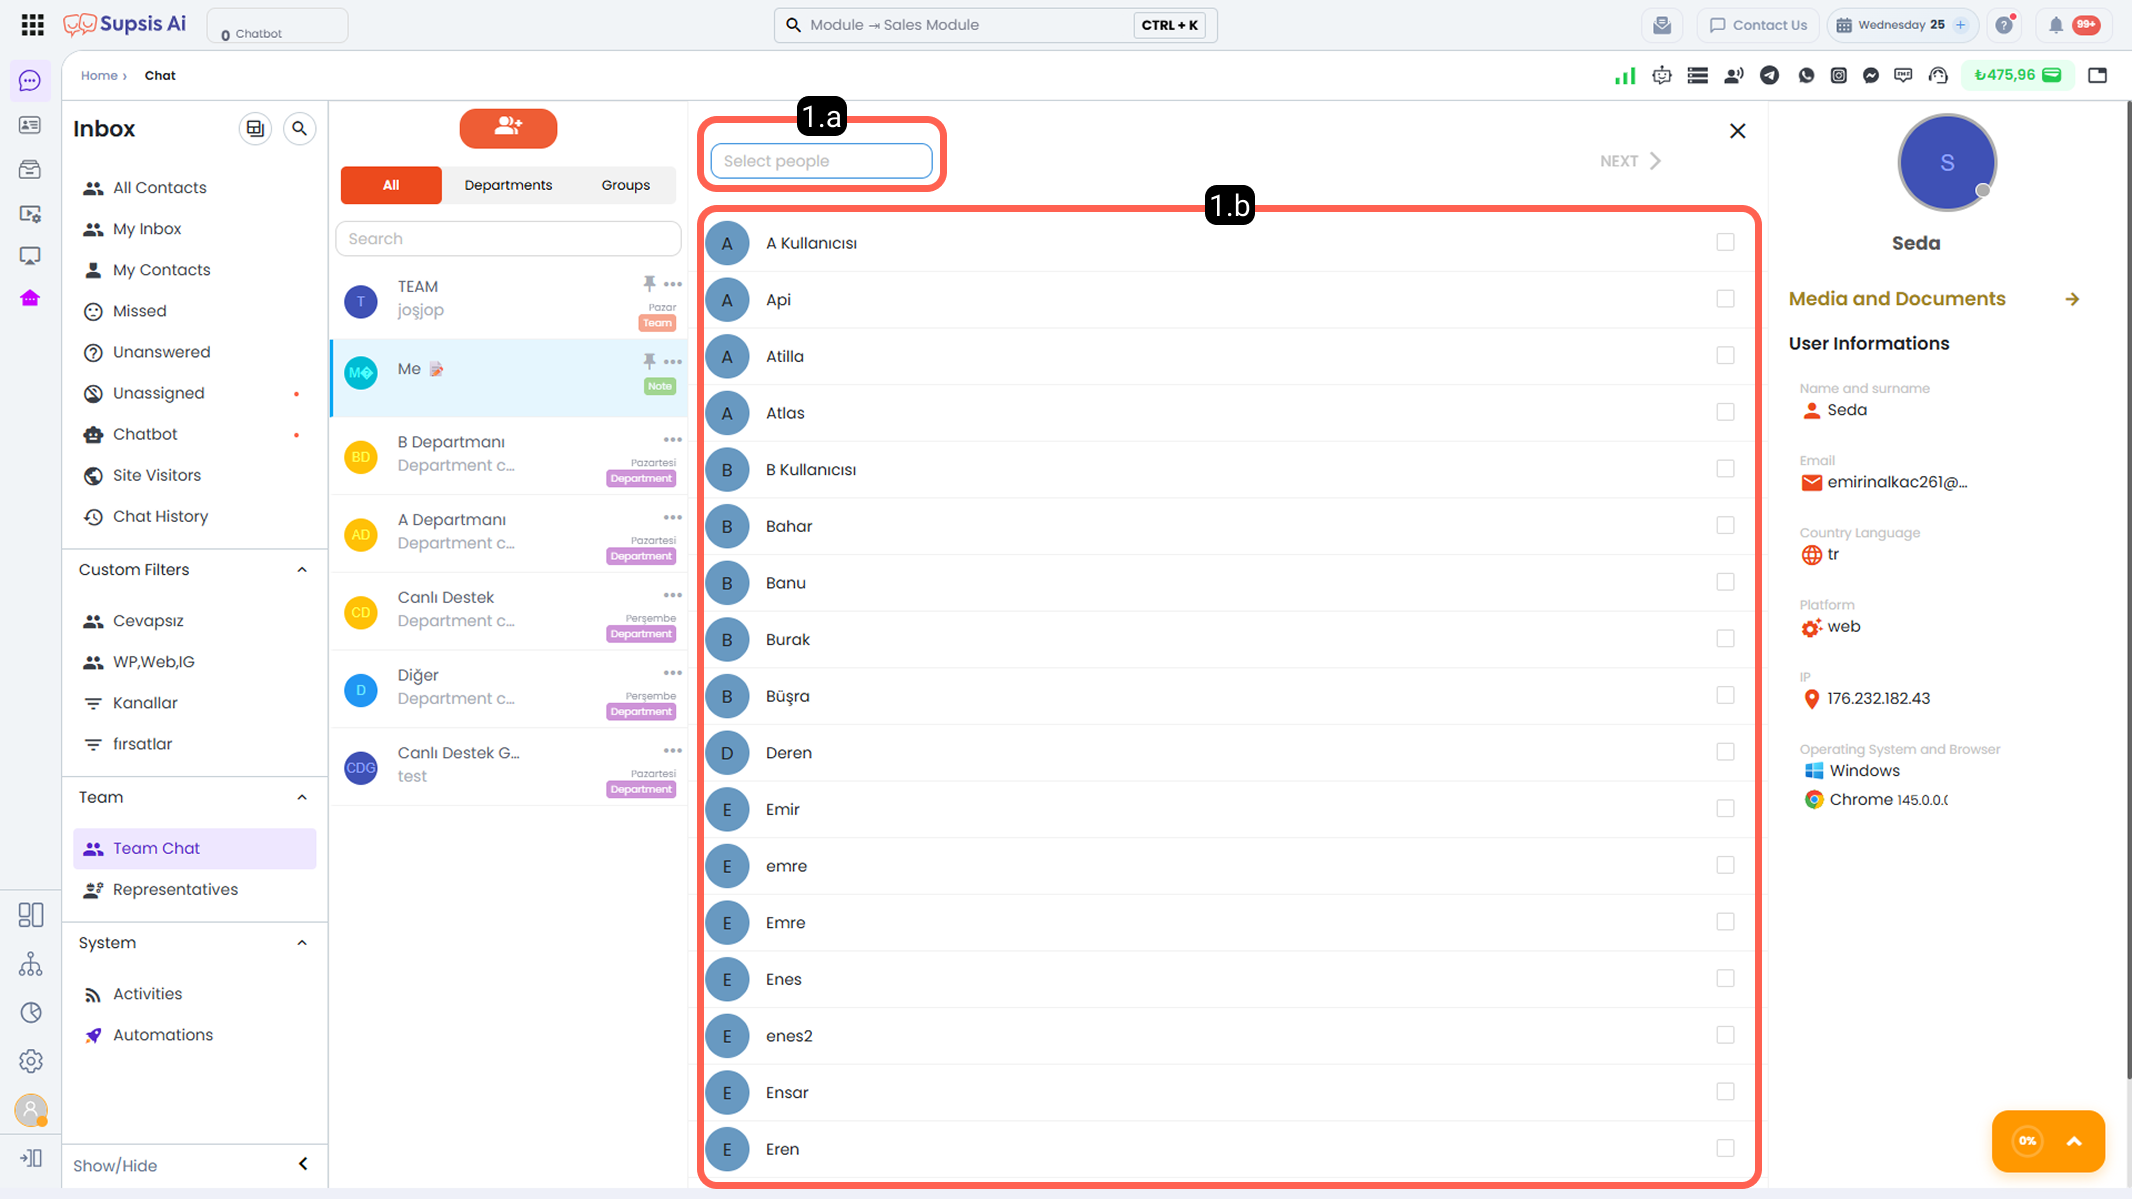
1.a – Search User
This is the area where you can search among users registered in the system. You can find users by their username via the search bar. -
1.b – User List
This is the area where all users defined in the Supsis system are listed. You can select users from this list or search via the section marked 1.a to determine which users you want to add to the group.
After selecting the users you want to add to the group, you can proceed to the group creation stage by using the Next button located at the top right.
-
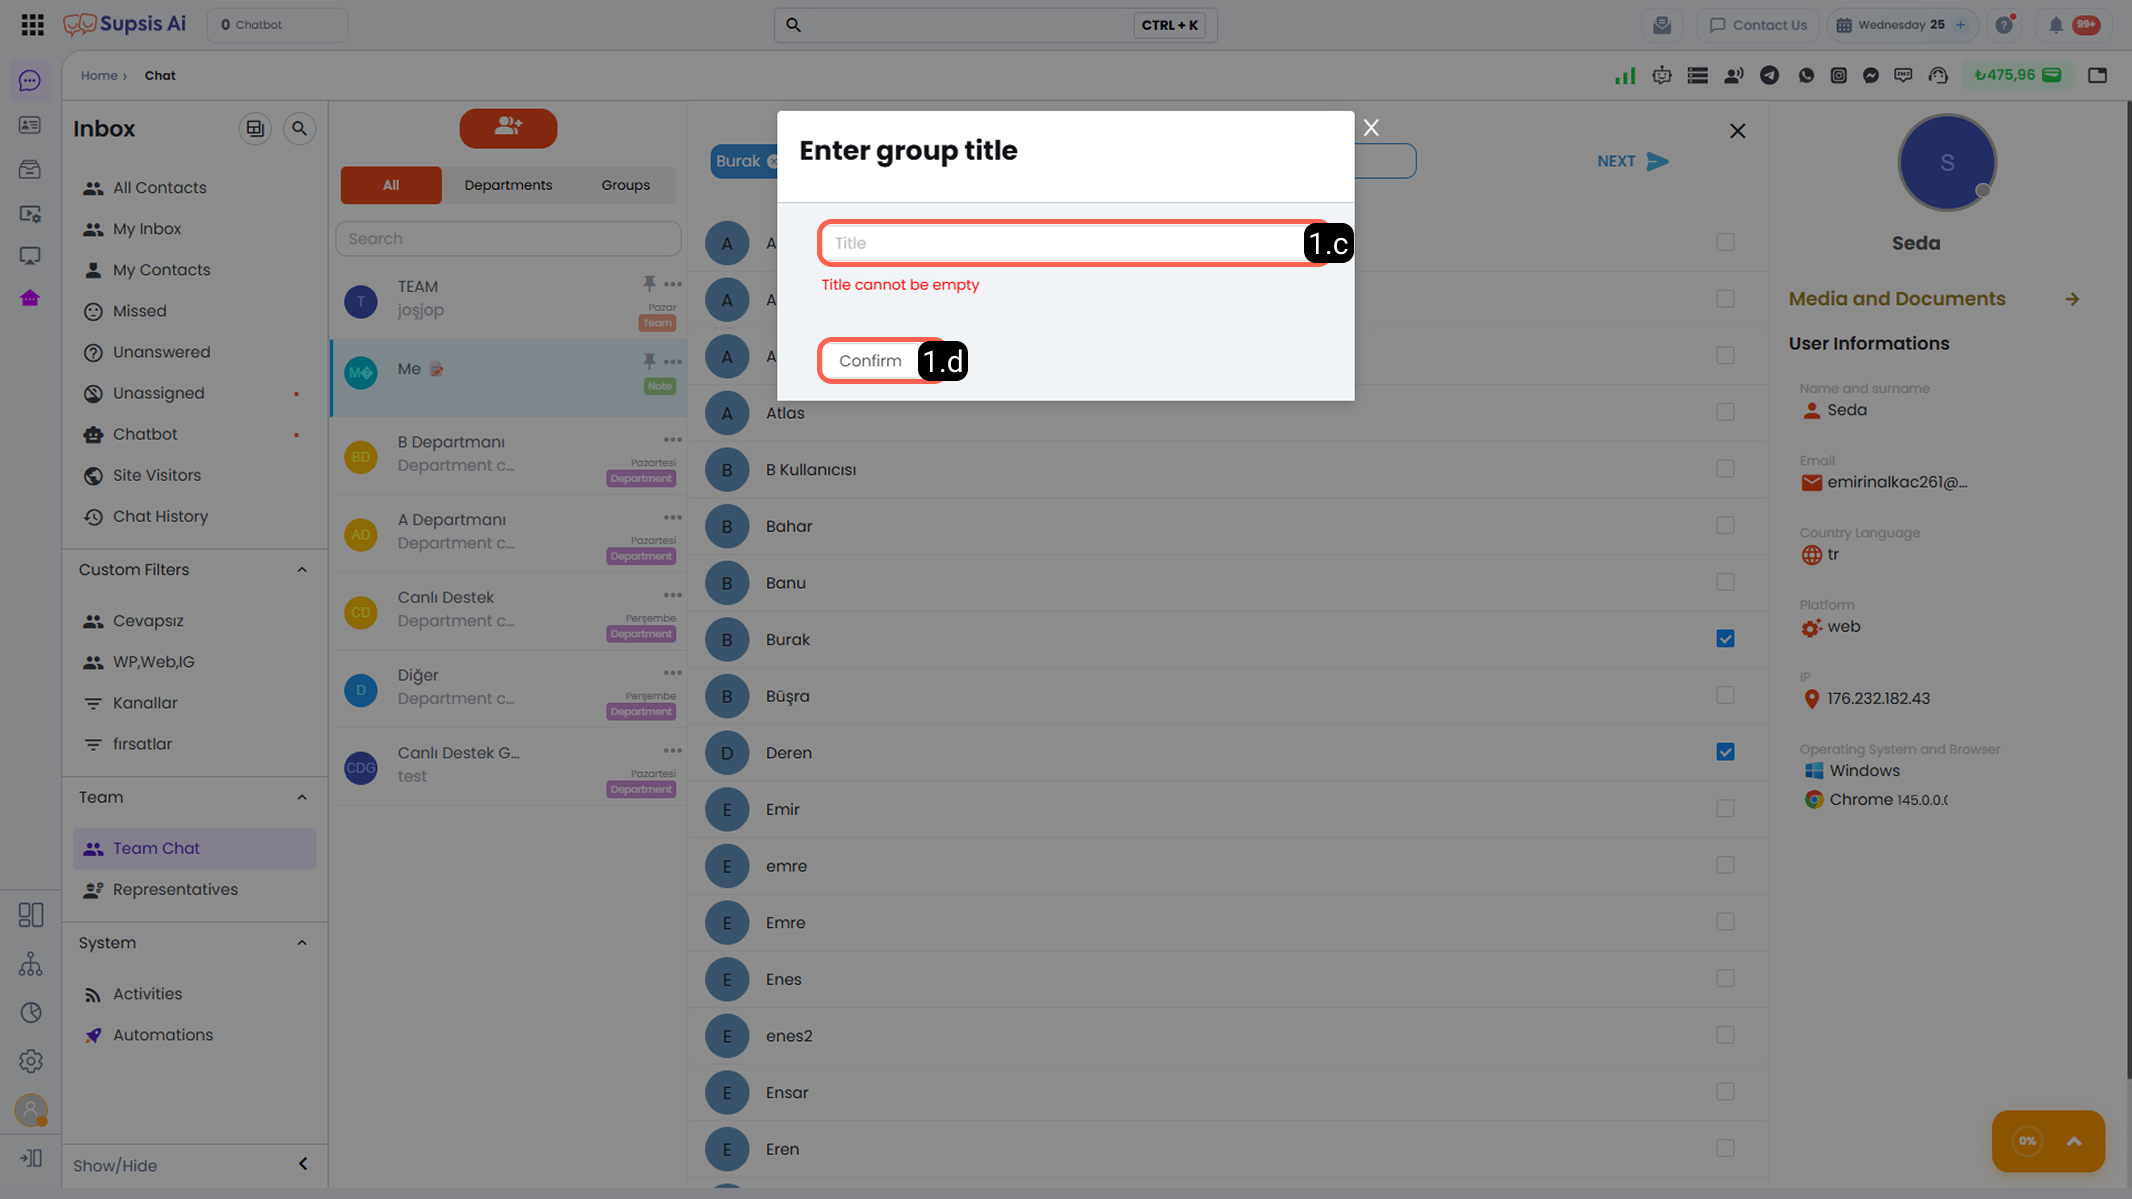
1.c – Group Title
This is the area where you must define a name for the group you are creating. This field is mandatory; the process cannot be completed without entering a group name. -
1.d – Complete Process
After defining the group title, you can complete the group creation process by using the Confirm button.
When you successfully complete the described steps, the group becomes active and the selected users can access the group conversation.
2-) Team Conversation Categories
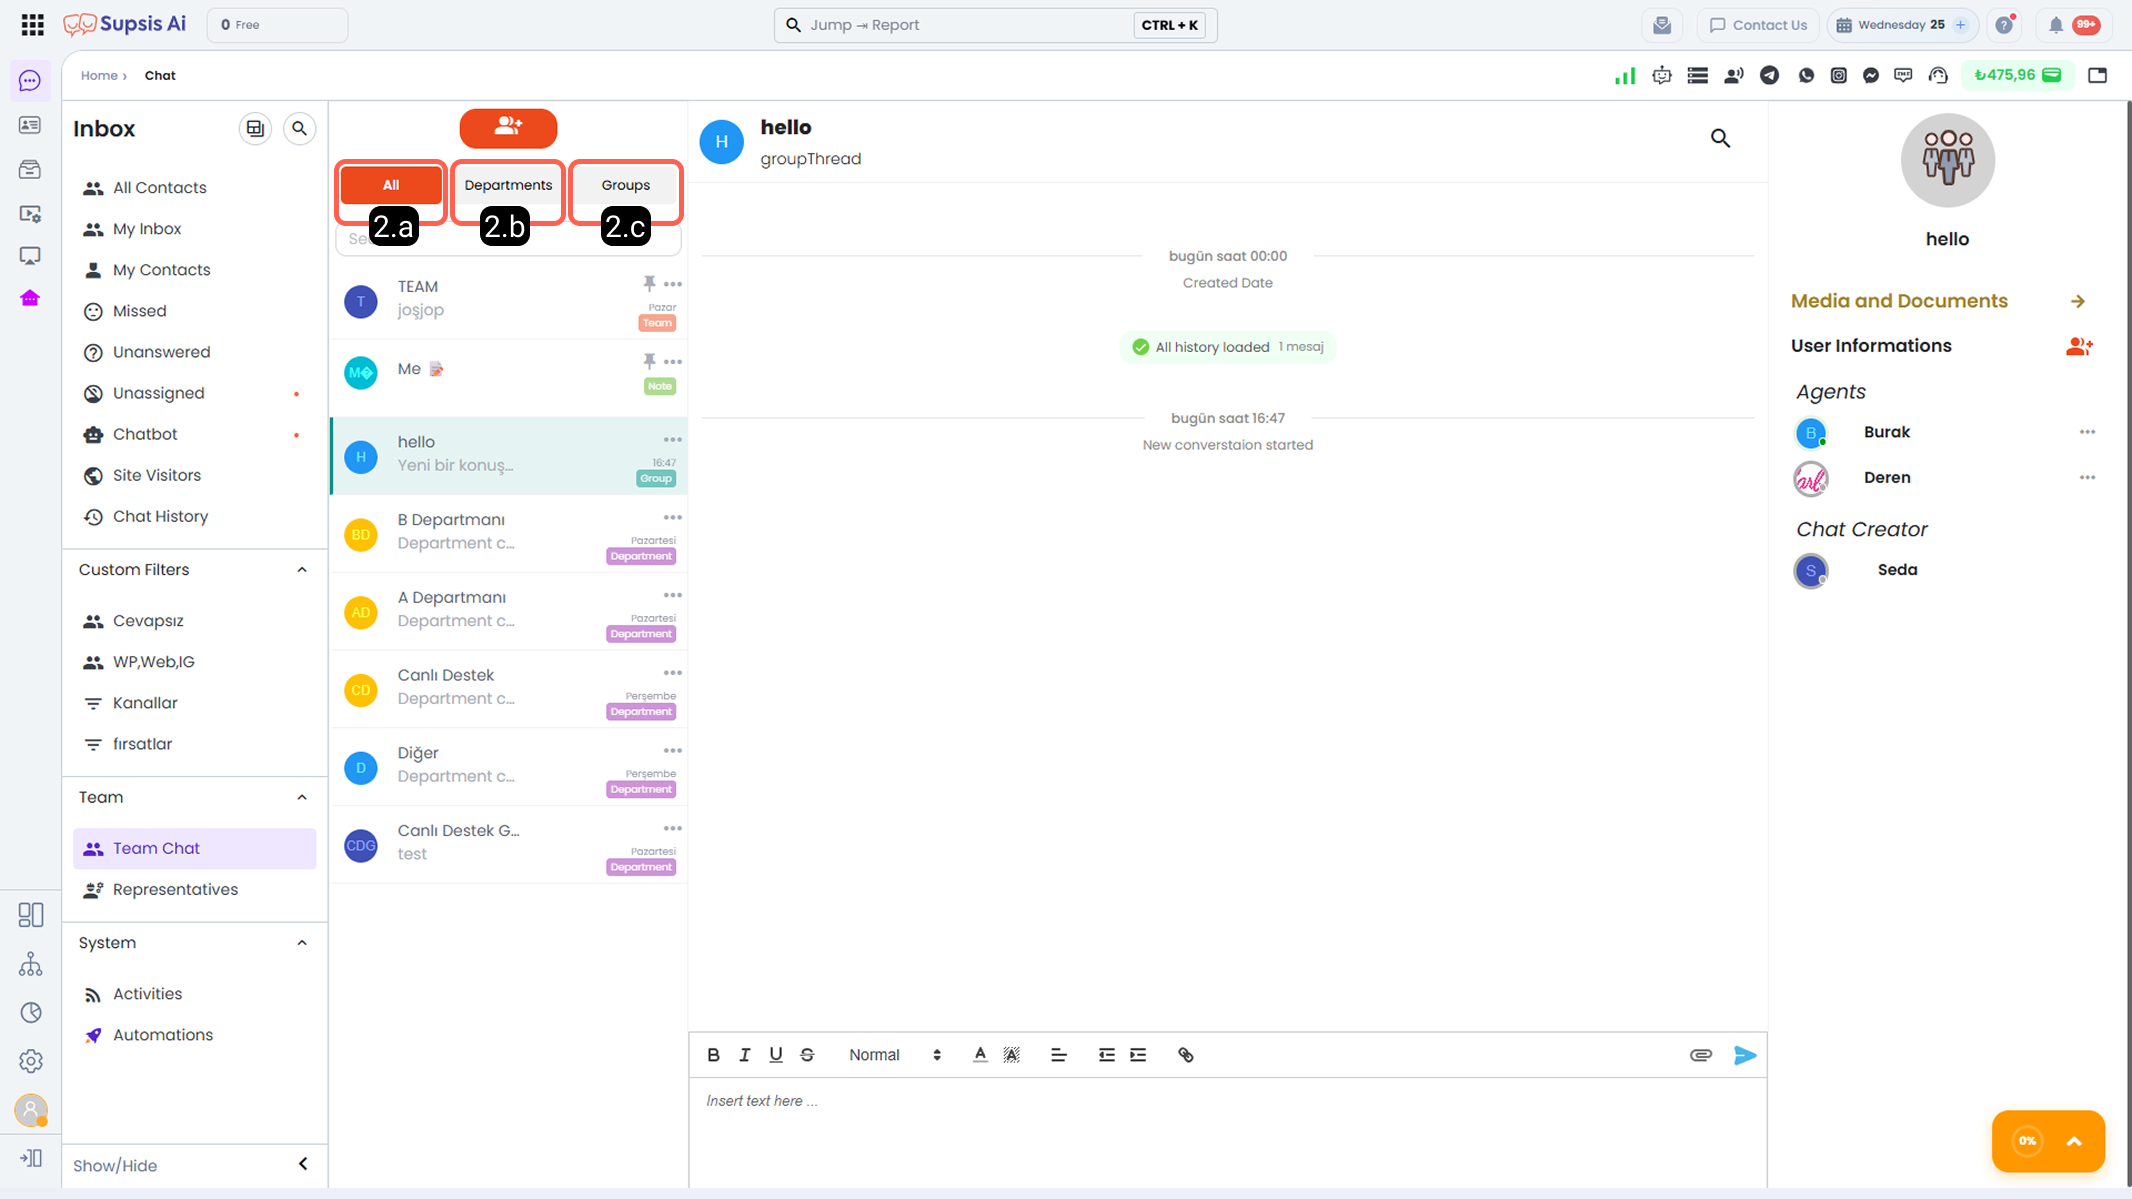
The Team Conversation module is divided into categories based on different communication types.
-
2.a – All
This section lists together one-to-one (DM) conversations between agents, department conversations, and all created group chats. -
2.b – Departments
Departments are user groups automatically created by the Supsis system. When a department is defined in the system, a conversation group belonging to that department is automatically created, and users added to the department are automatically included in this group.For more information about Departments, please review the Department documentation, and for adding users to a department, please review the Edit User documentation.
-
2.c – Groups
This is the area where communication groups manually created by users are listed.
Agents
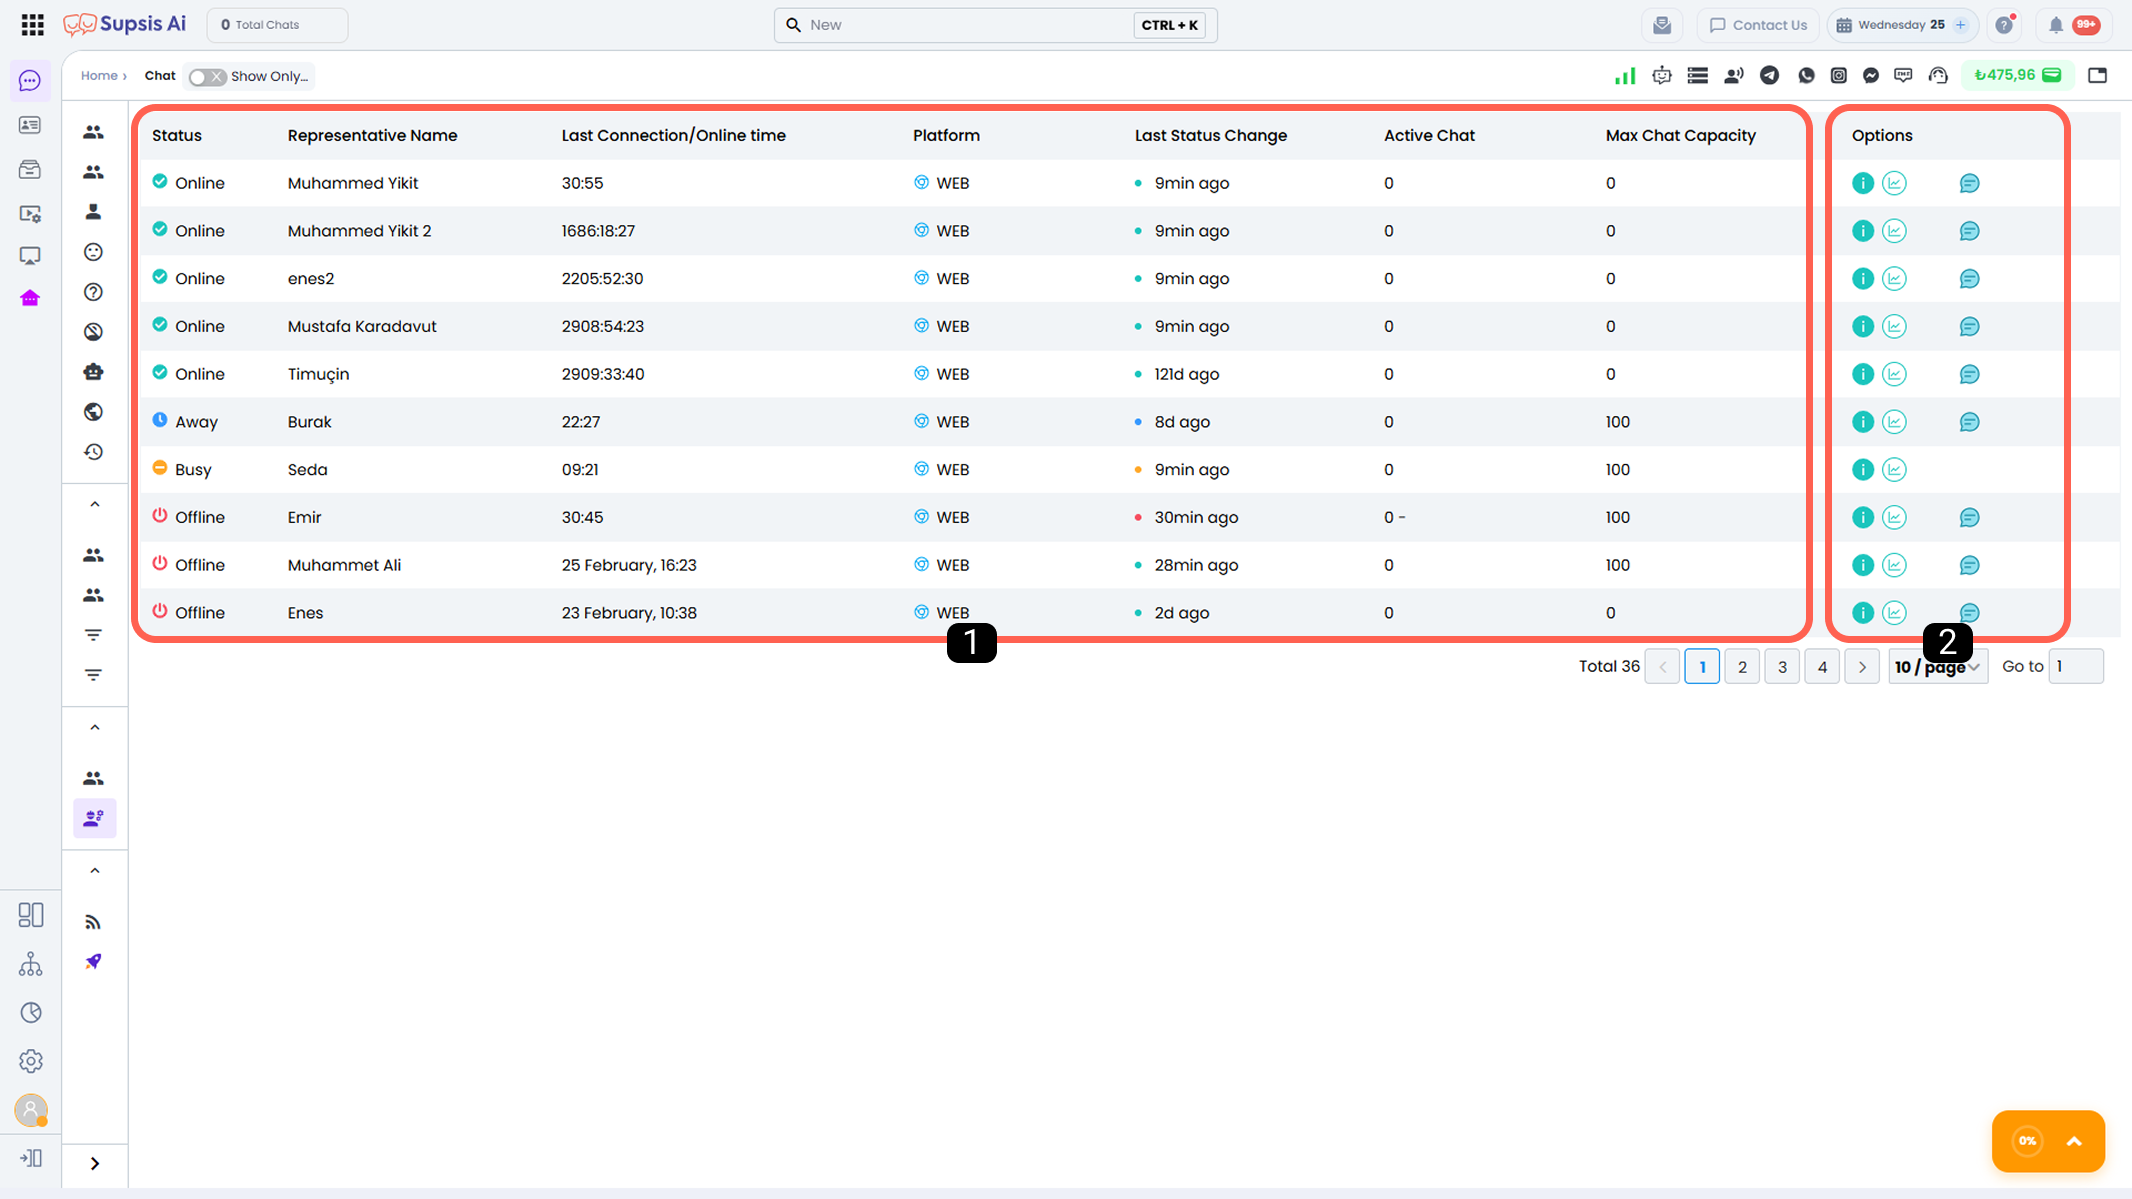
The Agents section allows centralized management and quick access to Supsis users’ basic information and agent-based report shortcuts.
- Agent Information
- Options
2.a – Agent Information
The Agent Information section is the area where you can view the basic information of agents defined in the system. Certain details about agents are listed in this area.
Through this section, you can quickly obtain information about agents, view the team structure, and manage the team more efficiently.
-
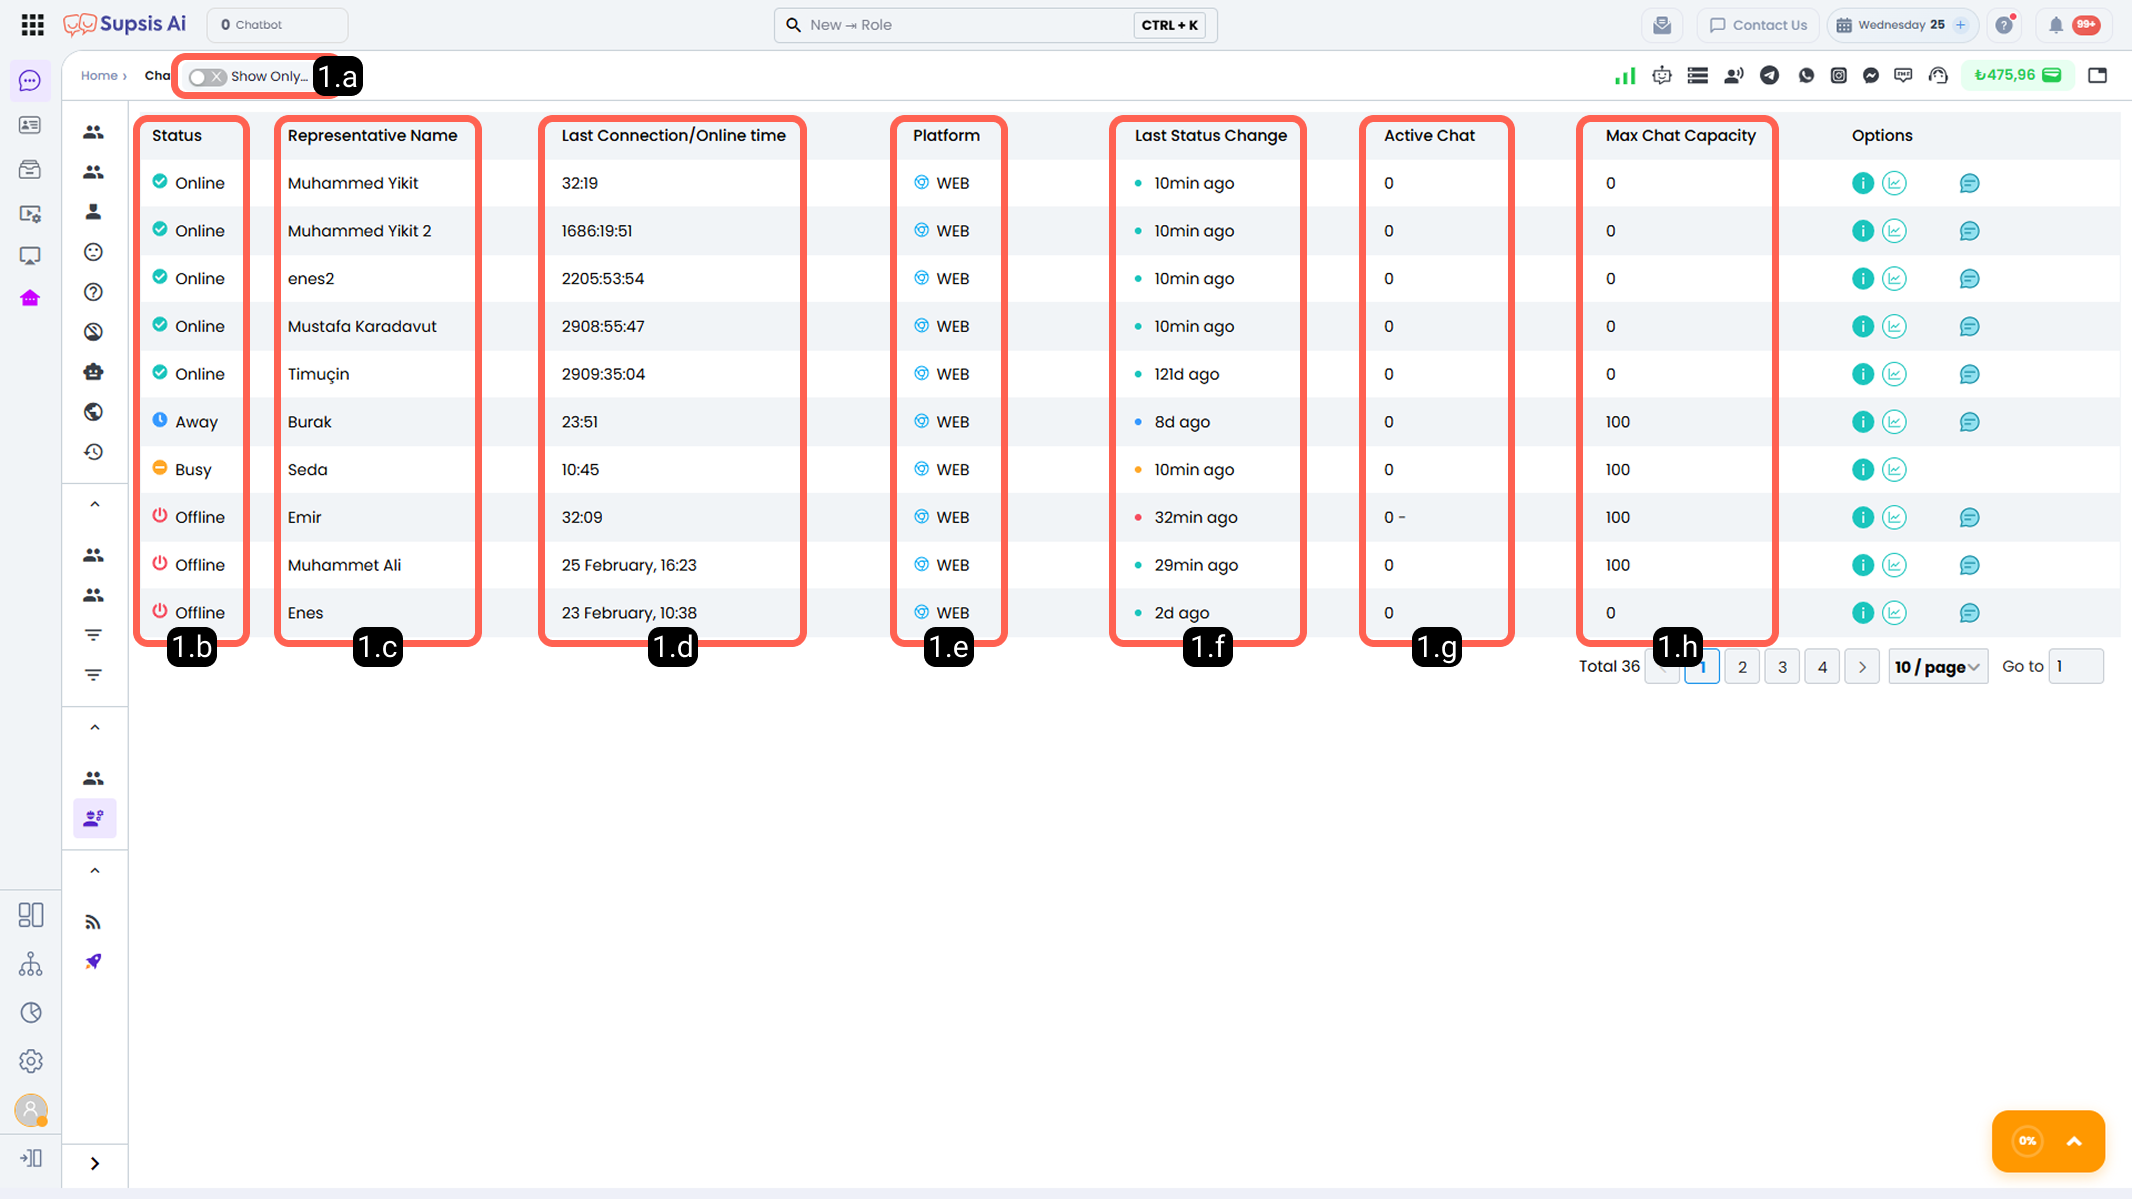
1.a – Show Only Online Agents
Displays only agents who are currently online. When this filter is enabled, agents who are not online are not displayed in the list. -
1.b – Agent Status
This is the area where you can view the current statuses of agents (Online, Back Soon, Busy, Offline, etc.). -
1.c – Agent Name
The area where you can view the name of the agent whose information you are displaying. -
1.d – Last Connection Time
Displays when the agent last connected to the system. You can track agents’ last active times through this field. -
1.e – Platform
Displays the platform from which the agent last connected to the Supsis panel (Web, Mobile). Enables platform-based tracking and evaluation. -
1.f – Last Status Change
Displays the time of the most recent status change of the agent. For example, when the agent switched to online status or when they were set to break status can be monitored here. -
1.g – Active Conversation Count
Displays the number of active chats the agent is currently handling simultaneously. This information is used in workload tracking and chat routing processes. -
1.h – Maximum Chat Capacity
Represents the maximum number of chats the agent can handle simultaneously. When this limit is reached, new chats are not automatically assigned to the agent; however, the agent can manually take over conversations.
To edit user-specific information such as Agent Name and Maximum Chat Capacity in this area, please review the Users documentation.
2-) Options
This area contains management options where various actions regarding agents can be performed. Agent-specific actions can be applied quickly and practically through this menu.
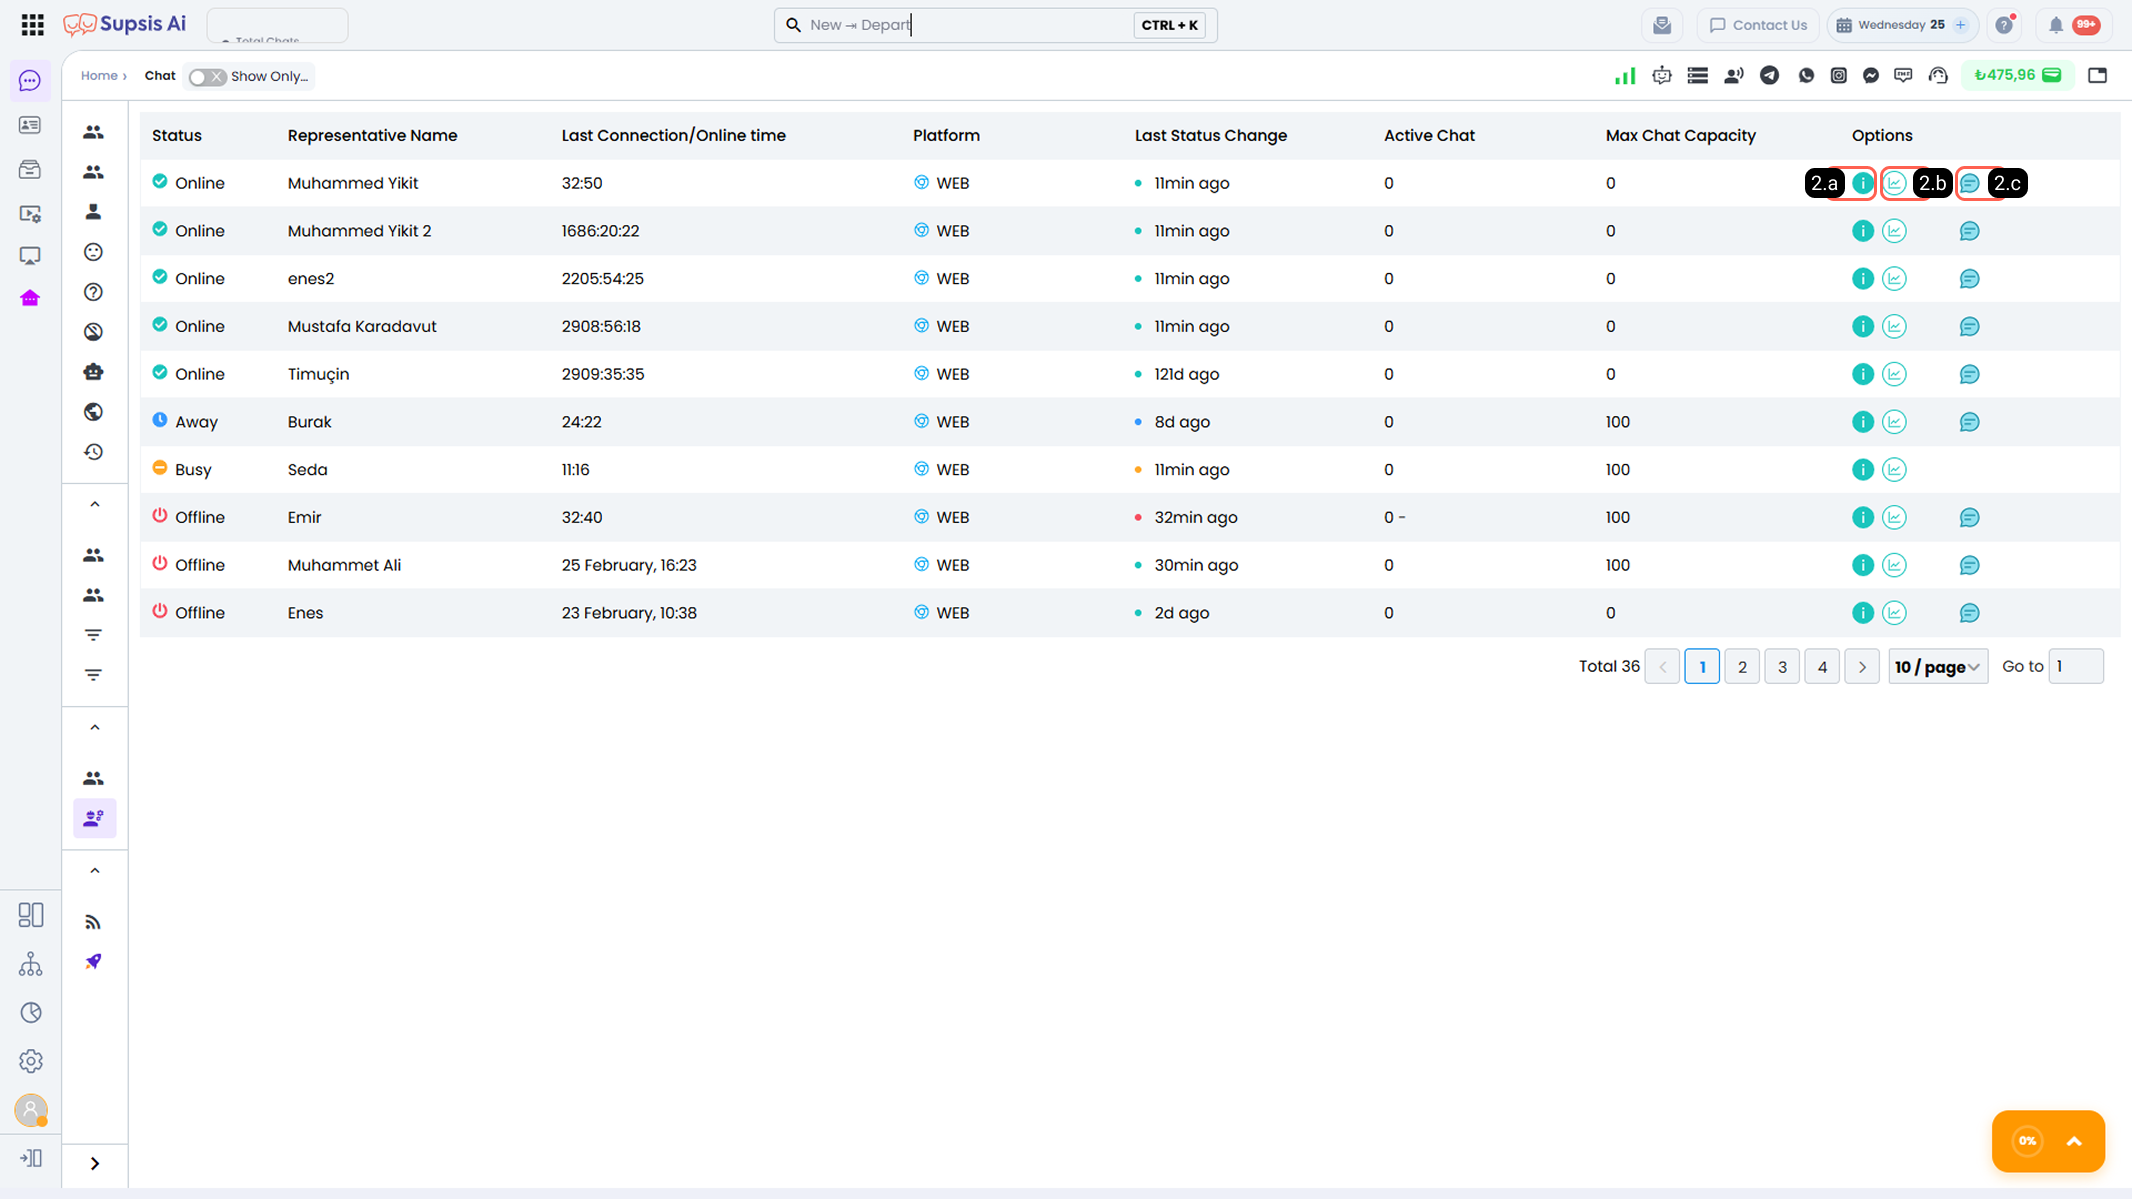
- 2.a – Agent Information
This is the area where the agent’s system connection details are displayed. This section includes the agent’s IP address, the country from which they connected to the panel, the operating system used, and browser information. It can be used for security and technical analysis purposes.
- 2.b – Agent Reports
Provides access to reports containing performance and usage data of the selected agent. From this area, you can review agent-based system reports and perform detailed analysis. For more information, please review the Reports documentation.
- 2.c – Send DM Message to Agent
Through this option, you can send a one-to-one (DM) message to the relevant agent via the Team Conversation module. It is used to ensure fast internal communication and coordination within the team.