
Ideasoft Integration
The Ideasoft integration allows you to connect your Ideasoft store’s API access to Supsis AI, enabling you to manage your e-commerce infrastructure and social media channels within a centralized system. This integration is designed to support data flow between your store’s shipping information and Supsis AI.
The integration process is based on obtaining the Client ID and Secret Key from the Ideasoft panel and entering this information into the relevant integration fields in the Supsis AI panel.
Ideasoft Operations
To start the integration process, first log in to your Ideasoft panel.
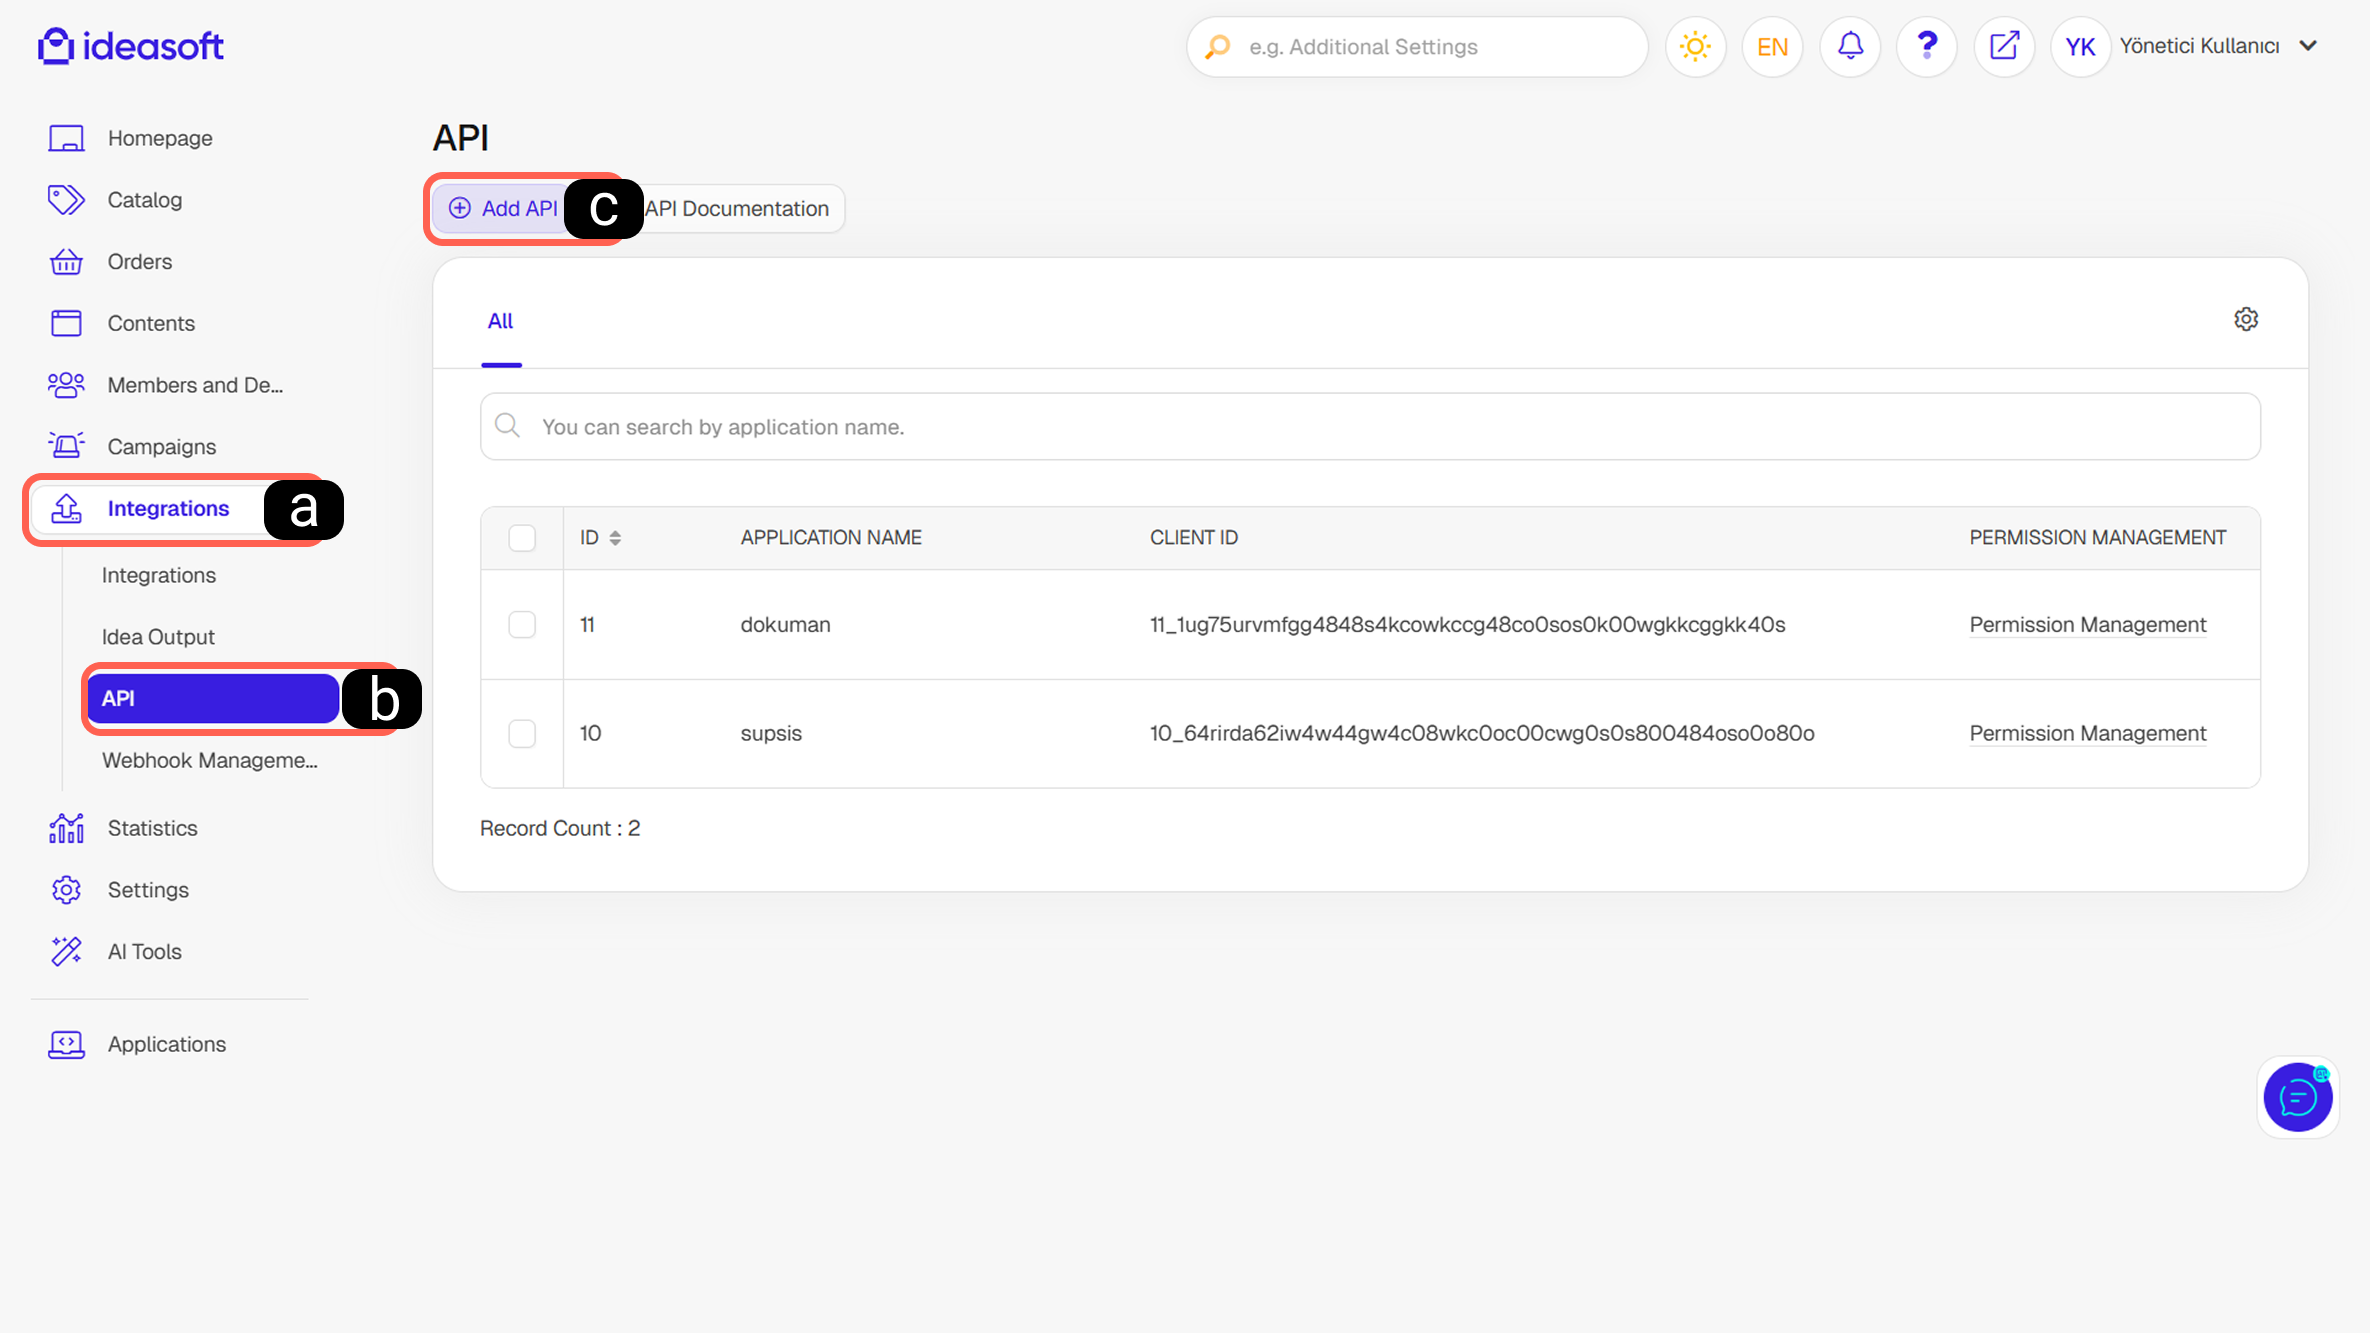
a. Integrations Menu
Click on the integrations tab from the menu on the left side of the panel.
b. API Management
From the available options, navigate to the API settings.
c. Add New API
Click this button to create a new API connection for Supsis AI.
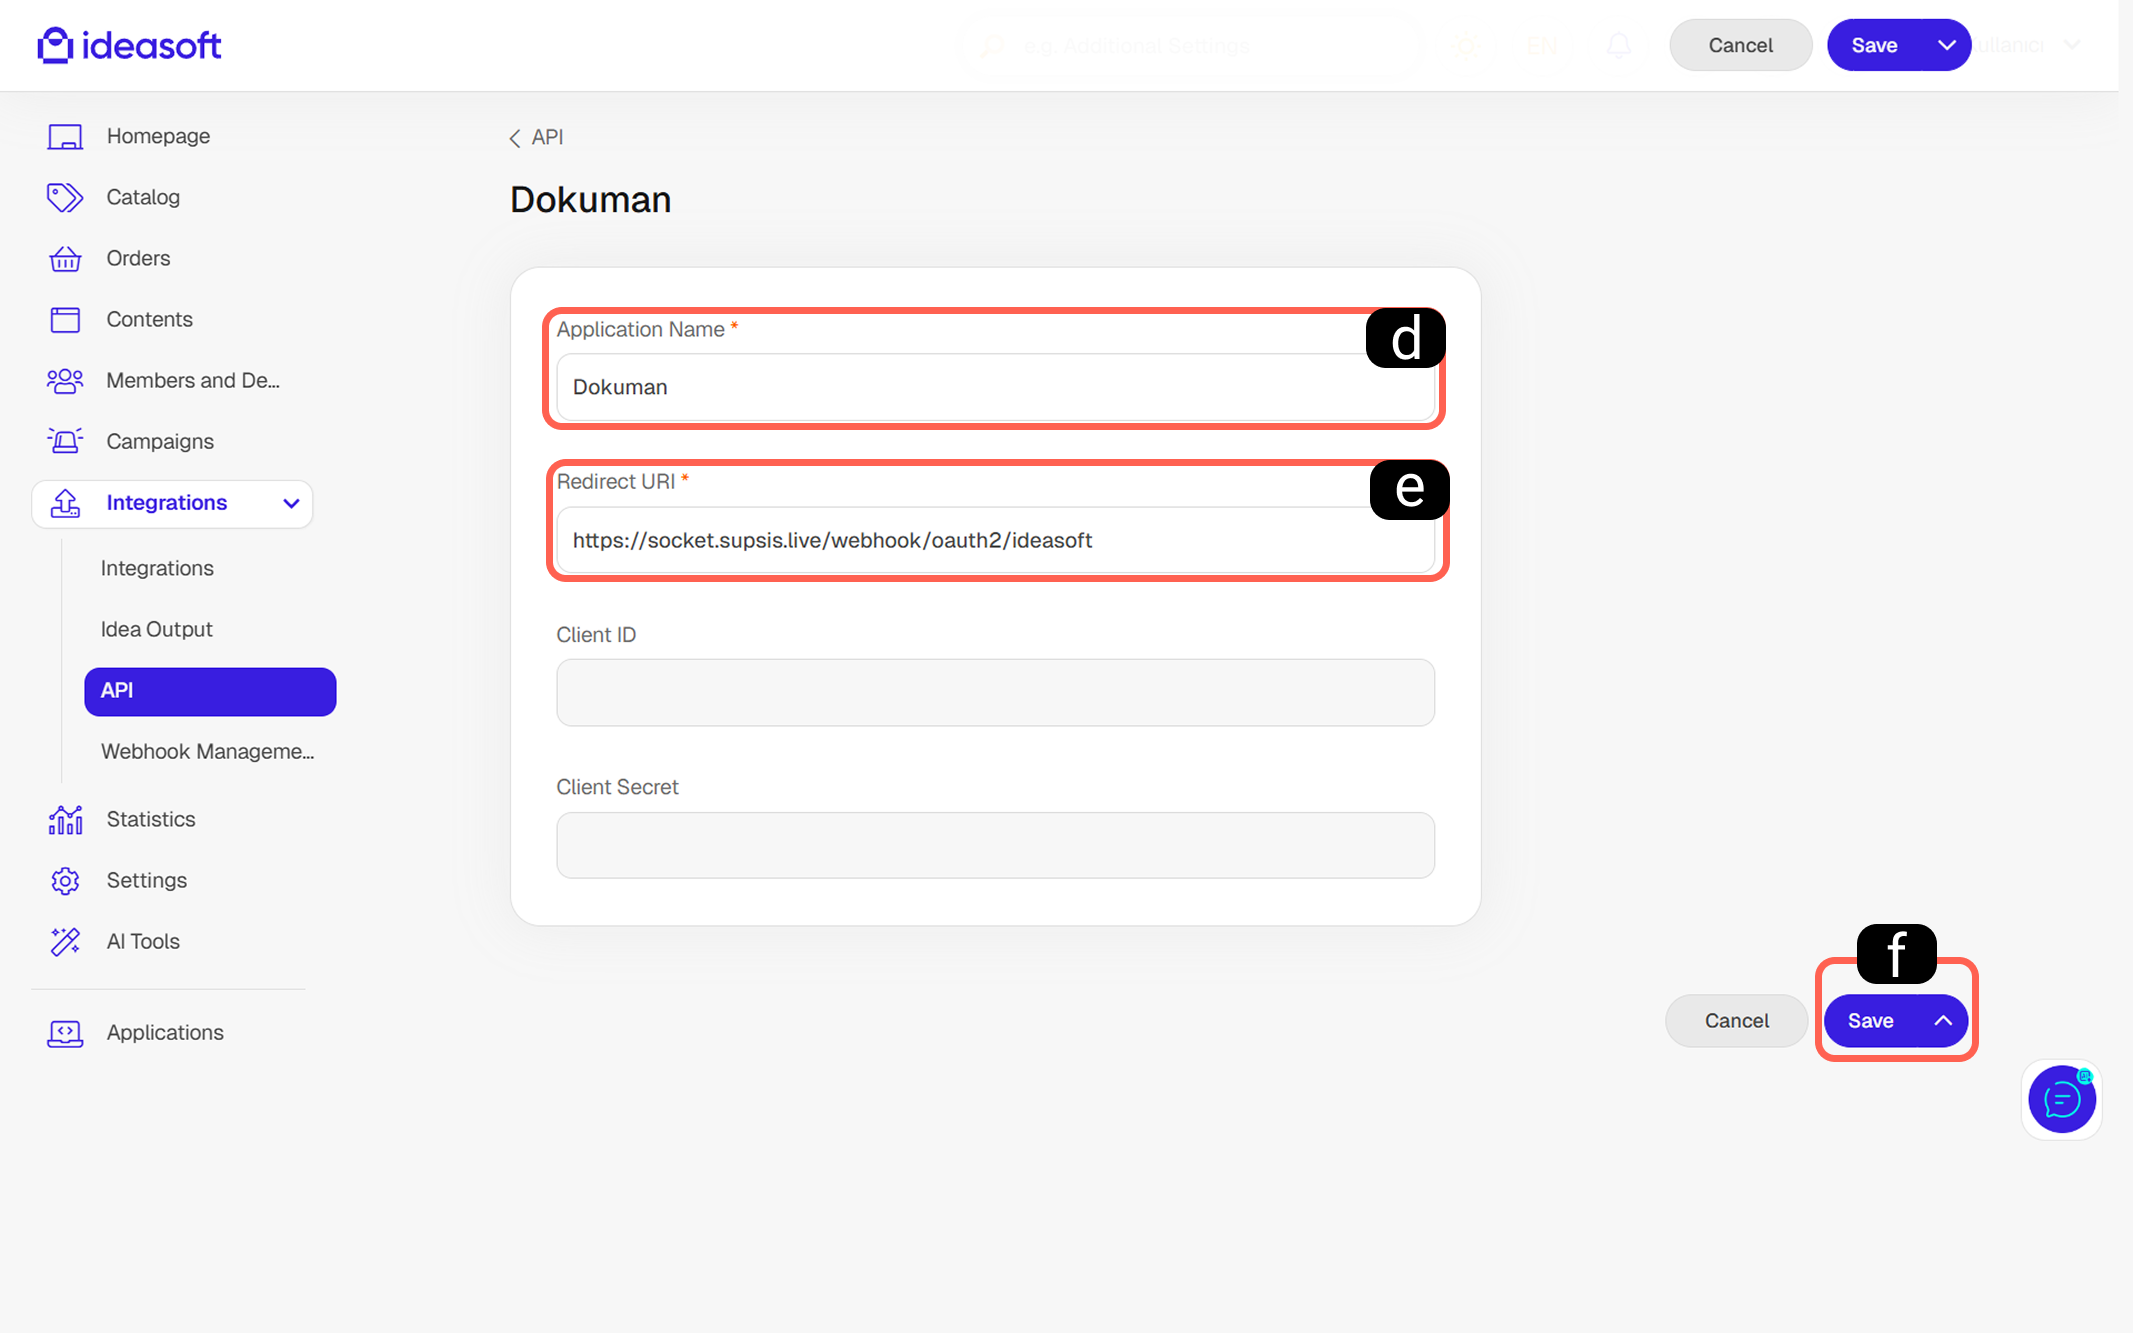
d. Application Name
Assign an application name to the integration so that you can recognize the connection.
e. Redirect URL
Fill in this field so that the systems can communicate with each other. This field must be set exactly as:
“https://socket.supsis.live/webhook/oauth2/ideasoft”
f. Save API
Save the basic connection settings you have entered.
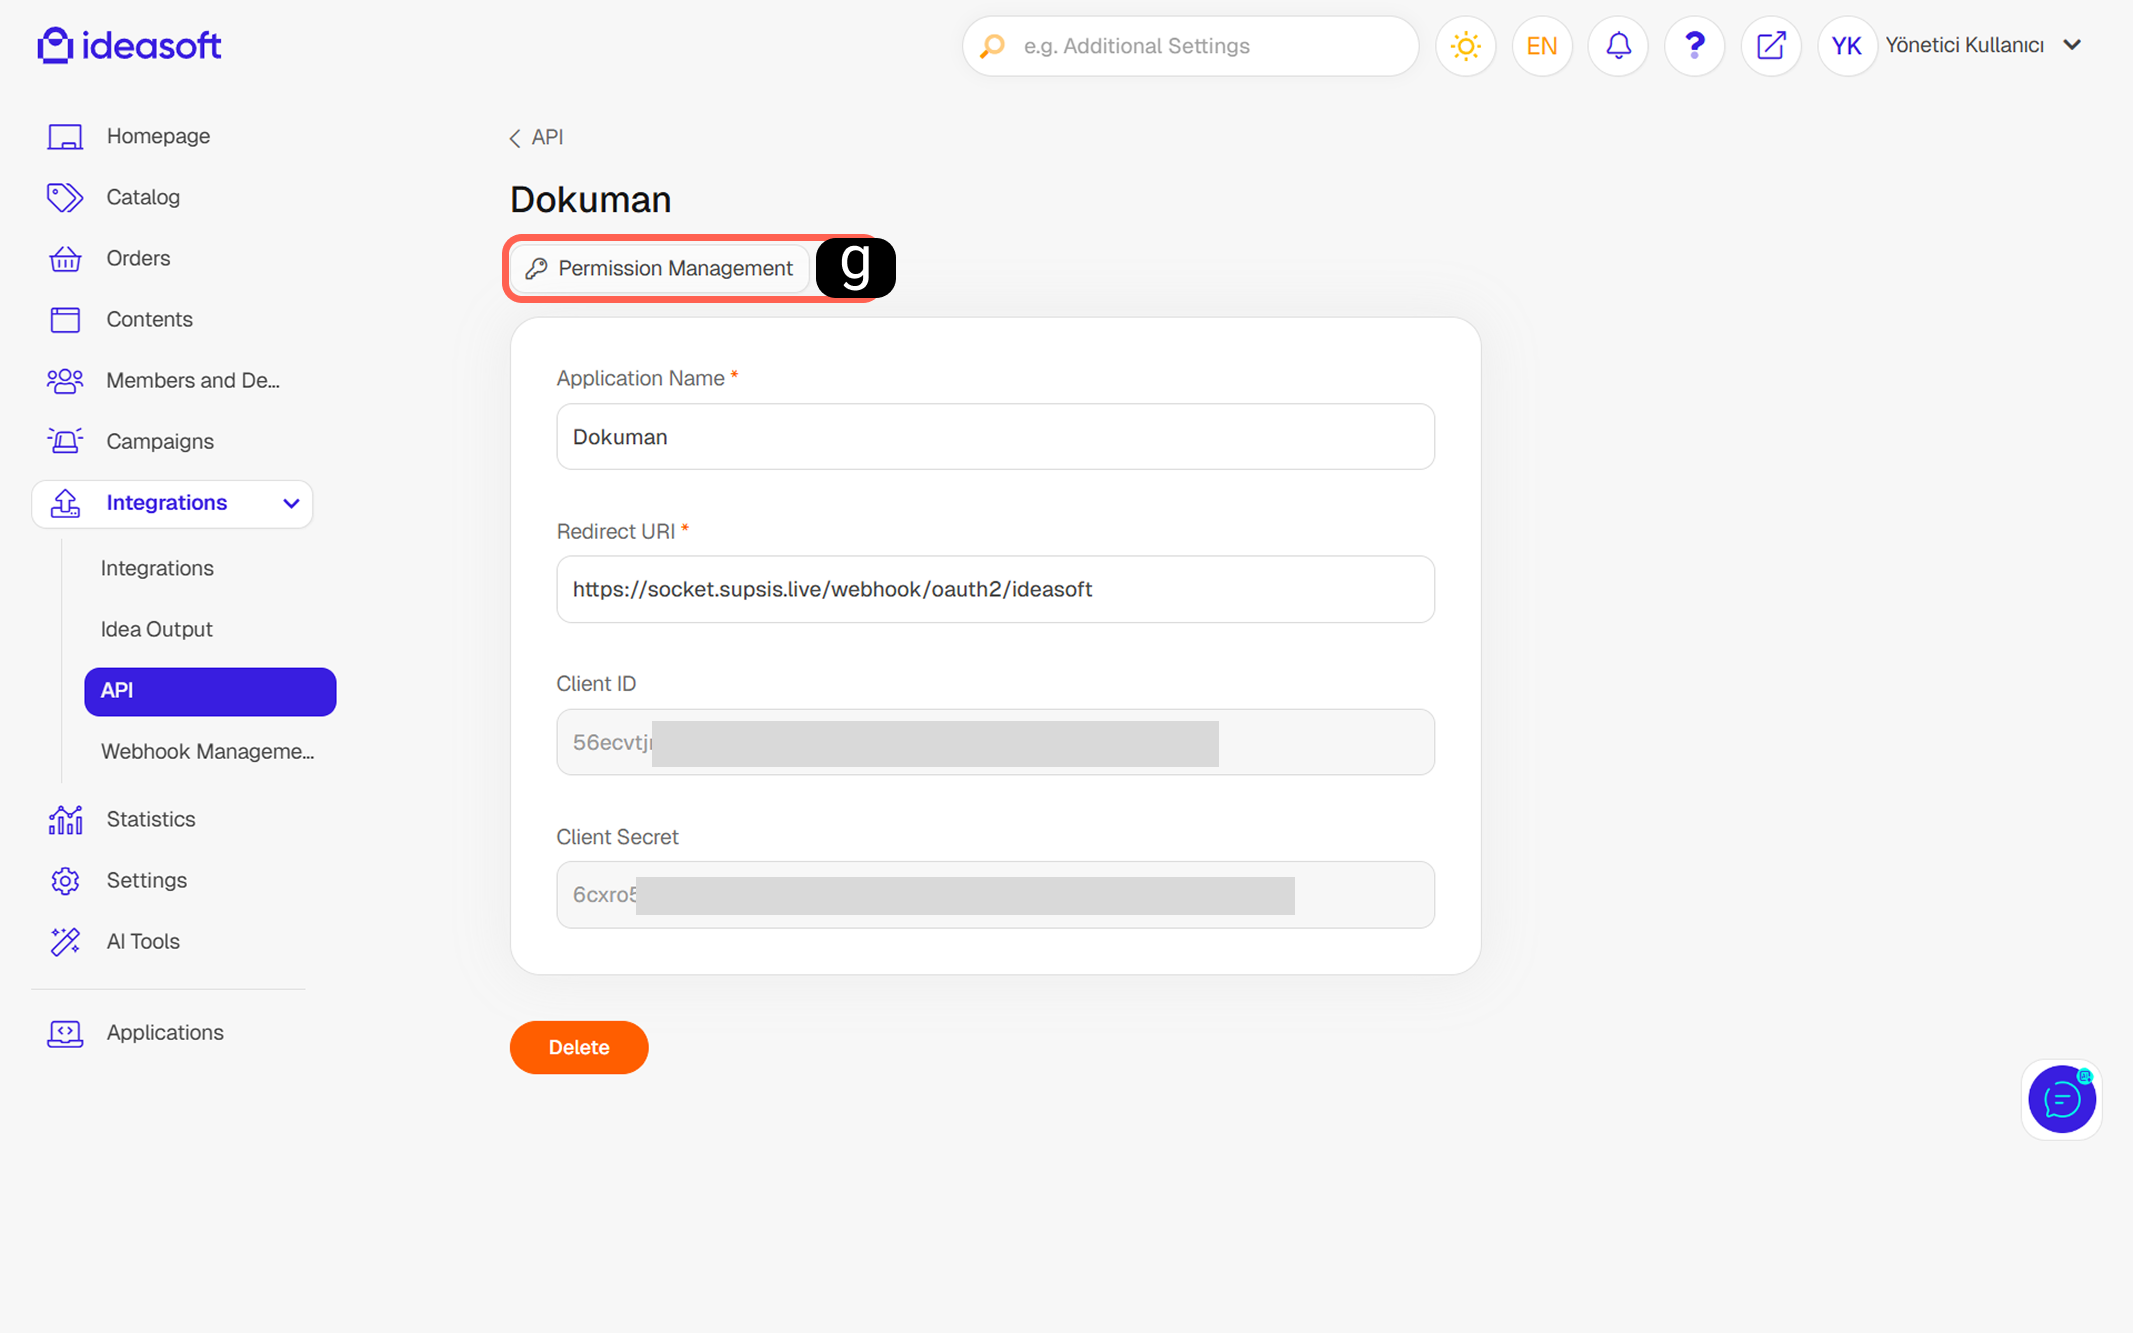
g. Permission Management
After saving the API, navigate to the permission management section on the screen that appears to configure the API access permissions.
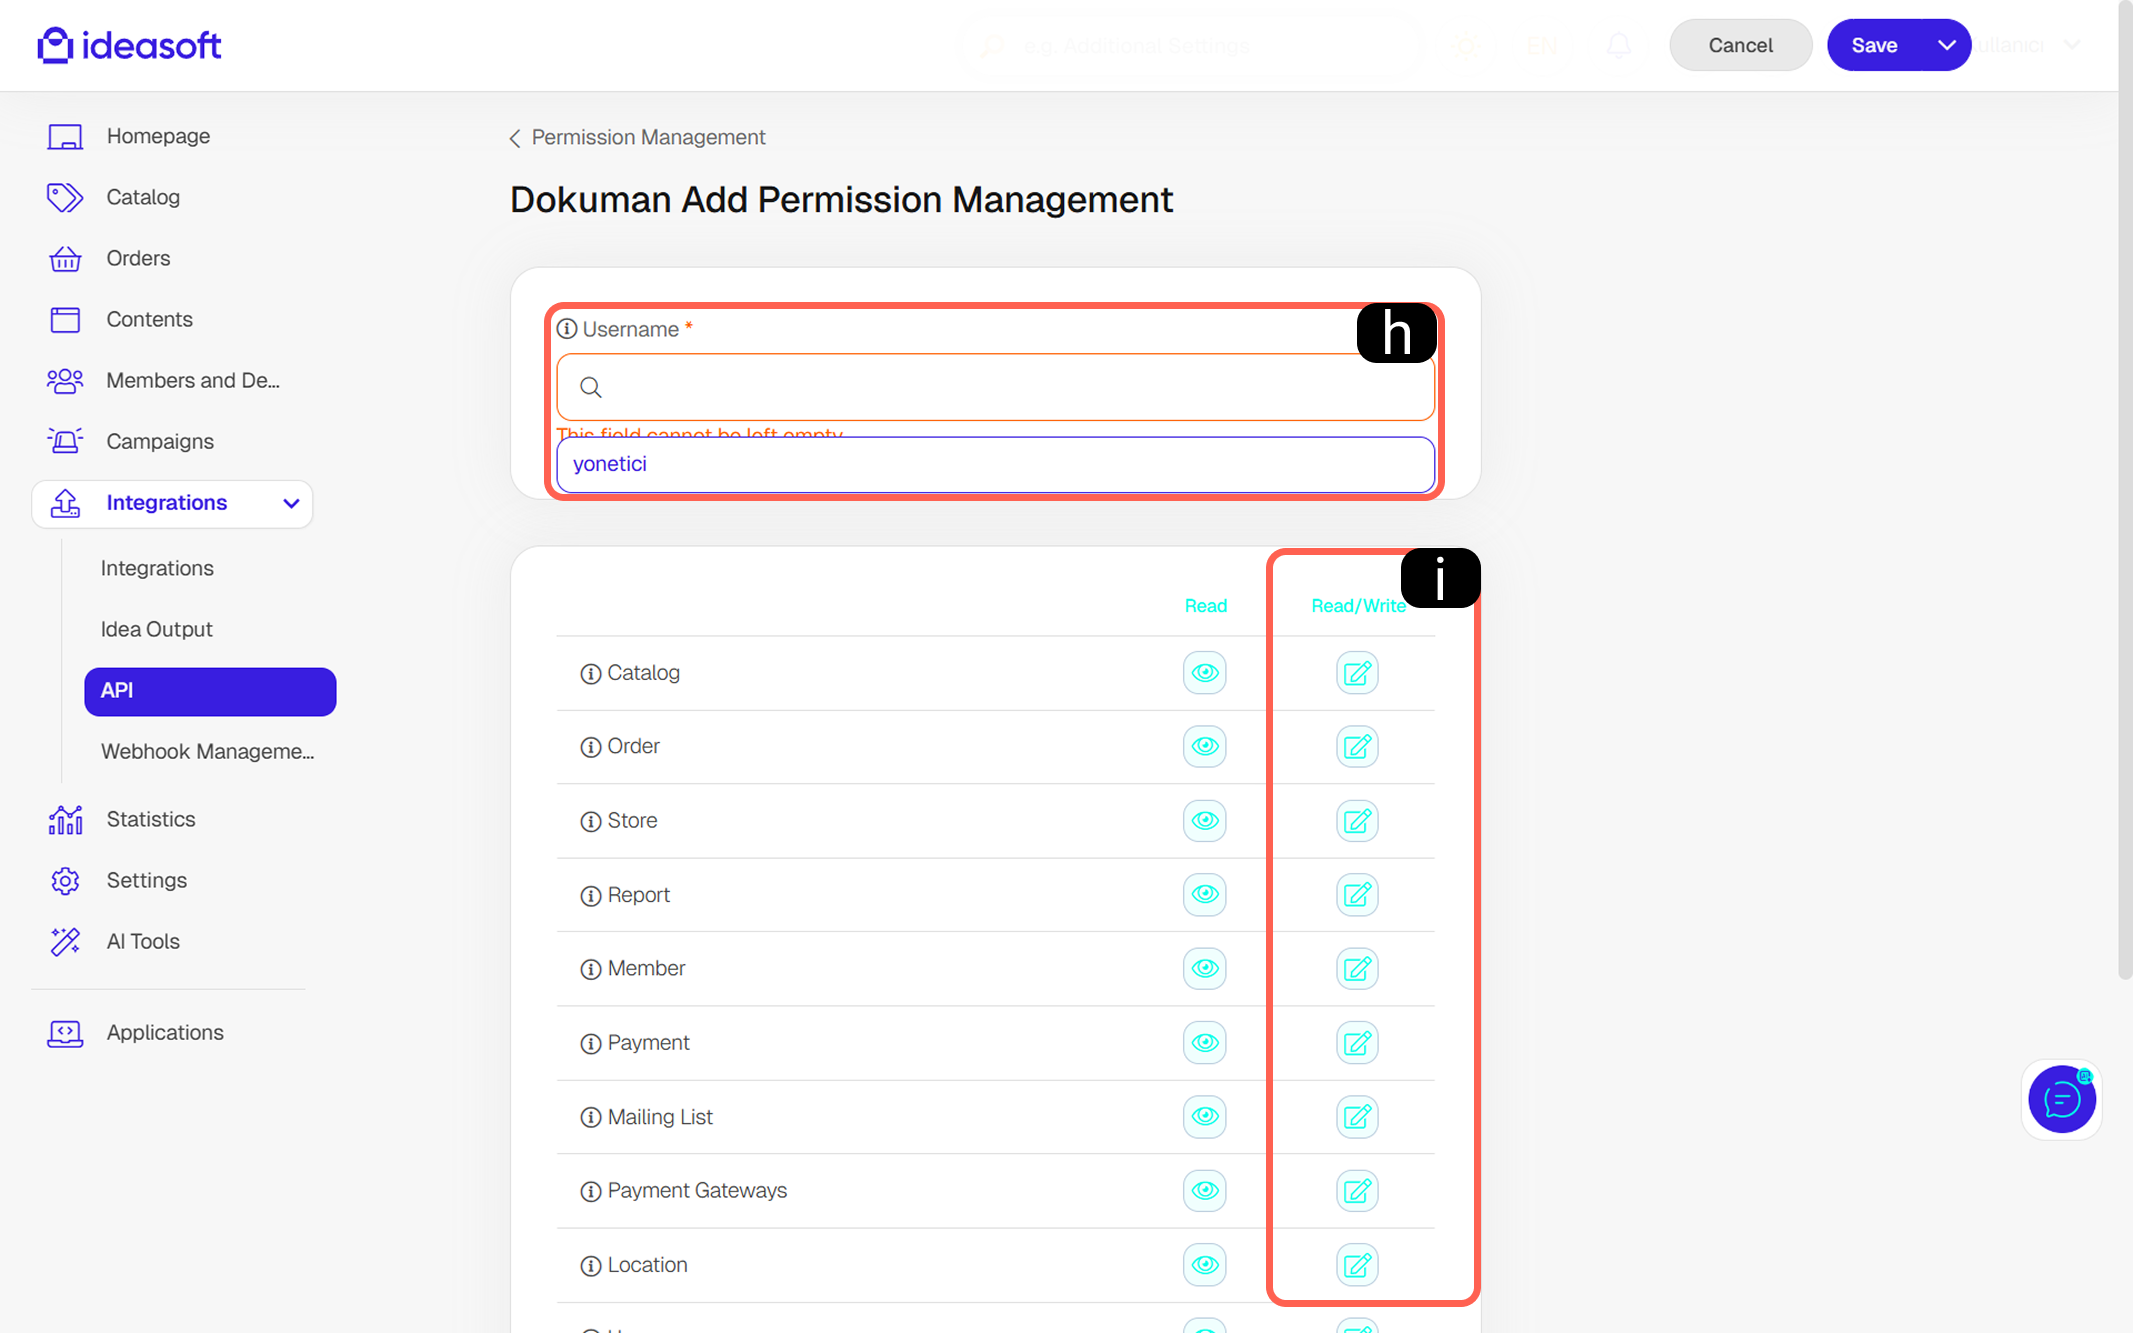
h. Username
Select the user who will perform the operations; this user must have "admin" privileges.
i. Read/Write Permission Approval
Approve the necessary read and write permissions in the system so that Supsis AI can process the required data.
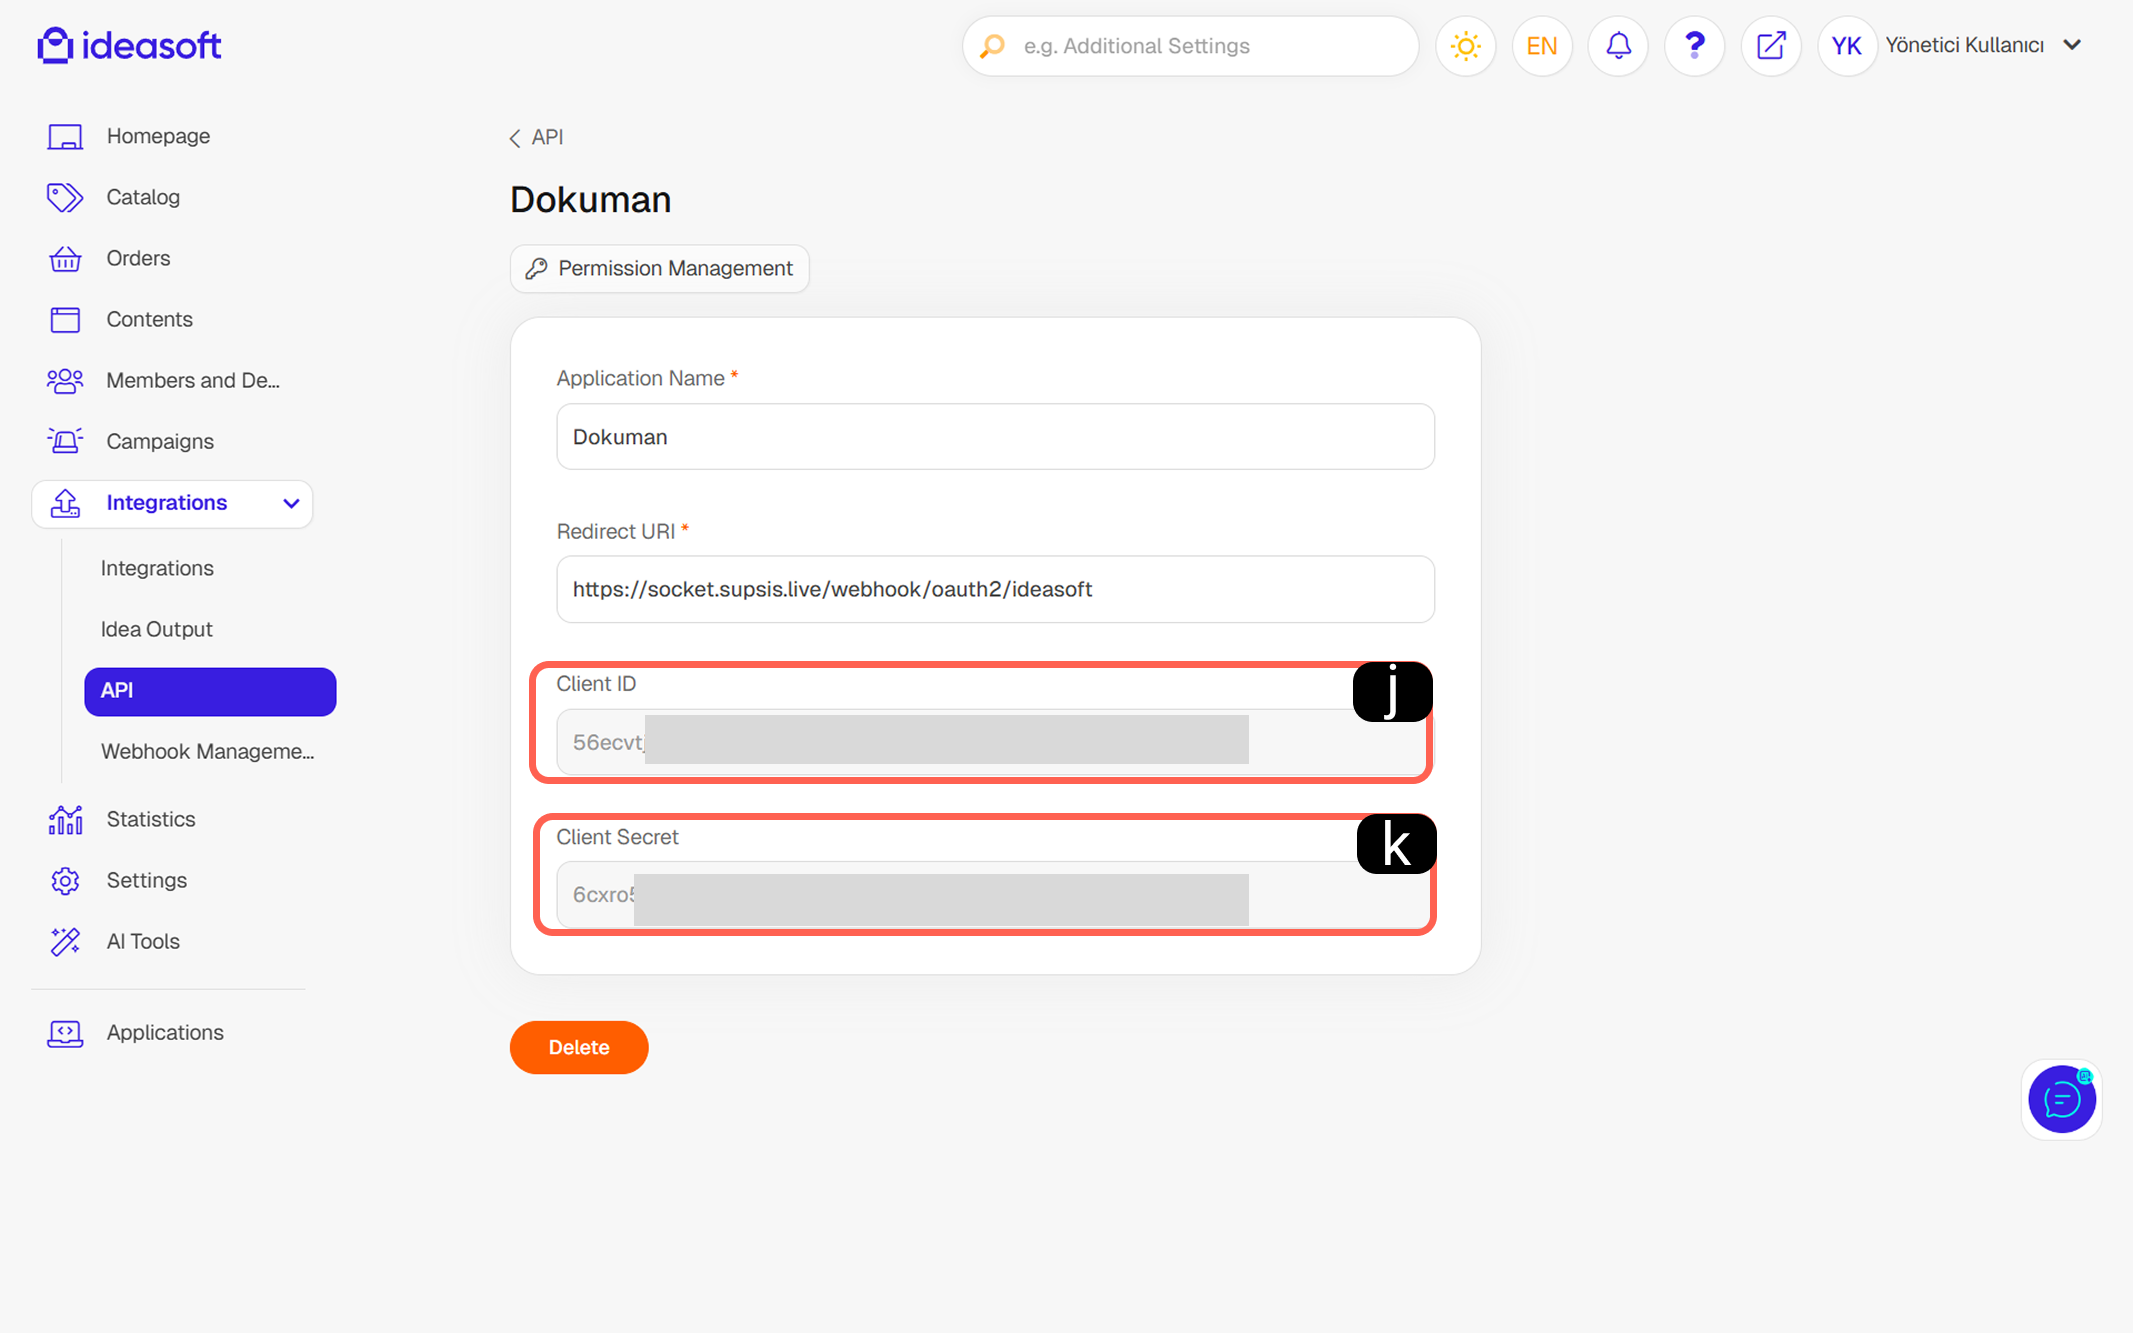
j. Client ID
After completing the permission steps, copy the unique Client ID provided by the system to complete the Supsis AI integration.
k. Client Secret
Copy the Client Secret, which is the security key generated by the system, to paste it into the Supsis AI panel.
Note: This information is used to establish the API integration. To complete the integration, this information must be pasted into the relevant fields in the Supsis AI panel.

Supsis AI Panel Operations
After completing the necessary steps in the Ideasoft panel, return to your Supsis AI panel and follow the steps below to complete the integration.
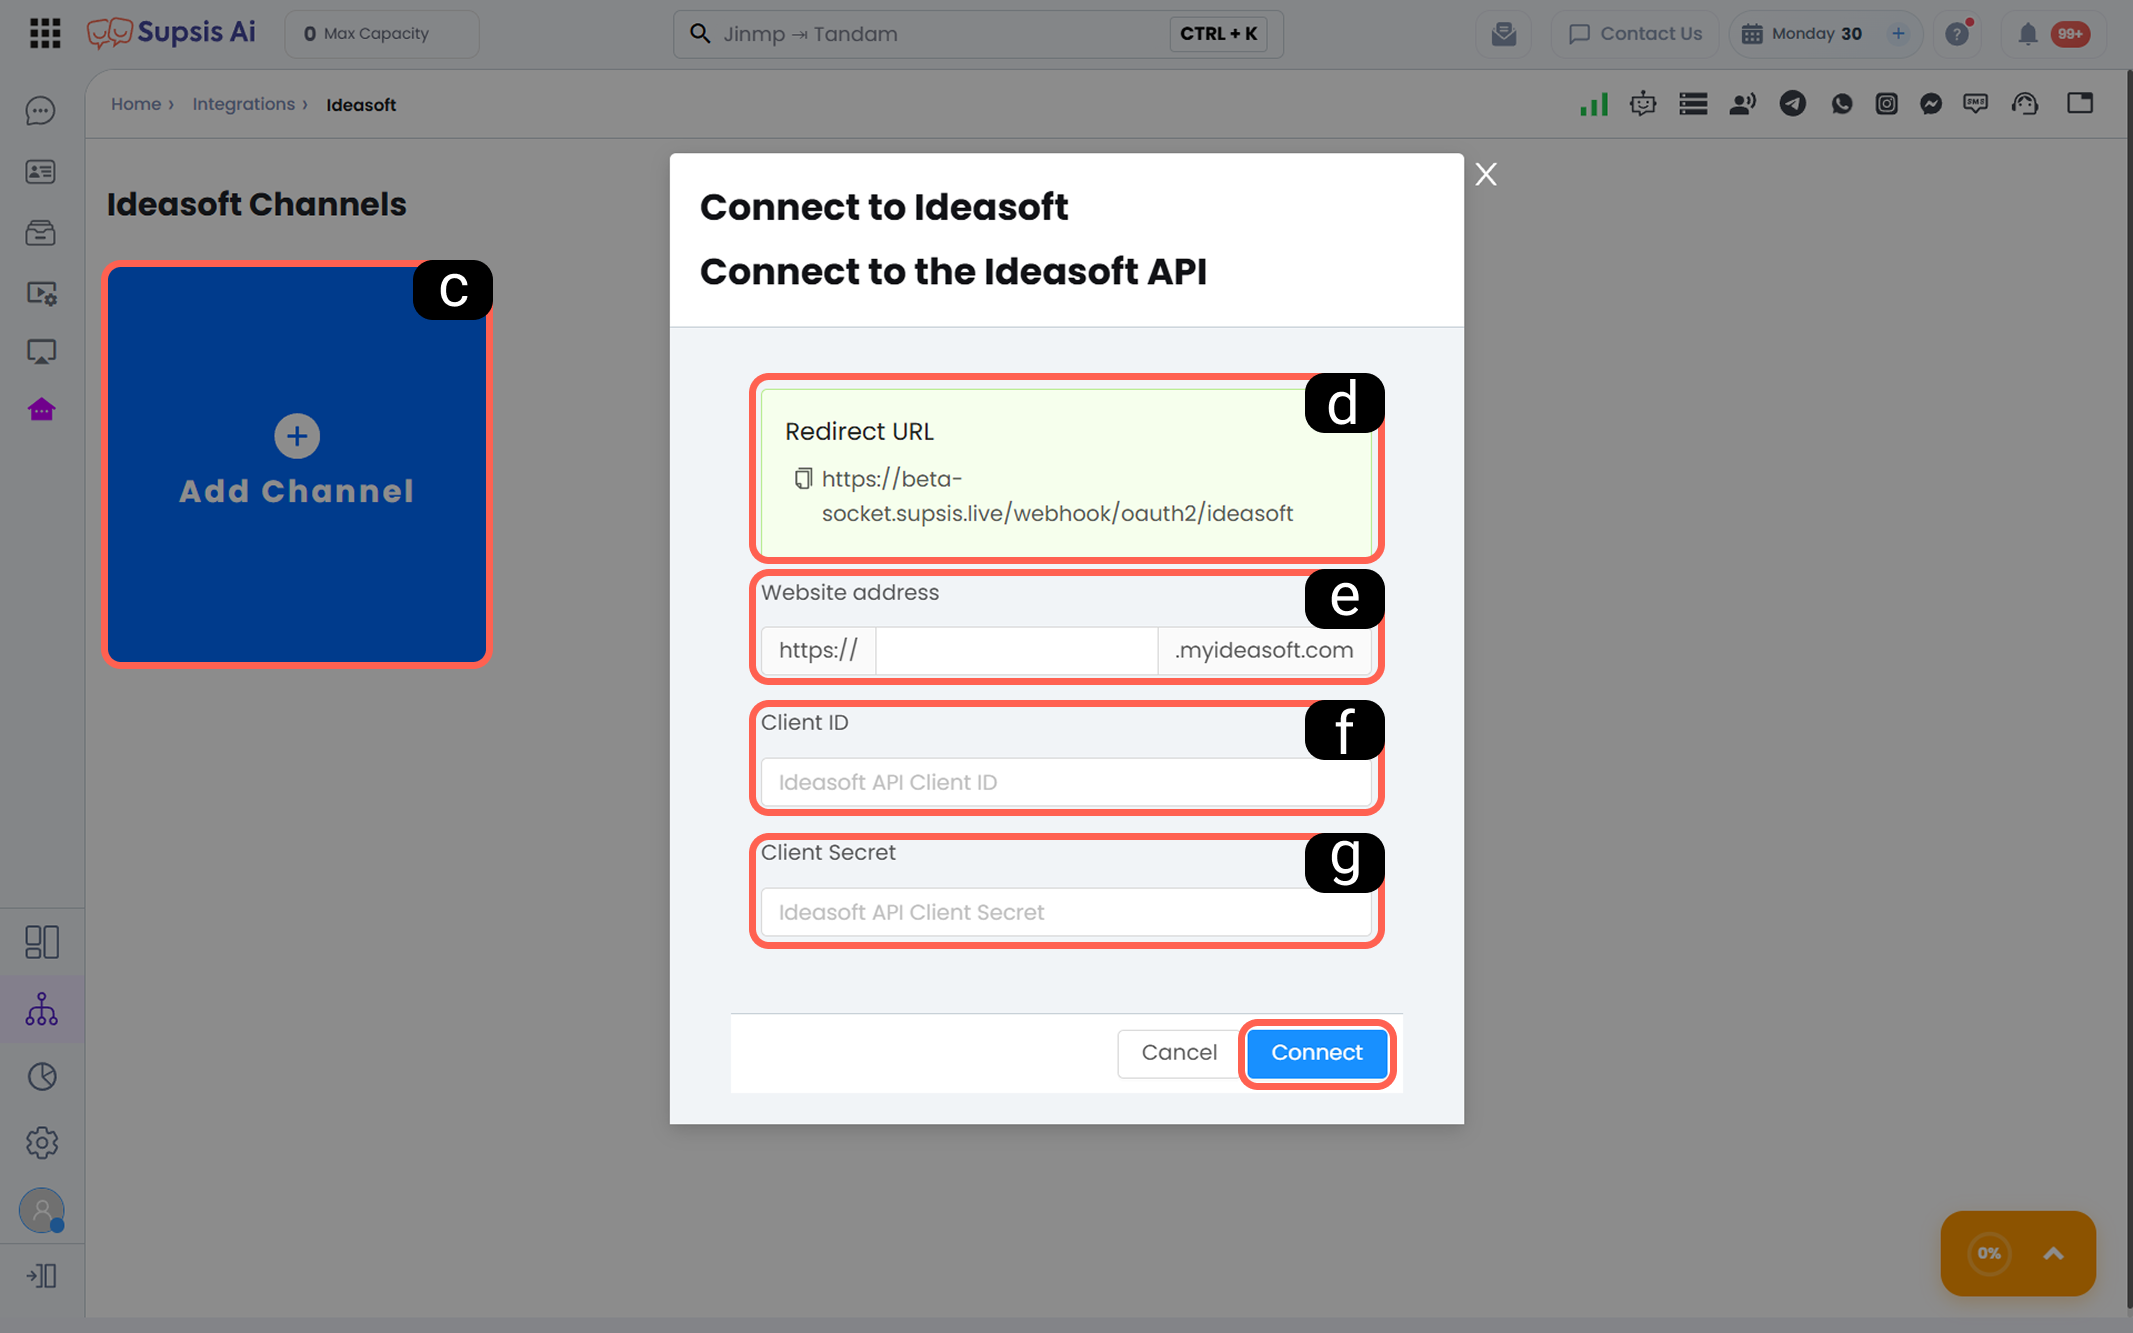
a. Integrations
Go to the main integrations tab located in the left menu of your Supsis AI panel.
b. Ideasoft Channel Selection
Find Ideasoft among the listed applications and open the integration settings.
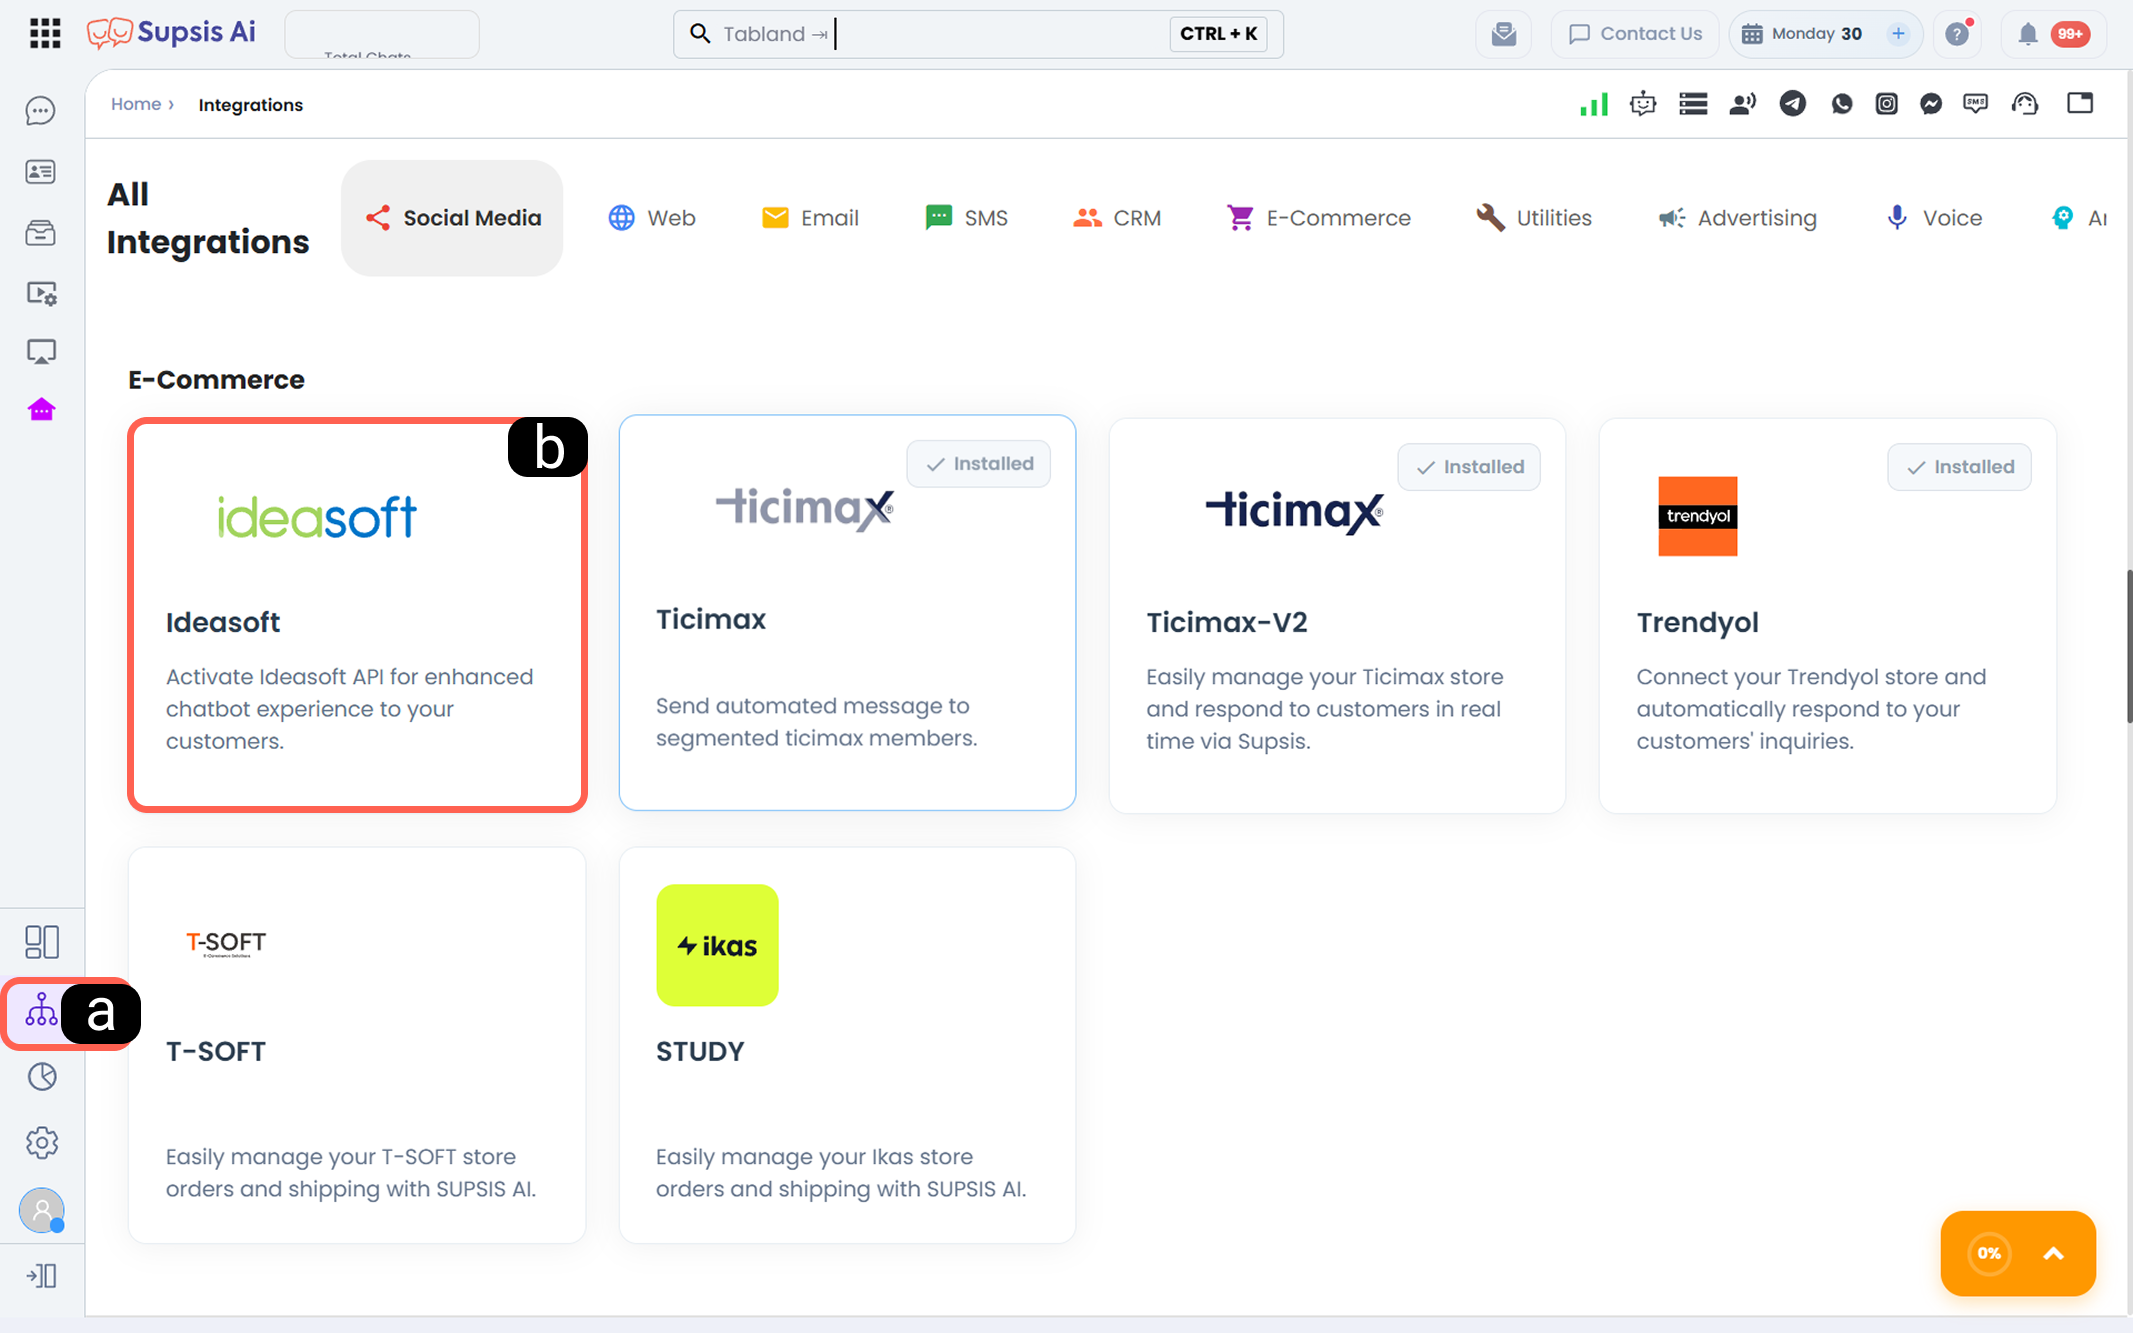
c. Add Channel
Click the add channel button to define a new store connection.
d. Redirect URL
You can copy the redirect URL to be pasted into the Ideasoft panel from this field.
e. Ideasoft Store URL (Domain) Entry
This is the section where you configure your e-commerce website domain. For example, if your Ideasoft panel link is “https://test.myideasoft.com”, you should enter only “test” in this field.
f. Client ID
Paste the Client ID you copied from the Ideasoft panel into this field.
g. Client Secret
Paste the Client Secret security key you copied from the Ideasoft panel into this field.
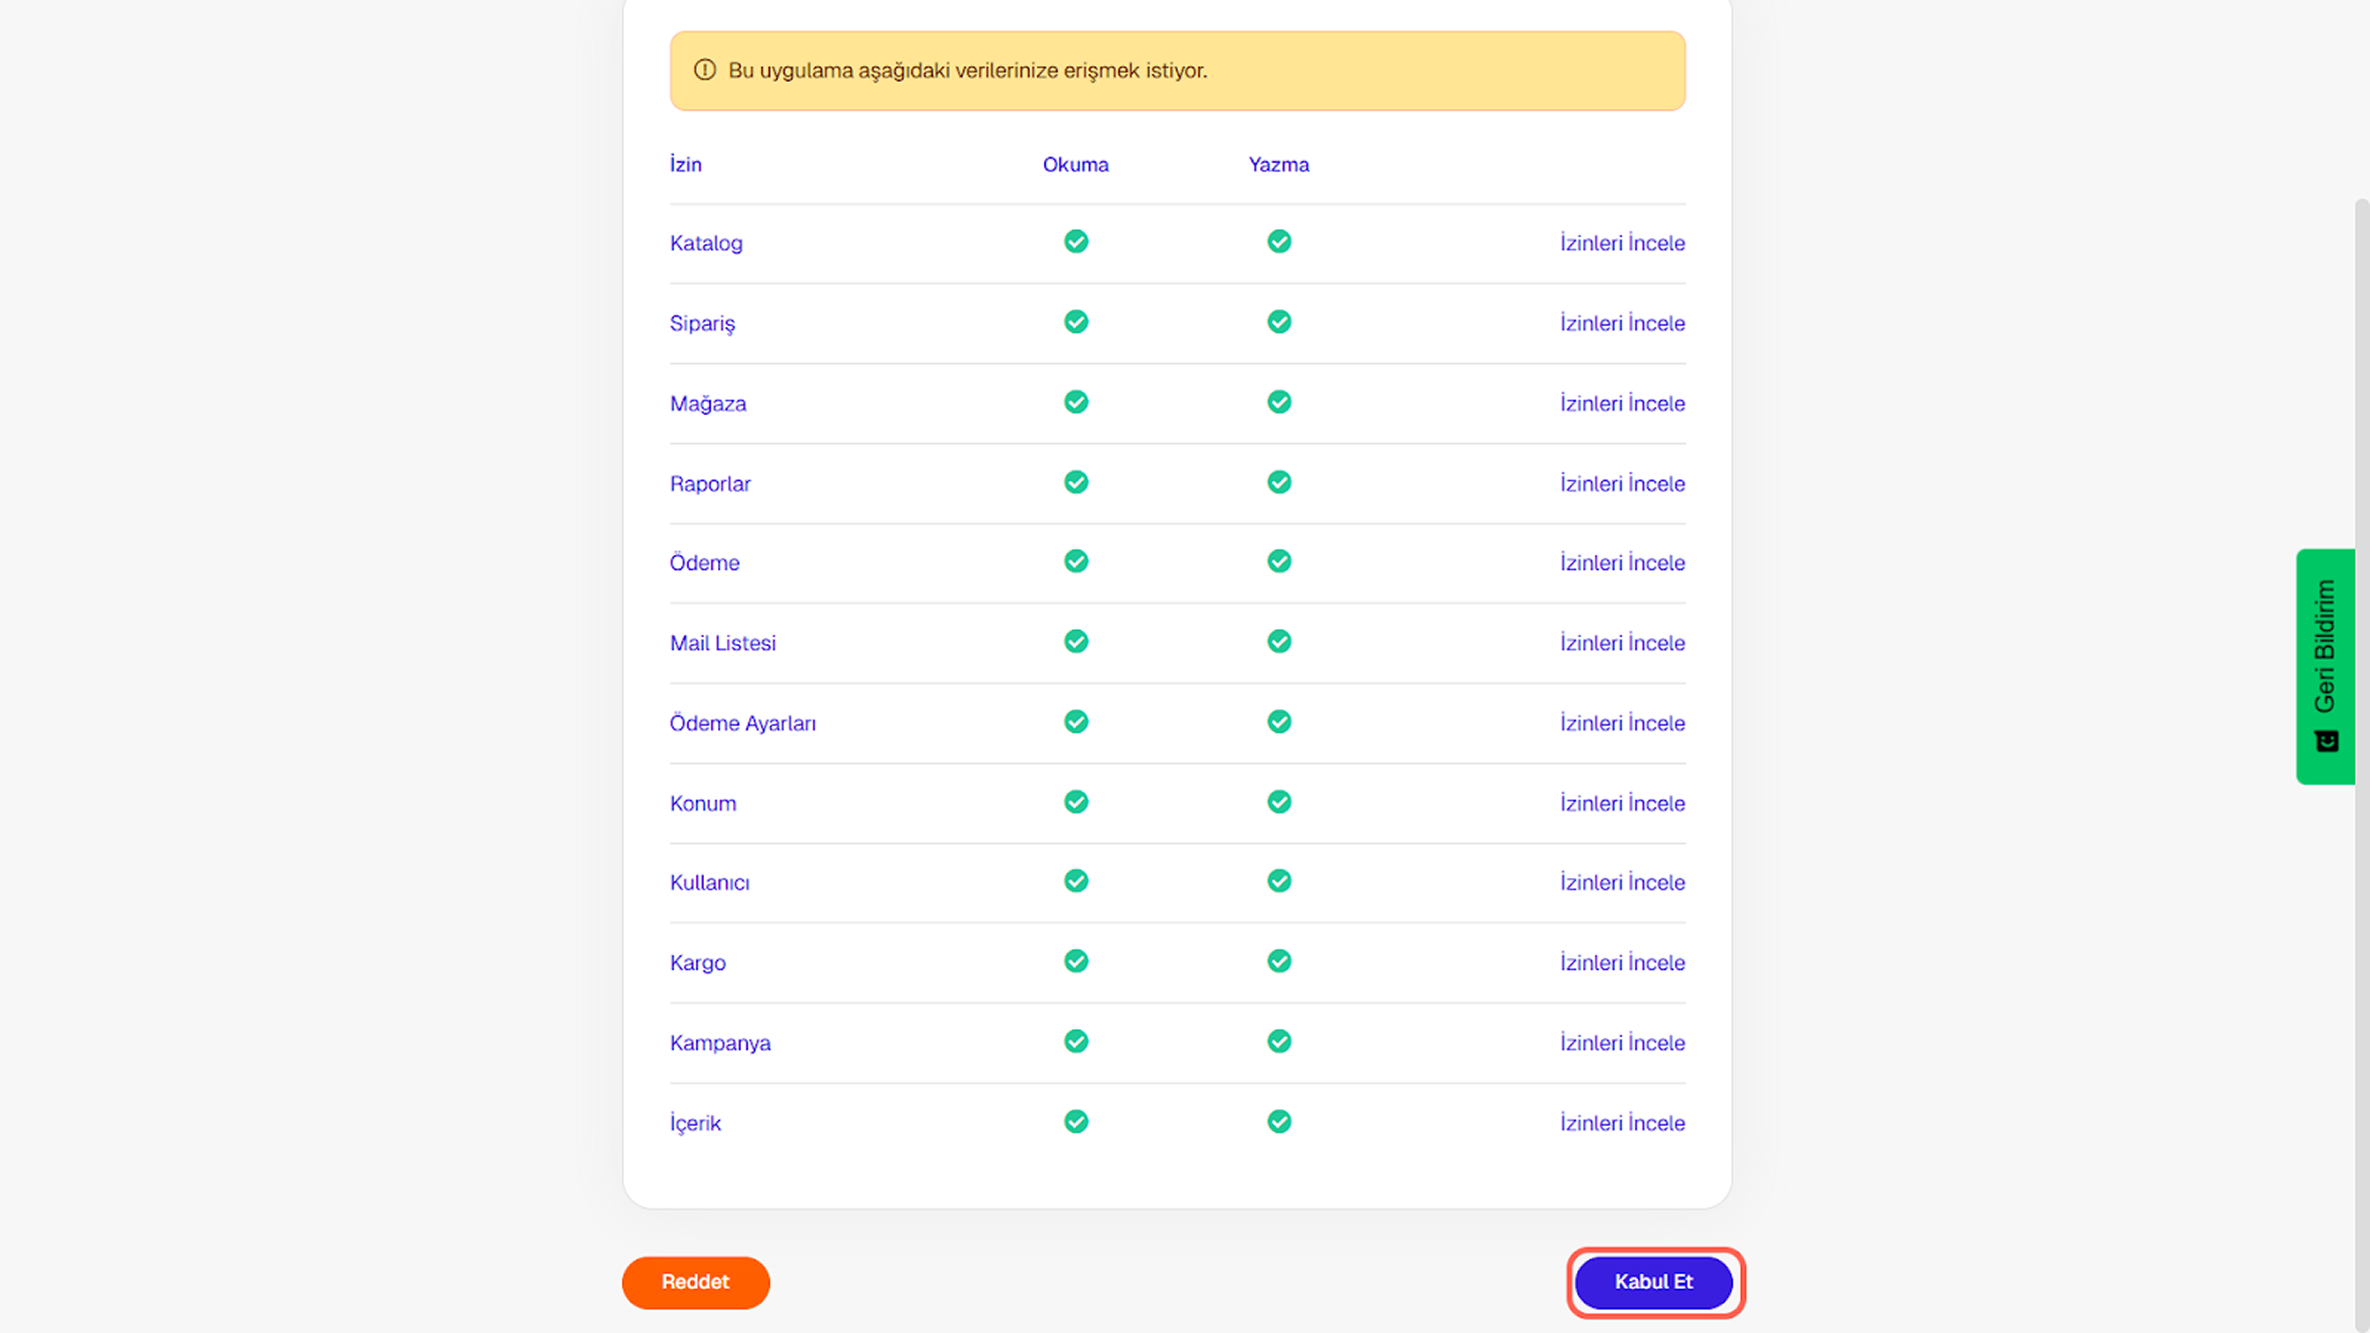
After entering all the required information, click the "Accept" button to complete the process. Once the Accept button is clicked, the Ideasoft panel will be directly integrated with the Supsis AI system, and your e-commerce processes will be included in your Supsis AI panel.