
From this section, you can access shortcuts to some core modules available on the Supsis platform and system-related information.
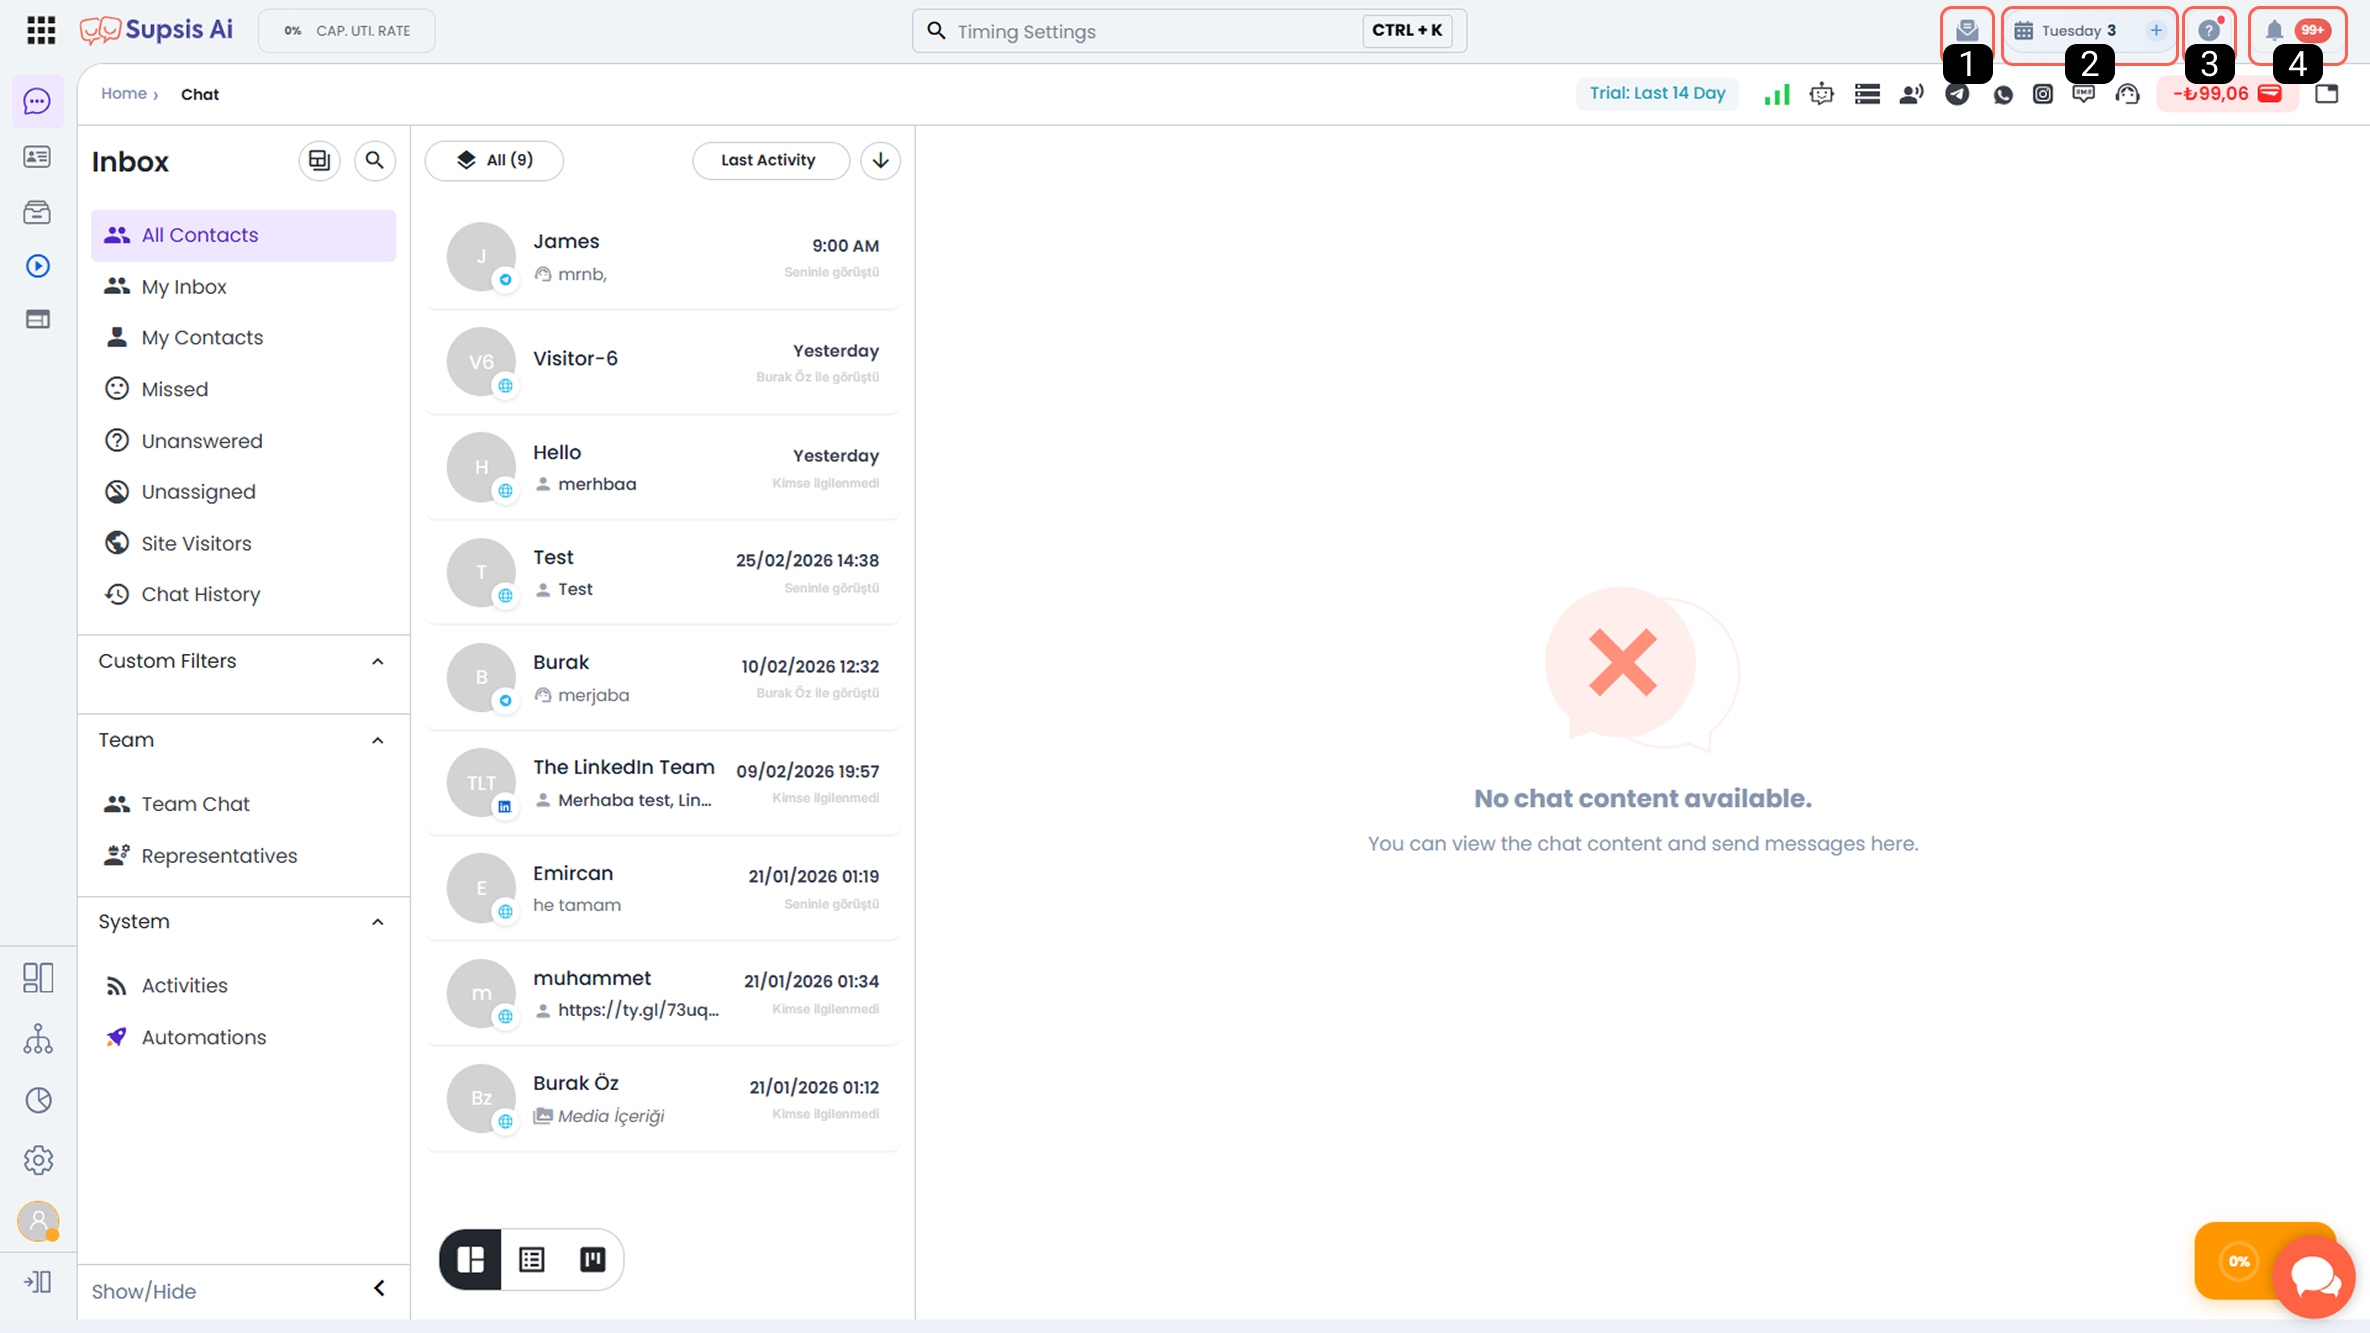
| No | Menu |
|---|---|
| 1 | Email Inbox |
| 2 | Calendar Shortcut |
| 3 | Tools and Shortcuts |
| 4 | Notifications |
1-) Email Inbox
This button provides access to the inbox where you can view emails sent to the email address assigned to you by Supsis or to the email addresses you have integrated through your panel.
Through this inbox, you can check your incoming emails and perform individual or bulk email sending.
To set up email integration, please review the Email Integration documentation. For more detailed information about inbox usage and the Email module, please review the Email Module Usage documentation.
2-) Calendar Shortcut
This button provides quick access to the Calendar Module.
The Calendar & Reservation Module allows Supsis users to create appointment calendars and reservation plans individually, department-based, or team-based.
With this feature, each agent can create their own calendar, a shared calendar structure can be established within the team, and calendar operations can be managed manually, through automation, or via chatbot.
The module manages processes such as meeting scheduling and reservation tracking in a systematic way, making customer interactions more organized.
To learn more about the Calendar module and access all details about its interactions with other features, please review the Calendar Documentation.
3-) Tools and Shortcuts
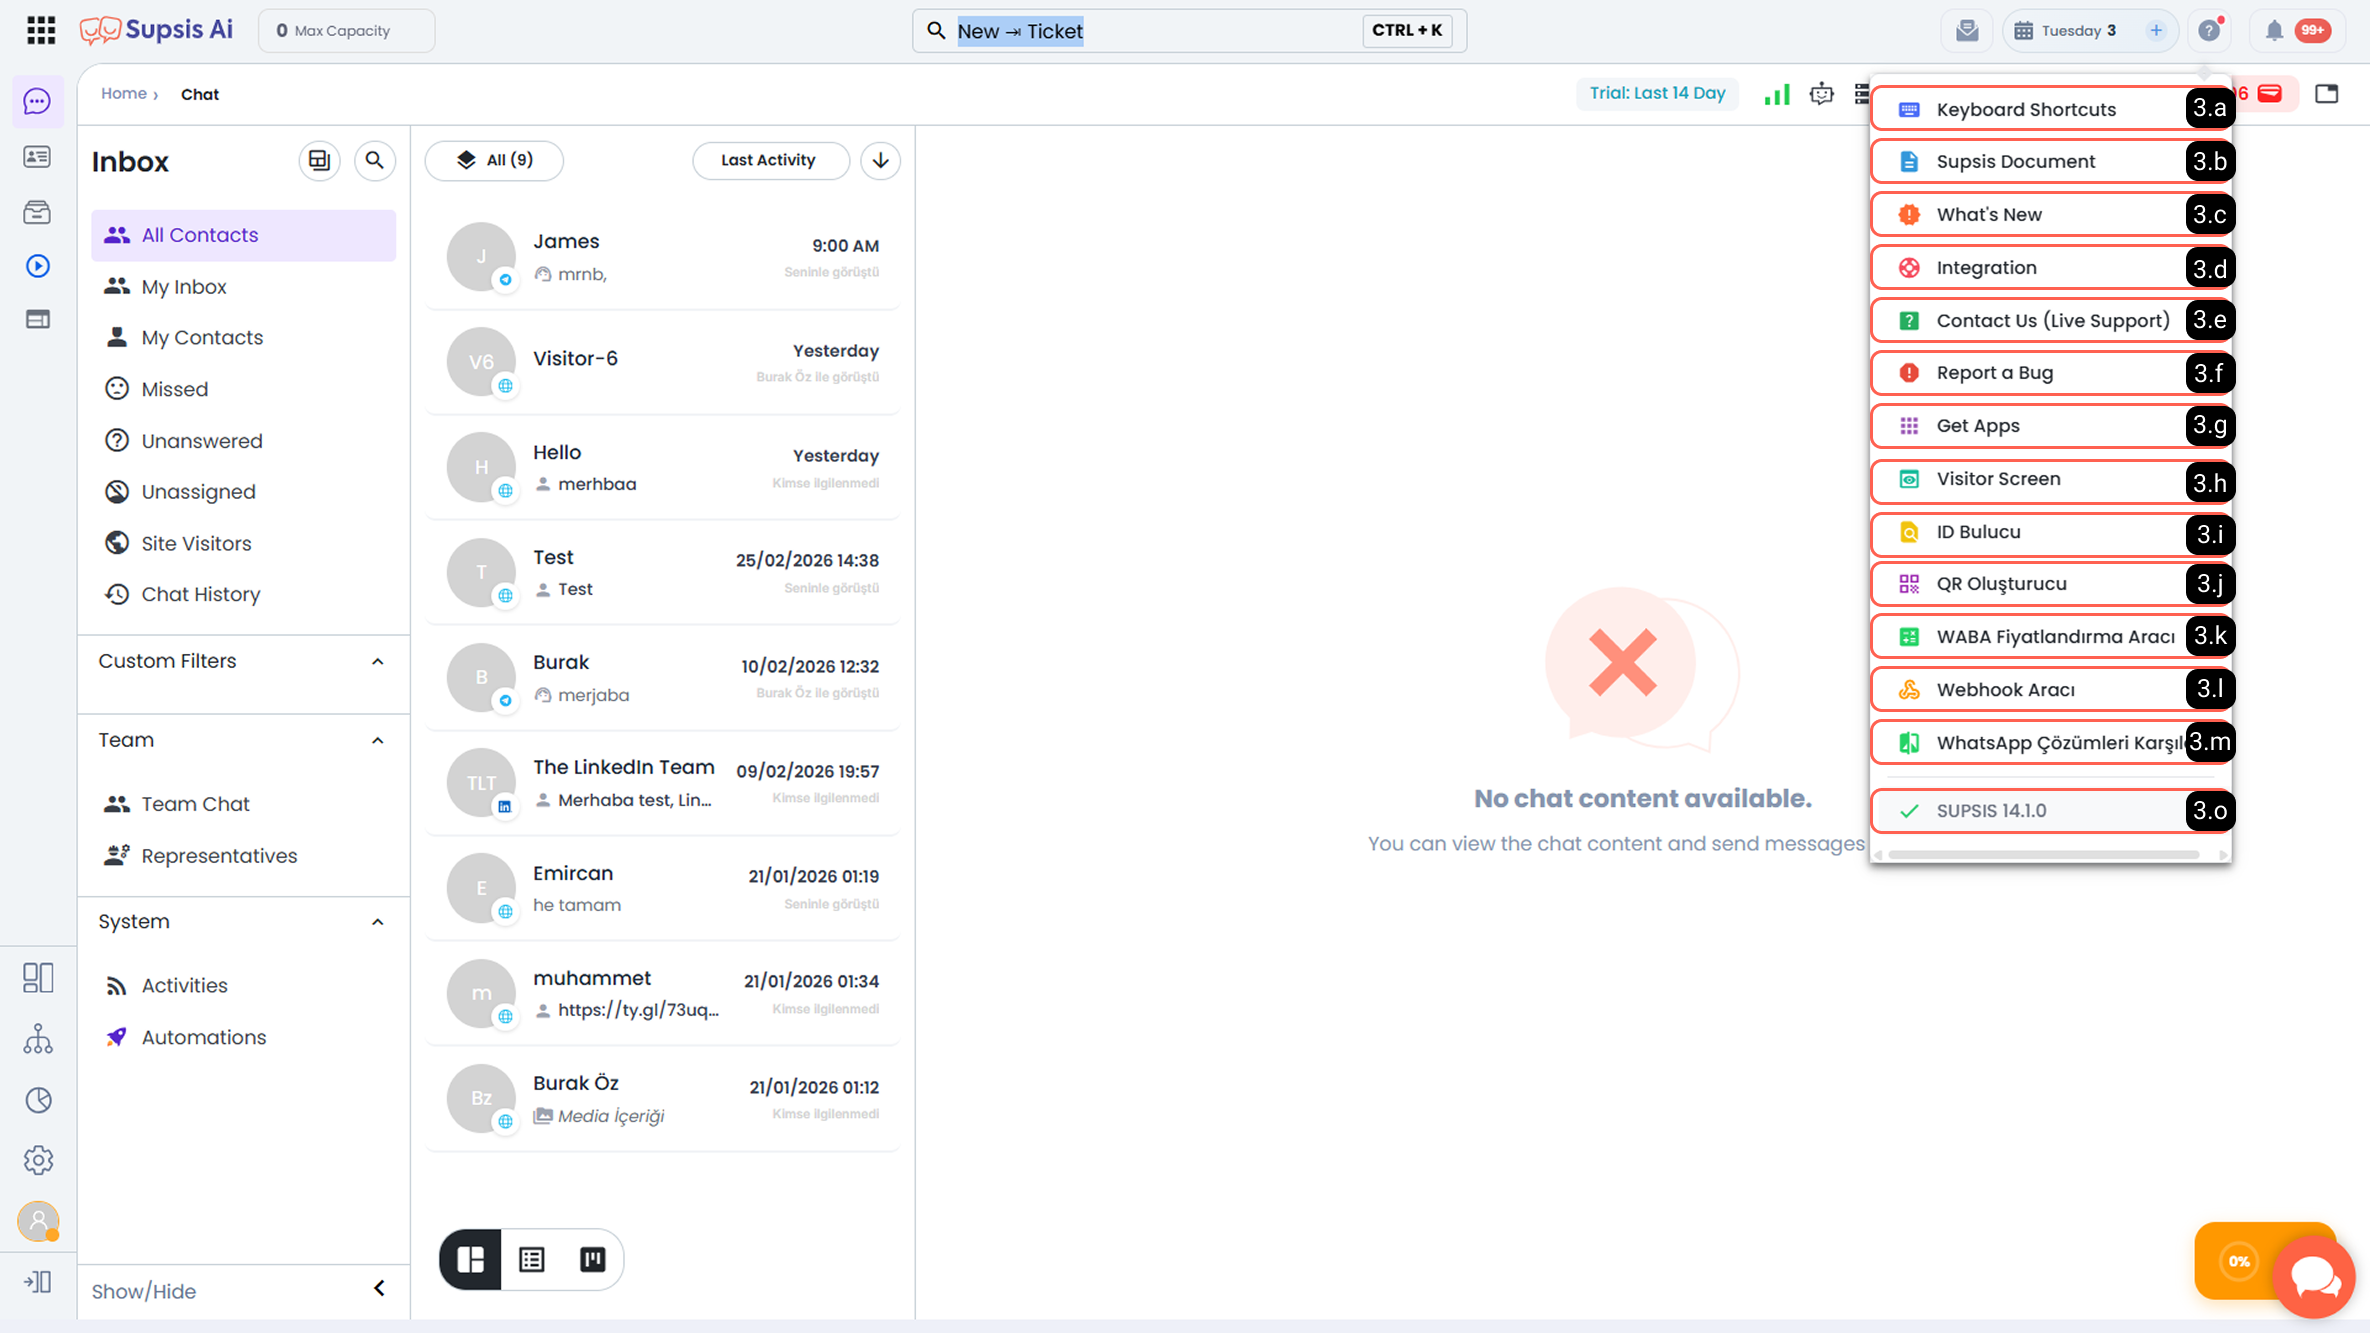
This area aims to provide quick access to frequently used tools, auxiliary pages, and informative content within the Supsis panel. Through this section, you can both accelerate your daily operations and access Supsis features, integrations, and tools from a single point.
-
3.a – Keyboard Shortcuts:
Opens the access screen where keyboard shortcuts that enable you to perform actions more quickly and efficiently within the panel are listed. From here, you can view available keyboard commands and learn them according to your usage habits. -
3.b – Supsis Documentation:
Through this button, you can access the Supsis documentation page where detailed usage explanations and technical documentation for all Supsis features are available. You can use this area to obtain comprehensive information about the product. -
3.c – What’s New:
The What’s New tab opens an informational page providing updates about system changes, newly added features, and improved functions within the Supsis panel. You can follow the latest developments here. -
3.d – Integration:
Provides access to the Website integration page. In this area, you can find the integration script, integration instructions, and the “Check Integration” button to verify your current integration status. For more information, please review the Website Integration documentation. -
3.e – Contact Us (Live Support):
Through this button, a chat bubble opens allowing you to instantly contact the Supsis live support team. You can submit your system-related questions and receive support from our team. -
3.f – Report a Bug:
Allows you to quickly and easily report errors encountered while using the panel. Reported issues are forwarded to the relevant technical team, and the resolution process is initiated. -
3.g – Get the Apps:
Opens the application download links required to use the Supsis system on your mobile devices. This allows you to access Supsis via mobile. -
3.h – Visitor Screen:
Opens the visitor screen where you can simulate and test the chat bubble that users visiting your website will see. You can send messages from this screen to initiate test chats in your panel. -
3.i – ID Finder:
This tool allows you to easily find ID information for users or content within relevant modules. By identifying IDs, you can manage specific data in the system more effectively. -
3.j – QR Generator:
Allows you to generate QR codes for quickly sending messages to WhatsApp numbers. The generated QR codes enable users to start a WhatsApp chat with a single scan. -
3.k – WABA Pricing Tool:
A calculation tool that allows you to review WhatsApp Business API pricing. You can calculate estimated costs based on message type and message volume to plan according to your needs. -
3.l – Webhook Tool:
This tool opens the link to the Webhook Tool page, which enables integration between the Supsis system and external platforms. Through webhooks, you can exchange data with different systems. -
3.m – WhatsApp Solutions Comparison:
A tool that allows you to compare different WhatsApp solutions offered by Supsis. By reviewing the features in detail, you can determine the most suitable option for your business. -
3.o – Supsis Version Information:
This area displays the currently active version information of your Supsis panel. You can track your system’s current status by monitoring the version.
4-) Notifications
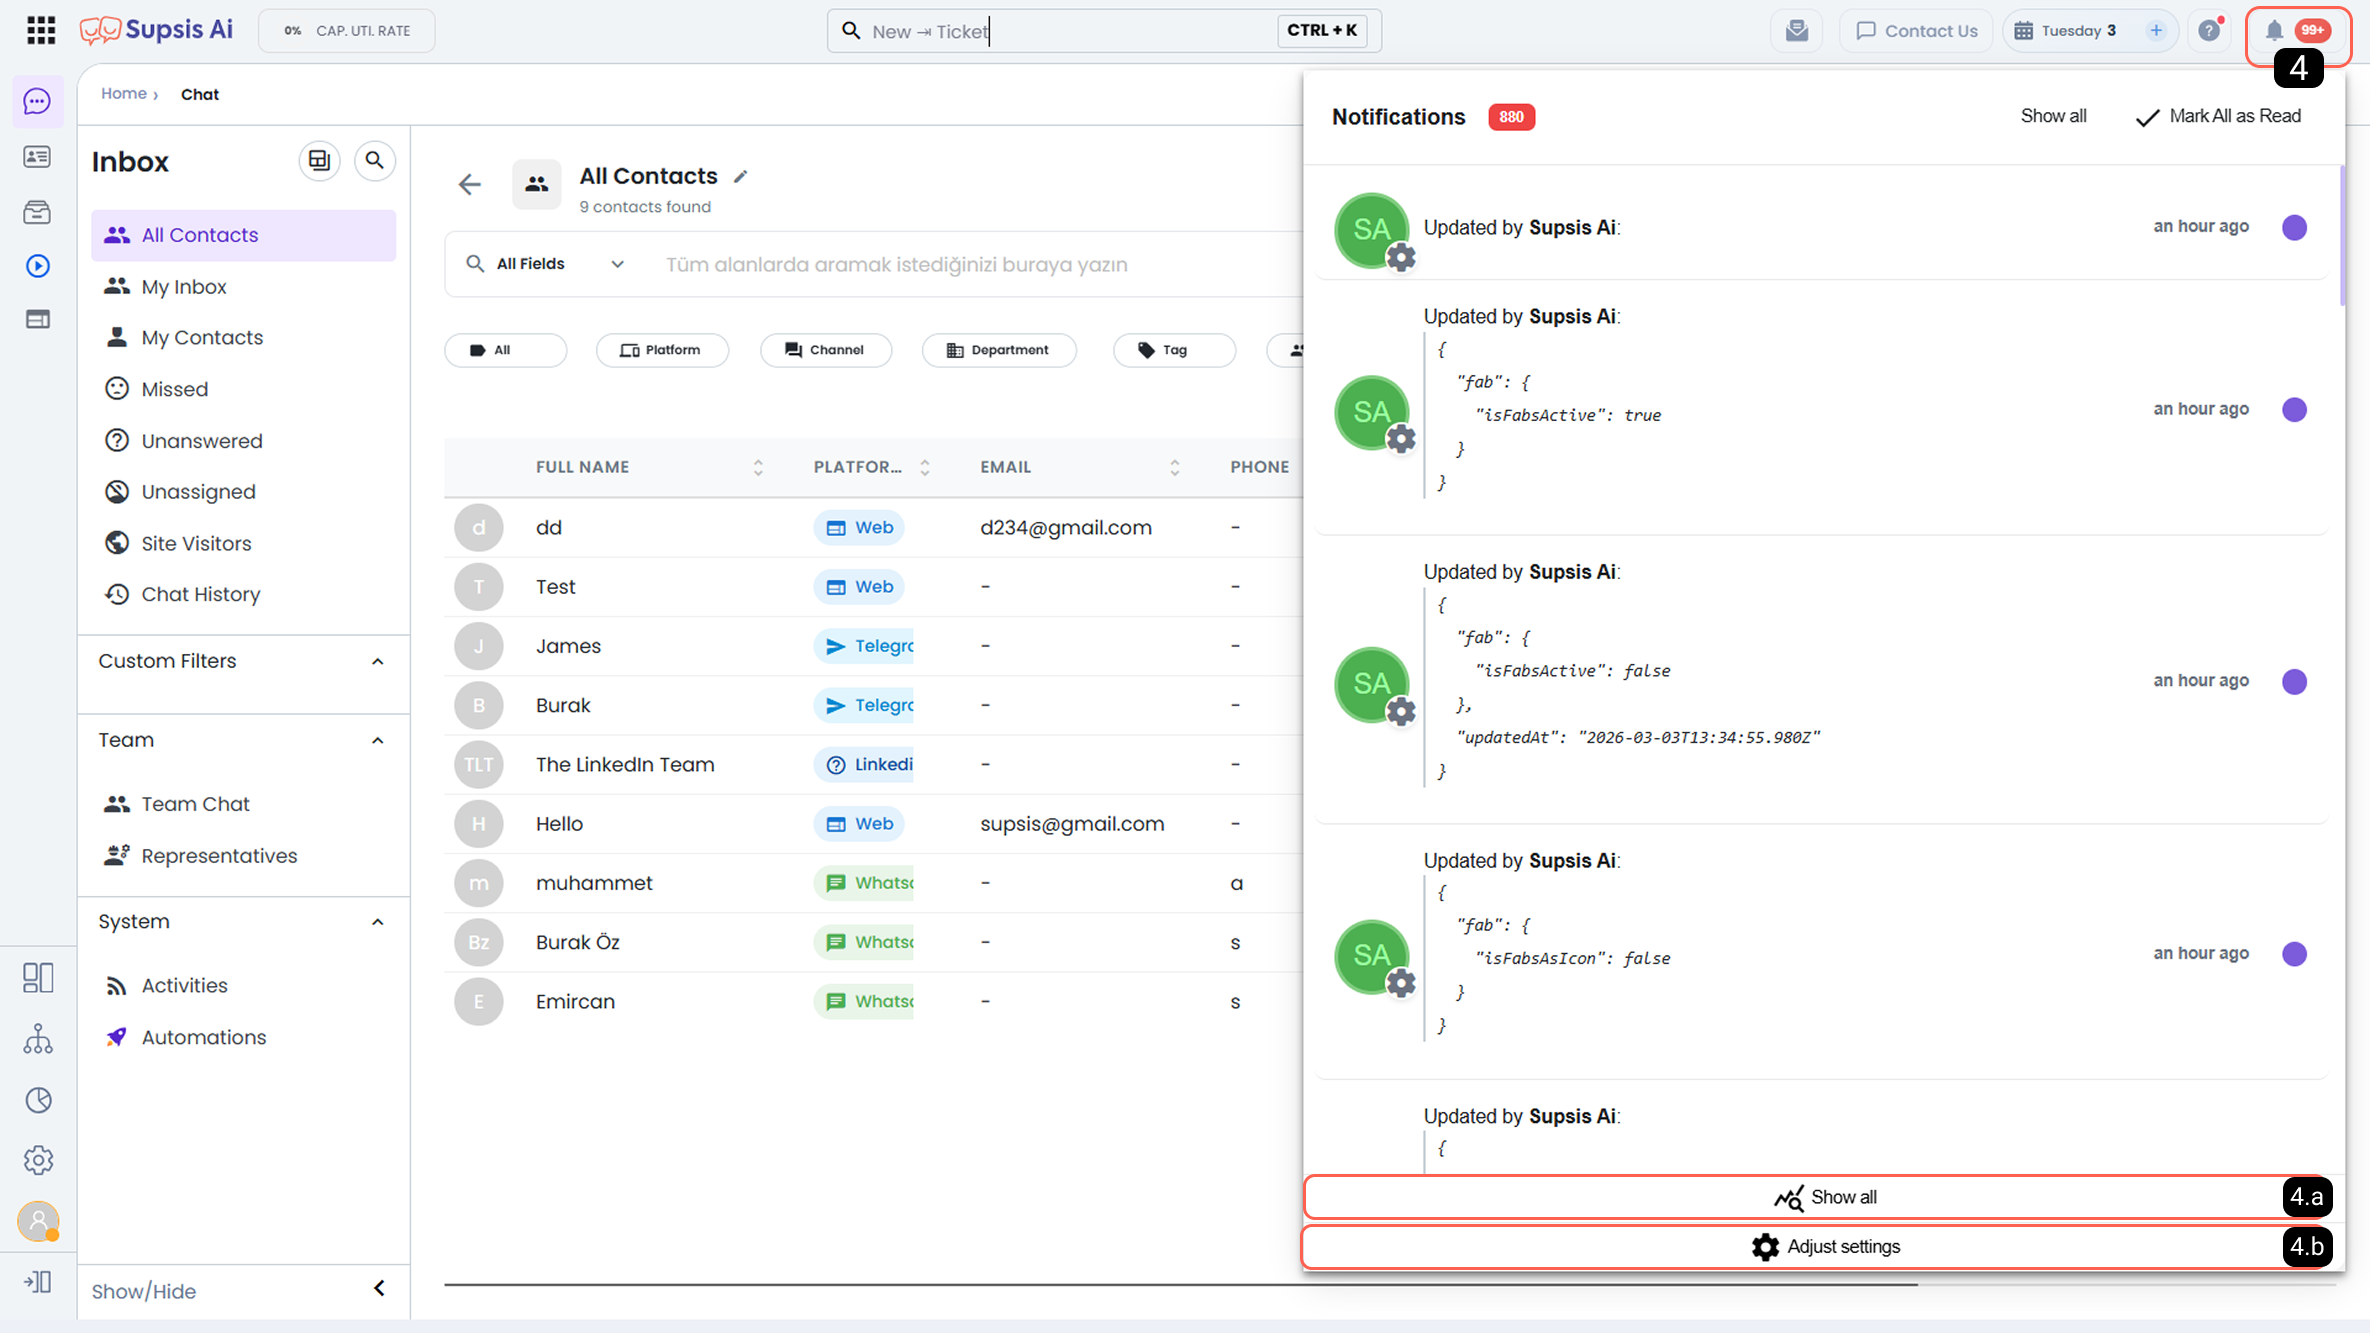
You can access notifications and notification content related to system and user activities occurring within the panel from this area. The notification area allows you to monitor important developments within the panel from a single center.
-
4.a – Show All:
This option displays all notifications created within the system. From here, you can review all previously received notifications and their detailed content. -
4.b – Edit Settings:
Opens the notification settings menu where you can manage your notification preferences. From this menu, you can determine which activities occurring within the panel you would like to receive notifications for.
Notifications you enable will appear in this notification area, while disabled notifications will not be displayed here. For more information about operations, please review the Notification Settings documentation.