In this section, status changes, interface settings, and personal profile customizations that the agent can perform specifically for their own user account are explained step by step.
Notification preferences, theme configuration, and profile details are unique to each agent. You can manage these settings either from the popover menu opened by clicking the user avatar in the bottom-left corner of the panel or directly via the User Settings (/profile) page.

| No | Menu | Description |
|---|---|---|
| 1 | Agent Status Change | Managing Online, Be Right Back, Busy, and Offline statuses |
| 2 | Panel Language Change | Customizing the management panel interface language |
| 3 | Temporary Notification Snooze | Pausing notifications with Do Not Disturb mode |
| 4 | User Settings (Profile & Security) | Configuring Profile, Password, Notifications, Sessions, Theme, and Language |
1- Agent Status Change
Agent status states determine the agent's real-time operational availability in the system and their eligibility for customer chat assignments. These statuses are directly reflected to team members, supervisors, live reporting dashboards, and the automatic chat assignment algorithm.
Status changes made by the agent immediately impact whether chat assignments remain active. When an agent is not ready to accept new chats, they can pause incoming assignments by changing their status to "Be Right Back", "Busy", or "Offline".

1.a- Agent Statuses and Working Logic
-
1.a – Online:
The agent is actively ready to work in the system and is open to receiving new chat assignments. The automatic chat assignment mechanism routes new conversations to the agent according to the assignment algorithm if the agent's maximum concurrent chat limit has not been reached and their role and department match. -
1.b – Be Right Back:
Indicates that the agent has temporarily stepped away (coffee break, quick phone call, etc.) but will return shortly. New chat assignments are paused while this status is active. -
1.c – Busy:
Indicates that the agent is handling an intensive conversation, participating in a meeting, or occupied with another operational task. New chat assignments are paused. -
1.d – Offline:
Indicates that the agent is off-duty or disconnected from the system. No automatic or manual chat assignments are routed to the agent, and they are completely excluded from queue management.
Impact of Statuses on Chat Assignment
All statuses other than "Online" completely halt new chat assignments to the agent. Different status options are provided to ensure internal transparency, assist team leaders in workload management, and distinguish break vs. working hours in performance reports.
2- Panel Language Change
Users can quickly change the interface language displayed in the Supsis panel using the Change Language option in the bottom-left user menu.

- 2.a – Language Selection: Choose the preferred interface language (Turkish, English, etc.) from the dropdown list.
- 2.b – Instant Application: The selected language takes effect immediately across the entire panel and is saved specifically to the agent's account.
- 2.c – Data Integrity: Language changes affect only UI buttons, menus, and text; customer messages, CRM data, and chat records remain preserved in their original language.
3- Temporarily Snoozing Notifications (Do Not Disturb)
During meetings, focused working periods, or breaks, agents can temporarily mute all alerts without having to modify their permanent notification configuration.
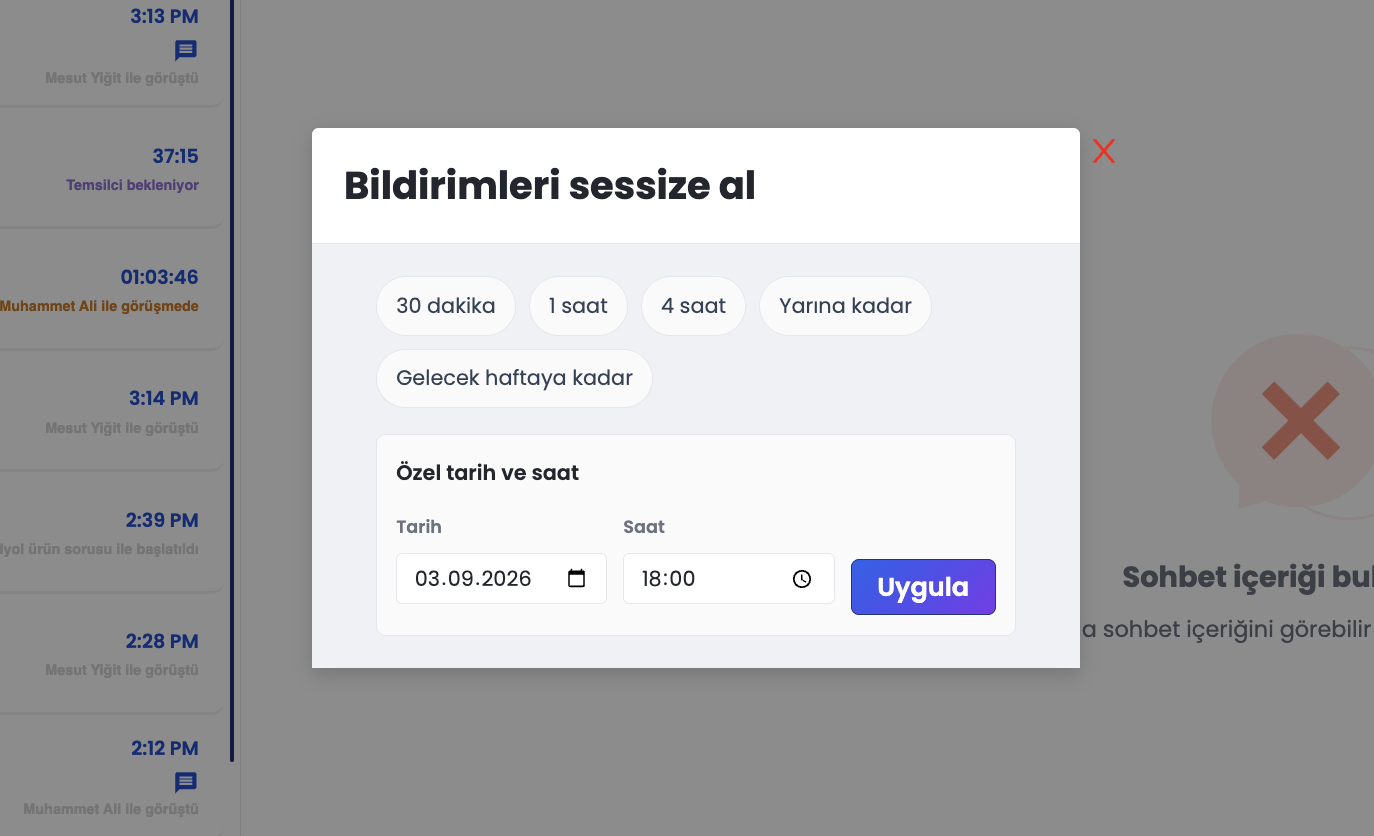
- Access: Click Mute notifications from the bottom-left avatar menu or click the slashed bell icon from the top-right notification bell menu.
- Duration Options: Select 30 minutes, 1 hour, 4 hours, until tomorrow, or specify a custom date and time from the calendar.
- Scope: During snooze mode, web push notifications, mobile push alerts, panel toast cards, and notification sounds are completely muted. Once the duration expires, standard alerts resume automatically.
4- User Settings (Profile & Account Management)
When the agent clicks User Settings in the bottom-left menu, they are navigated directly to the modern profile management page (/profile). From this page, all personal account configurations are organized into structured tabs.
4.a- Profile Tab
Configure your display name and default conversation language from the Profile tab:

- Username Configuration: Edit your first and last name displayed across the system and save changes with the Update Username button. This name is shown to customers in chat bubbles and to team members.
- Conversation Language: Defines the primary operational language used as a reference by the automatic translation engine. When a customer writes in another language, messages are automatically translated into this conversation language (independent of panel UI language).
4.b- Change Password Tab
Maintain account security by providing your current password and setting a new, strong password.

4.c- Notification Settings Tab
Manage user-specific auditory and visual alerts:

- Channel-Based Notification Actions: Enable or disable Web Panel, Mobile App, and Email notifications independently.
- Notification Sounds and Volume: Assign distinctive sounds and volume levels for new visitors, incoming messages, or transferred chats.
- Infinite Loop: Enable "Loop notification sound when assigned a message" so that the assignment alert continues repeating until the agent clicks into the panel and takes action.
4.d- My Sessions Tab (Passkey & Biometric Authentication)
Manage passwordless and biometric authentication credentials:
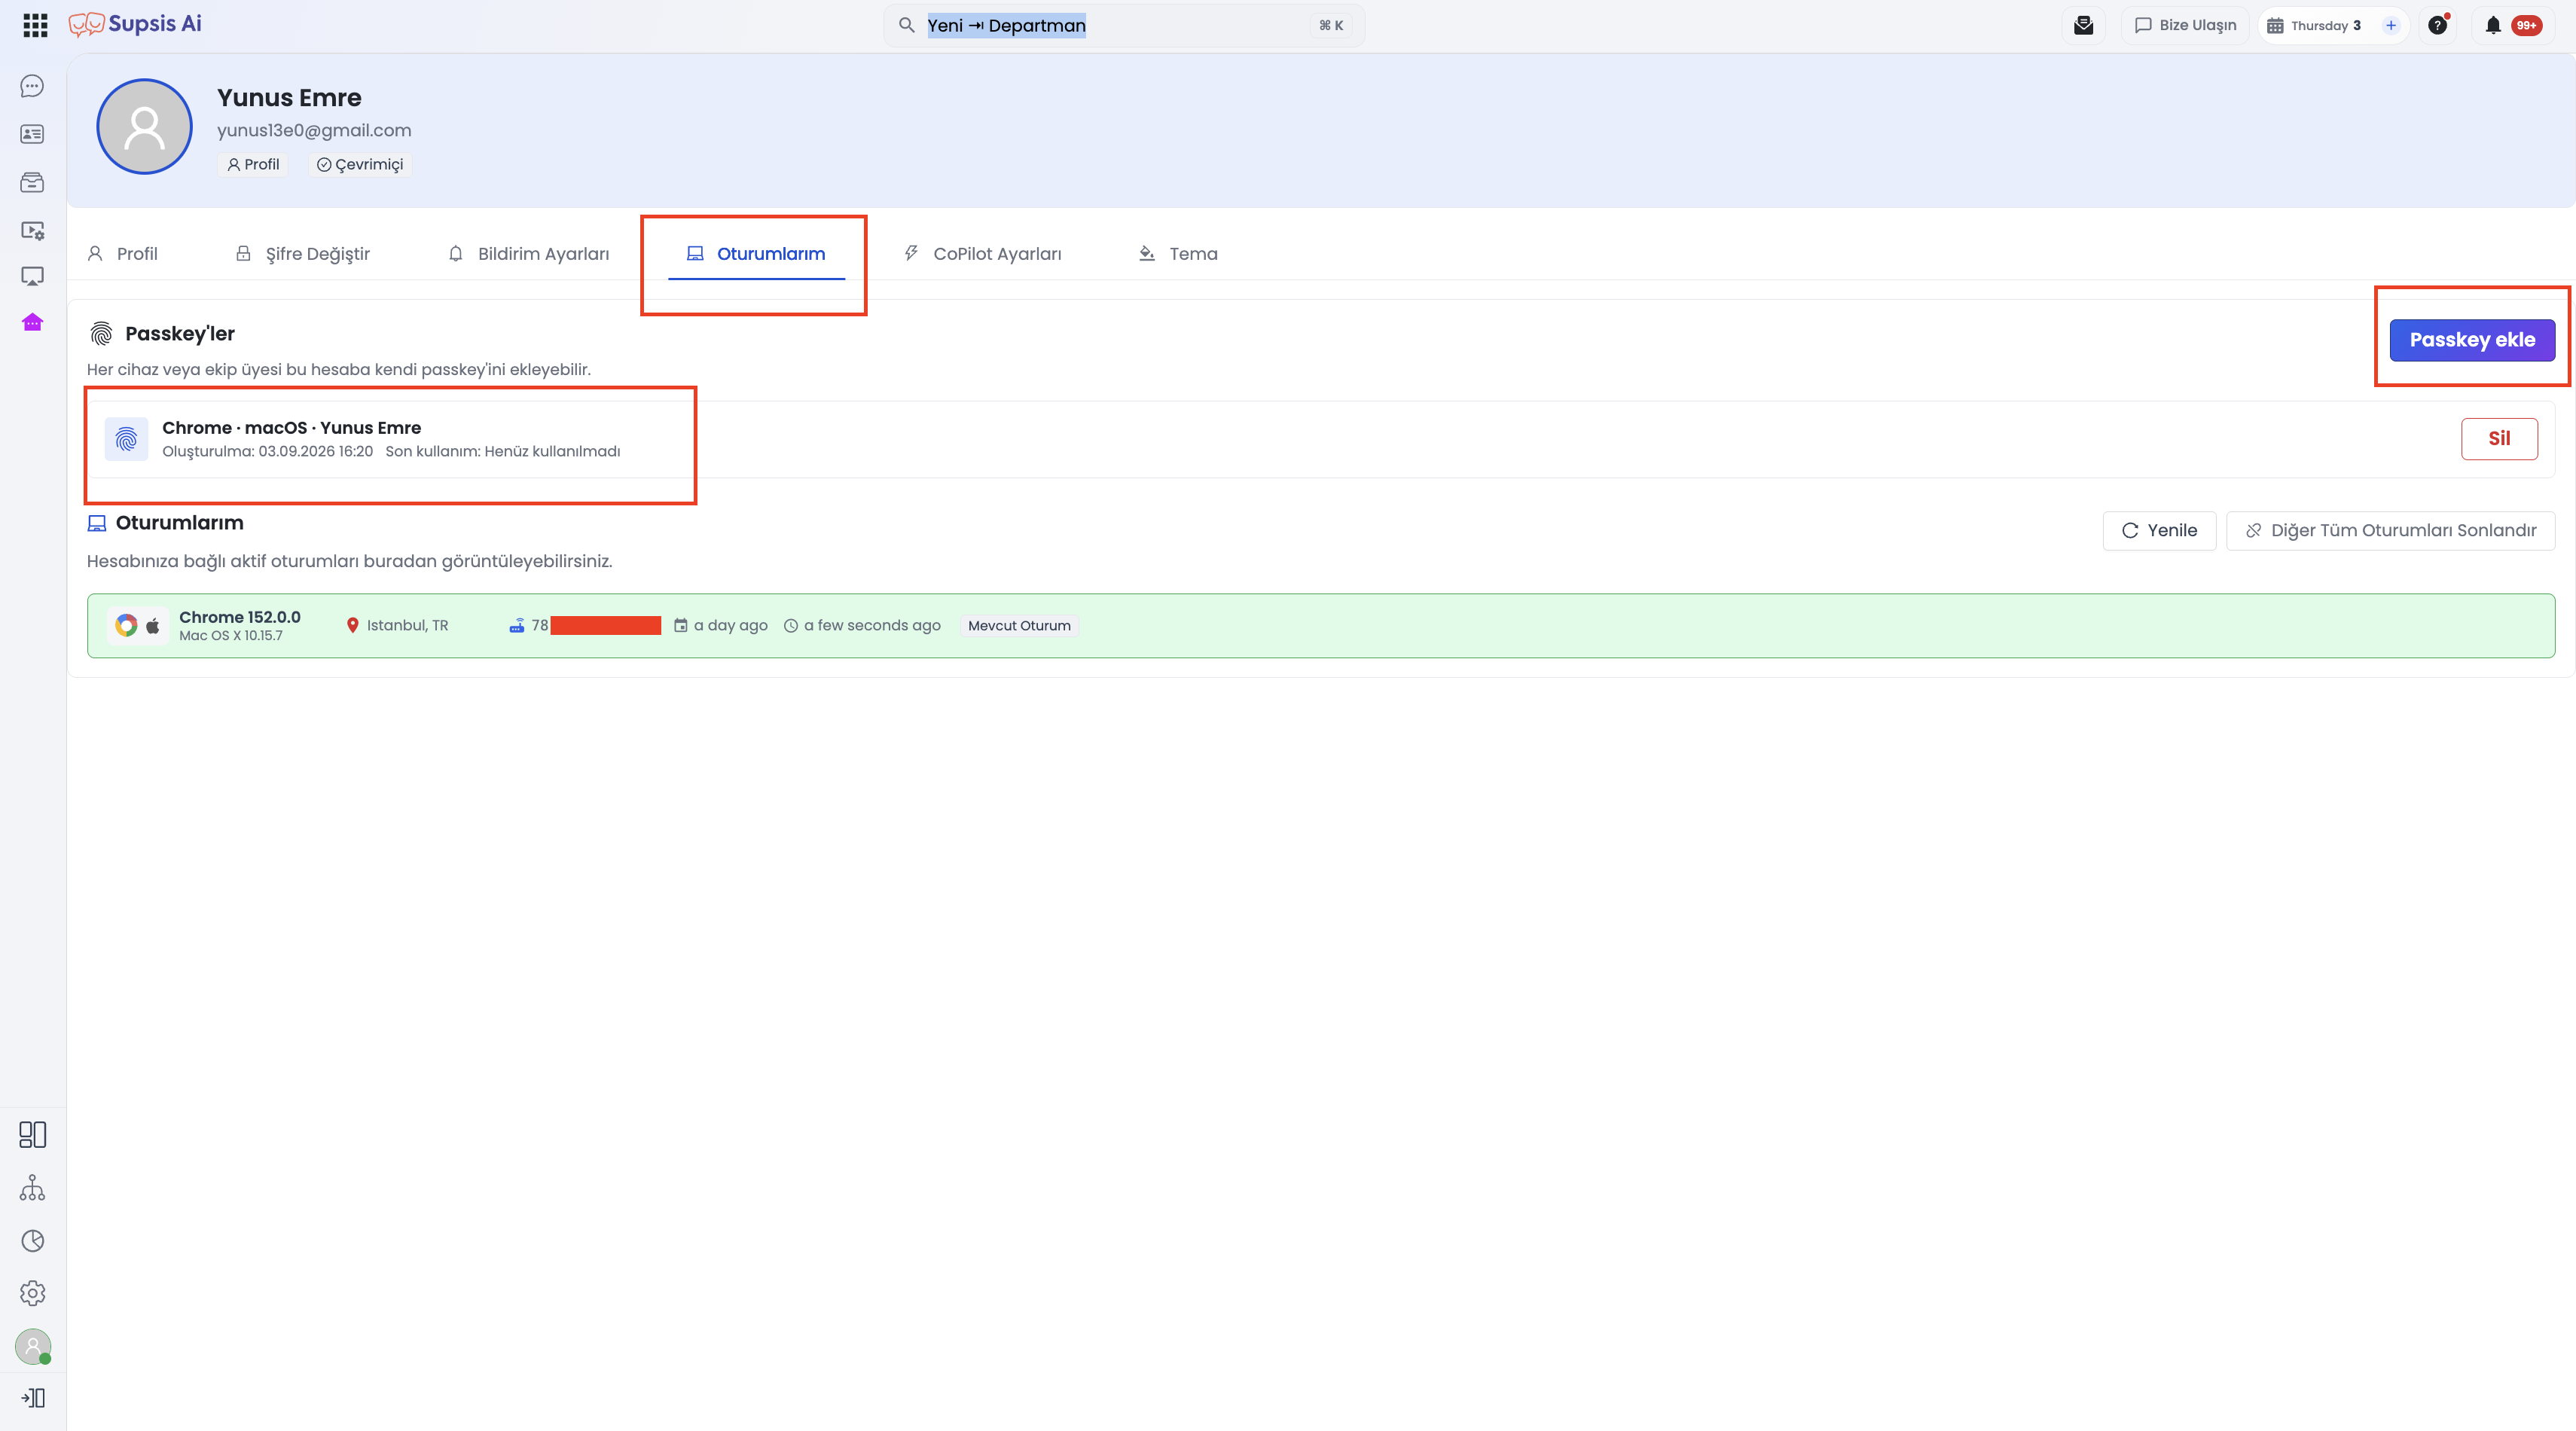
- Passkey: Register biometric authenticators like Touch ID, Face ID, or Windows Hello to log in within seconds without typing passwords.
- Active Devices: View all browsers and devices connected to your account and revoke obsolete or unused sessions.
4.e- CoPilot Settings Tab
Configure suggestion frequency, auto-completion, and response assistance preferences for the Supsis CoPilot AI assistant.
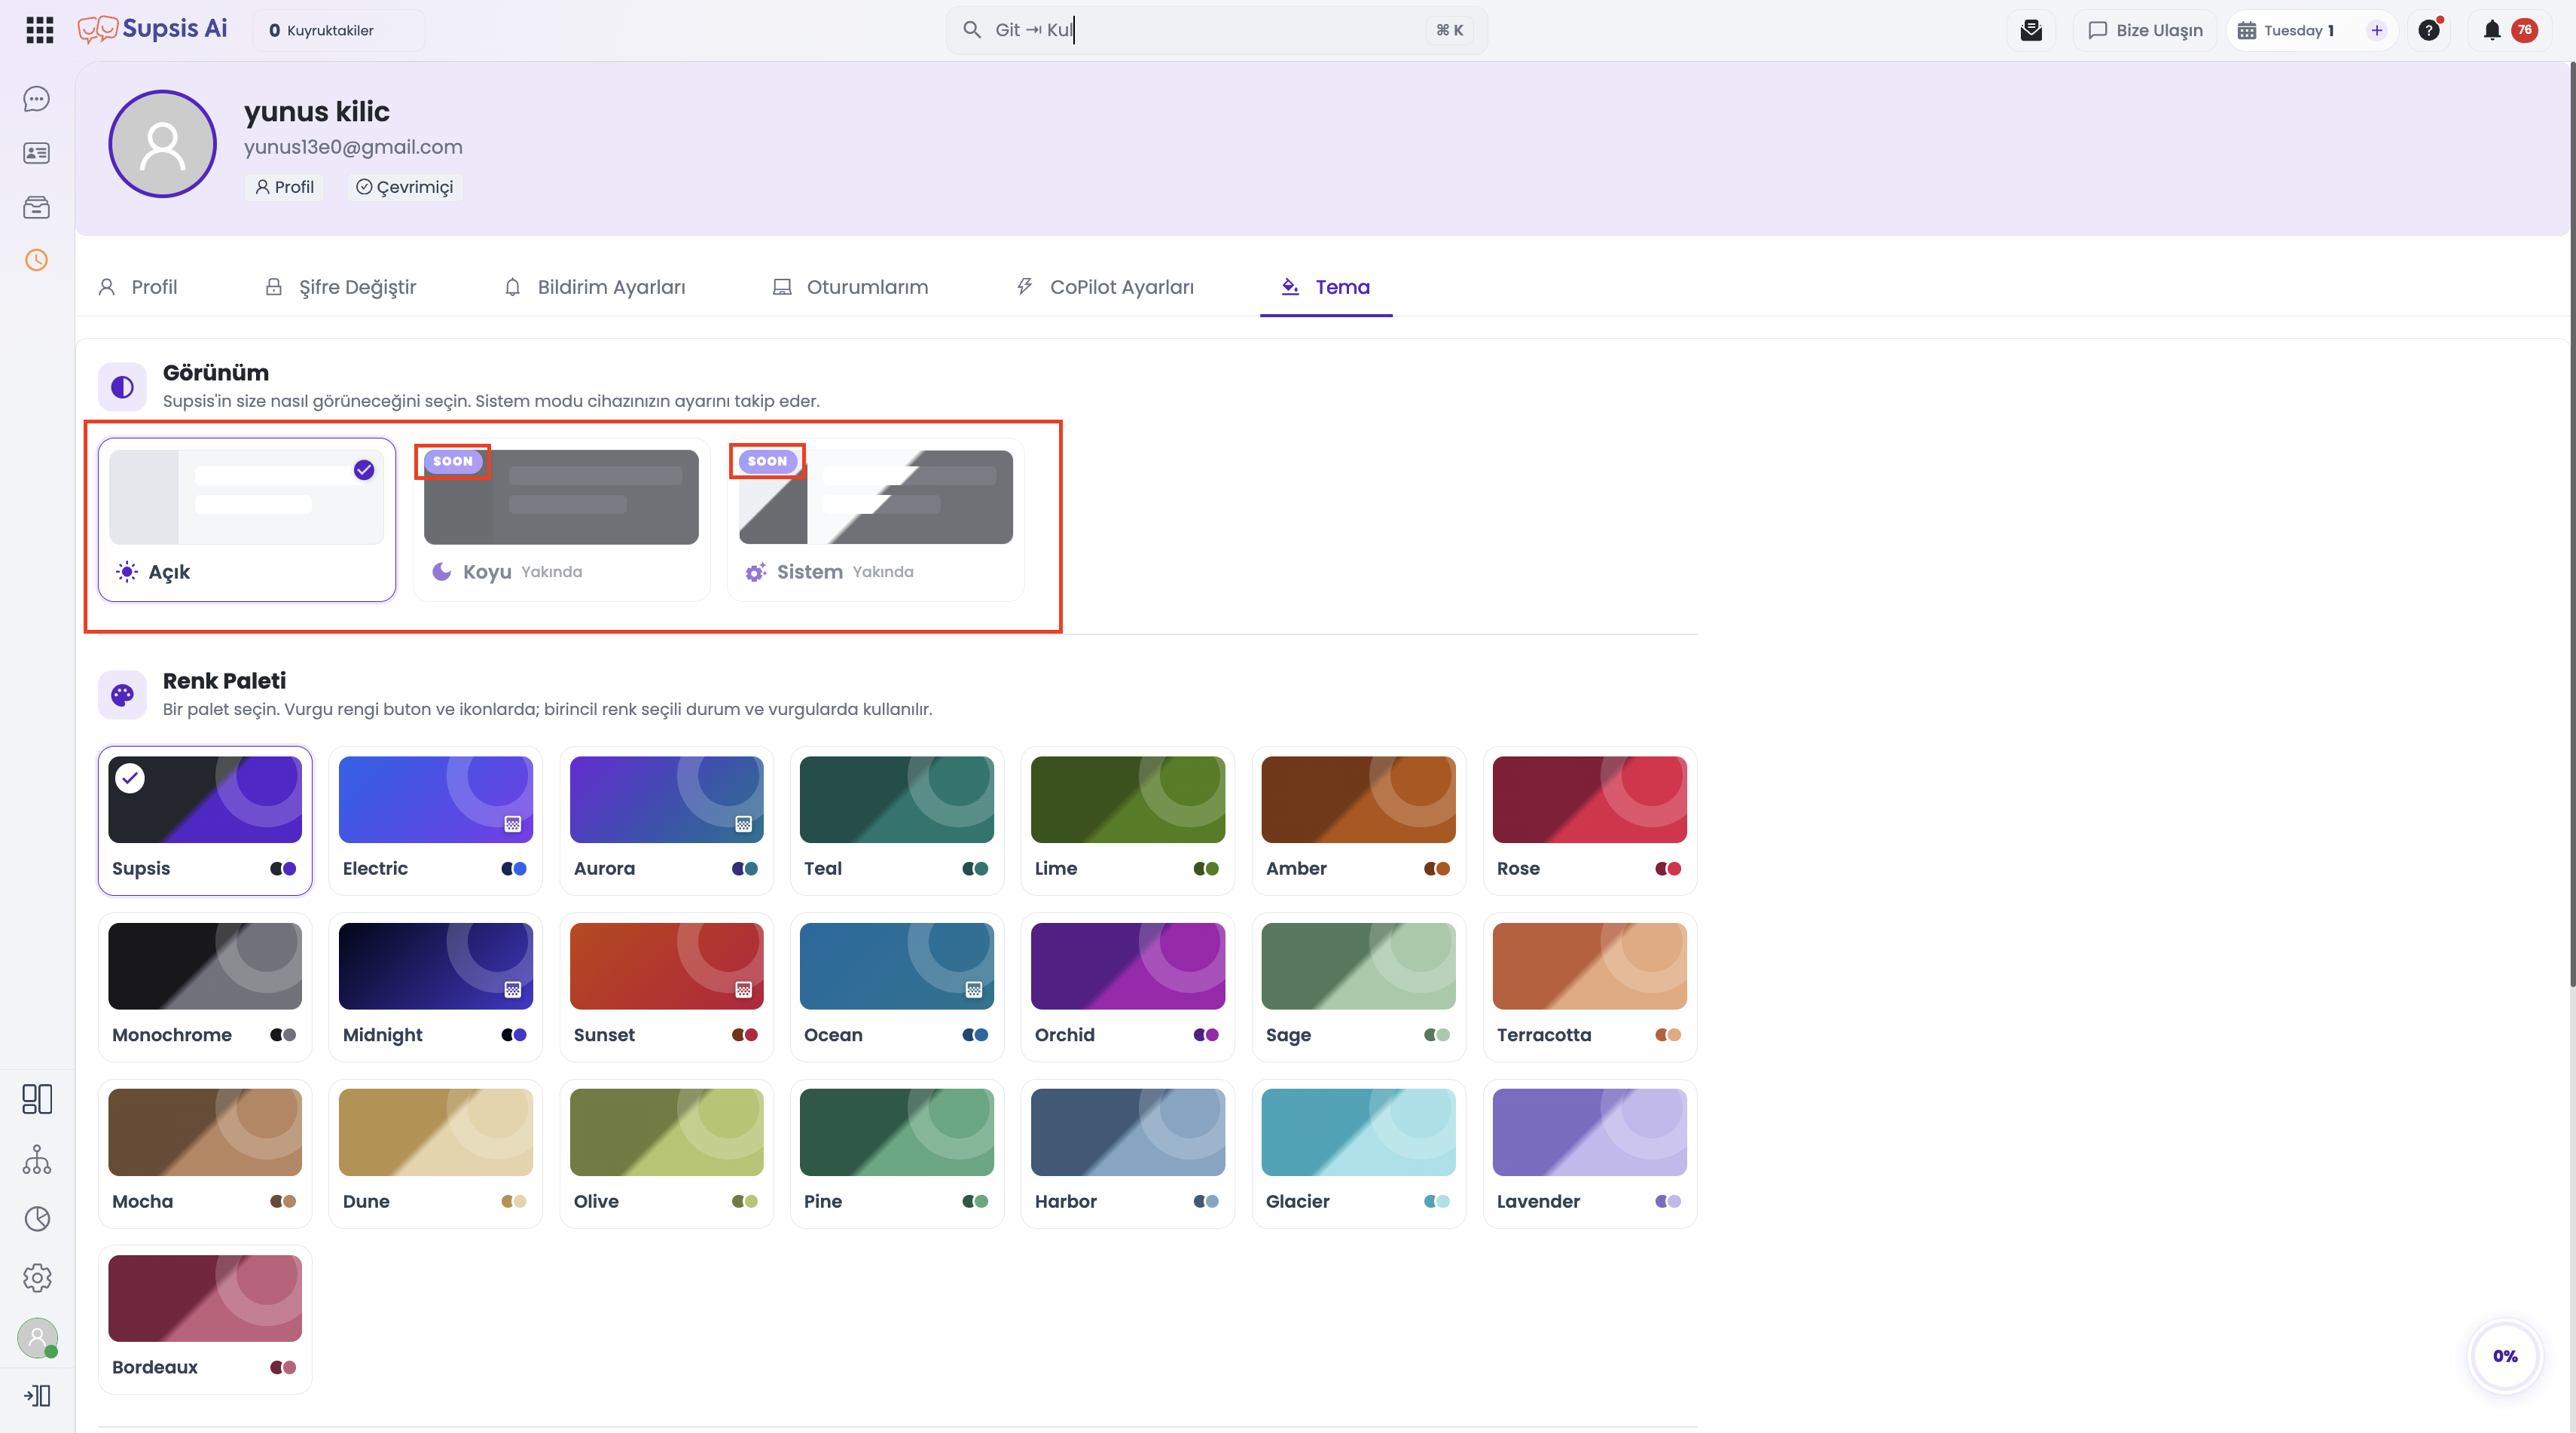
4.f- Theme Tab
Personalize your working environment by choosing between Light, Dark, or System appearance modes, and apply any of the 22 pre-designed color palettes.