
Cache Manager Integration
Cache Manager (Cache Management Tool) is a tool within Supsis AI that allows you to share data between your chatbot scenarios and automations. Through this integration, you can securely store and manage a user's session information, preferences, or temporary data that the chatbot needs to remember.
To activate Cache Manager, follow these steps via the Supsis AI panel:
-
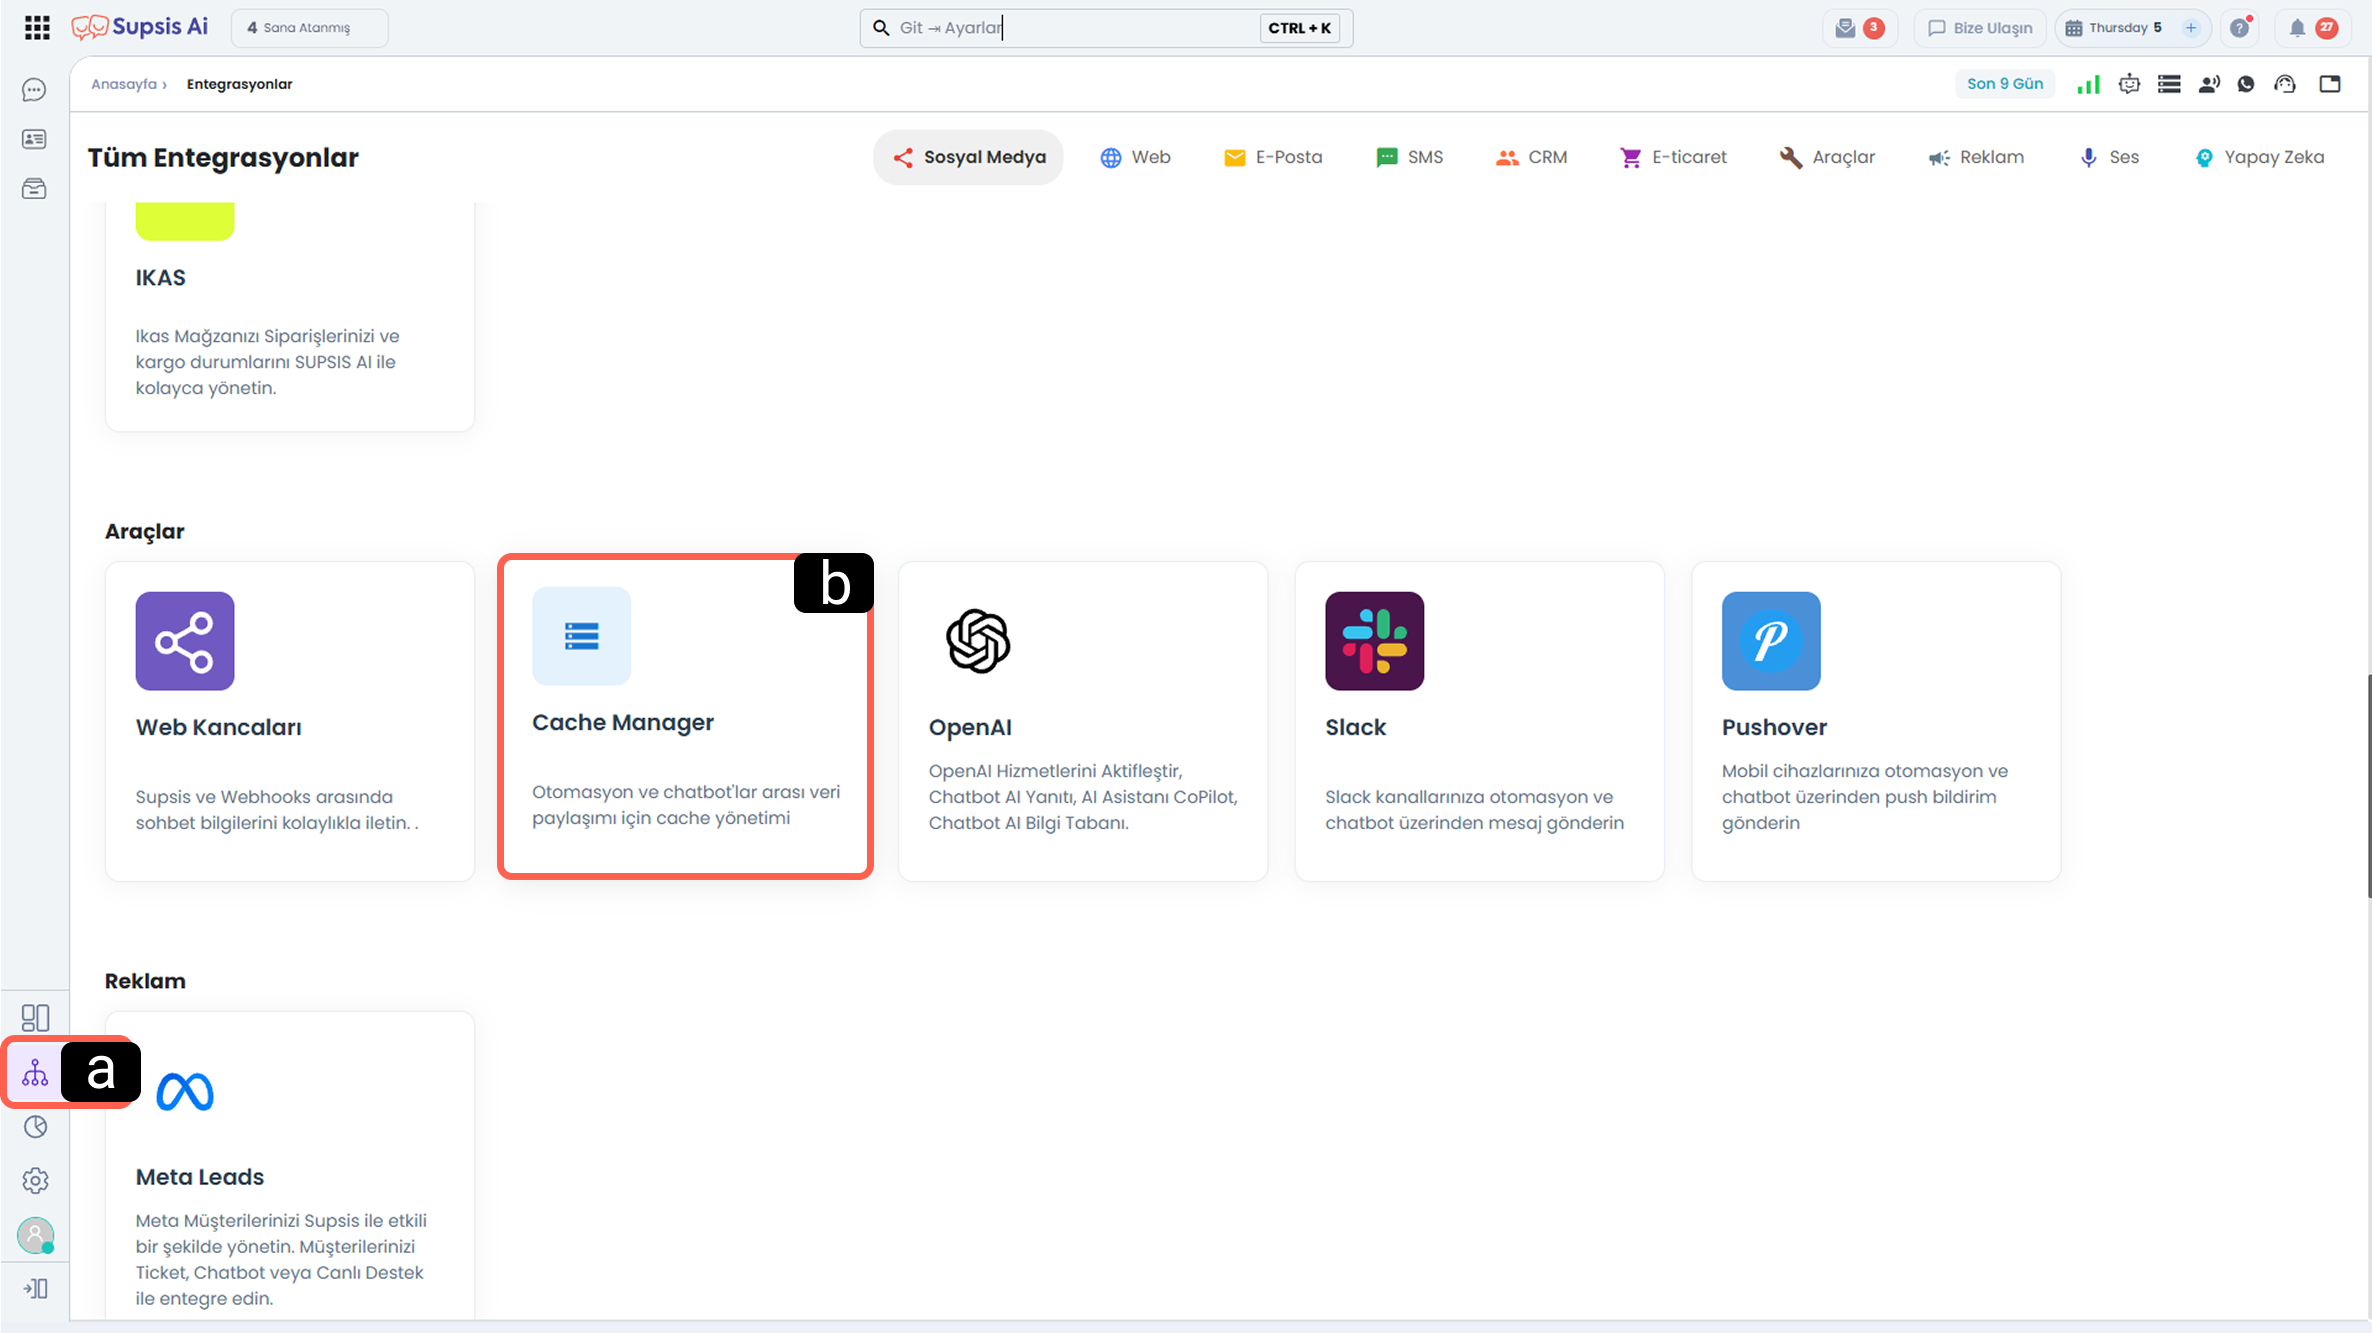
a – Integrations Menu
Click on the Integrations button located in the left menu of your Supsis AI panel. -
b – Channel Selection
Under the "Tools" category, find the Cache Manager card and click on it.
-
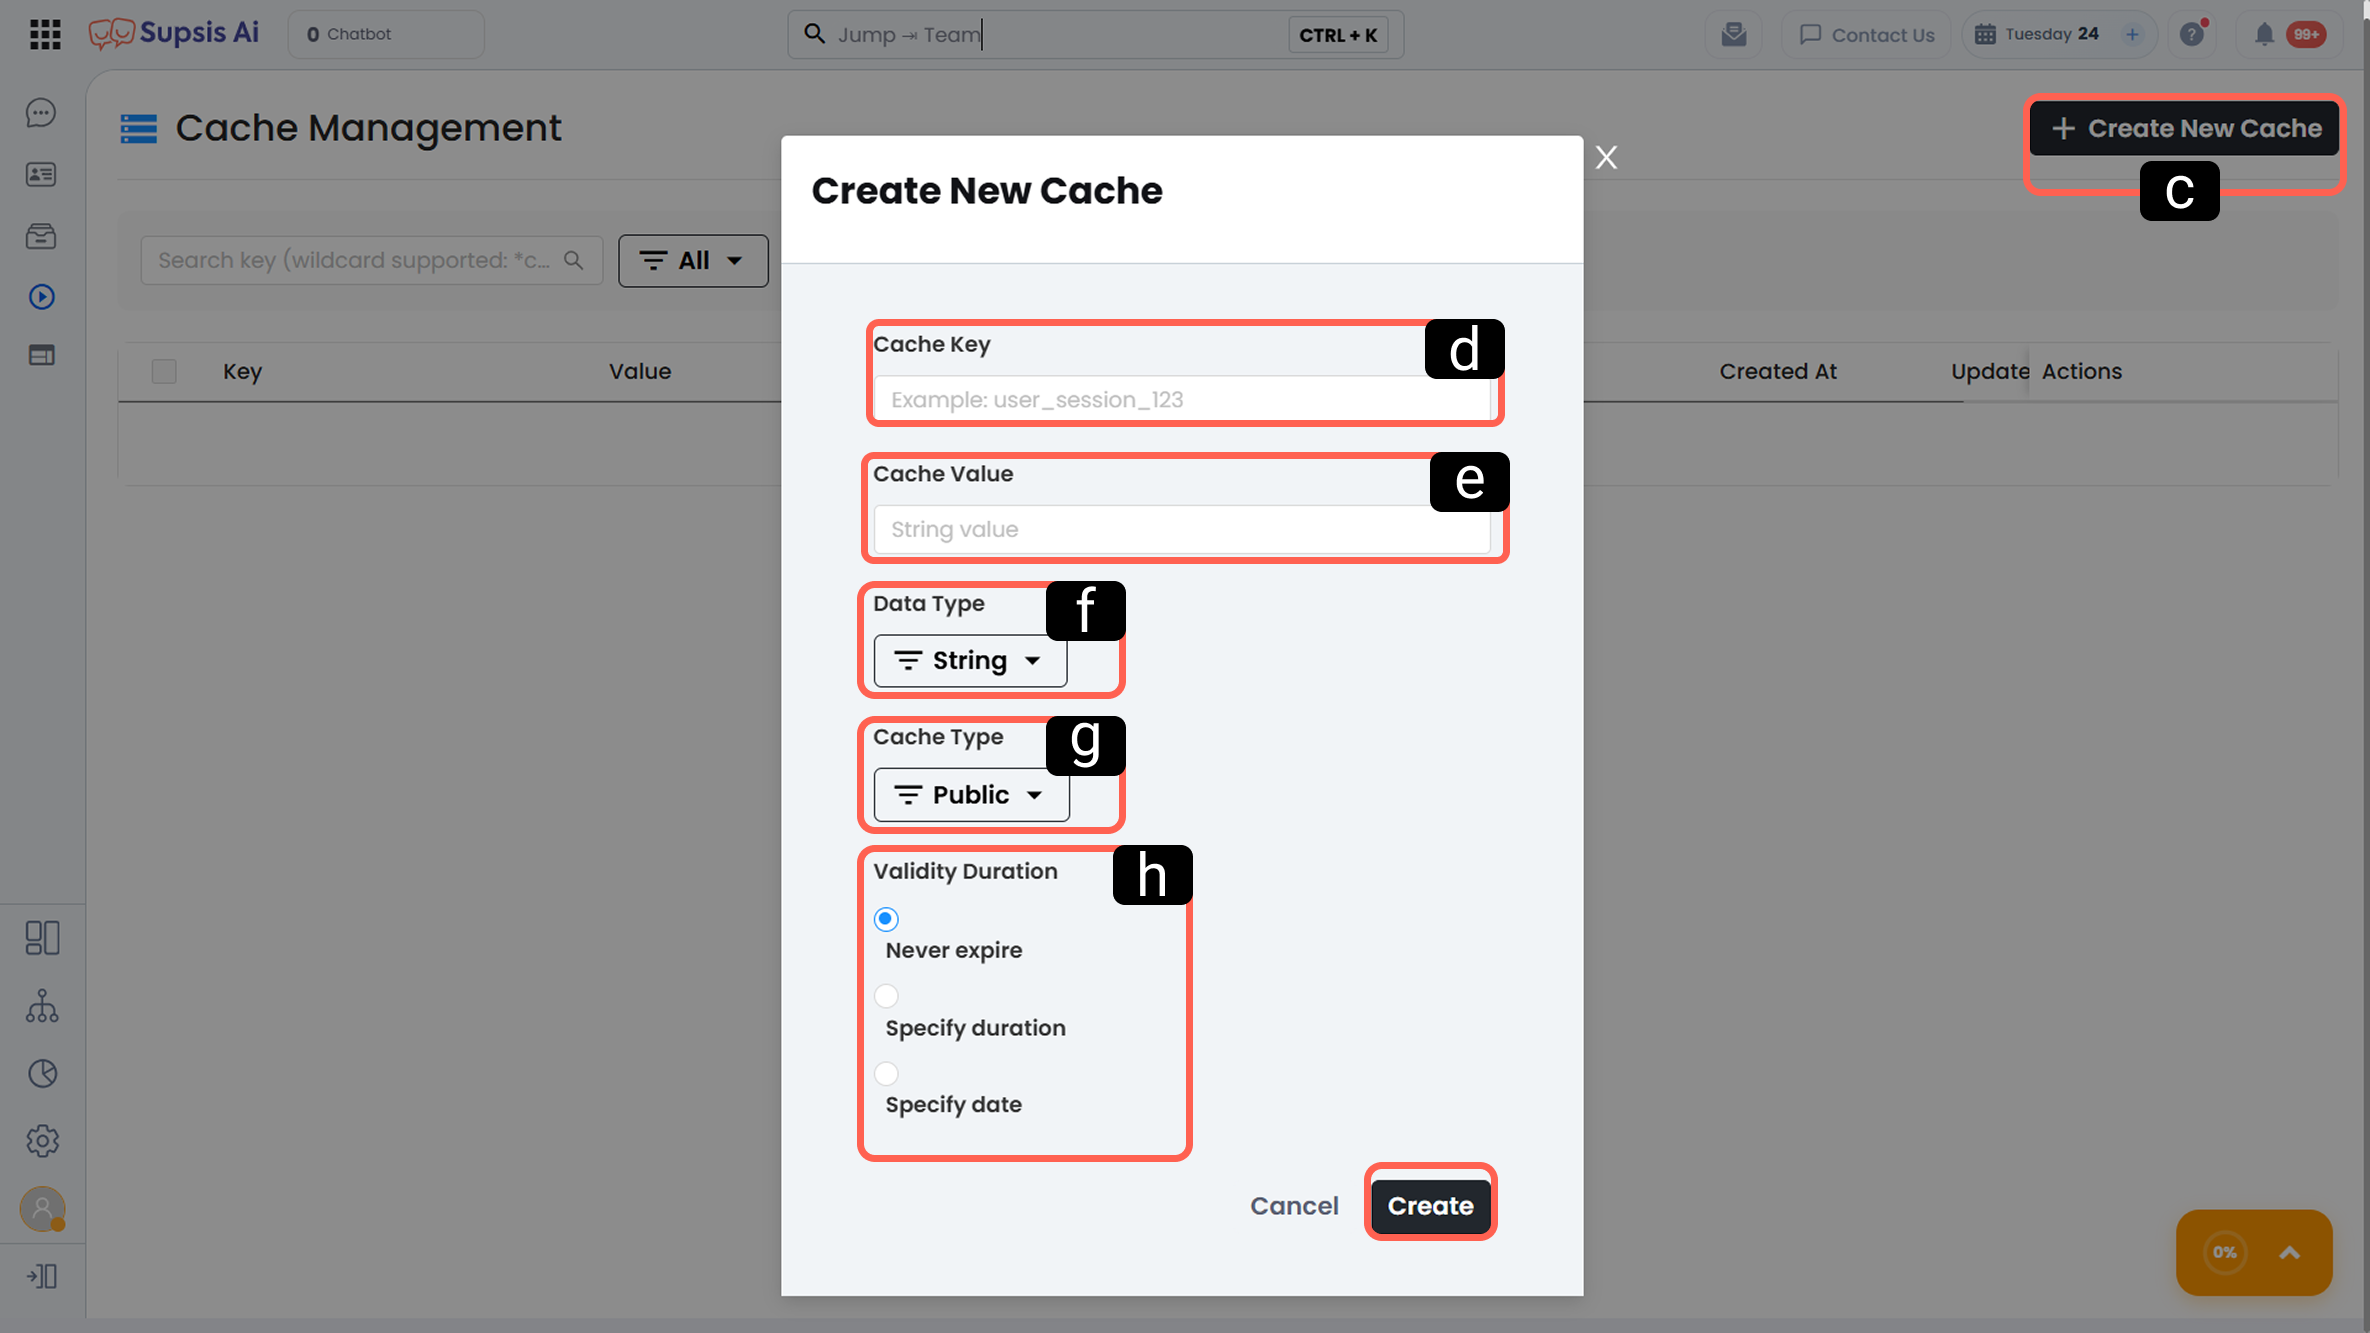
c – Create New Cache
In the opened list, click the "+ Create New Cache" button at the top right to define a new data field. -
d – Cache Key
The unique key name you will use to access the data later (Example:user_session_123). -
e – Cache Value
The actual data corresponding to the key that will be stored in the system. -
f – Data Type
You must select the appropriate type for the system to process the data correctly.
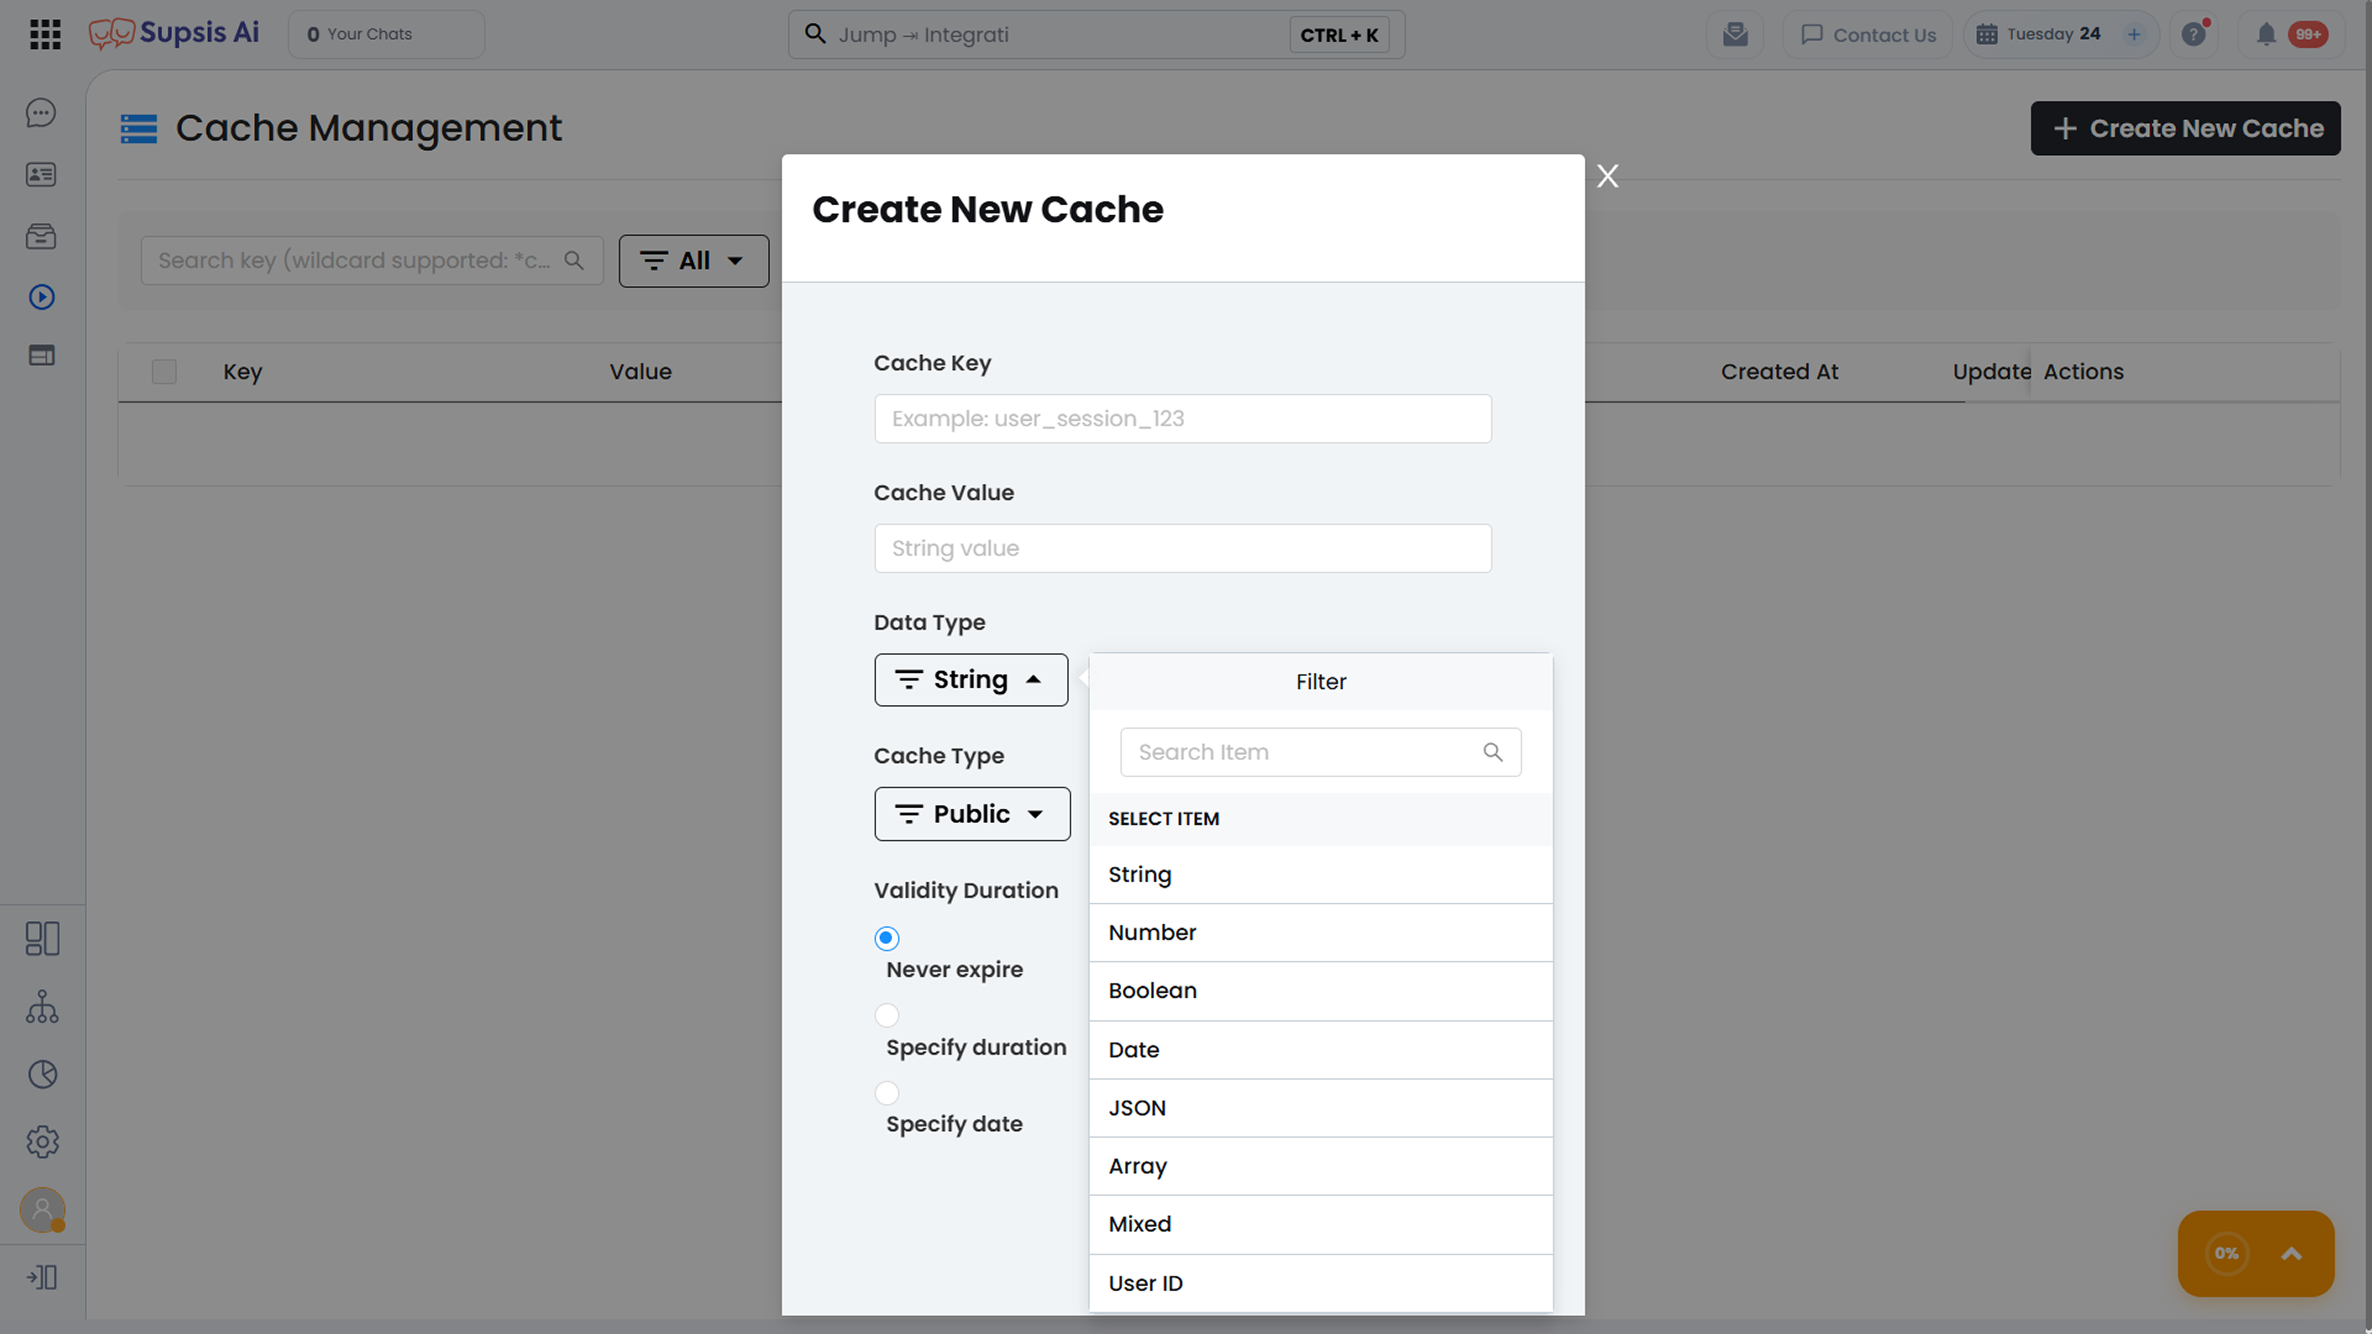
   String: Used for text-based data.

   Number: Used for numerical values.

   Boolean: Used for True/False logical values.

   Date: Used for date and time type data.

   JSON: Used to store JSON model data structures.

   Array: Used to store complex data structures or lists.

   Mixed: Used for values containing more than one data type.

   User ID: Used to directly associate the data with a specific user identity.
- g – Cache Type
You can determine the scope in which the data will be visible within the system from this section.
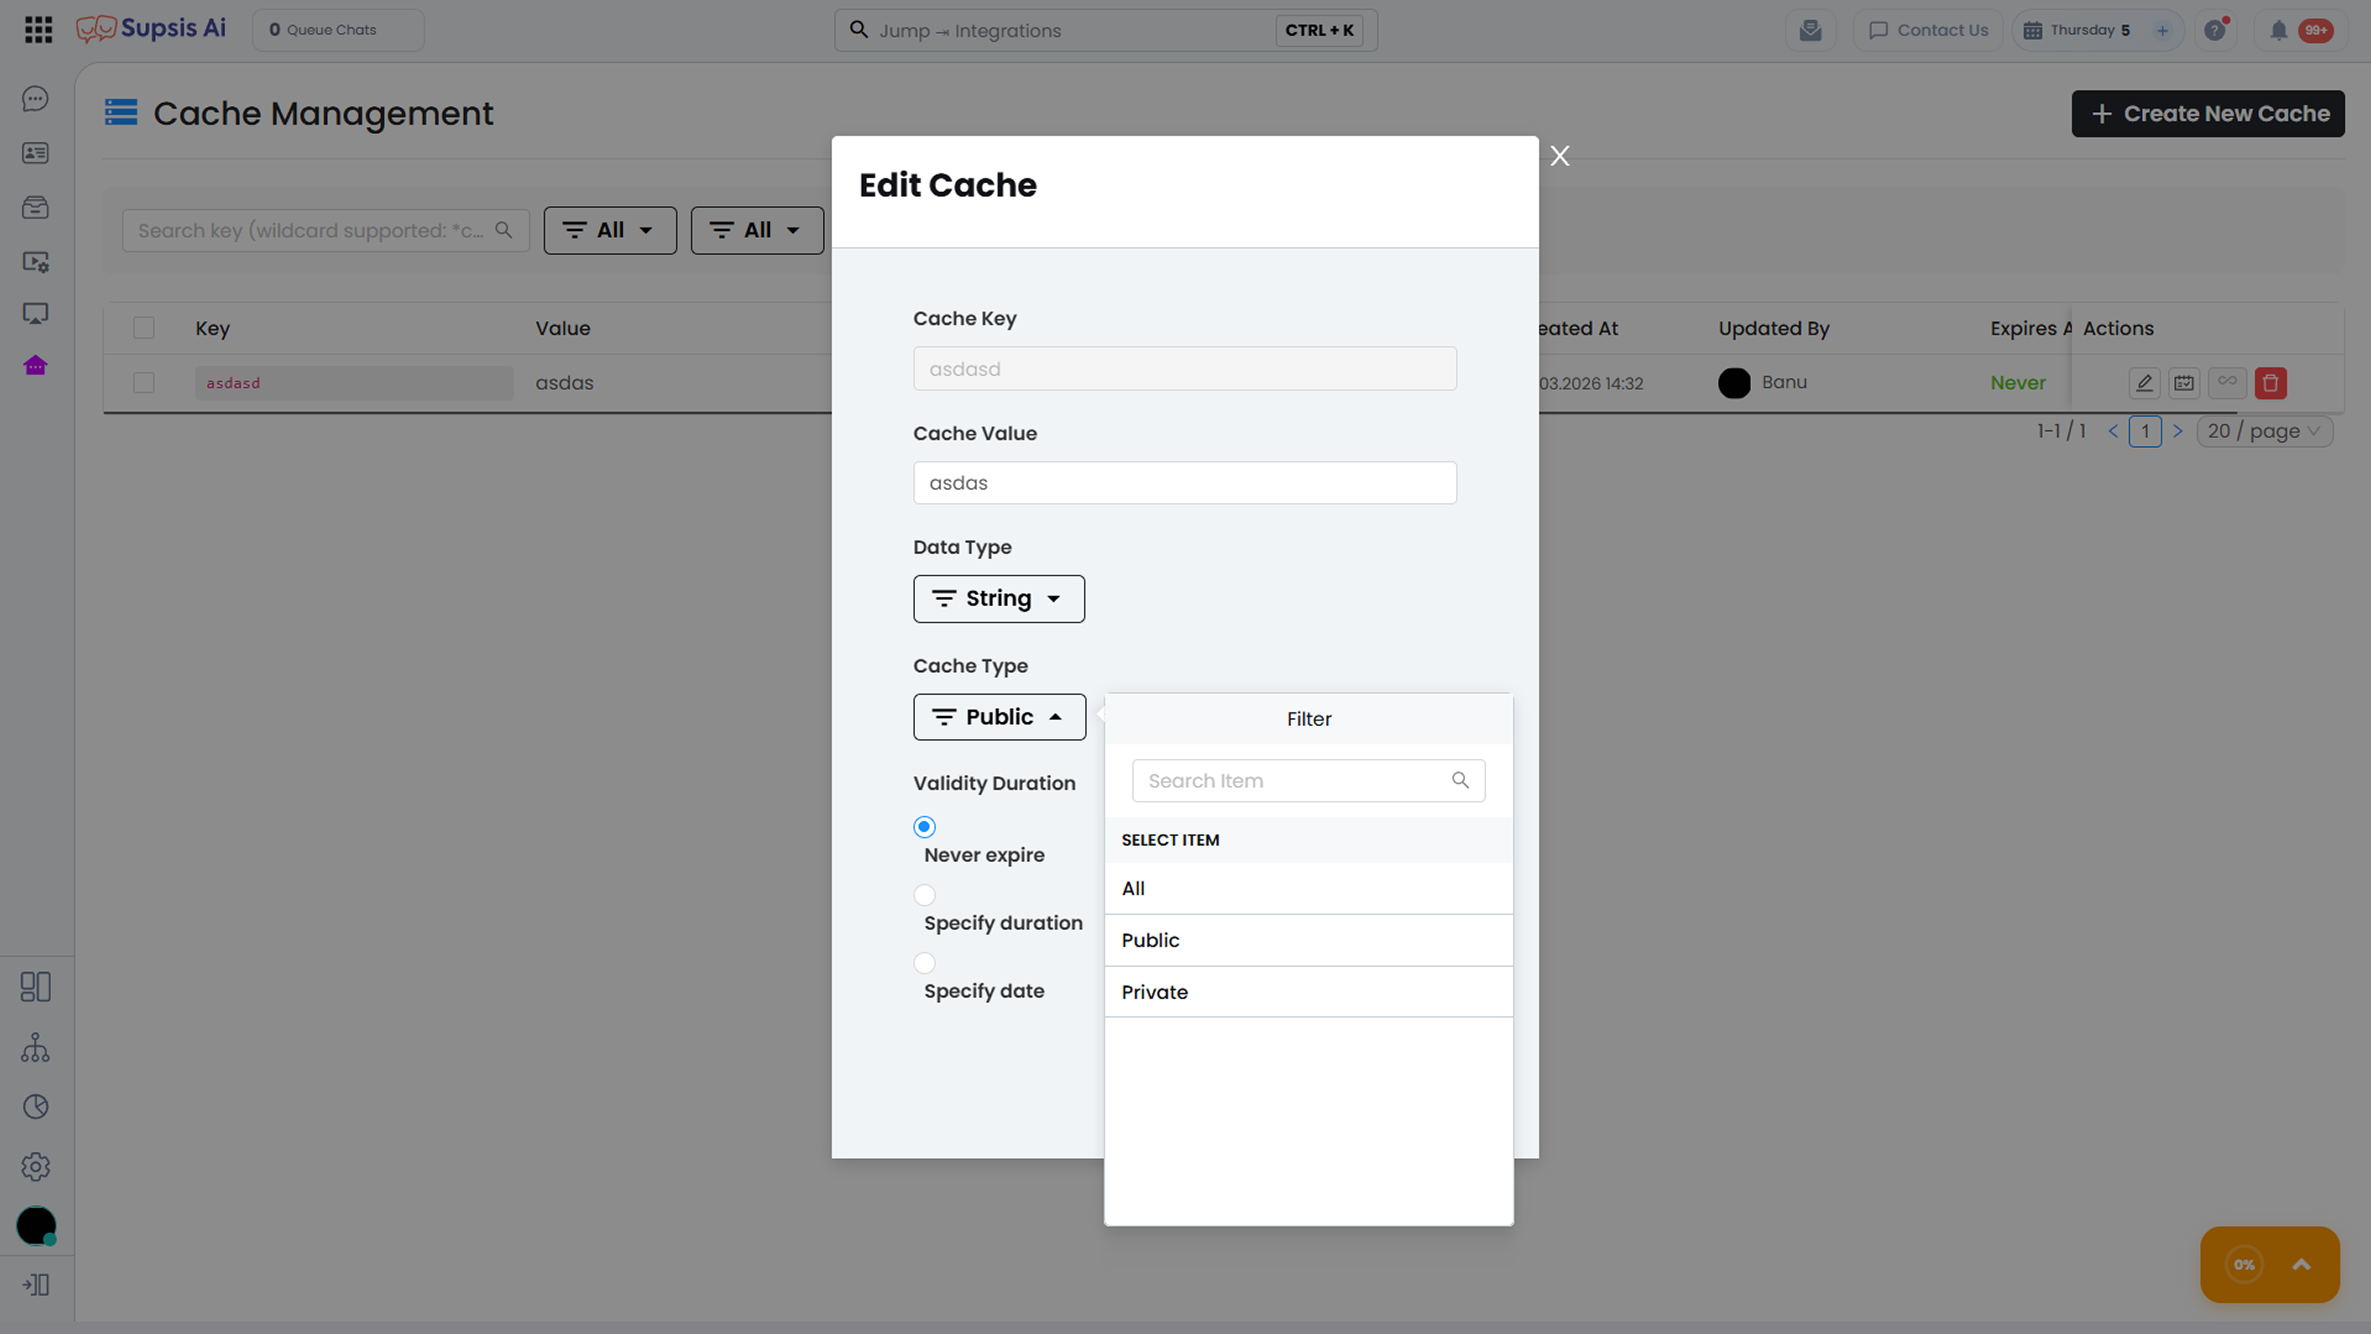
- Public: All system users can access these cache types within scenarios.
- Private: Only the user who defined the cache can access these private caches within scenarios.
- h – Cache Expiration Time
You can manage how long the cache data will remain in your panel's memory from this section.- Never expire: The data remains permanent until you manually delete it.
- Specify Duration: The data is automatically cleared after the number of minutes or hours you define.
- Specify Date: The data becomes invalid on a specific calendar date.