
Web Tabs Integration
The Web Tabs Integration allows you to add external web pages or custom web applications developed within Supsis AI to your panel as menu items. This enables your team to access all required tools and data from a single screen without switching between different platforms.
1-) Creating a Web Tab
Web Tabs allow you to register an external URL or a Web Application defined within Supsis AI as a menu item in the panel. This enables your team to quickly access the relevant page/application directly from a single panel.
-
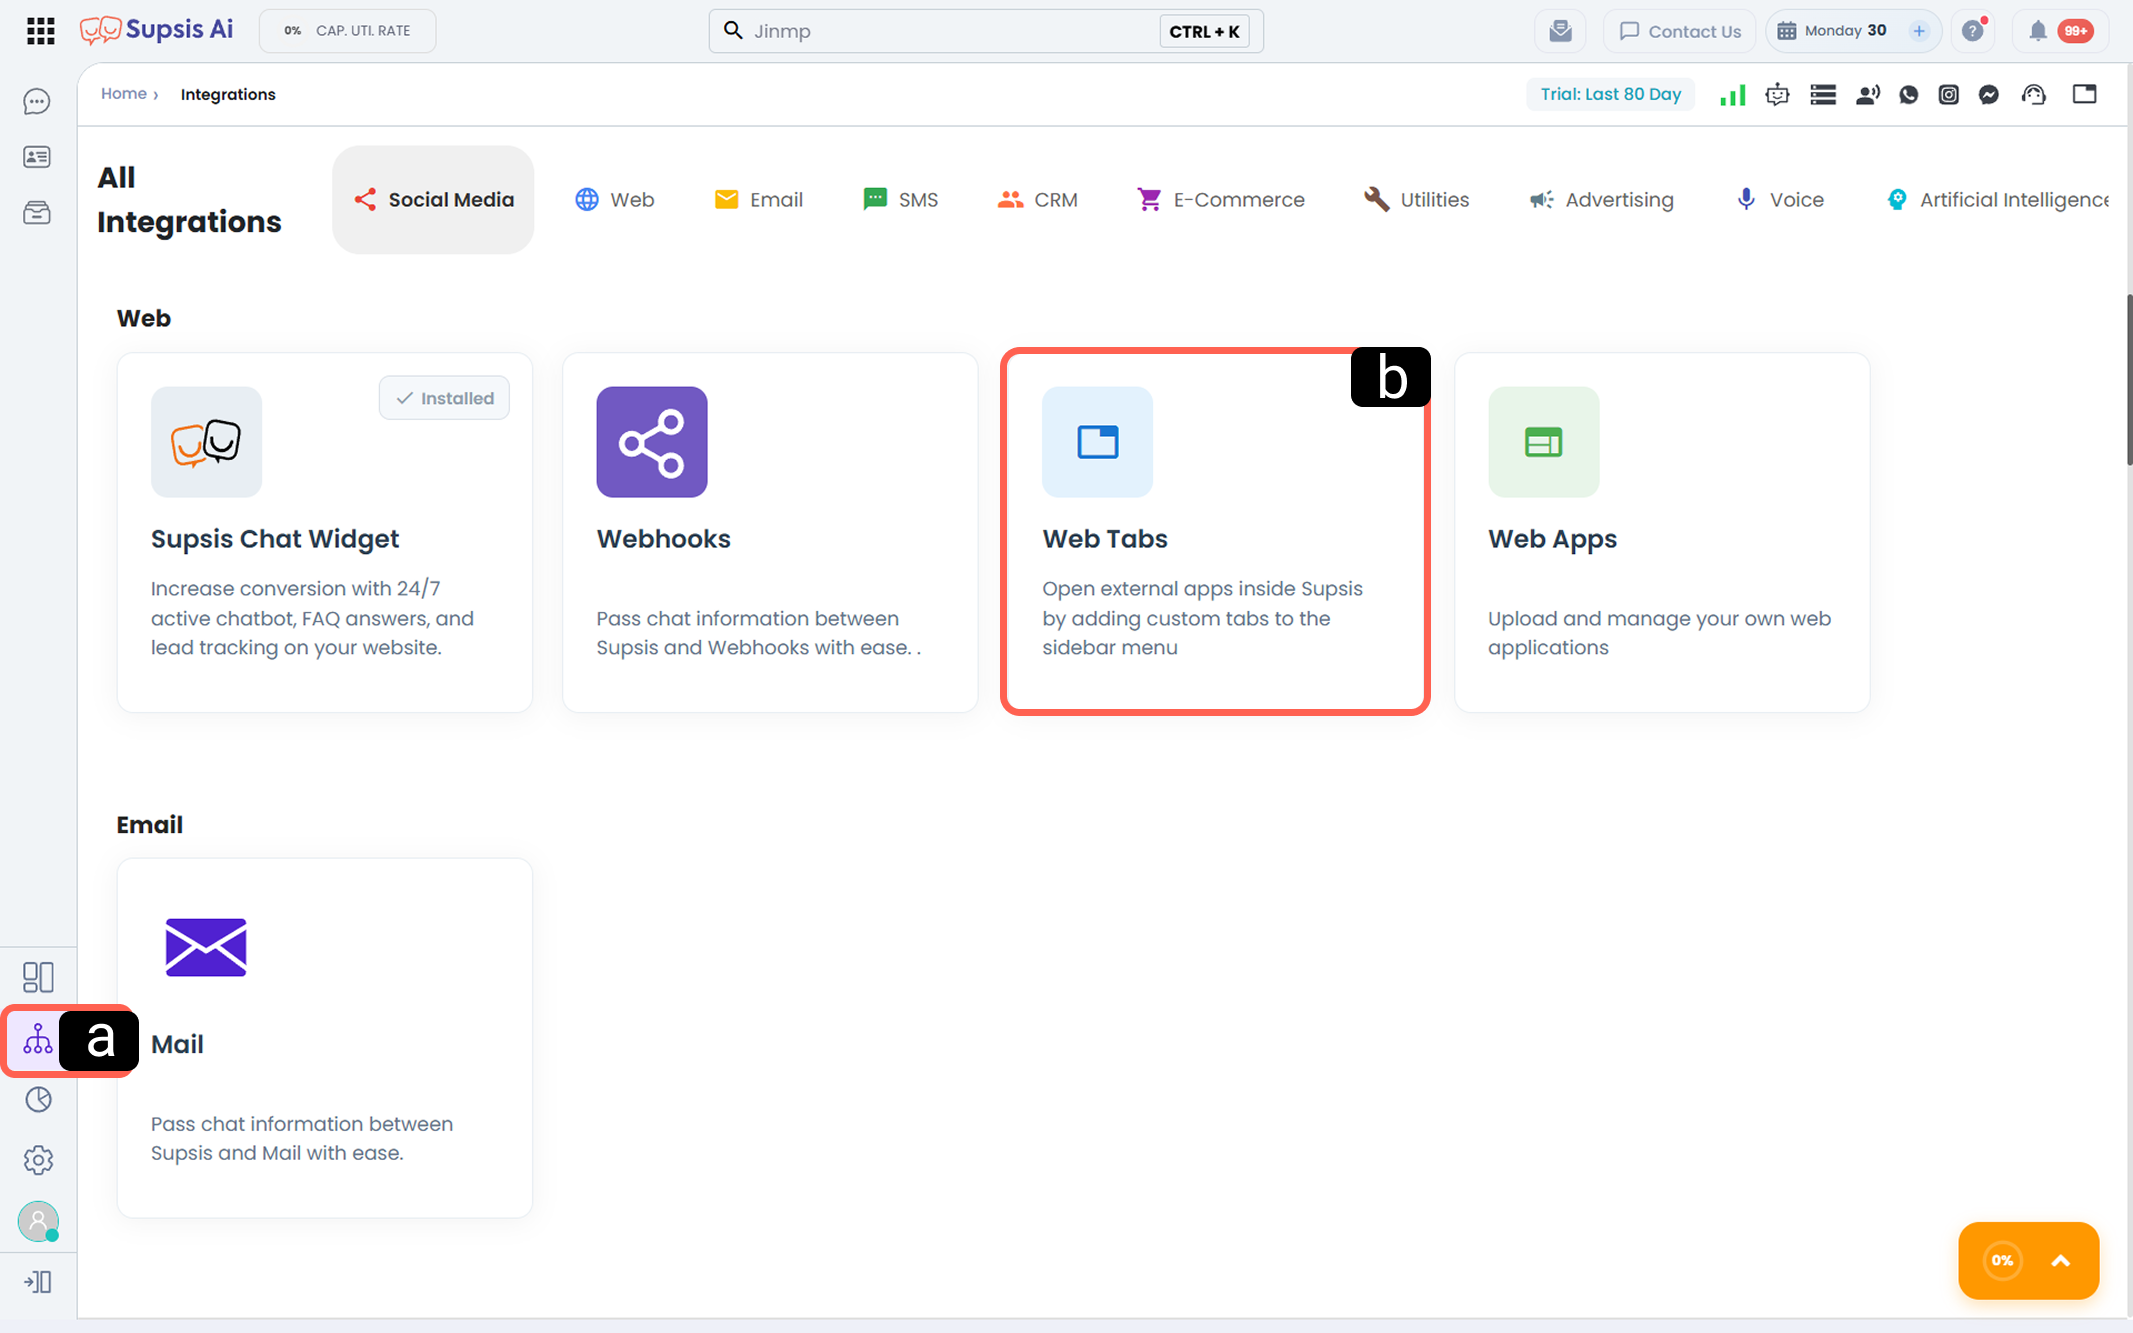
a – Access Integrations
Click the Integrations icon located in the left menu of your Supsis AI panel to enter the integrations section. -
b – Web Tabs
In the integrations list, find the Web Tabs card under the "Web" category and click on it.
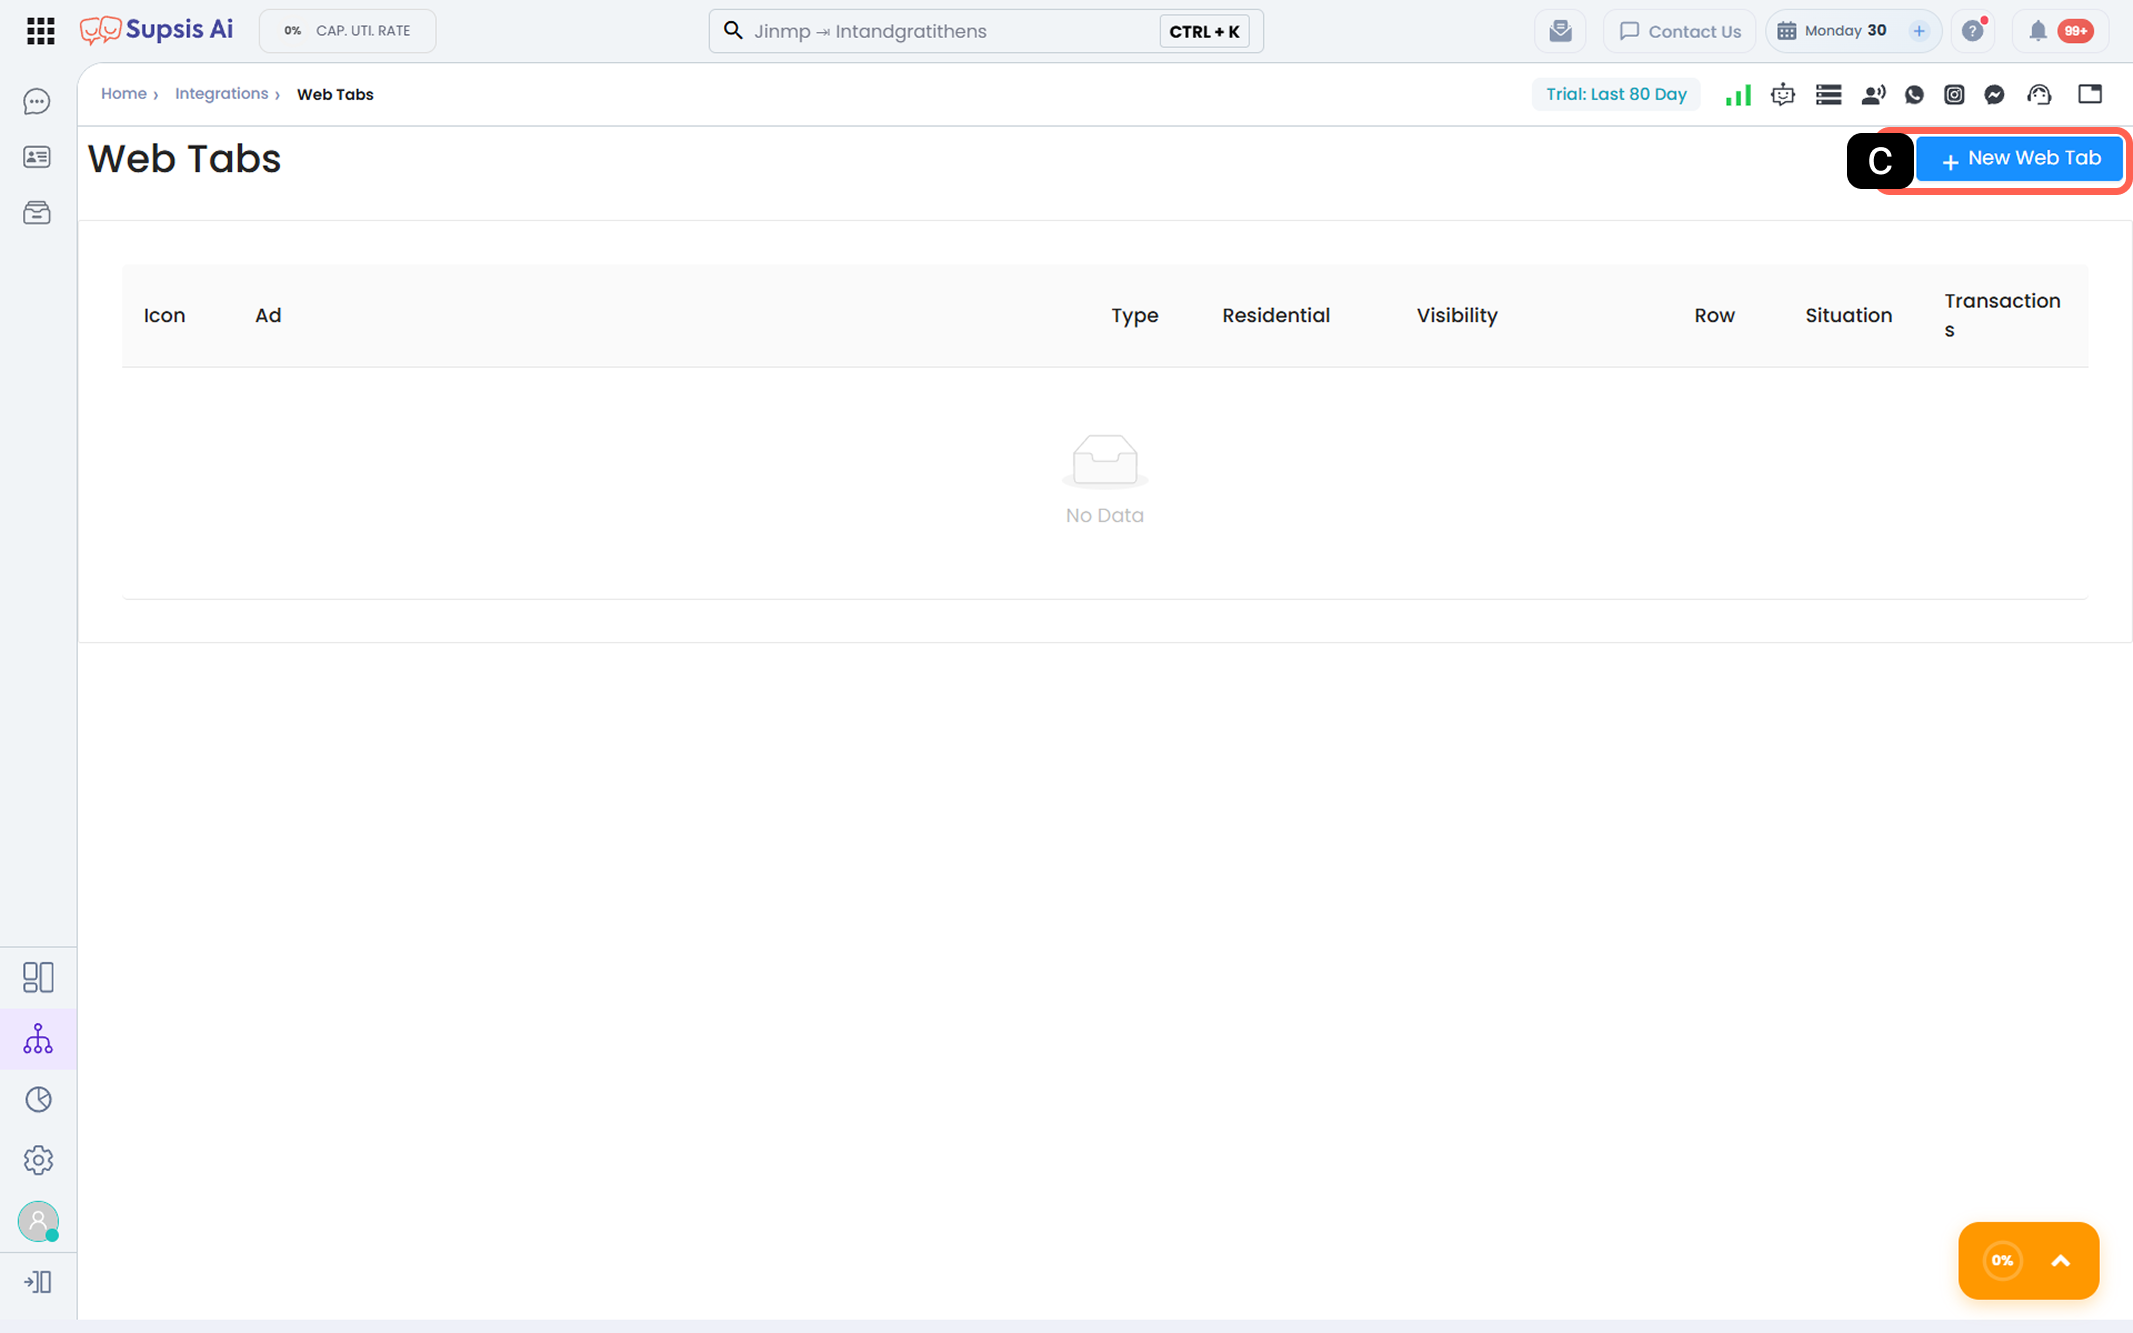
- c – New Web Tab
In the opened list, click the "+ New Web Tab" button located in the top-right corner to define a new tab. This action will redirect you to the Web Tab configuration screen.
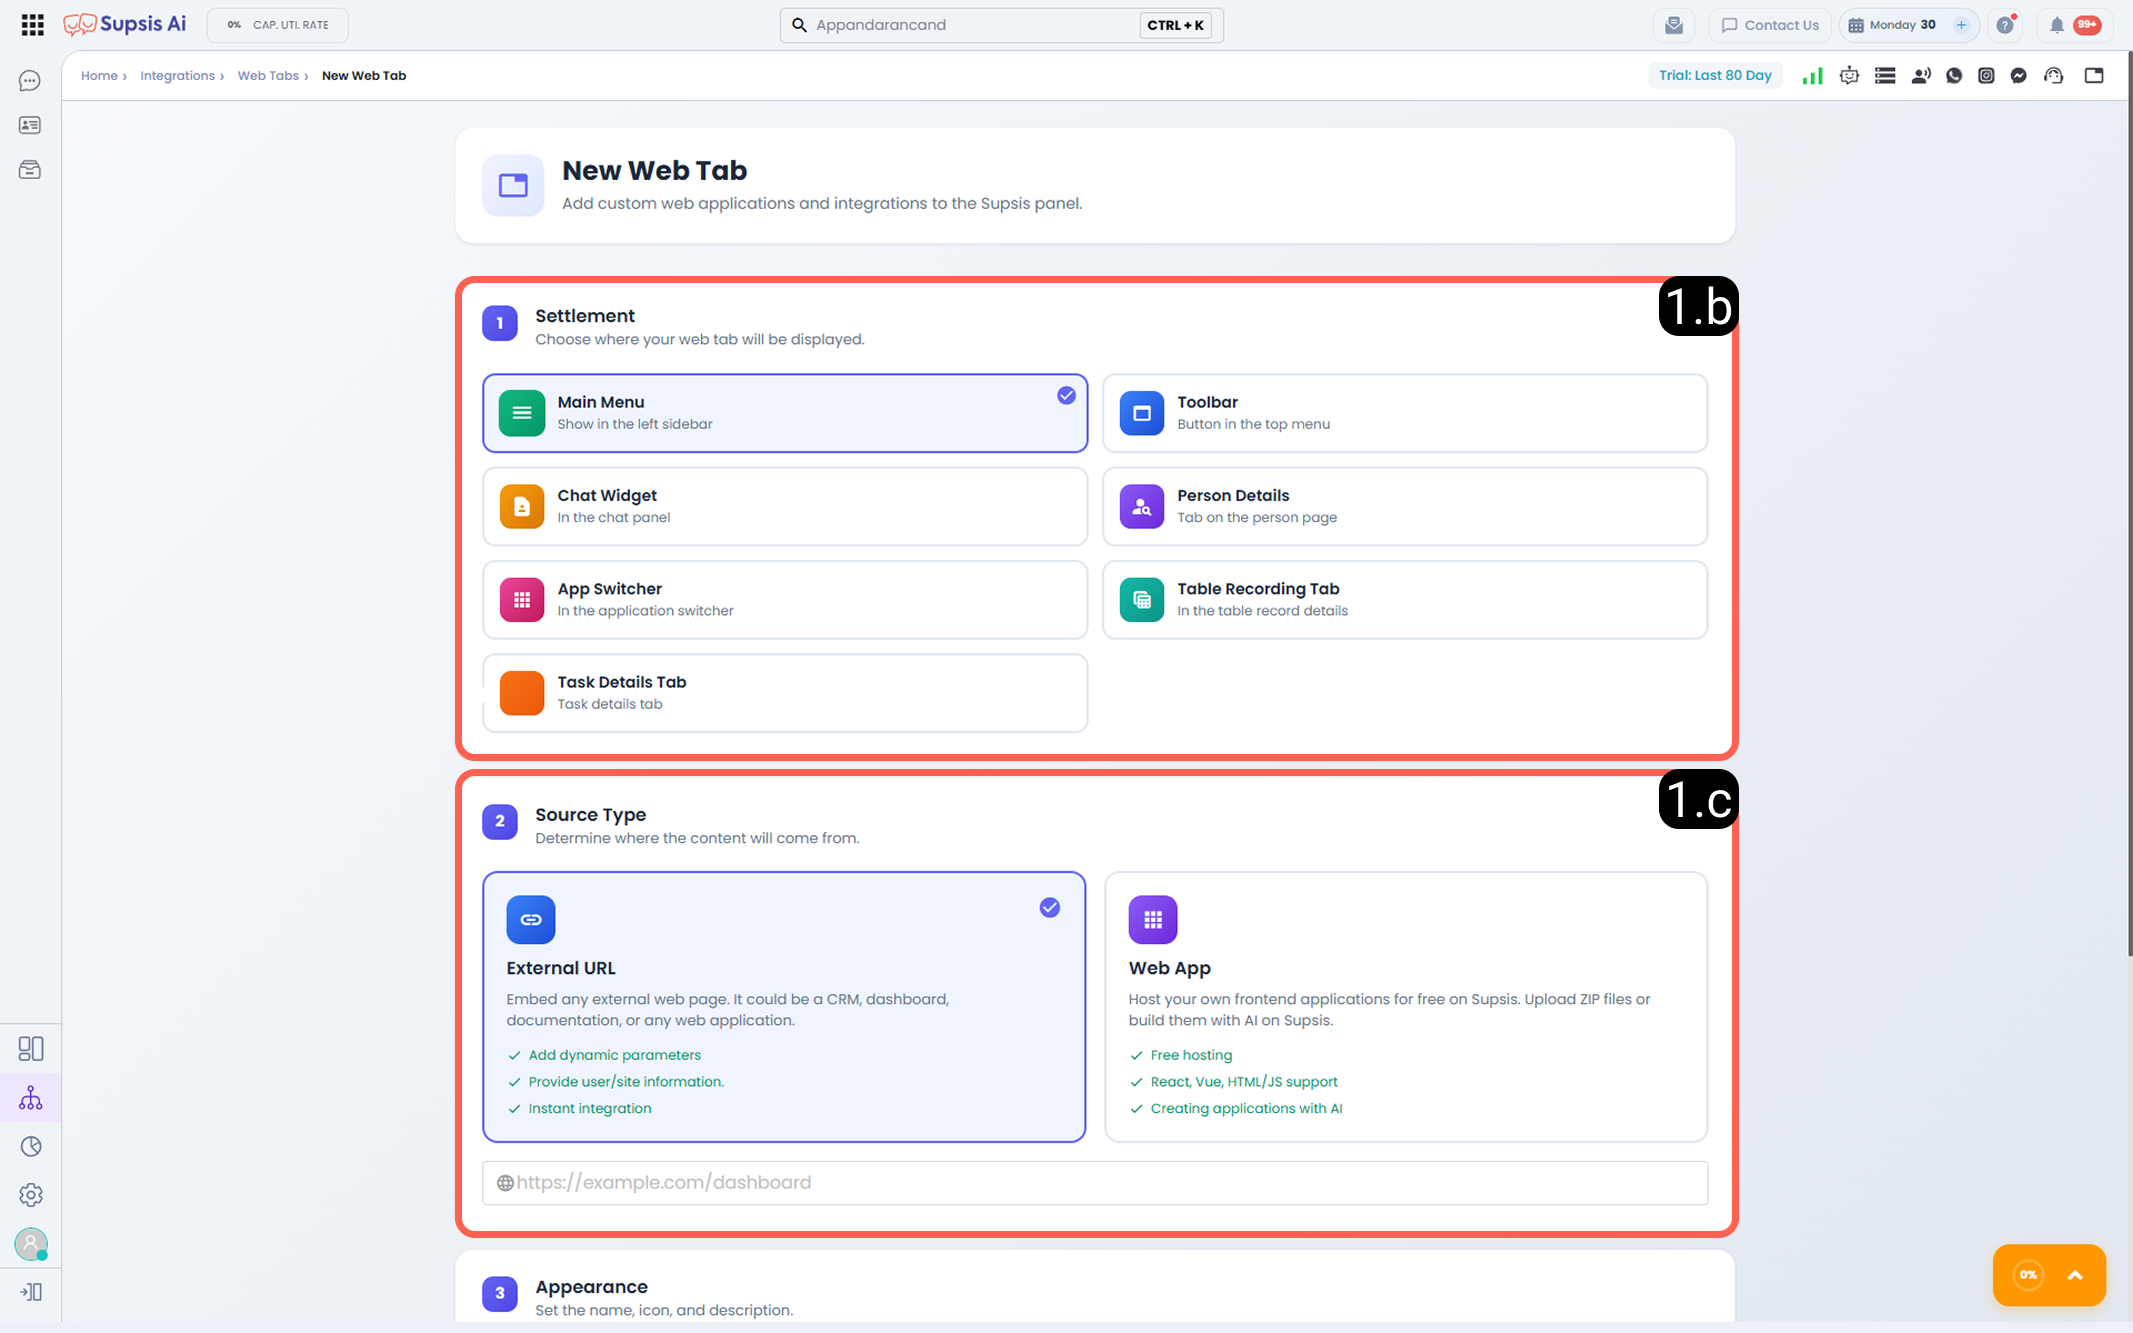
In this section, you define where your tab will appear and what content it will display.
1.b – Placement
You can choose where your Web Tab will be positioned within the Supsis AI panel.
Select the appropriate option from the Web Tab creation form. Based on your selection, the Web Tab will appear as a menu item in the specified area.
Available options:
- Main Menu: Appears as a main menu item in the left sidebar.
- Toolbar: Appears as a button in the top menu bar.
- Chat Widget / Contact Detail / Task Detail: Opens as a dedicated tab within the respective modules.
1.c – Source Type
Define where the content of your tab will be sourced from:
-
External URL: Embeds a specified web address (CRM, Dashboard, etc.) within Supsis AI.
-
Web App: Allows you to select your own web applications hosted within Supsis AI. For more information about Web Apps, please refer to the Web Apps documentation.
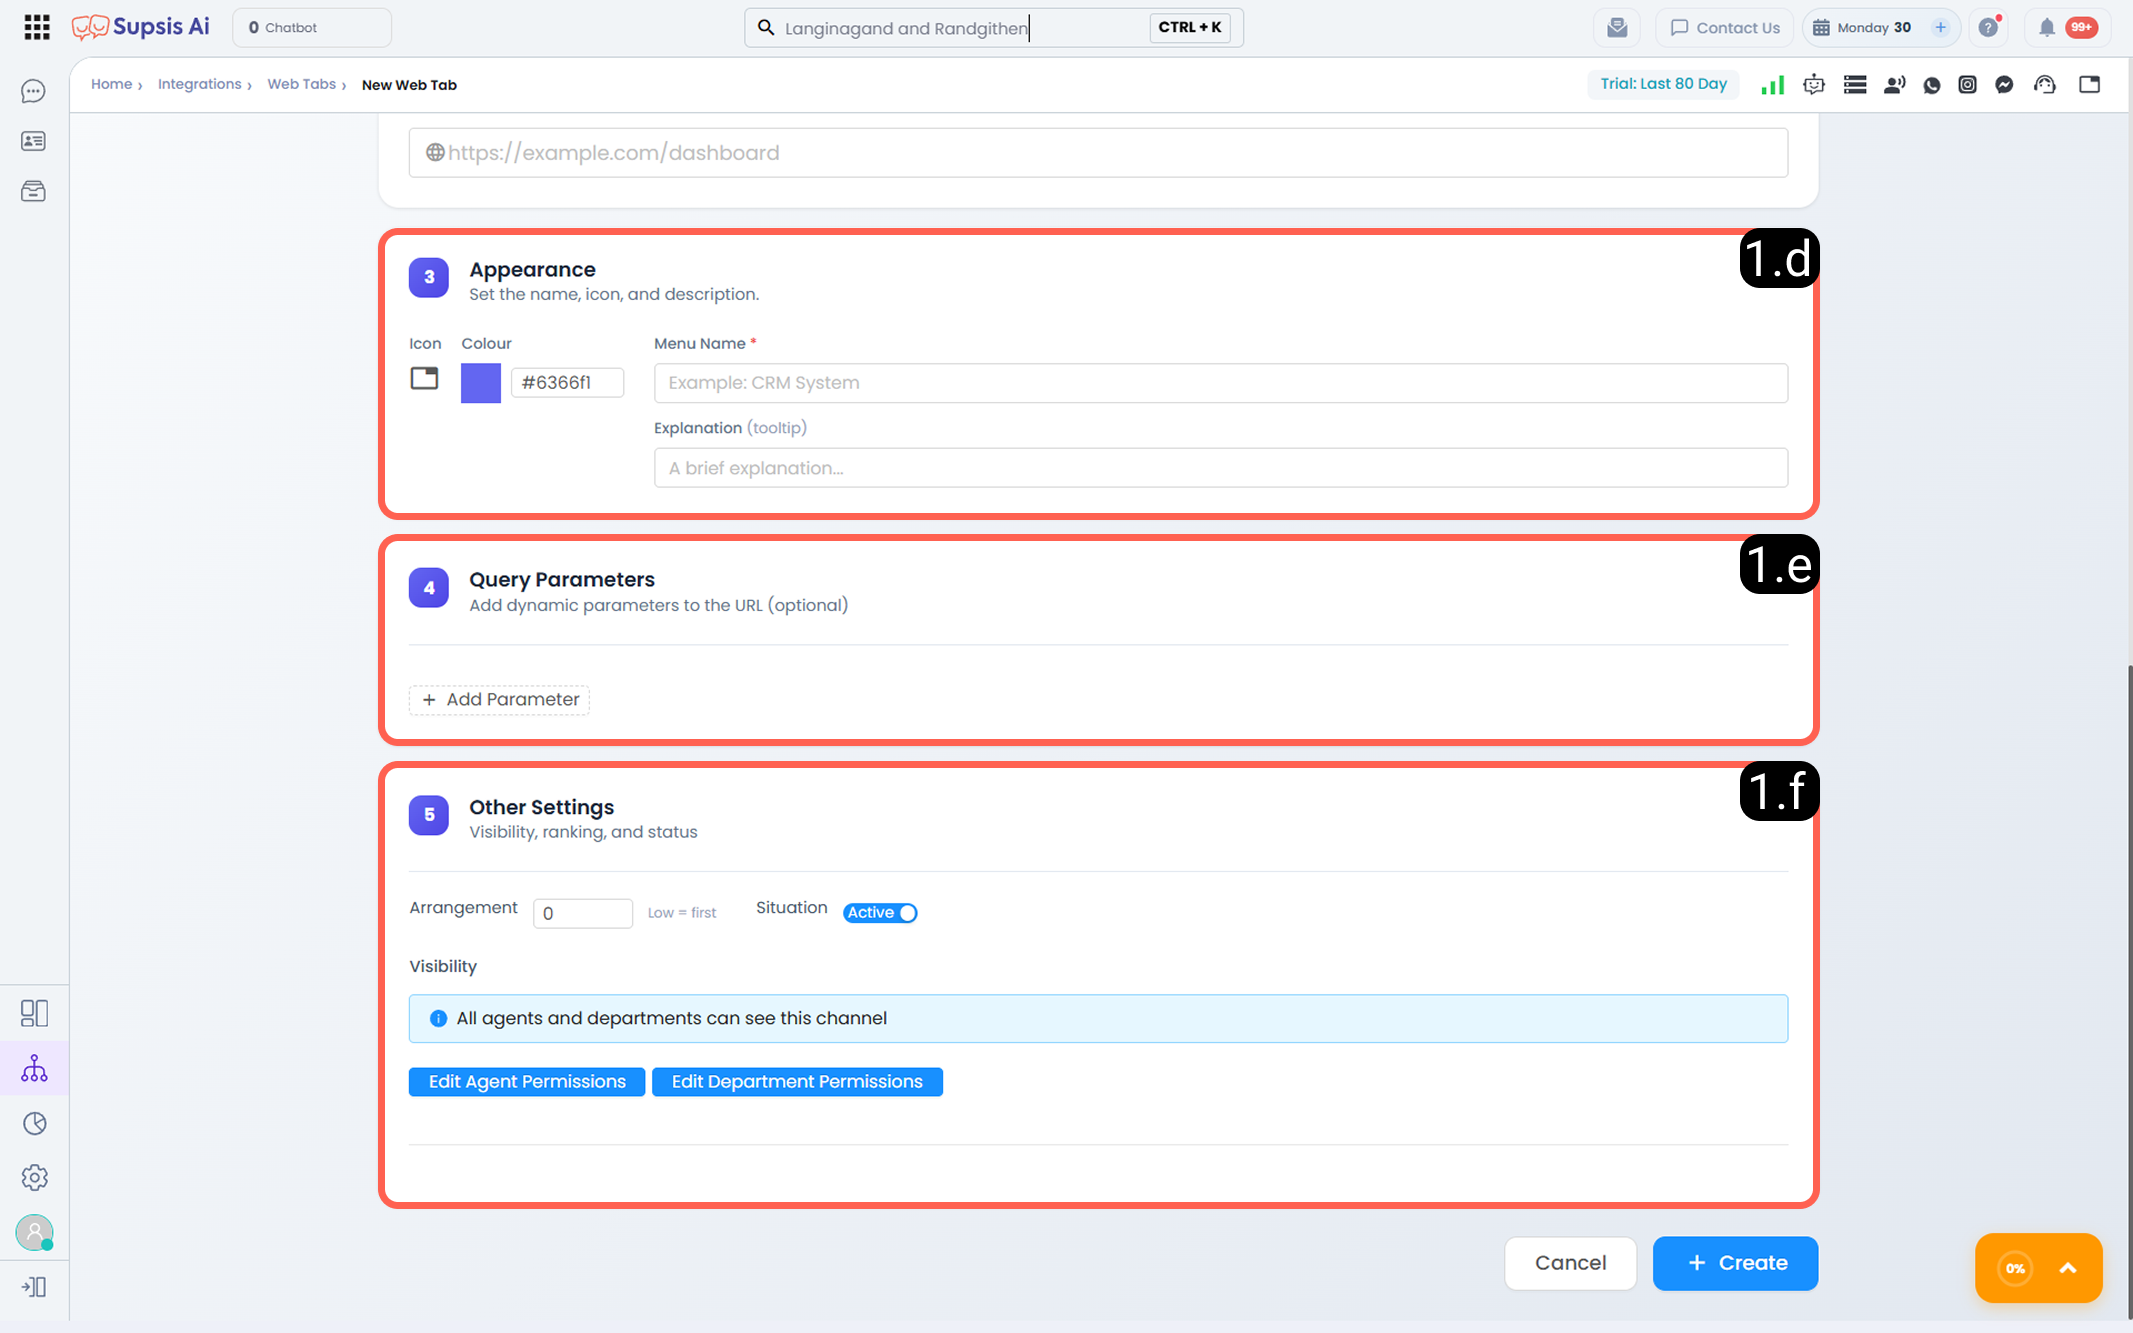
1.d – Appearance
You can configure how your tab will appear to panel users in this section.

-
a – Icon
Select the icon that will represent your tab in the chosen location. -
b – Icon Color
Choose the color of the selected icon. -
c – Menu Name
Enter the name of the Web Tab that will appear in the selected area. It is recommended to use a clear, descriptive, and short name so users can easily access it from the menu. -
d – Description
This is the description displayed when hovering over the tab. Enter explanatory text describing the purpose and function of the tab.
1.e – Query Parameters
Query Parameters allow you to add dynamic data to the target URL. This feature enables Supsis AI data to be automatically transmitted to the target page, ensuring the page opens in a customized manner based on that data.

-
a – Key
Define the technical name of the parameter to be sent to the external system (e.g., ID, user_email). -
b – Key Value
Determines the data that the parameter will carry. -
Static Value: You can directly enter the data. The value written in this field will be transmitted to the target page.
-
Dynamic Value: Used to automatically retrieve data from the system. When using this type, you must follow the
${example_value}format. -
c – Value Type
Select from the dropdown menu whether the data will be manually entered (static) or dynamically retrieved from the system. -
d – Add Parameter
If you need to transmit multiple pieces of data through the same URL, use this button to add additional query parameters.
Tip: With dynamic parameters, for example, when opening a "CRM Tab," you can automatically query the current customer’s information in your CRM system, saving valuable time for your agent.
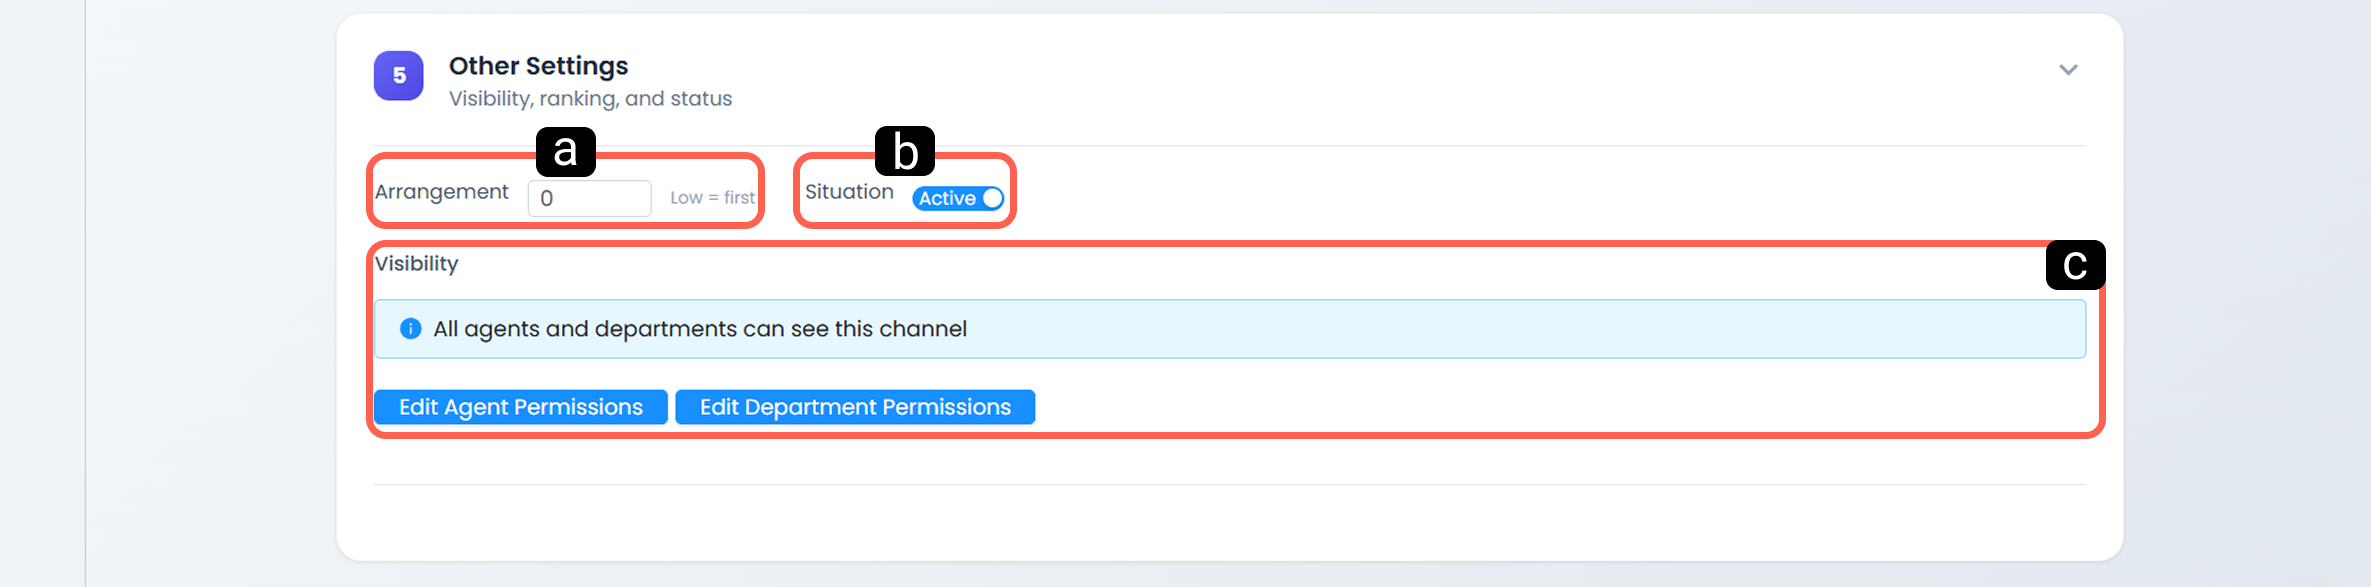
1.f – Other Settings
-
a – Order
Define the position of the tab within the selected menu. -
b – Status
Allows you to deactivate the tab without deleting it and reactivate it when needed. Deactivated tabs are removed from the relevant menu and can only be accessed via Integrations > Web Tabs. -
c – Visibility
Restrict access to the tab by Agent or Department, ensuring that only authorized users can view it.