
Automation - Sending Emails with Custom SMTP (sendWithSMTP)
1-) Custom SMTP Setup and JS Functions
This section covers the usage of the new supsis.email.sendWithSMTP(...) function added to the JavaScript block (Run JavaScript) in the Supsis AI Automation module. You can use this function when you want to send emails directly through your own corporate SMTP servers instead of using Supsis's default email infrastructure (AWS SES). Optionally, you can also keep a copy of sent emails within the Supsis system for record-keeping.
1.a – Automation Editor and Autocomplete Support
When you open a code block (JavaScript) on your Automation page, the system provides writing convenience.
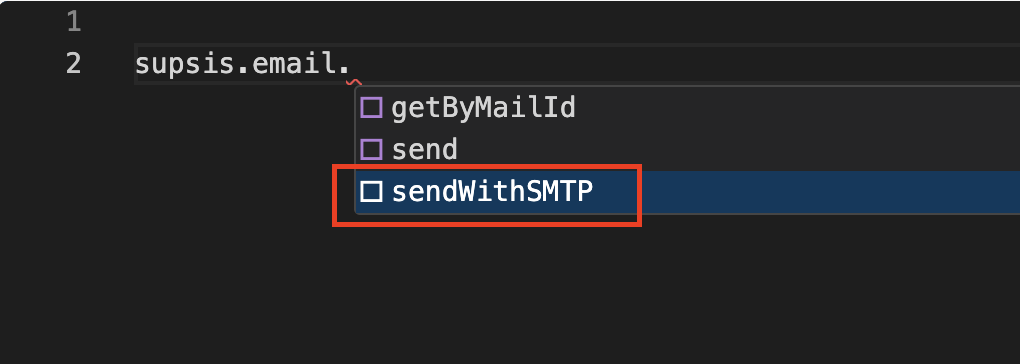
- a – Autocomplete:
When you start typingsupsis.email.in the code editor, thesendWithSMTPoption is automatically suggested from the dropdown list. This allows the template with all parameters to be added to the editor quickly.
1.b – Code Structure and SMTP Parameters
The sendWithSMTP function requires specific parameters that determine from whom, to whom, and through which server the email will be sent.
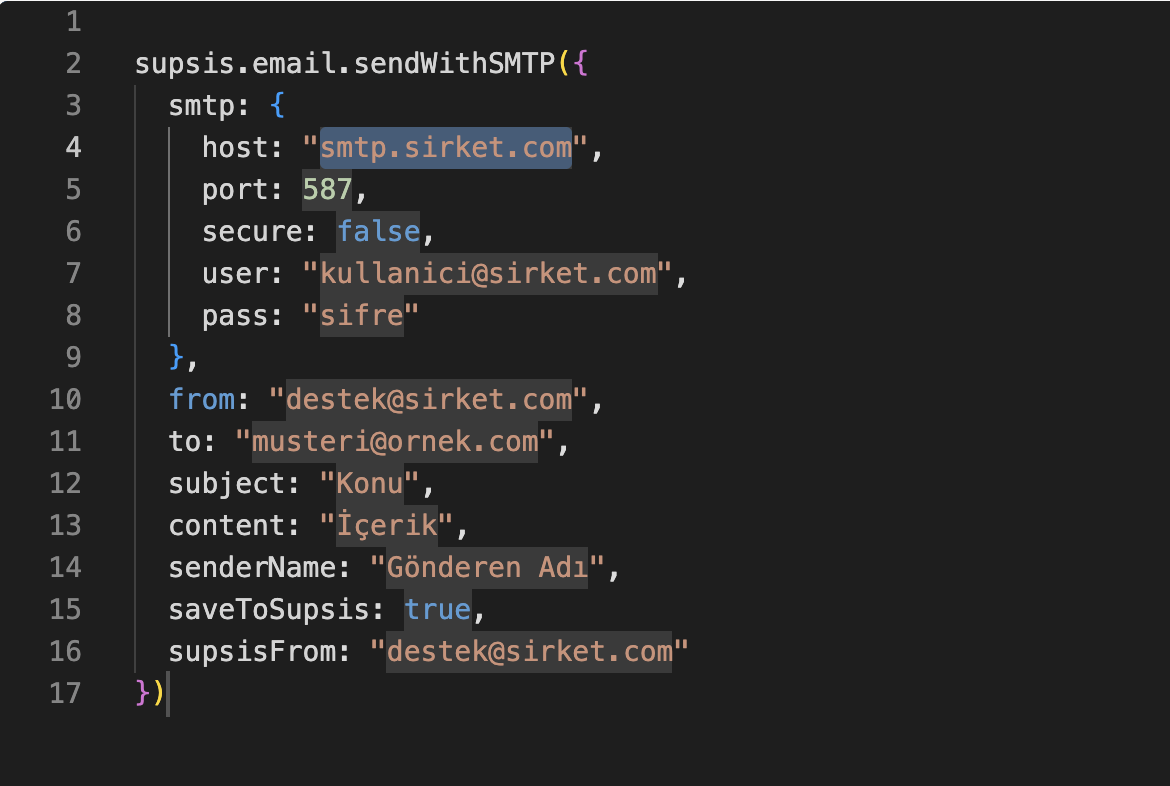
- b – SMTP Connection Details (
smtp):
These are the outbound server settings for the email. Thehost,port(default 587),secure(true if port 465),user, andpassvalues are required. - c – Sending and Content Parameters:
from: The actual sender email address (Required).to: The recipient email address (Required).subject&content: Email subject line and HTML content (Required).- Optional Fields:
senderName(Sender display name),replyTo,cc,bcc, andtemplateId/templateParamsfor using predefined templates.
1.c – Saving a Copy in Supsis (saveToSupsis)
If you want to track emails sent from your own server within Supsis, you can activate the copy saving feature.
saveToSupsis: true: Saves a copy of the outgoing email to the Supsis Email screen. In this case, if the function executes successfully, an additionalemailIdvalue is returned.supsisFrom: The address you want to appear as the "sender" ONLY in the copy stored within the Supsis panel. (e.g., An email actually sent fromno-reply@can be listed as sent fromsupport@in the Supsis panel so your support agents can review it).
Sample Code Usage:
const result = await supsis.email.sendWithSMTP({
  smtp: { host: "smtp.company.com", port: 587, secure: false, user: "user@company.com", pass: "smtp-password" },
  from: "no-reply@company.com",
  to: "customer@example.com",
  subject: "Welcome!",
  content: "Hello, your registration has been successfully completed.",
  senderName: "Company Support",
  saveToSupsis: true,
  supsisFrom: "support@company.com"
});

return { success: result.success, messageId: result.messageId, emailId: result.emailId };
1.d – Sample Usage Scenarios
Here are some scenarios where the custom SMTP function enhances your business processes:
- Brand Reputation and Custom Infrastructure: Instead of Supsis AWS SES infrastructure, you can send directly through your company domain's IP addresses to maximize deliverability and brand consistency.
- Shadow Mail Management: While sending invoices to customers through accounting software (via your SMTP), you can save a copy of the email to the Supsis Inbox with
supsisFromredirection so support reps stay informed. - Automated Template Usage: By invoking
templateId(template ID) within Automations, you can securely deliver personalized bulk or transactional emails directly from your own server.