
1-) Create Form
Supsis AI Form Builder enables you to design flexible forms with advanced AI generation support, pre-built template libraries, and categorized drag-and-drop components.
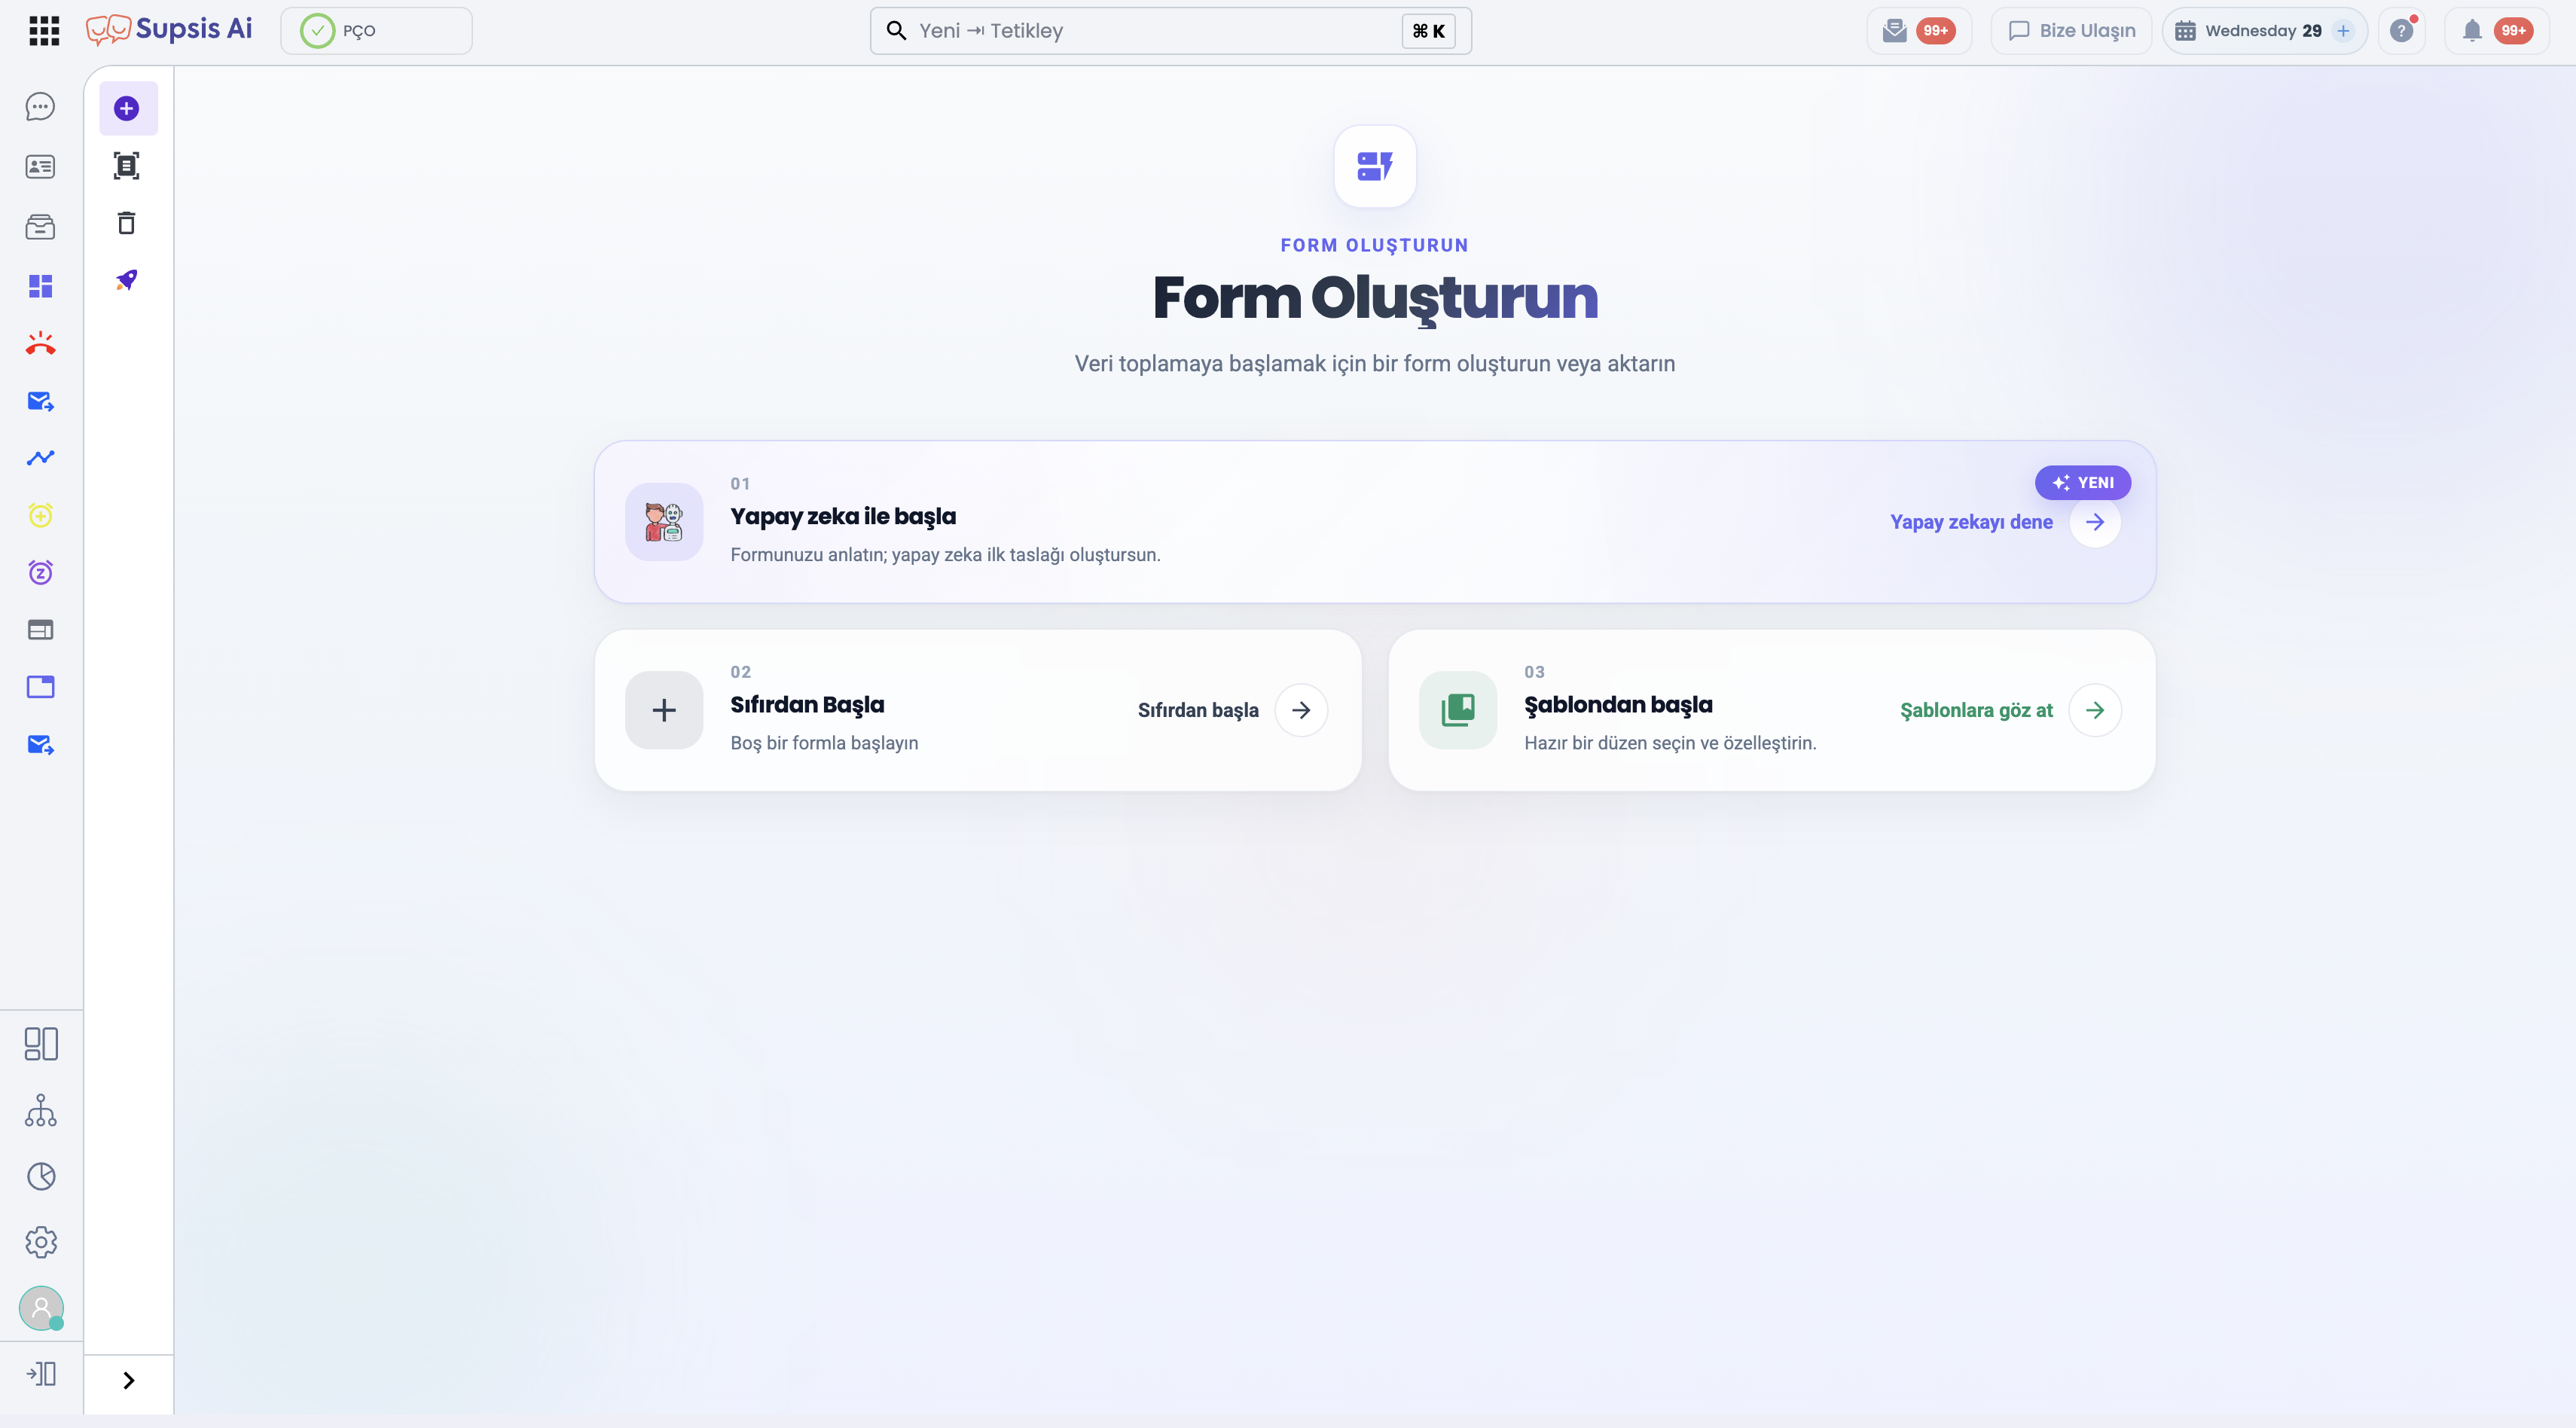
1-) Form Creation Methods
You can start the form creation process by choosing one of 3 different methods:
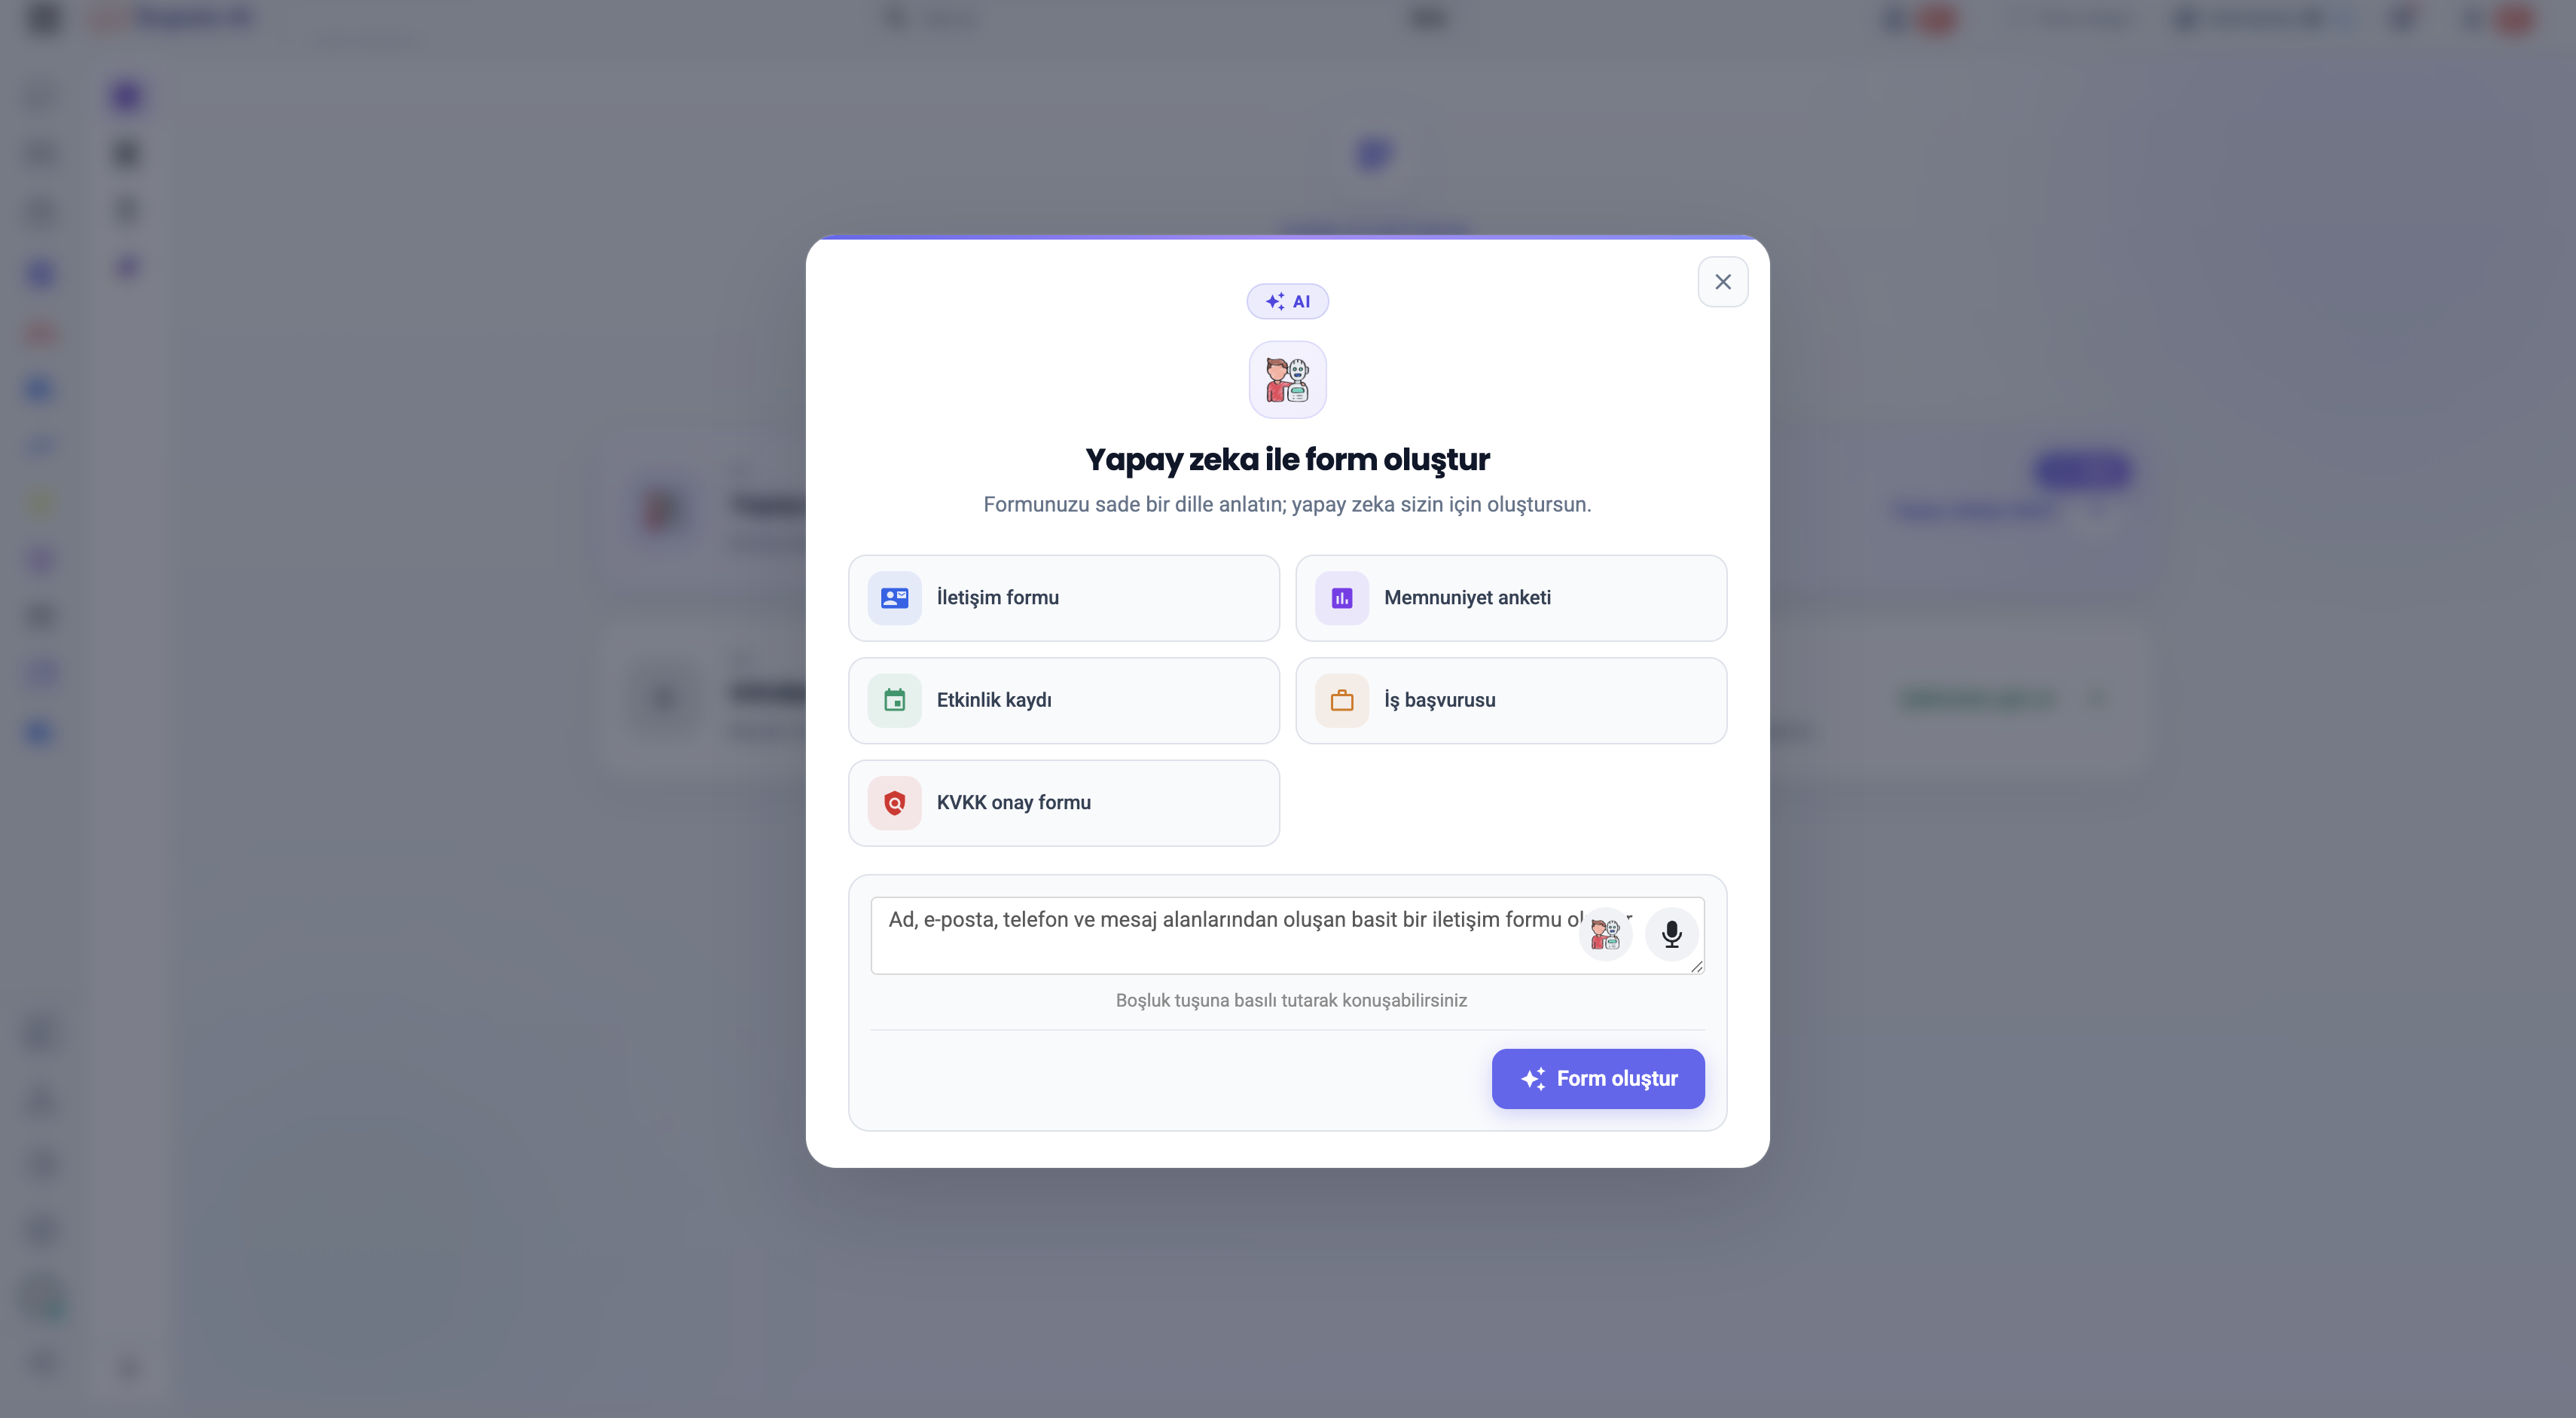
1.a – Start with AI (AI Form Generator)
- Voice & Text Prompts: Describe your form's goal in the text box or press and hold the Spacebar to speak via voice input.
- Pre-built Prompt Templates: Click quick template buttons like
Contact form,Satisfaction survey,Event registration,Job application, orGDPR consent formto let AI generate your first draft instantly.
1.b – Start from Scratch
A blank canvas mode allowing you to manually add and customize fields to fit your exact requirements.
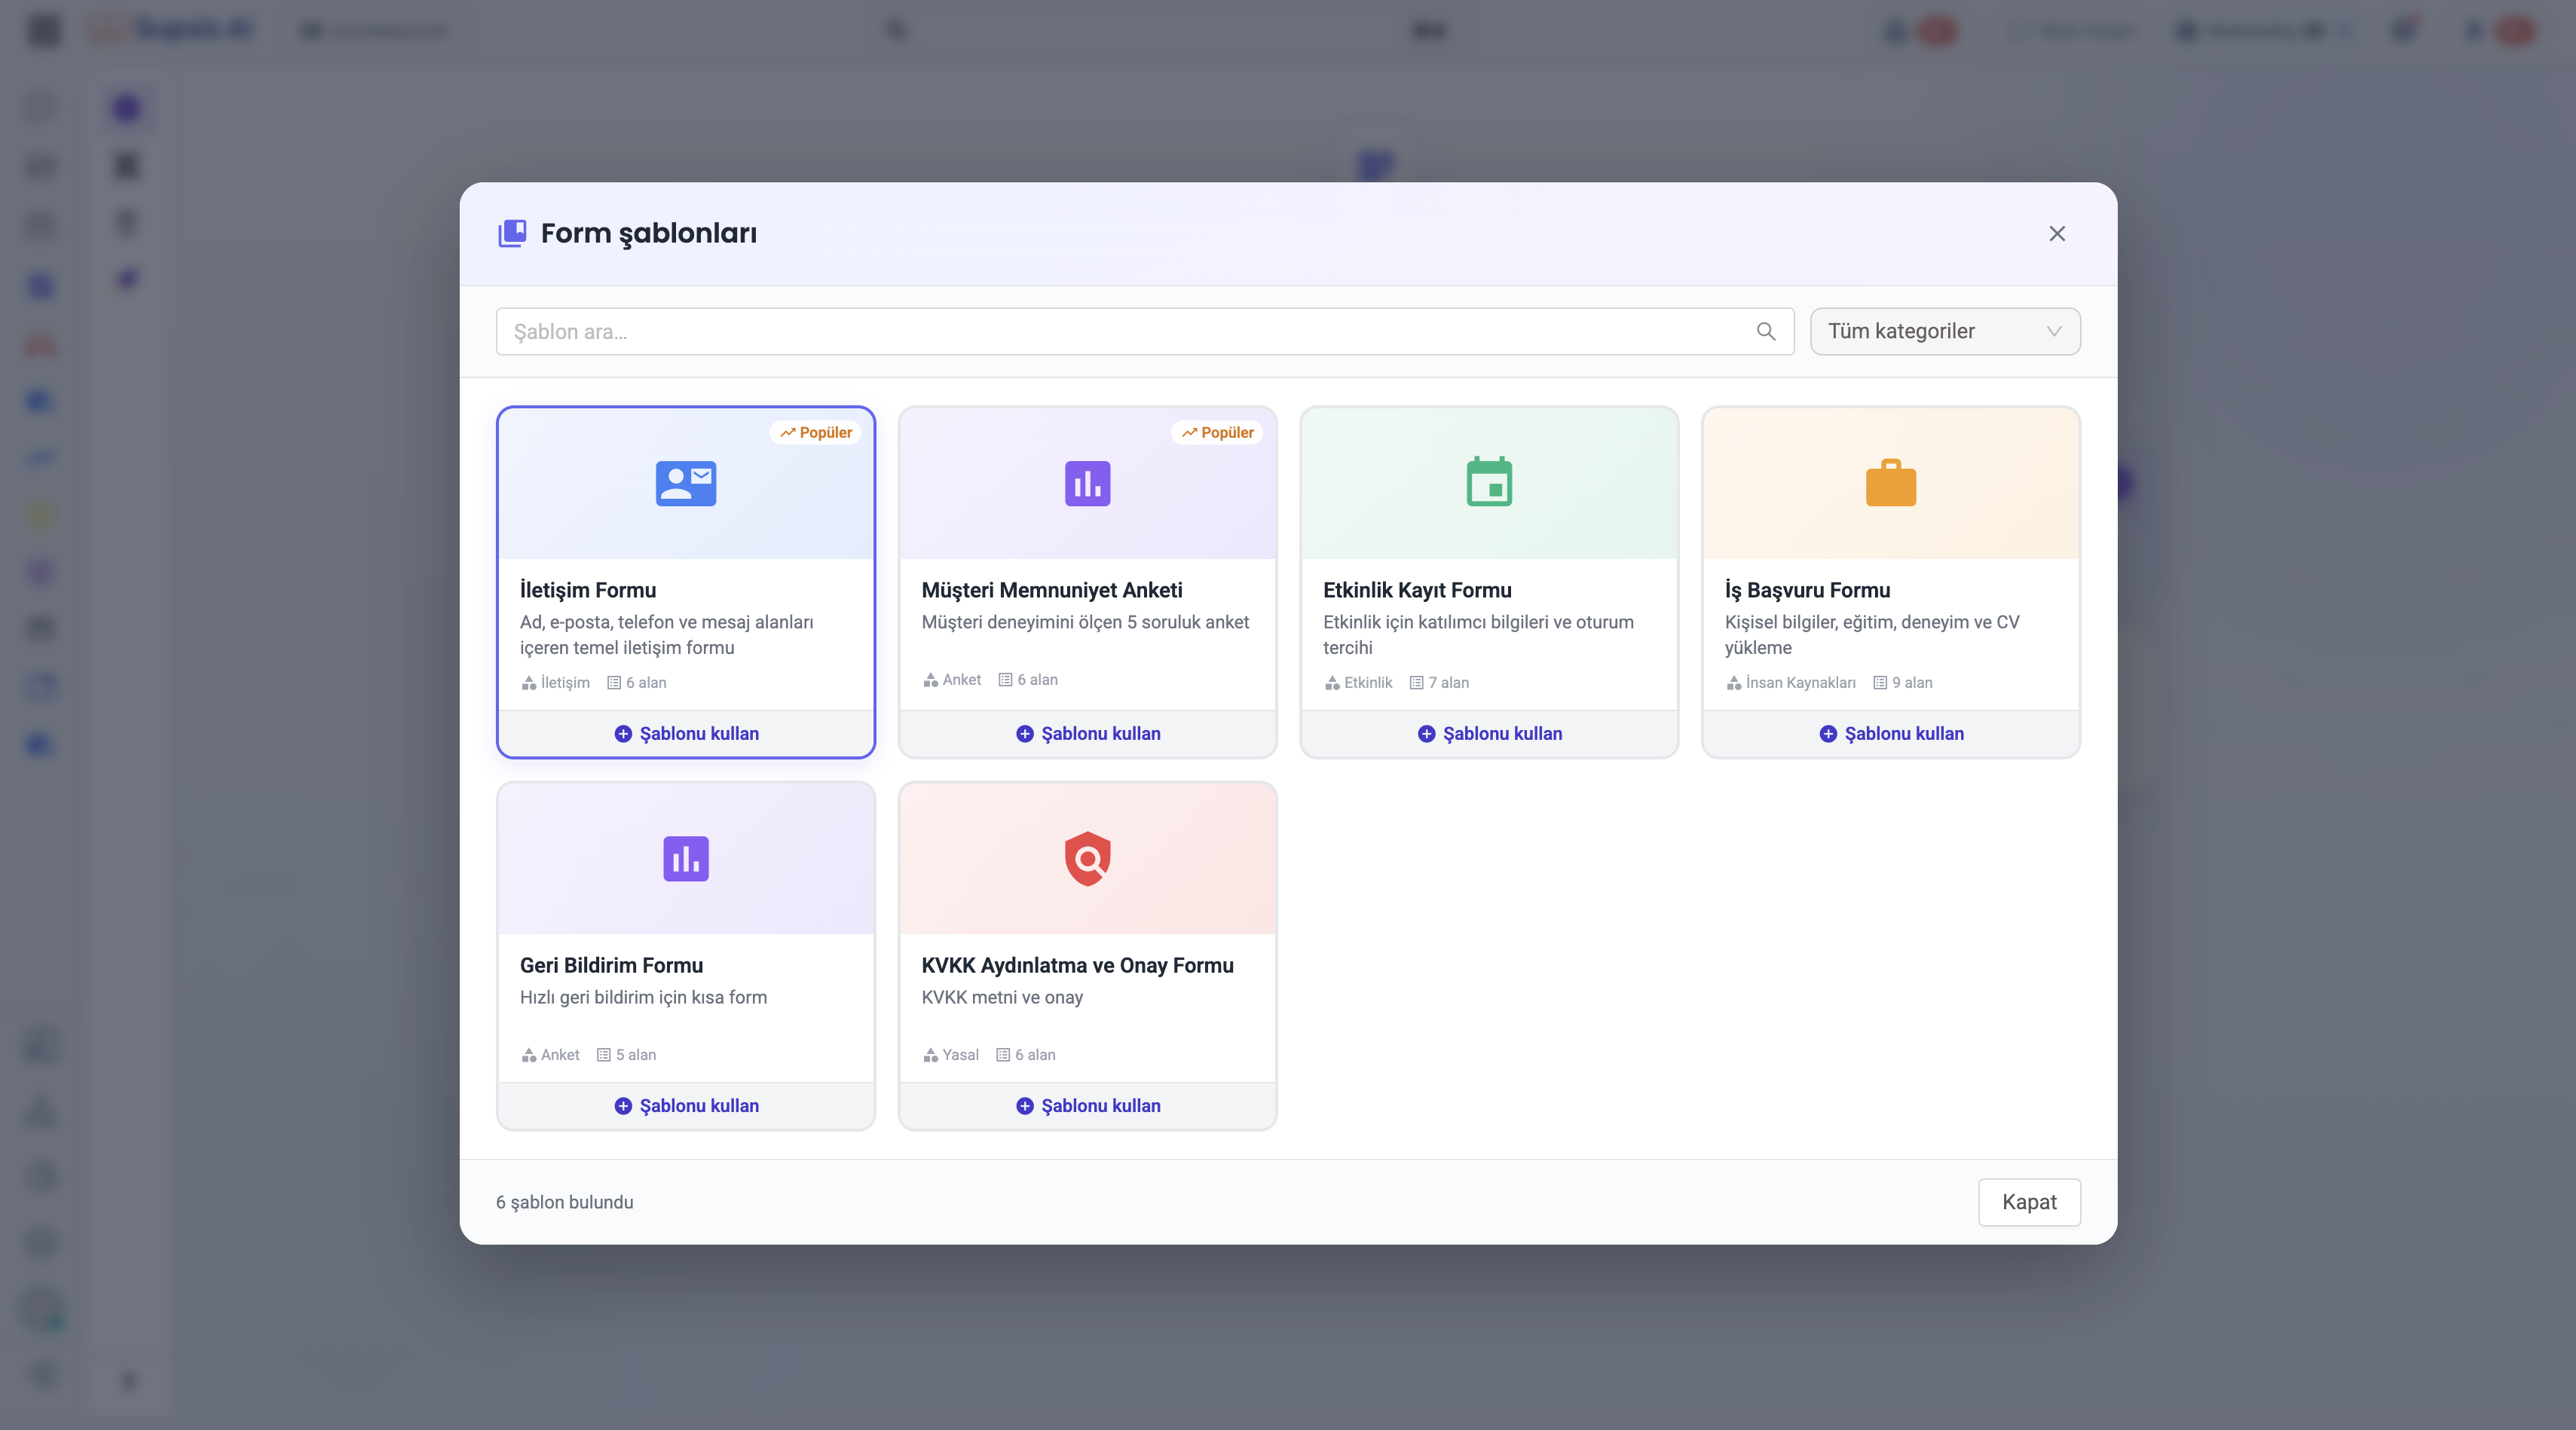
1.c – Start from Template
Browse a categorized template library to pick pre-designed forms and launch immediately. * Categories & Search: Search templates by name or filter by categories (Contact, Survey, Event, Human Resources, or Legal). * Pre-built Templates: Contact Form, Customer Satisfaction Survey, Event Registration Form, Job Application Form, Feedback Form, and GDPR Consent & Info Form.
2-) Form Editor & Component Categories
The Form Editor interface features a left panel with searchable component categories, a live center canvas, and a right panel for element settings.
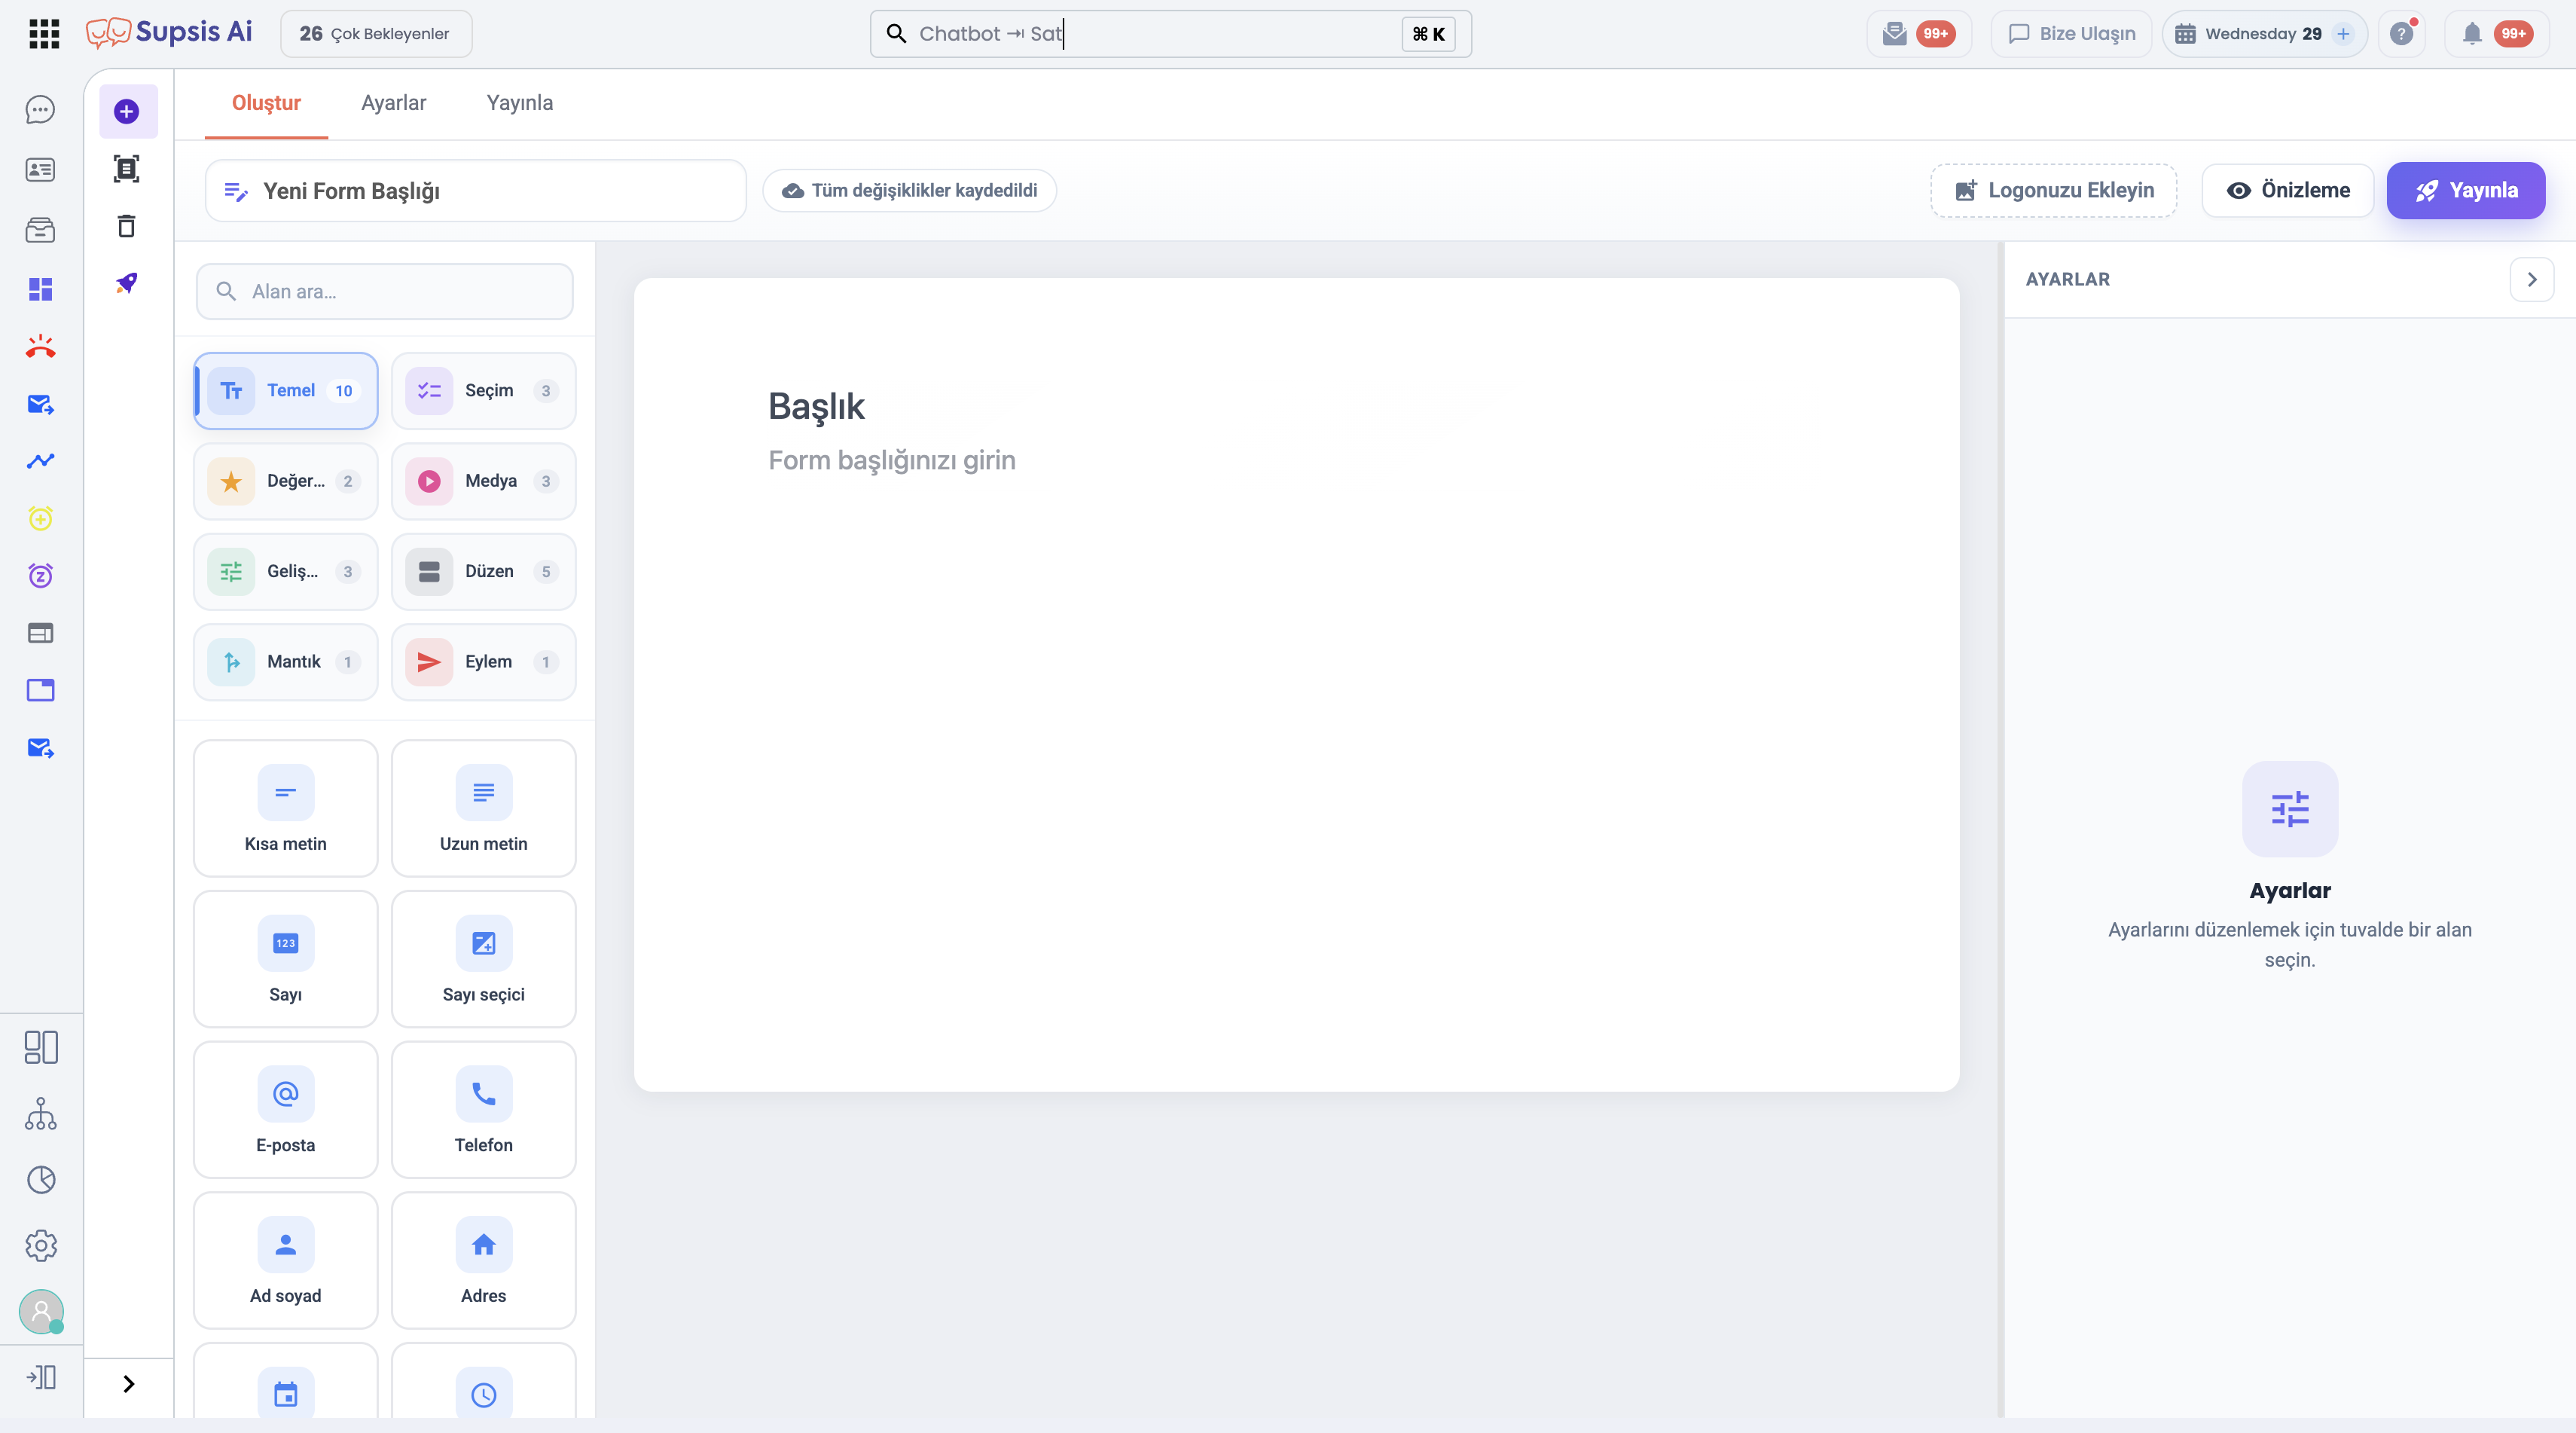
2.a – Top Toolbar (Topbar)
- Form Title: Instantly rename your form.
- Auto-Save: All modifications are automatically saved in the background (
☁️ All changes saved). - Add Logo: Upload your corporate logo to display at the top of the form.
- Preview (
👁 Preview): Test the live interactive form before publishing. - Publish (
🚀 Publish): Finalize the form and access sharing options.
2.b – Left Panel Component Categories
Search for elements using the search bar (🔍 Search field...) or drag and drop elements onto the canvas from the following categories:
- Basic:
- Short Text: Single-line text input field.
- Long Text: Multi-line text field for detailed descriptions.
- Number & Value Picker: Numeric-only input and increment/decrement buttons.
- Email & Phone: Fields with automatic format validation for emails and phone numbers.
- Full Name & Address: Identity and detailed address input fields.
- Date & Time: Calendar and time picker controls.
- Selection:
- Single Choice (Radio Button): Allows selecting only one option from a list.
- Multiple Choice (Checkbox): Allows selecting multiple options simultaneously.
- Dropdown List: Dropdown menu presenting predefined options.
- Rating:
- Star Rating: 1-5 star rating component.
- Rating Scale: Numeric 1-5 rating scale for customer satisfaction evaluation.
- Media:
- Image: Add informational images to the form (non-interactive).
- File Upload: Securely collect documents, images, or media files from users.
- Signature: Digital signature drawing field via touch or mouse.
- Advanced:
- Captcha: Security verification protecting forms against automated bot submissions.
- Layout:
- Header & Paragraph: Section headers and informational text blocks.
- Divider & Page Break: Visual dividers and multi-page step navigators.
- Logic: Conditional logic rules to dynamically show or hide fields based on user responses.
- Action: Form submission button.
2.c – Right Panel (Field Settings)
Selecting any element on the canvas opens the right panel to configure field labels, placeholder text, required field status, and visibility settings in real-time.
3-) Form Settings
The Form Settings tab allows you to configure form titles and route incoming responses to automated workflows.
- Form Name: Configures the display name of the form in Supsis dashboards and inbox logs.
- Route Answers to Ticket System:
- Automatically converts incoming form submissions into new tickets in the Tickets Module.
- Best Practice: When forwarding form responses to tickets, ensure you include Email or Phone Number fields as required inputs so agents can follow up with the user.
4-) Publishing & Sharing Options
Flexible sharing options allow you to distribute your form directly or embed it seamlessly into your website.
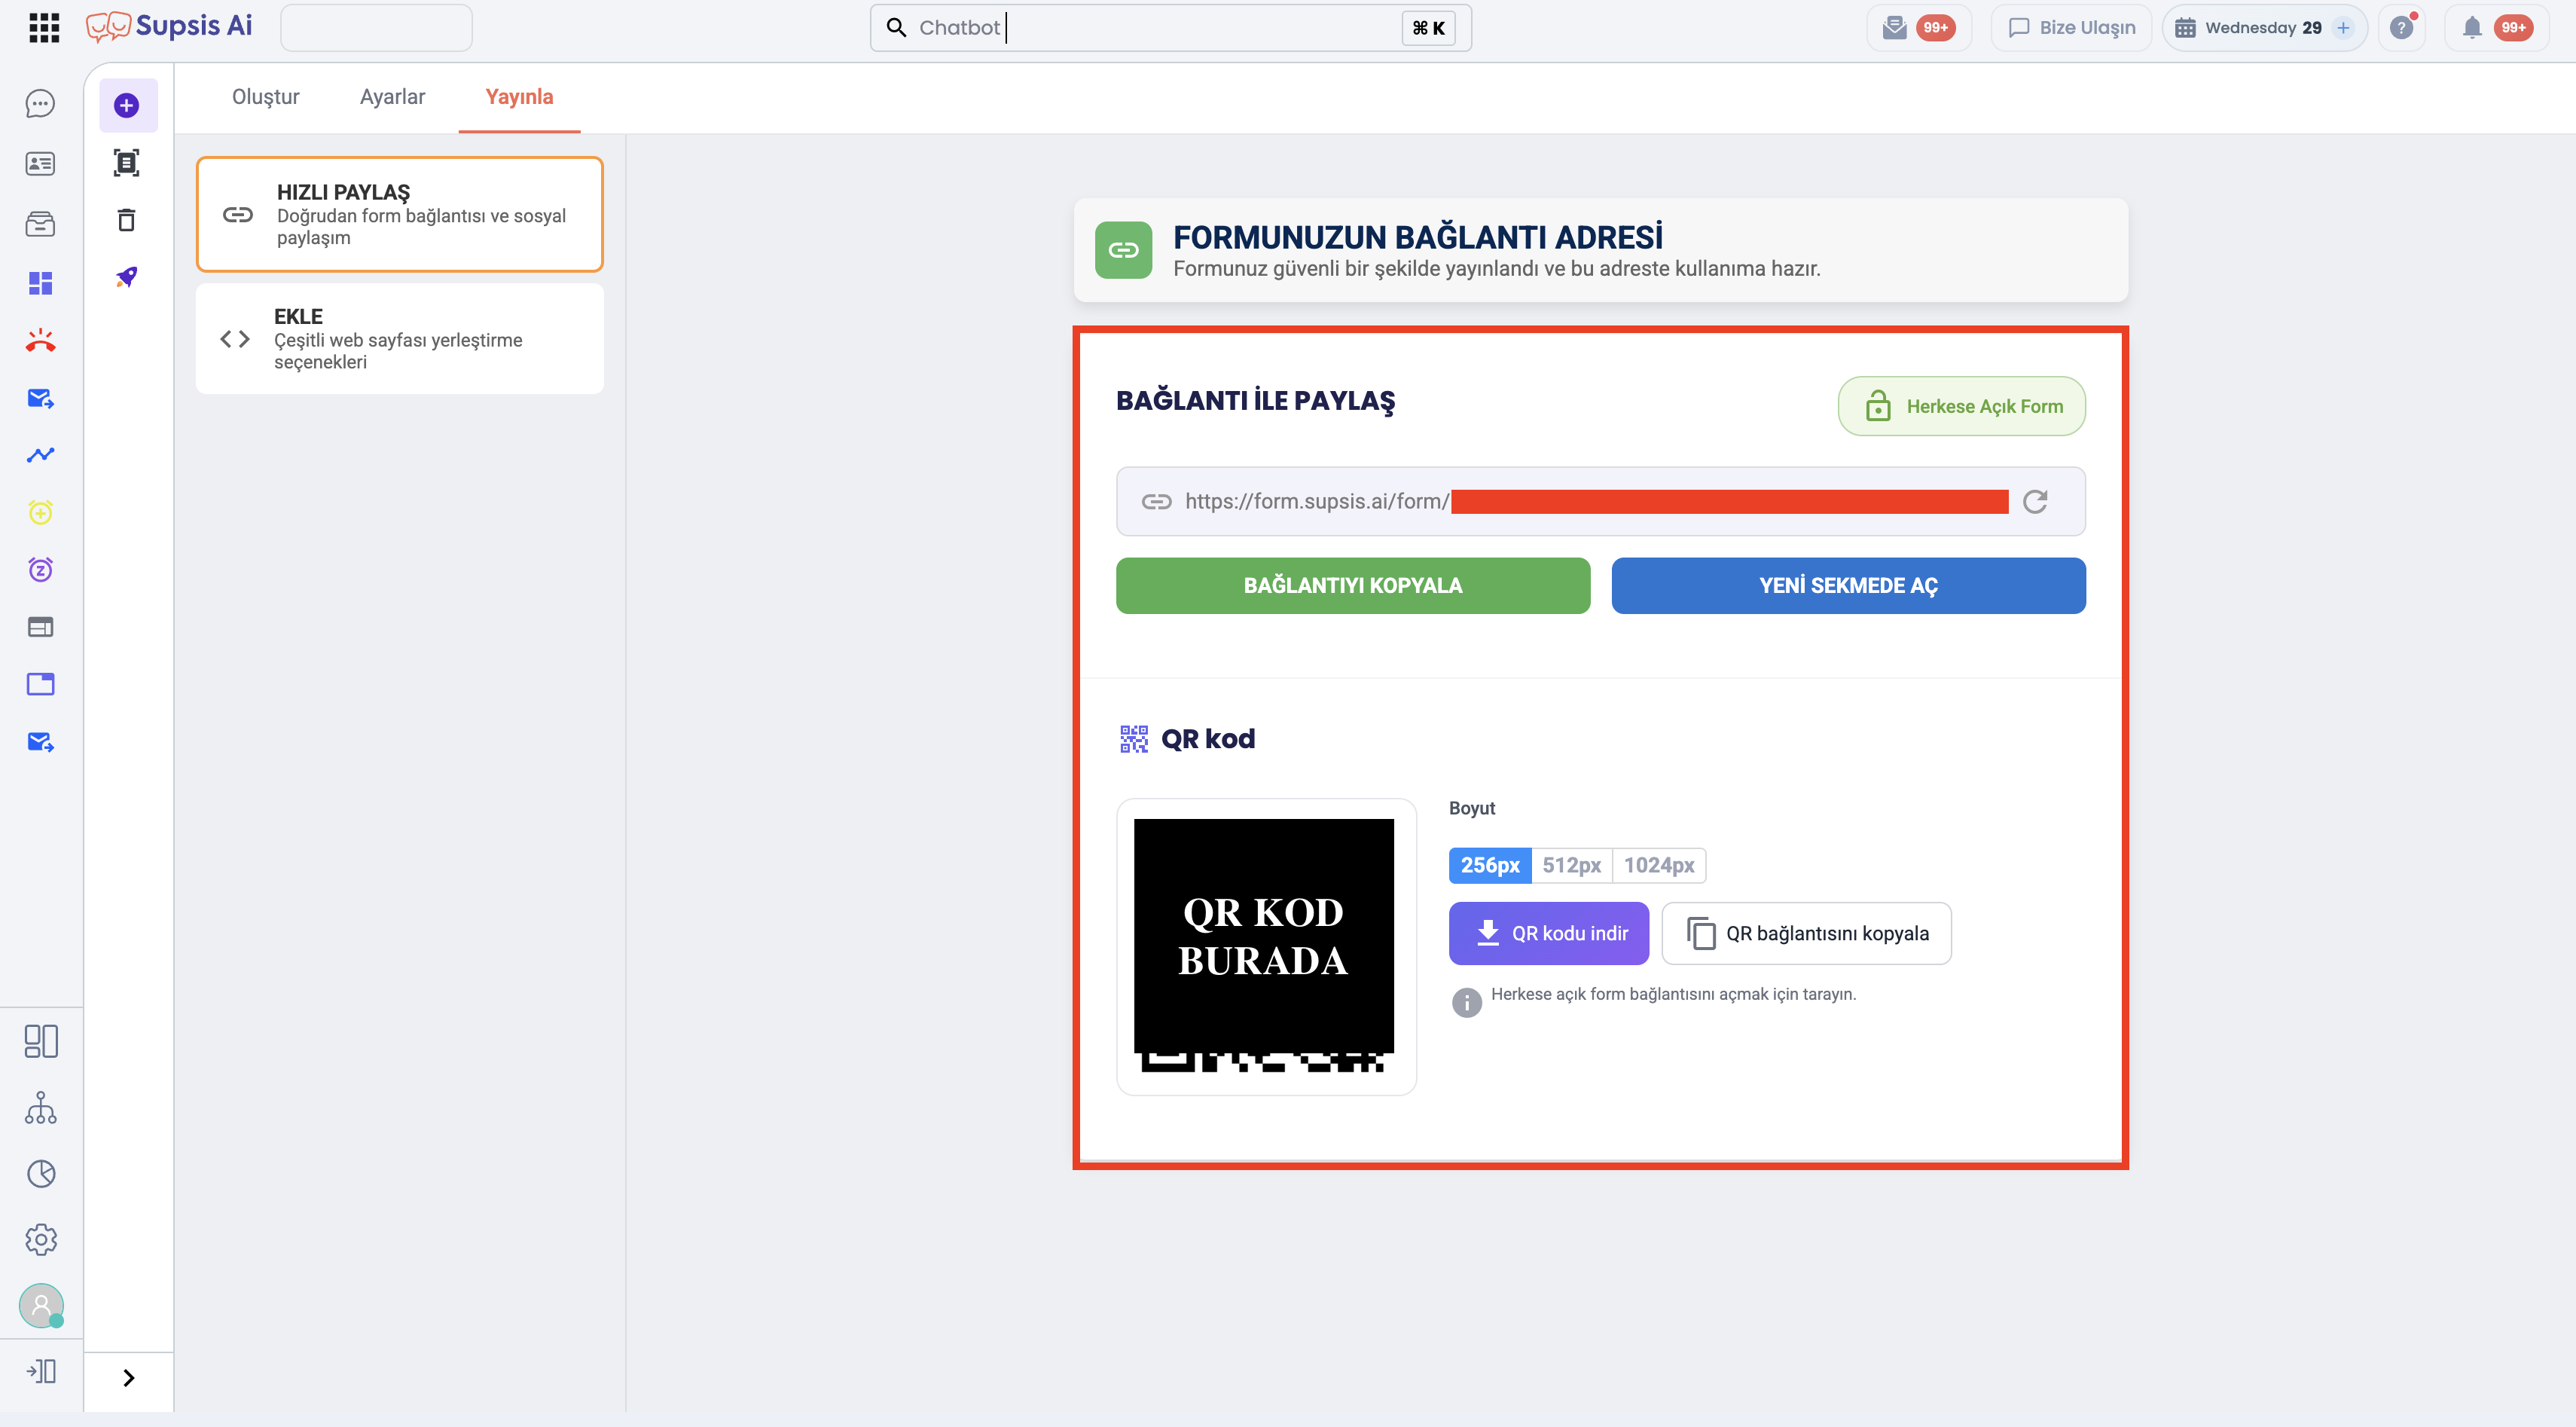
4.a – Quick Share & QR Code
- Direct URL Link: Copy your form's unique public URL or click Open in New Tab to preview.
- QR Code Sharing:
- Automatically generates a QR code for your public form URL.
- Resolution Options: Choose between
256px,512px, and1024pxresolutions. - Actions: Click
Download QR Codeto save the image orCopy QR Linkto share.
4.b – Embed (Website Integration)
- iFrame Code: Copy the ready-to-use
<iframe>code snippet to embed the form into any webpage. - Popup Link: Embed a JavaScript popup link (
<a>tag anchor) that opens the form in a modal window upon user click.