
Webhooks Integration
Webhooks enable specific events occurring within the Supsis AI panel to be instantly transmitted to your external systems (such as CRM, ERP, or custom databases) via HTTP requests. With this integration, you can automate your workflows and make data transfer real-time.
1-) Integration Steps
To create and configure your Webhook channel, follow the steps below:
1.a – Creating a Webhook Channel
-
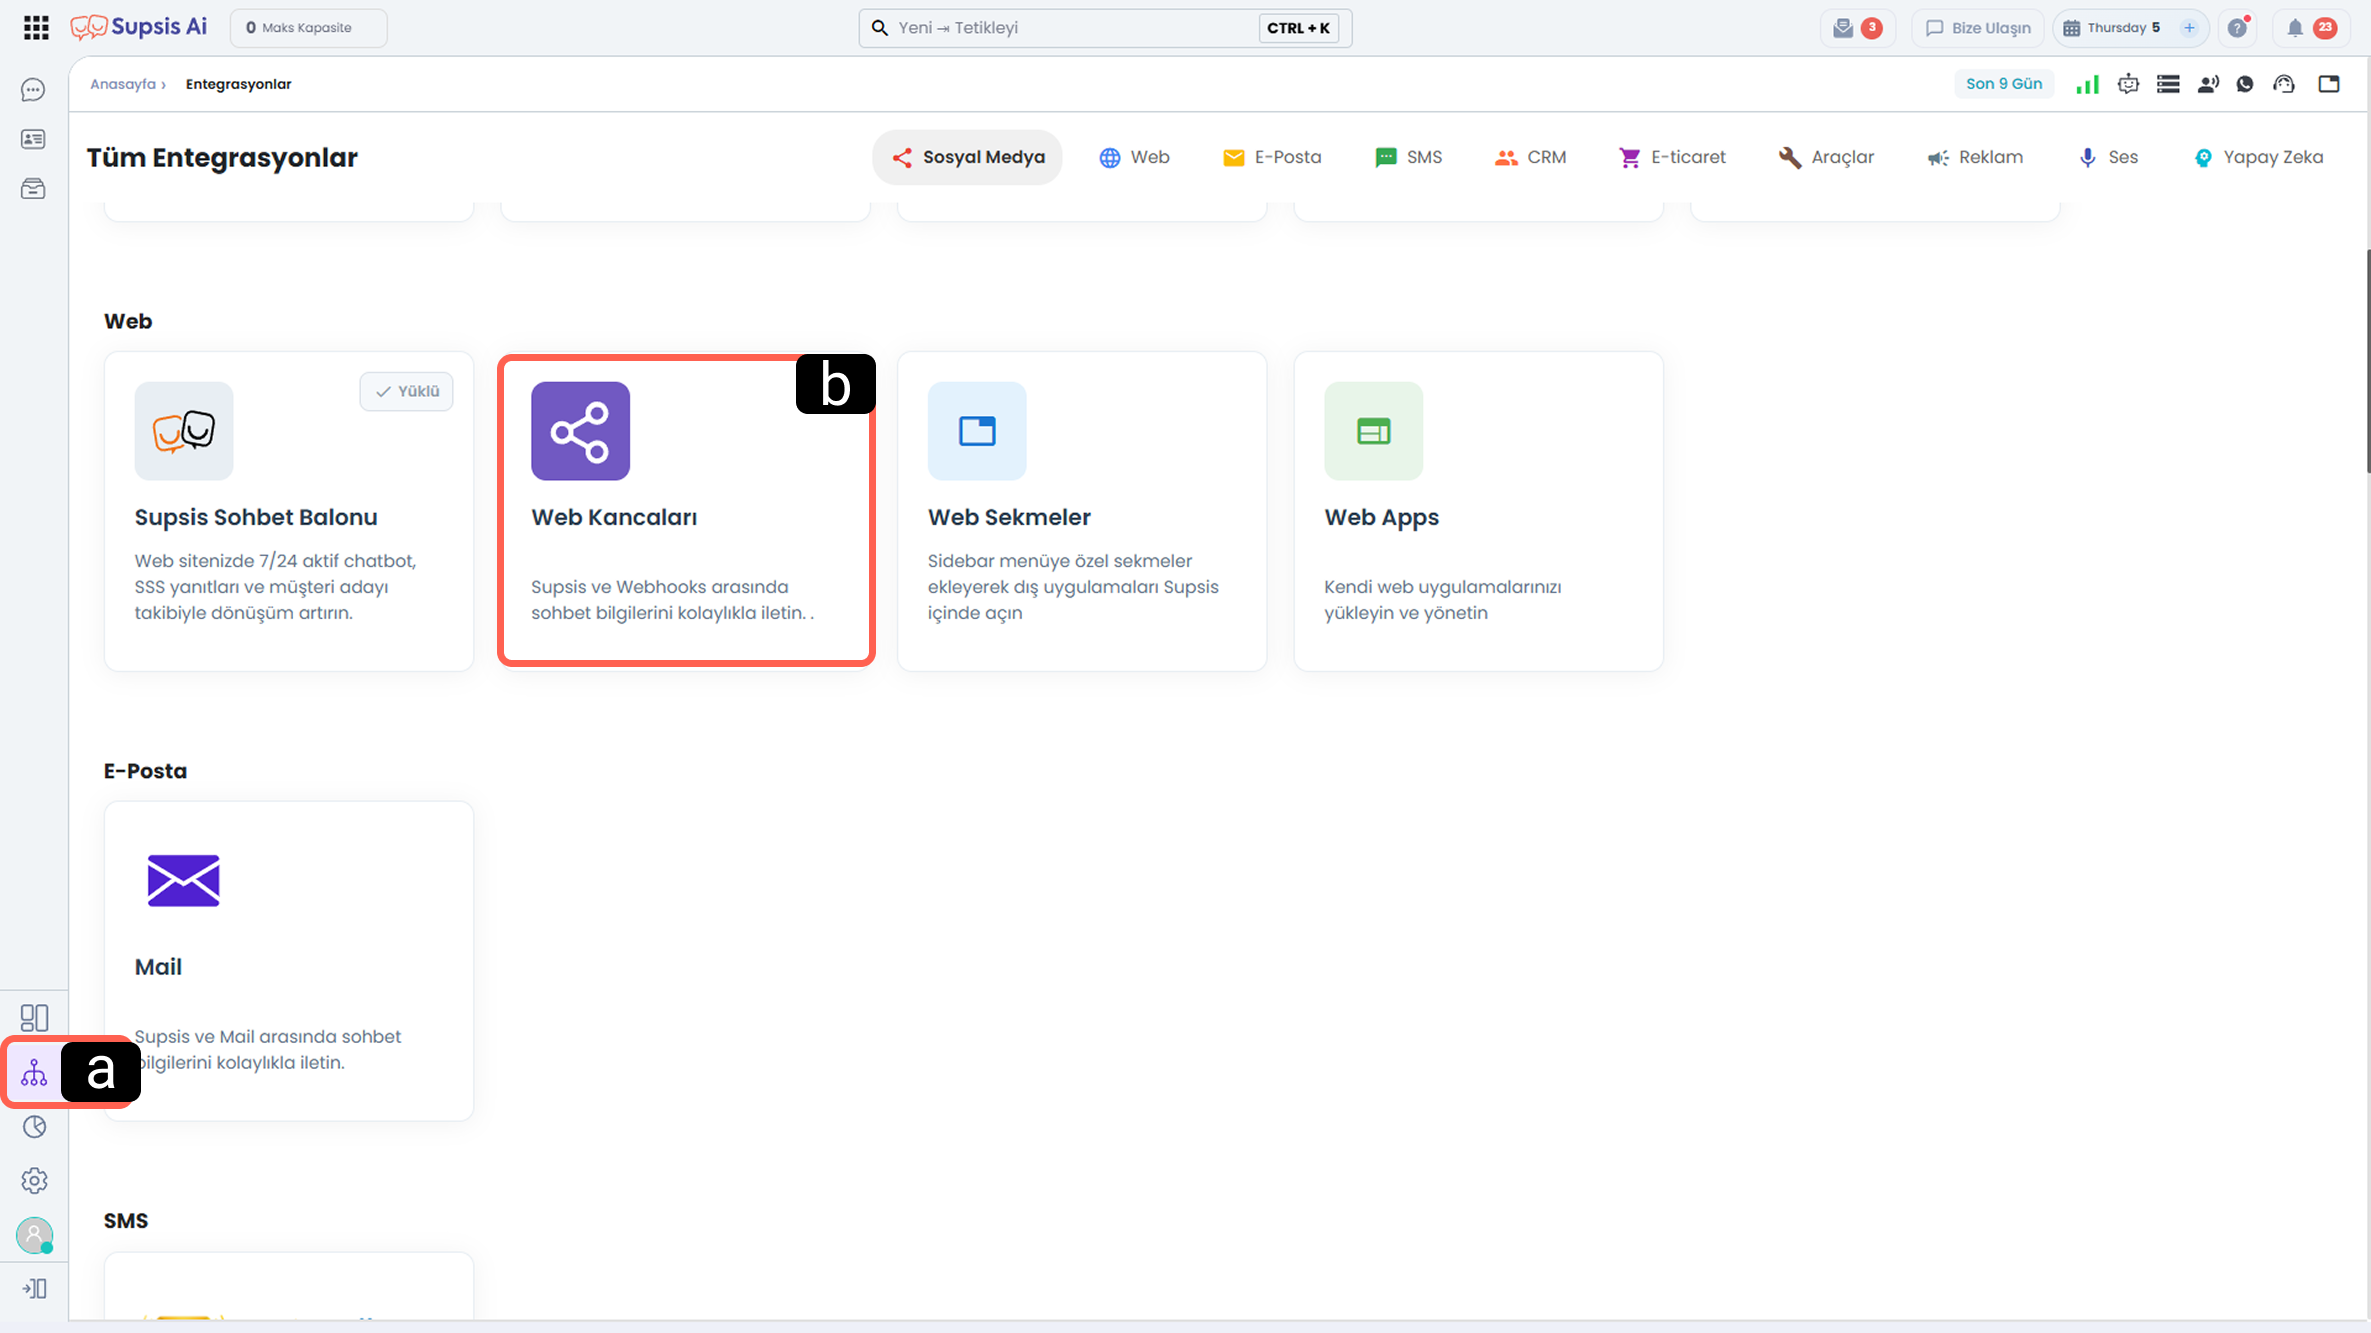
a – Access Integrations
Click the Integrations icon located in the left menu of your Supsis AI panel to enter the integrations section. -
b – Webhooks
In the integrations list, find the Webhooks card under the "Web" category and click on it.
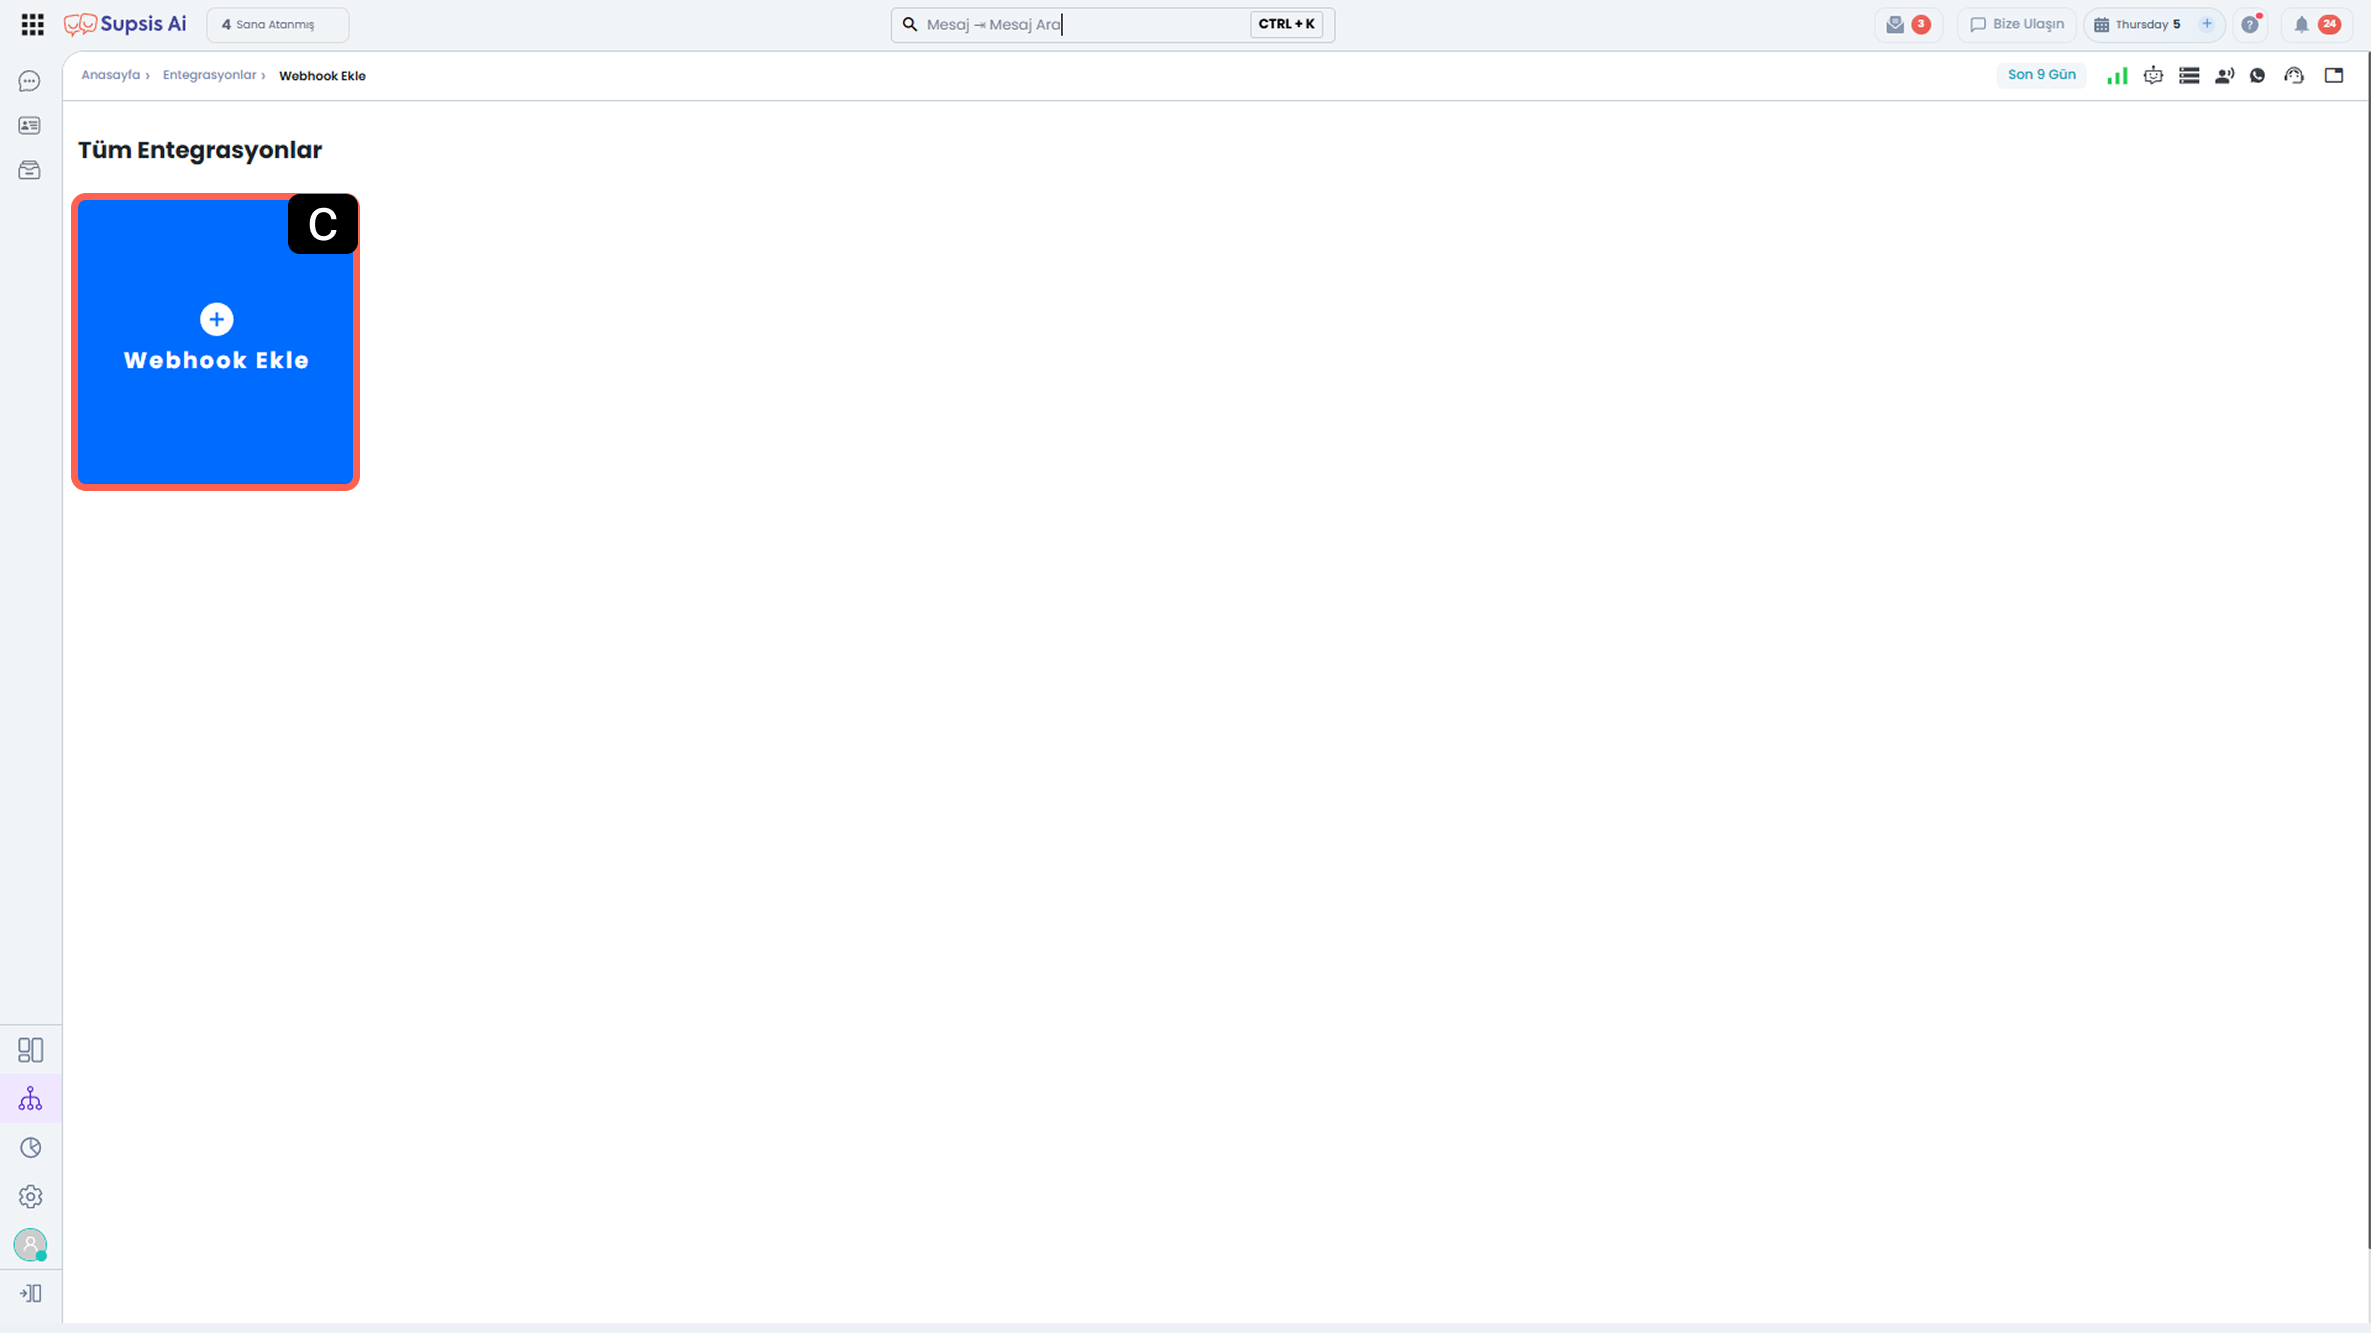
- c – Add Webhook
In the opened list, click the blue "+ Add Webhook" button to define a new channel. This action will redirect you to the Webhook configuration screen.
1.b – Webhook Configuration
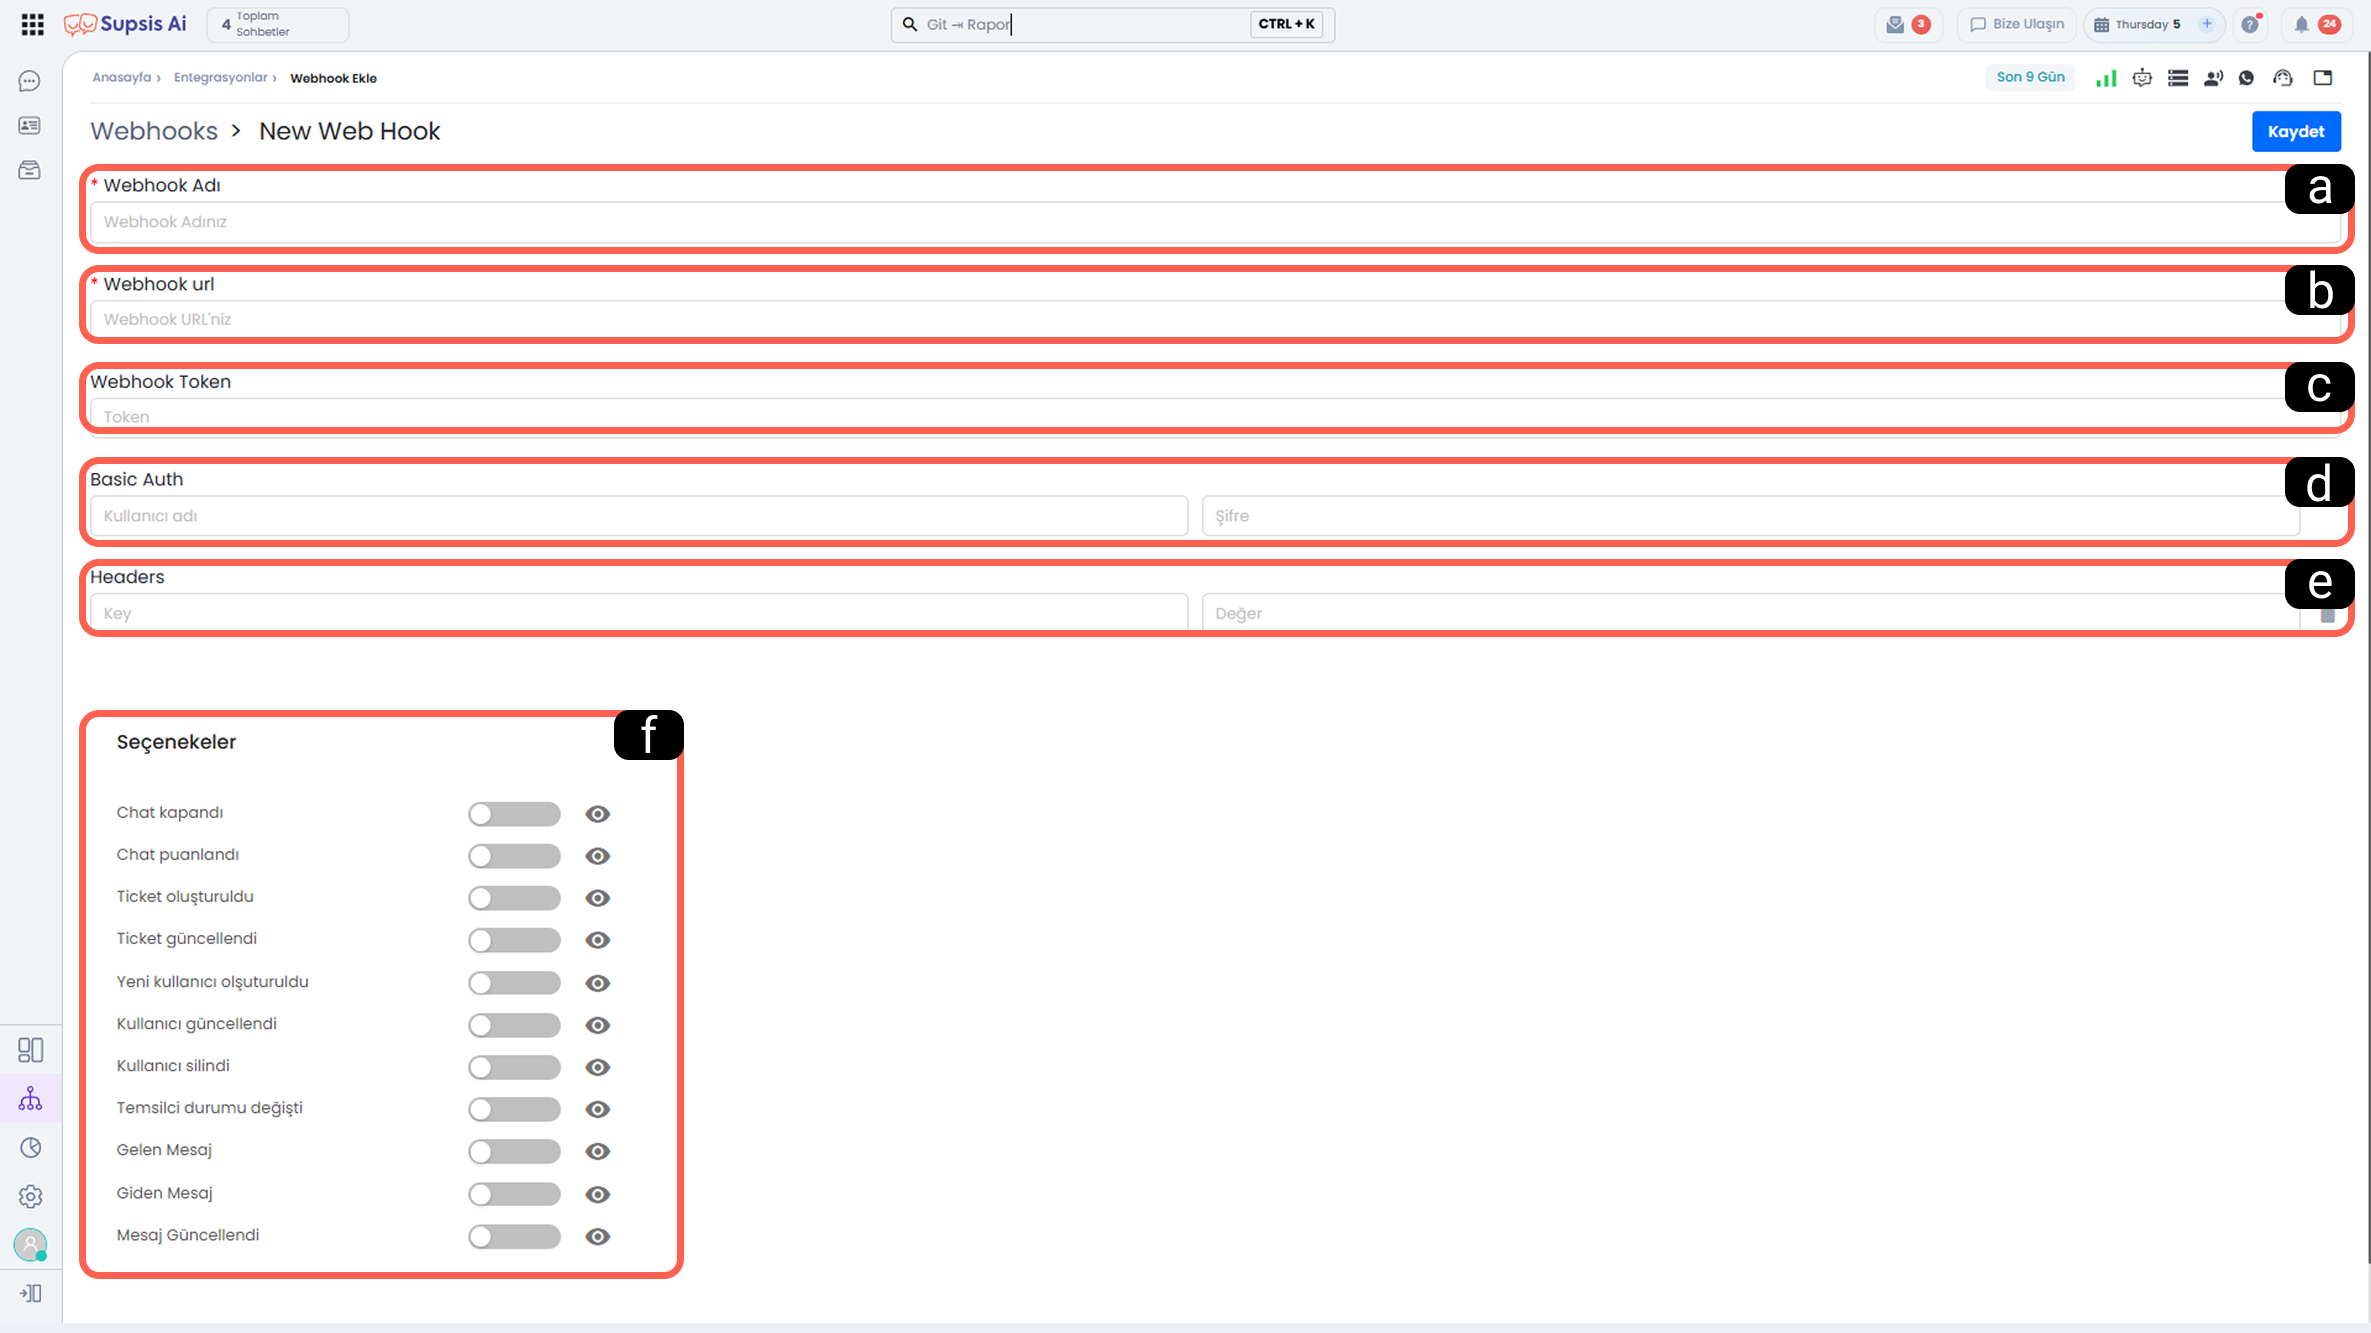
On the New Webhook screen, you must fill in the technical details defining the target system to which the data will be sent.
-
a – Webhook Name
The name used to identify your Webhook channel within your panel. -
b – Webhook URL
The target server (HTTP) address where the data (payload) will be sent. When the selected event occurs, event details will be transmitted to this HTTP URL. -
c – Webhook Token (Optional)
A special key used to secure the requests. This field is not mandatory but can be optionally added to enhance request security. -
d – Basic Auth (Optional)
If the target system requires username and password authentication, enter the relevant credentials here. -
e – Headers (Optional)
Custom HTTP header (Key-Value) information to be included in the request. Filling this field is optional. -
f – Webhook Triggers
In the Options section located at the bottom of the Webhook screen, you can define which events will trigger data transmission to your external system.- Chat Status: When a chat is closed or rated.
- Ticket Operations: When a new support ticket is created or updated.
- User Management: When a new user is created, updated, or deleted.
- Messaging: Incoming/outgoing messages and message updates are transmitted instantly.
- Agent Status: When an agent’s online/offline status changes.
1.c – Webhook Security, Authorization, and Data Isolation
Webhook endpoints contain connection URLs, verification secrets, and data transmission parameters pointing to your organization's internal CRM, ERP, or database systems. Therefore, Supsis enforces a rigorous security, authorization, and data isolation architecture to protect webhook configurations.
| Security Scope | Protection Mechanism & Policy | Standard Applied |
|---|---|---|
| Mandatory Authentication | All webhook listing, creation, modification, and deletion requests (GET, POST, PUT, DELETE) require a valid session authentication token (getAuthorize). |
Anonymous or unauthenticated requests are immediately rejected (401 Unauthorized / 403 Forbidden). Simply specifying a site-id without credentials is not permitted. |
| Target Endpoint Isolation | Your 3rd-party integration URLs and webhook destinations are strictly concealed from public networks. | External crawlers, bots, or unauthorized third parties cannot discover or inspect your backend endpoints from the internet. |
| Sensitive Attribute Masking | Sensitive data configured in webhook requests, such as Verification Tokens, Basic Auth passwords, and Custom Headers. | Critical secrets and credential parameters are securely masked in management interfaces and API responses to prevent data exposure. |
Webhook Security Standards & Best Practices
- Full Session Isolation: Webhook management services do not expose any public endpoints. Without an authenticated user session or valid authorization token, webhook records cannot be read or manipulated.
- Payload Verification (Token Usage): To guarantee that incoming HTTP payloads received on your server originate exclusively from Supsis, it is recommended to configure an optional Webhook Token or custom Header key in the webhook settings.
- Role-Based Access Control: Creating, altering, or removing webhook channels is restricted strictly to authorized administrative roles within the Customer Panel.
Endpoint and Data Isolation Guarantee
Supsis stores your webhook destinations and integration parameters within a dedicated, authenticated security layer. Access to webhook URLs and operational metadata via public web services or unauthenticated external requests is strictly prevented.