
Web Apps Integration
The Web Apps Integration allows you to include your own custom frontend applications (React, Vue, HTML/JS) into the Supsis AI panel or use predefined ready-made templates. This enables you to run tools tailored to your operational processes (such as calculators, reporting tools, custom CRM interfaces, etc.) directly within the panel.
1-) Creating a Web App
To start the integration process, follow the steps below in your Supsis AI panel:
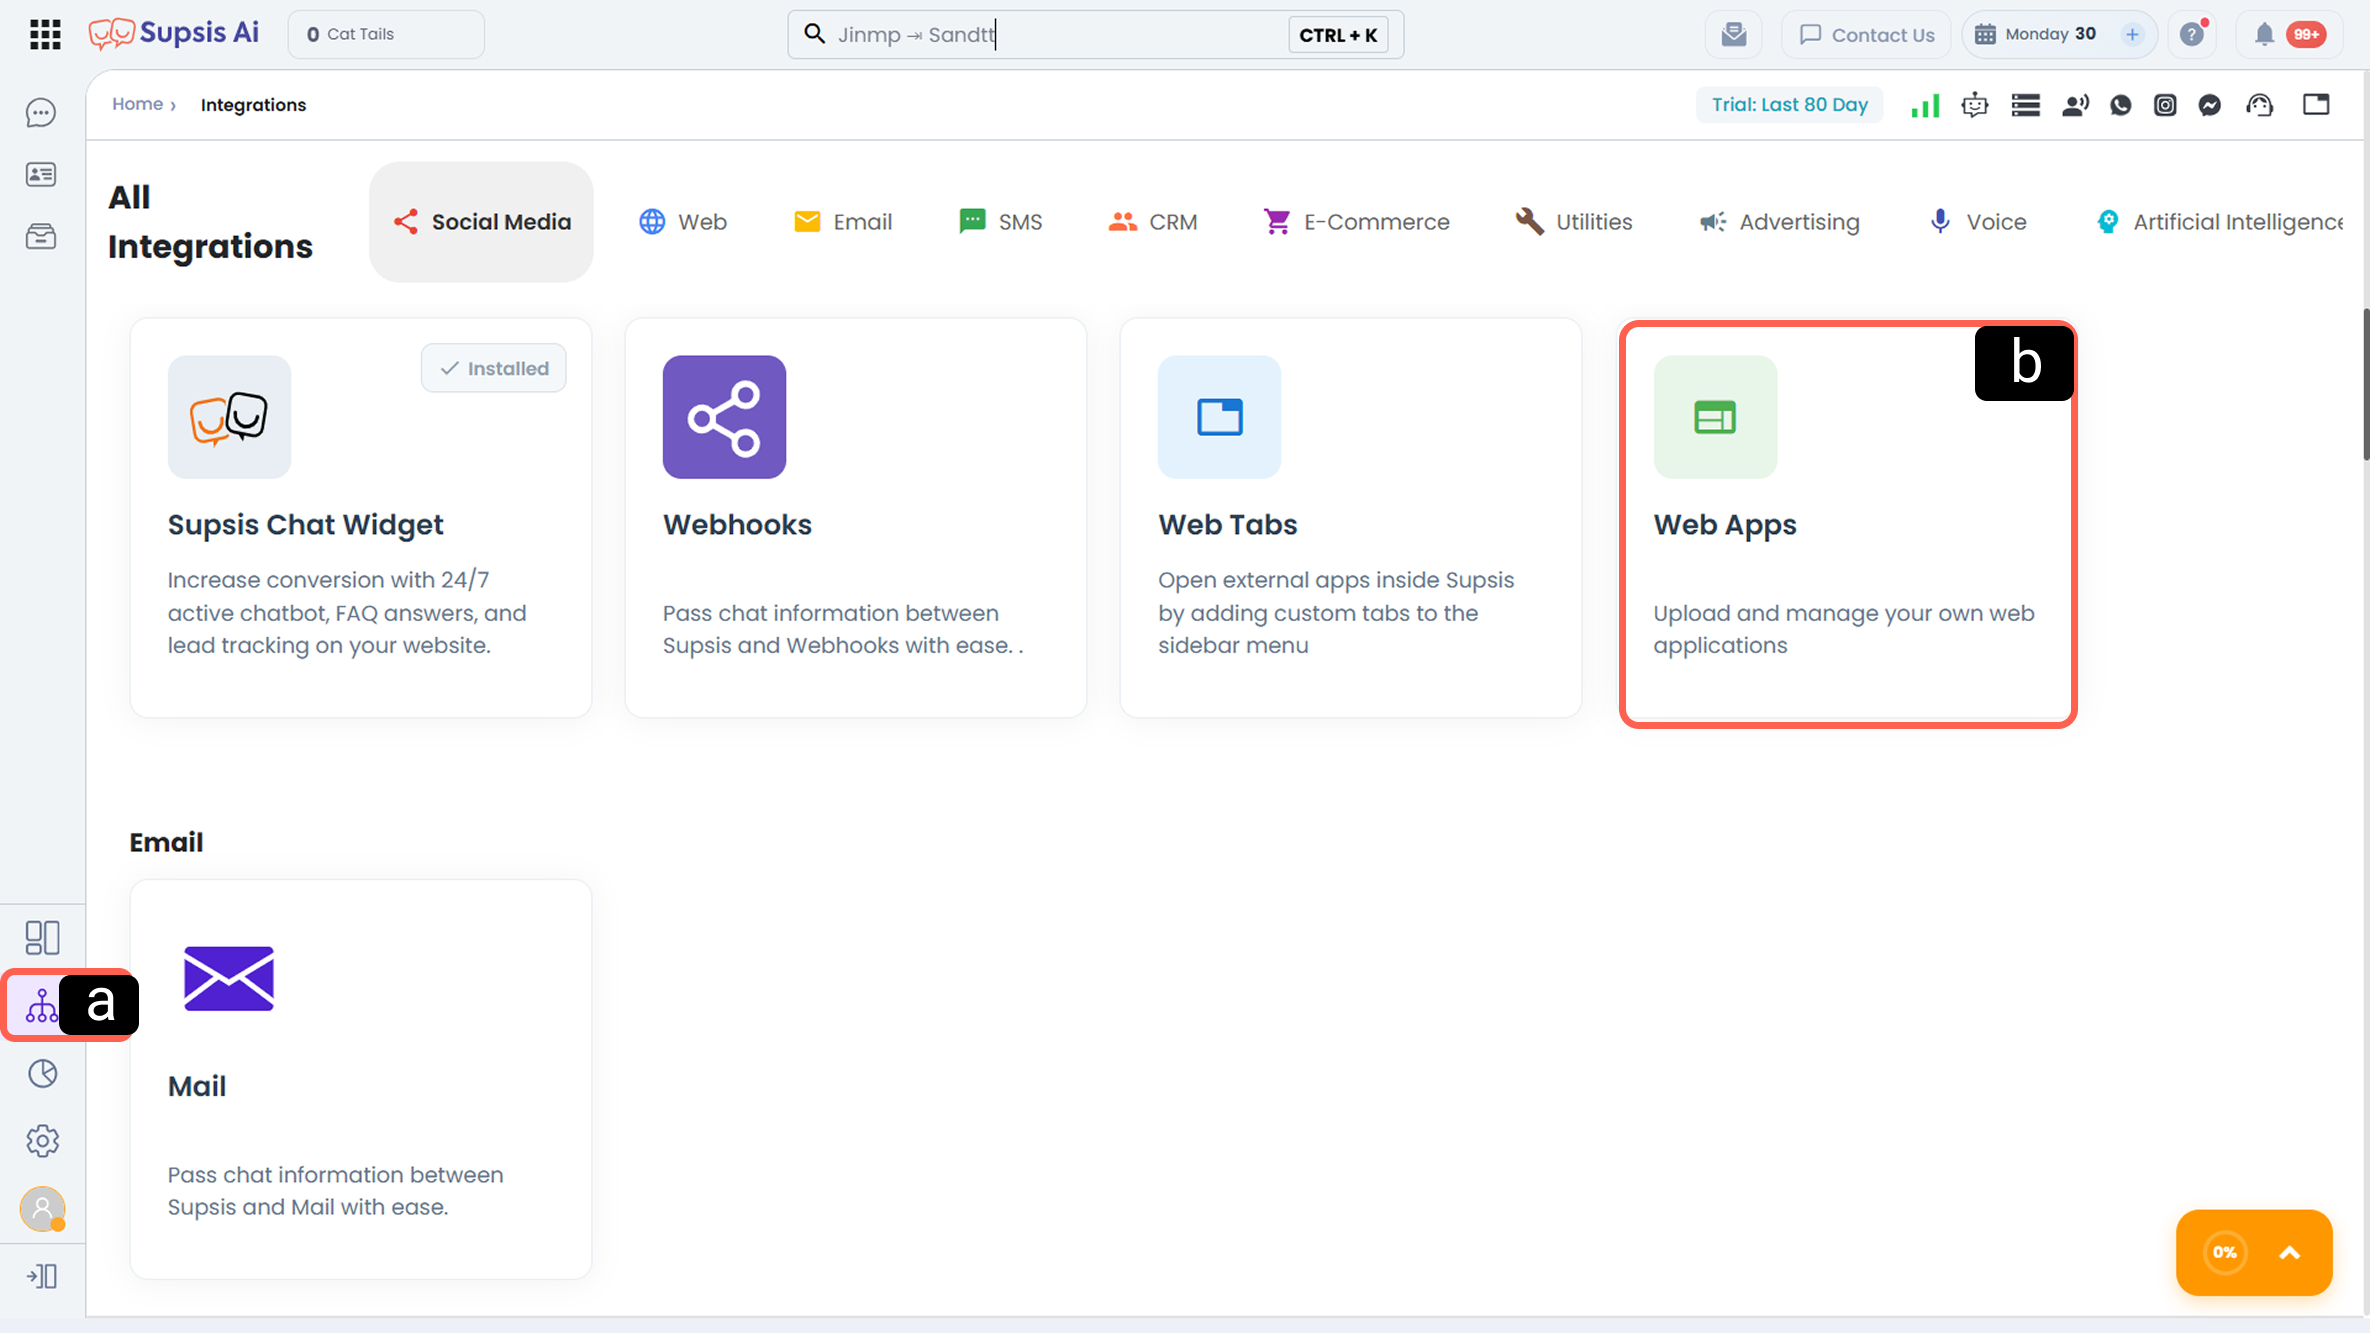
1.a – Supsis AI Panel Operations
-
a – Integrations Menu
Click the Integrations button located in the left menu to access the integrations section. -
b – Channel Selection
Under the “Web” category in the Integrations menu, find the Web Apps card and click on it to open the channel details.
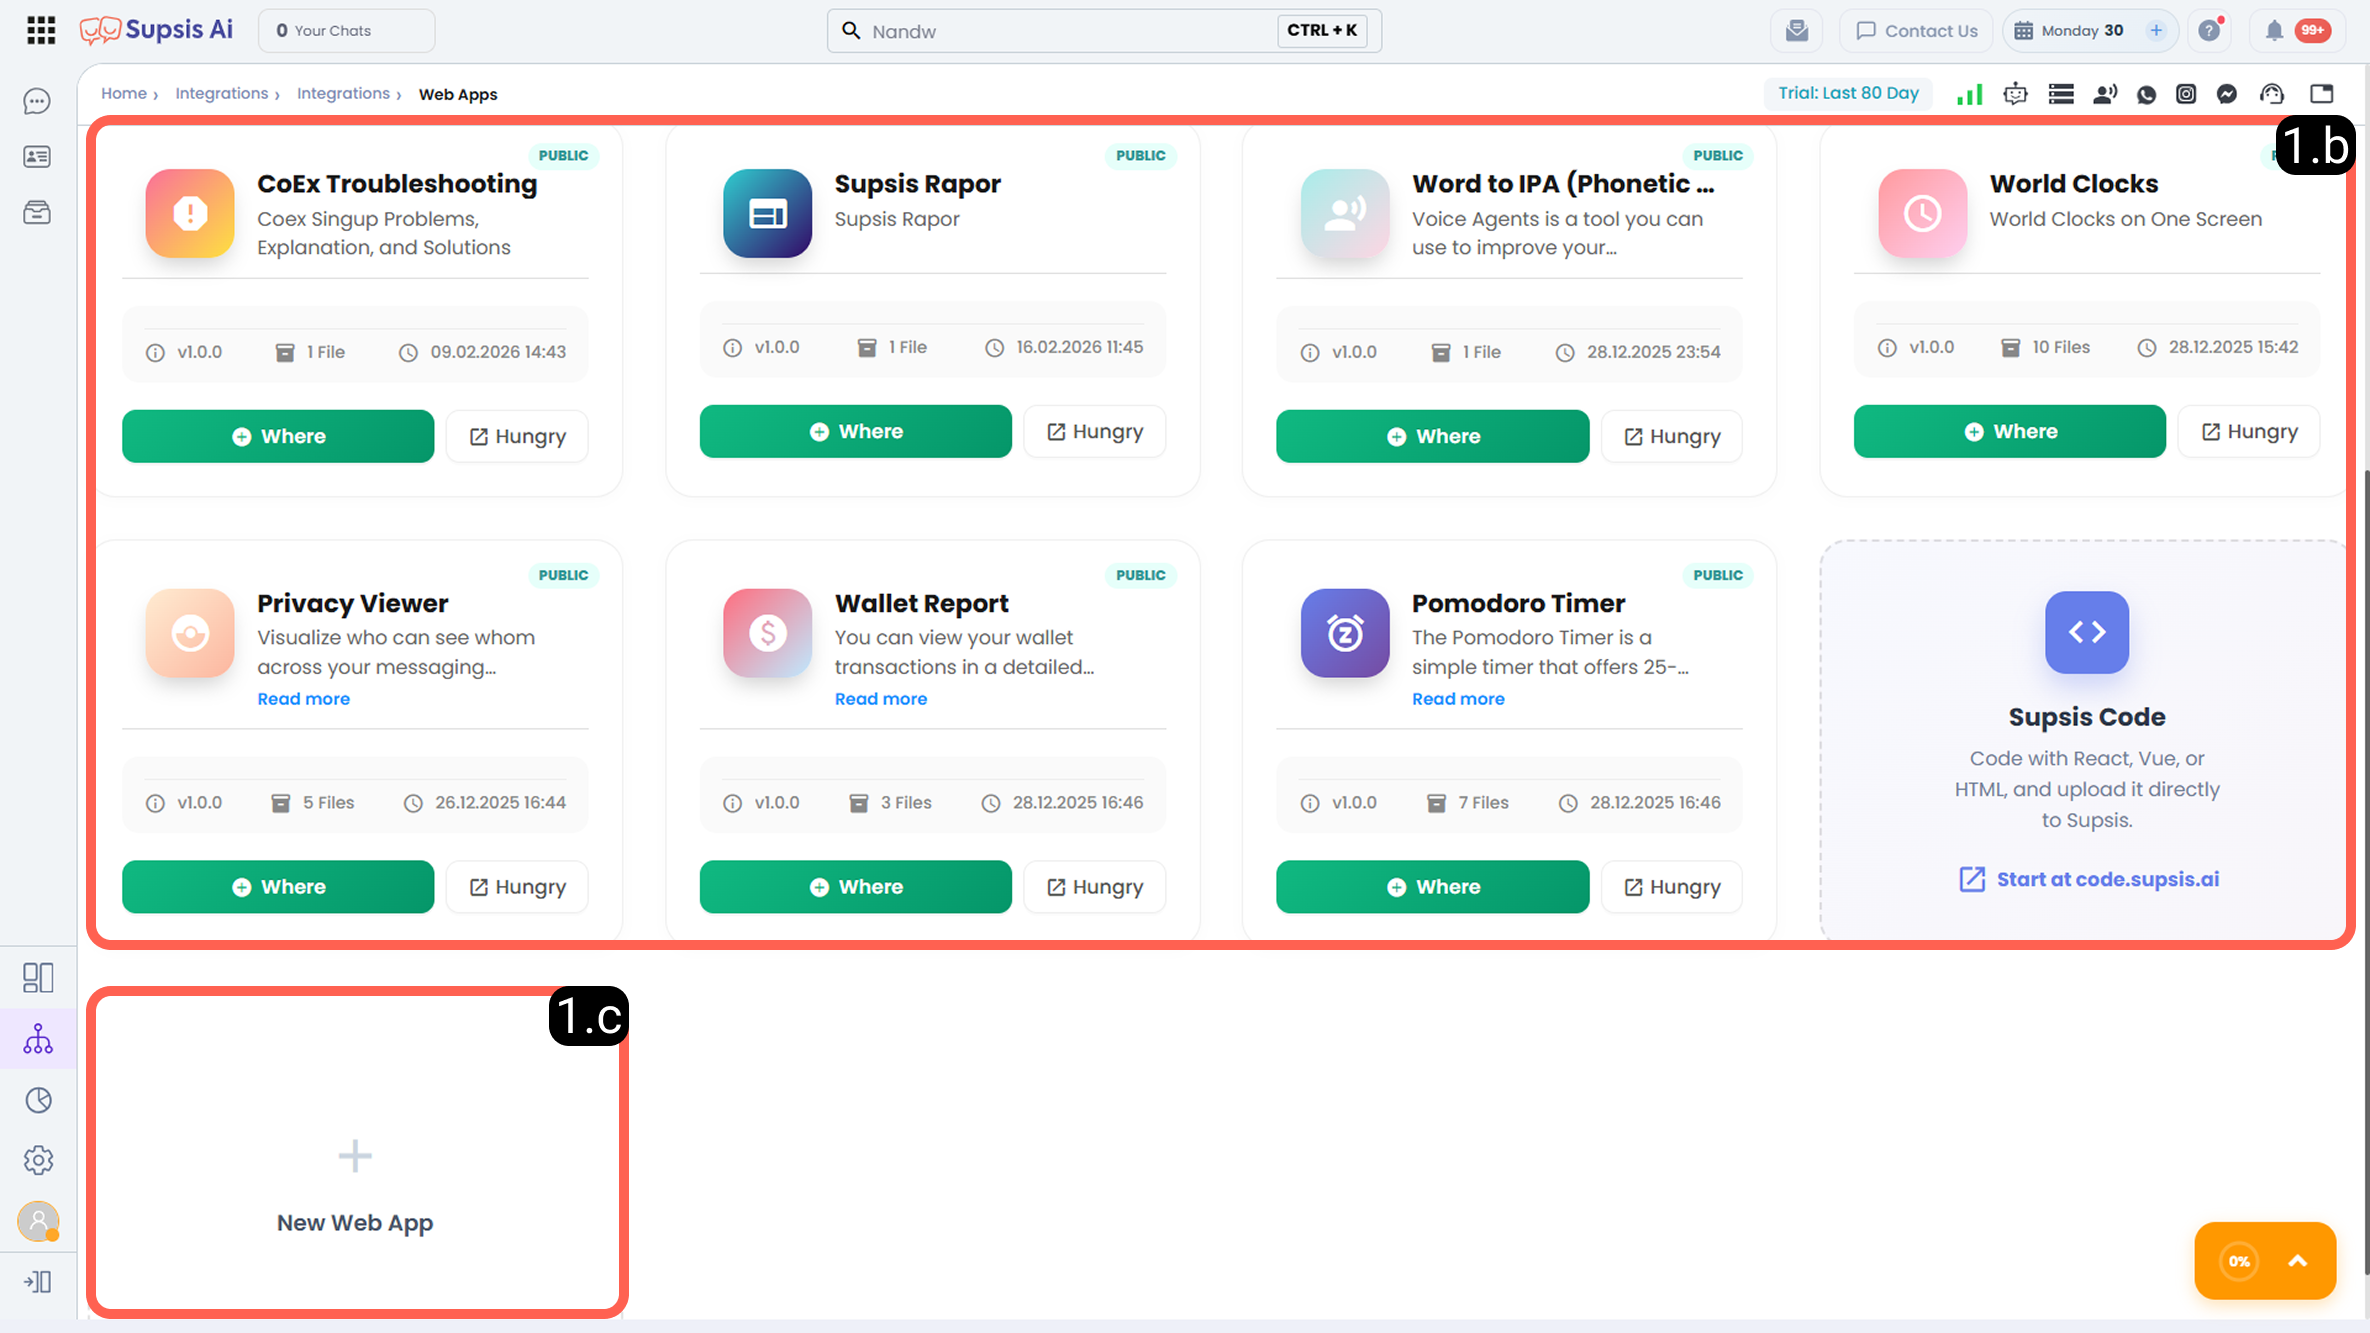
1.b – Template Web Apps
Supsis AI provides various ready-to-use applications that you can quickly install and start using immediately. You can select any application you like and integrate it directly into your panel.
-
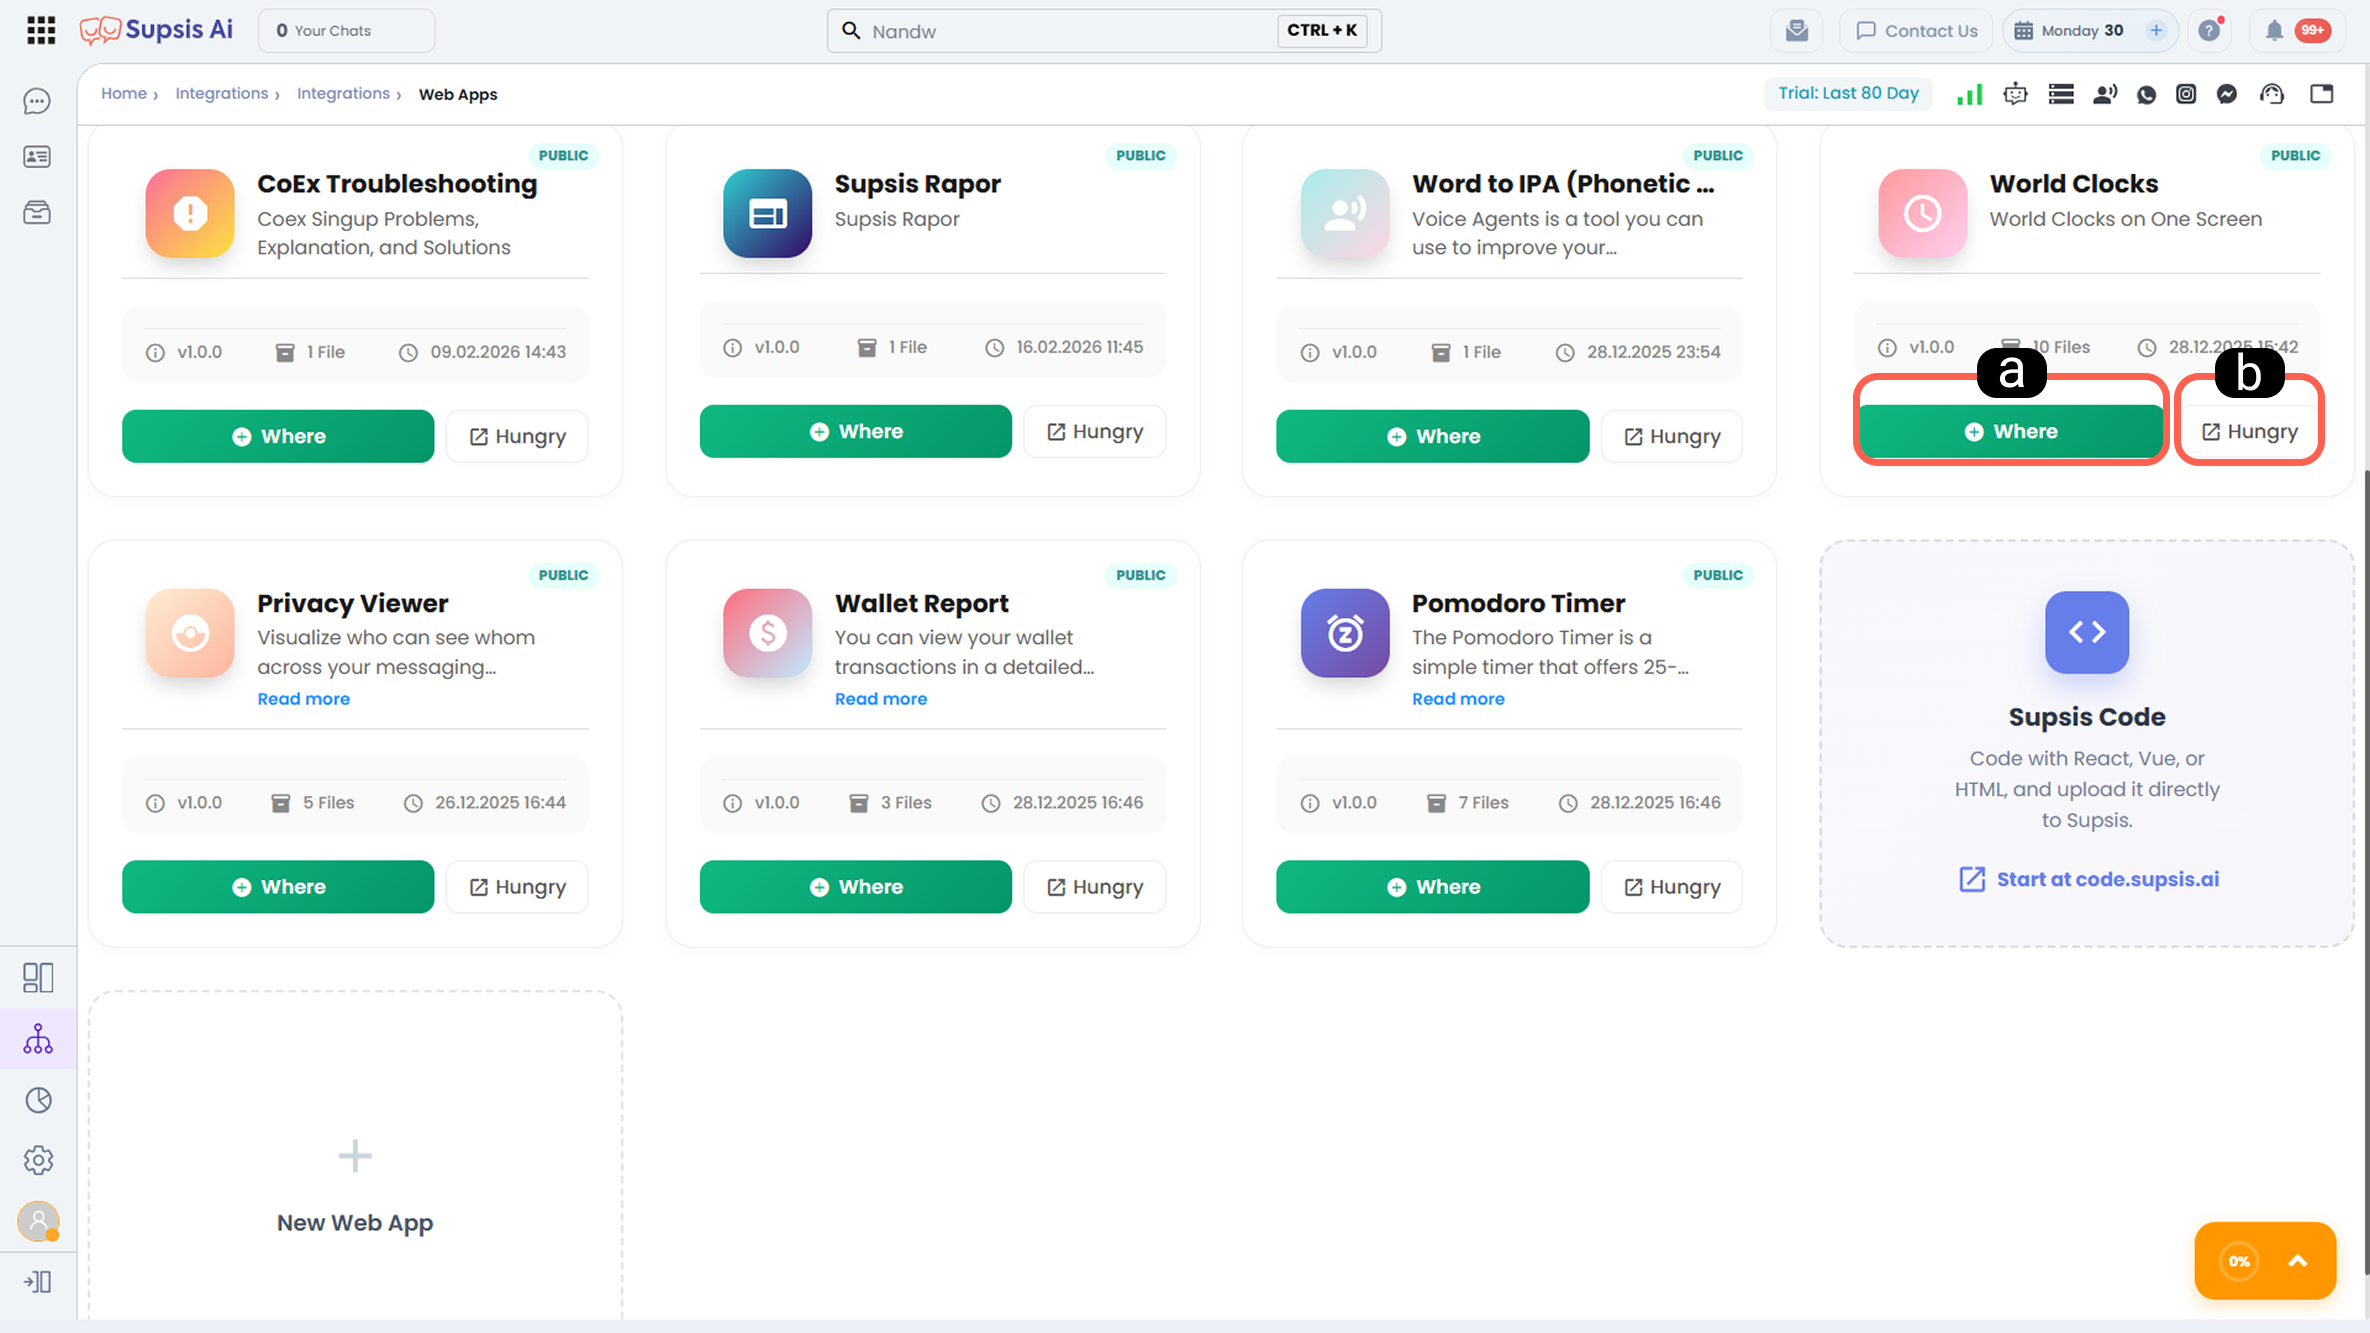
a – Template Applications
Click the “Install” button on the application you prefer to add it to your system. -
b – Open
Use the “Open” button to directly launch and experience the selected Web App.
1.c – Create a New Web App
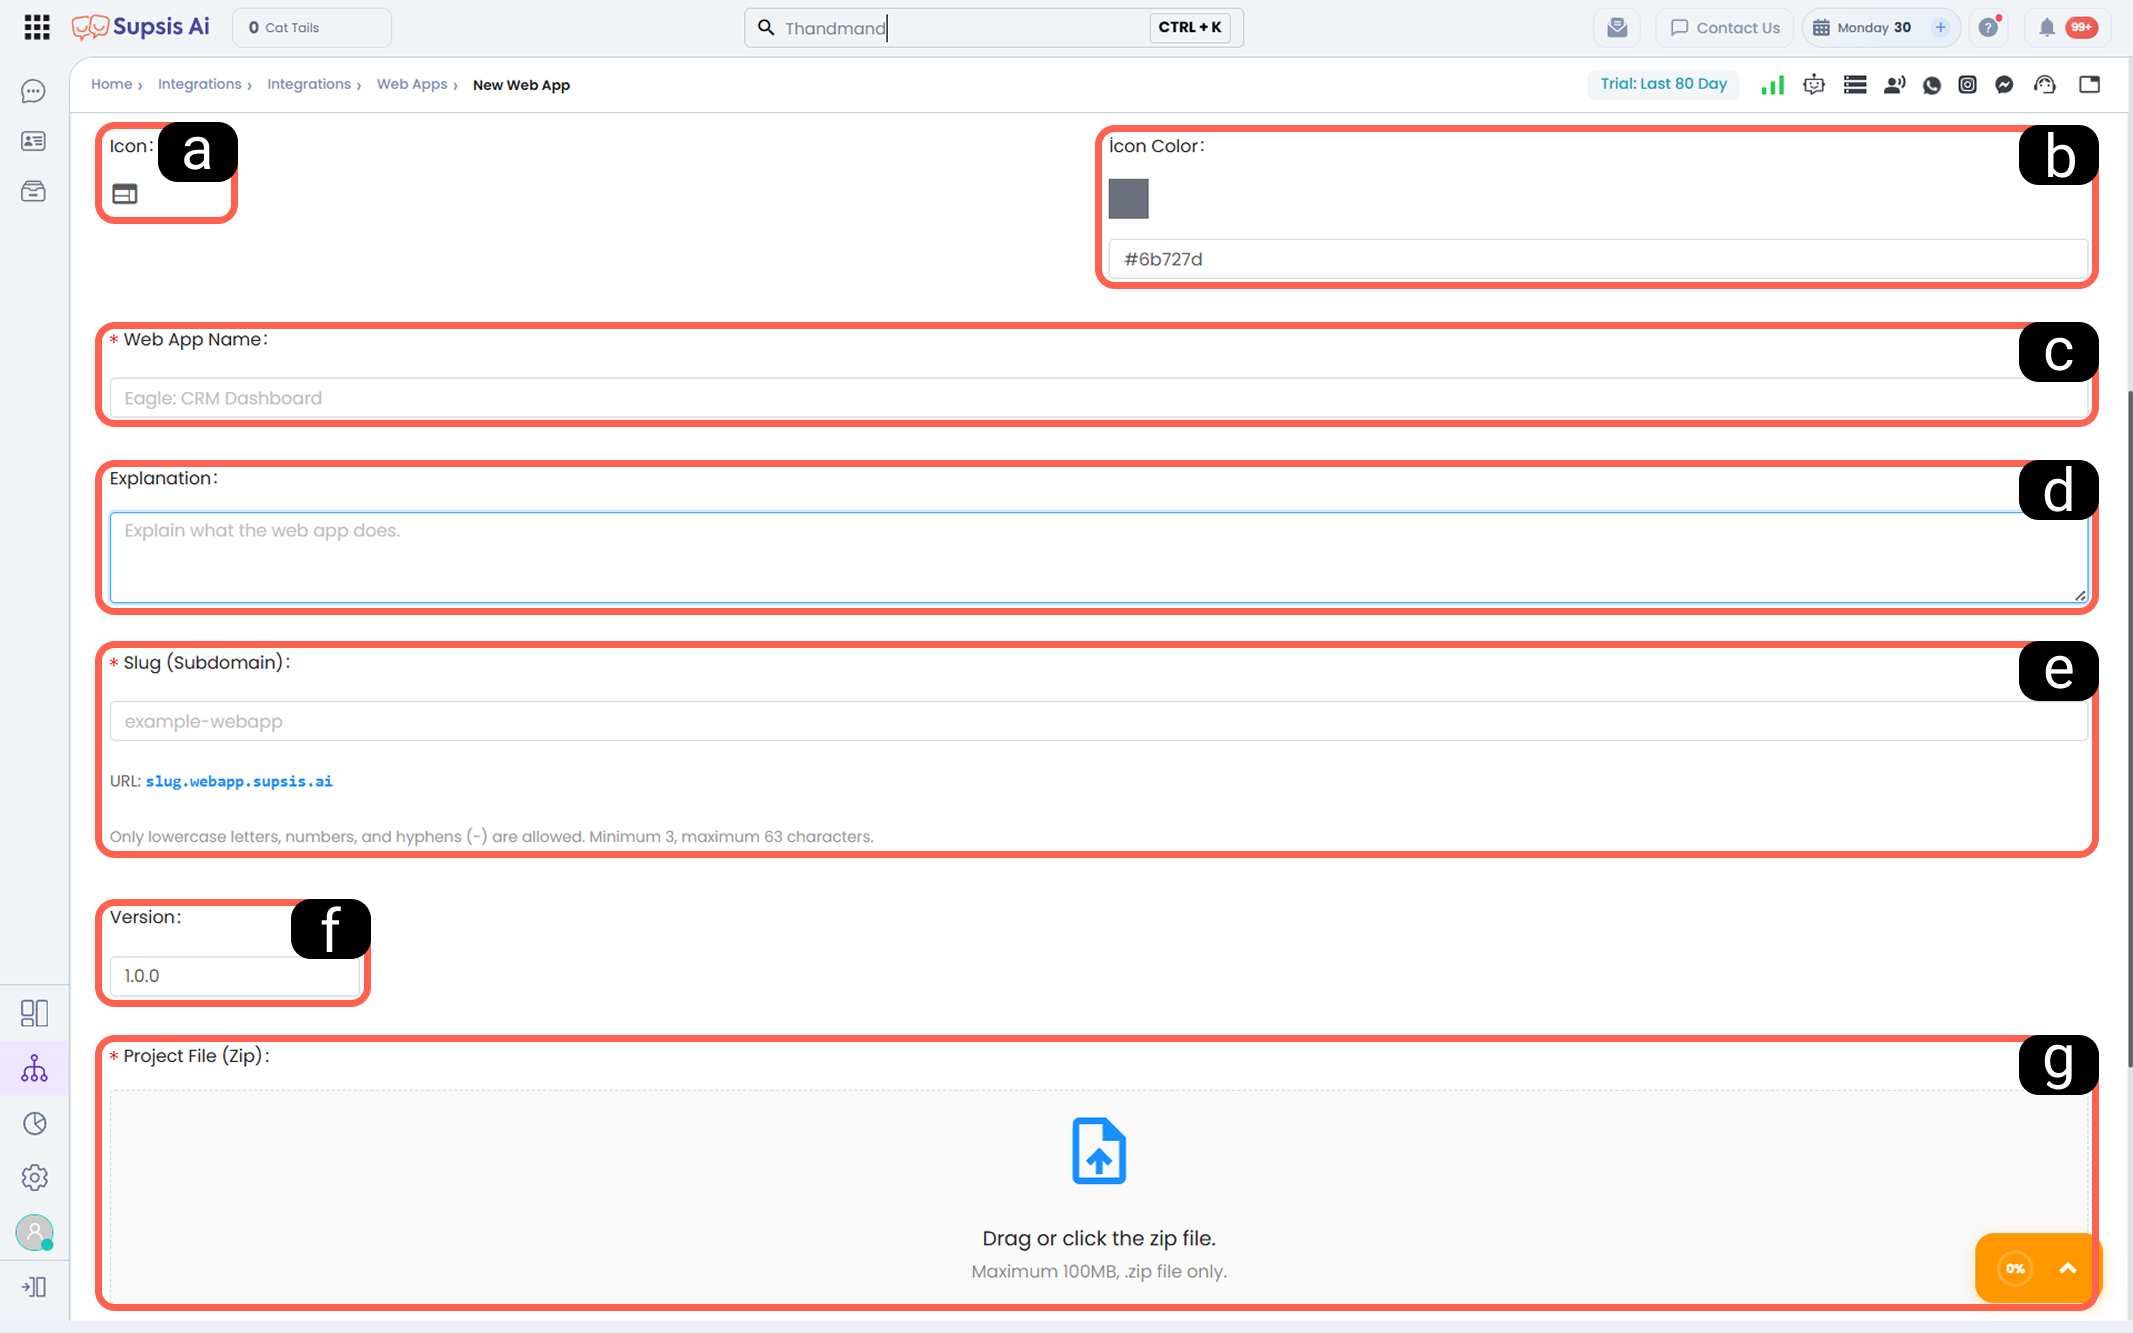
To create your own application, click on the “New Web App” section. In the form that opens, you can define the attributes and functions of your Web App. The configuration fields in this form are as follows:
-
a – Icon
Select the icon that will represent your app. -
b – Icon Color
Choose the color of the selected icon. -
c – Web App Name
Define the name of your Web App. It is recommended to use a clear, descriptive, and short name so panel users can easily access it. -
d – Web App Description
This is the description that appears when hovering over the app. Enter a clear and explanatory text describing the purpose and function of the tab. -
e – Slug (Subdomain)
Define the address where your application will be published in the formatslug.webapp.supsis.ai. -
f – Version
Enter the version information of your application (e.g., 1.0.0). -
g – Project File (Zip)
Upload your prepared frontend project (maximum 100MB) by dragging and dropping it into the system.

When your application is installed as a web tab, you can define dynamic or static URL parameters (Key/Value) that will automatically be added to the tab and sent to your external systems.
-
h – Key
Define the technical name of the parameter to be sent to the external system (e.g., ID, user_email). -
i – Key Value
Determines the data that the parameter will carry.- Static Value: You can directly enter the data. The value written in this field will be transmitted to the target page.
- Dynamic Value: Used to automatically retrieve data from the system. When using this type, you must follow the
${example_value}format.
-
j – Value Type
Select from the dropdown menu whether the data will be a manual (static) entry or dynamically retrieved from the system. -
k – Add Parameter
If you need to transmit multiple pieces of data through the same URL, use this button to add additional query parameters to your list. -
l – Status
Allows you to deactivate the app without deleting it, and reactivate it when needed.