
The Netgsm integration enables you to connect your company’s communication infrastructure on to the system, allowing you to manage and automate your customer communication processes from a single centralized platform. To successfully complete this integration, you must retrieve the integration details from the Netgsm panel and enter them into the relevant sections within the Supsis AI panel.
Netgsm Operations
To create the API and PBX (santral) connection details required for the integration, log in to your Netgsm user panel via https://www.netgsm.com.tr/ and follow the steps below.
Note: These actions must be performed by an admin user with full API permissions.
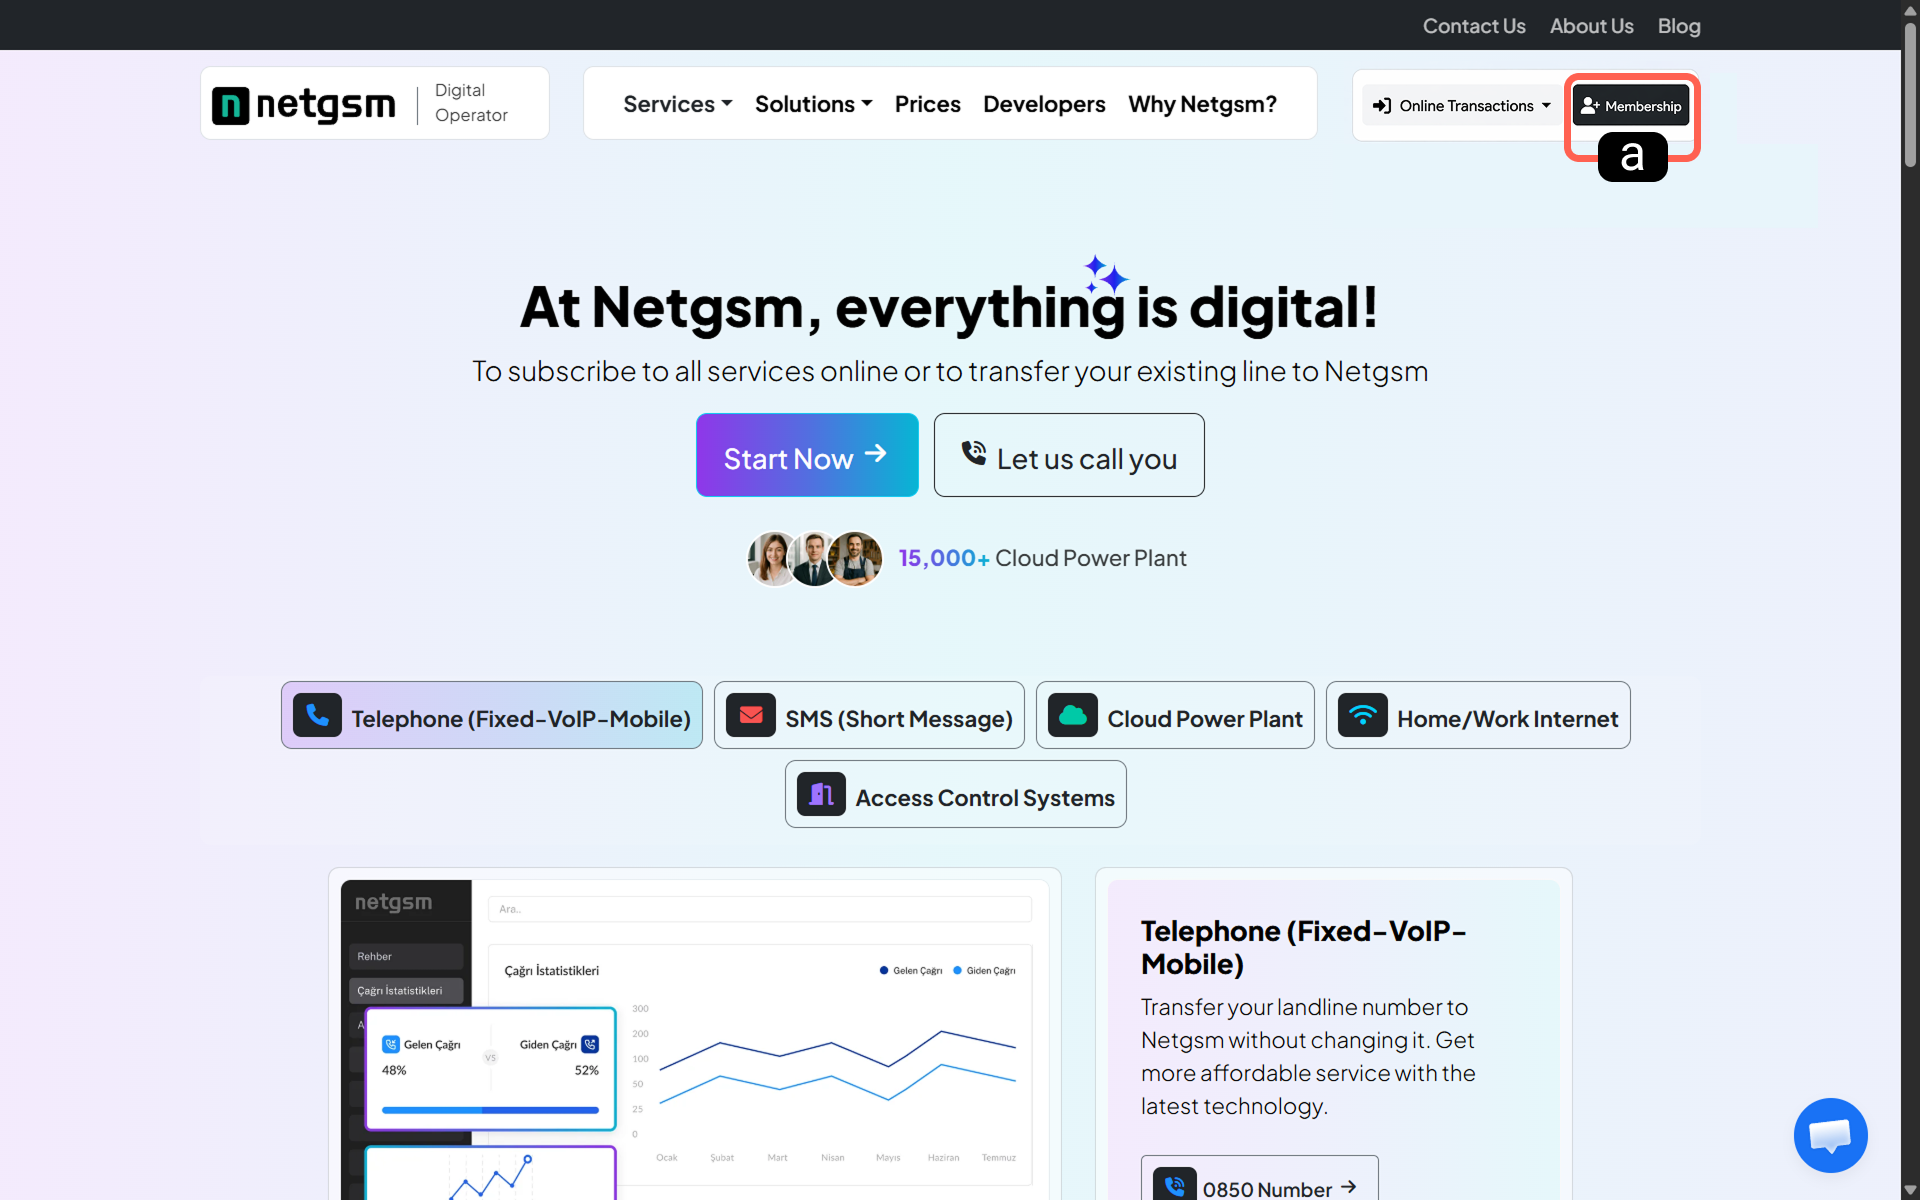
a. Login
Log in to the Netgsm panel using your user credentials via your browser.
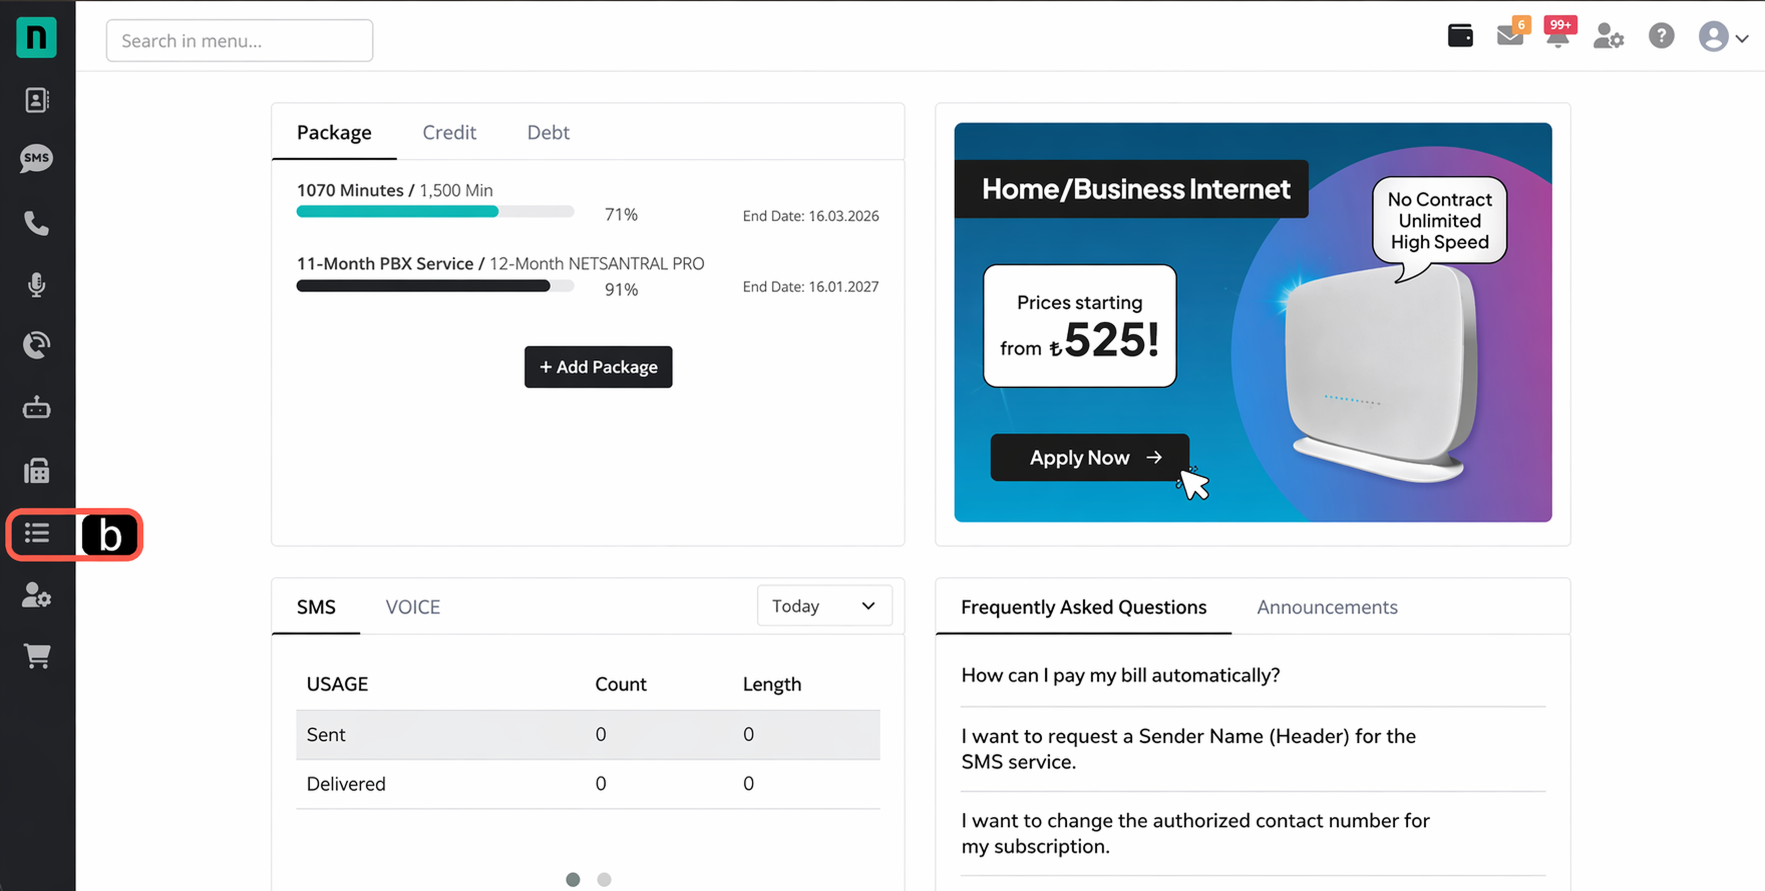
b. Settings
Click on the relevant tab in the left-hand menu.
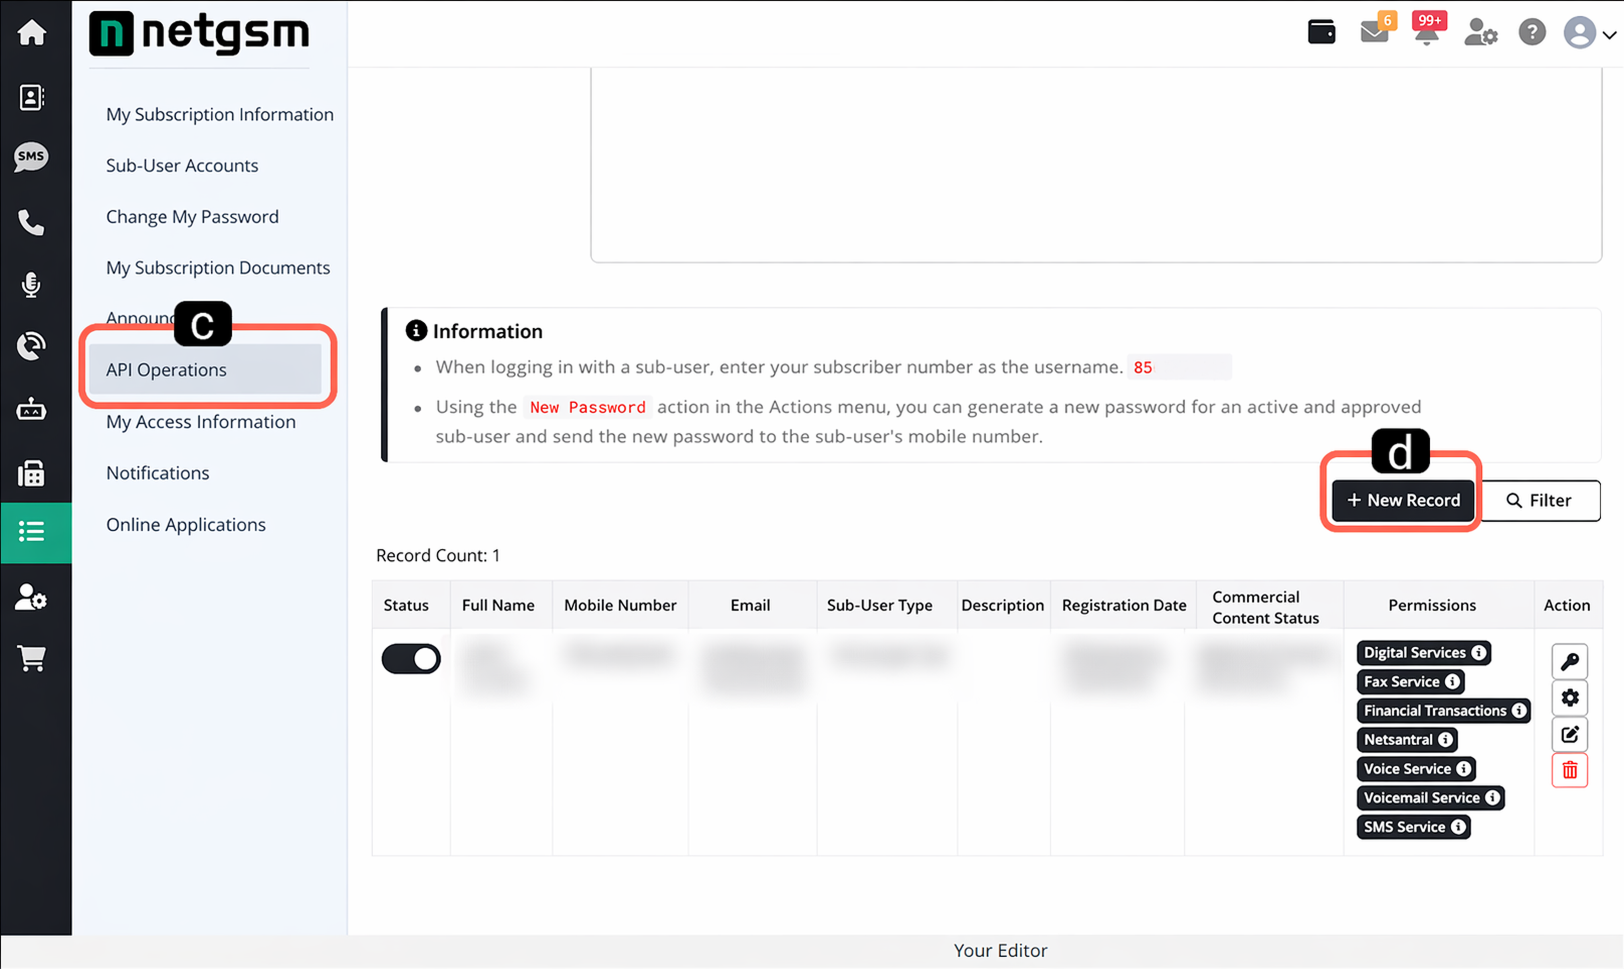
c. API Operations
Navigate to the "API Operations" section under the Settings menu, where you can manage API connections.
d. New API Record
Click the "New API Record" button to create a new connection that allows the Supsis AI system to access your Netgsm infrastructure.
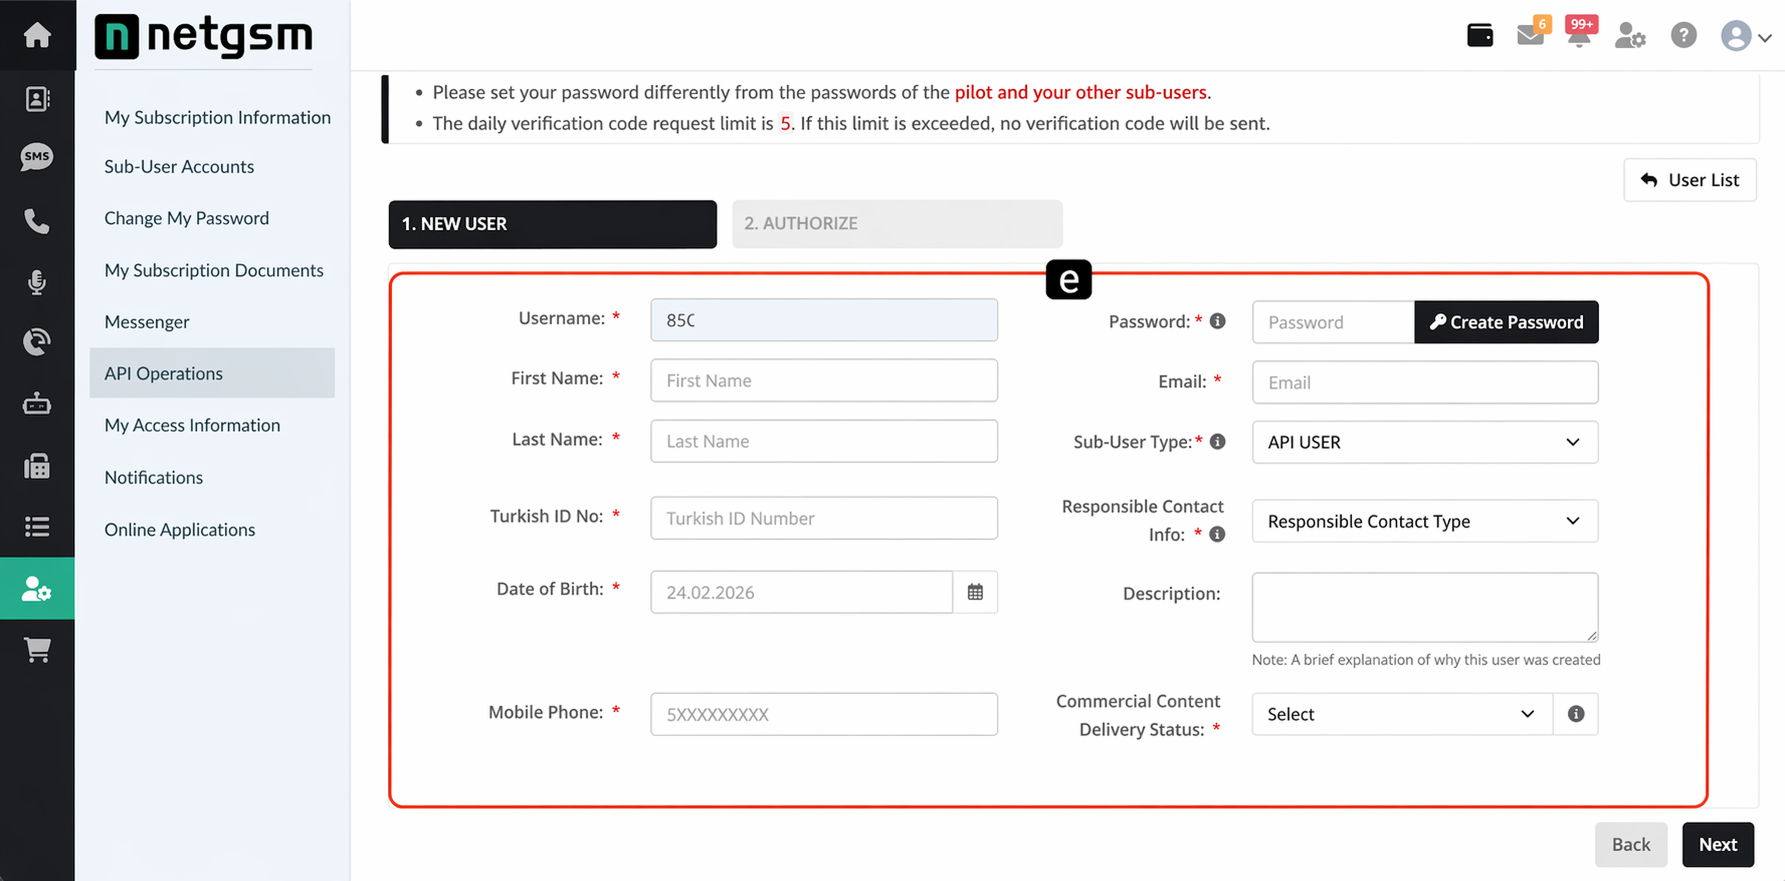
e. New API User
Create a new API user for the integration and assign a password.
Important Note: The password you create here will be used as the "API Password" during the Supsis panel setup stage. Make sure to copy and store this password securely.
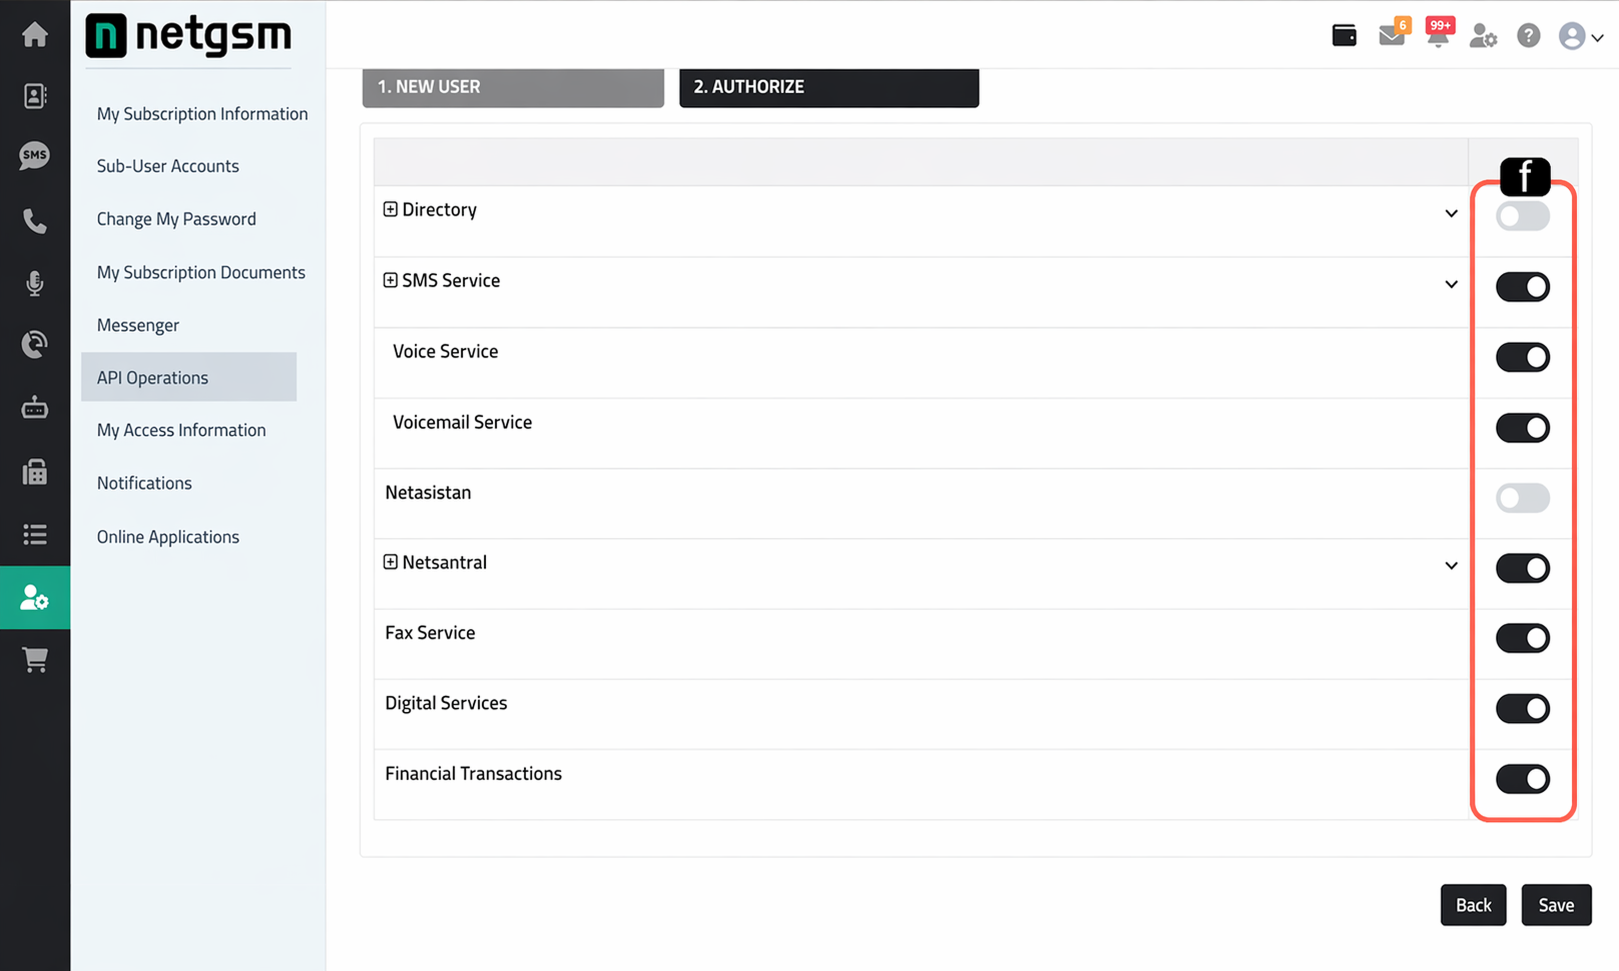
f. API User Permissions
Assign the necessary permissions to the API user, such as read/write access and call initiation capabilities required by Supsis AI.
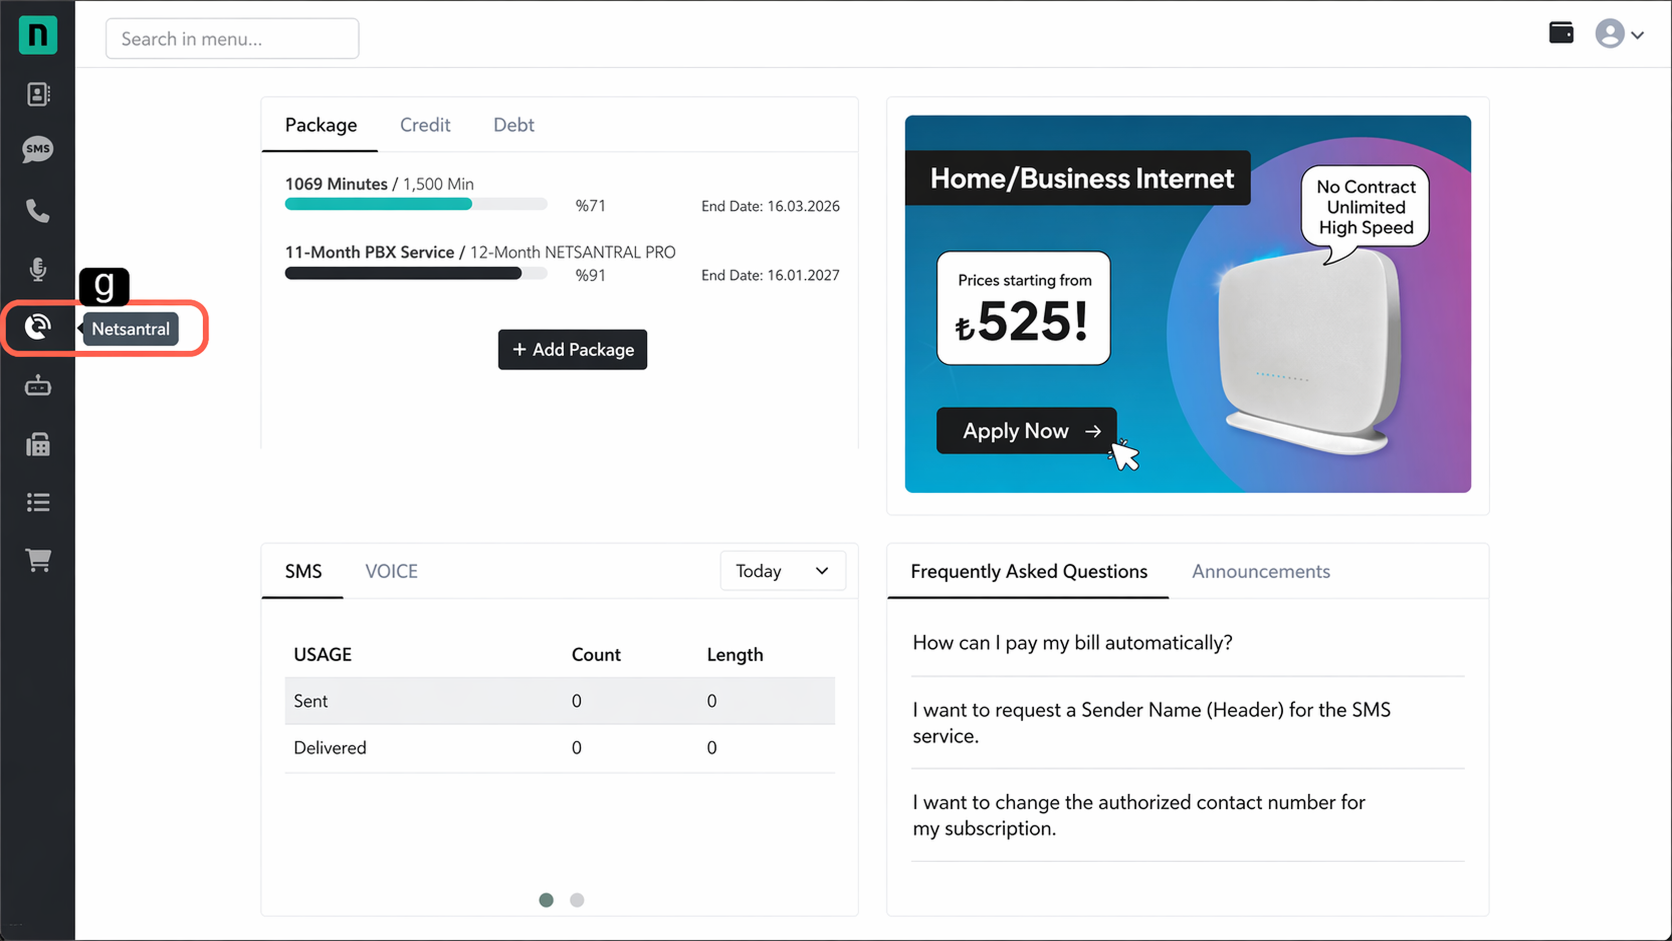
g. Netsantral
Ensure that the API user has the required permissions for operations such as reading, writing, and initiating calls within the Netsantral system.
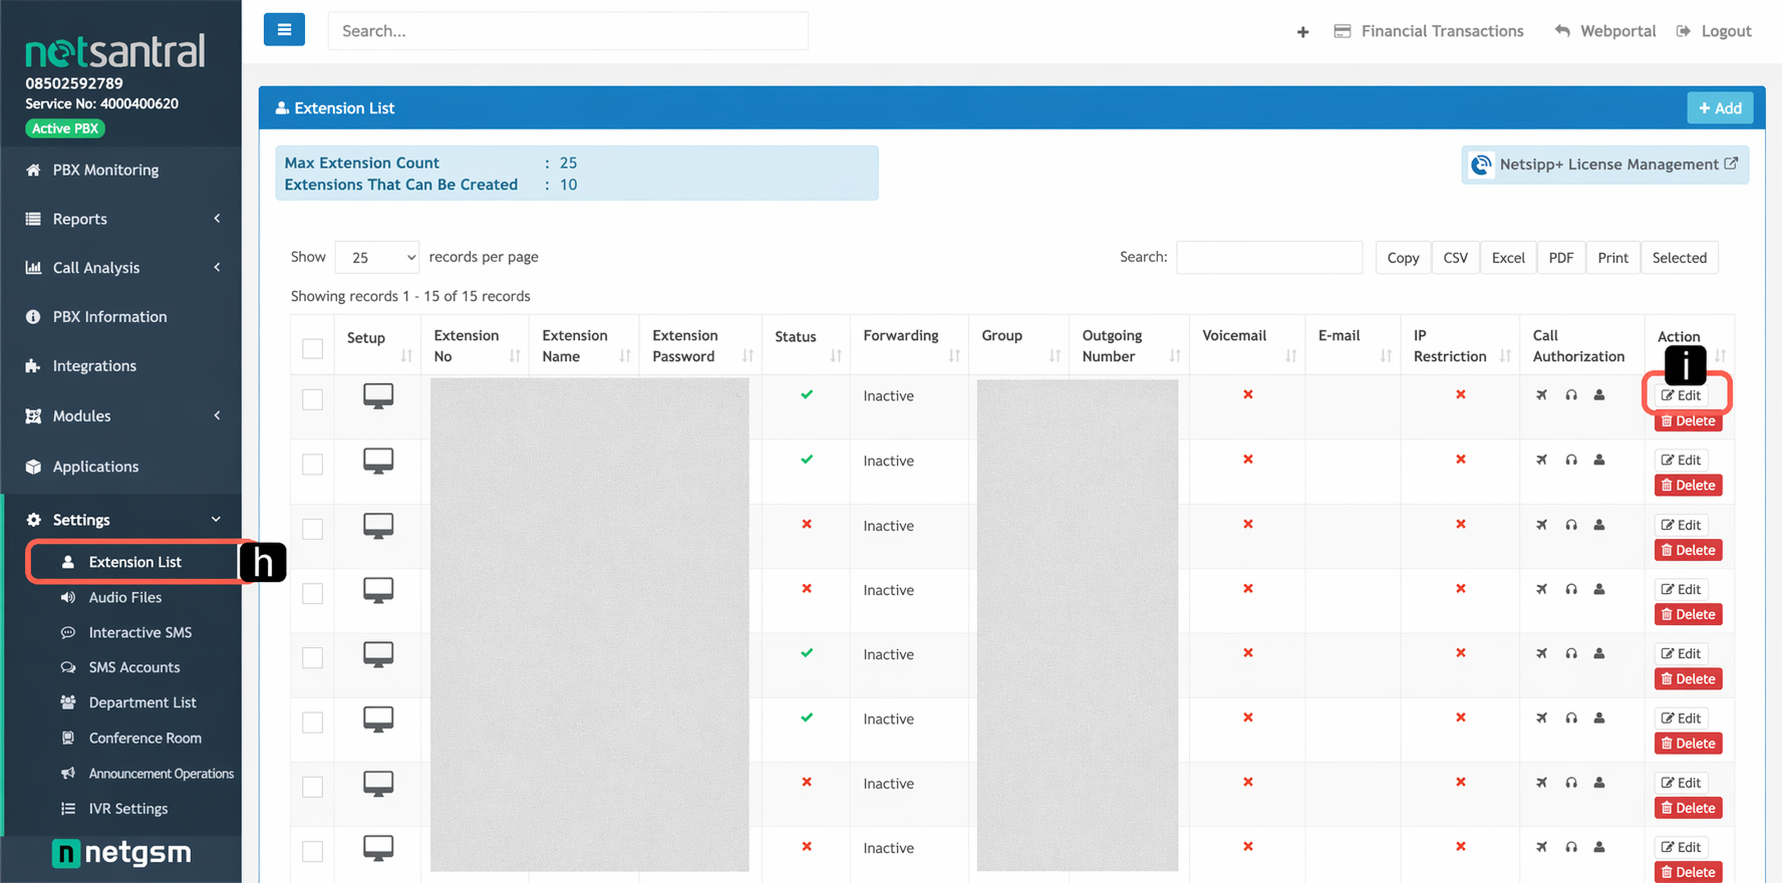
h. Extension List
Click on the "Extension List" tab to view the numbers or internal lines connected to your PBX system.
i. Edit
Click the "Edit" button next to the extension number you want to connect to Supsis AI.
Note: If you do not have an existing extension, you can create a new one using the add button located at the top right.
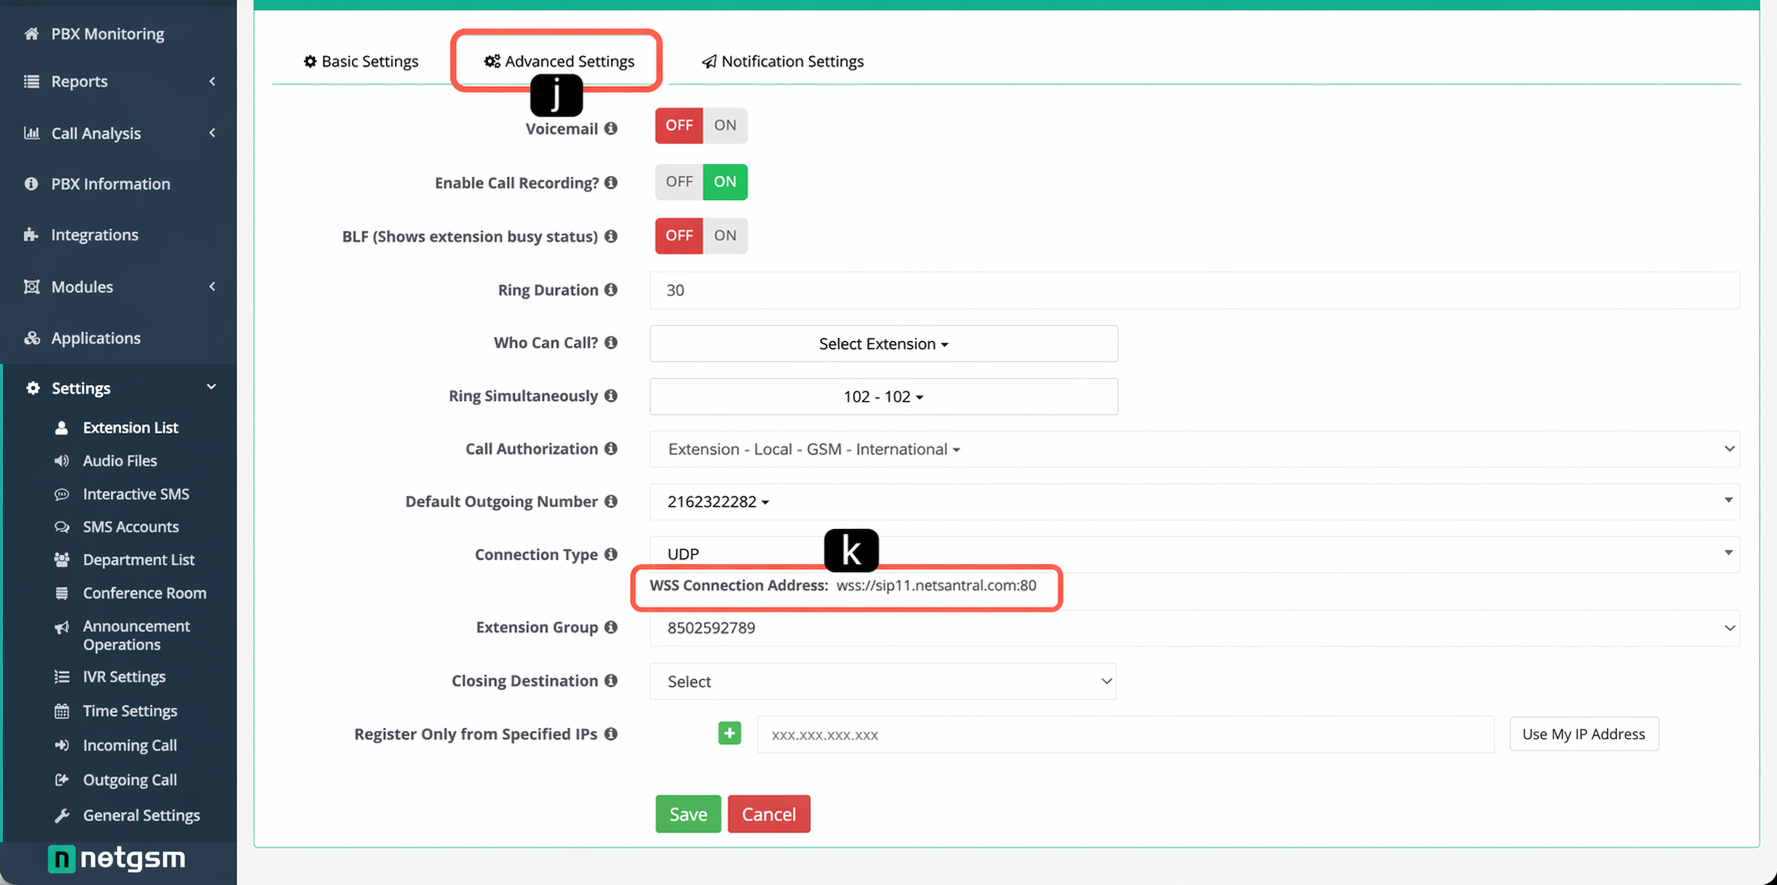
j. Advanced Settings
Open the "Advanced Settings" tab within the extension details.
k. WSS Connection Address
Copy the WSS Connection Address provided by the system to enable secure voice communication via WebSockets. This information will be used during the Supsis setup stage.
Note: For the integration to work successfully, the connection type of the extension must be set to WSS.
Supsis AI Operations
After obtaining the API Password and WSS Connection Address from the Netgsm panel, return to your Supsis AI panel and follow these steps to complete the integration:
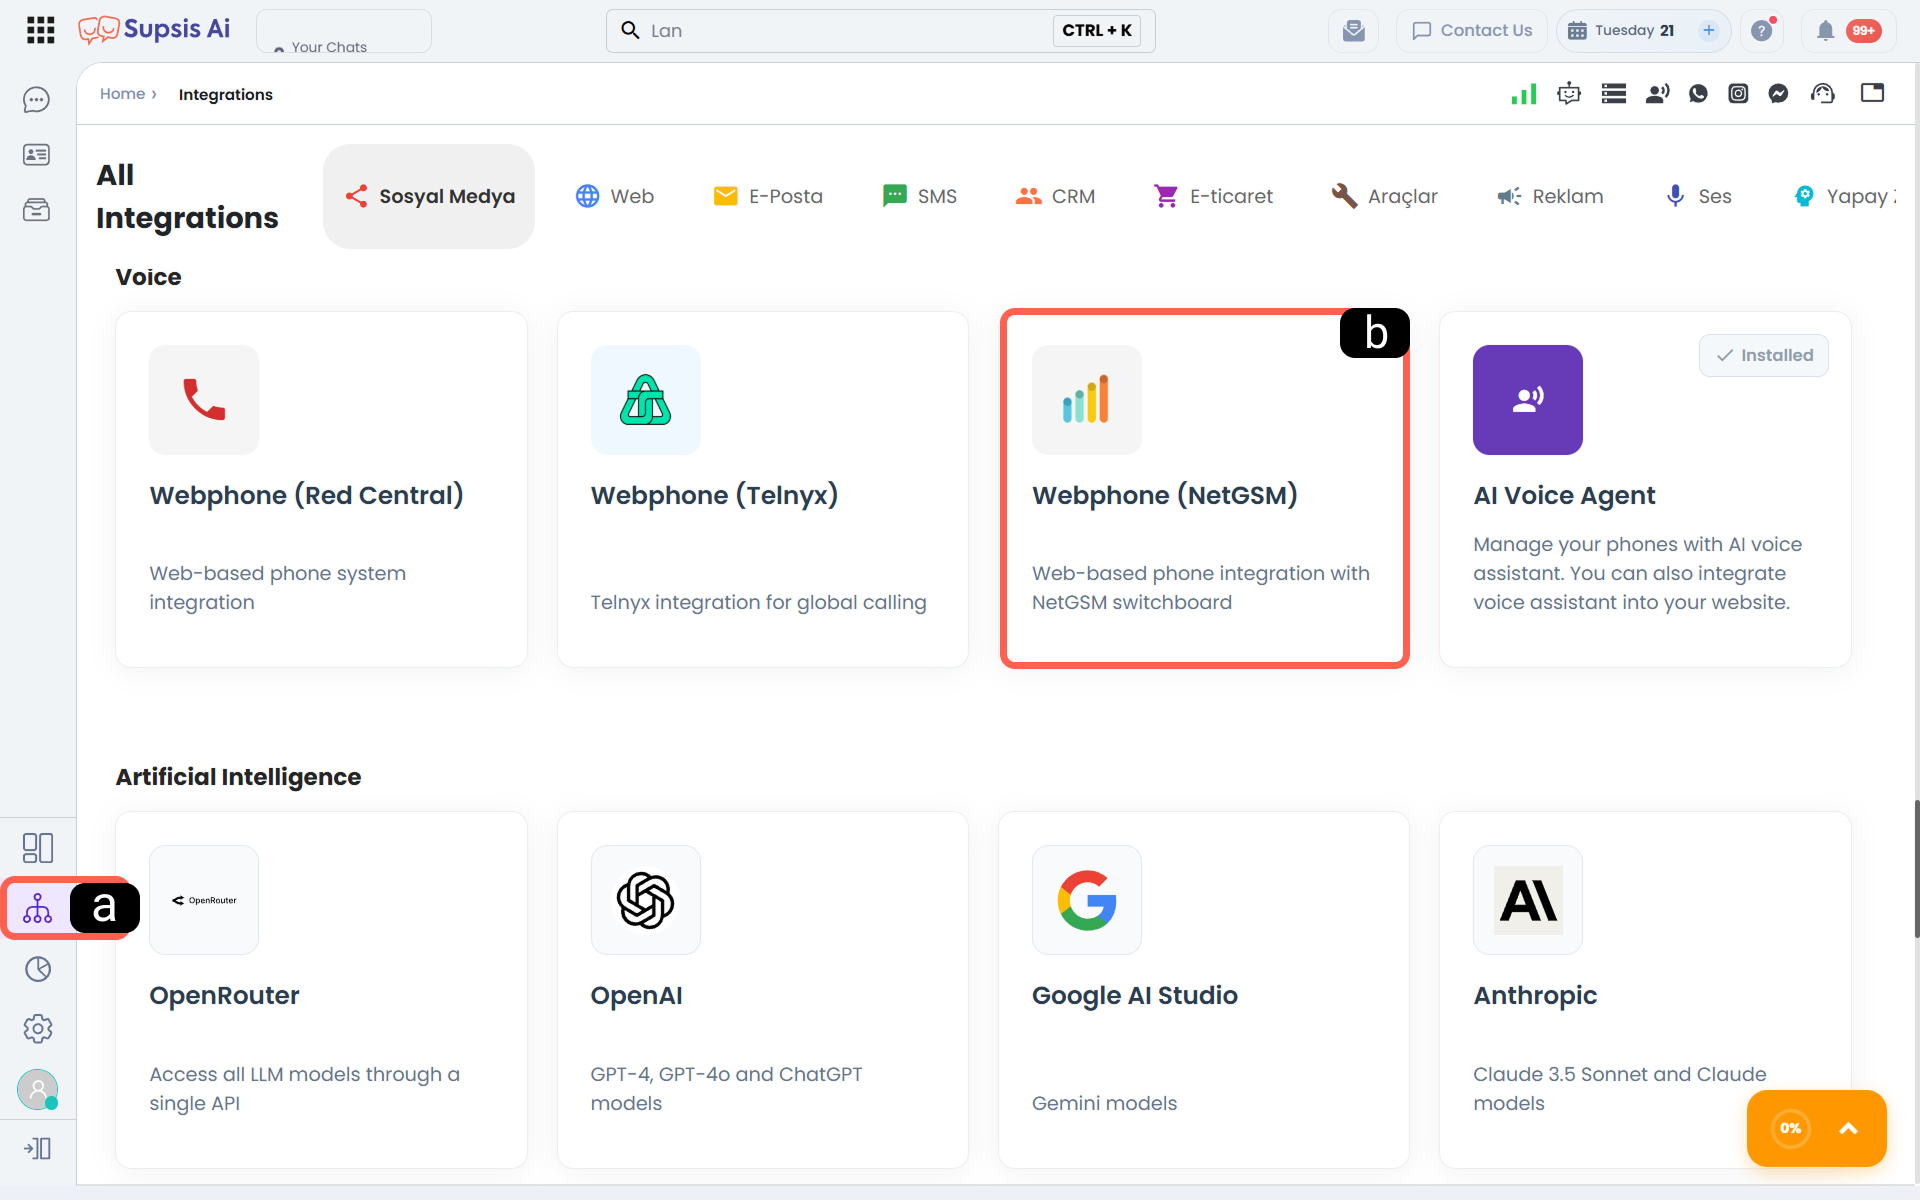
a. Integrations
Go to the "Integrations" section from the left-hand menu in your Supsis AI panel.
b. NetGSM
Find the "NetGSM" module among the listed applications and services and open its integration settings.
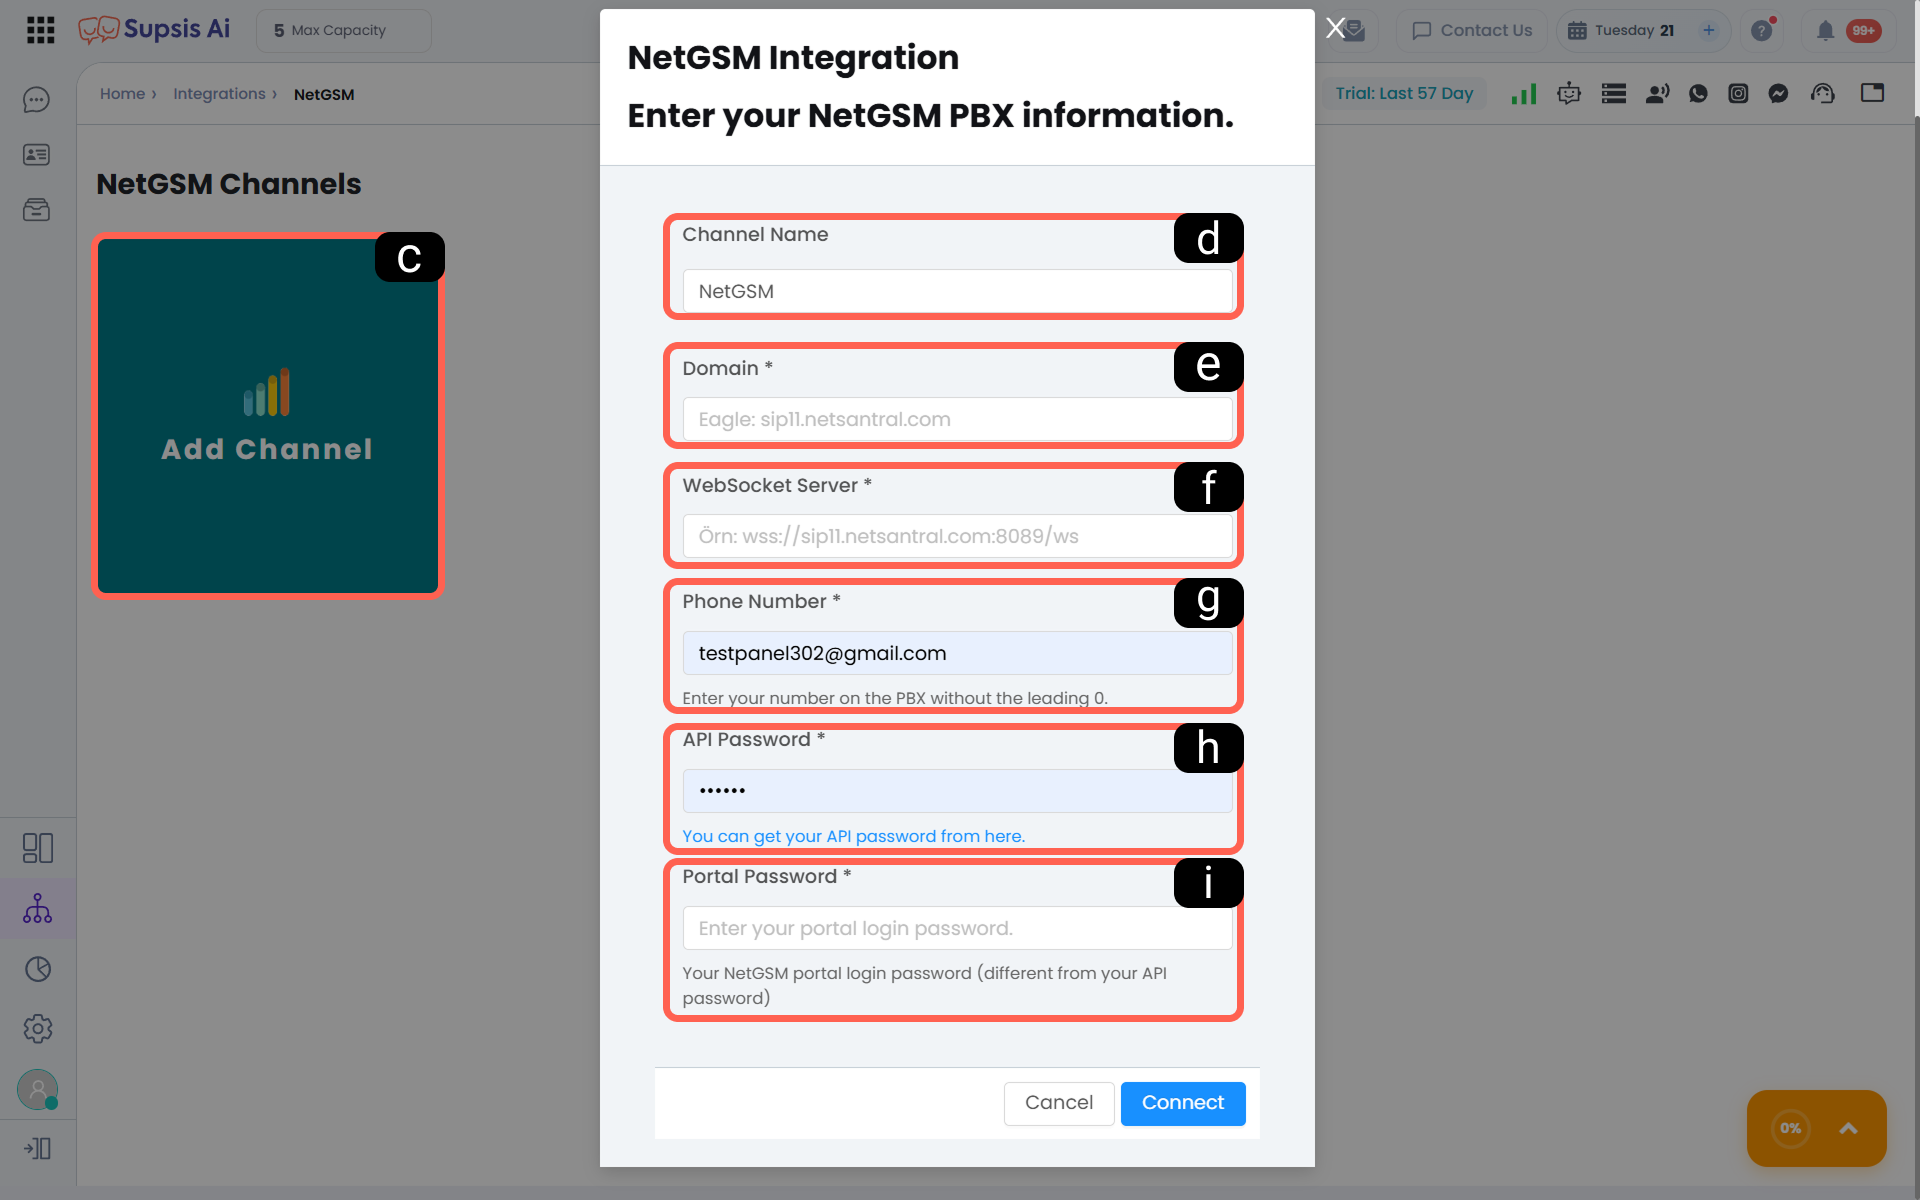
c. Add Channel
Click the "Add Channel" button to define a new PBX connection.
d. Channel Name
Enter a descriptive name for this connection within the Supsis AI system (e.g., "Netgsm 0850").
e. Domain
Enter the domain information from your WSS address.
For example, if your WSS address is wss://sip11.netsantral.com:8811/ws, the domain is sip11.netsantral.com.
f. WSS Address
Paste the WSS Connection Address you copied from the advanced settings section in the Netgsm panel into this field.
g. Phone Number
Enter the full phone number defined on the Netgsm side that will be used for the integration.
h. API Password
Enter the password you created while setting up the new API user in the Netgsm panel.
i. Portal Password
Enter your main portal password used to log in to the Netgsm panel.