
The Slack integration allows you to route specific events occurring in your :contentReference[oaicite:0]{index=0} panel directly to your company’s :contentReference[oaicite:1]{index=1} channels. To set up this integration, you must first create an application (App) on the Slack side, and then add the generated connection address (Webhook URL) to the Supsis AI panel.
Slack Operations
To start the integration process, first go to api.slack.com/apps via your browser.
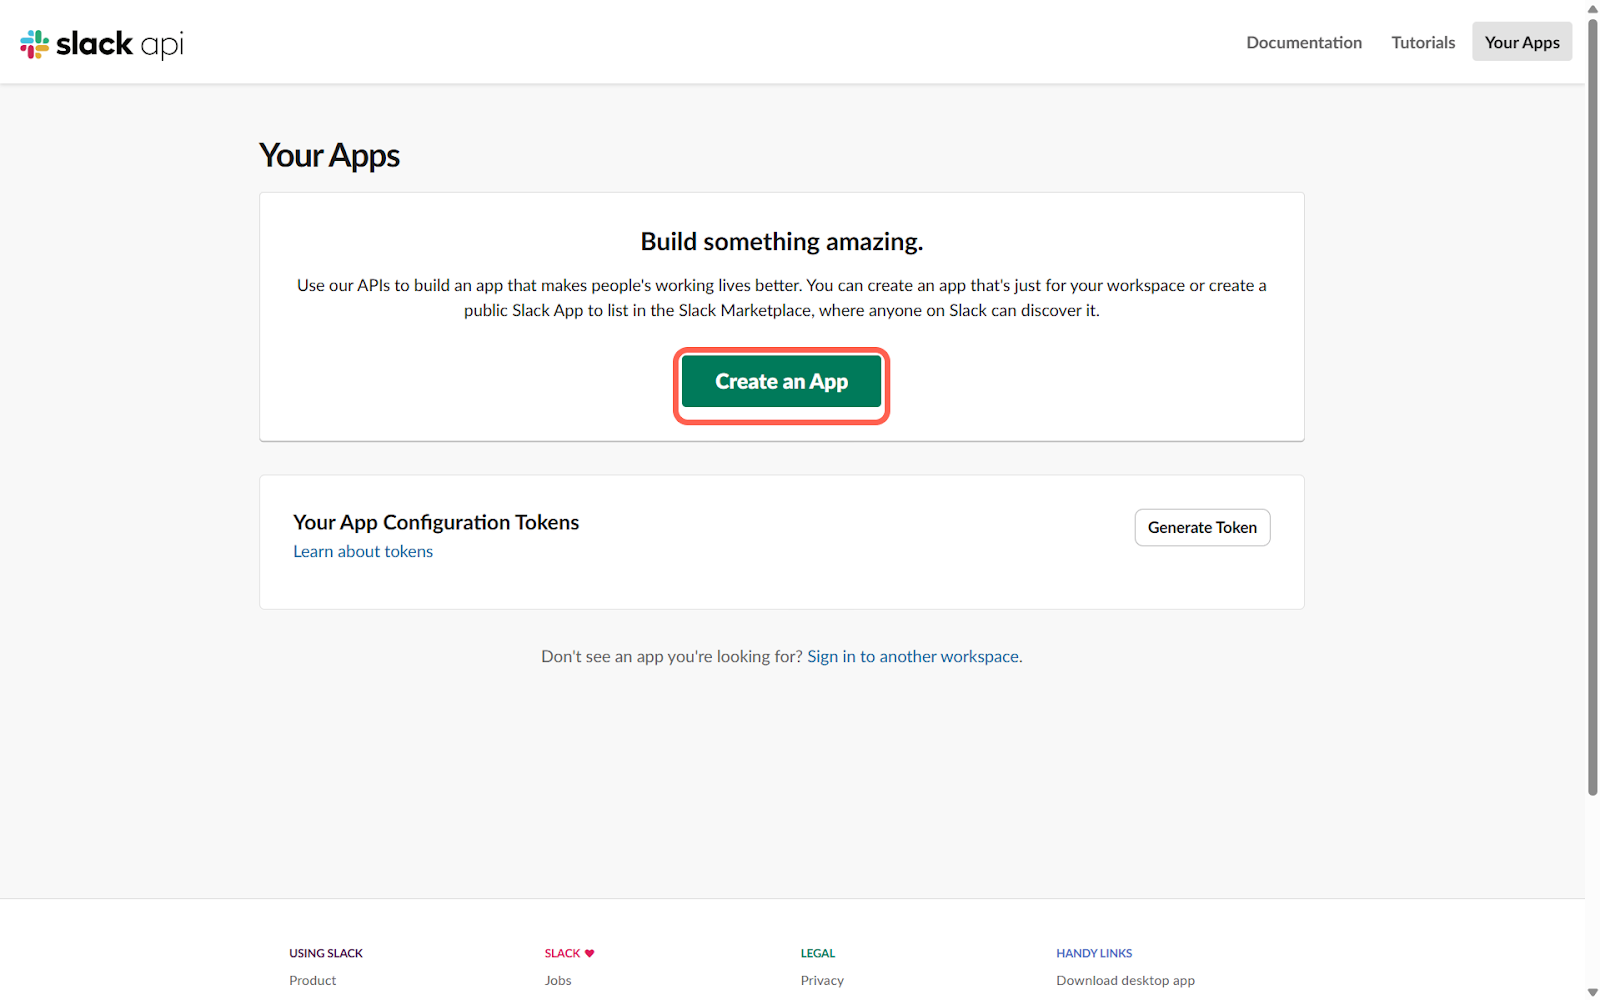
Log in to your Slack account and click the "Create an App" (Create Application) button on the page. You will be presented with two different methods to create the application.
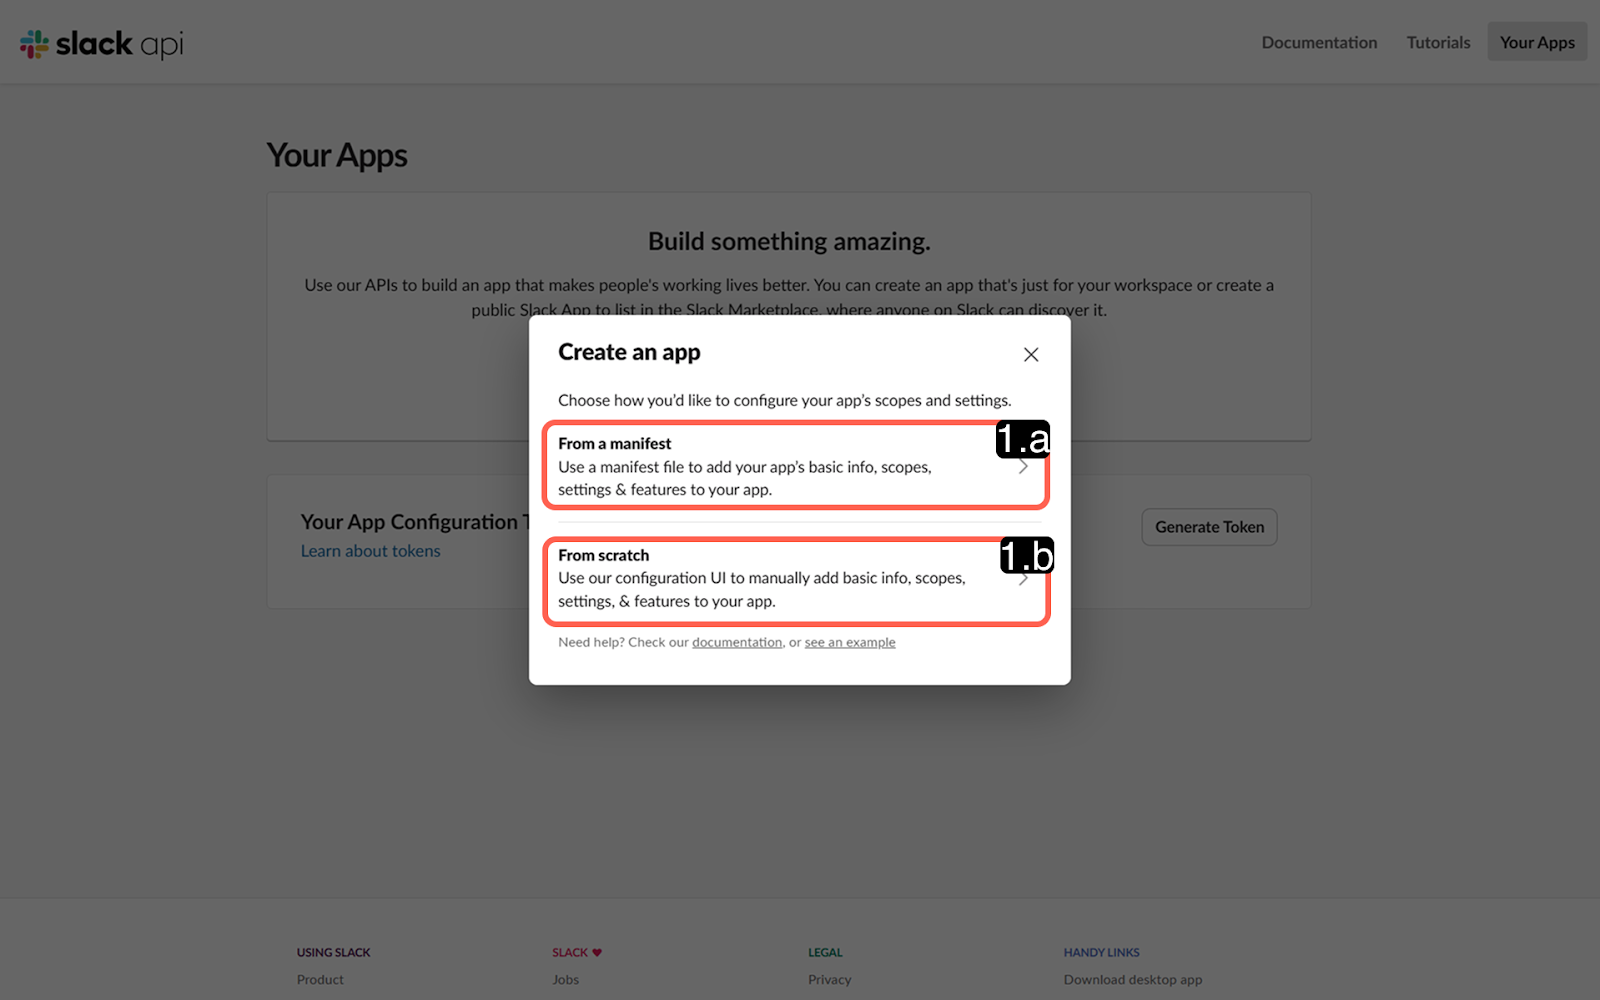
1.a – From a Manifest (Create from Manifest File): This option allows you to quickly configure your application using a pre-prepared JSON/YAML manifest code.
1.b – From Scratch (Create Application from Scratch): This option allows you to create your application by manually defining the basic settings without using any code template.
1.a – Steps to Create an Application from a Manifest File
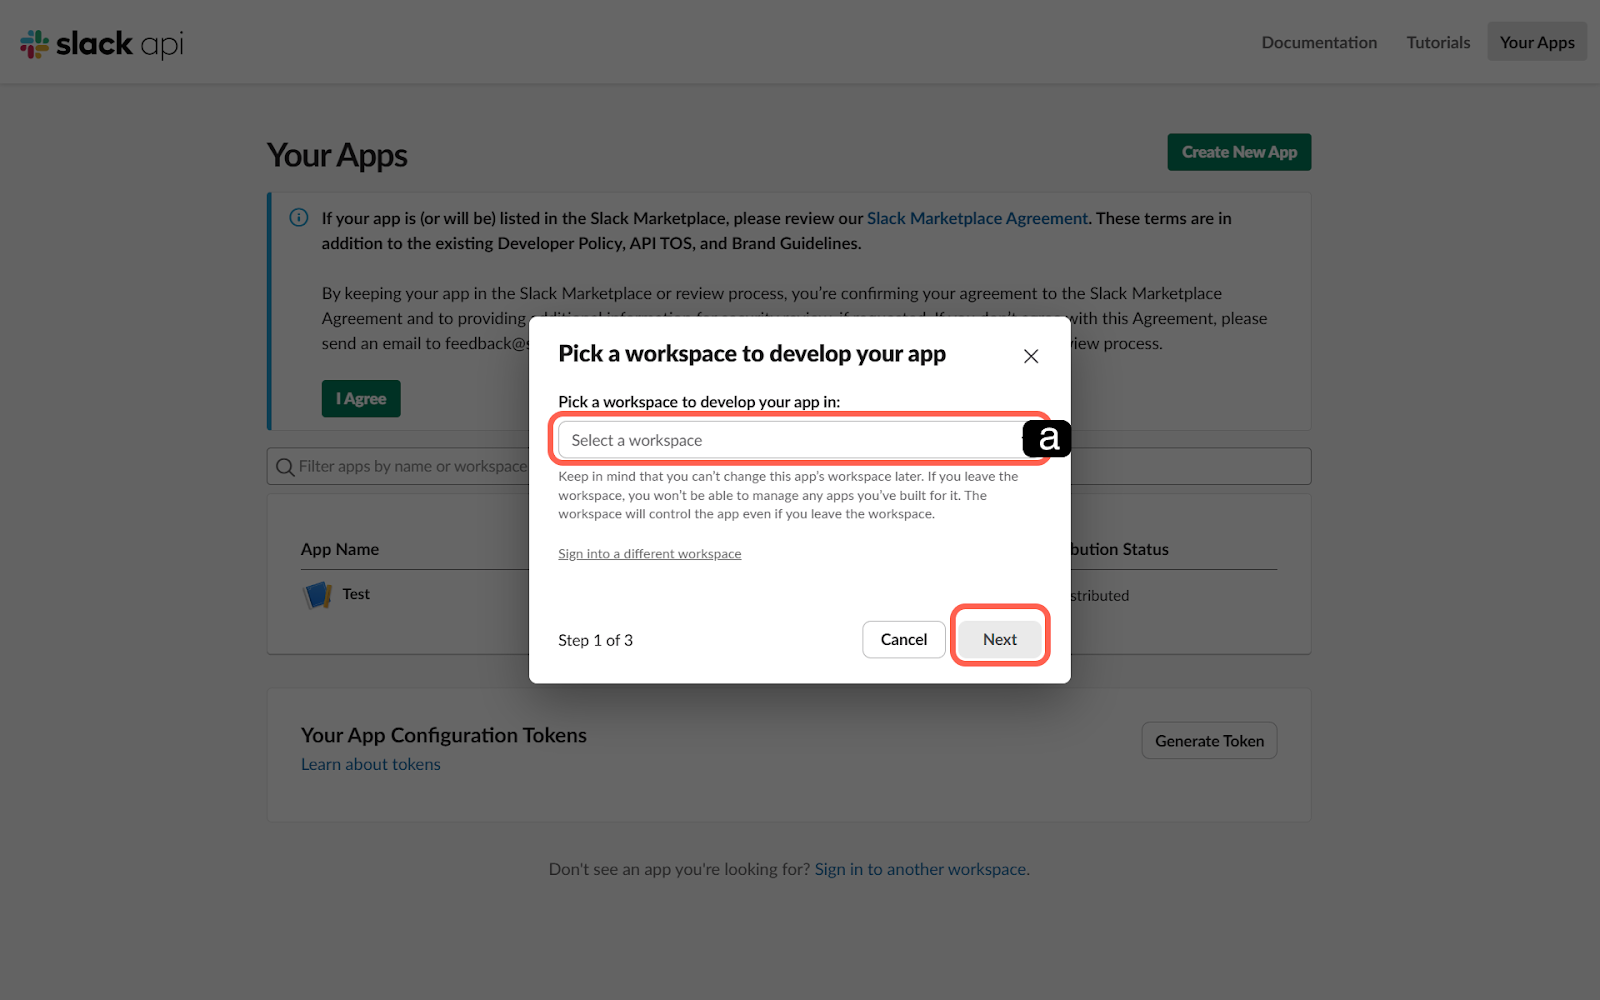
a. Workspace Selection
This is the menu where you determine which Slack workspace the application will be installed in.
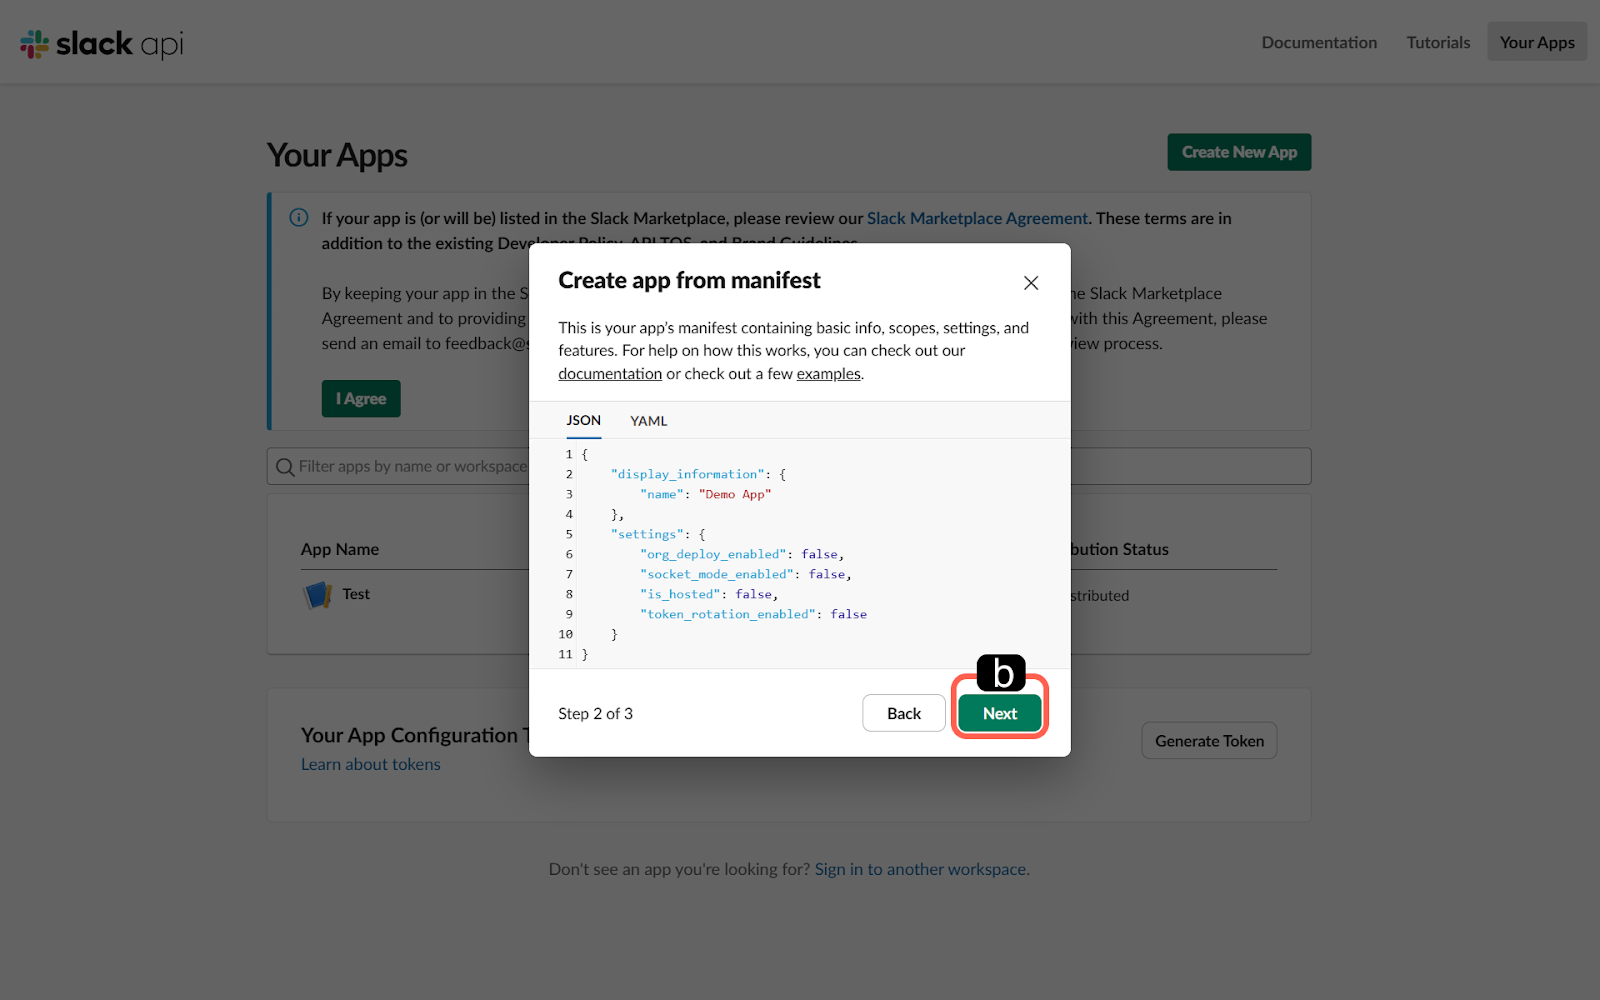
b. Next
Check the preview of the manifest code at the top and click the Next button to continue.![][image5]c. Create
You can create the new app using the Create button.
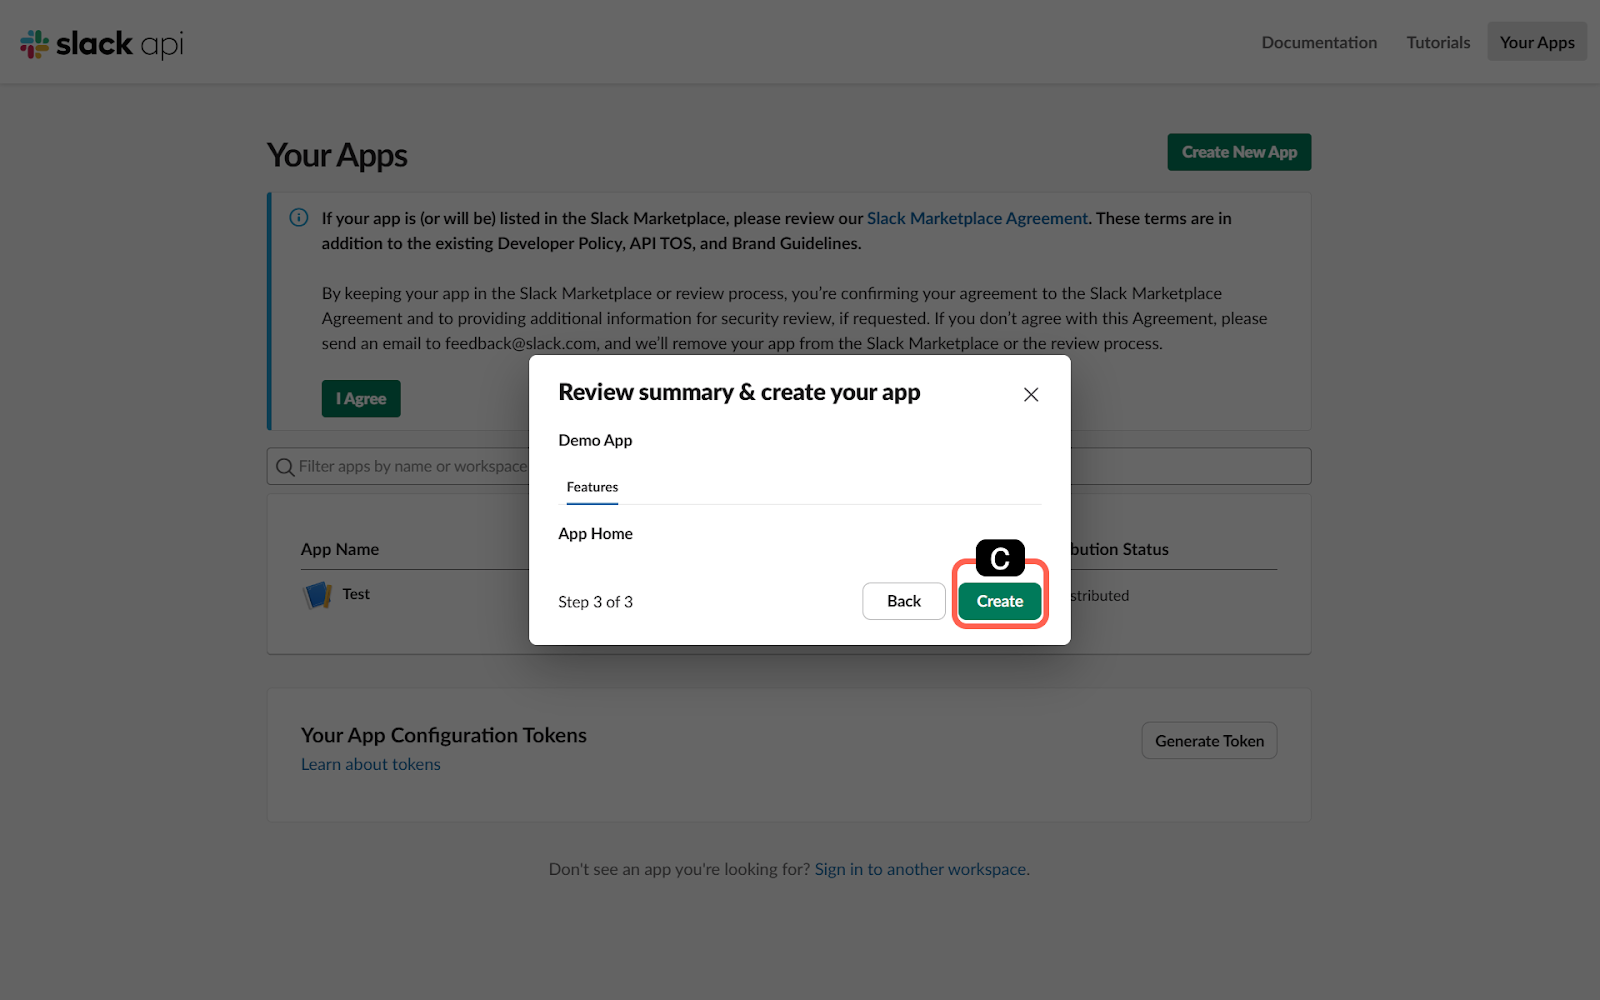
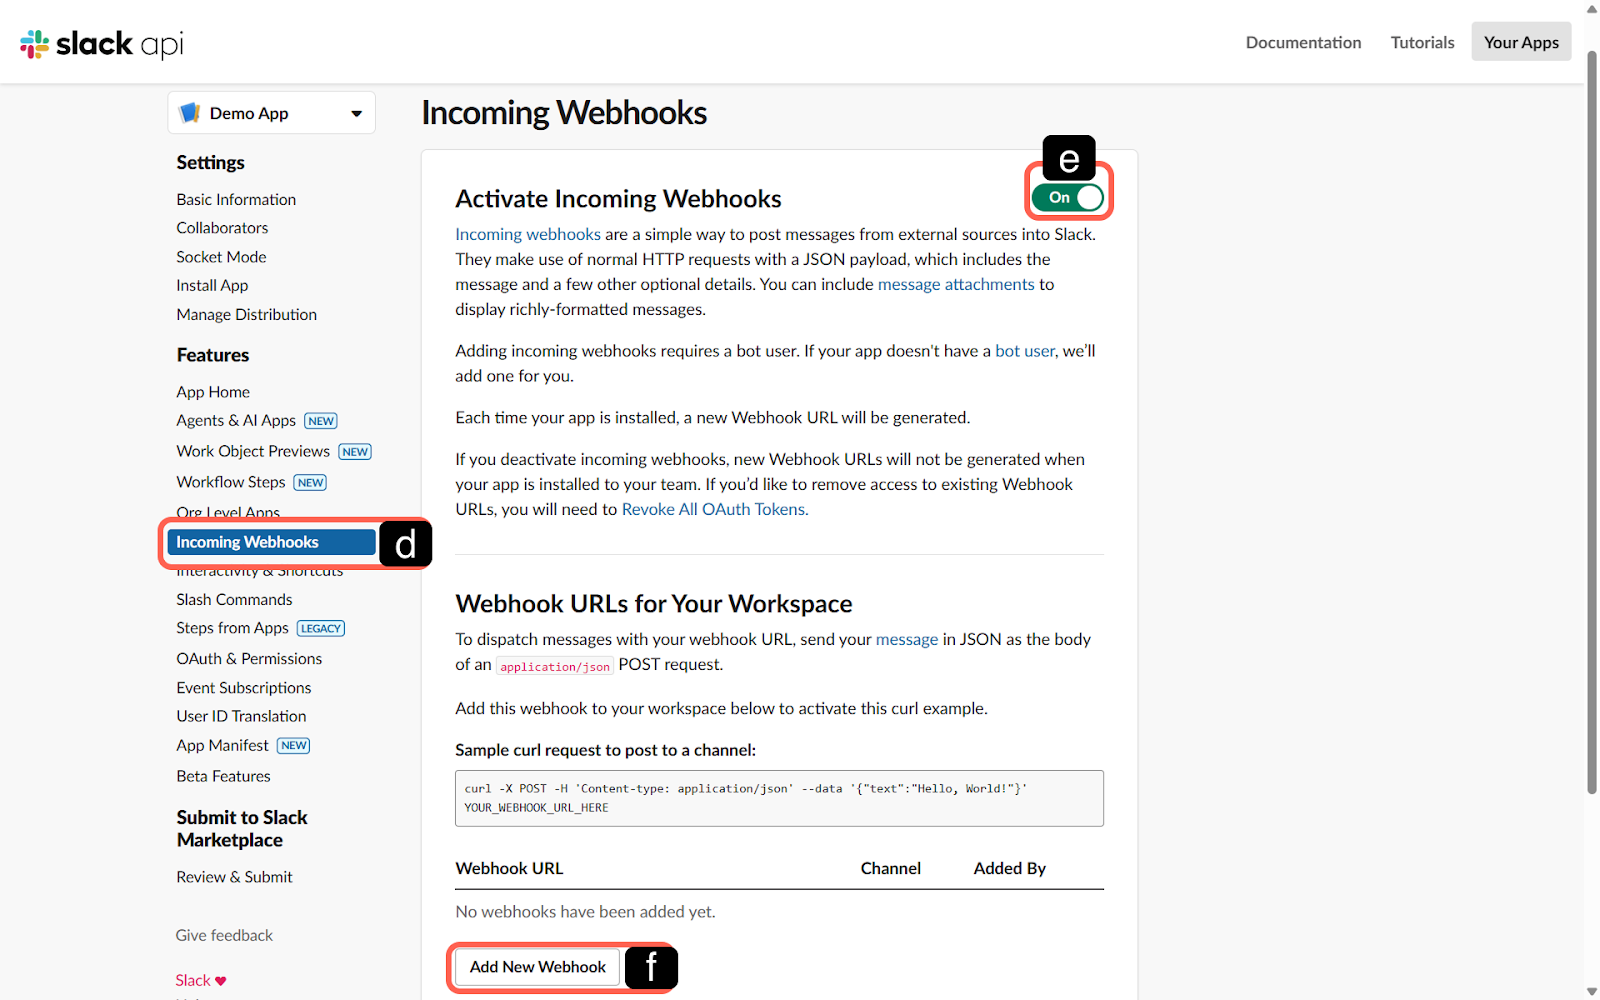
d. Incoming Webhooks
Enter the created application and go to the Webhook menu under the Features category in the application panel. This is the menu where you can configure the Webhook feature of your application.
e. Incoming Webhook Activation
To use the Supsis AI & Slack integration feature, turn the inactive activation button to active (On).
f. Add New Webhook
This is the button where you can create a new Webhook connection that will provide data flow to your Slack channel.
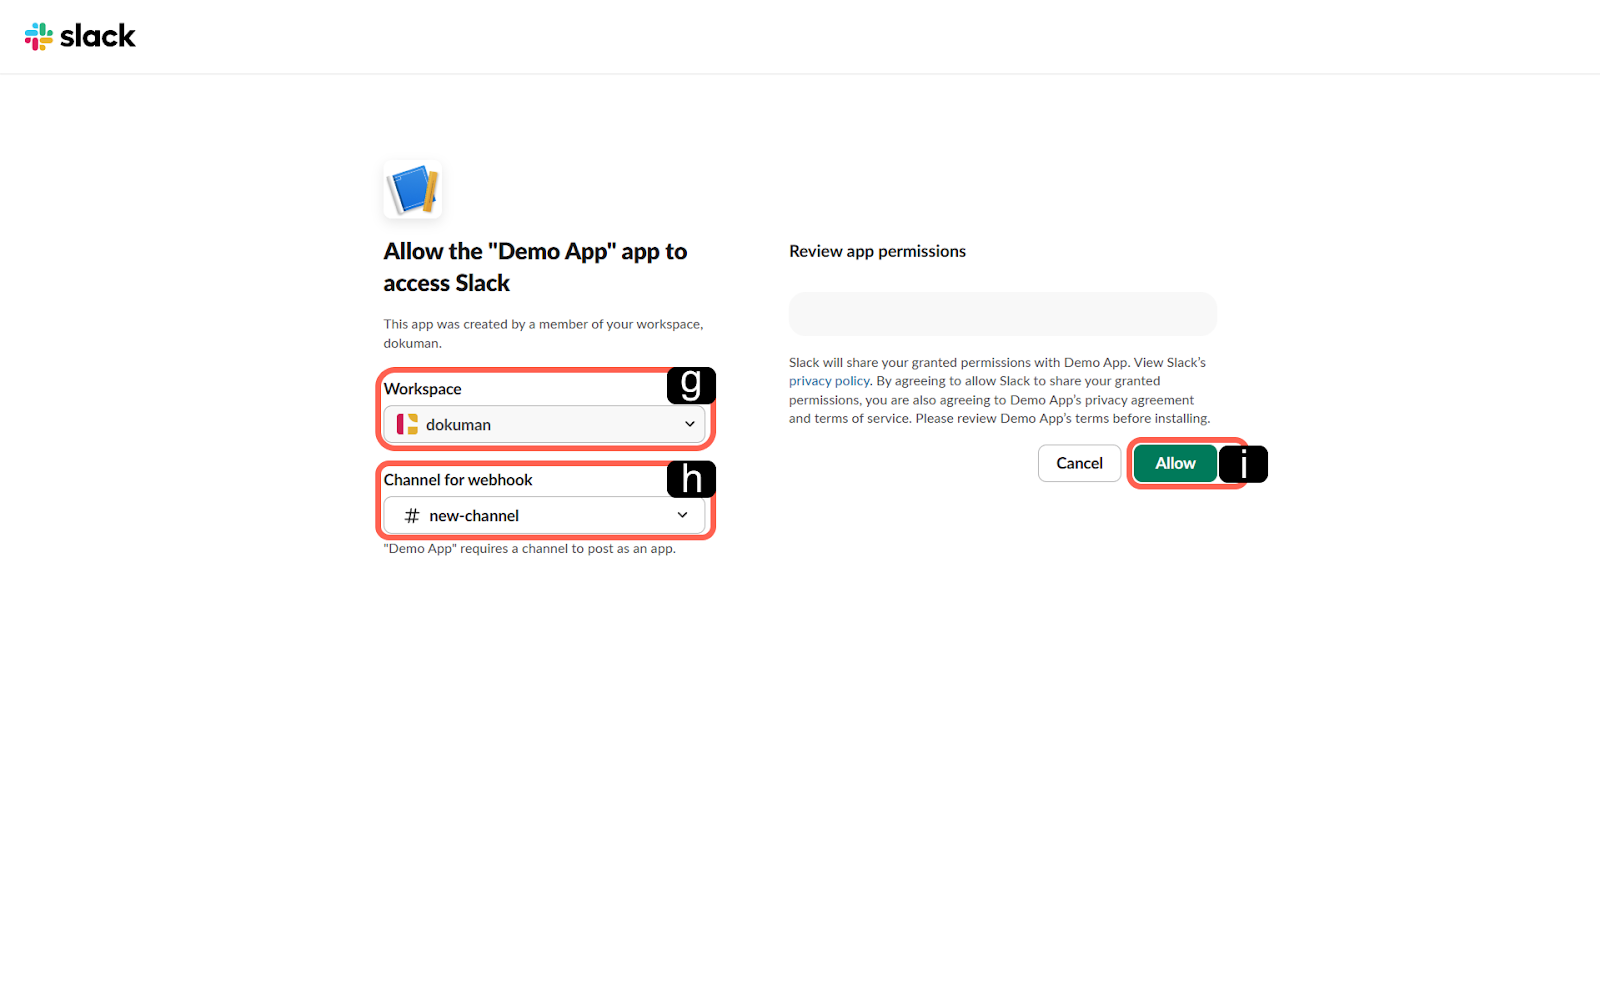
g. Workspace Selection
This is the section where you can determine the Slack workspace that the Webhook will access.
h. Channel for Webhook
This is the field where you select from the list which Slack channel the Supsis AI integration will send messages to.
Note: Integration can only be provided through channels. Integration cannot be established with DM messages.
i. Approval
This is the security step where you approve the application's permission to send messages to the channel. After making the appropriate selections, use the approve button.
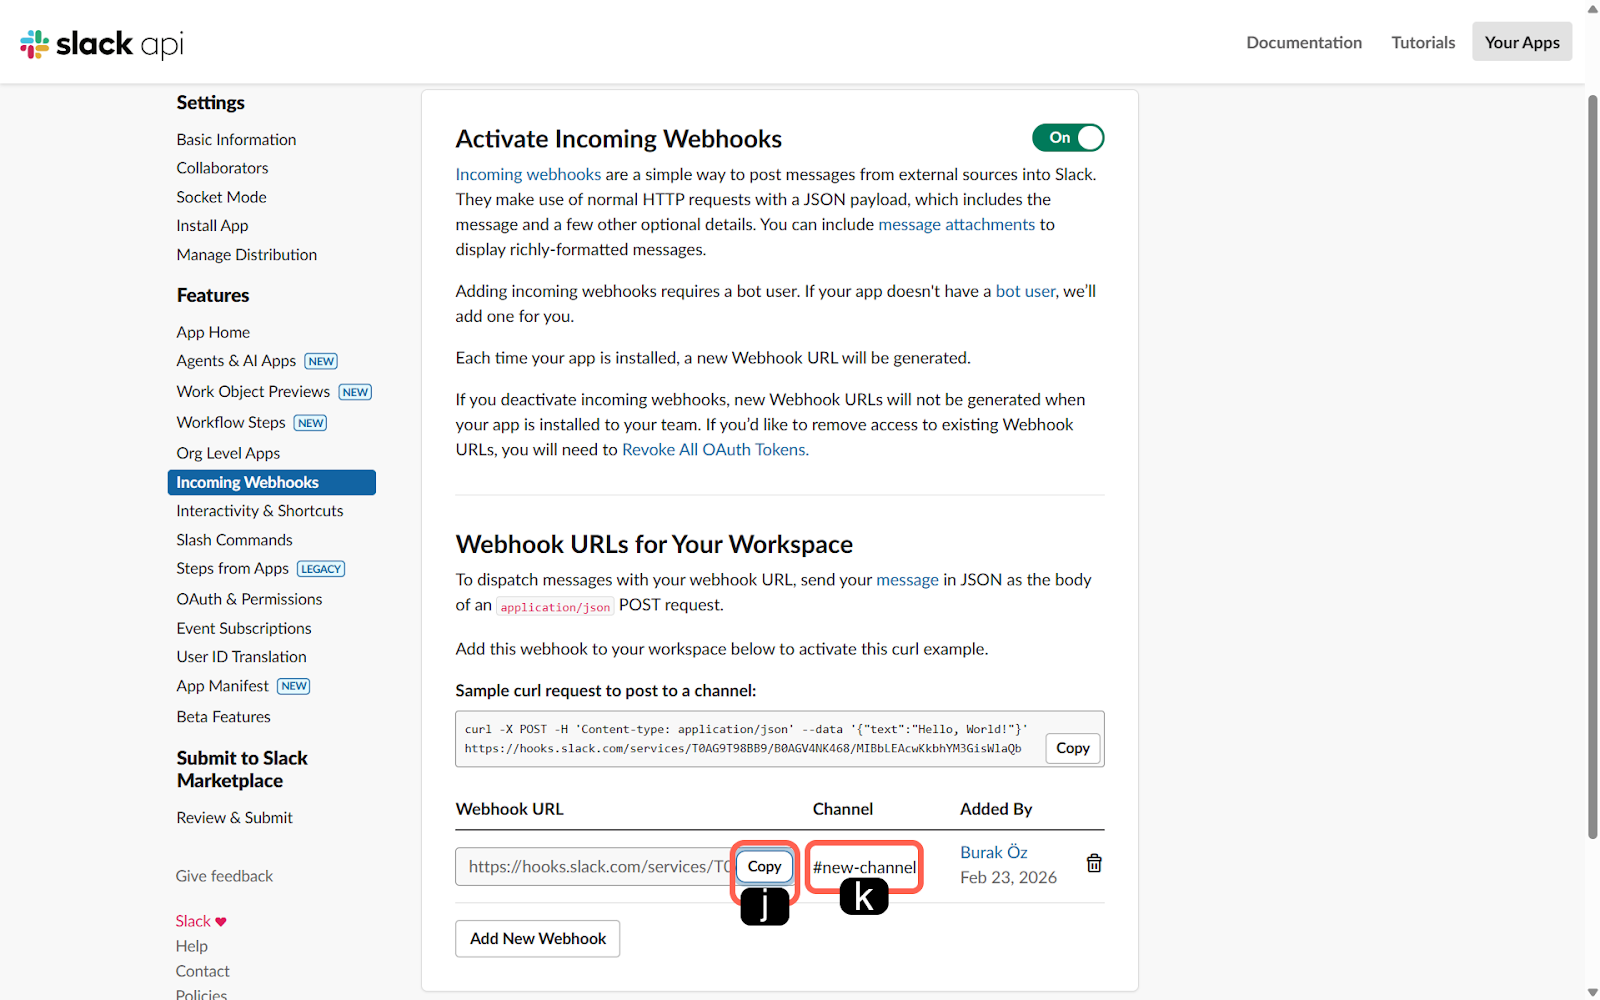
j. Webhook URL
This is the connection address of the Webhook URL generated by the system. To define the integration in the Supsis AI panel, copy this address using the relevant button.
k. Channel
This is the information field showing that the Webhook is successfully connected to the target channel.
1.b – Steps to Create an Application from Scratch
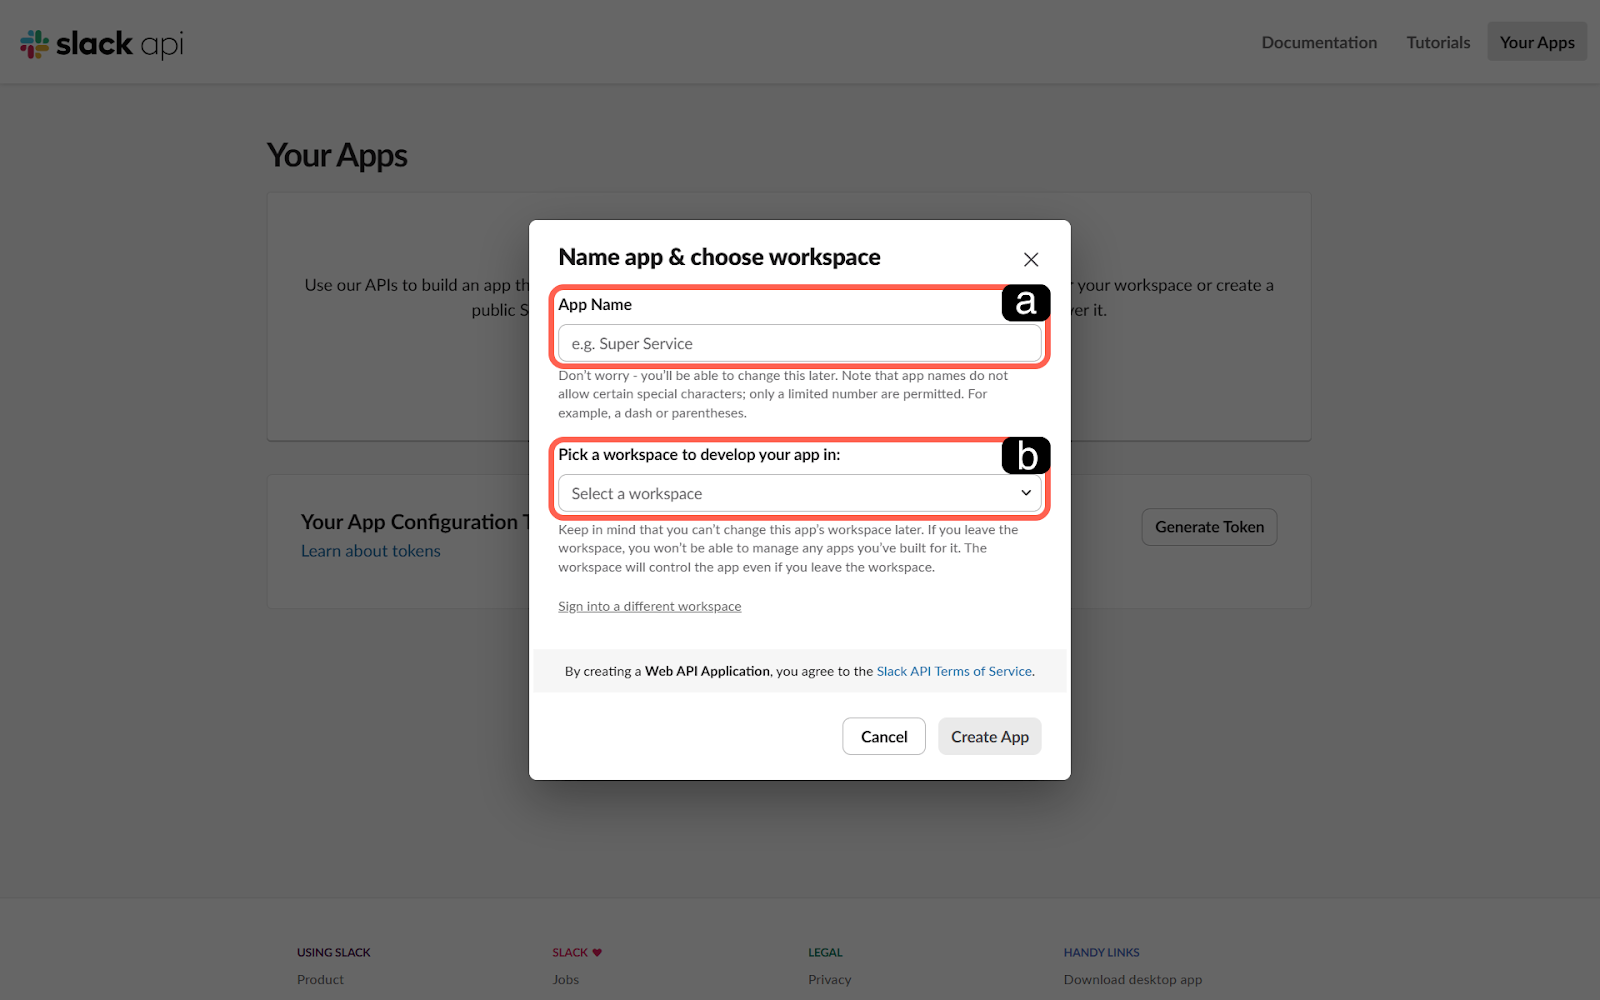
a. Application Name
This is the descriptive name you will assign to your integration. (e.g., "Supsis AI Notification Bot")
b. Workspace Selection
This is the menu where you determine which Slack workspace the application will be installed in.
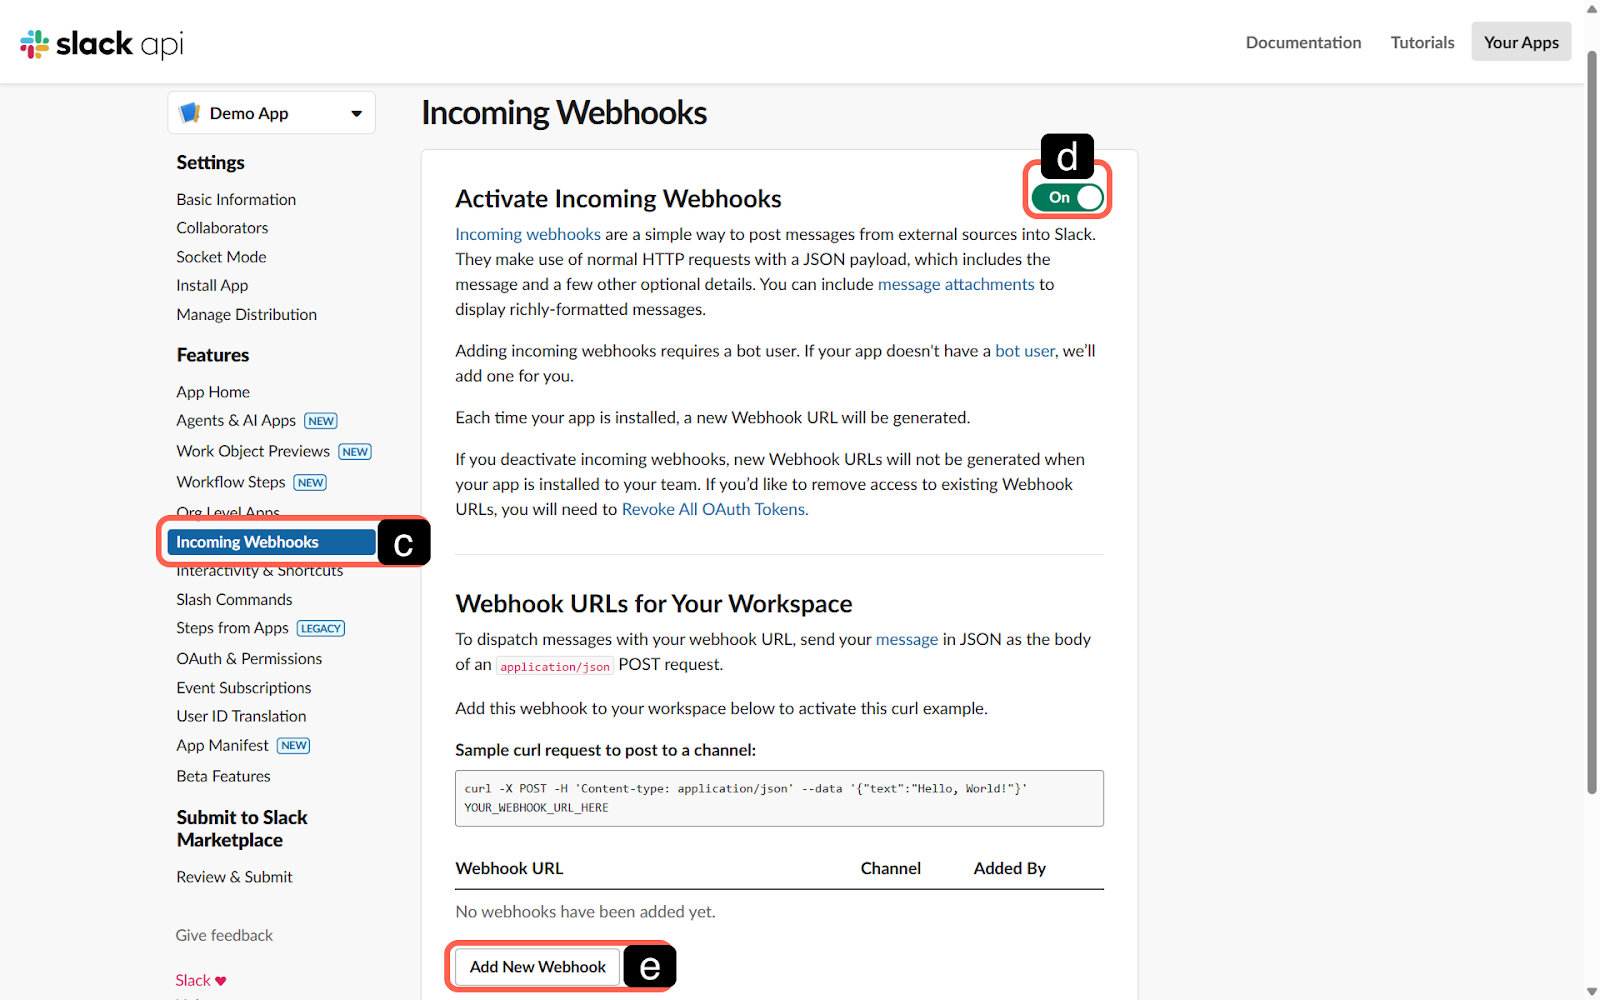
c. Incoming Webhooks
Enter the created application and go to the Webhook menu under the Features category in the application panel. This is the menu where you can configure the Webhook feature of your application.
d. Incoming Webhook Activation
To use the Supsis AI & Slack integration feature, turn the inactive activation button to active (On).
e. Add New Webhook
This is the button where you can create a new Webhook connection that will provide data flow to your Slack channel.
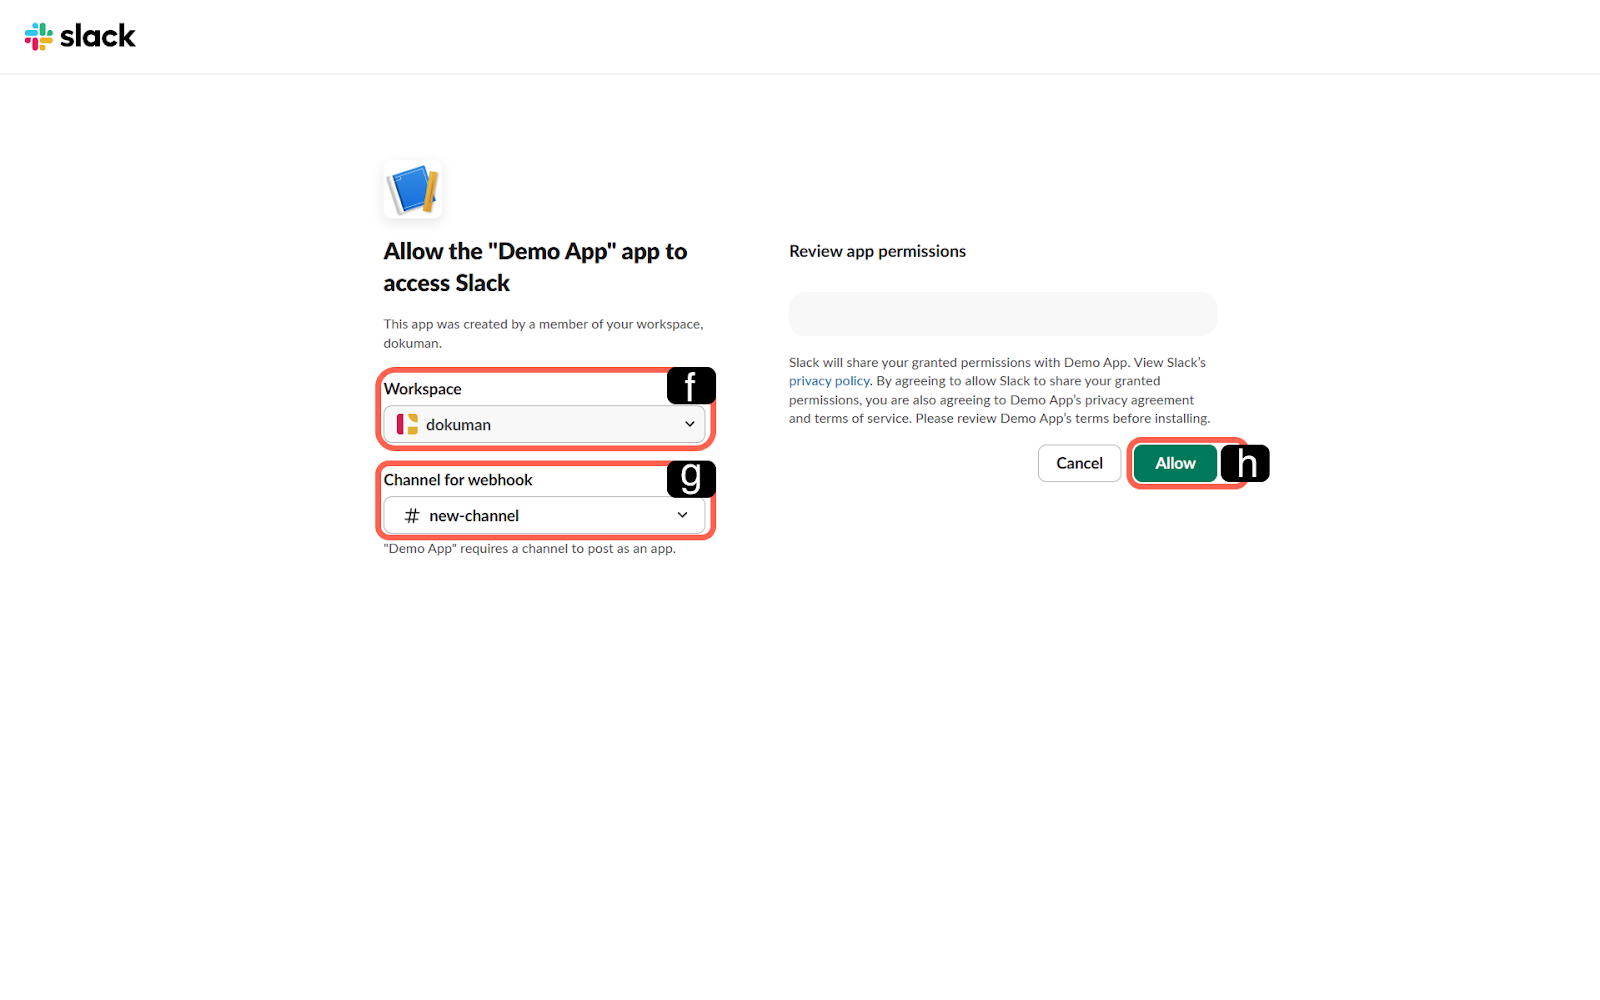
f. Workspace Selection
This is the section where you can determine the Slack workspace that the Webhook will access.
g. Channel for Webhook
This is the field where you select from the list which Slack channel the Supsis AI integration will send messages to.
h. Approval
This is the security step where you approve the application's permission to send messages to the channel. After making the appropriate selections, use the approve button.
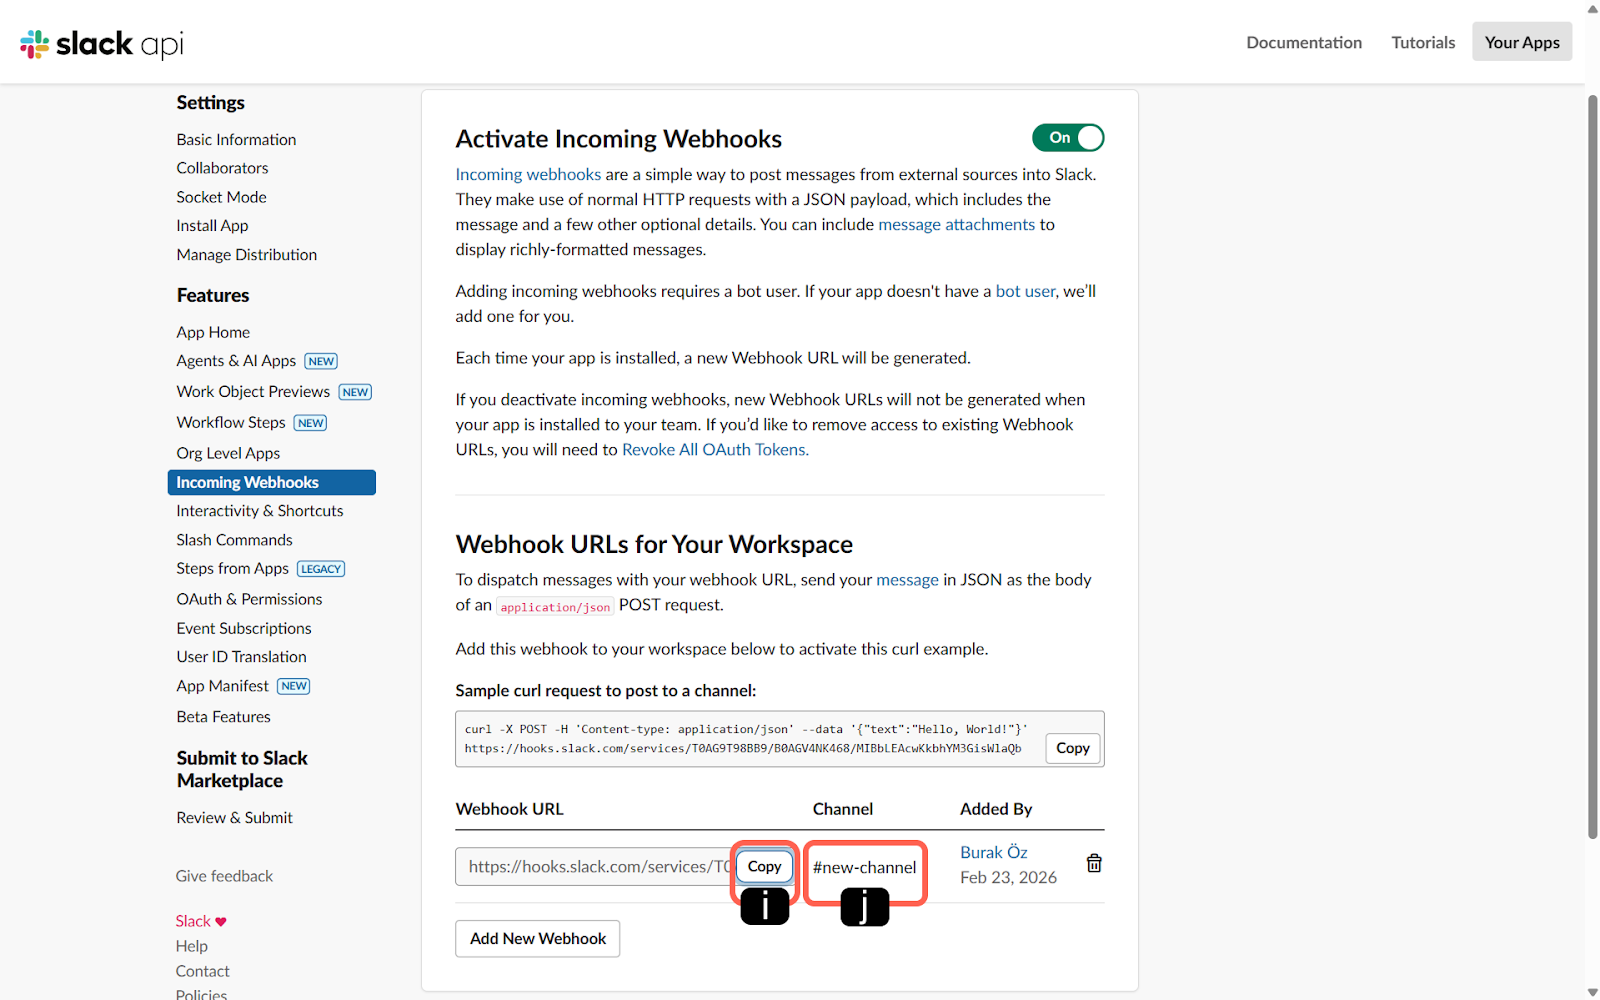
i. Webhook URL
This is the connection address of the Webhook URL generated by the system. To define the integration in the Supsis AI panel, copy this address using the relevant button.
j. Channel
This is the information field showing that the Webhook is successfully connected to the target channel.
Supsis AI Operations
After generating the Webhook URL address on the Slack side, to complete the integration, return to your :contentReference[oaicite:0]{index=0} panel and follow the steps below.
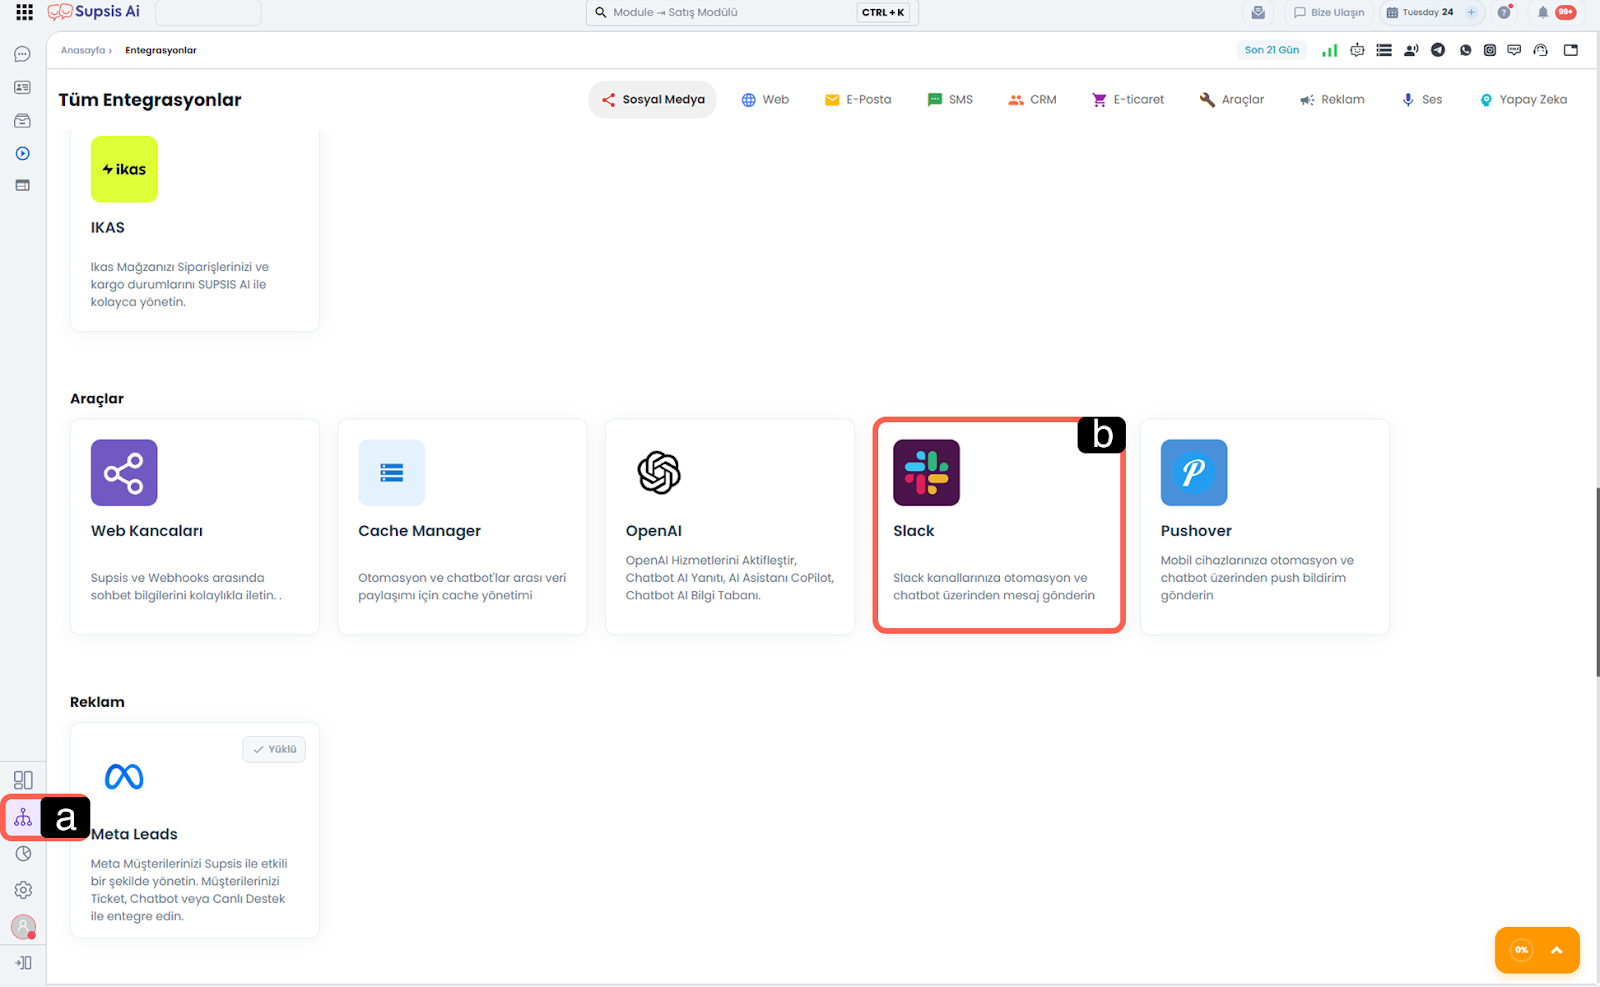
a. Integrations
Go to the general integrations section located in the left menu of your Supsis AI panel.
b. Slack
Find the "Slack" module among the listed applications and open the integration settings.
c. Channel Name
This is the descriptive name you will assign to this integration within the Supsis AI panel.
d. Webhook URL
This is the most critical field where you will directly paste the unique connection address (URL) you copied from the Slack platform. Data flow between systems is provided through this address.
e. Default Channel (Optional)
This is an optional setting where you define which channel messages sent via the Slack integration will be directed to by default unless otherwise specified.