
1-) Chat Widget Settings
Chat Widget Settings allow you to manage the appearance, position, and behavior of the chat widget that your visitors interact with on your website. With these settings, you can customize the chat widget to match your brand identity and website design.
By configuring features such as the widget’s colors, size, on-page position, and display timing, the chat experience becomes more user-friendly and accessible for visitors. This makes it easier for visitors to engage and increases the efficiency of the support services provided.
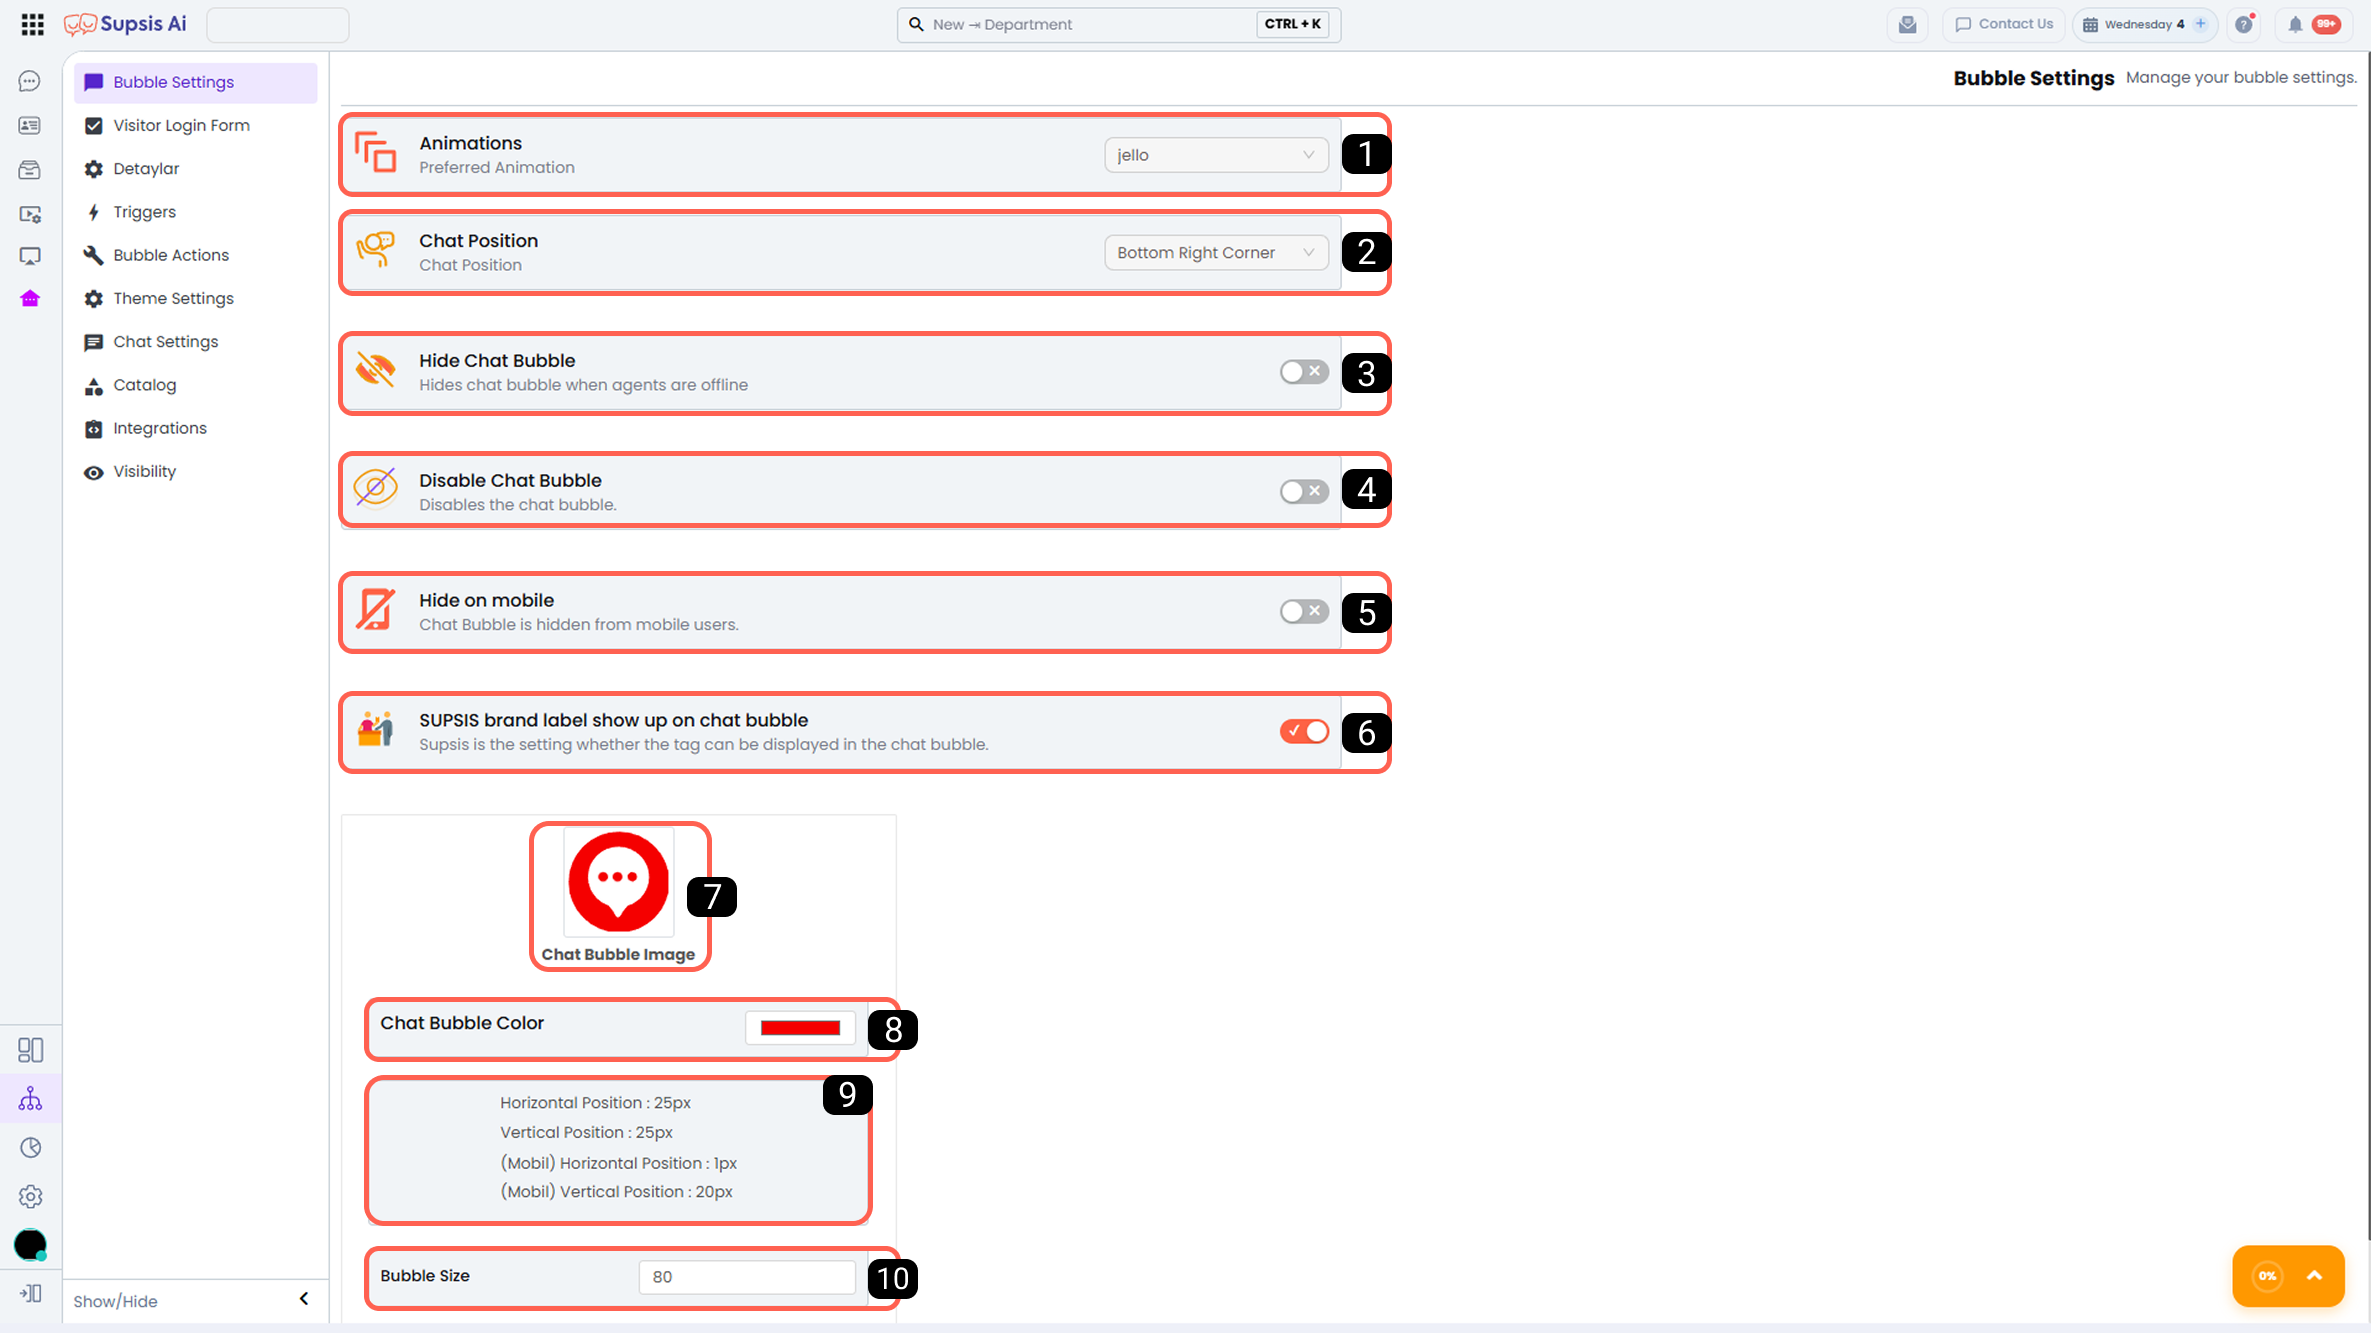
1-) Animations
Chat Widget Animation Settings allow you to determine which animation effect will be used when the chat widget appears on the screen. Animations can make the chat widget more eye-catching and help visitors notice it more quickly.
Using the right animation makes it easier for users to engage with the chat widget, increases interaction, and contributes to faster initiation of support requests.
2-) Widget Position
Chat Widget Position Settings allow you to determine which corner or position on your website the chat widget will be displayed (e.g., bottom right or bottom left).
Proper positioning ensures that visitors can easily access the chat widget and improves user experience. It also helps align the widget with the overall design of the website.
3-) Hide Chat Widget
The Hide Chat Widget in Offline Mode setting automatically hides the chat widget when all users defined in the Supsis AI panel are offline.
With this feature, the chat widget is displayed only when you are online, preventing visitors from initiating unnecessary interactions when no service is available. This ensures a more consistent and controlled user experience.
4-) Disable Chat Widget
The Disable Chat Widget setting completely turns off the chat widget. When enabled, the widget becomes invisible to visitors and new chats cannot be initiated.
This option can be used during maintenance periods, temporary shutdowns, or when chat services are not intended to be provided during certain time intervals.
5-) Hide on Mobile
The Hide on Mobile setting disables the visibility of the chat widget for users accessing the website via mobile devices, displaying it only to desktop users.
Additionally, in scenarios where the chat widget is integrated into the mobile website menu as a button via SDKs, enabling this feature helps maintain a cleaner mobile interface and improves the mobile user experience.
6-) Display Supsis Brand Label on Chat Widget
This setting allows you to determine whether the Supsis AI brand label displayed on the chat widget will be visible.
To remove the Supsis brand label, the “Remove Supsis Logo” add-on package under billing and payment options must be purchased. For detailed information about add-on packages, you can review the Add-on Packages documentation.
7-) Chat Widget Image
The Chat Widget Image setting allows you to customize the visual of the chat widget. With this feature, you can align the widget’s appearance with your brand identity and overall website design. The selected image enhances the visual appeal of the widget and strengthens brand perception.
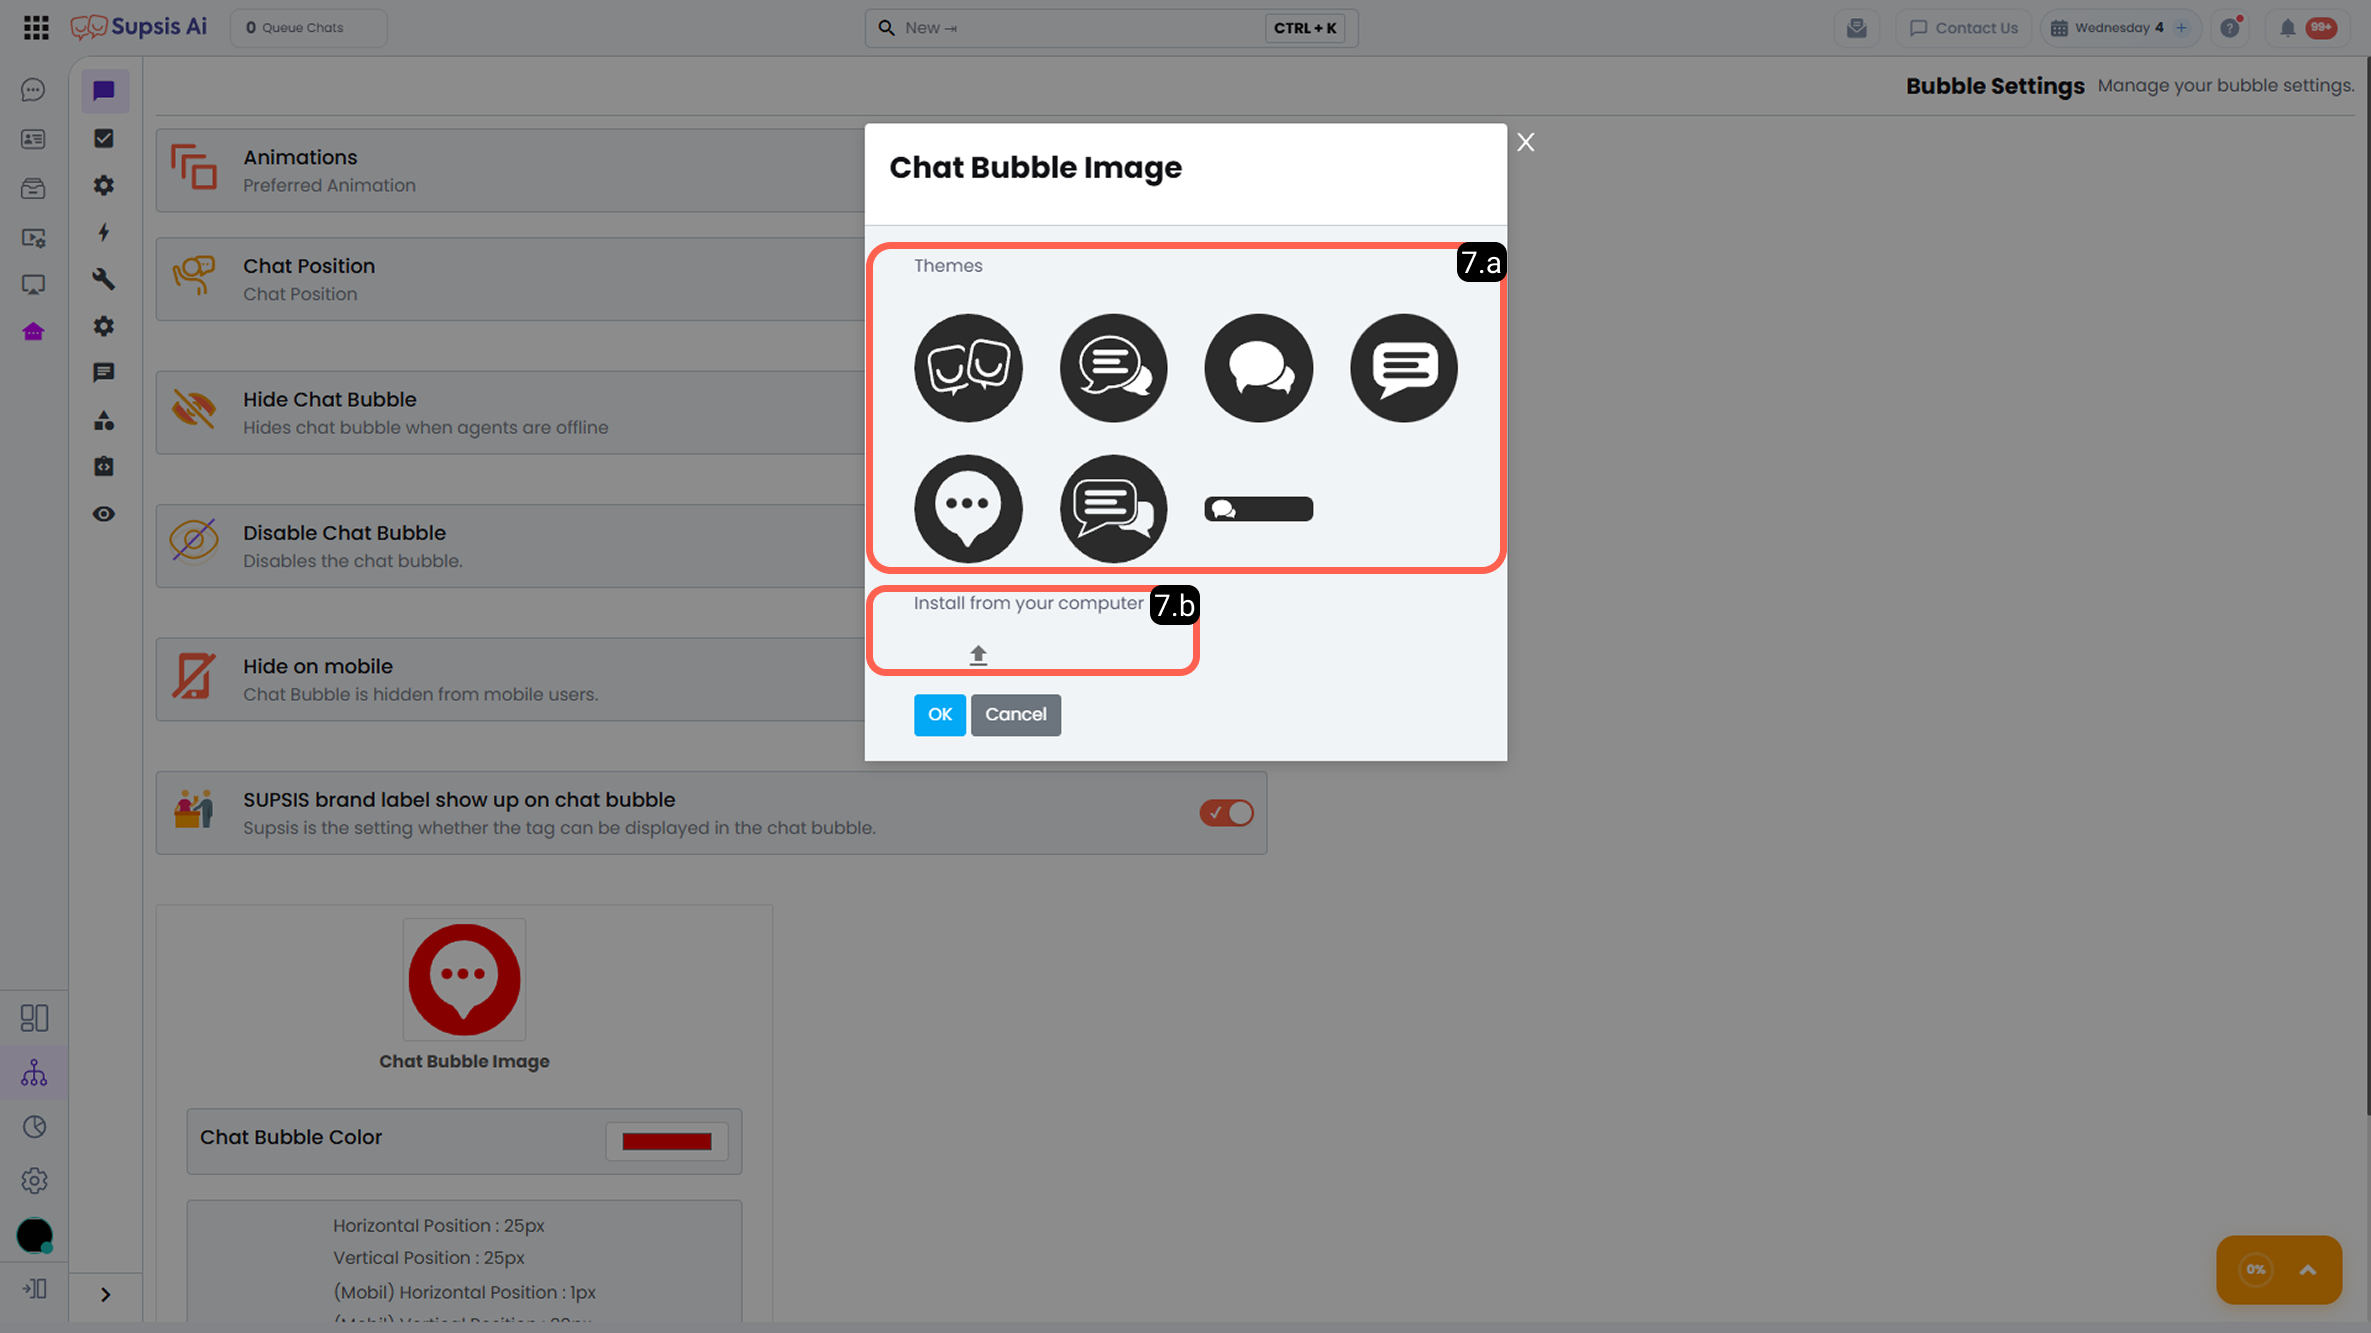
7.a – Template Images:
In this section, you can select from predefined template chat widget images available on the platform. Template images work fully compatible with the system and offer quick setup.
7.b – Upload from Your Computer:
With this option, you can upload your own chat widget image from your computer. This allows you to create a completely custom and brand-specific widget design.
Note: If you want the background of your uploaded image to be transparent, the image must be uploaded in WebP format. Images uploaded in JPG, JPEG, or PNG formats will be displayed with a background, fitted to fully contain the visual content.
8-) Chat Widget Color
This feature allows you to customize the color of the chat widget. With this option, you can adjust the widget color according to your website’s theme and aesthetic structure.
Note: You can customize the widget color only if you select one of the template chat widget images. You cannot modify the color of custom images that you upload.
9-) Chat Widget Height and Offset
The Chat Widget Height and Offset setting allows you to determine how far the chat widget will be positioned from the edges of your website (bottom, top, right, or left).
With this feature, you can align the widget with your website’s overall design, prevent overlap with other interface elements, and ensure a balanced layout to optimize user experience.
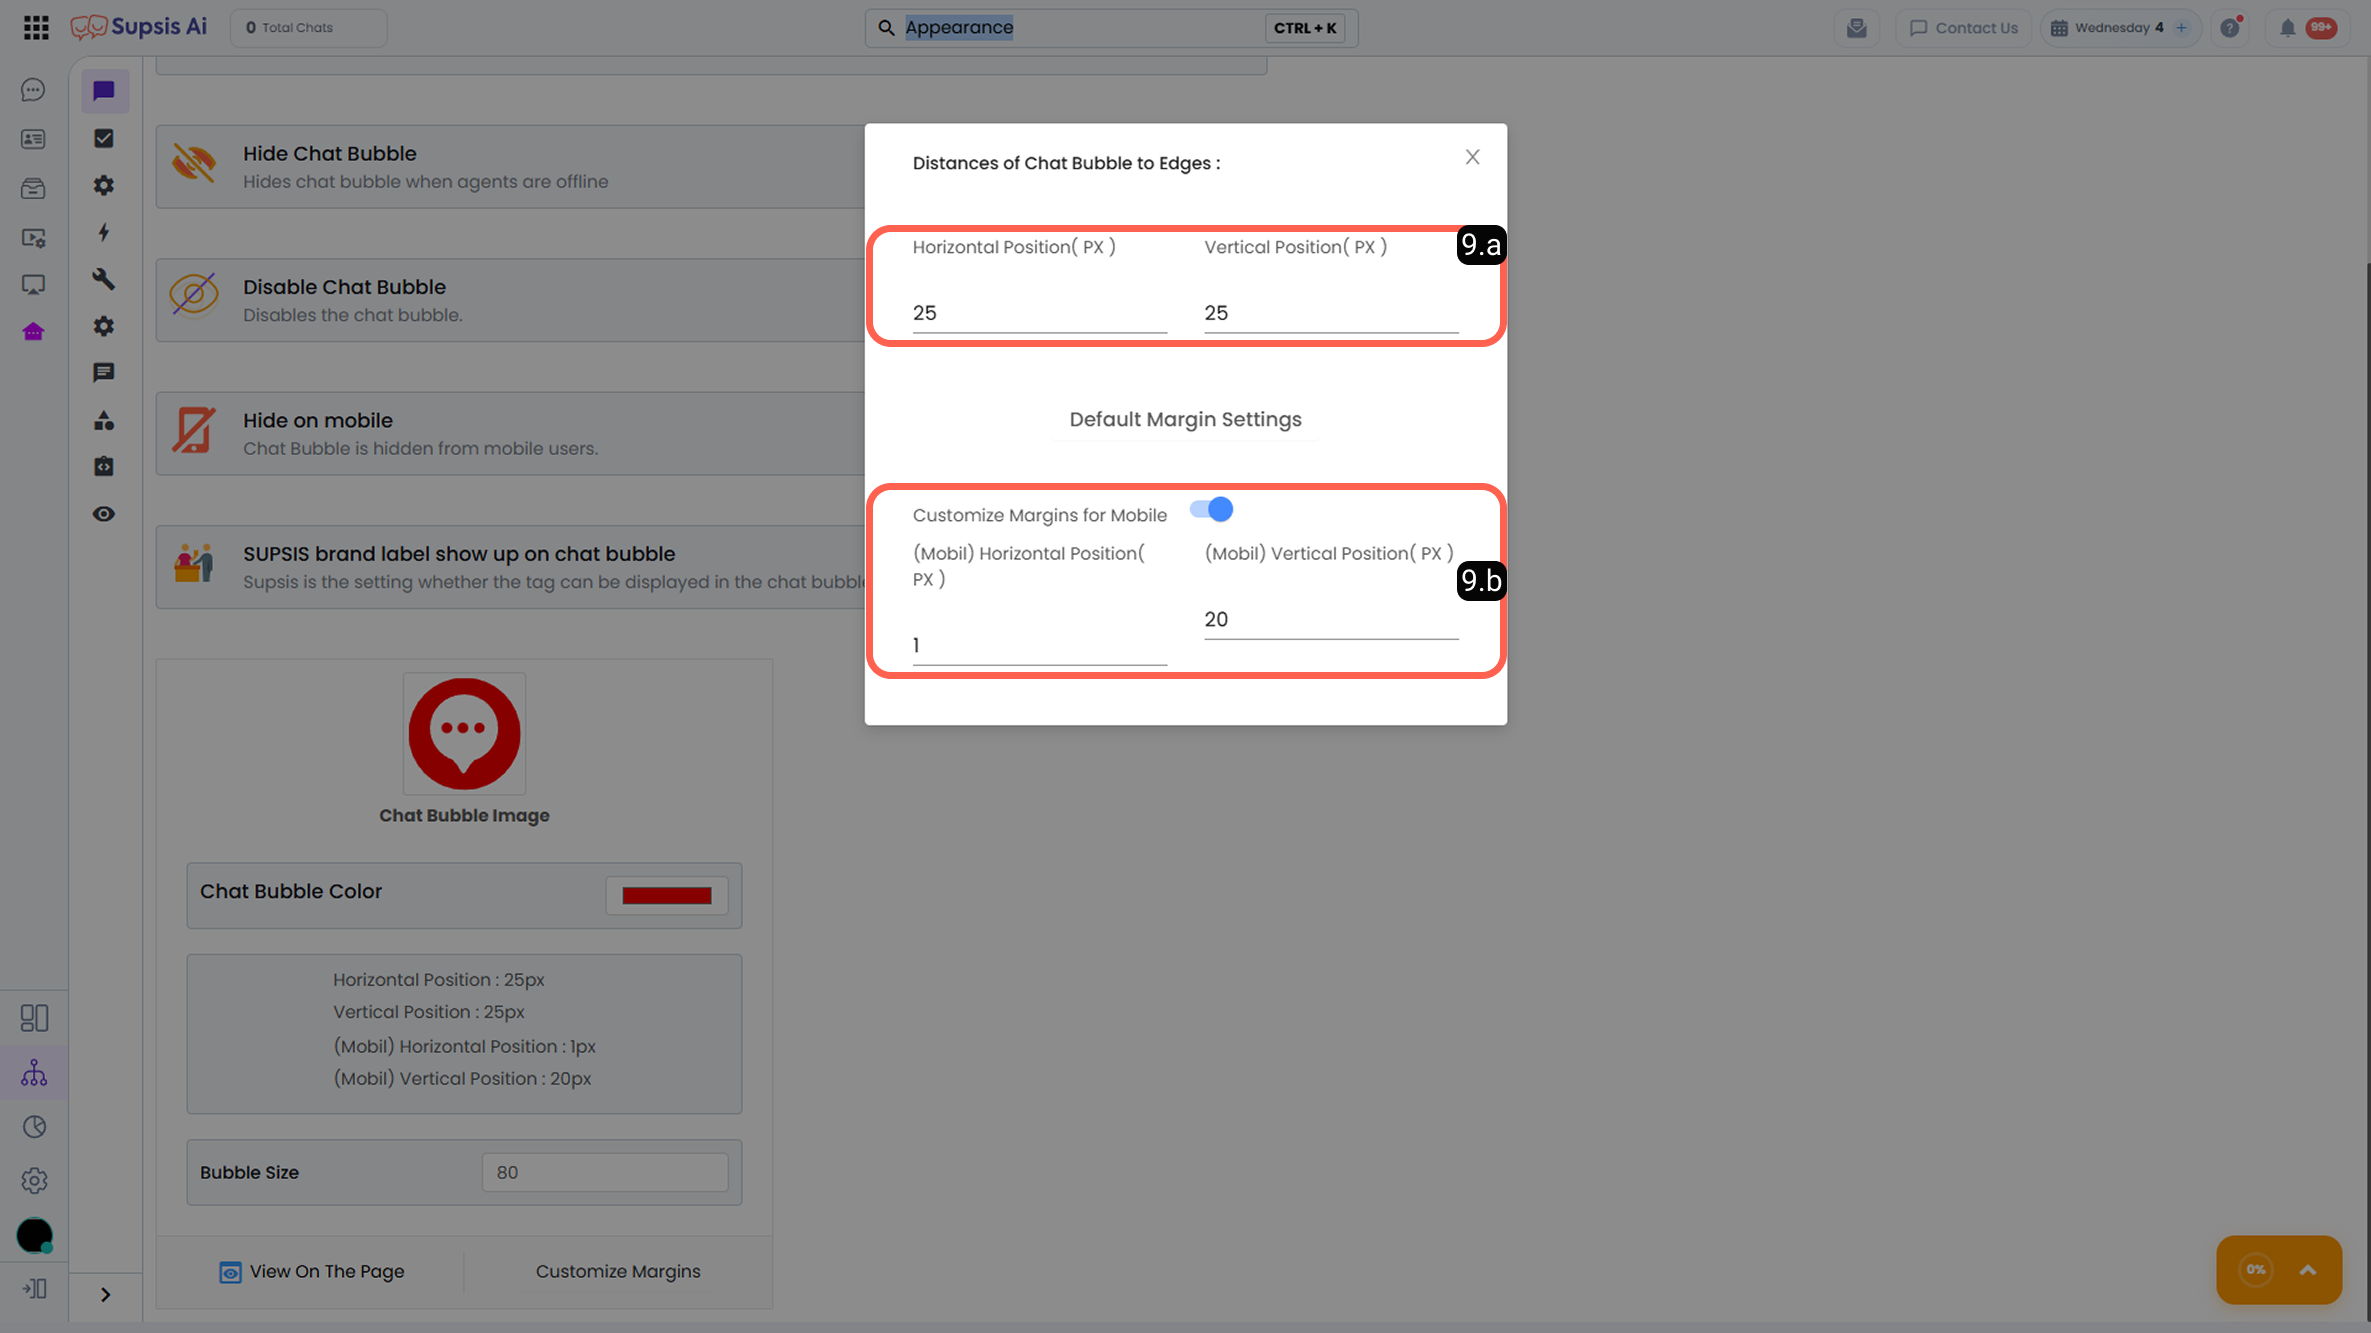
9.a - Horizontal & Vertical Position (Web Version):
In this section, you can customize the horizontal and vertical position of the chat widget for visitors accessing your website via the desktop (web) version. Adjustments made here affect only the web version and ensure ideal positioning for desktop users.
9.b - Horizontal & Vertical Position (Mobile Version):
This feature allows you to separately adjust the horizontal and vertical position of the chat widget for visitors accessing your website via mobile devices.
To enable custom positioning for the mobile version, the “Customize Mobile Version Spacing” option must be activated.
If this option is not enabled, the chat widget on mobile devices will be displayed according to the web version positioning settings.
10-) Widget Size
The Widget Size setting allows you to determine the physical size of the chat widget on the screen.
With this feature, you can adjust the size of the chat widget according to your website’s design structure, content density, and user interaction habits. Proper sizing ensures that the widget remains eye-catching while preserving overall interface consistency.