
Through the Integration section, you can integrate the chat widget into your website and track customer requests coming from your website via the Supsis AI panel. This menu includes the integration code, the steps you need to follow during the integration process, and the integration control tool.
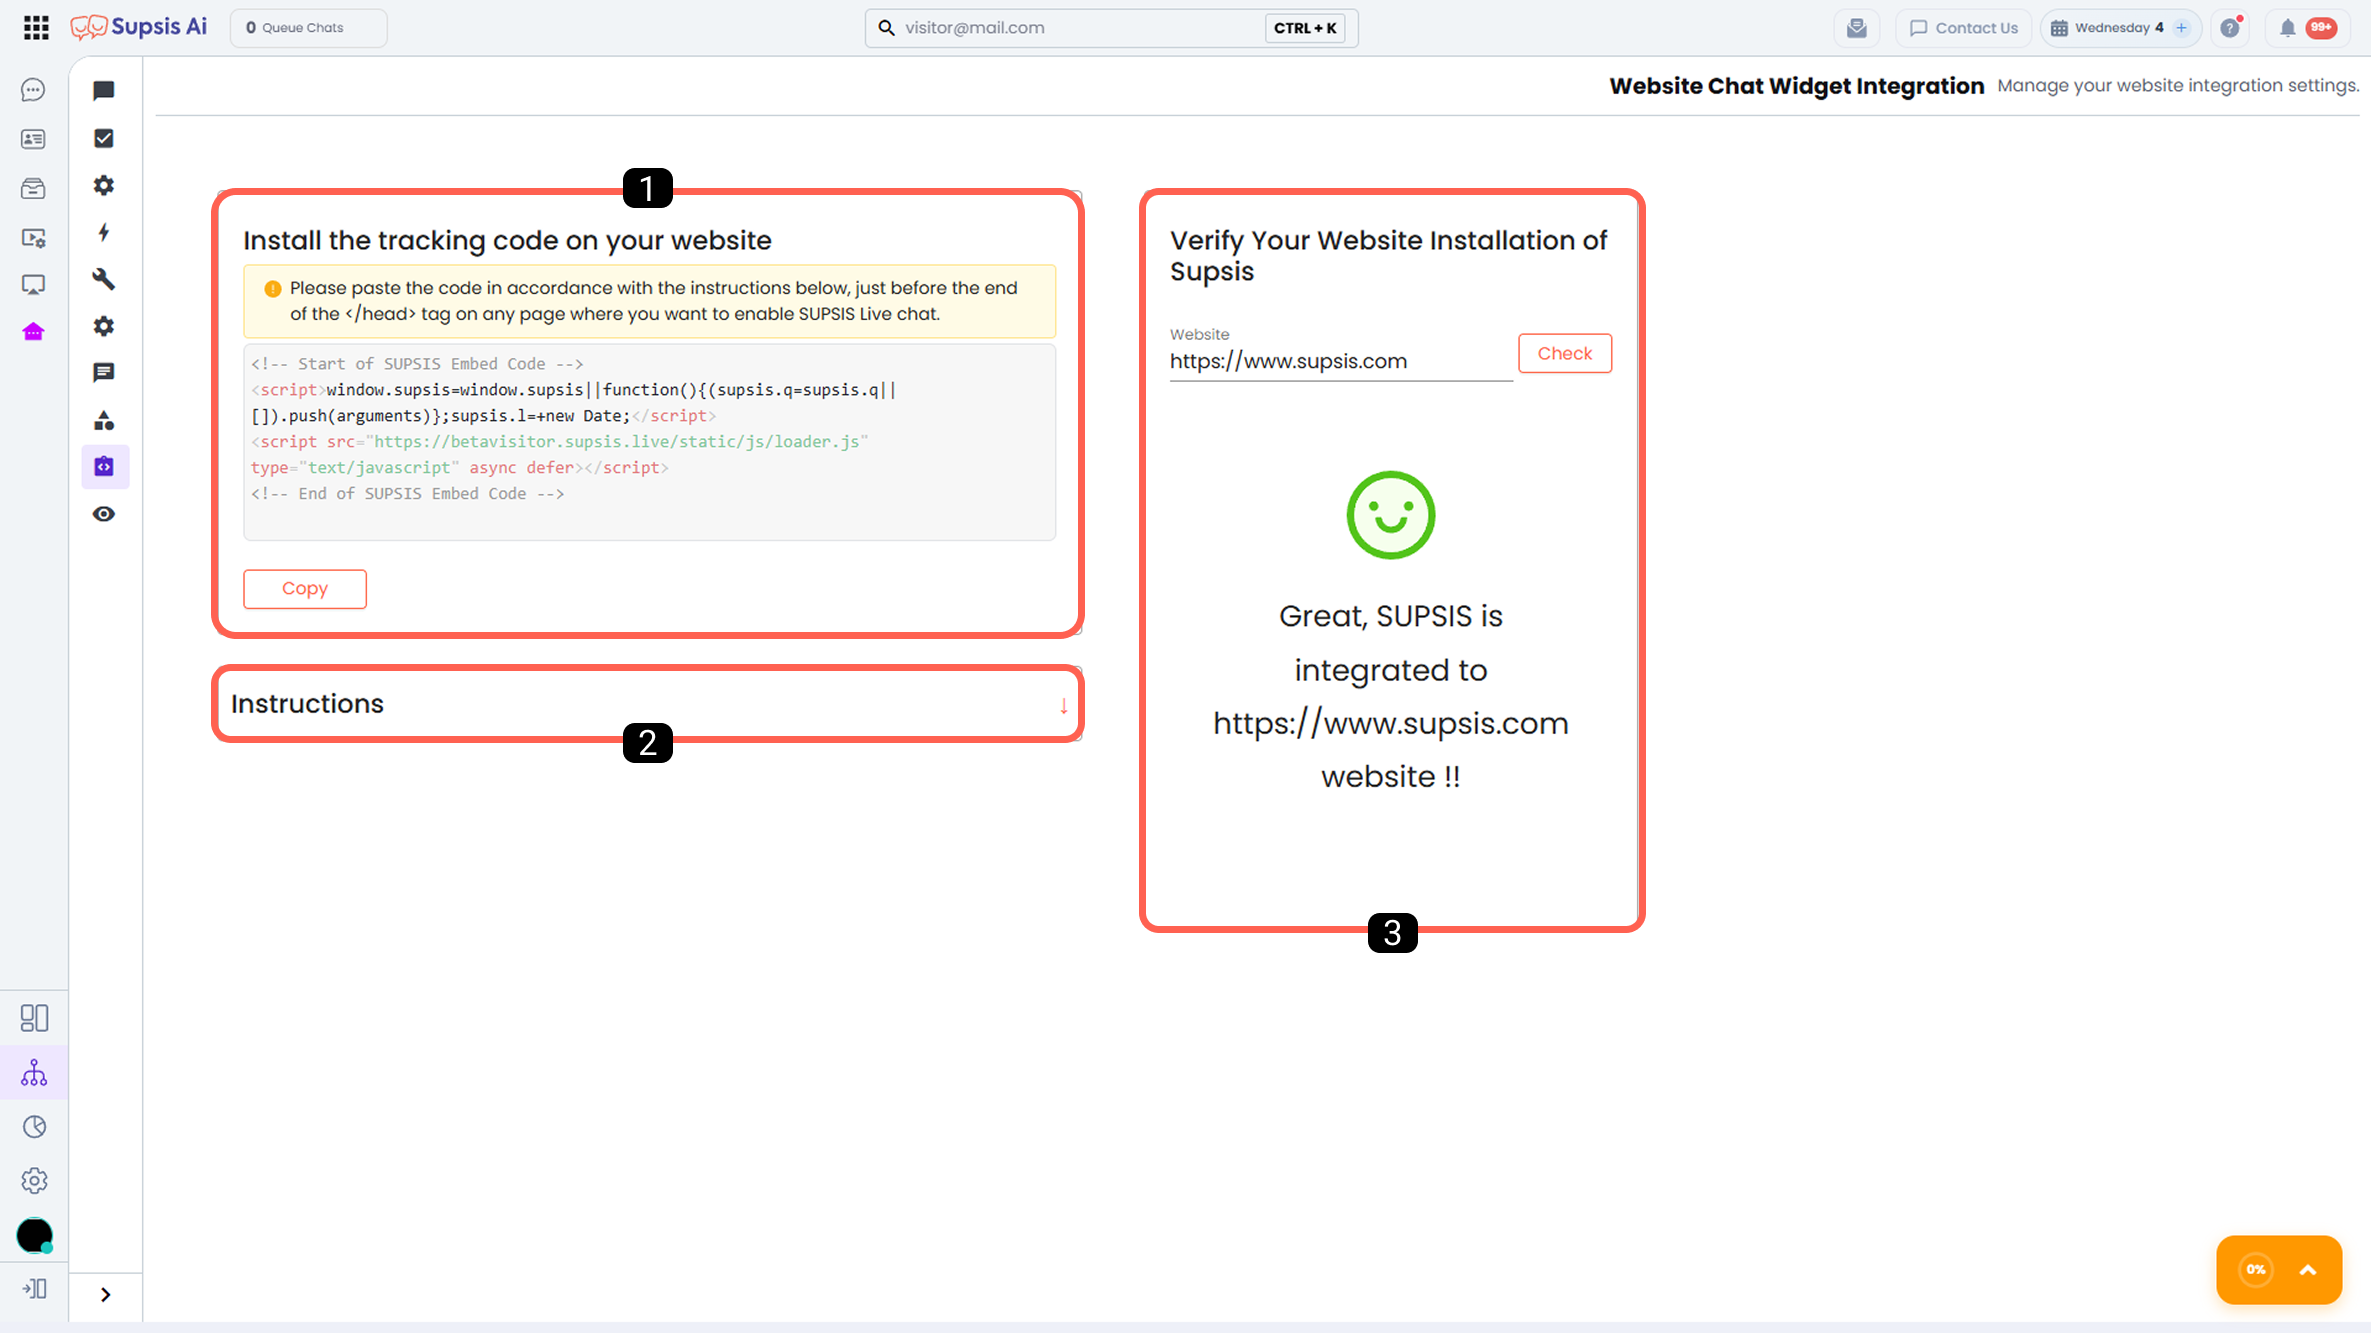
1 - Integration Code:
The Integration Code contains the script that must be embedded into your website to enable Supsis AI & website integration.
2 - Integration Instructions:
You can access the instructions you need to follow while adding the integration code from this section. The instructions include guidelines suitable for different website infrastructures. If you cannot find instructions specific to your infrastructure, you can complete the integration using the JavaScript instructions.
3 - Integration Check:
After adding the code, you can verify whether the integration has been successfully completed by entering your website address in the Website section.
4 - Google Tag Manager (GTM) and Event Tracking
You can track visitor interactions with the Supsis live support chat widget across analytics platforms such as Google Tag Manager (GTM), Google Analytics 4 (GA4), or Meta Pixel to measure conversions.
This integration captures two critical visitor touchpoints in real time: 1. Chat Bubble Click: Triggered when a visitor clicks the floating chat button in the bottom right to open the chat window. 2. Visitor Connected: Triggered when a visitor submits their details and is successfully connected to a live support agent.
4.a – GTM Tracking Code and dataLayer Integration
Add the following JavaScript snippet to your website's <head> or <body> (ideally after your GTM container script) or inject it directly as a Custom HTML tag within Google Tag Manager:
<script>
  // 1. Listen for chat bubble click once Supsis SDK is ready
  if (typeof supsis === "function") {
    supsis("ready", function(s) {
      if (s.i && s.i.openButton) {
        s.i.openButton.addEventListener("click", function() {
          window.dataLayer = window.dataLayer || [];
          window.dataLayer.push({
            event: "supsis_chat_opened",
            event_category: "Supsis Chat",
            event_action: "Chat Bubble Opened"
          });
        });
      }
    });
  }

  // 2. Listen for iframe message when visitor connects to live support
  window.addEventListener("message", function(e) {
    if (e.data && e.data.command === "visitor-connected") {
      window.dataLayer = window.dataLayer || [];
      window.dataLayer.push({
        event: "supsis_visitor_connected",
        event_category: "Supsis Chat",
        event_action: "Live Support Connected",
        chat_id: e.data.id || null
      });
    }
  });
</script>
4.b – Event Definitions
| Event Name | Trigger Moment | GTM / GA4 Tracking Purpose |
|---|---|---|
supsis_chat_opened |
When a visitor clicks the bottom-right bubble or launches the chat widget. | Measures interest in chatting and interaction engagement (Micro Conversion). |
supsis_visitor_connected |
When a visitor submits a message and connects to an active customer support agent. | Measures completed live support connections and qualified lead conversions (Macro Conversion). |
4.c – Live Console Testing and Verification
Before publishing your GTM tags, you can verify event triggers directly within your browser console:
- Open your website in Google Chrome, press F12 to open Developer Tools, and switch to the Console tab.
- Paste the test script and execute it.
- Clicking the chat bubble and initiating a conversation will log success messages and data payloads in the console:
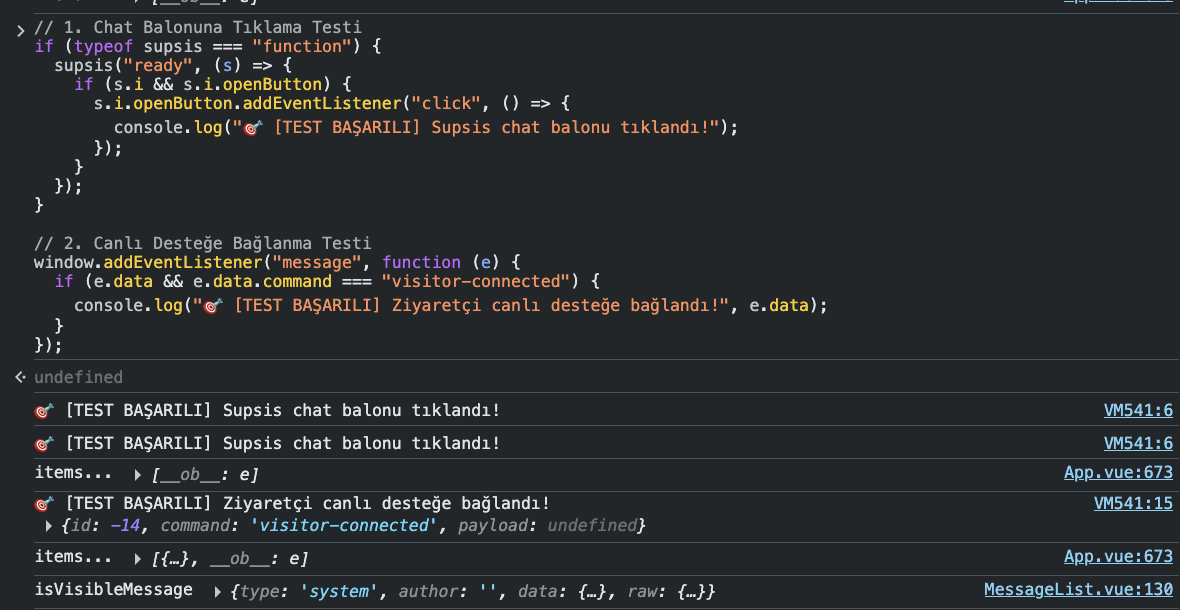
GTM Trigger Configuration
Within Google Tag Manager, create two Custom Event triggers:
* Event name: supsis_chat_opened
* Event name: supsis_visitor_connected
Link these triggers to your GA4 Event Tag or Meta Pixel Conversion Tag to optimize campaign ad performance.