
LinkedIn Integration
1-) Integration Process
This section includes the steps required to initiate the process of adding the LinkedIn channel to the Supsis AI panel and defining the necessary authorizations through the platform. During the process, the system will redirect you to the LinkedIn panel for authorization procedures.
1.a – Creating a Channel
To complete the integration, follow the steps below via the Supsis AI panel:
-
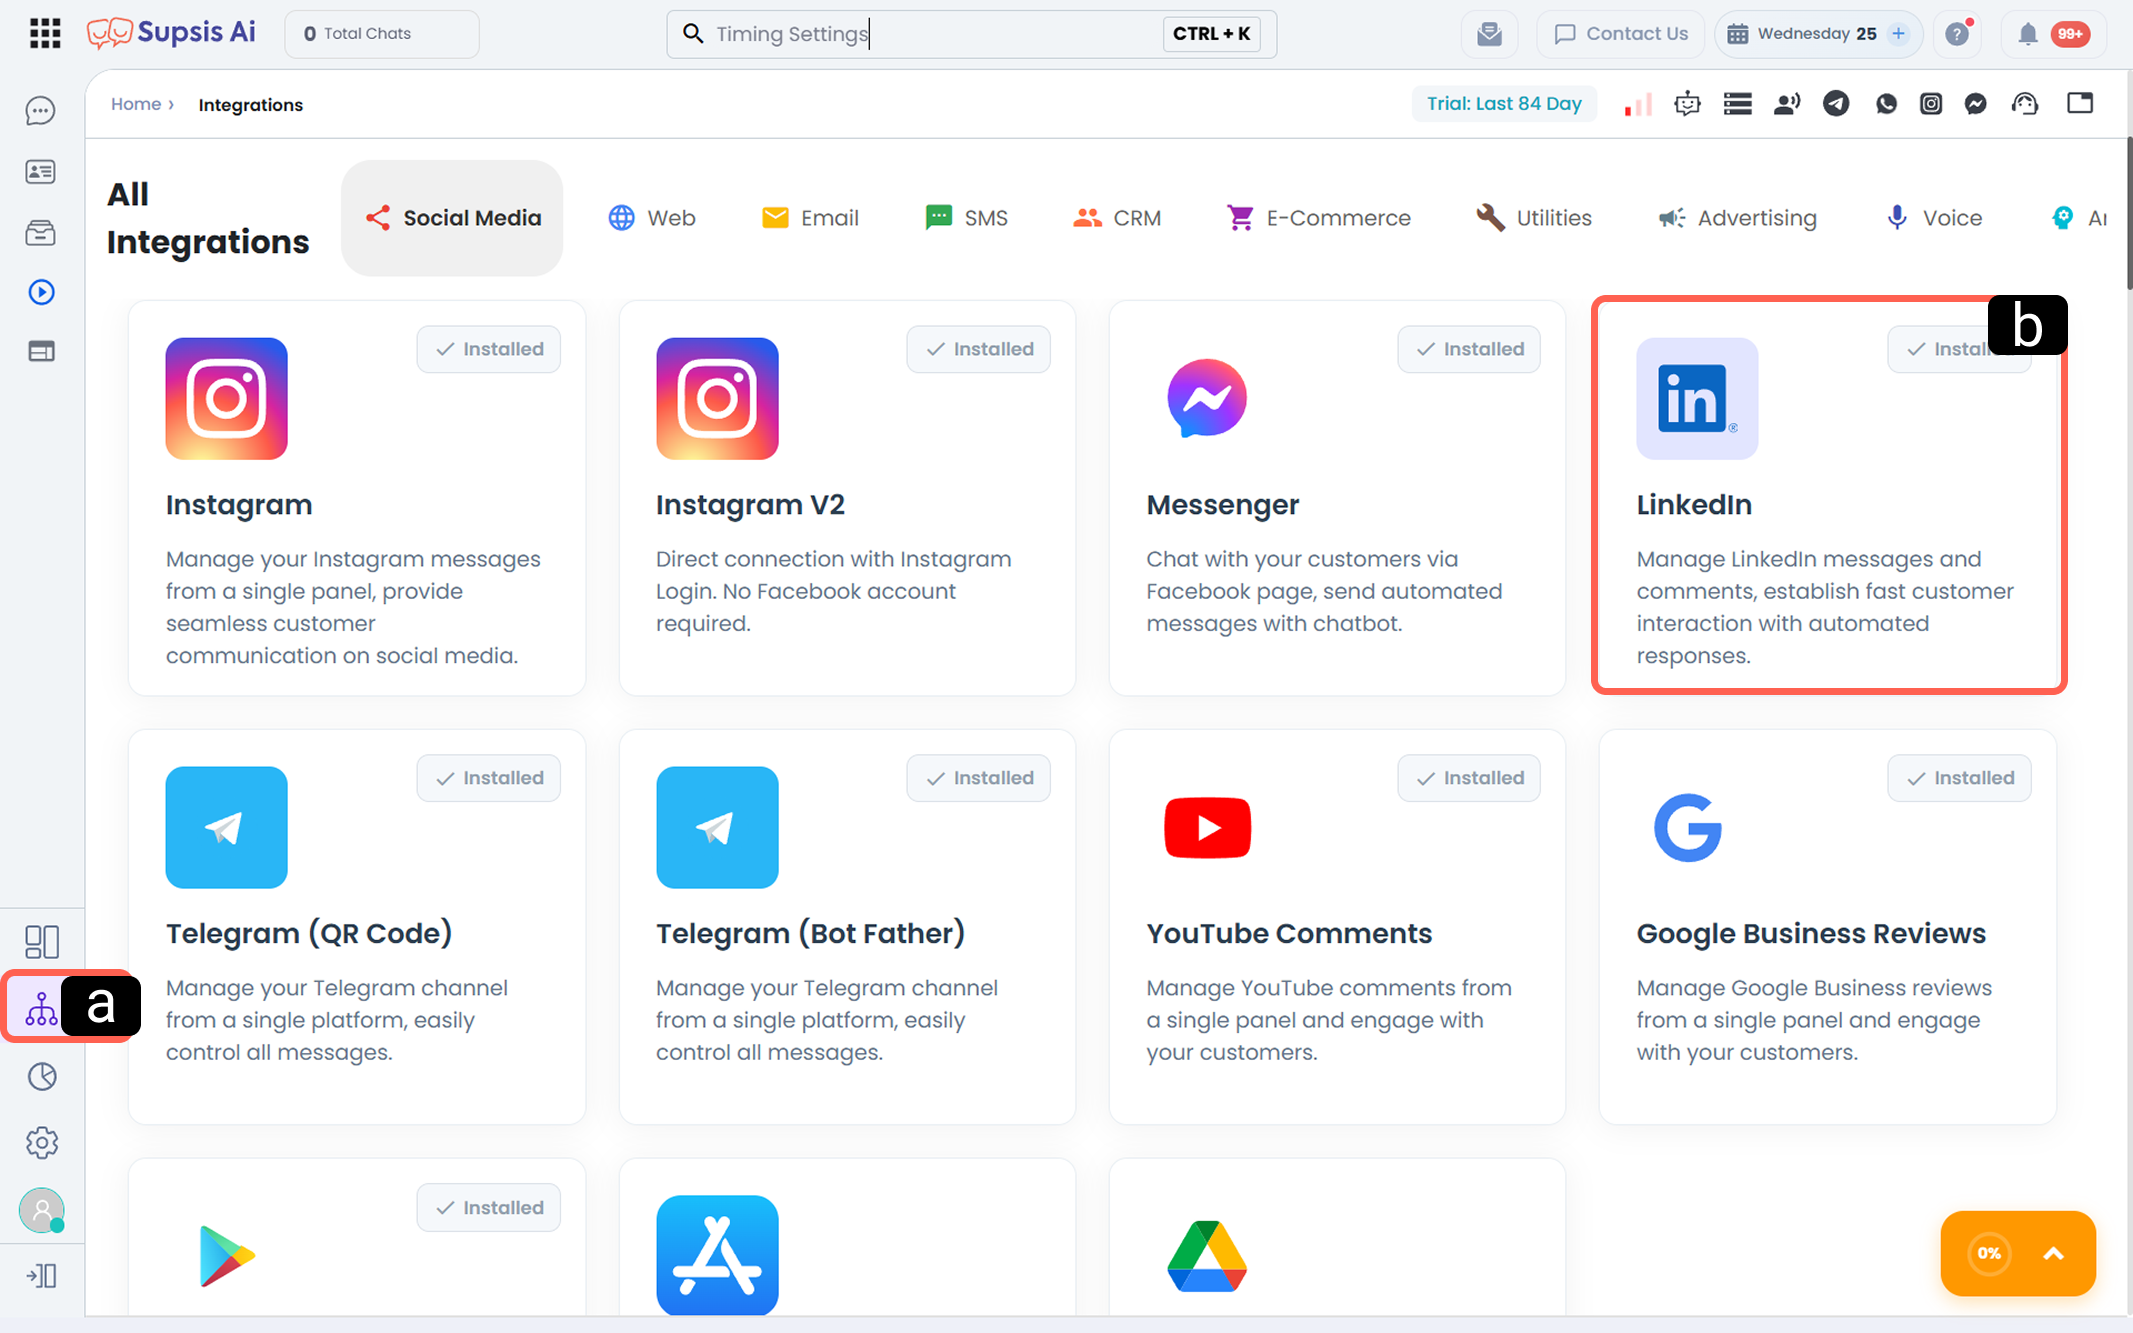
a – Integrations
Click on the Integrations icon located in the left menu of your Supsis AI panel to access the menu. -
b – Channel Selection
Find the LinkedIn card in the list of social media channels and click on it to view the channel details.
-
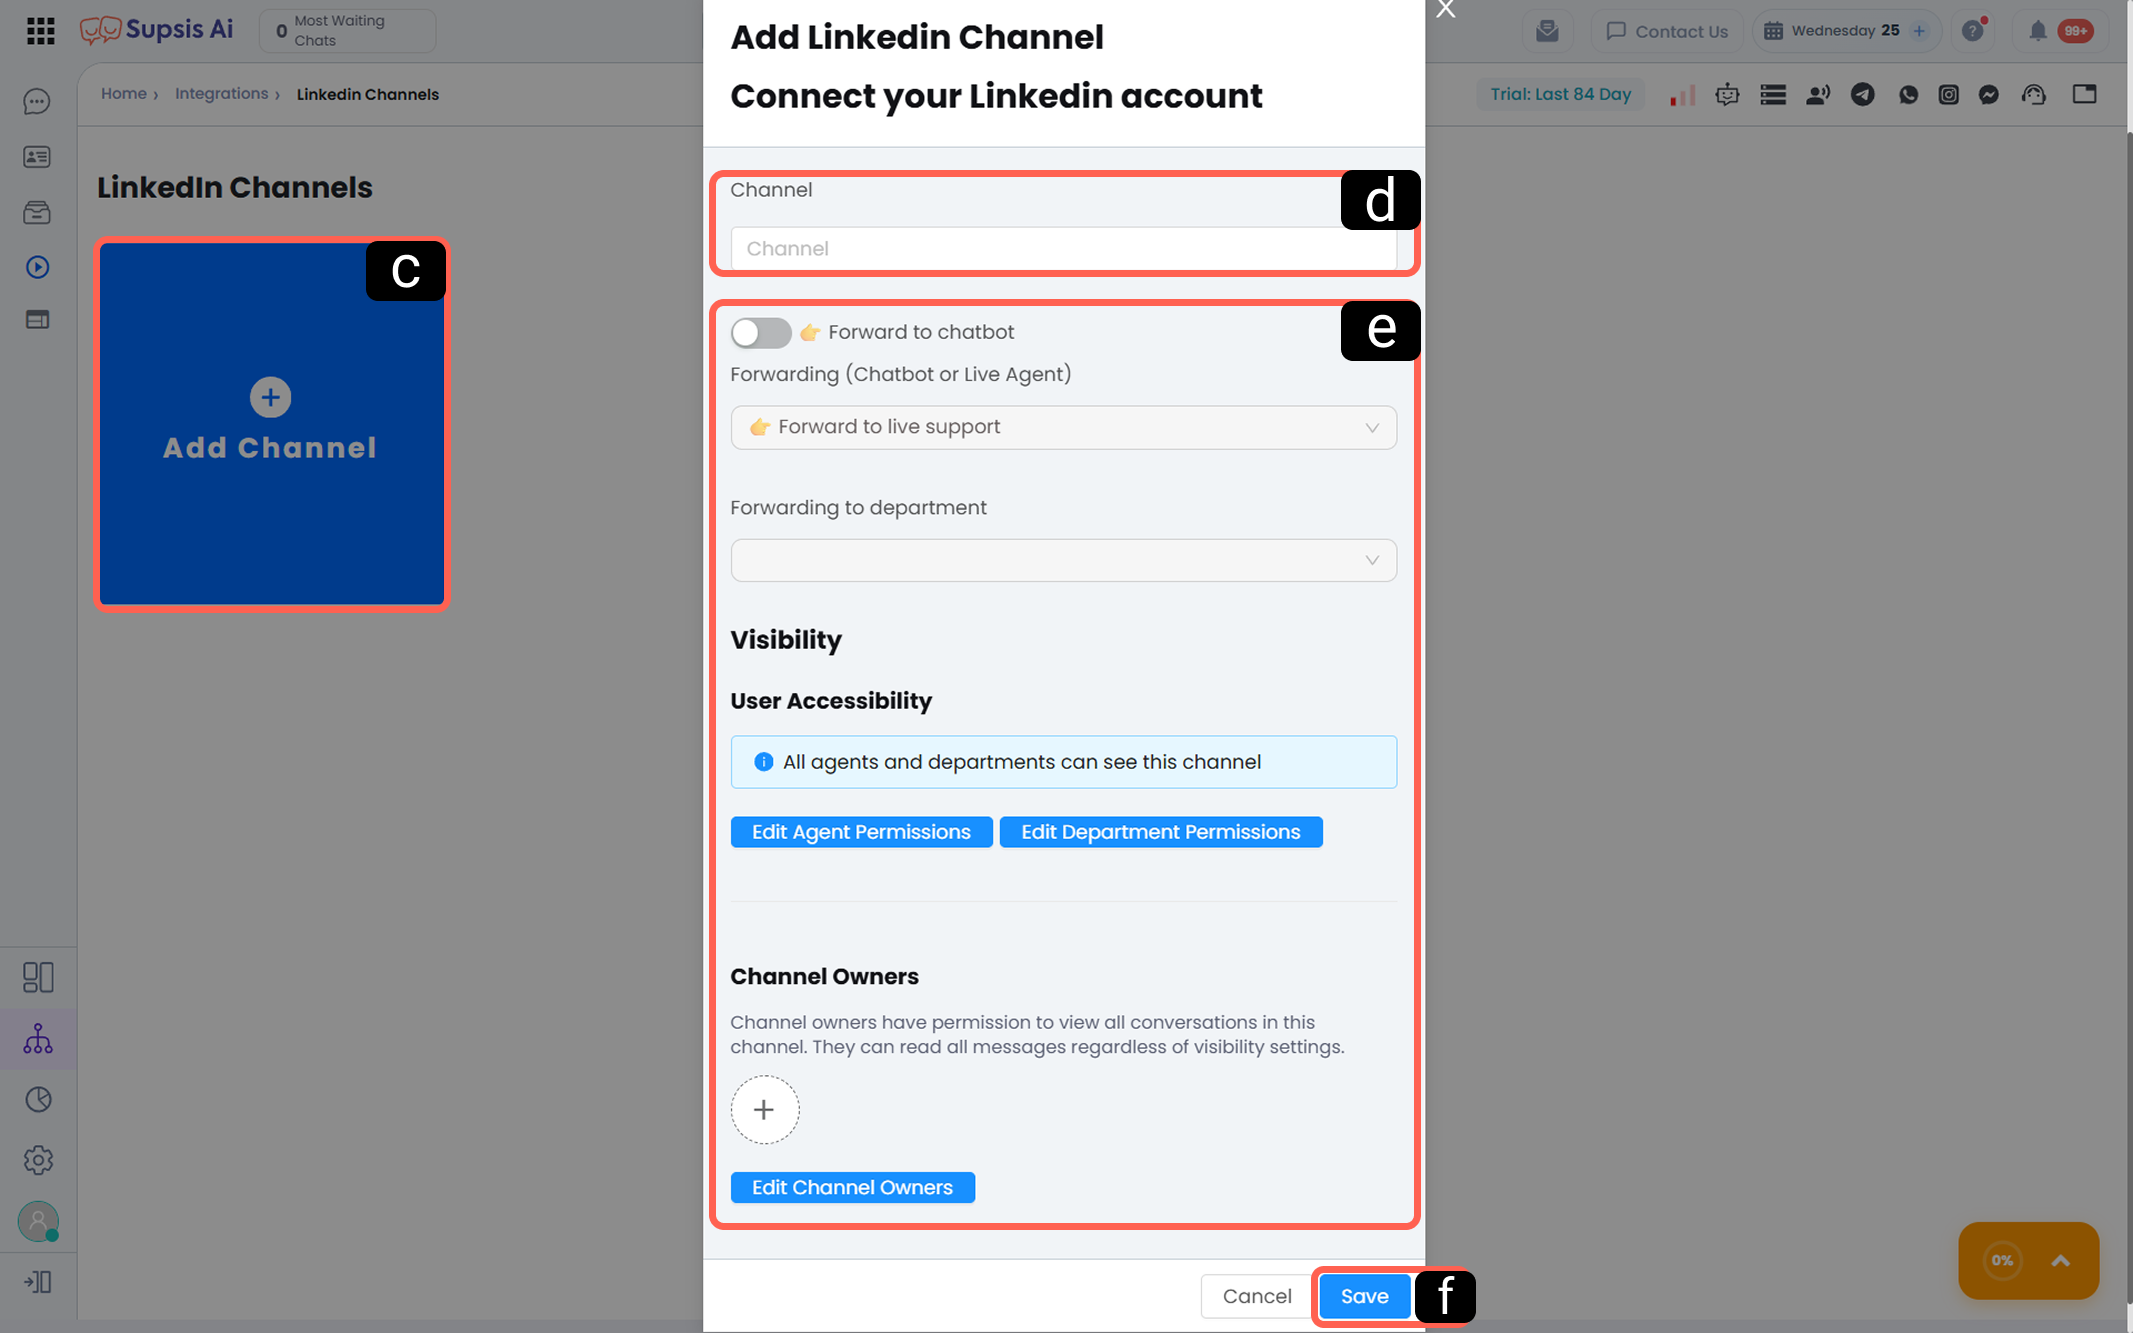
c – Add Channel
Click the Add Channel button (blue area with a plus icon) within the LinkedIn integration channel. This action will create a new Supsis AI channel where you can define your LinkedIn account. -
d – Channel Name
Channel Name allows you to define the name under which your integrated LinkedIn account will appear in the Supsis AI panel. This name represents how your account is displayed only within the Supsis AI panel. -
e – Channel Management
This section allows you to configure the operational principles and management preferences of your LinkedIn account integrated into the Supsis AI panel.
The data and settings defined during integration can later be updated more easily and in greater detail from the In-Channel Details section. For more information about channel management, you can review our LinkedIn In-Channel Details documentation. -
f – Save Channel
After filling in the required fields, you can save your channel to your Supsis AI panel using this button.
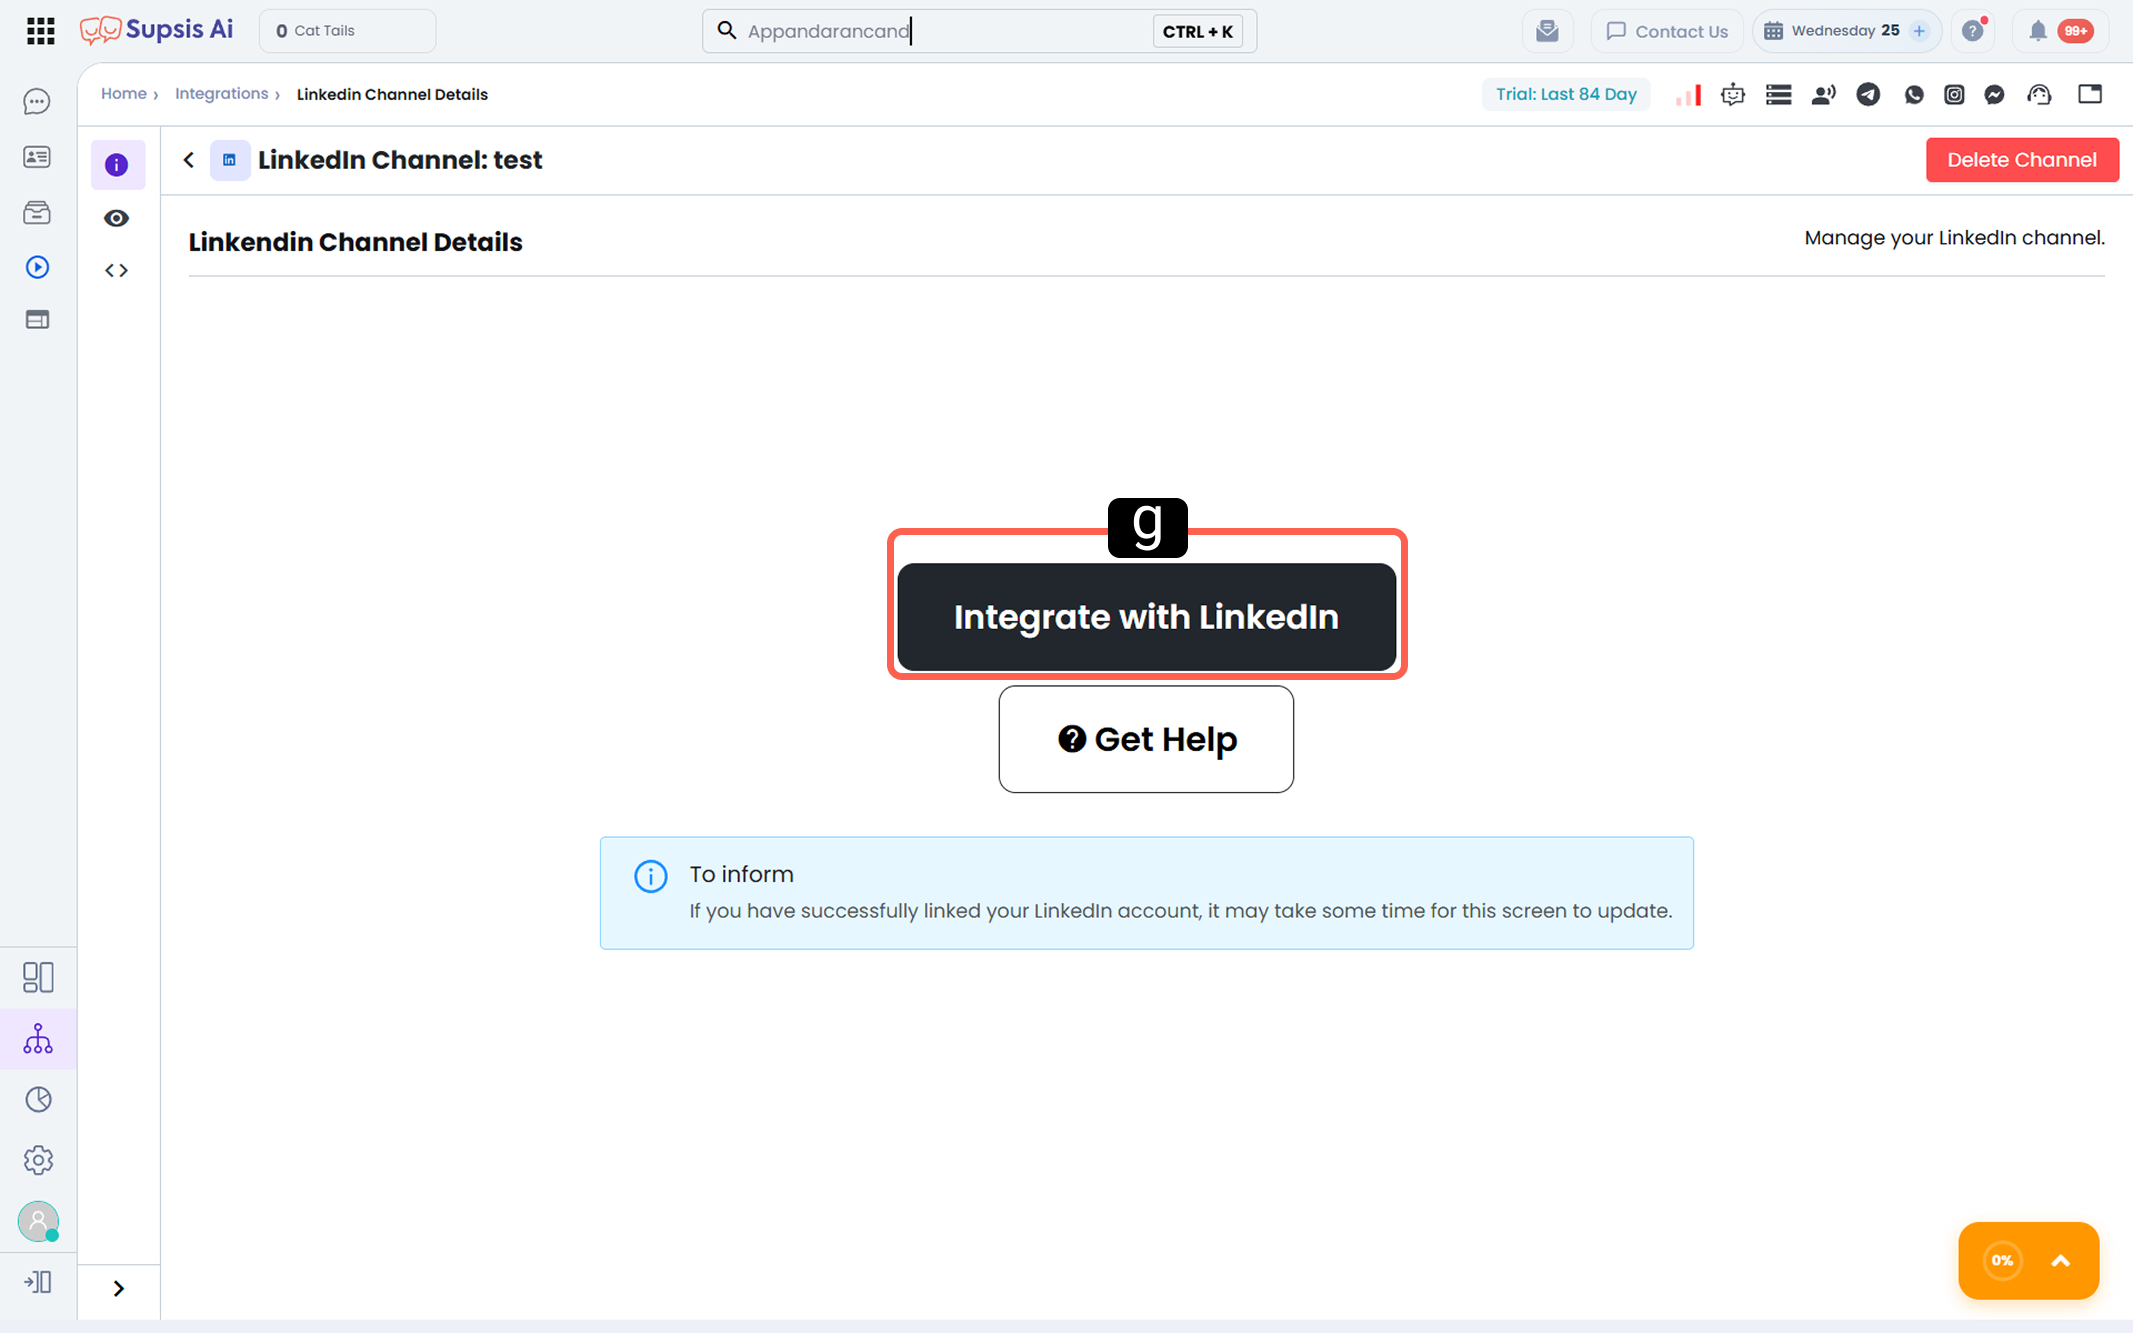
- g – Complete Integration
Click the Complete Integration button. This will redirect you to the LinkedIn connection page where you will log in and complete the authorization process.
While integrating your LinkedIn channel into the Supsis AI panel, you can choose your connection method and customize optional settings to optimize data flow.
There are two primary methods to connect your LinkedIn account to Supsis AI:
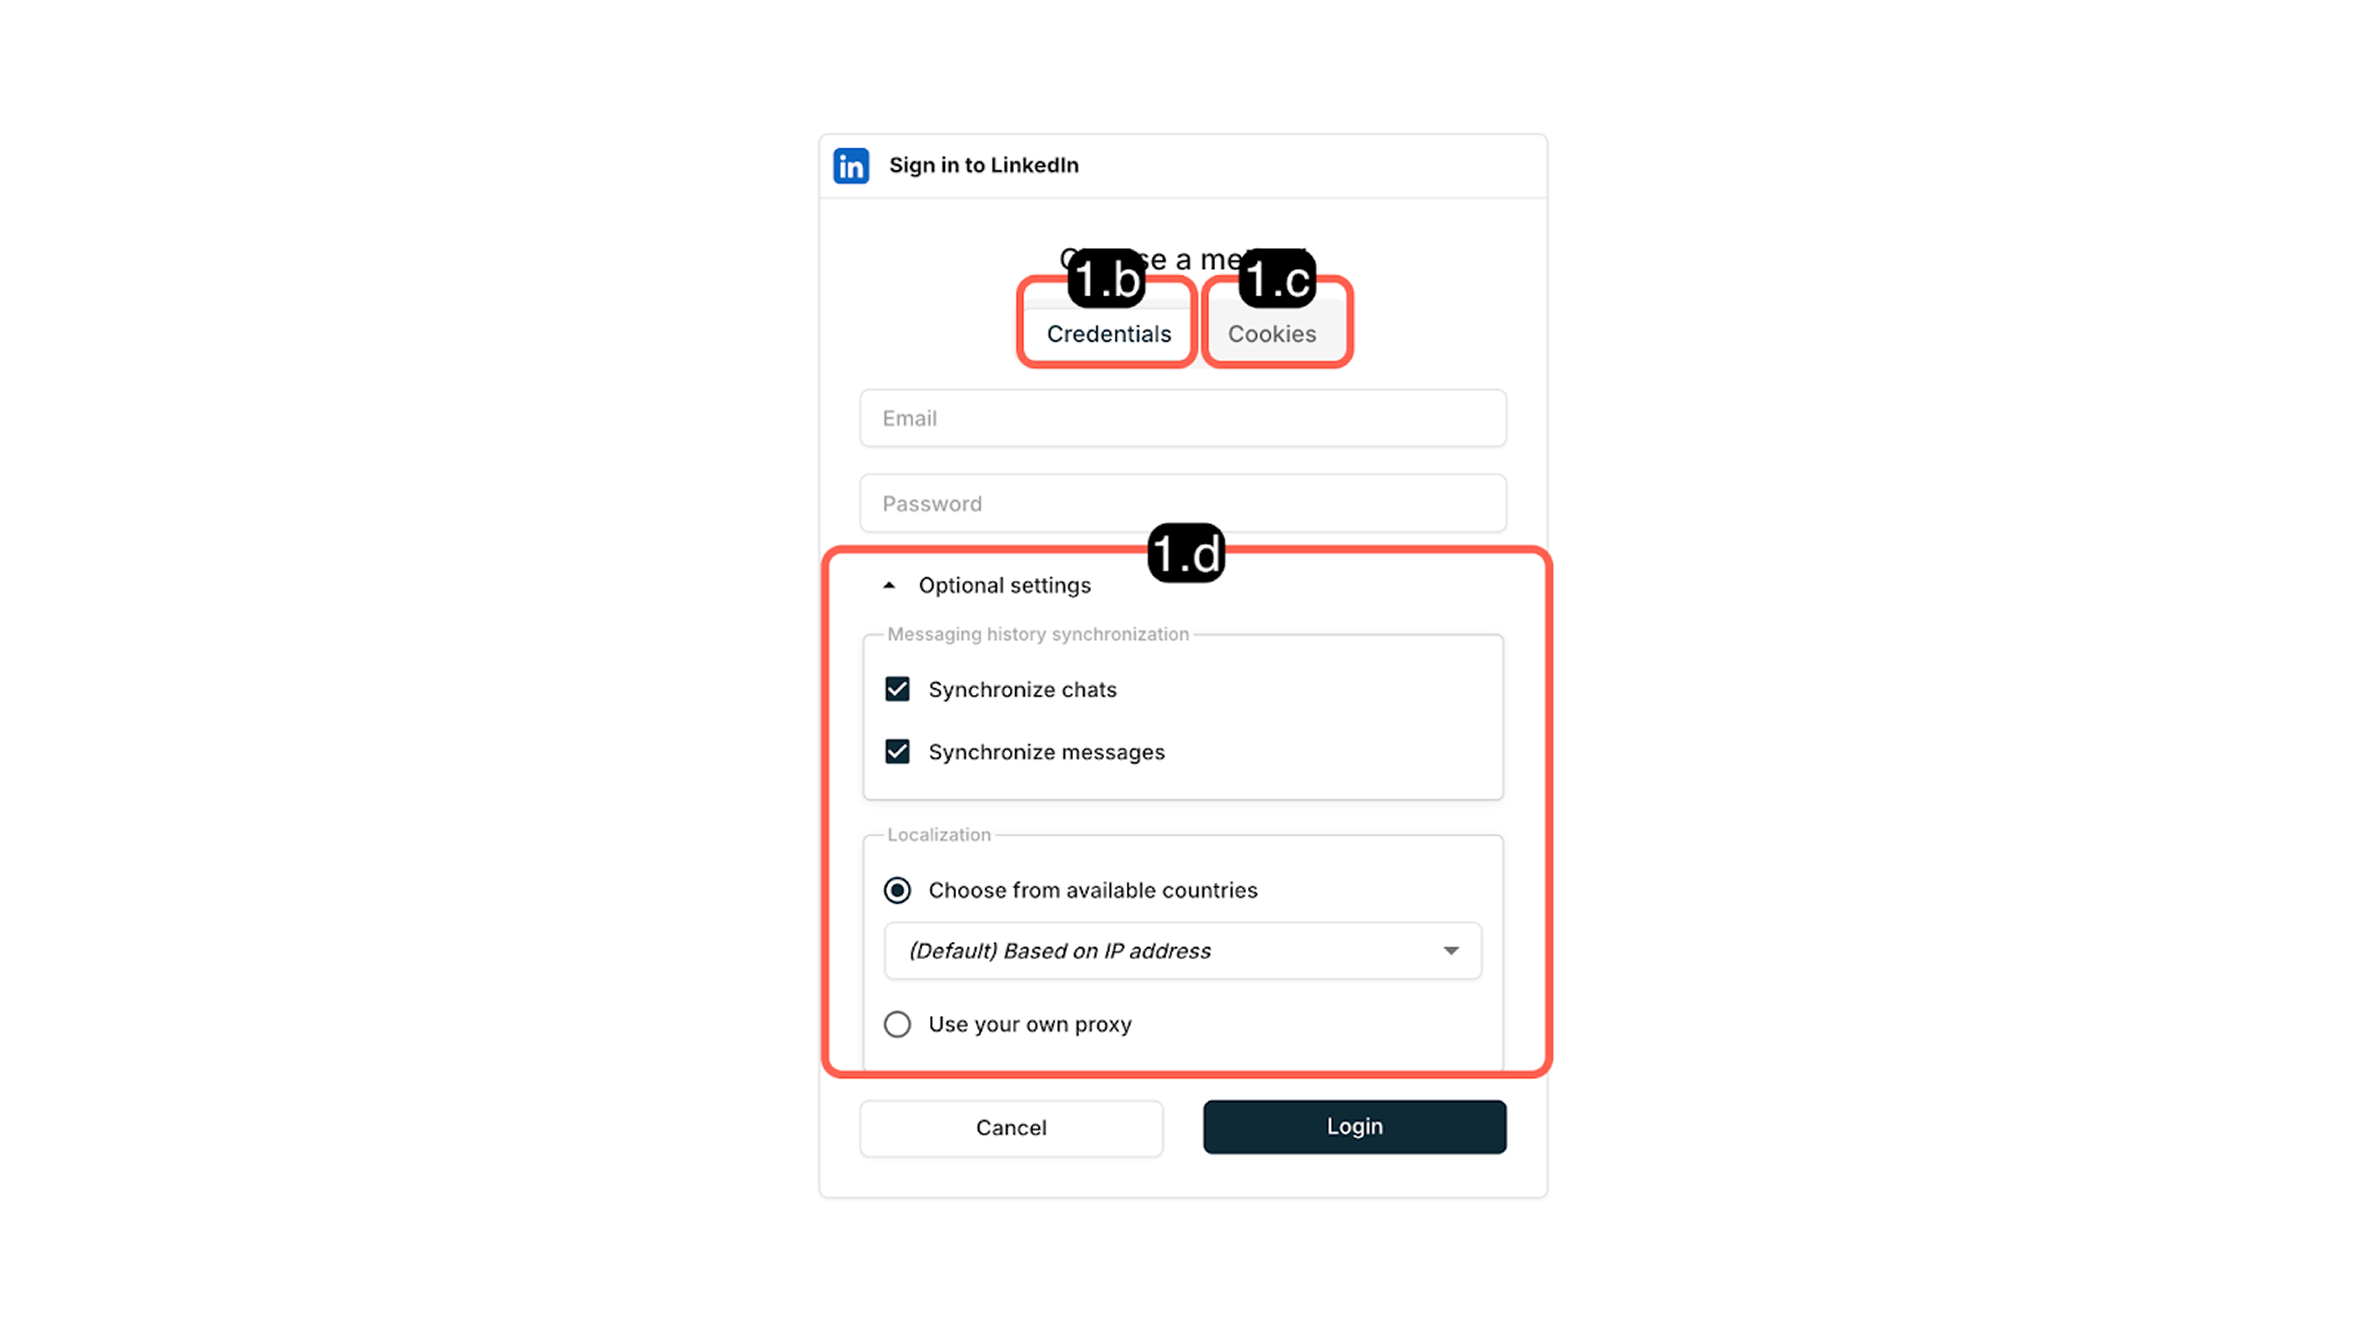
1.b – Login with User Credentials
Allows you to quickly establish a connection using your standard email address and password.
1.c – Login with Cookie Information
Provides connection via cookie data for advanced users or those who want to transfer specific browser sessions.
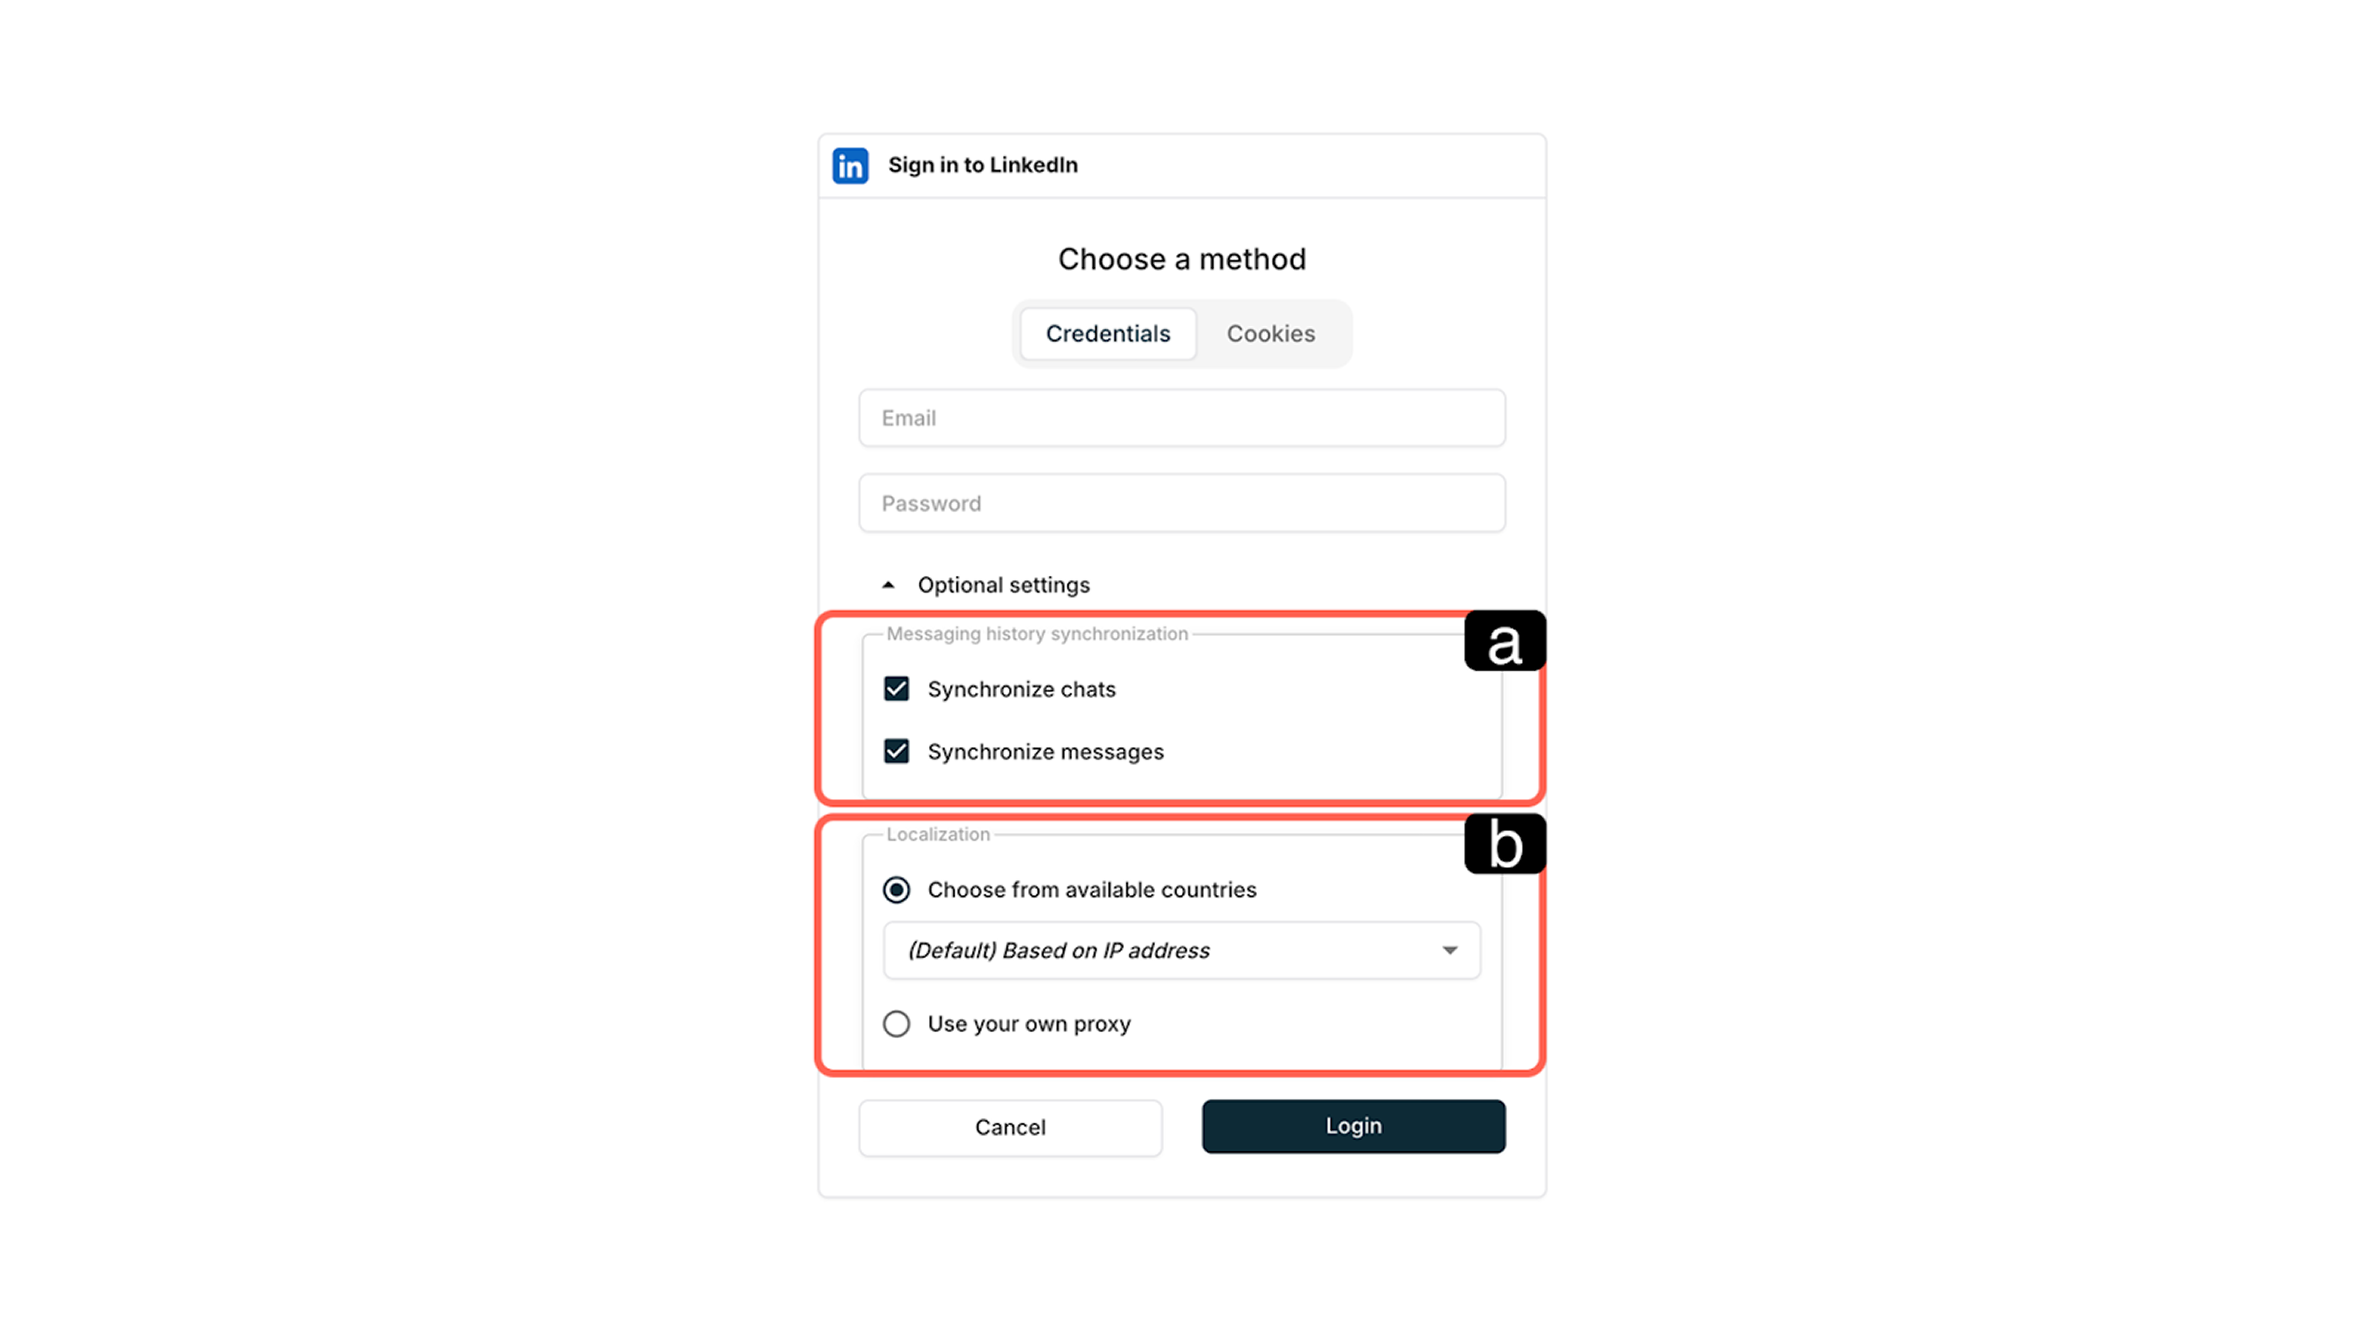
1.d – Optional Settings
This section, located at the bottom of the connection screen, offers additional configurations regarding how Supsis AI processes your LinkedIn data.
-
a – Synchronization Settings
You can enable synchronization options to preserve customer history and provide uninterrupted support.-
Synchronize Chats:
Transfers your existing conversations to the Supsis AI panel. -
Synchronize Messages:
Synchronizes message history during conversations, providing your agents with historical context.
-
-
b – Localization Settings
These settings are used to prevent integration from being affected by regional restrictions or to ensure it operates according to a specific location.-
Country Selection (Choose from available countries):
By default, a location is determined based on your IP address. -
Use Your Own Proxy:
If your organization uses a private proxy network, you can route the connection through that network.
-