WhatsApp Business API Integration
WhatsApp Business API Integration
WhatsApp Business API enables businesses to manage customer communication more effectively, increasing customer satisfaction and operational efficiency. With WhatsApp Business API, you can send bulk messages, integrate AI and chatbots into your line to provide instant automatic responses to frequently asked questions and customer requests, automatically schedule appointments, or make automatic product recommendations. This way, while your customer service workload is reduced, 24/7 support is provided to customers.
1. Editing Business Settings
This documentation explains step by step how to edit your business settings and how to update the information in your business portfolio.
1. Accessing Business Settings
- Log in to your business account via
 Meta Business Suite.
 - Click on the profile picture on the left to access the business portfolio where you will make the edits
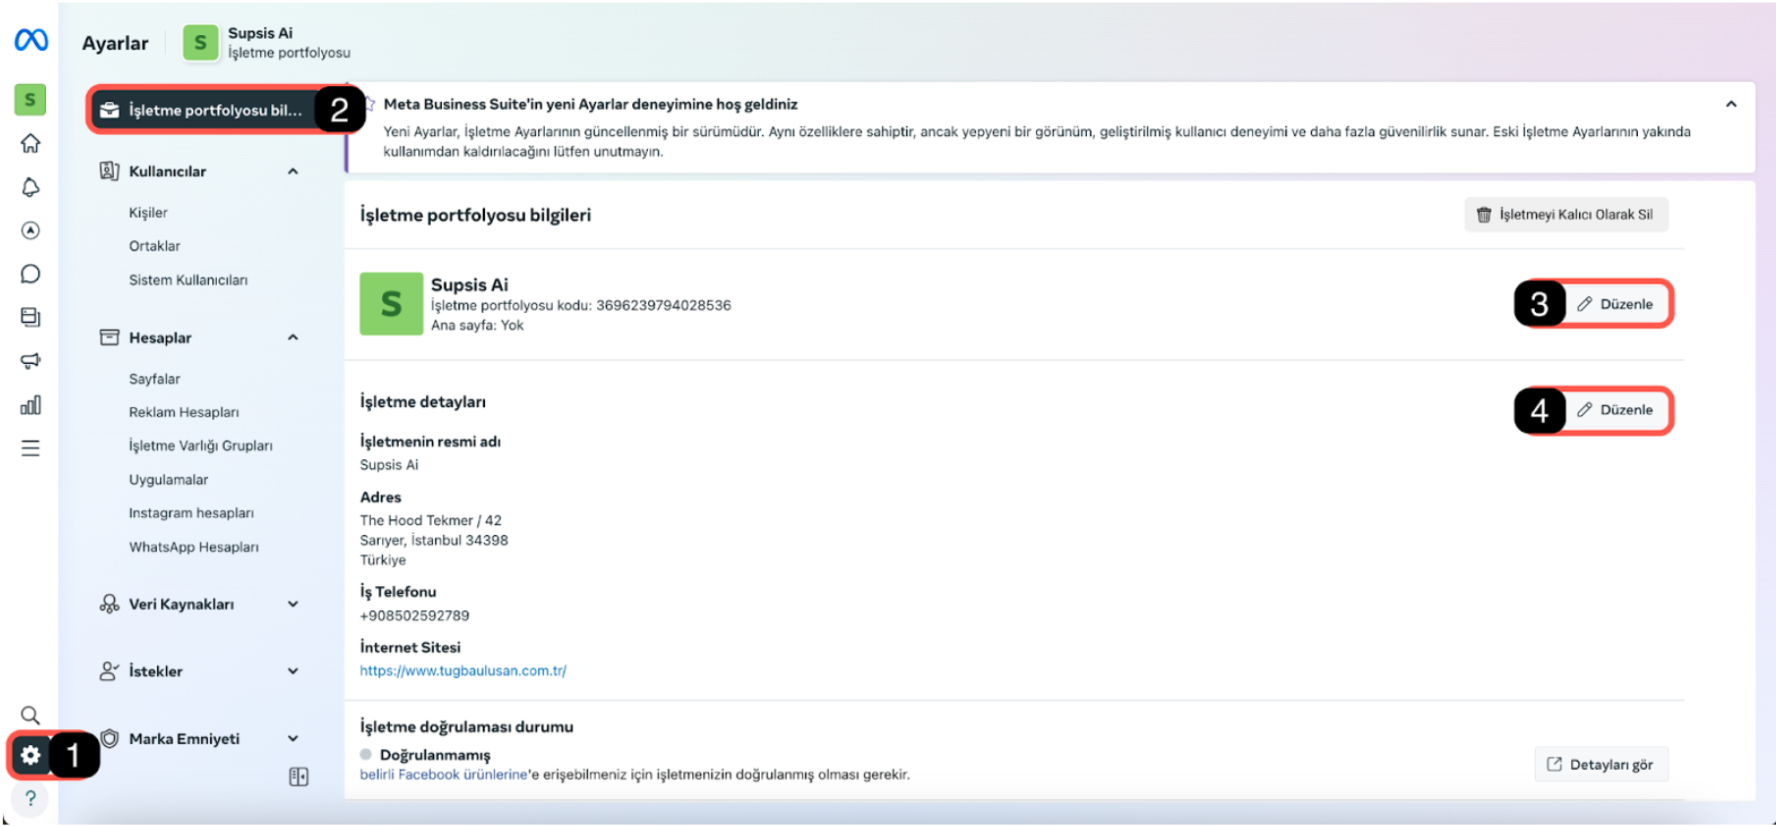
- Then click on the Settings (1) icon from the menu on the left.
2. Accessing Business Portfolio Information
- Click on the Business Portfolio Information (2) tab at the top of the left menu. If this button is not found, go to the bottom of the left menu to access business information.
3. Editing Business Name
- Click the Edit (3) button to edit your business name.
- In the window that opens, edit your business name only in accordance with your tax plate. After completing the editing process, click the Save button.
4. Editing Business Details
In this section, entering your business information correctly and completely by matching it with the information in the contact section of your website plays a critical role in Facebook's business verification process. Facebook evaluates three main elements when verifying your business:
Information on Your Website: The business name, address, phone number, and other contact information on your website must be compatible with the information you add to the Facebook Business Portfolio.
Documents You Submit: The information in the documents you submit to Facebook (tax plate, business license, etc.) must match the information both on the website and in the Facebook Business Portfolio.
Information You Write in Business Details: The business name, address, phone number, and other details entered in the Facebook Business Portfolio must be fully compatible with your website and the documents you submit.
The complete compatibility of these elements with each other will ensure that your business is verified quickly and smoothly. Therefore, when filling in business details, you should pay attention to ensuring complete matching with the website and documents.
-
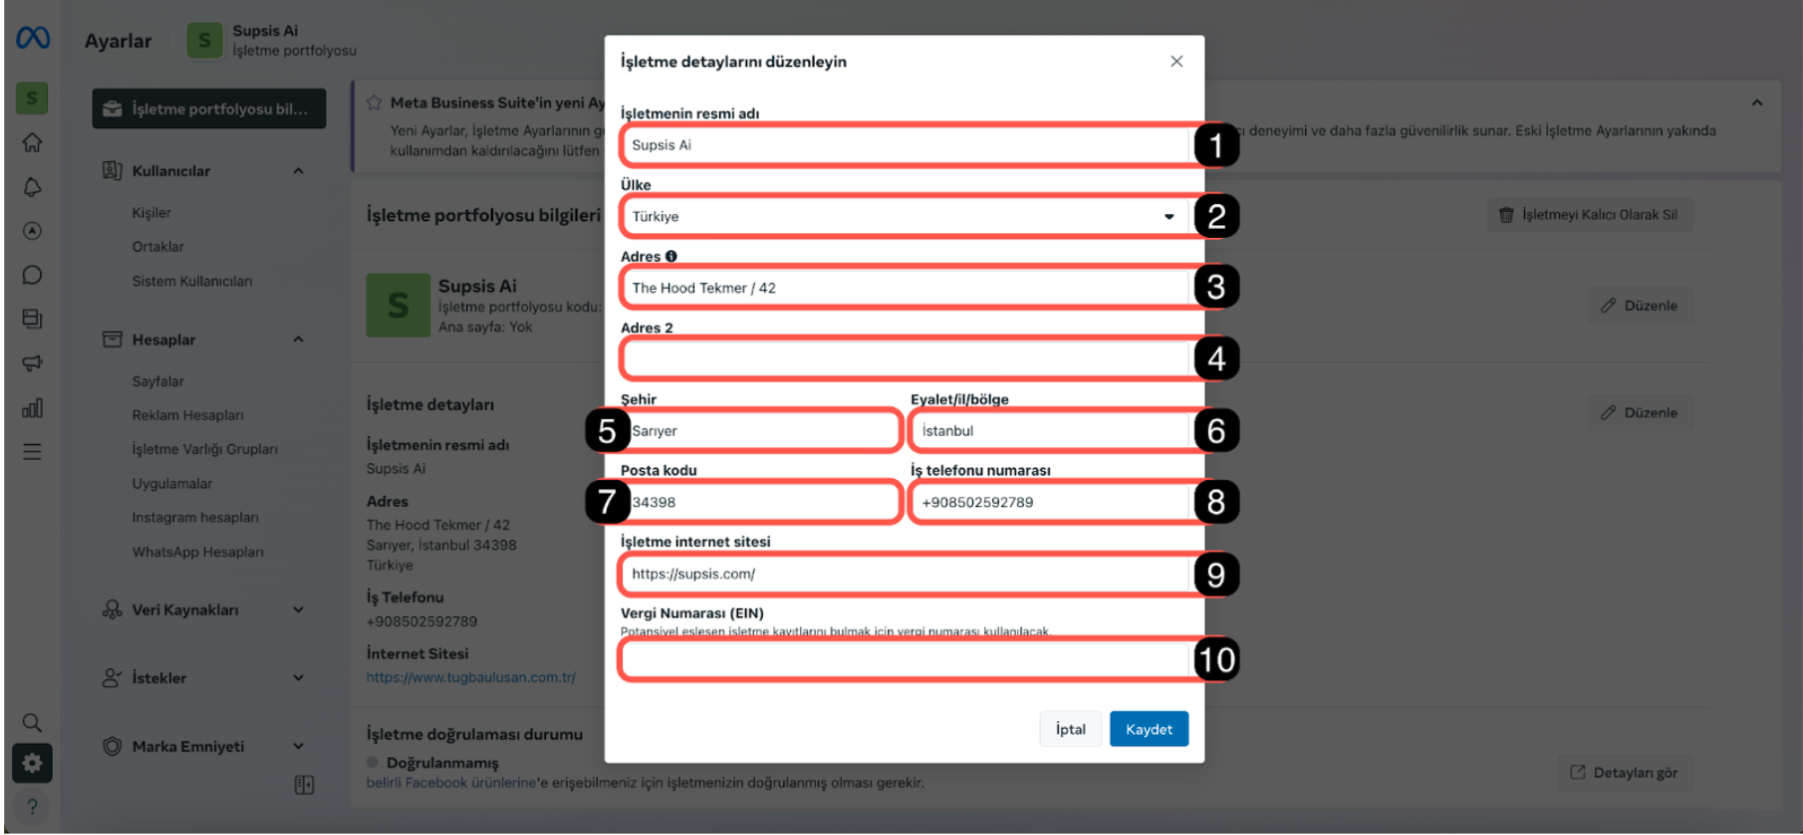
You should update the following information appropriately with the information written in the contact section of your website, which you wrote in the business website section marked with card number 9:
-
Official Name of the Business The full name of your business in accordance with your tax plate.
- Country The country where your business is located.
- Address 1 Your business's main address must be exactly the same as your website address and compatible with the tax plate.
- Address 2 If there is a second address on your website, you can add it here.
- City The district where your business is located.
- State/Province/Region The province where your business is located.
- Postal Code Your business's postal code.
- Business Phone Number Your business's contact number
(The number must appear in the contact section of your website. The number you write here is not the number you will use through WhatsApp Business API, it is only checked whether the number you write here matches your website.) 9. Business Website Your business's website address. 10. Tax Number (EIN) Add your tax number here. This step is not mandatory, you can leave it blank. - After updating all information, click the Save button.
2-) Getting Activation Link
After editing business details, users must take one more additional step to complete the verification process in the Facebook Business Portfolio. This step is getting the activation link. You can complete the operations as follows:
1-) Question Mark in the Top Right of Supsis Panel
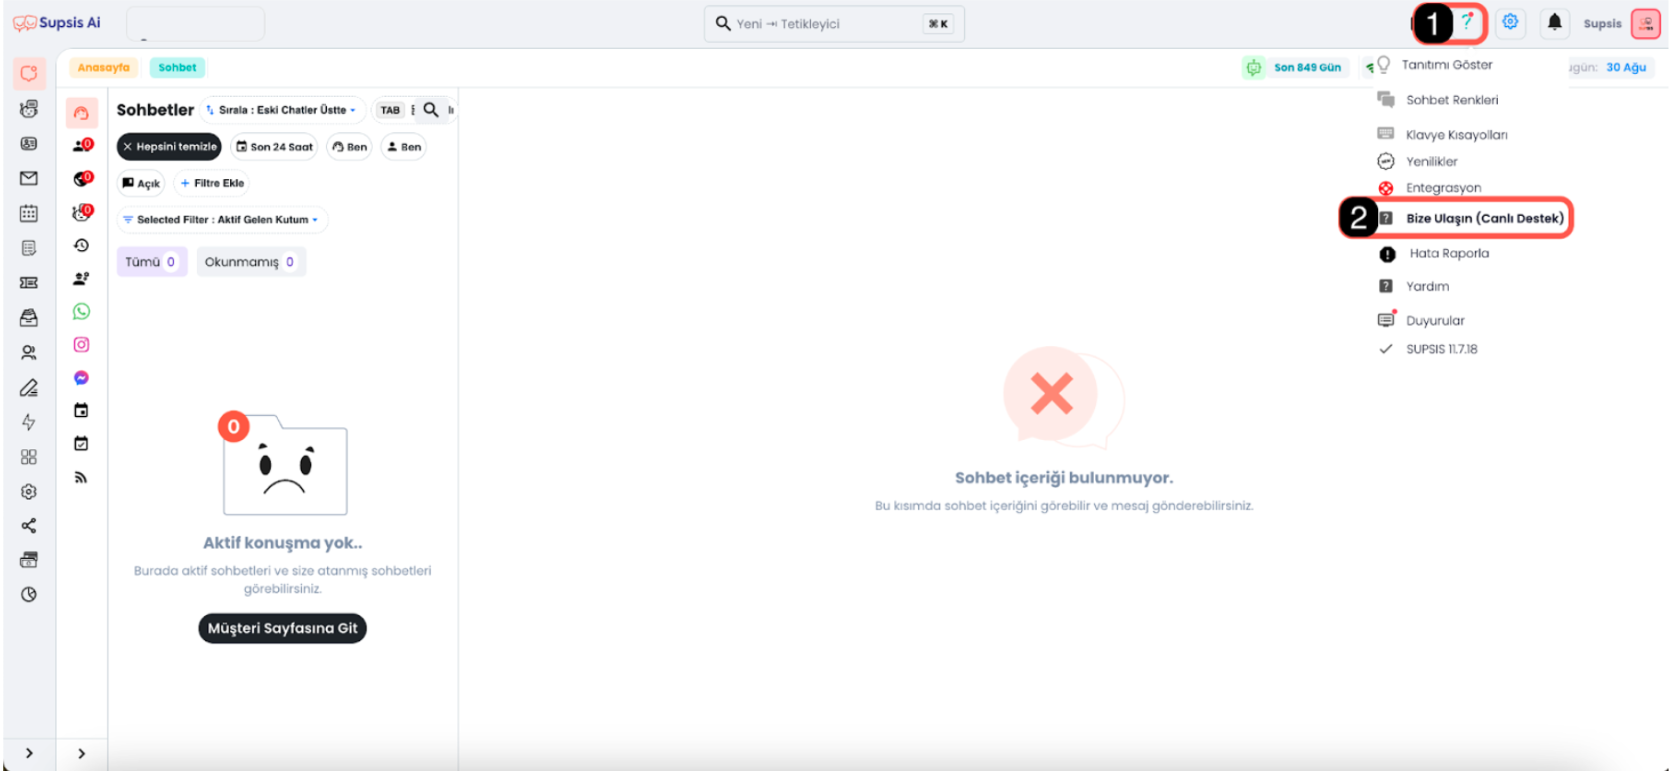
In your Supsis Panel, click on the question mark icon in the top right corner.
2-) Using the Contact Us Button
Select the "Contact Us" button from the menu that opens. Through this button, you can contact the Supsis support team and request the activation link necessary for your business verification.
3-) Getting the Activation Link
After connecting to the chat balloon, click on the technical support button from the chatbot buttons, then get the activation link provided to you by the support team and continue with the number linking process by following the steps below.
3-) Number Linking Guide
This guide includes the steps to integrate your WhatsApp Business account with Supsis. You can easily complete the operations by proceeding step by step.
!Important Note! The number you want to connect to WhatsApp Business API should not have any WhatsApp account on it. If there is currently a WhatsApp account, log in to the WhatsApp application and delete the number by following these steps:
Click on the three dots in the top right> Settings> Account> Delete account
When you delete the number, past conversations will be deleted, backups will become non-functional. If conversations are important, it is recommended to continue with a new number.
1. Logging in with Facebook
Step 1: Click on the link provided by the support team and click the "Continue with Facebook" button on the page that opens.
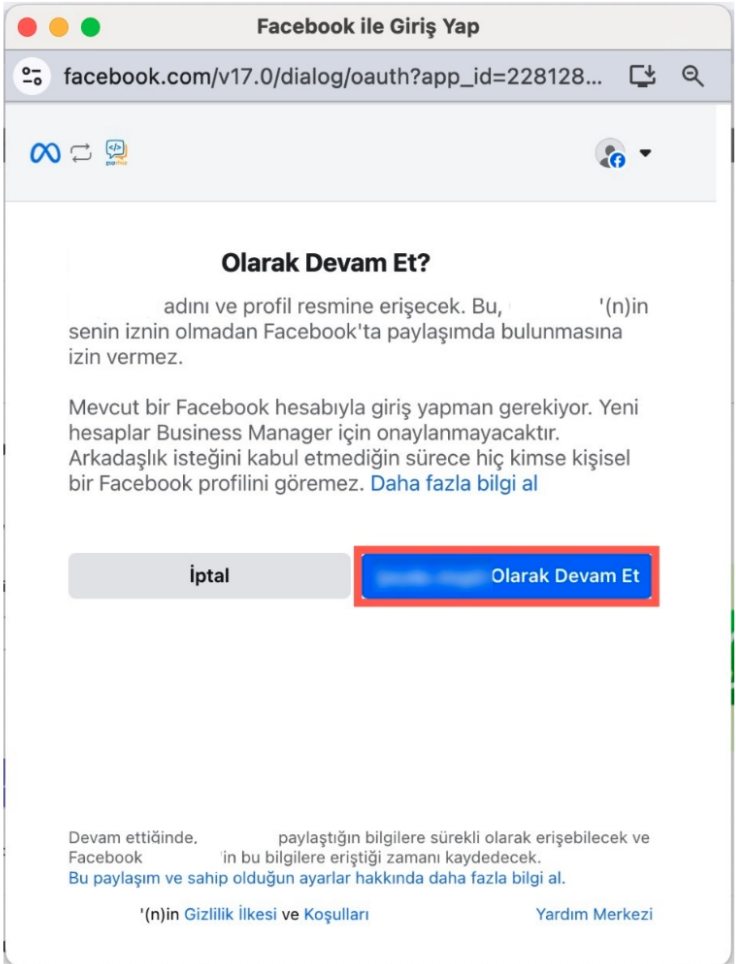
- Step 2: On the screen that opens, you need to log in from the Facebook account where your business portfolio to which you will link the number is registered. After logging into this account, click the "Continue as xx" button to continue with your profile.
2. Approving Permissions
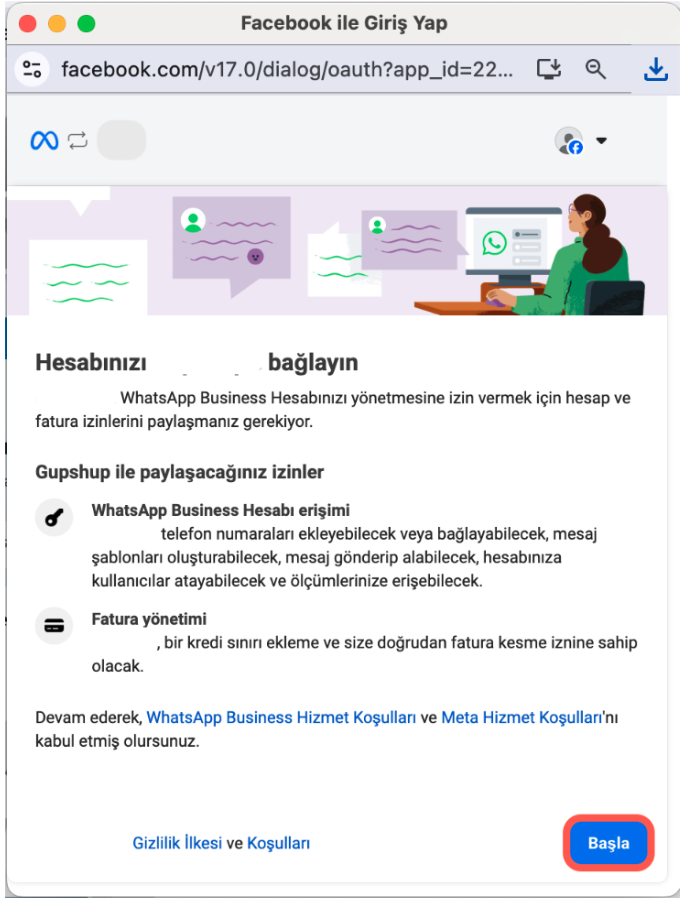 - On the permission screen that appears, you will see that it requests access permission to your WhatsApp Business account and billing management permission. Approve the permissions by clicking the "Start" button.
3. Business Portfolio Selection
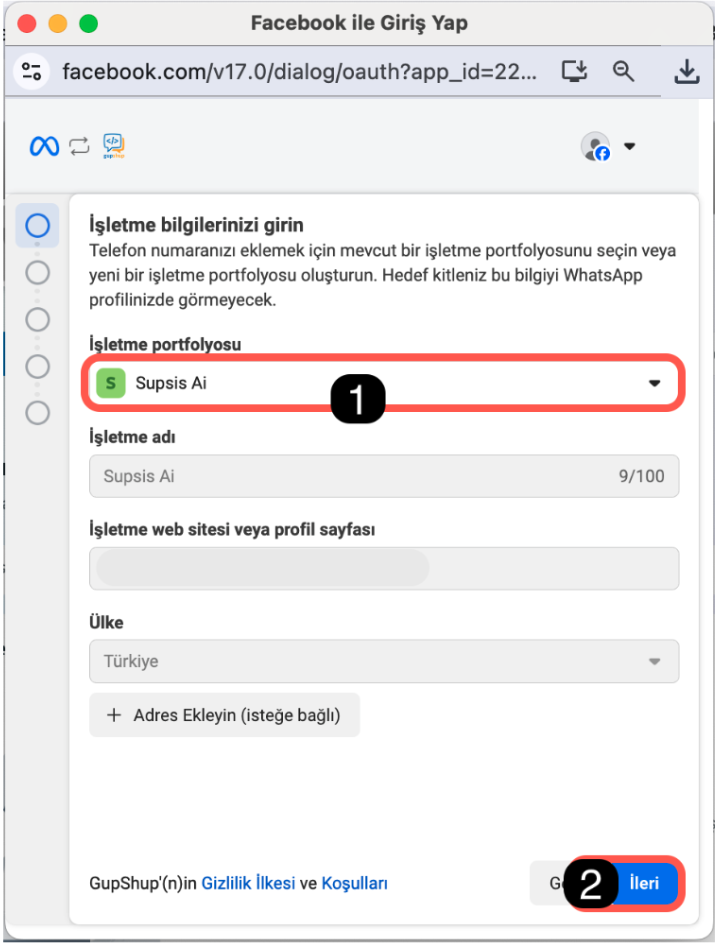
- Step 1: Select the Facebook business portfolio you want to link to your account.
- Step 2: After making the selection, click the "Next" button.
4. Creating or Selecting WhatsApp Business Account
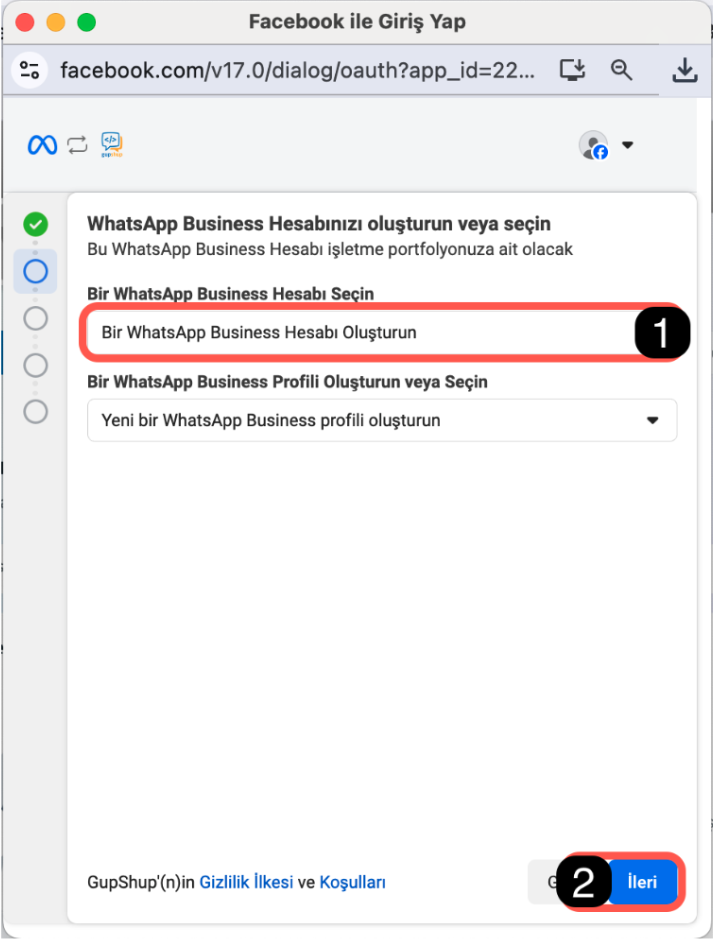
- Step 1: If you have an existing WhatsApp Business account, you can select it from the list. If you want to create a new account, check the "Create a WhatsApp Business Account" option.
- Step 2: After making the appropriate selections, click the "Next" button.
5. Filling WhatsApp Business Profile Information
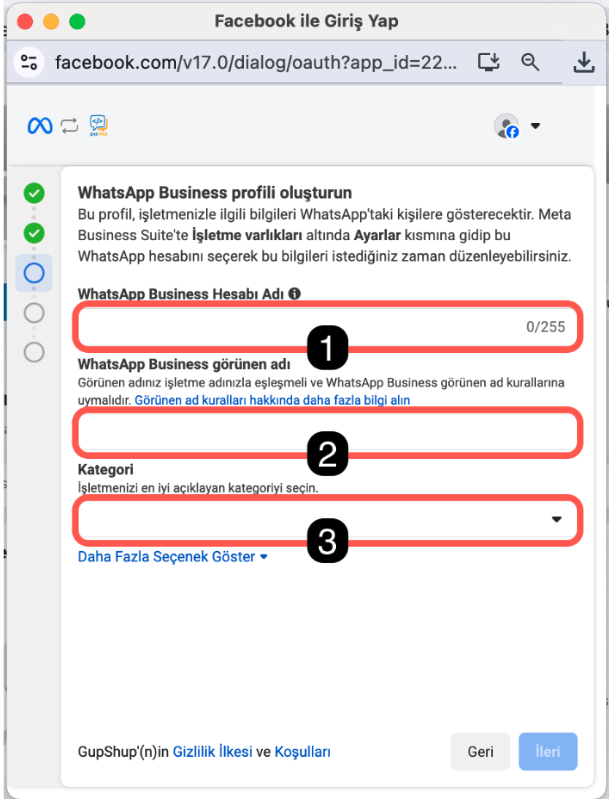
- Determine the name and category for your WhatsApp Business account:
- Step 1: WhatsApp Business Account Name This is the name that will appear in your business portfolio for your WhatsApp Business account, customers do not see it.
- Step 2: WhatsApp Business Display Name This is the display name that your customers will see for your WhatsApp account.
- Step 3: Category Select the category that best describes your business.
- After filling in the information appropriately, click the "Next" button.
6. Adding and Verifying Phone Number
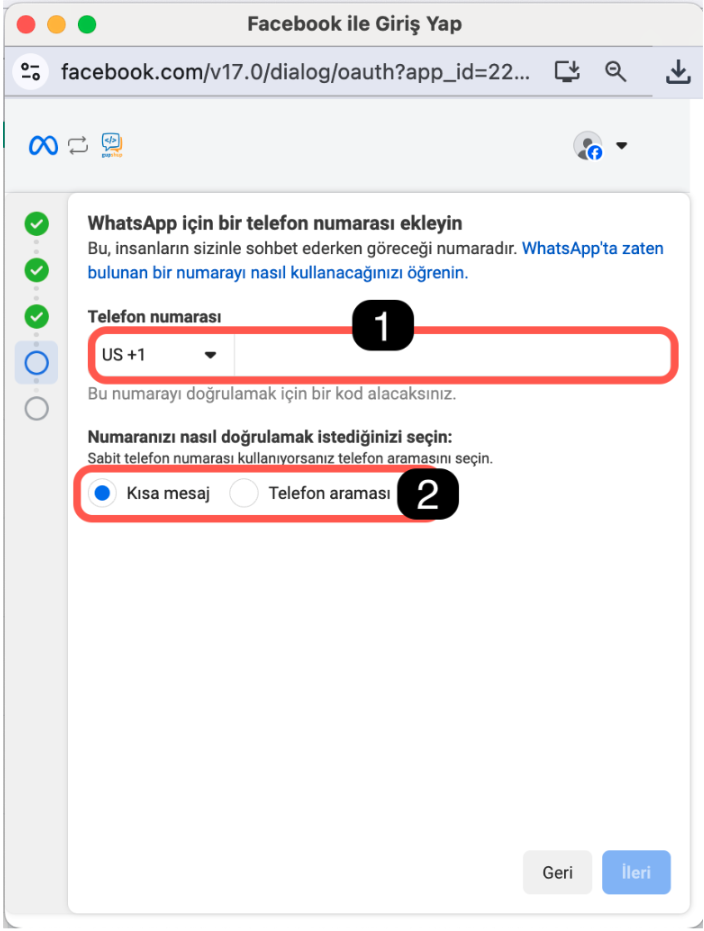
- Step 1: Enter the phone number you want to use for your WhatsApp Business API account.
- Step 2: Select the appropriate method to verify the number (SMS or phone call). If your number is connected to a switchboard and you cannot receive SMS, you need to redirect the call to a line you have access to through the switchboard panel and remove the IVR.
-
Note: If your number is linked to a WhatsApp account, it will give an error at this step. If you get an error at this stage, you need to delete the WhatsApp account. To delete the account, log in to the WhatsApp or WhatsApp Business application where the number is registered and delete the number by following these steps:
-
Click on the three dots in the top right> Settings> Account> Delete account
-
When you delete the number, past conversations will be deleted, backups will become non-functional. If conversations are important, it is recommended to continue with a new number.
-
After meeting the requirements and making the appropriate selection, click the "Next" button and complete the process. After completing these steps, your WhatsApp Business account will be ready to be managed through the system. To complete the operations, contact our support team by clicking on the question mark icon in the top right of your panel.
4-) Business Verification Steps
1. Accessing Security Center and Starting Verification

- Access via Meta Business Suite, click on the profile picture in the top left, then click on the settings gear next to the business portfolio where the number is connected to go to business settings.
- Enter the Security Center tab.
- Click the Start Verification button on the screen.
2. Starting Verification
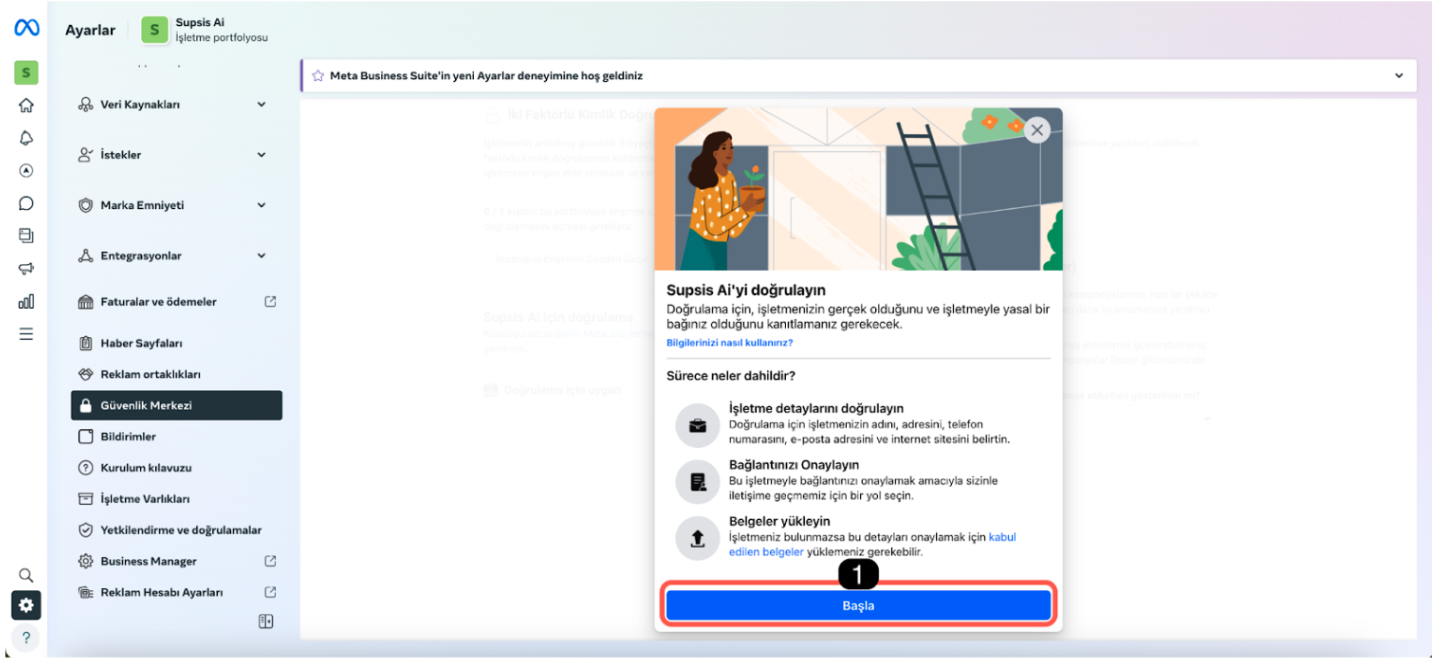
- Start the operations by clicking the Start button.
3. Country Selection
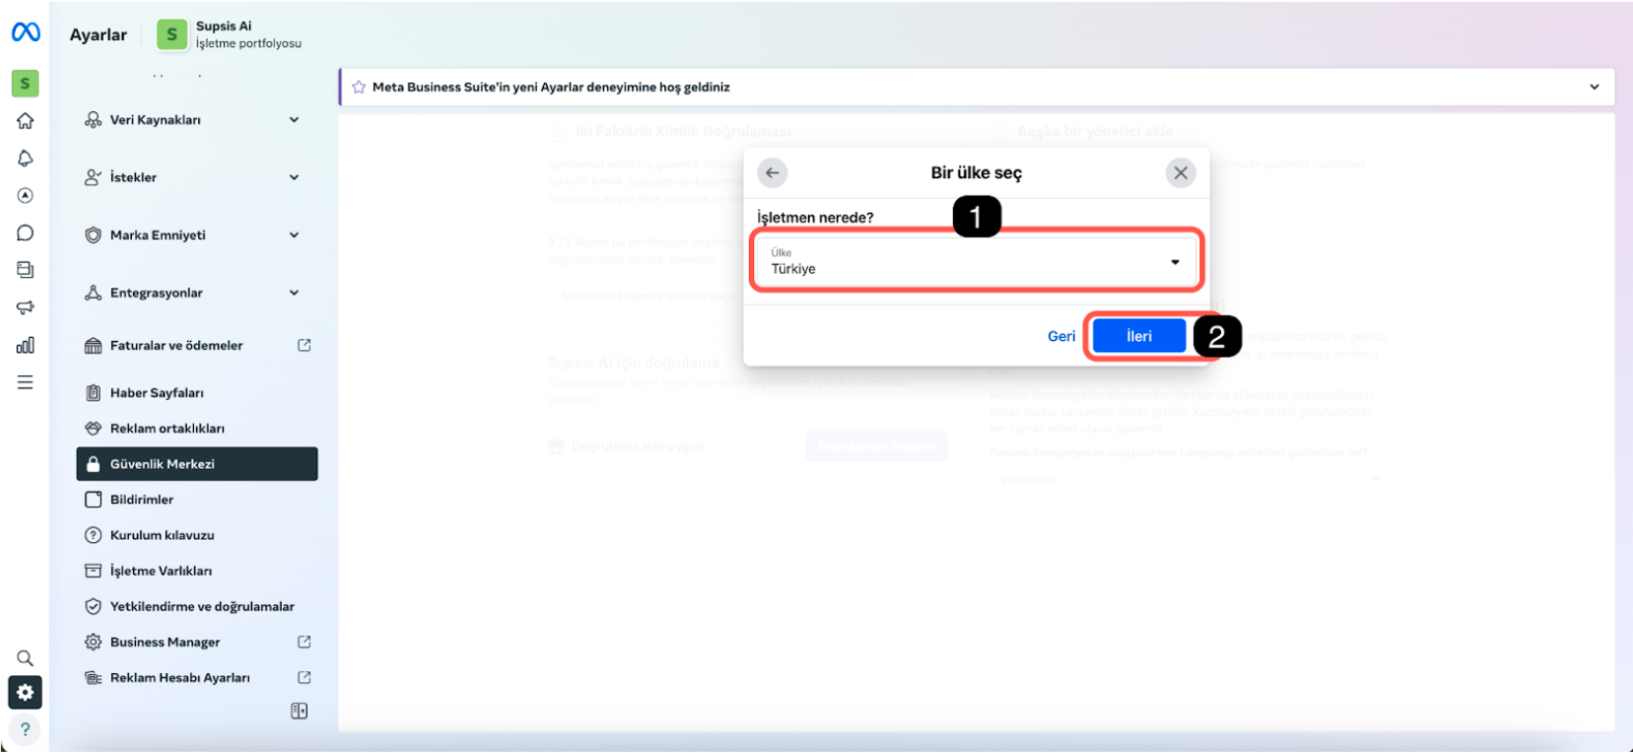
- On the screen that opens, select the country (for example, Turkey) written on your business's tax plate.
- Click the Next button.
4. Business Type Selection
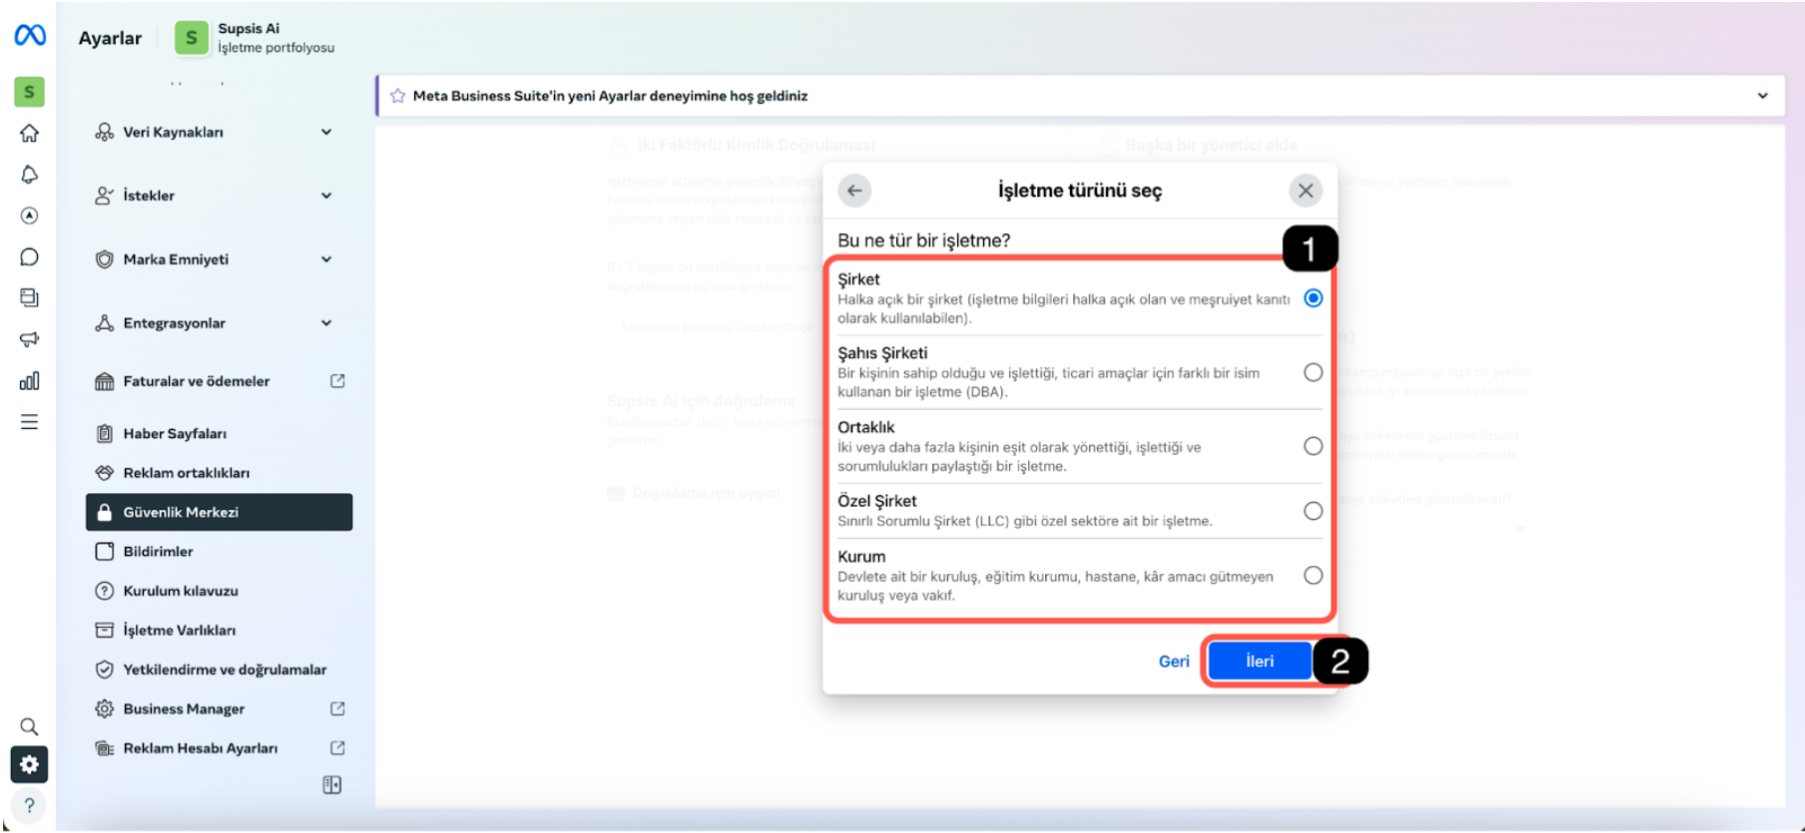
- Select the appropriate business type.
- Click the Next button.
5. Address Information and Compatibility Check
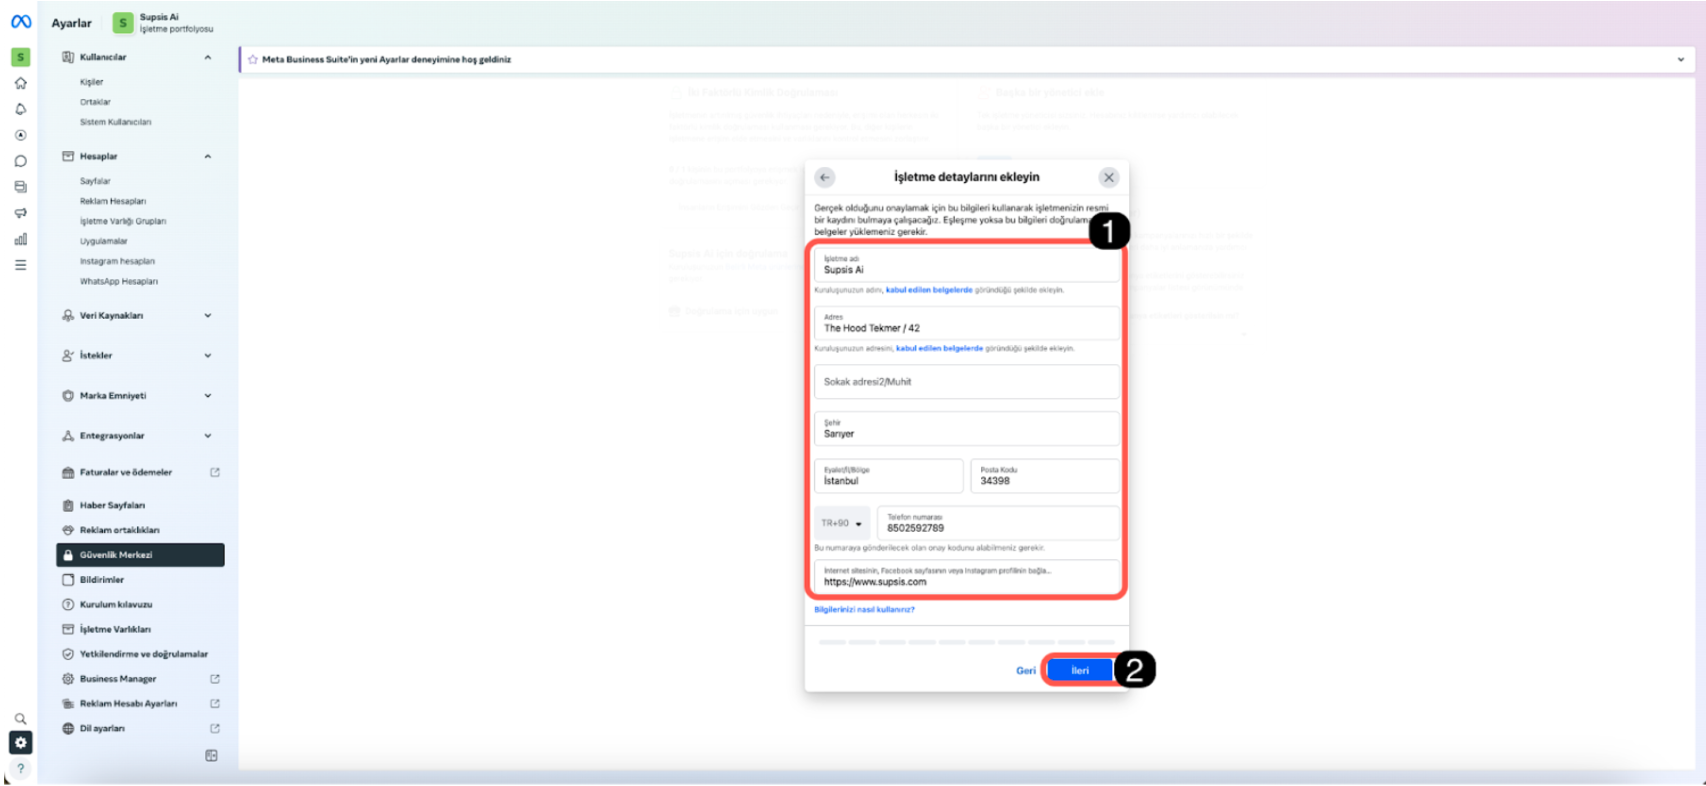
- Make sure that the address information on this screen is compatible with the information on the website and tax plate.
- If the information is compatible, click the Next button.
6. Business Selection or Adding New Business
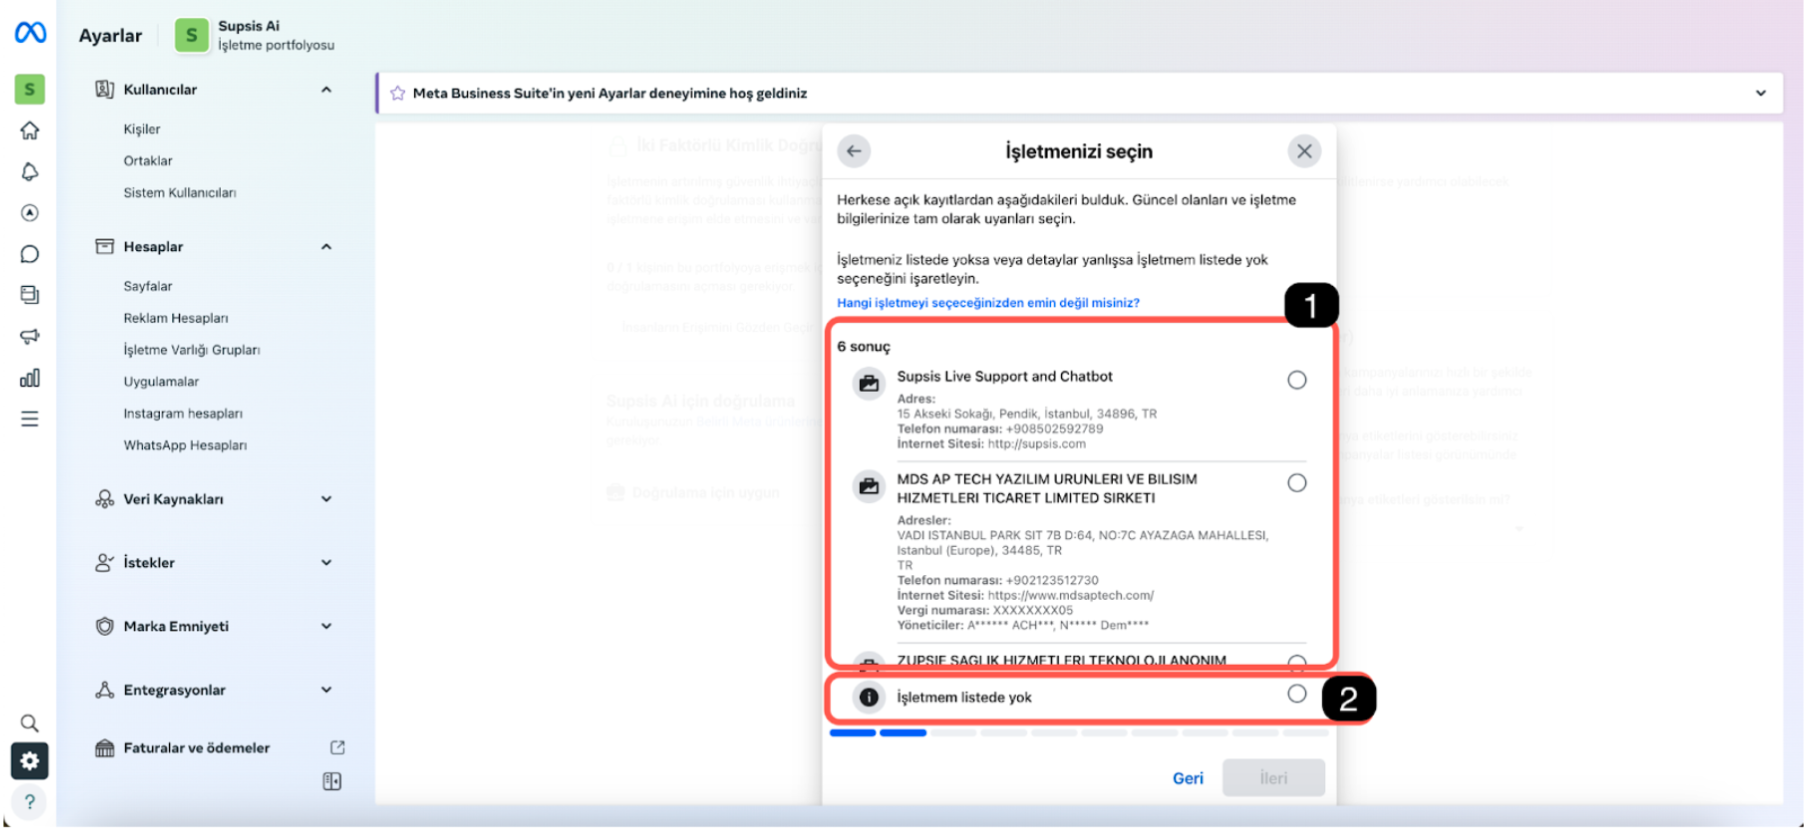
- If your business is in the list, select the appropriate business. The information must be fully compatible with business details and tax plate. If the name is consistent but information such as address and number are not consistent, continue from the "my business is not in the list" step.
- If the business is not found or all information is not compatible, check the My business is not in the list option.
- After making the selection, click the Next button to continue.
7. Verification Method Selection
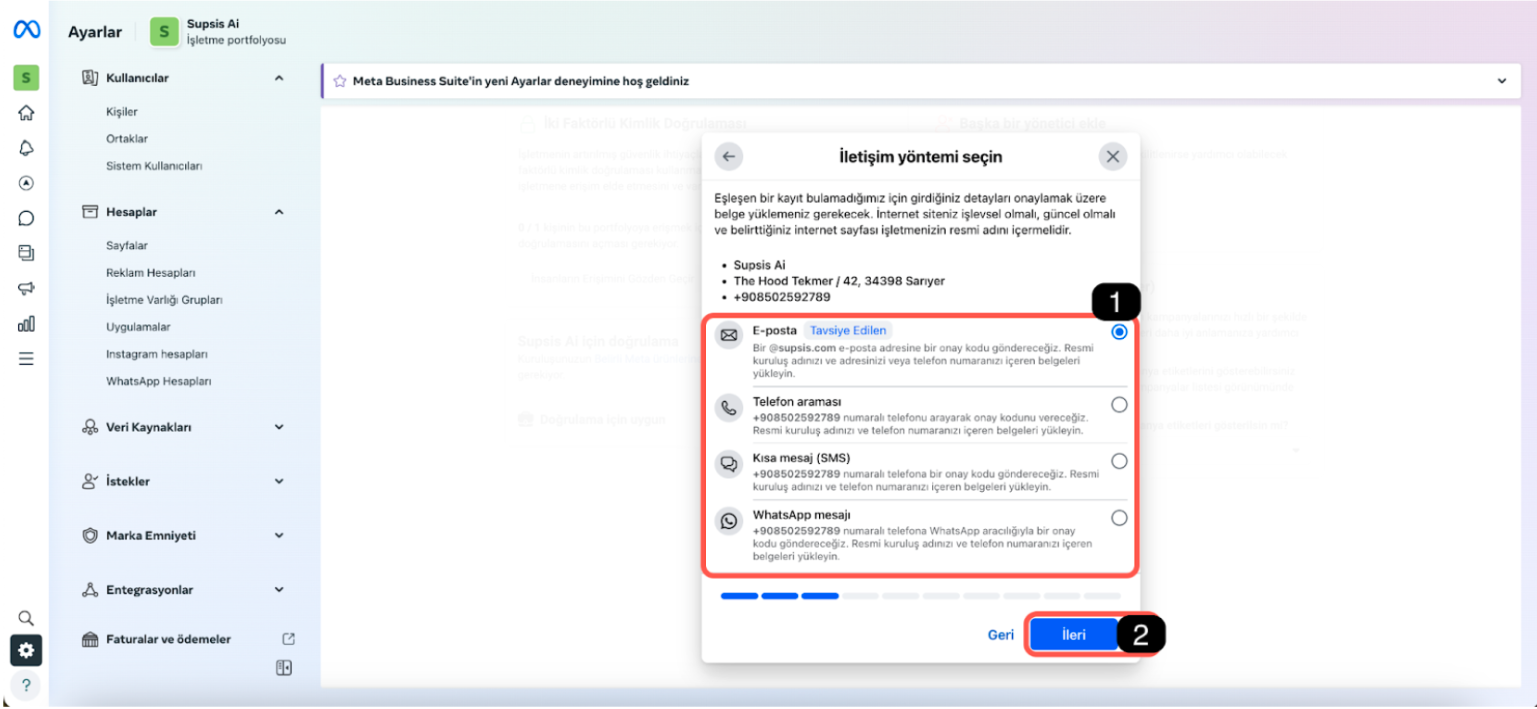
- The recommended verification method is Email. It is sufficient for the email address to include the extension in the website address. Your info email or personal email belonging to your company will be accepted. If you don't have an email address, you can complete the verification with the phone number on your website.
- After selecting the appropriate method, click the Next button.
8. Document Upload
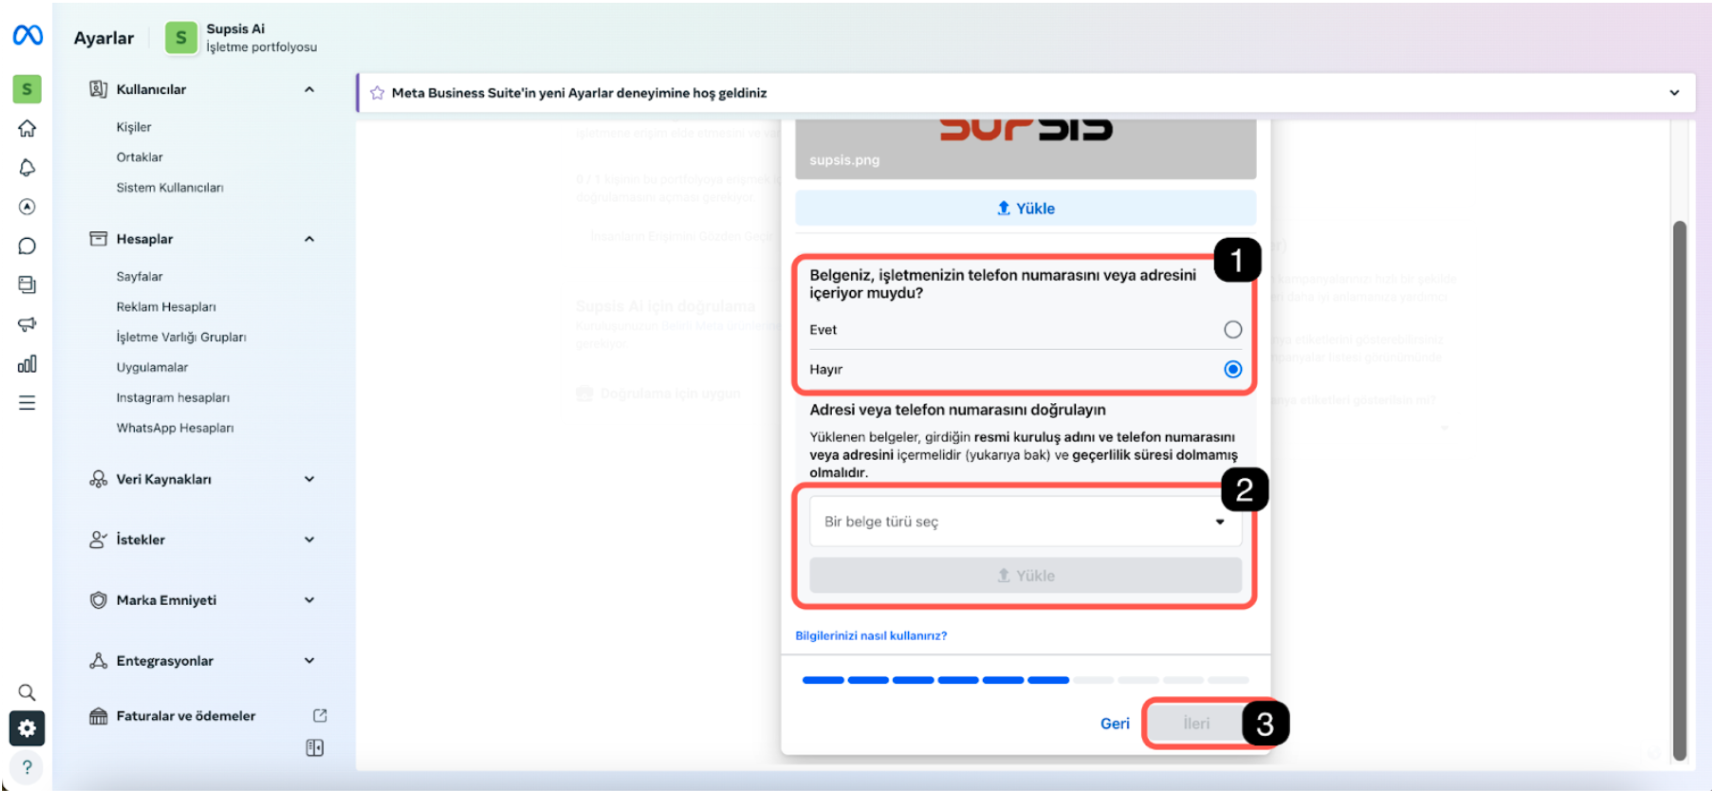
- Select the appropriate document from the Select a document type field and upload it. For the top section, the recommended document type is tax document and uploading the tax plate.
- Check whether the uploaded document is compatible with business information and sufficient. The top document must include business name, phone number, and address information. If it doesn't include them, you need to ensure sufficiency by uploading additional complementary documents from the bottom section.
- If the first document meets the requirements of phone number, address, and business name, check the Yes option and proceed. If it's not sufficient, check the No option and upload the complementary additional document.
- After meeting the requirements, click the Next button to continue.
9. Confirmation Code Entry
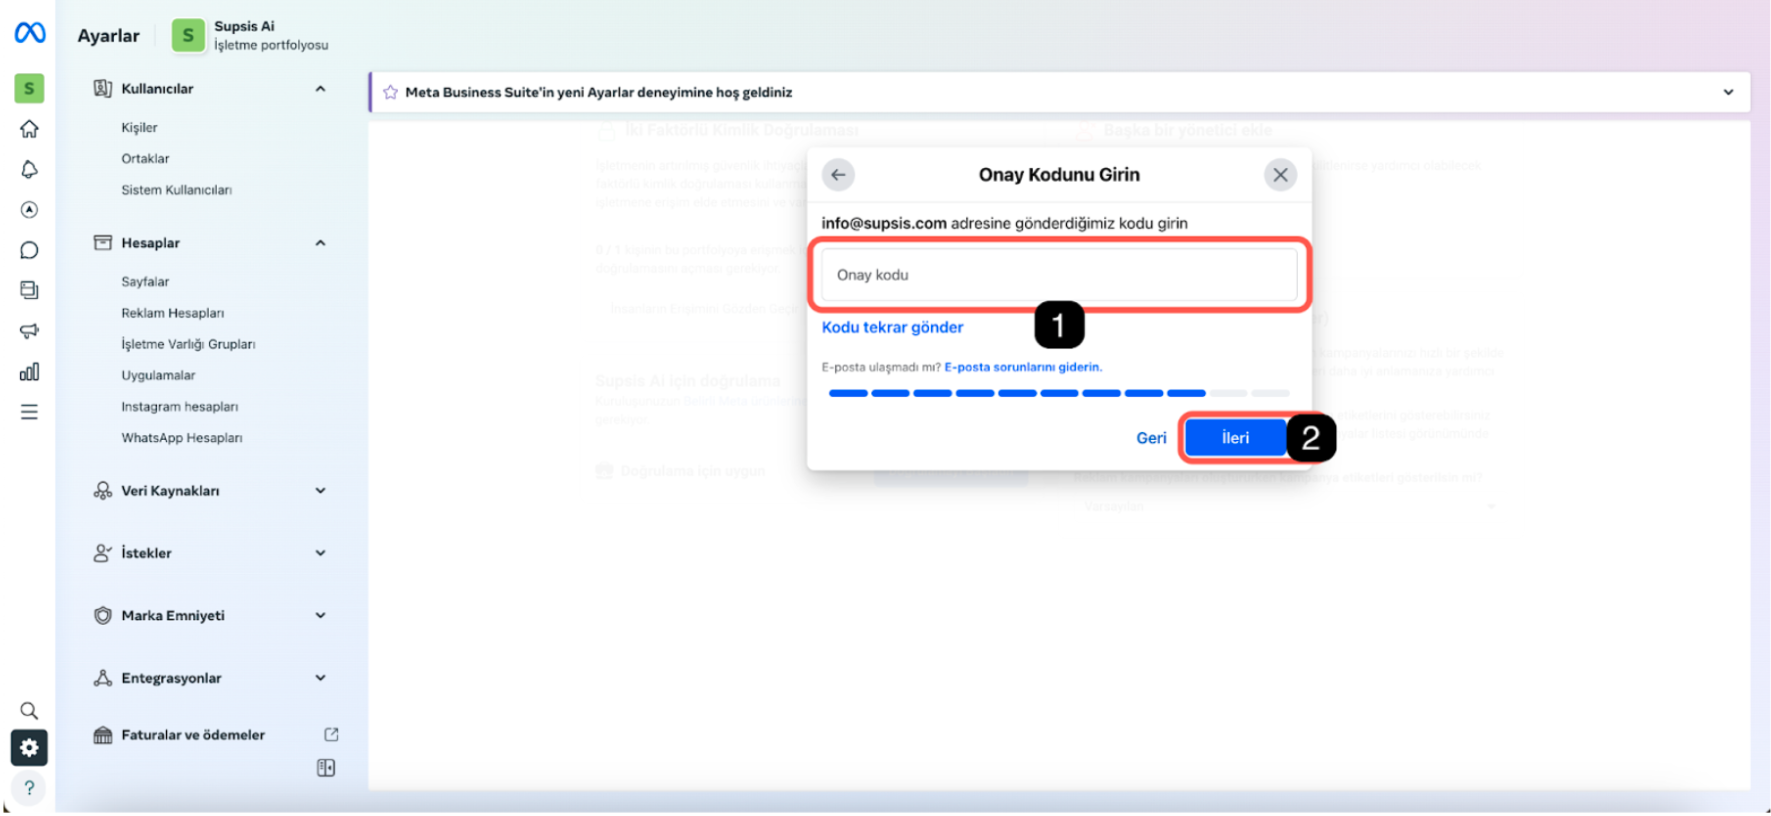
- If you selected Email as the verification method, write an email address that matches your website domain code and enter the confirmation code that comes. If you selected phone call, SMS, or WhatsApp message management, enter the code that comes to your phone.
- After entering the code, click the next button.
10. Completing Operations
When you enter the code transmitted through the selected verification method, the process will be completed.
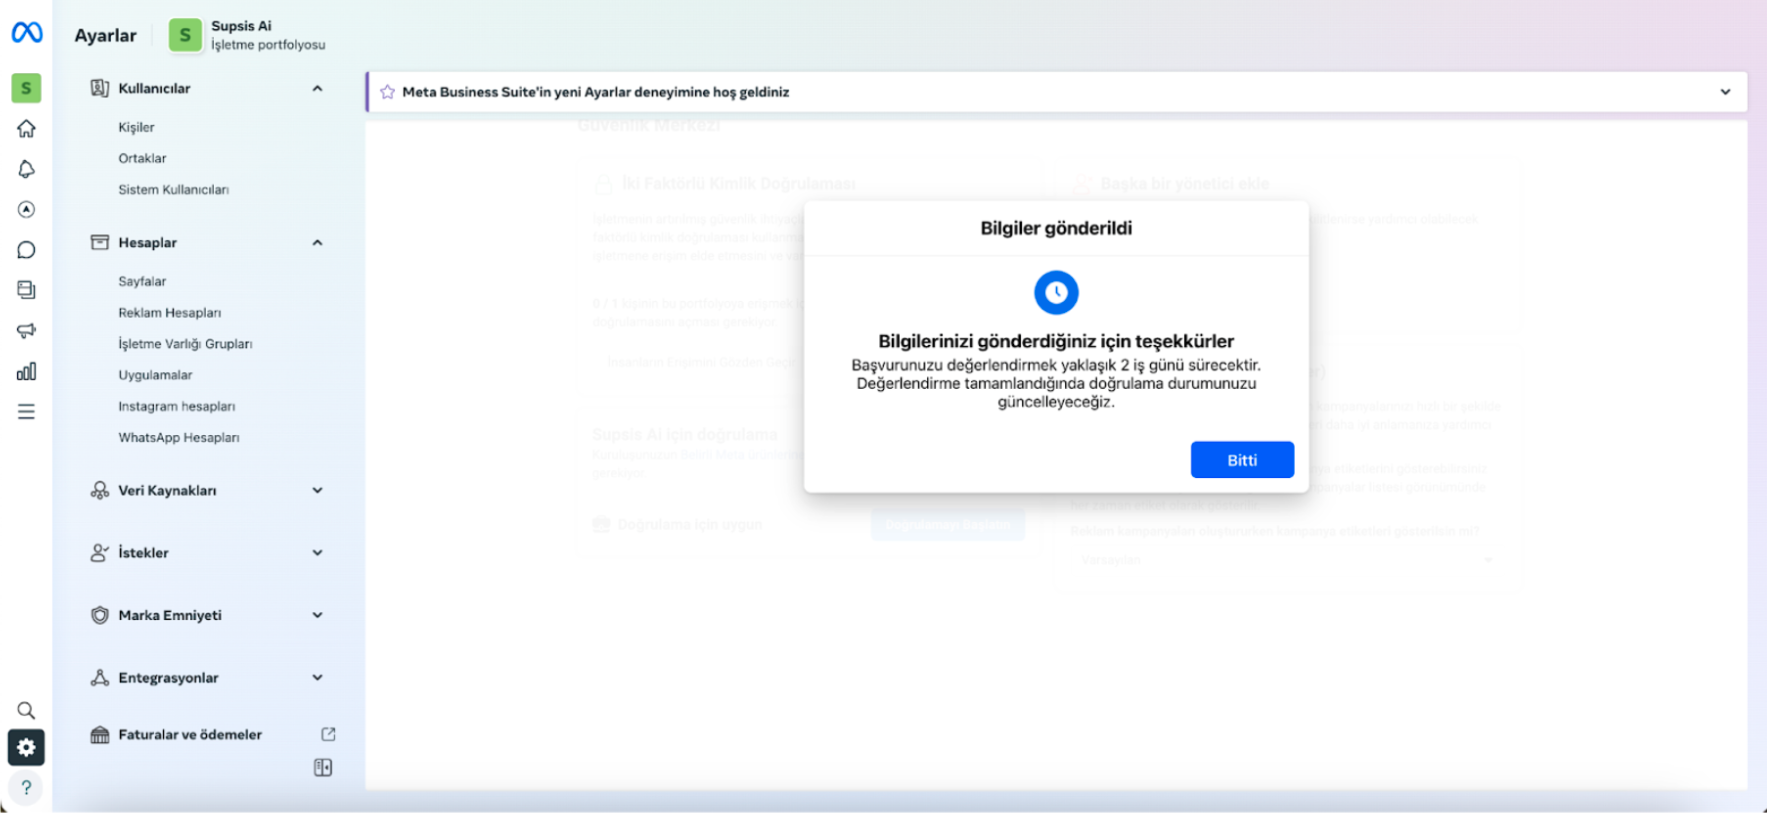
By following these steps, you can verify your Facebook business account. If you have applied the steps completely, verification will come within a few days. After verification; you can have the right to send 1000 daily bulk messages, make your WhatsApp account appear with name instead of number, and apply for a green tick.