WhatsApp Business API Customer Groups
Customer Groups
The Customer Groups section helps you organize your bulk message sending in specific groups. From this section, you can create, name, add or edit groups. Here are the necessary steps to manage customer groups:
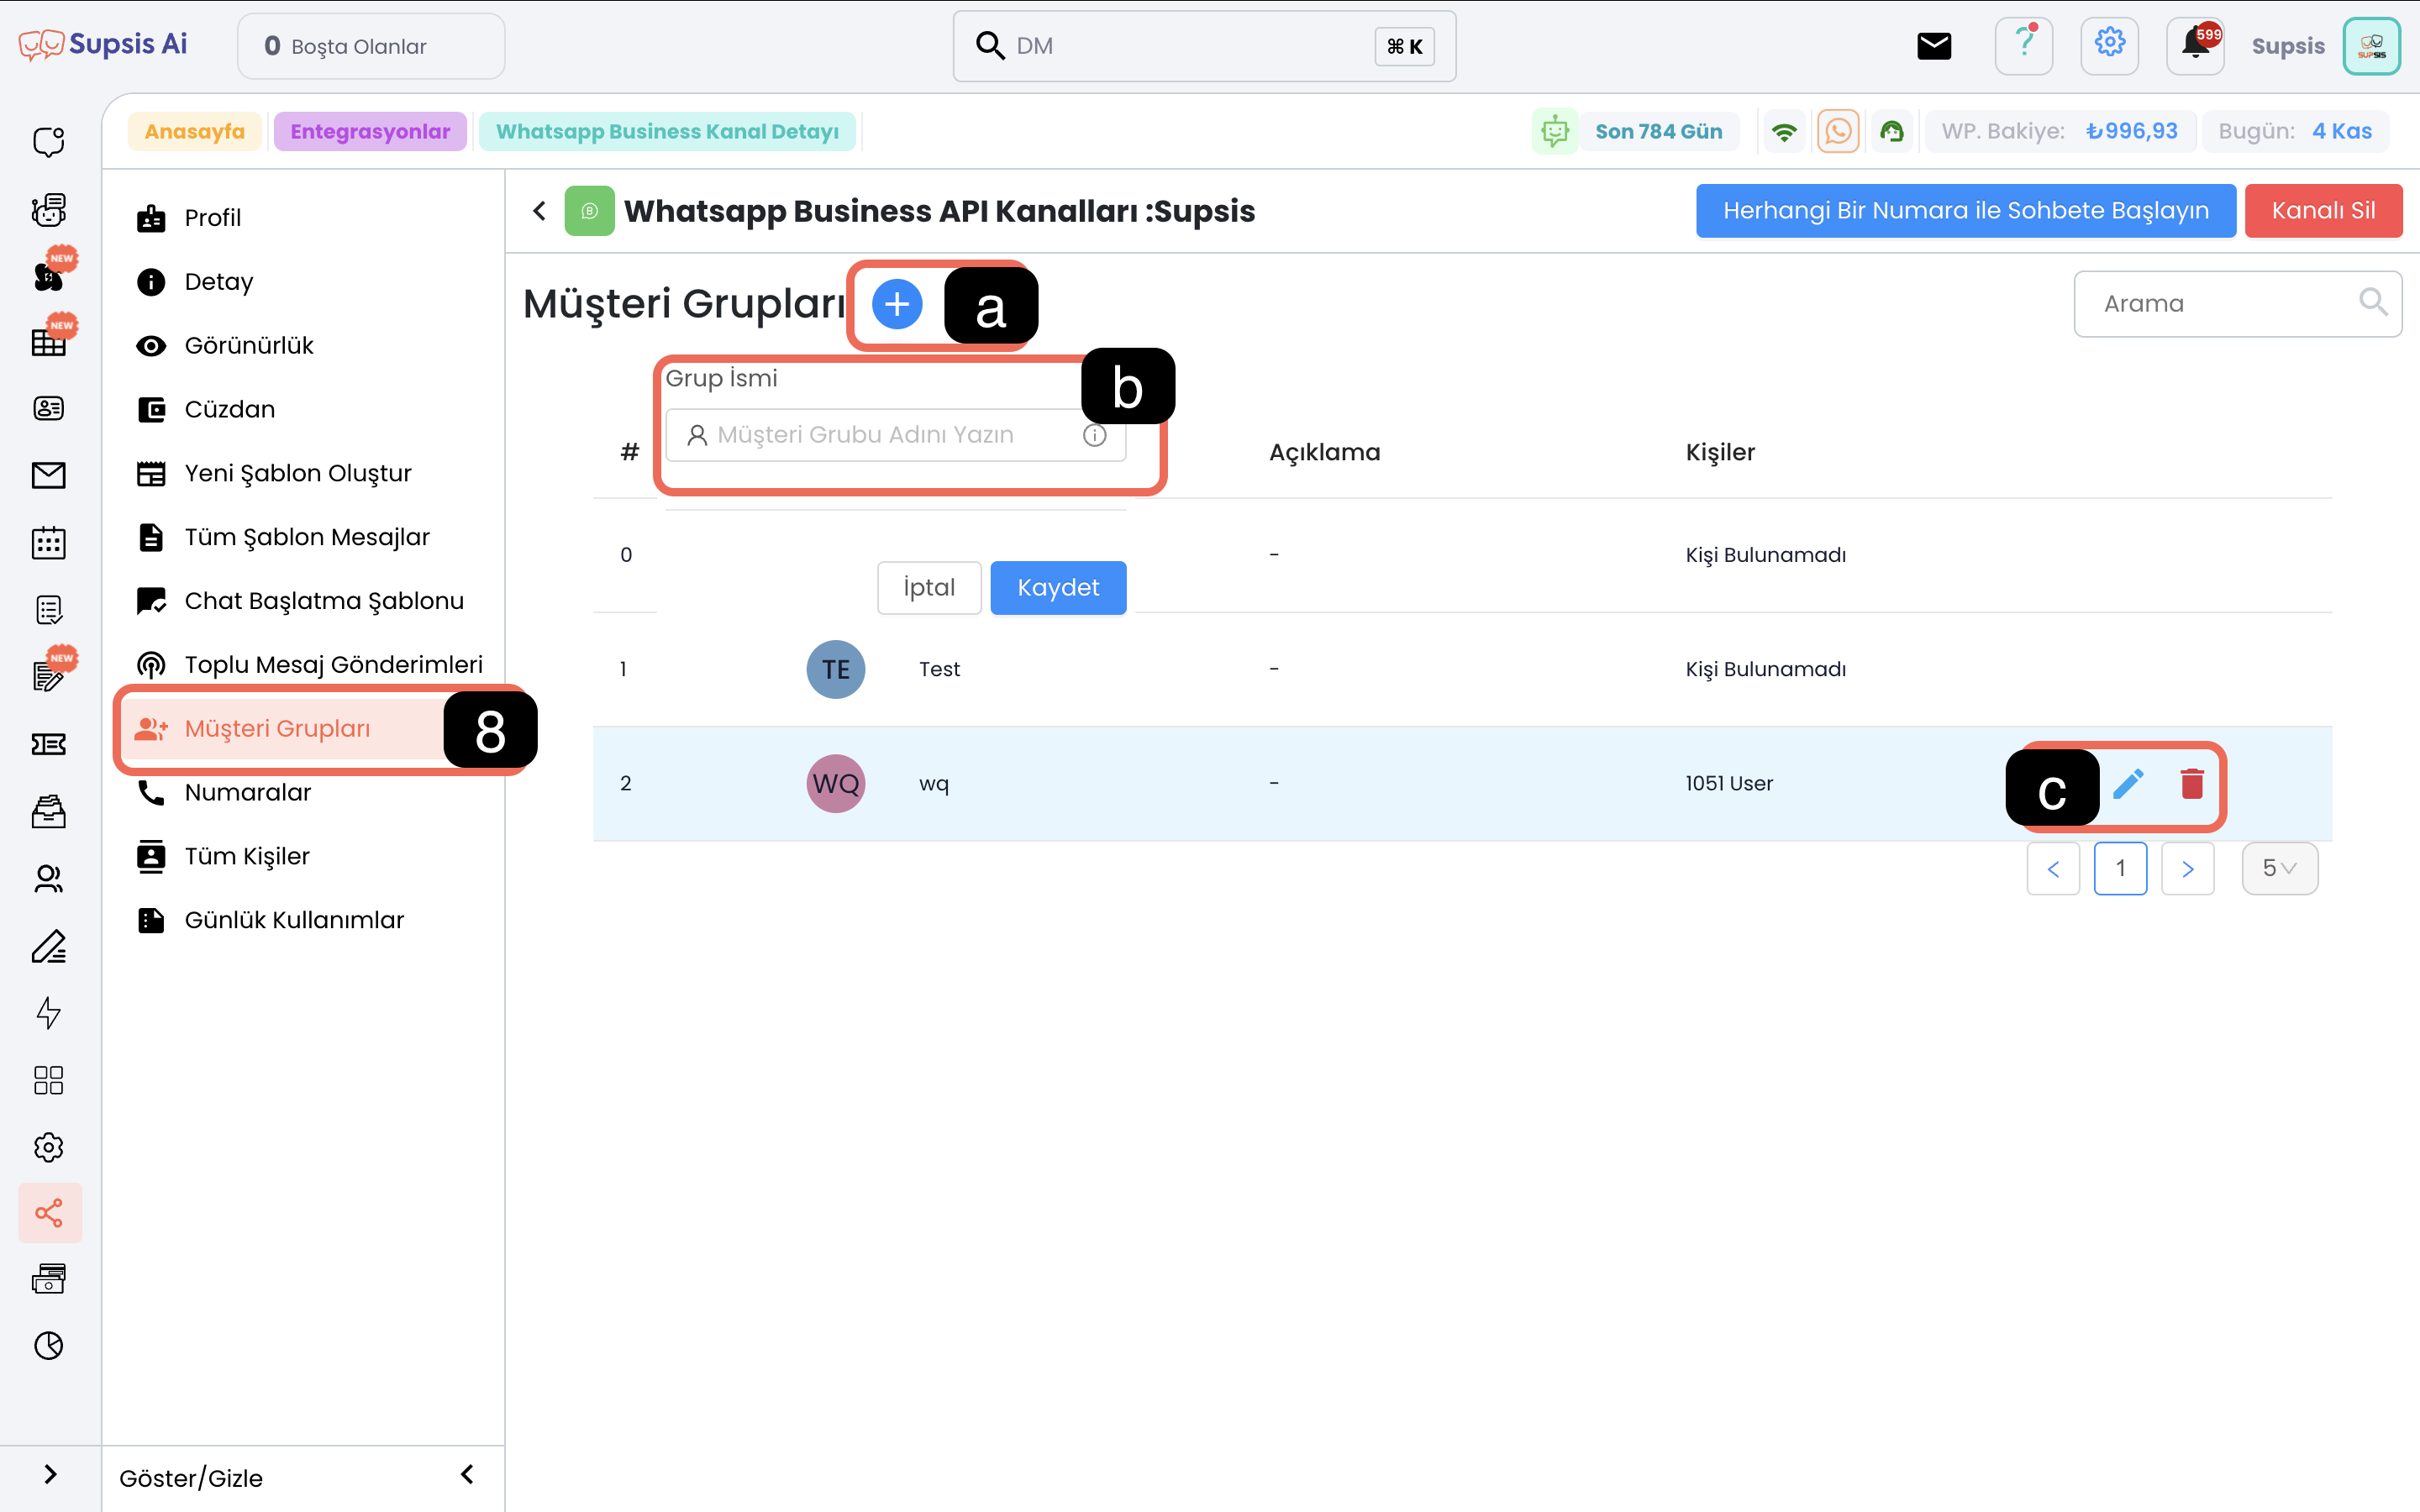
- Create Group
- Name Group
- Delete/Edit Group
a-) Create Group
You can add a group by pressing the "+" button to create a new customer group.
b-) Name Group
Give your created group a clear and classifying name so you can easily recognize it later. This allows you to manage the group more effectively.
c-) Delete/Edit Group
You can edit your created groups by clicking the pencil icon or delete them by clicking the trash icon.
Group Contents
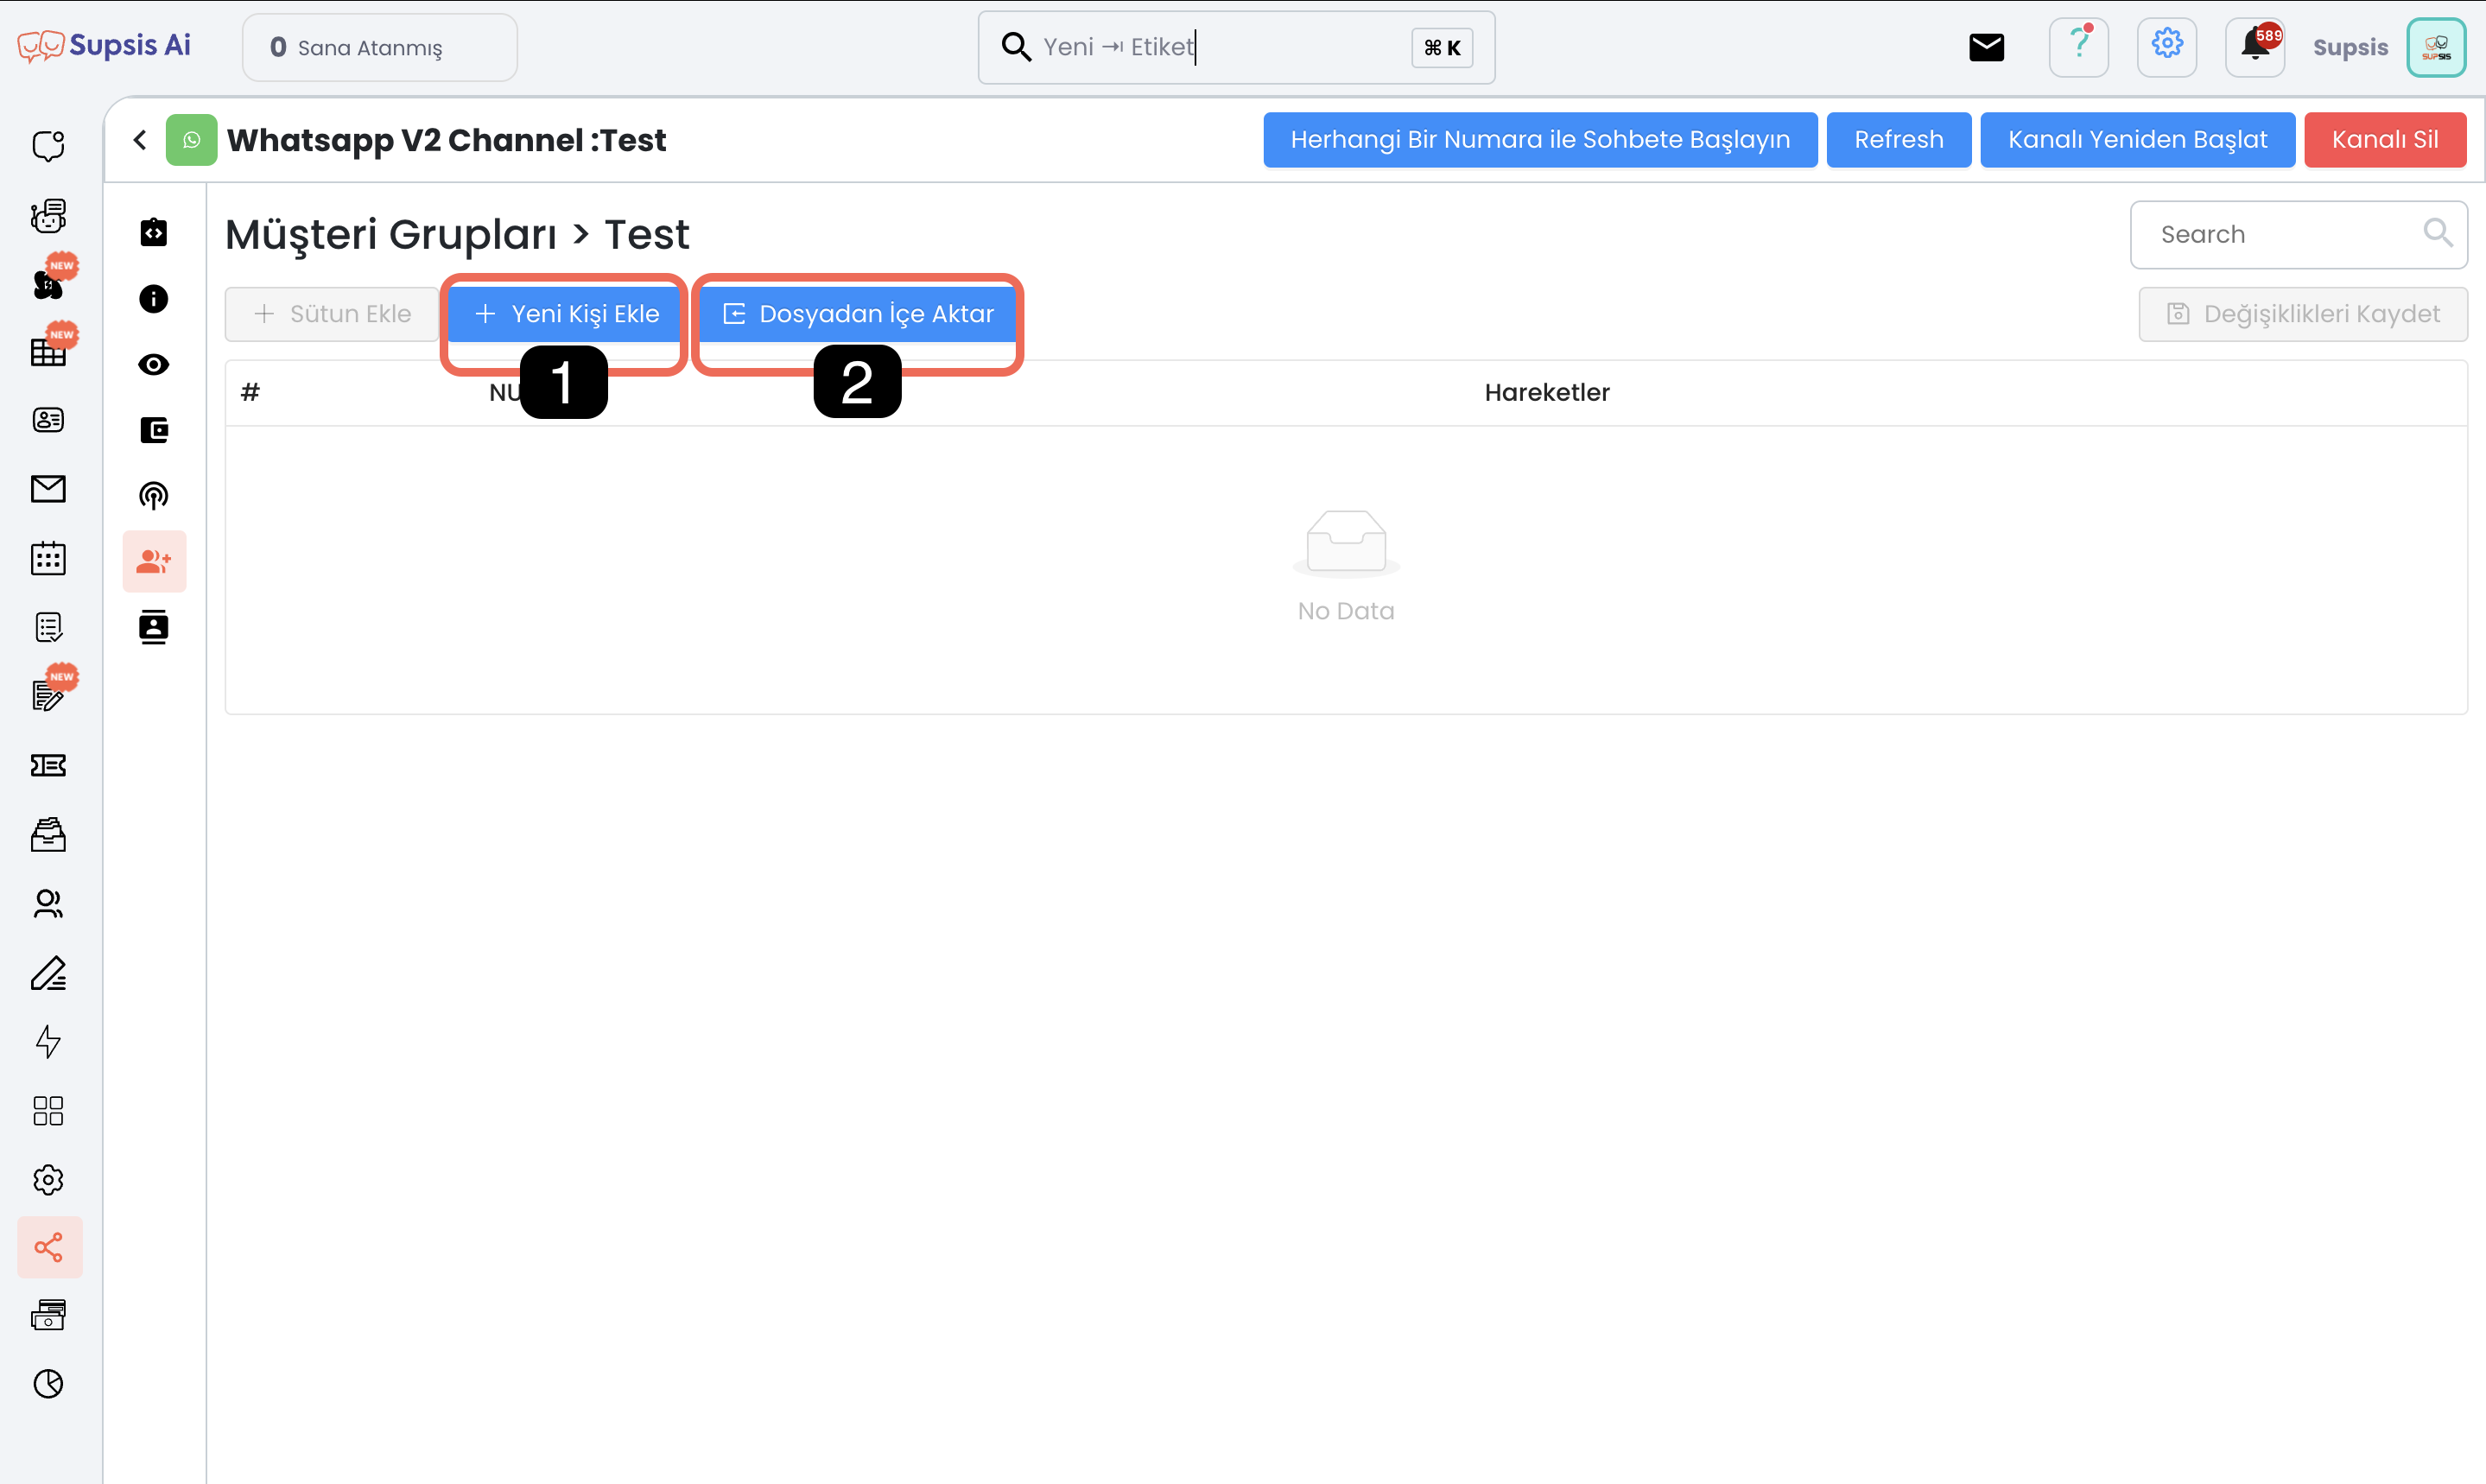
- Manual Contact Addition
- Bulk Contact Upload with File
1-) Manual Contact Addition
- You can add contacts one by one manually from this section.
- In addition to numbers, you can use the "Add Column" option to add extra information (name, title, etc.).
- This information you add can be used as customized content in bulk message sending. The system automatically integrates the information entered next to the number into the message content.
2-) Bulk Contact Addition with File
You can bulk import customer groups by uploading your Excel or CSV file. Here are the steps:
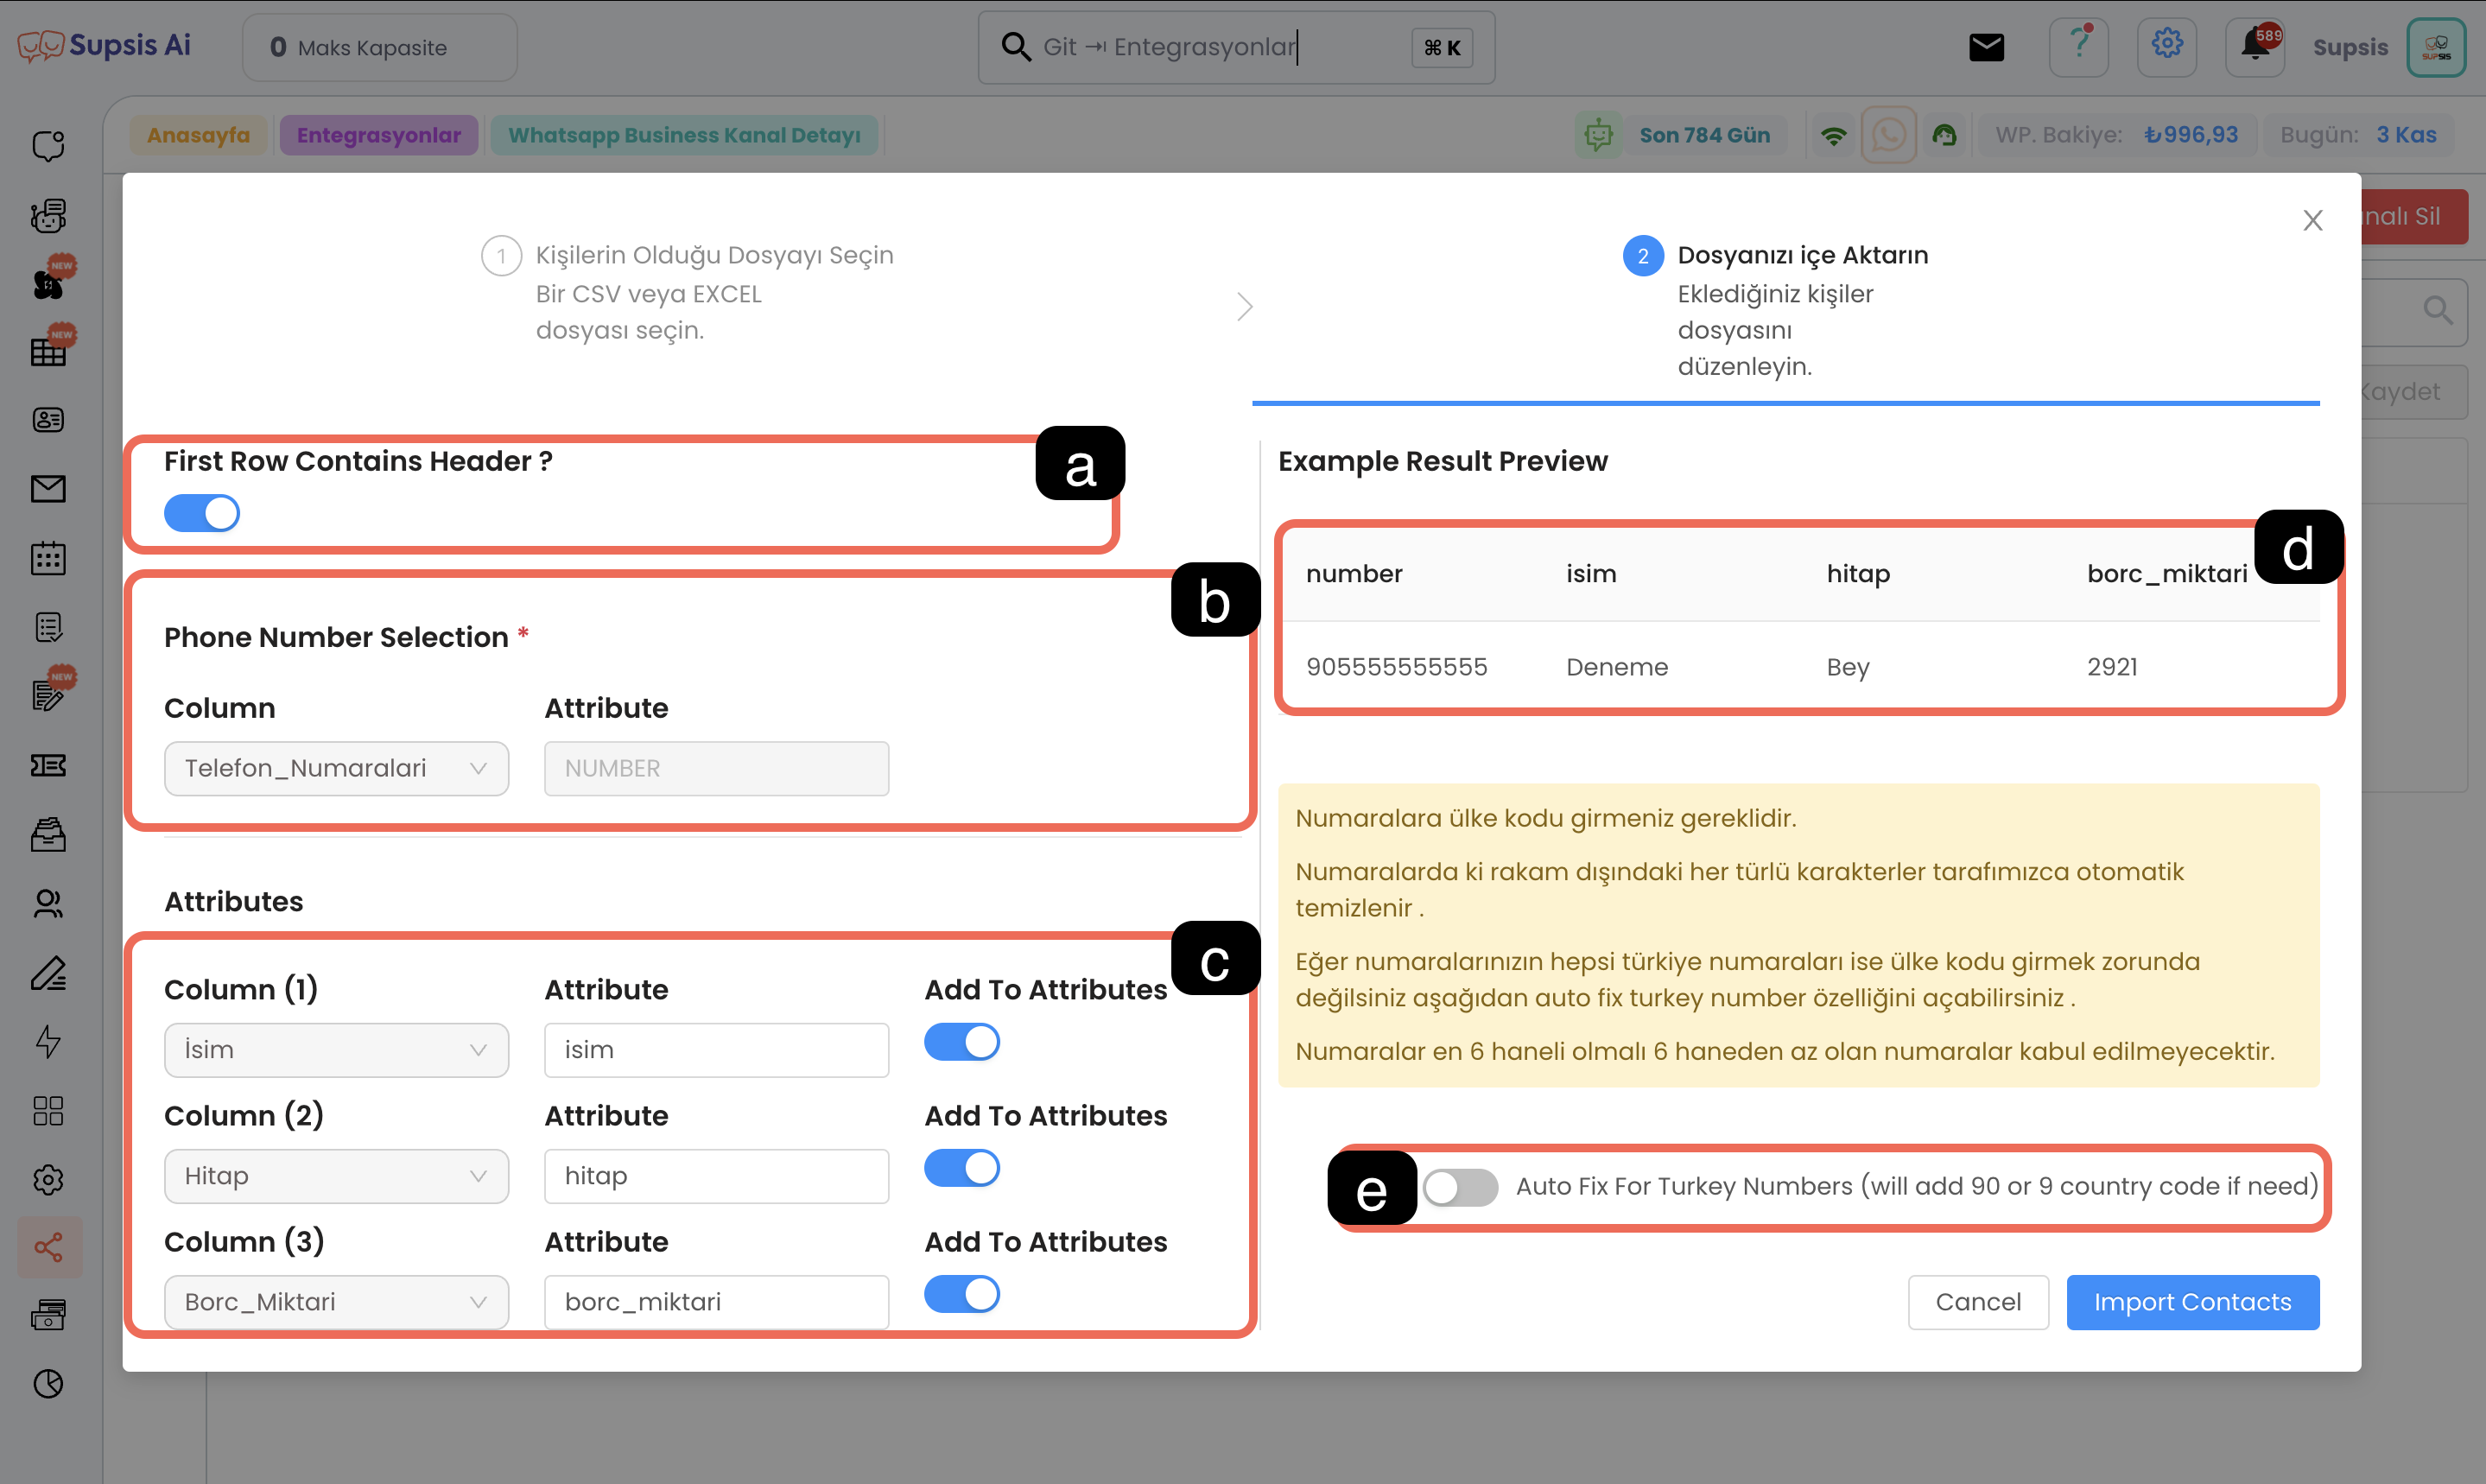
a-) First Row Contains Header: If the first row of the file you uploaded contains headers (such as name, phone number), activate this option. If there is no header, turn off this option. This tick will automatically add a header row. If you are uploading a csv document, the "Separator Character" selection will be active right next to this section, you need to select the "," or ";" values that separate the row information from this section.
b-) Phone Number Selection: Select the column where the phone numbers in your file are located. There is a preview area (d) on the right; you can make the correct selection by checking the column of numbers from here.
c-) Attributes: This section contains other information in other excel columns. You can determine the necessary additional information for customized messages by turning the ticks here on and off. The system will automatically match and use other information next to the numbers in the message content as long as you determine their use in the message.
d-) Preview: You can check the general appearance of your customer group before uploading.
e-) Auto-Format Numbers: If you activate this option, Turkish area code phone numbers entered in broken format are automatically formatted. The system uses E164 format (e.g. 9055xxxxxxxx). If you will add different country codes for numbers outside Turkey, turn off this option. If you will upload Turkish area code numbers to the system and your numbers are not in E164 format, activate this tick. The system will automatically format the numbers.
Upload Contacts
After completing all steps, add contacts to the group by pressing the "Import Contacts" button in the bottom right. Then click the "Save Changes" button in the top right corner to complete the process.