WhatsApp New Template Creation
Create New Template
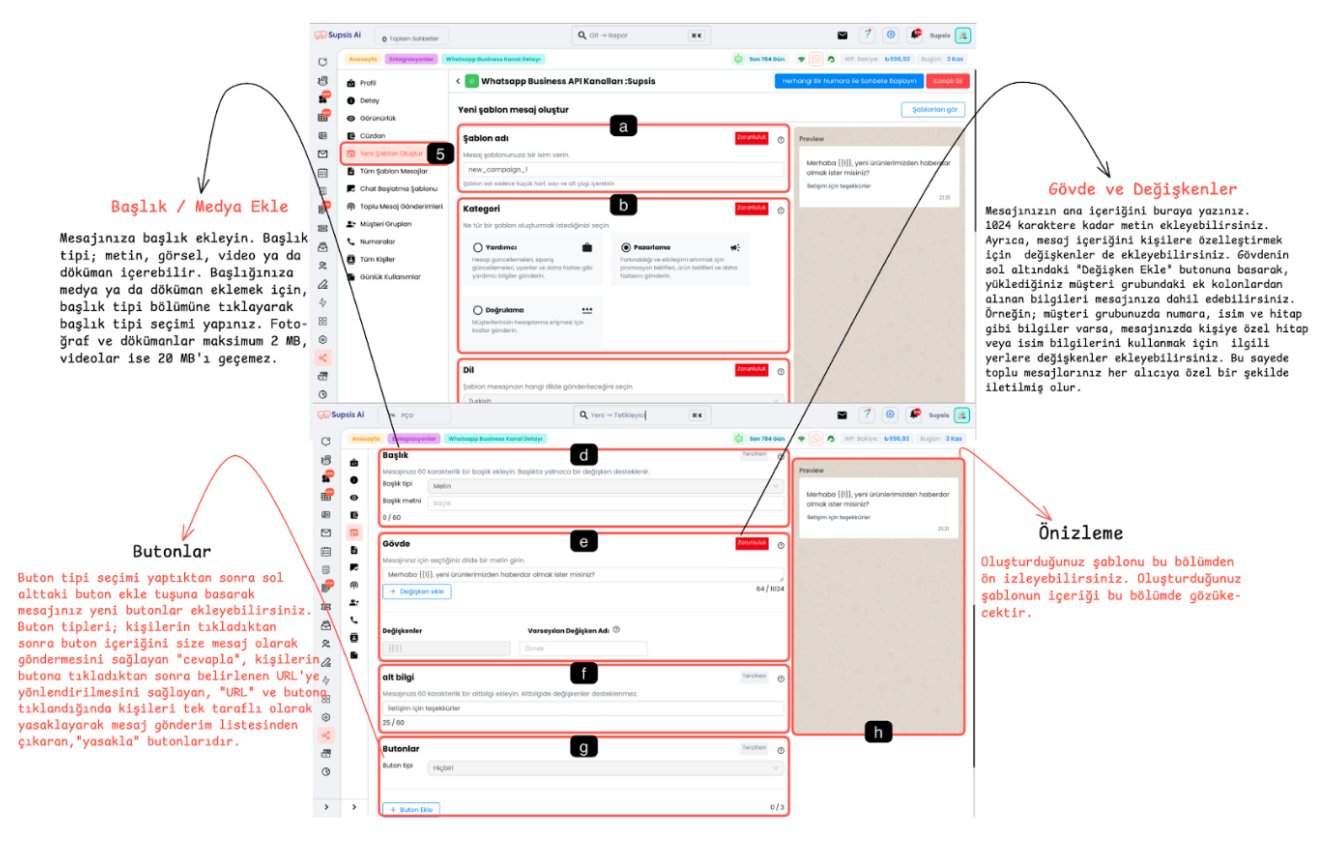
You can create message templates that you can use for bulk message sending or as chat initiation templates in this section. WhatsApp Business API operates according to specific rules. Therefore, WhatsApp subjects every template to an approval process for sending; the content and compliance of your template is checked and approved if found suitable, otherwise rejected. The template creation steps are explained below:
- Template Name
- Category
- Language
- Header
- Body
- Footer
- Buttons
- Preview
a-) Template Name
Give your template an appropriate name. This name will help you identify your template and provide easier access during management.

- Determine a short and clear name for the template.
- When determining the name, do not use Turkish characters; you can only use lowercase letters, numbers and underscore "_". You cannot use spaces or special characters.
b-) Category Selection
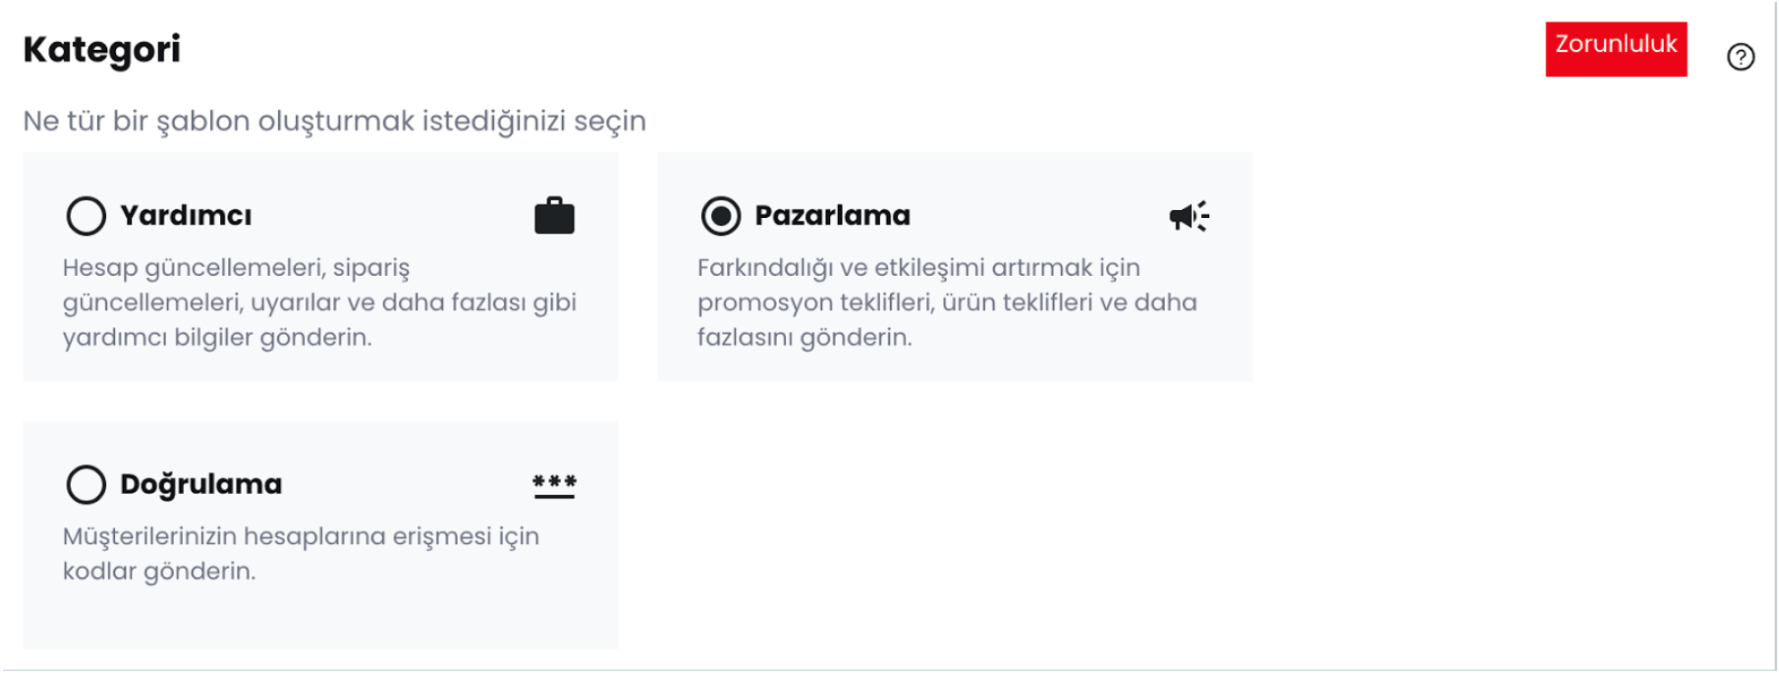
- Select a category appropriate for the template's purpose of use:
- Utility: Reminder messages. For reminder messages such as cargo or order updates, appointment reminders or account updates.
- Authentication: For authentication code sending purposes.
- Marketing: For promotional and marketing messages. Select this category if the template content does not fit any of the above categories.
c-) Language

Select the language of the template content. This section is important to make the right choice as it is a section that WhatsApp robots will check.
d-) Header
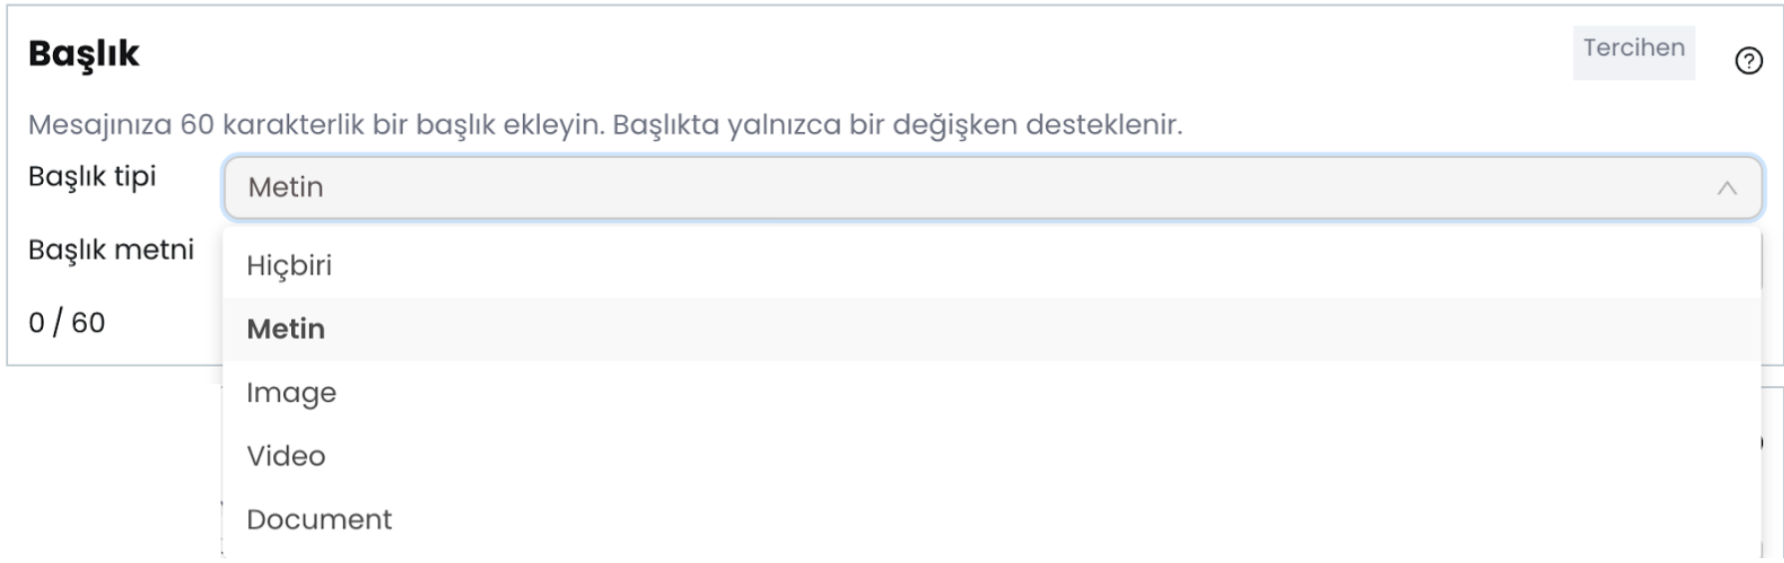
- Add an attention-grabbing header to your message. When the header type is set to text, the header becomes the most prominent part of the message.
- You can add a variable to the header section and use a maximum of 60 characters.
- In addition, the header type can be changed to add visual media (video, photo or document) to the template. A maximum of 2 MB is accepted for documents and photos, and a maximum of 20 MB for videos.
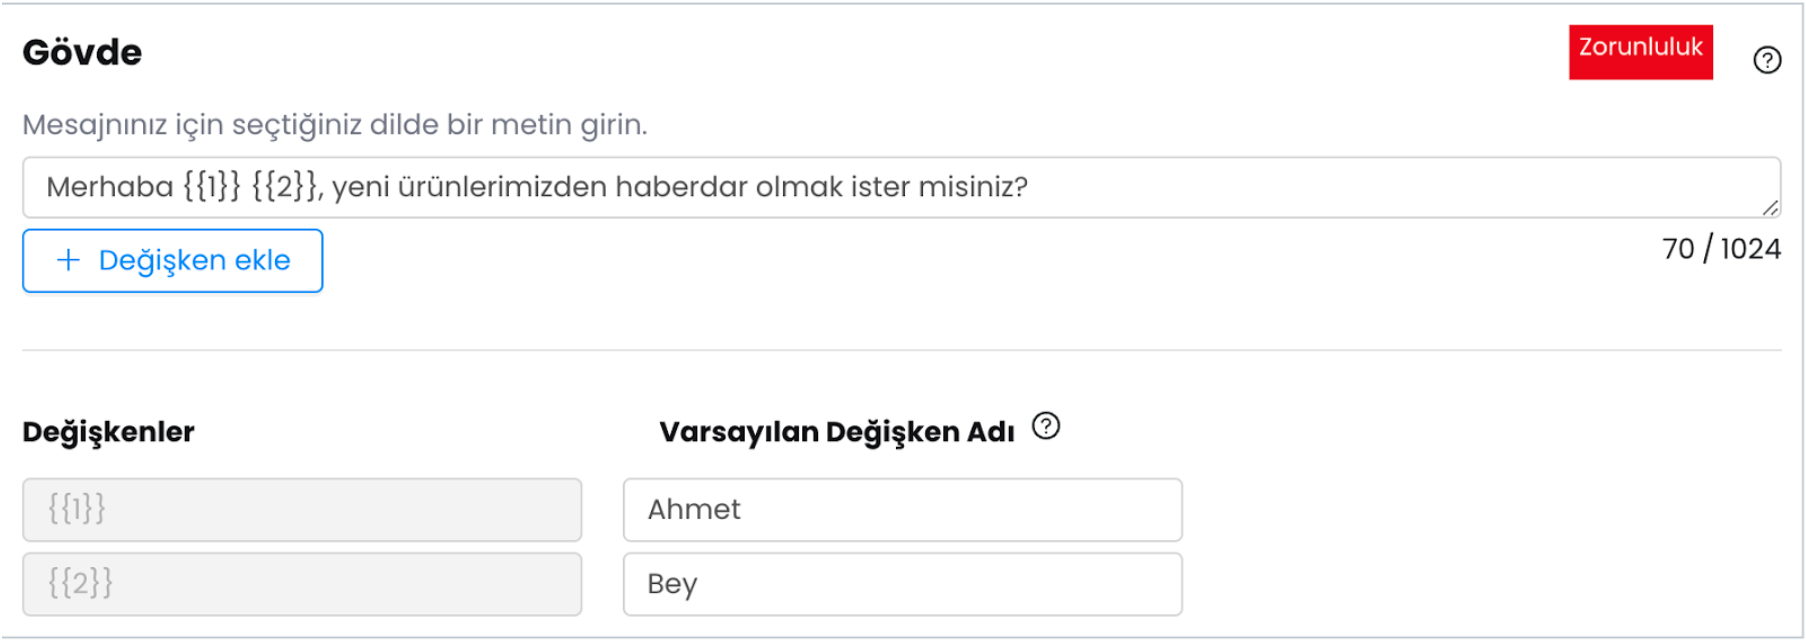
e-) Body
- Write the main content of the message here (maximum 1024 characters).
- You can add variables to the body to personalize the message. By using the "Add Variable" button at the bottom left, you can ensure that the message is specific to each recipient.
- To send bulk messages with personalized information, you need to add variables to the appropriate parts of the template content and add other variable information to be used other than phone numbers in the content of customer groups.
- The default variable name section allows you to control how variables will appear in the template preview. If the column from which the relevant variable information will be retrieved is not selected during bulk message sending, messages are sent with the default value.
- The system matches the numbers with the columns next to the numbers during bulk message sending and embeds the information in the columns added to the variable section into the messages during sending. In this way, even bulk messages become personalized. We will touch on this section in the bulk message sending explanation.
f-) Footer
 Add a short information that will appear at the bottom of the message in smaller font. The footer is used to make an additional explanation at the end of the message. You can add your brand slogan or website address to this section.
g-) Buttons
- You can add interaction buttons to your message:
- Reply Button: When users click this button, the specified response is sent to you as a message.
- URL Button: Directs the user to a specific website.
- Block Button: Removes the user who clicks the button from the message sending list.
- After selecting the appropriate button type, add buttons to your message with the "Add Button" key.

- You can check the final version of the template from here. After completing the content, preview to check the accuracy of the template and that the variables are placed correctly.
- By putting default names in the default variable names section, you can also view how the variables will appear during preview.