WhatsApp Web (QR) Integration
The steps you need to follow when performing WhatsApp Web (QR) integration on the Supsis platform are explained below. Thanks to these steps, you can easily integrate your WhatsApp channel and manage incoming communication requests.
WhatsApp V2 (QR) Integration
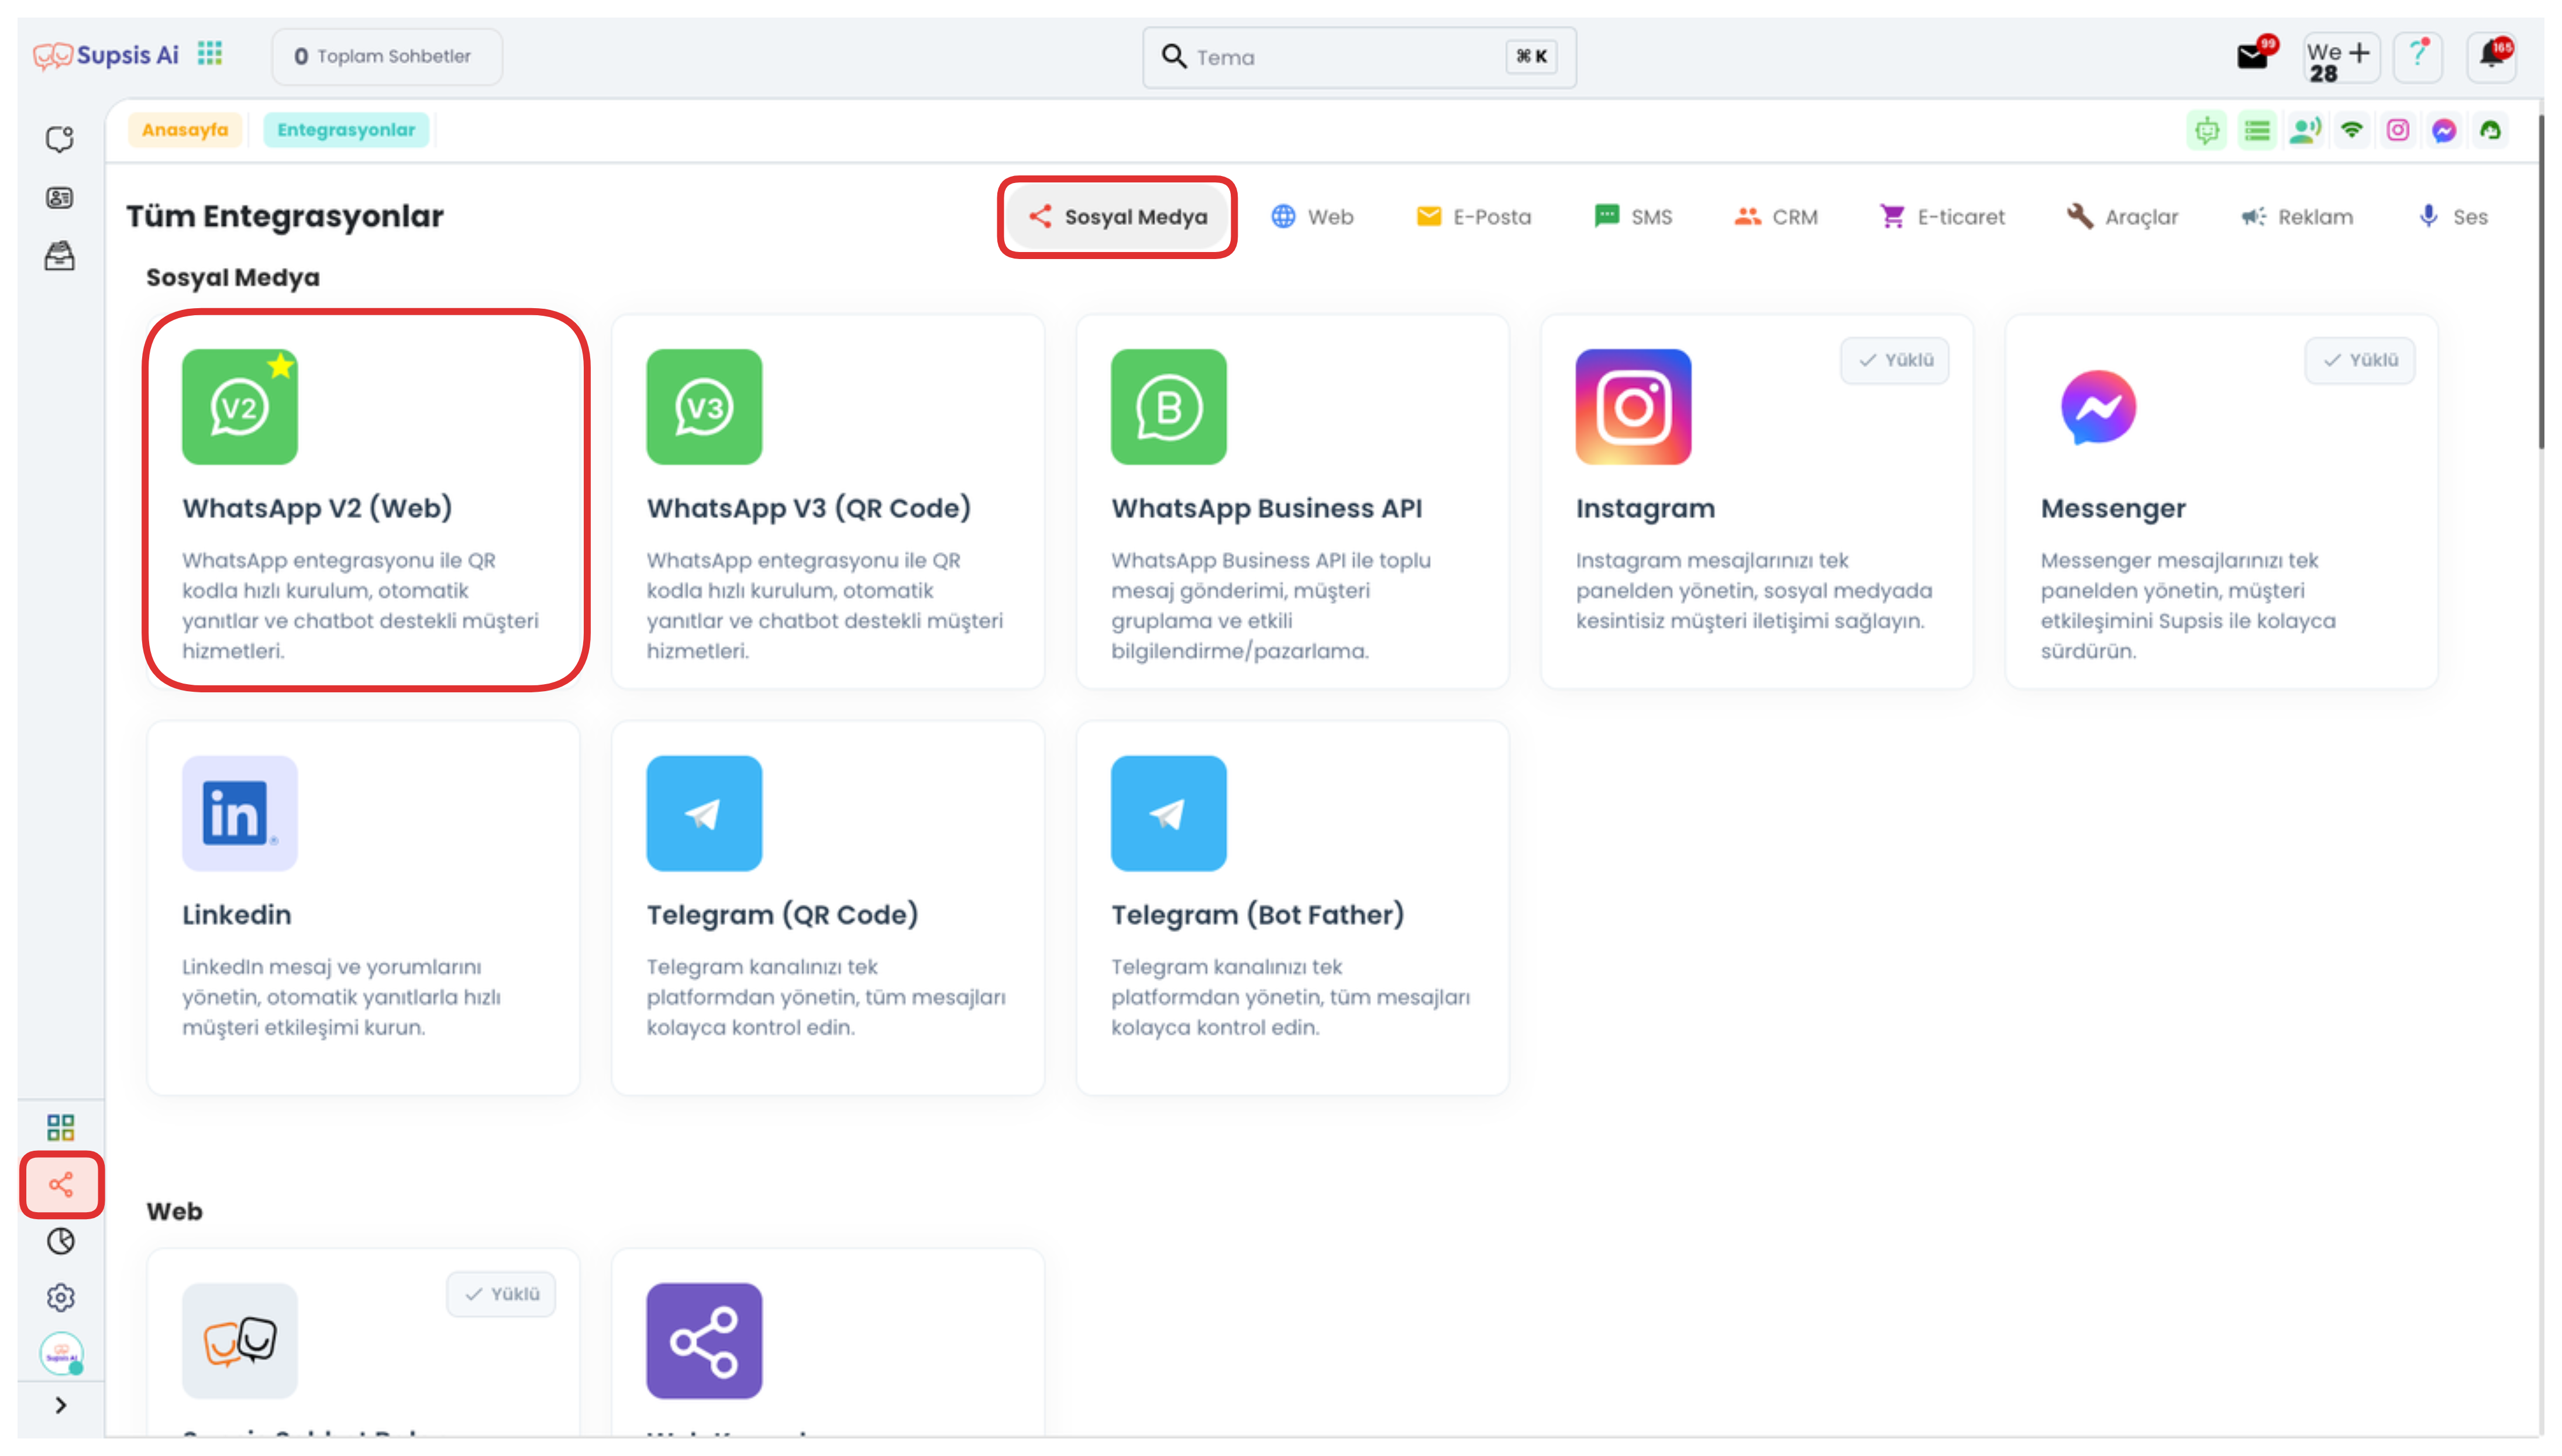
First, log into your Supsis panel. Then click on the "Integrations" tab in the left menu. On the opened page, click on the "WhatsApp V2 (Web)" integration option at the top to start the process.
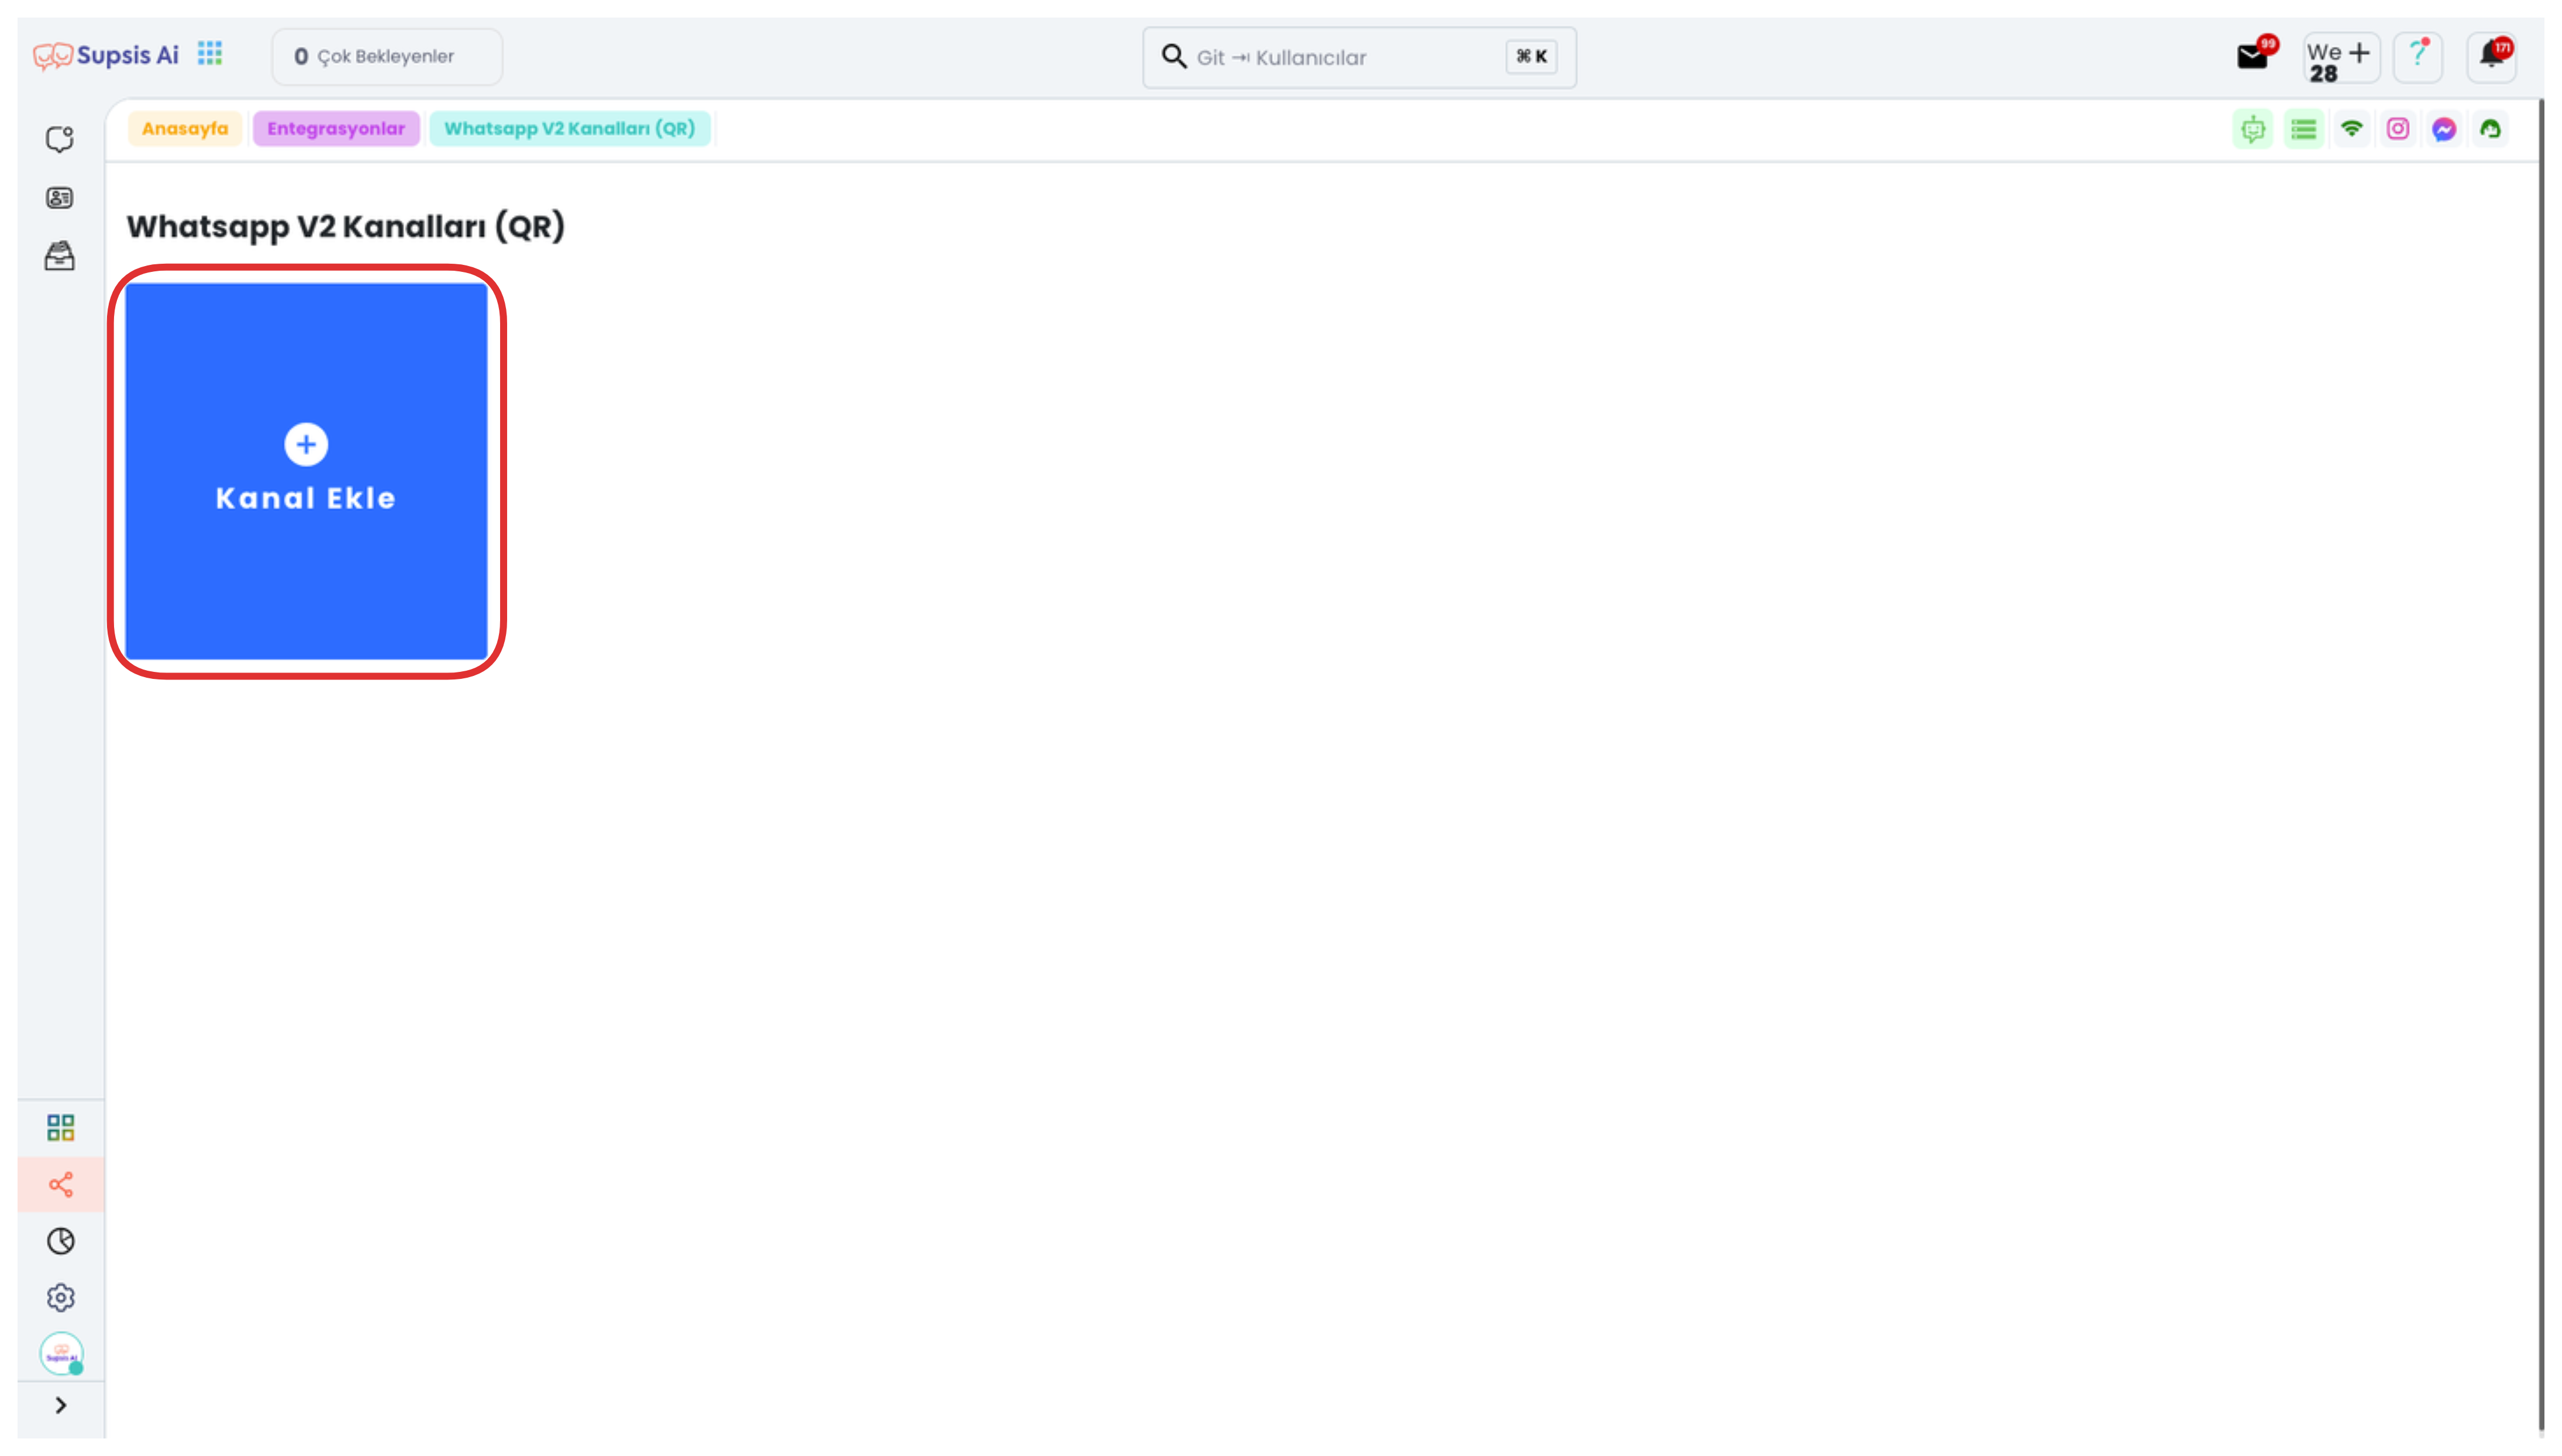
On the opened page, if you don't have an existing channel, you can create a new WhatsApp V2 Channel by clicking the "Add Channel" button. This process allows you to establish a connection between Supsis and your WhatsApp account.
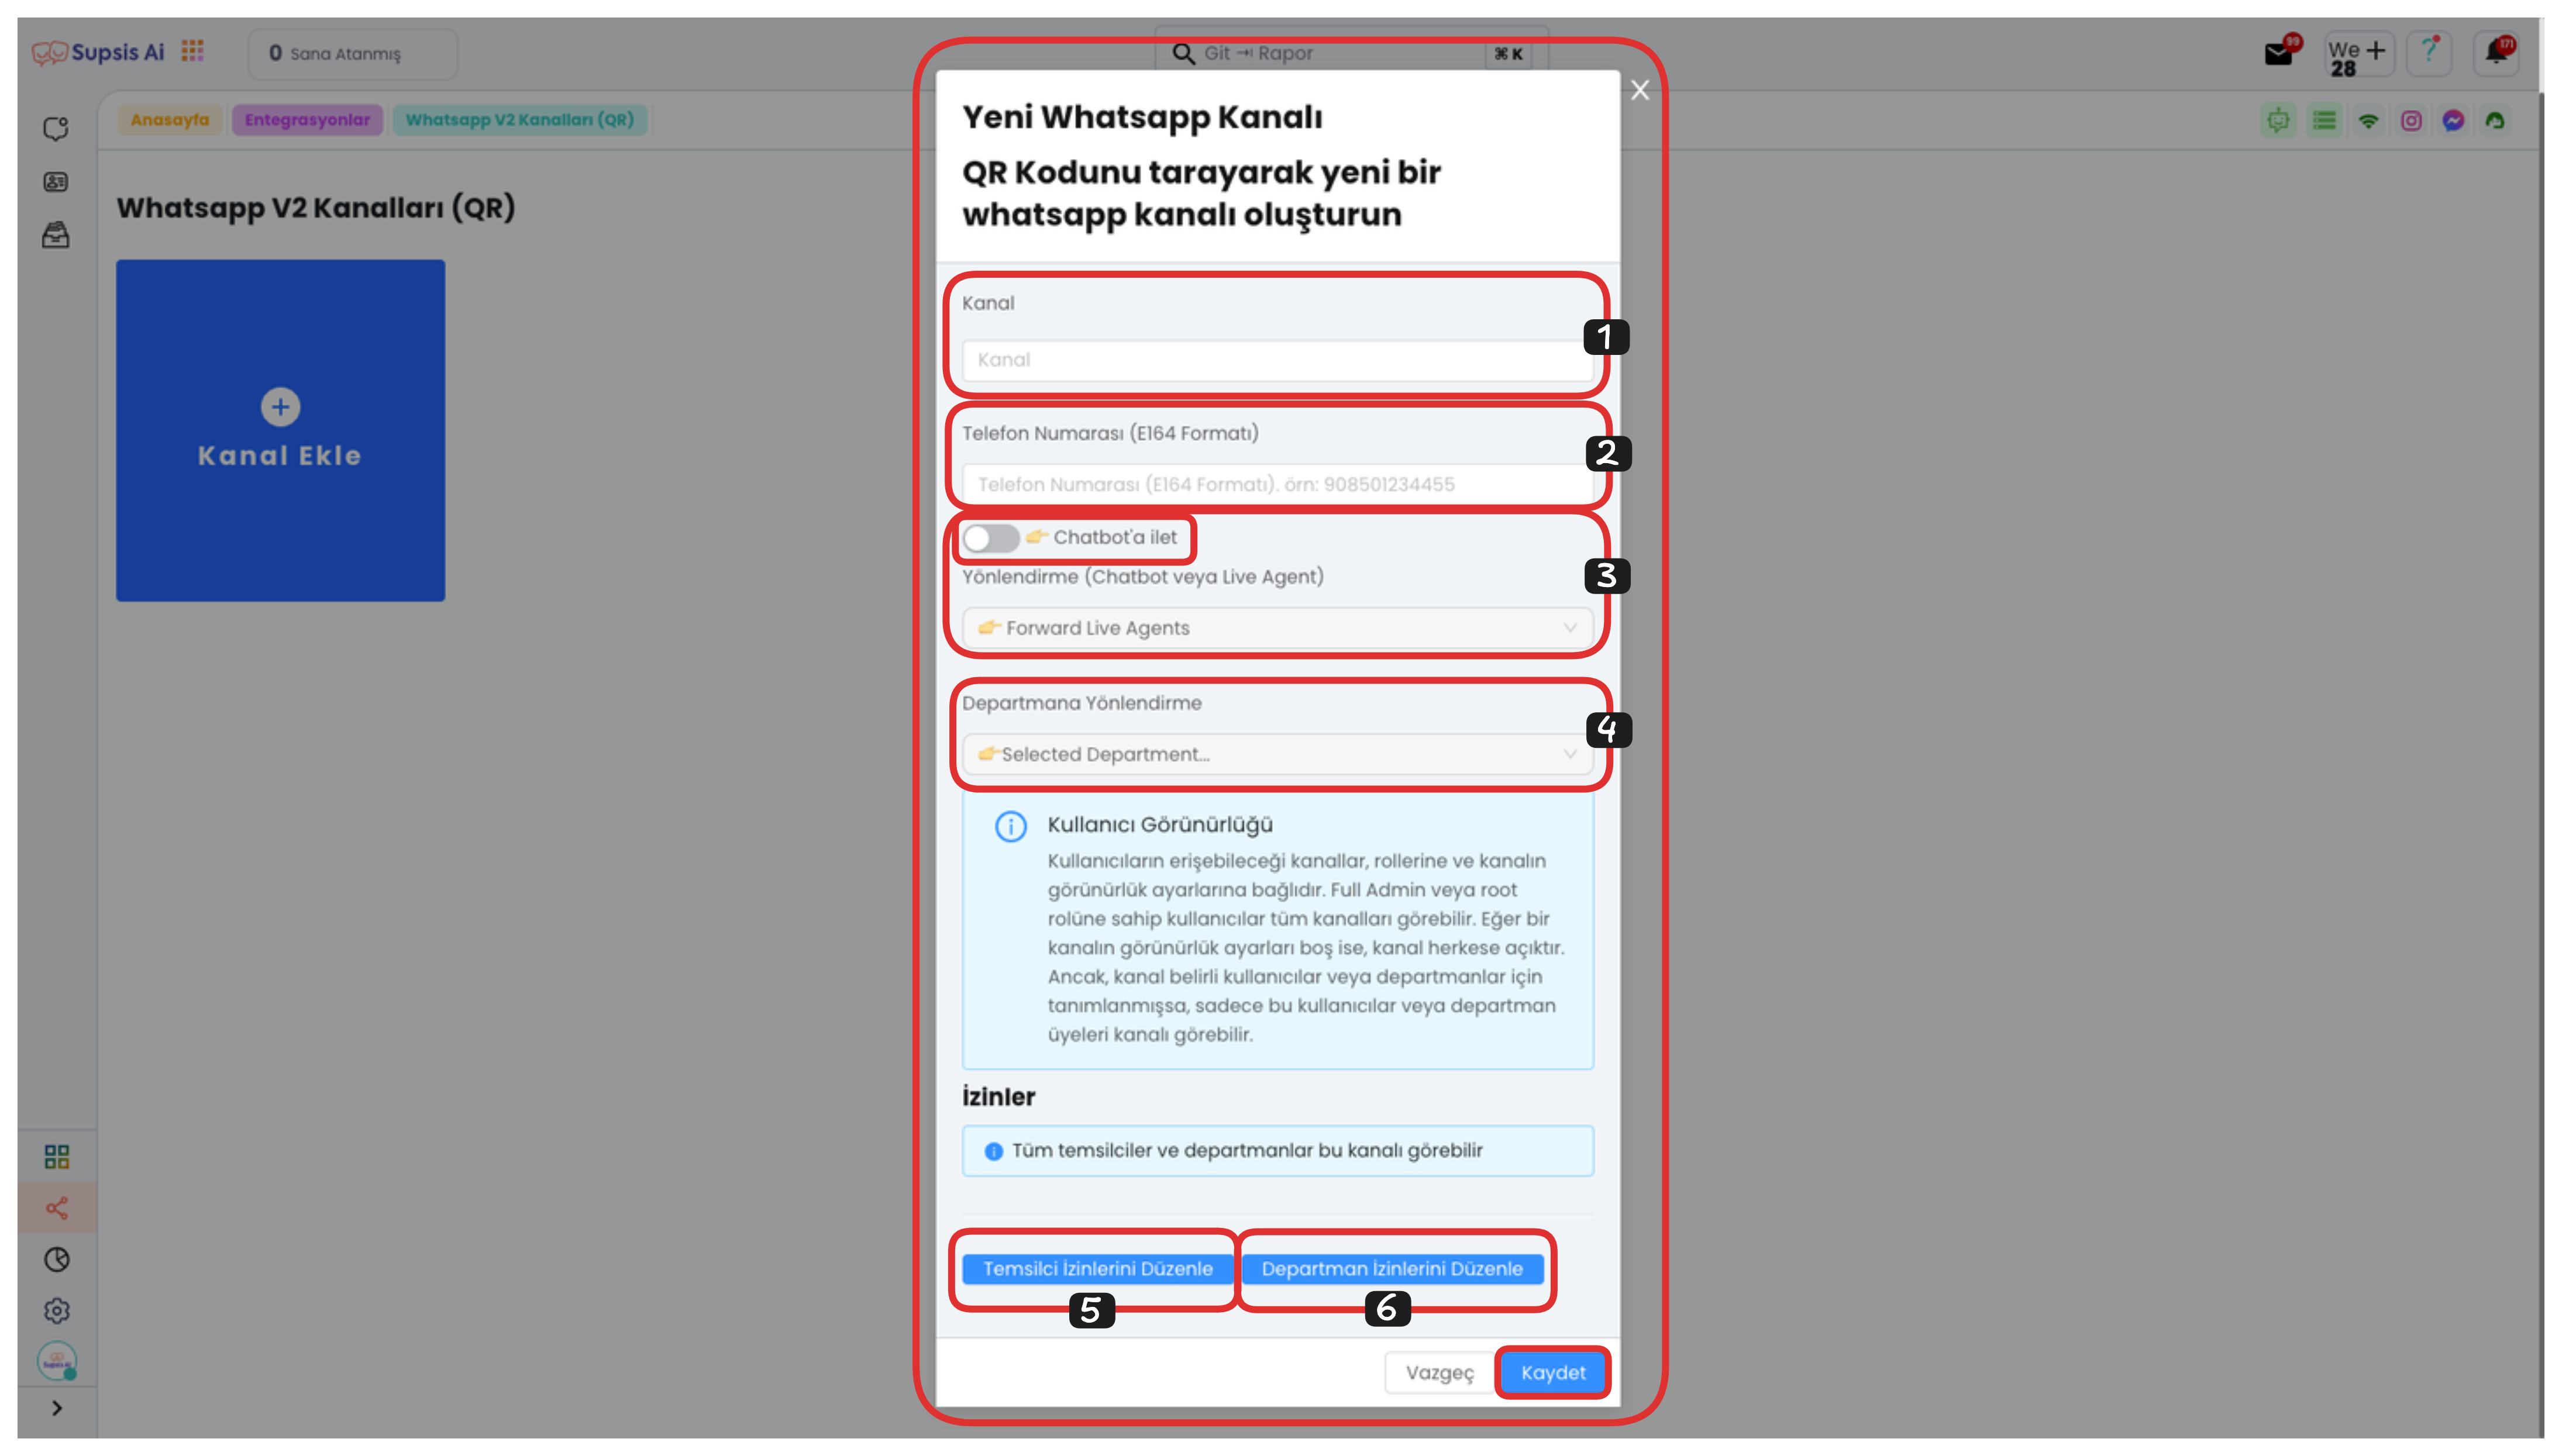
1-) Channel Name Determination
First, enter the name you will give to your channel in the "Channel" field in the opened modal. This name allows you to distinguish your channel from others.
2-) Phone Number Addition
Enter the WhatsApp number you will connect in the "Phone Number" field in E.164 format. (For example: +905xxxxxxxxx)
3-) Redirection Selection
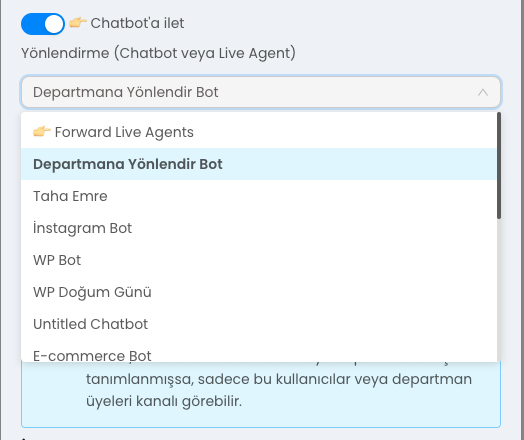
From the "Redirection" section, you can determine who will handle incoming conversations. If you activate the "Forward to Chatbot" option, all messages coming to your WhatsApp line are automatically handled and redirected by the chatbot. This is ideal for situations where you want to respond quickly with automation.
If you don't activate this option, your WhatsApp line is managed directly by Live Representatives and messages are answered manually. This is suitable for scenarios that require one-on-one customer communication.
4-) Department Redirection
From the "Department Redirection" field, select the relevant department to which messages from this WhatsApp channel will be redirected. This way, incoming messages are automatically redirected to the representatives of the department you have determined and the communication process proceeds in a more organized manner.
5-) Representative Permission Editing
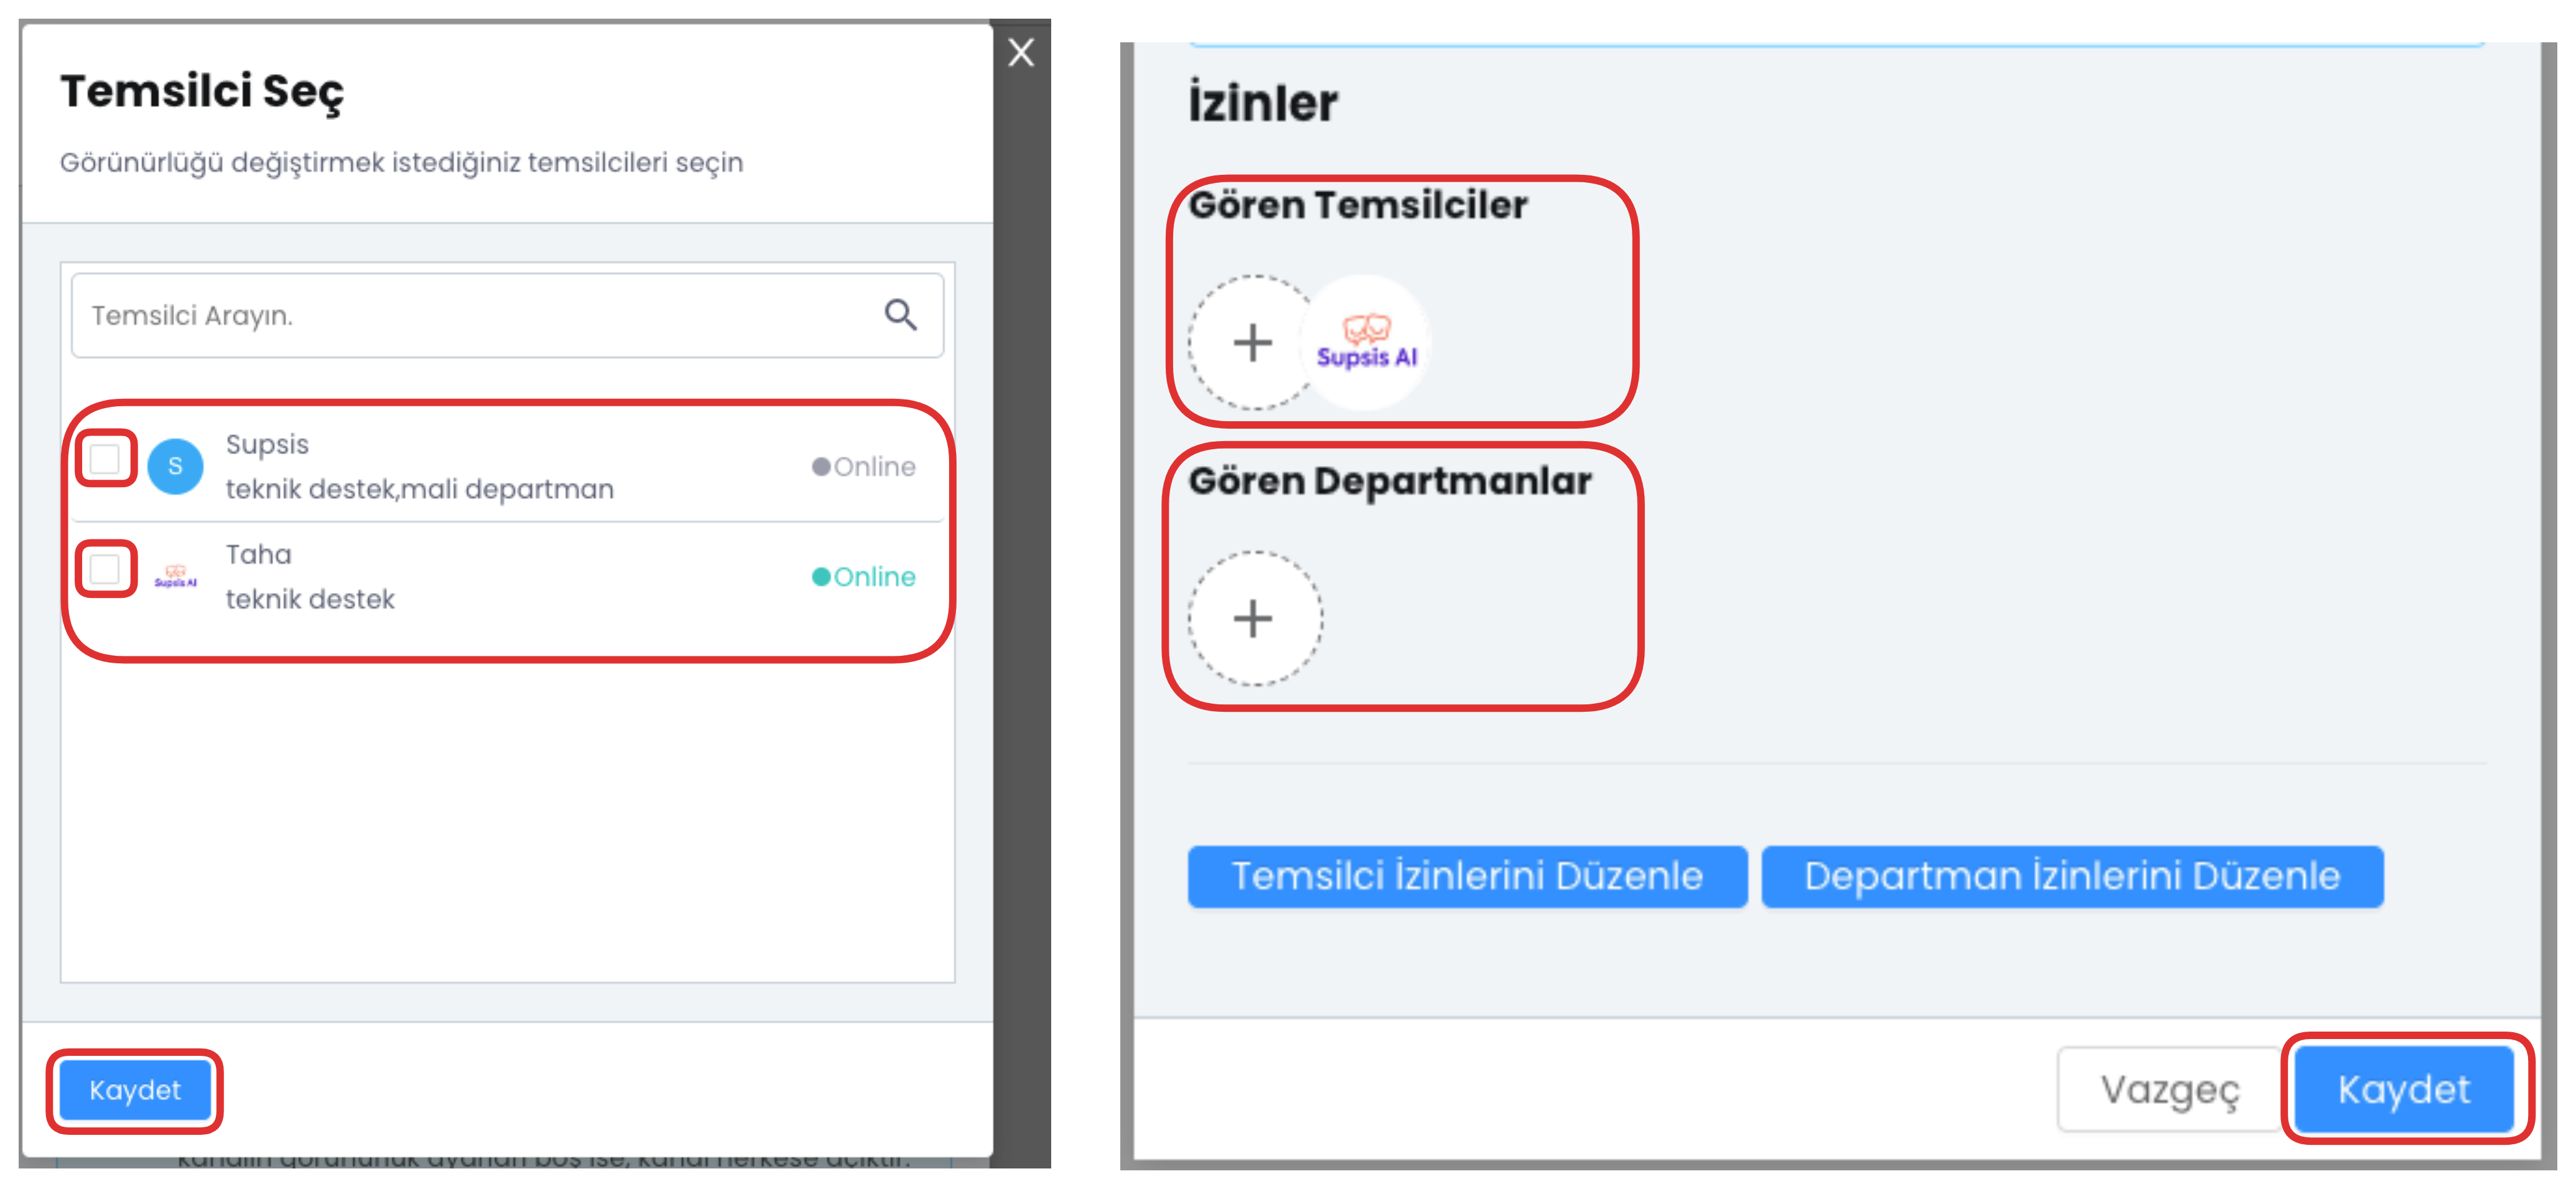
In this section, you can determine which representatives will be authorized in this channel and which operations they can perform.
6-) Department Permission Editing
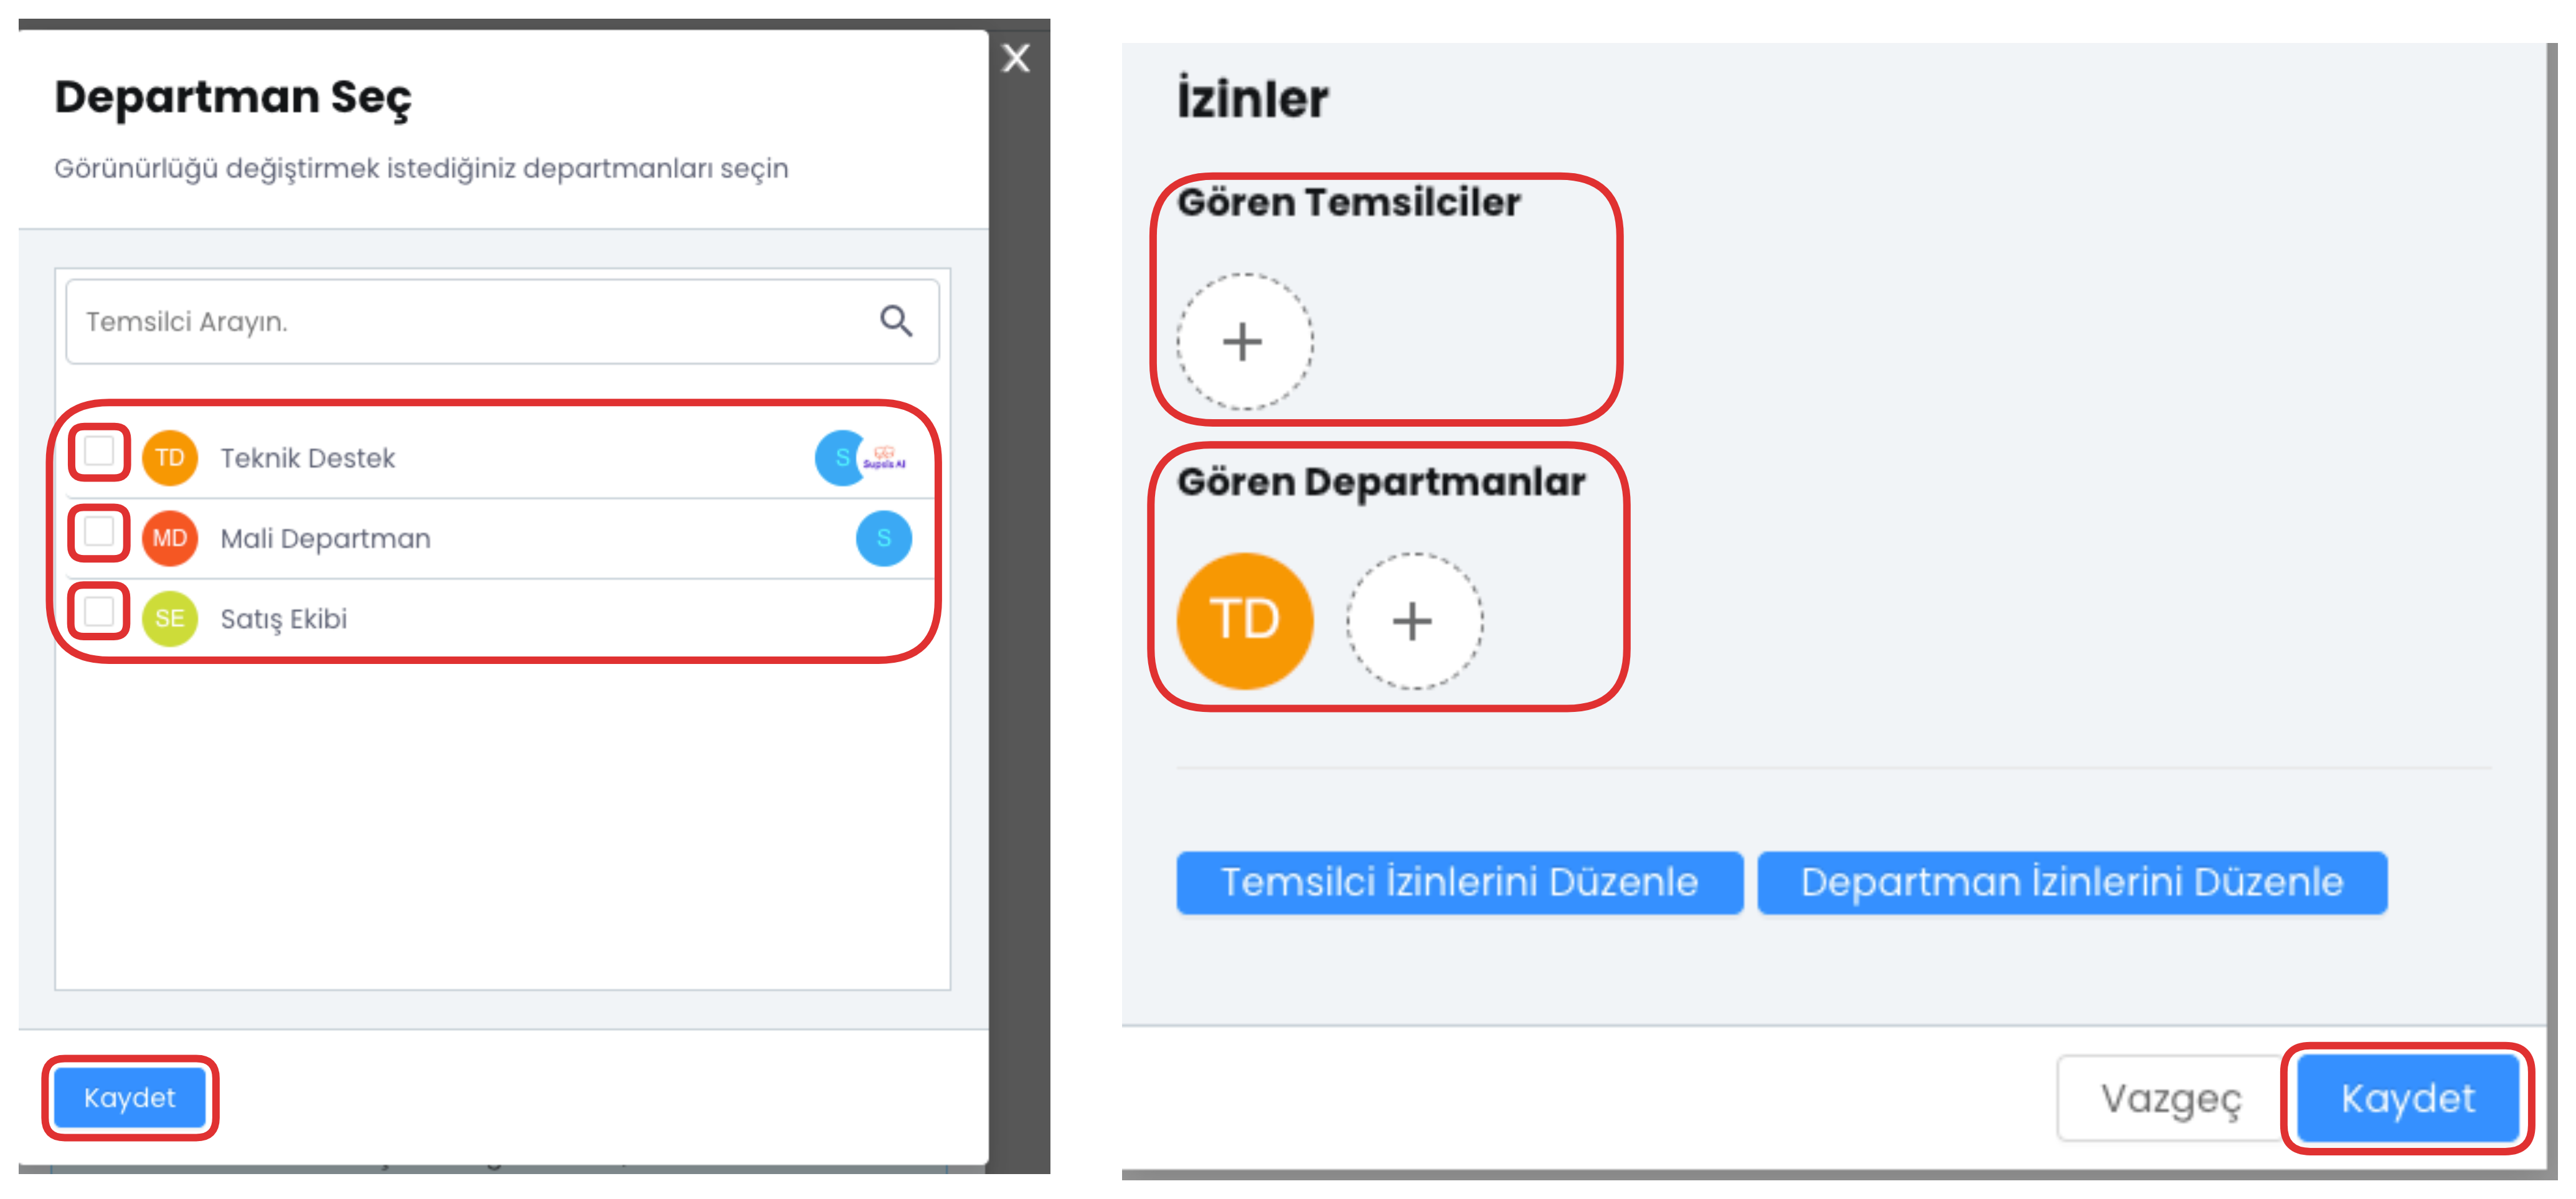
In this field, you can configure department-based authorizations and set which department will have which accesses.
After filling all these fields completely, you can complete the WhatsApp V2 (Web) channel creation process by clicking the "Save" button.

Click on the channel you have created to access the detail page of the relevant channel. From this area, you can view, edit channel settings and perform necessary configurations.
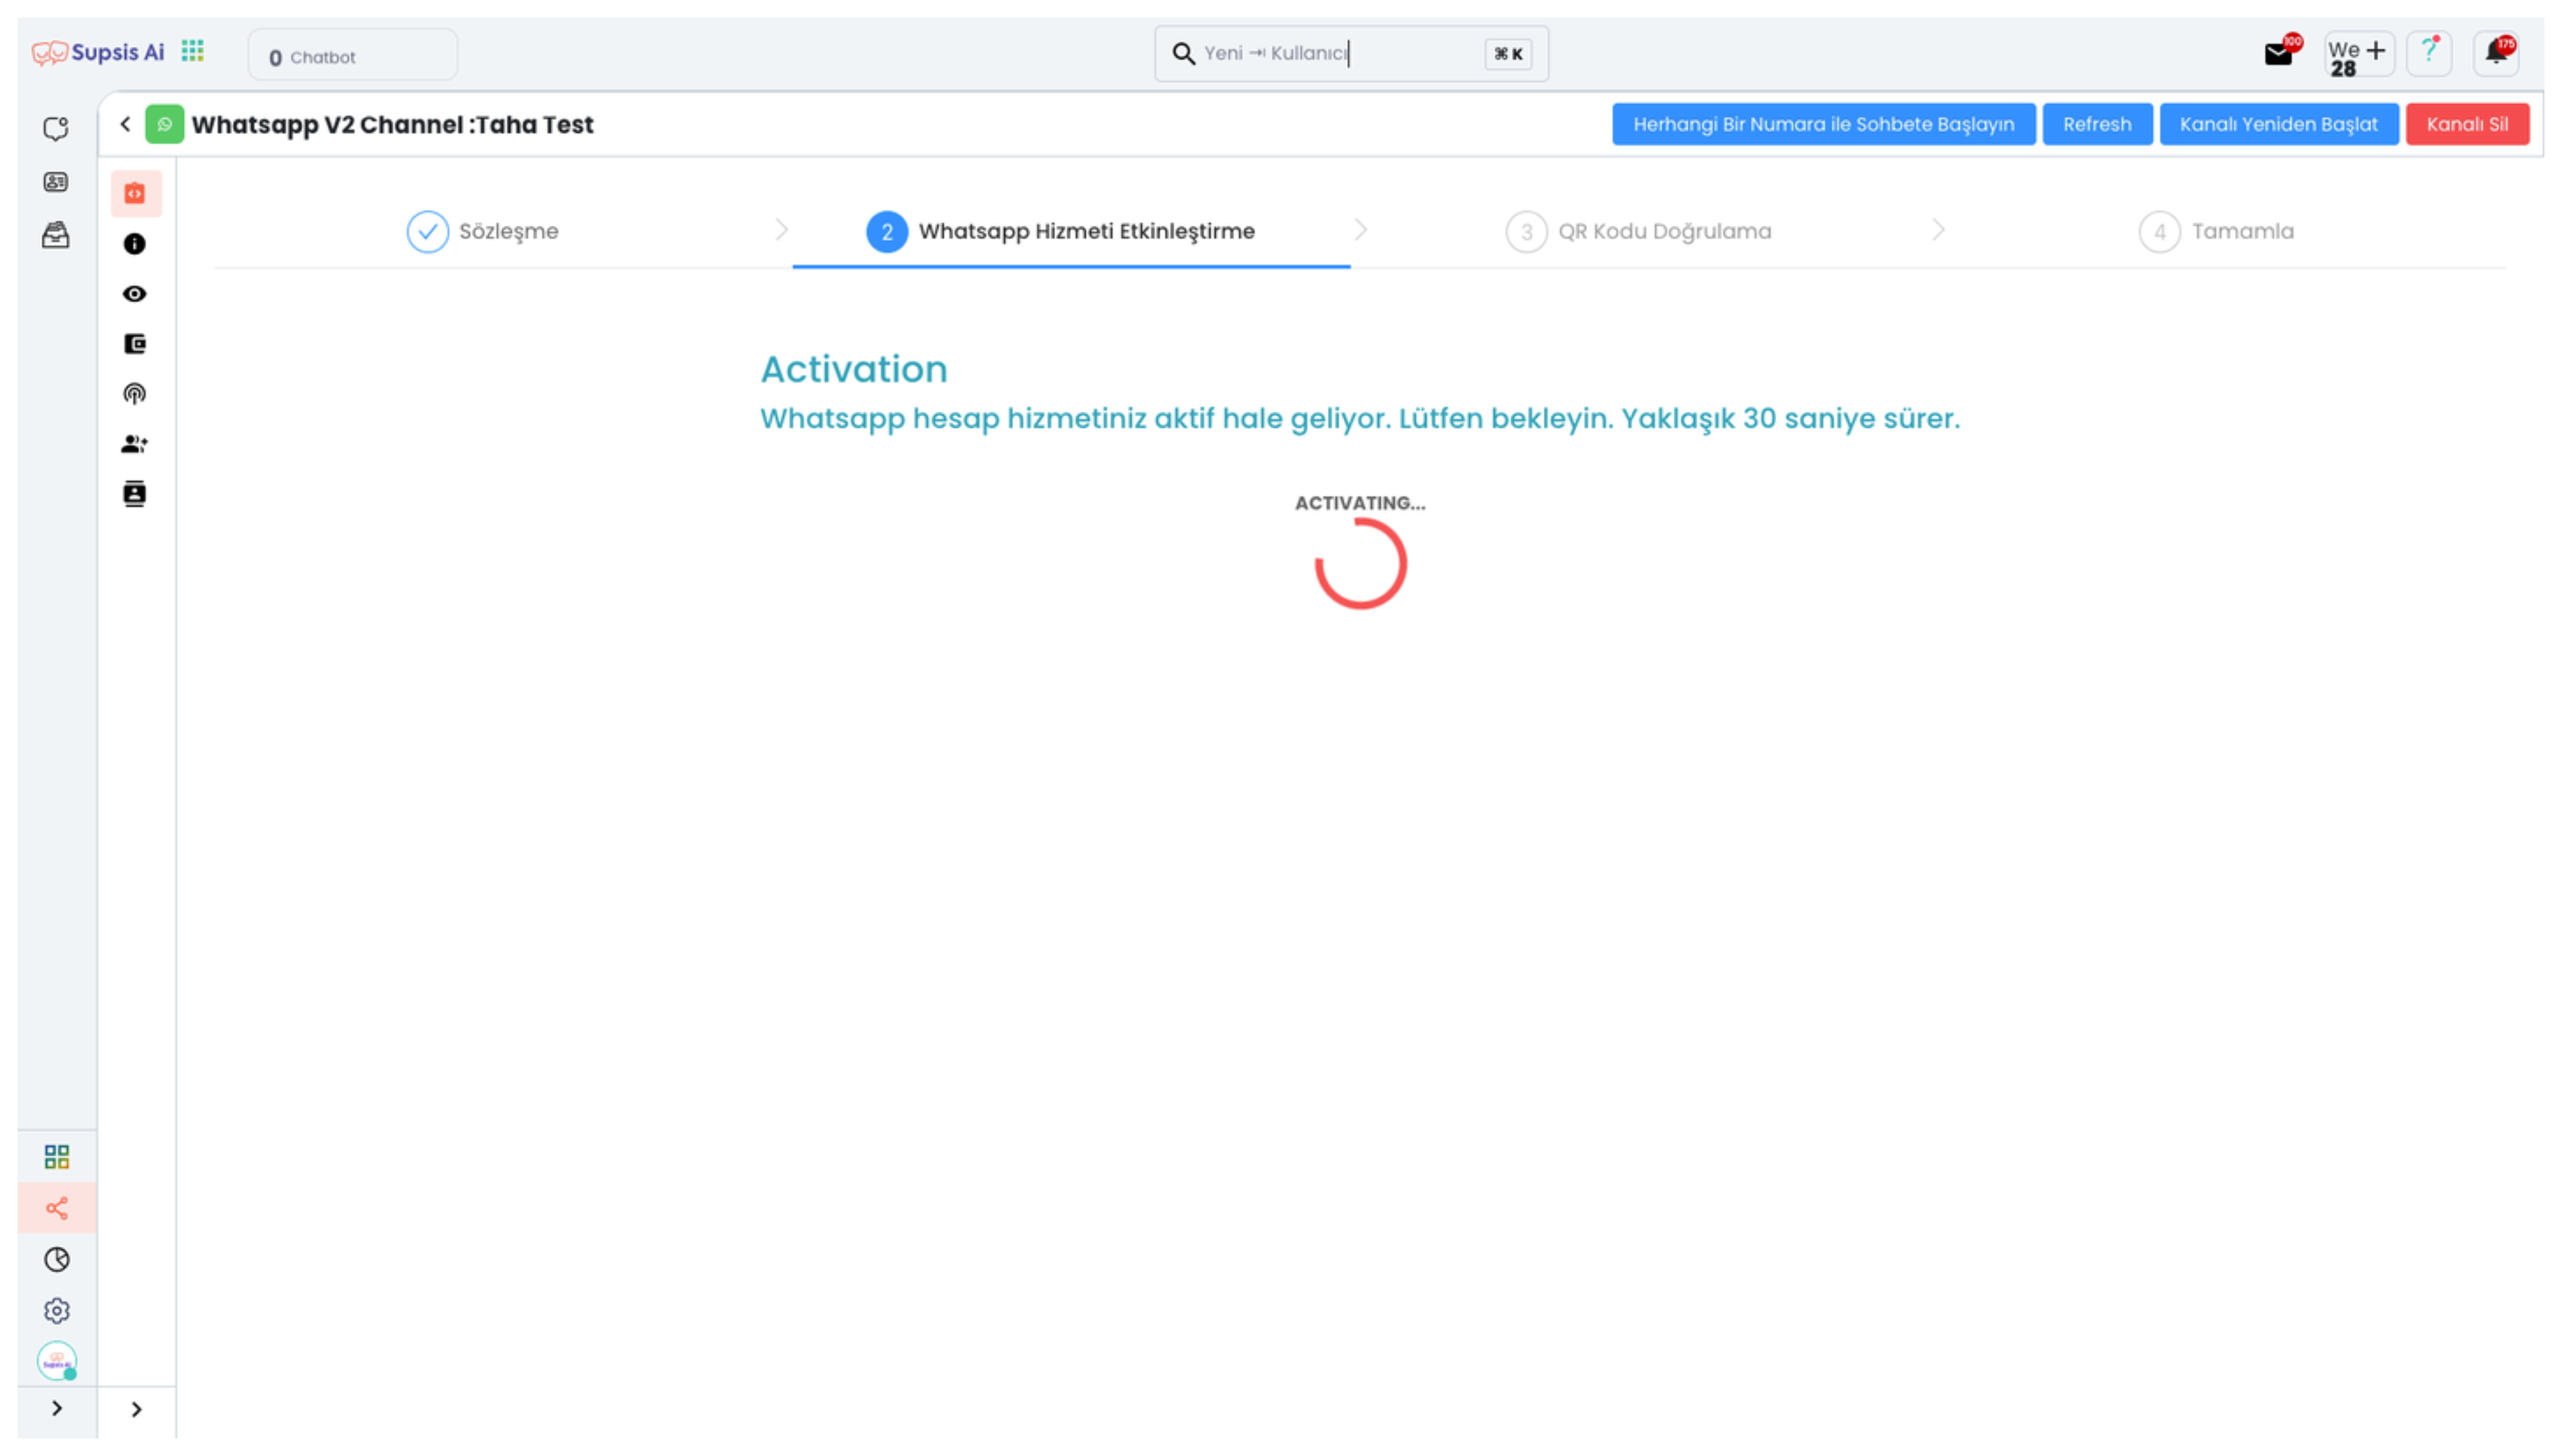
On the opened page, as the first step, you need to complete the WhatsApp Service Activation process. This step is necessary for the WhatsApp integration to be configured correctly in the background. The system establishes the necessary technical connections and activates the service. The channel does not work completely without completing this process.
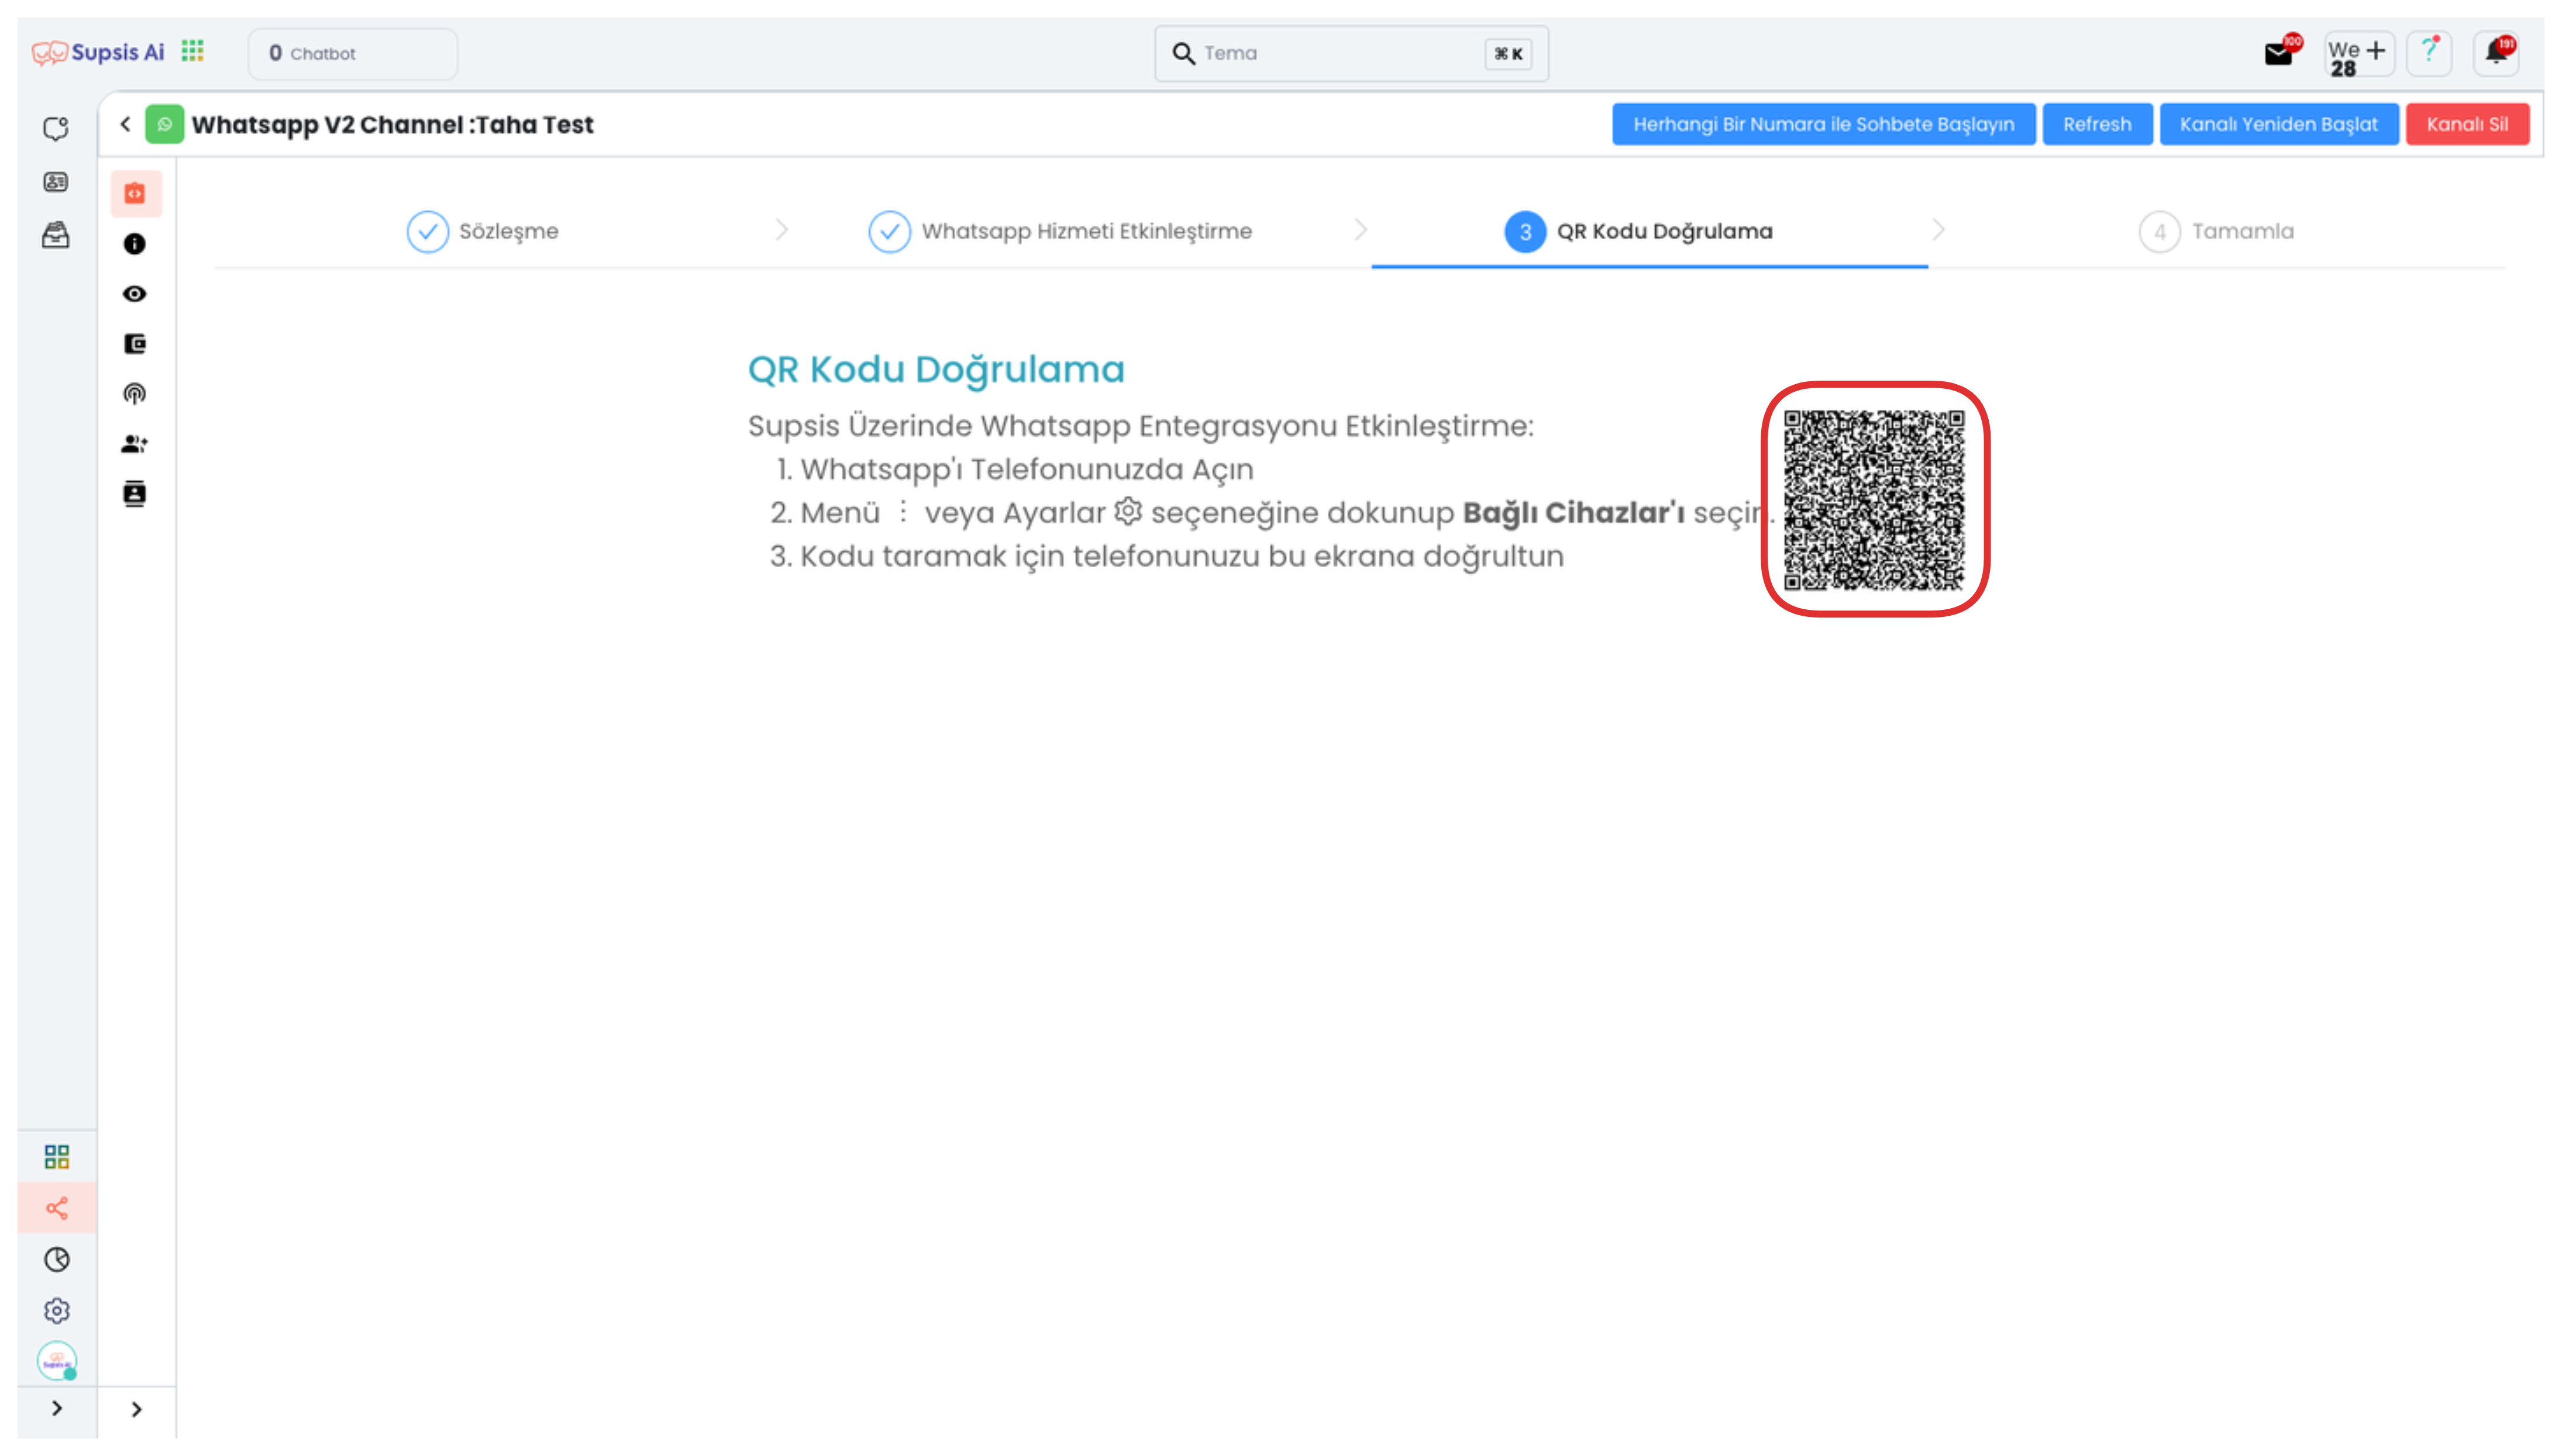
You can continue the integration process by scanning the QR code displayed in the opened area through the WhatsApp application installed on your mobile phone. This step ensures the connection between Supsis and your WhatsApp account and is necessary for the channel to become active.

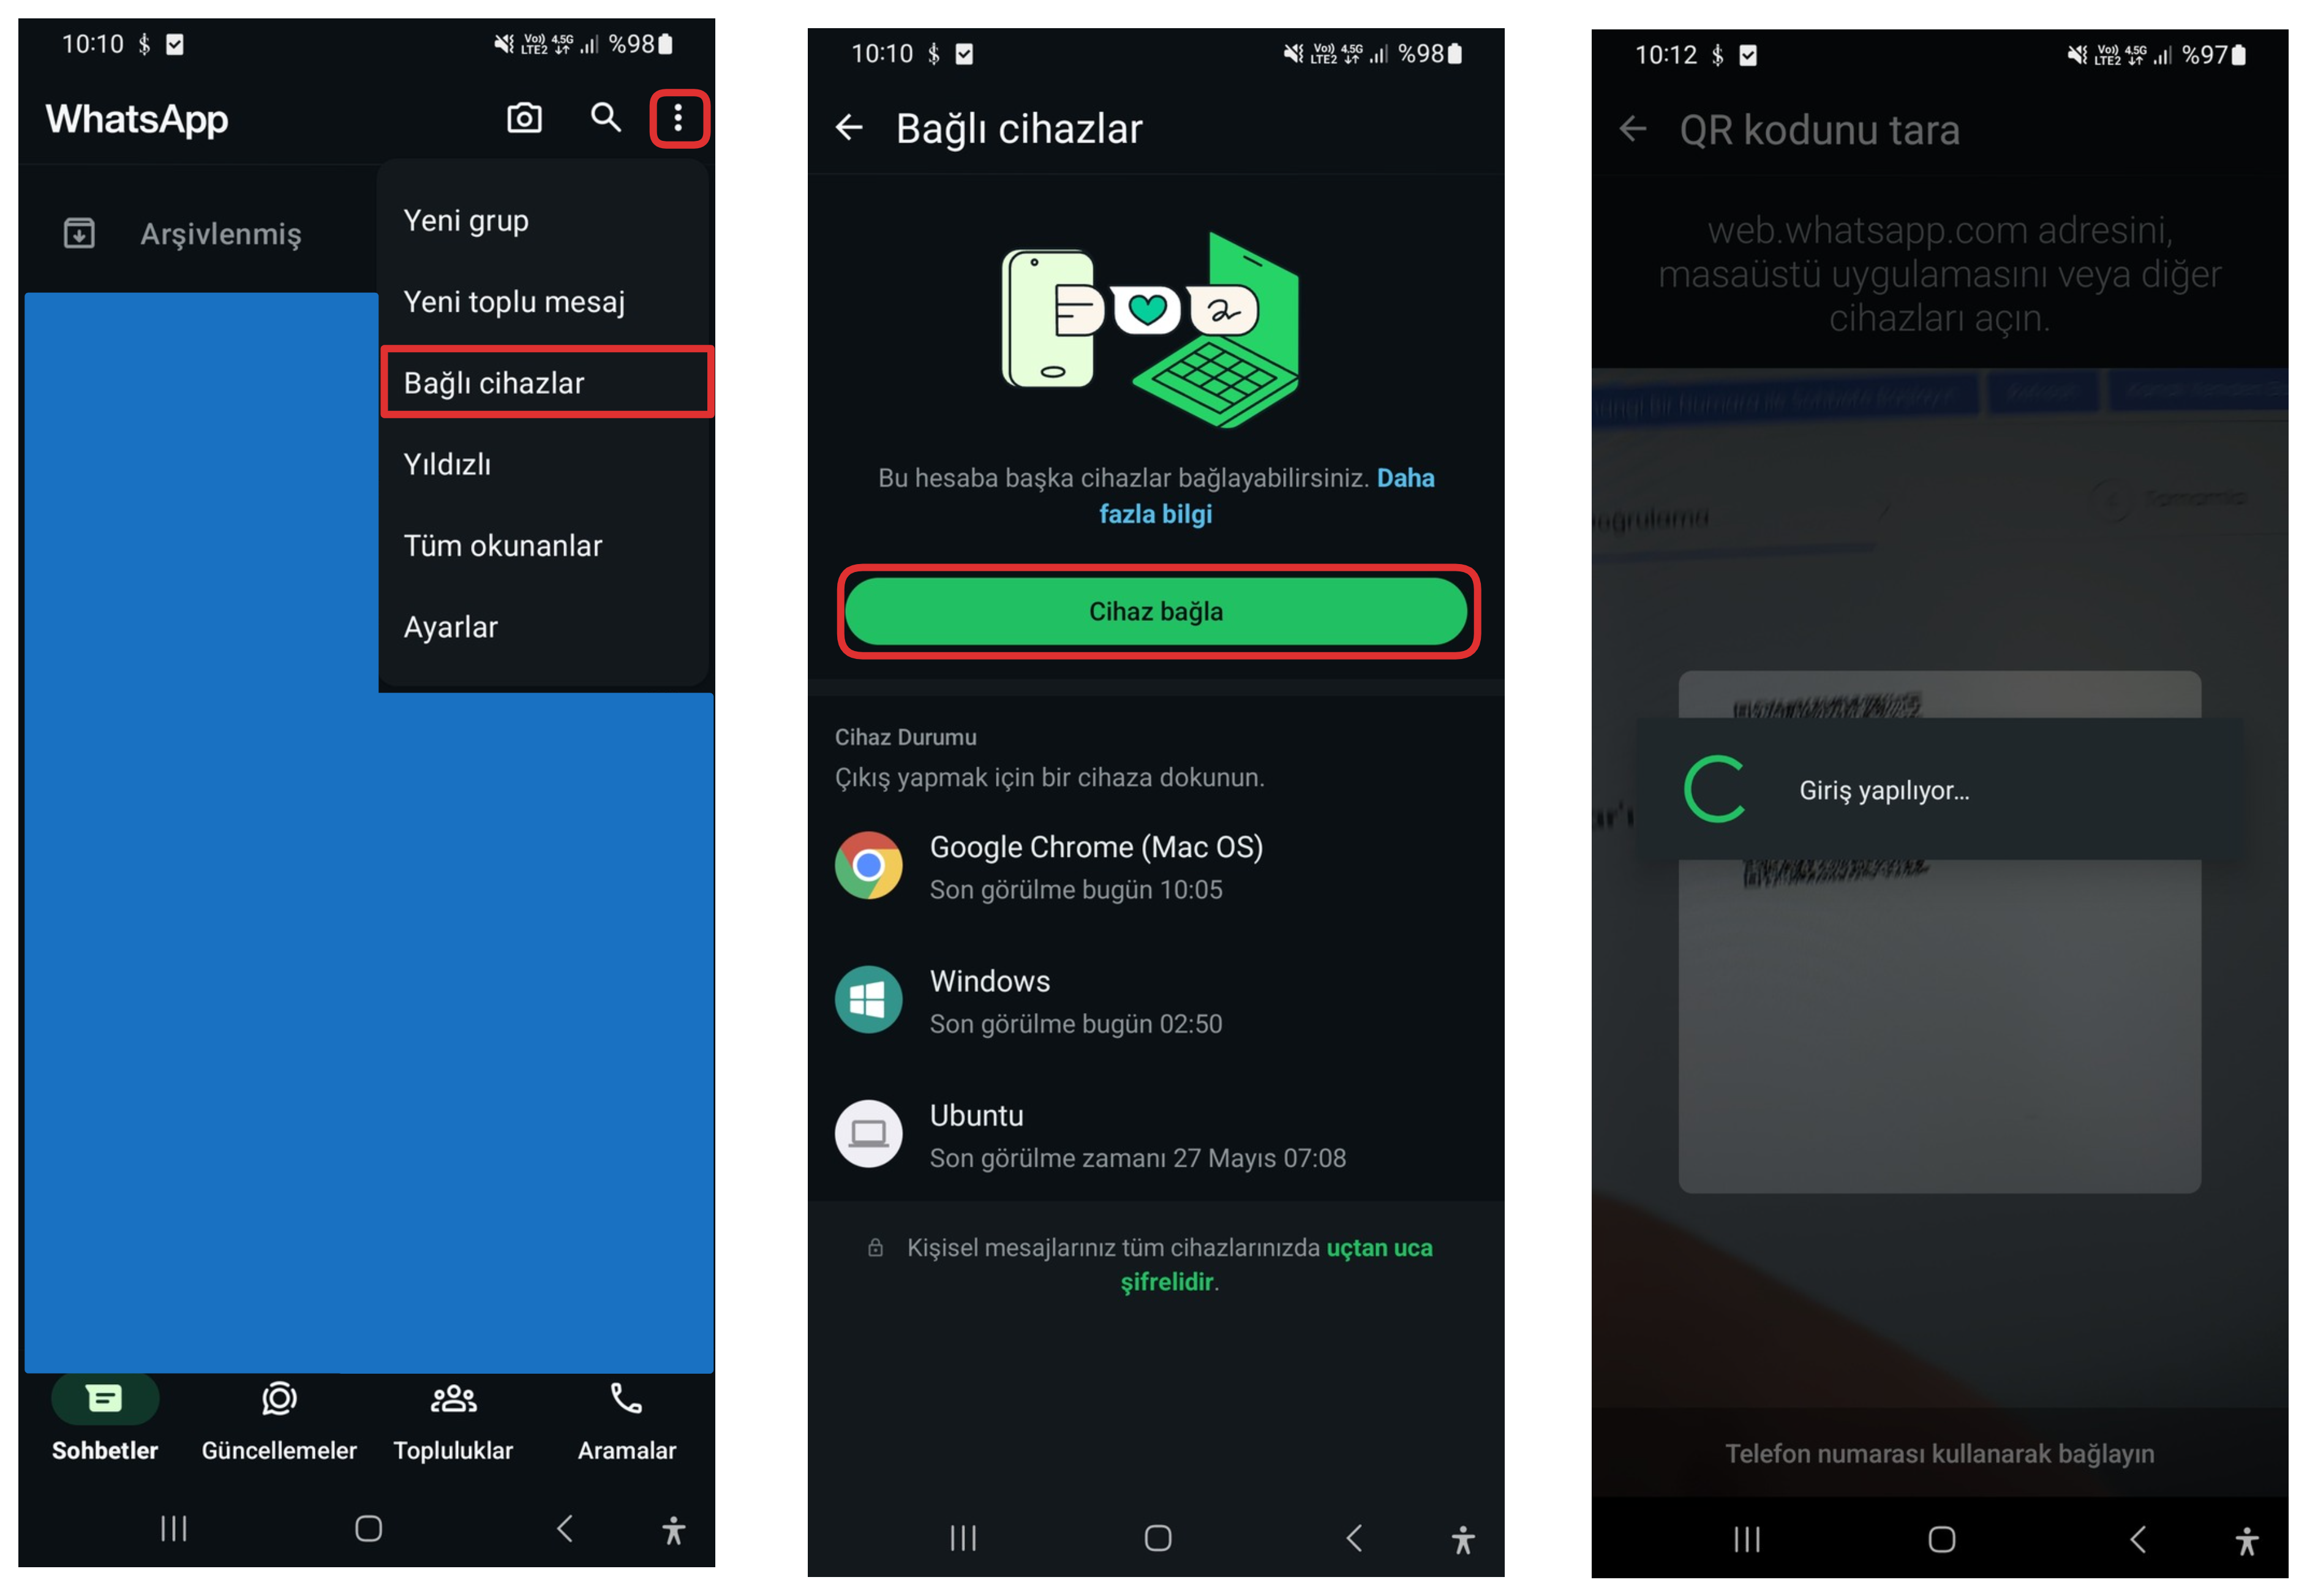
Log into the WhatsApp application from your mobile phone and click on the "Three Dots" icon in the top right corner to open the settings menu. From the opened menu, touch the "Linked Devices" option. Then, click the "Link Device" button and direct the QR code scanner opened on your phone screen to the QR code on the page open in your Supsis panel to scan the code. When this step is completed, your WhatsApp account will be successfully integrated with Supsis.
If you have completed all the operations, the integration has been successful. Now you can manage incoming messages from the Supsis panel. For detailed information, review this documentation.
WhatsApp V3 (QR) Integration
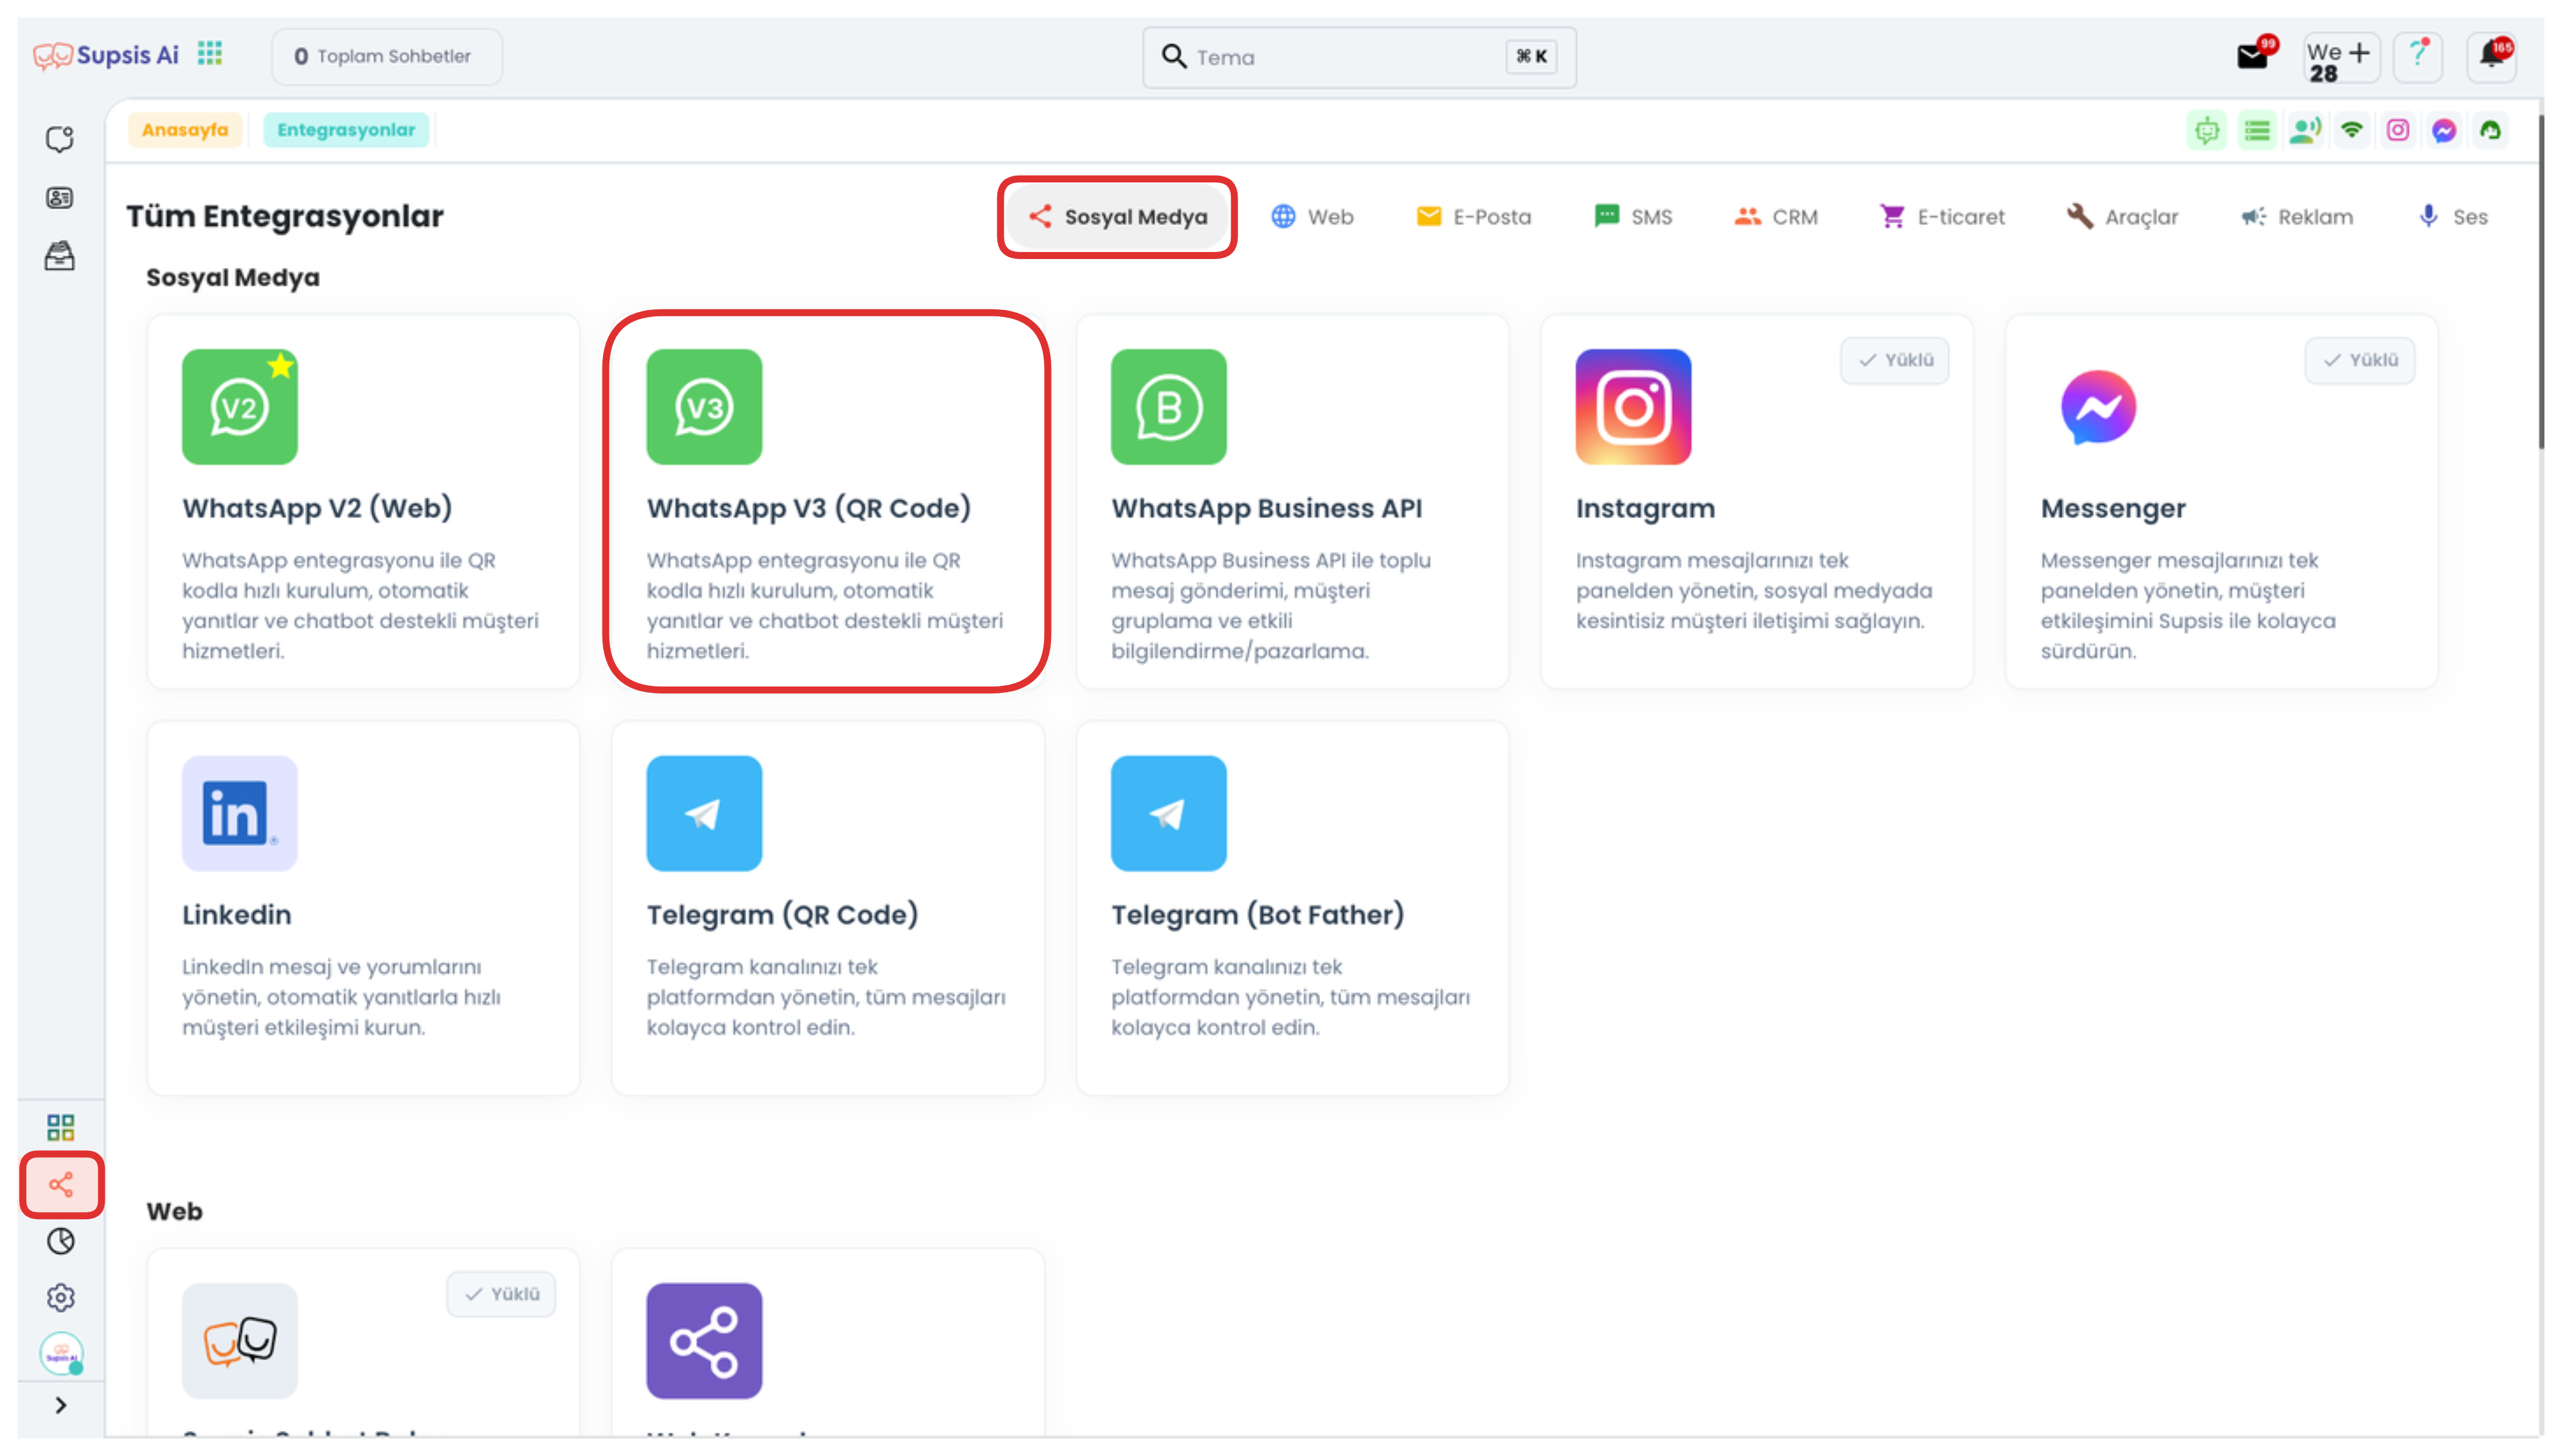
First, log into your Supsis panel. Then click on the "Integrations" tab in the left menu. On the opened page, click on the "WhatsApp V3 (QR)" integration option at the top to start the process.

On the opened page, if you don't have an existing channel, you can create a new WhatsApp V3 Channel by clicking the "Add Channel" button. This process allows you to establish a connection between Supsis and your WhatsApp account.
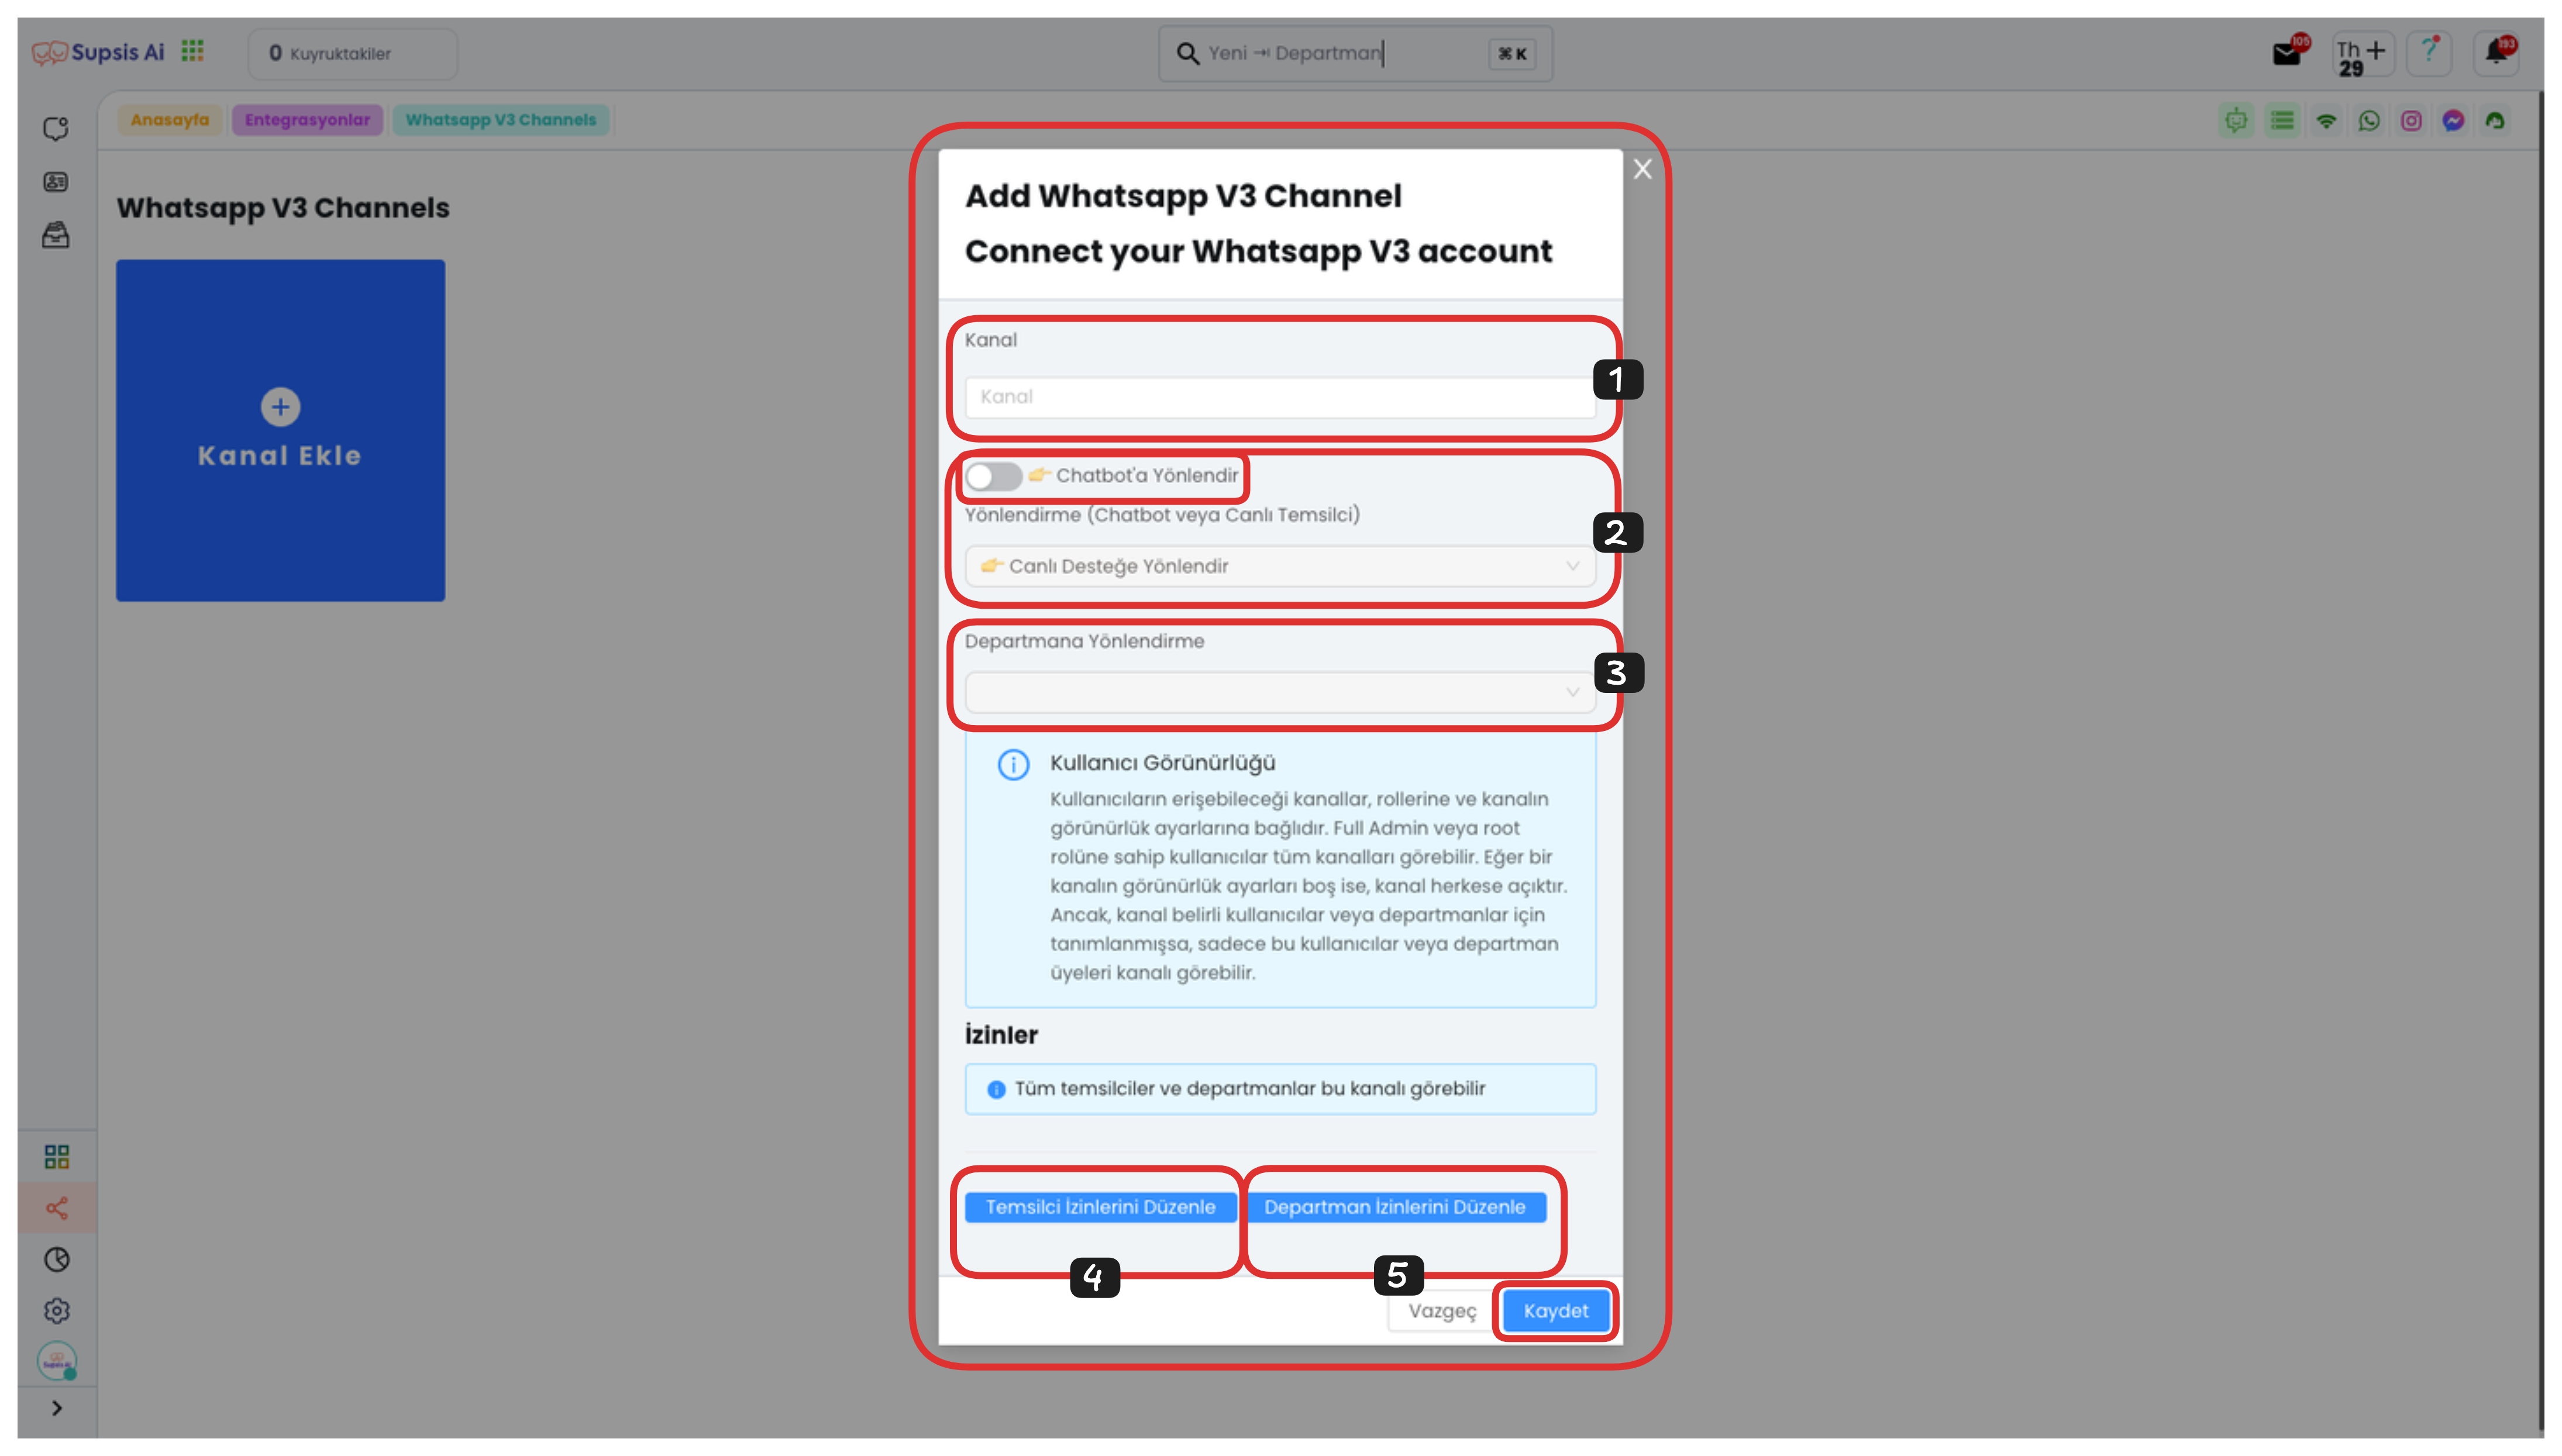
1-) Channel Name Determination
First, enter the name you will give to your channel in the "Channel" field in the opened modal. This name allows you to distinguish your channel from others.
2-) Redirection Selection

From the "Redirection" section, you can determine who will handle incoming conversations. If you activate the "Forward to Chatbot" option, all messages coming to your WhatsApp line are automatically handled and redirected by the chatbot. This is ideal for situations where you want to respond quickly with automation.
If you don't activate this option, your WhatsApp line is managed directly by Live Representatives and messages are answered manually. This is suitable for scenarios that require one-on-one customer communication.
3-) Department Redirection
From the "Department Redirection" field, select the relevant department to which messages from this WhatsApp channel will be redirected. This way, incoming messages are automatically redirected to the representatives of the department you have determined and the communication process proceeds in a more organized manner.
4-) Representative Permission Editing

In this section, you can determine which representatives will be authorized in this channel and which operations they can perform.
5-) Department Permission Editing

In this field, you can configure department-based authorizations and set which department will have which accesses.
After filling all these fields completely, you can complete the WhatsApp V3 (QR) channel creation process by clicking the "Save" button.
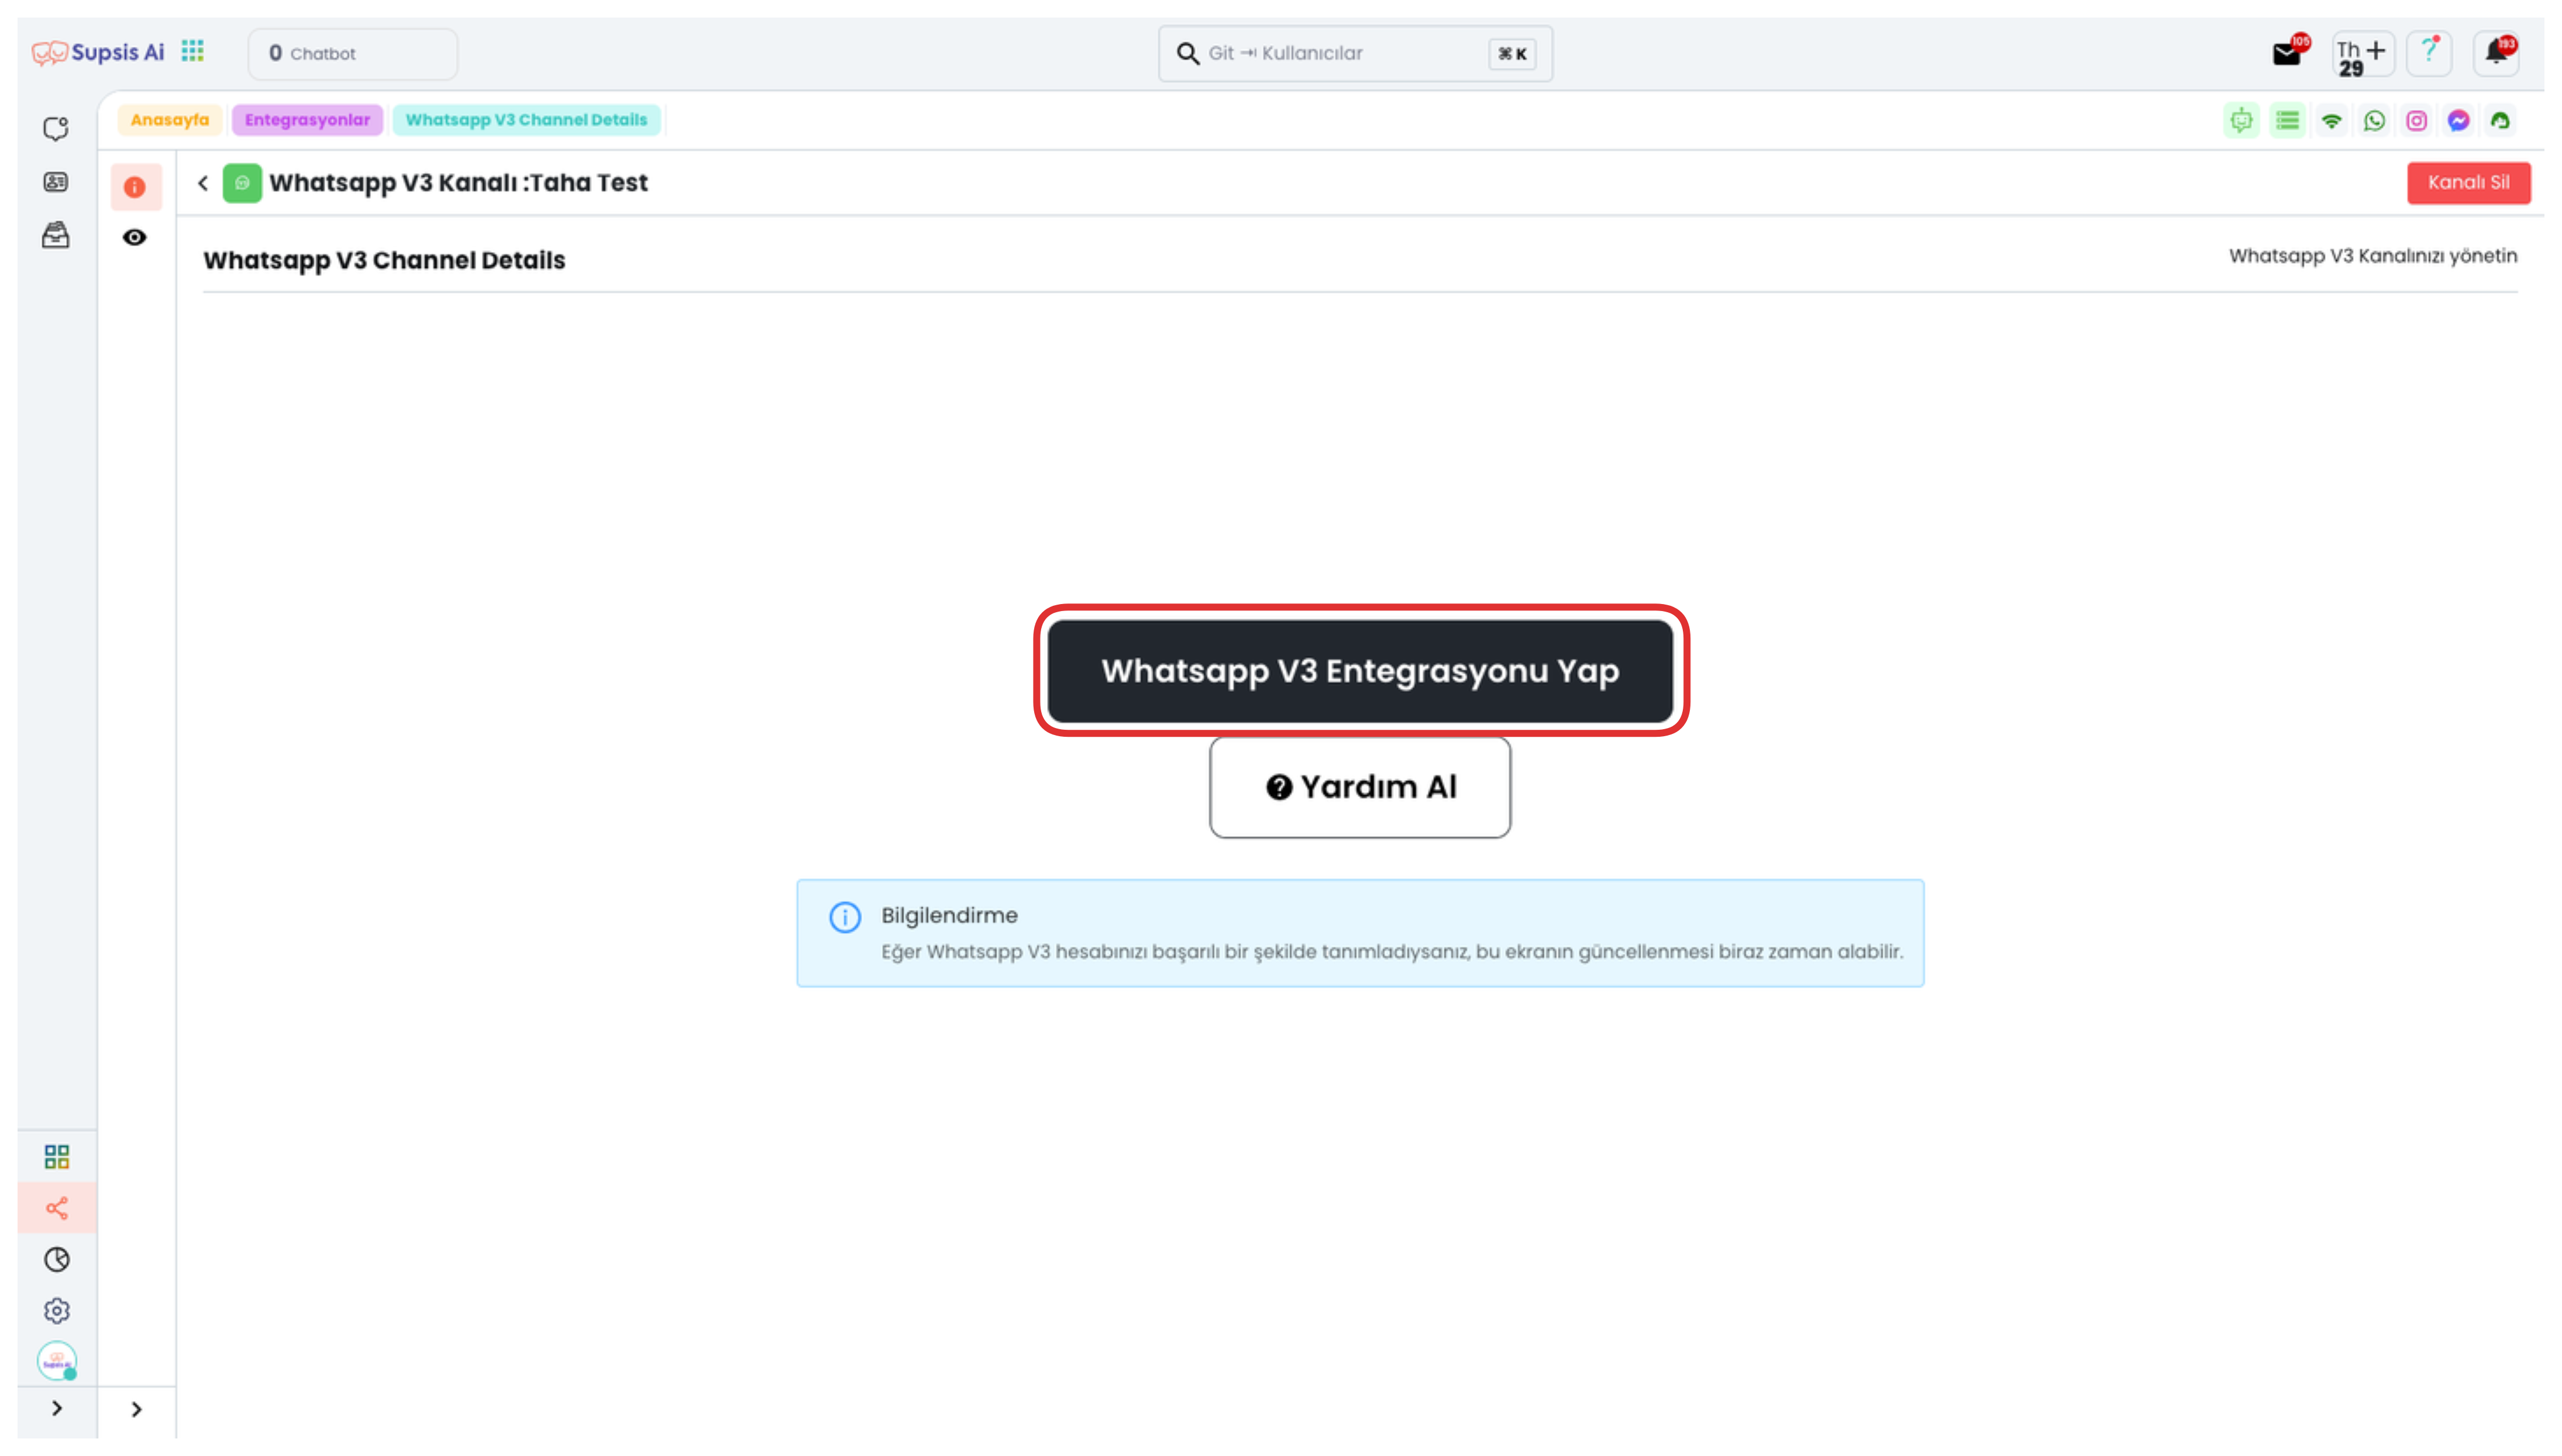
Click the "Do WhatsApp V3 Integration" button on the opened page to be quickly directed to the QR code screen. With this step, you can directly proceed to the integration process.
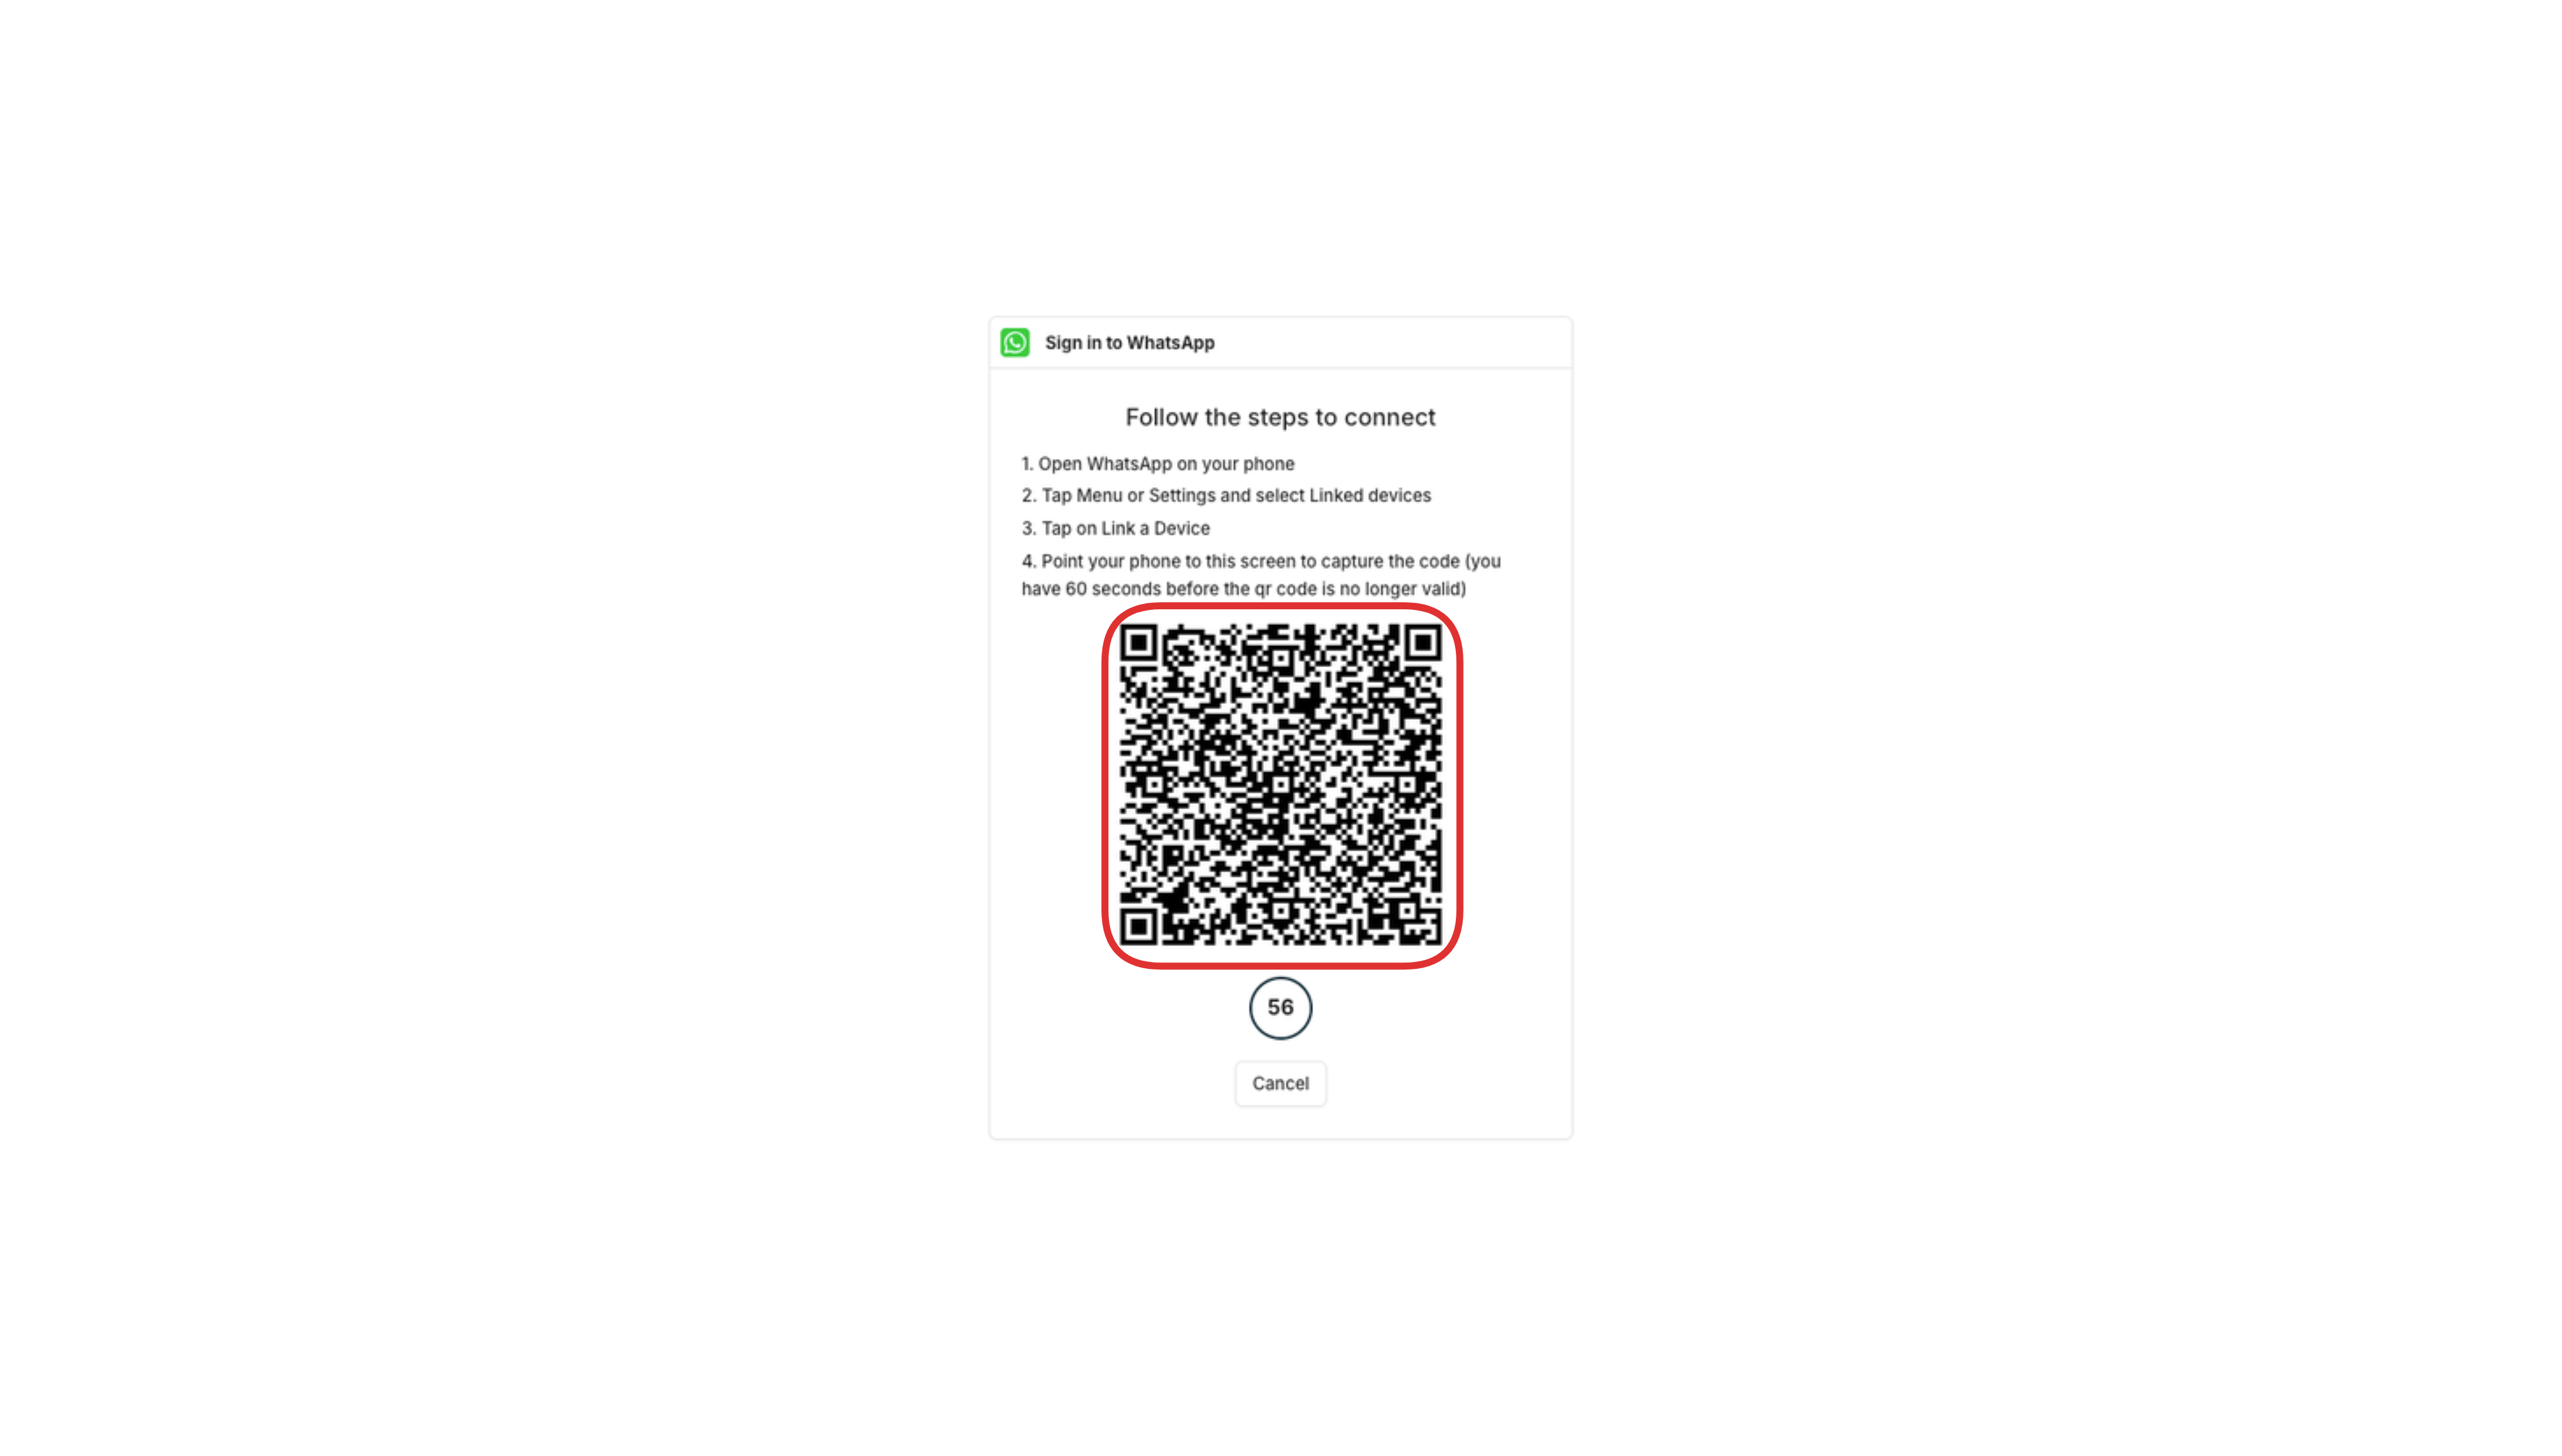
You can complete the integration process by scanning the QR code on the opened page through the WhatsApp application on your mobile phone.
Log into the WhatsApp application from your mobile phone and click on the "Three Dots" icon in the top right corner to open the settings menu. From the opened menu, touch the "Linked Devices" option. Then, click the "Link Device" button and direct the QR code scanner opened on your phone screen to the QR code on the page open in your Supsis panel to scan the code. When this step is completed, your WhatsApp account will be successfully integrated with Supsis.
If you have completed all the operations, the integration has been successful. Now you can manage incoming messages from the Supsis panel. For detailed information, review this documentation.