Supsis User Management Screen
On the Supsis platform, there is a special user management screen for the purpose of managing, authorizing and monitoring users. Through this screen, you can access detailed information about existing users, add new users and update existing users' information. Below are detailed information on how to use this screen.
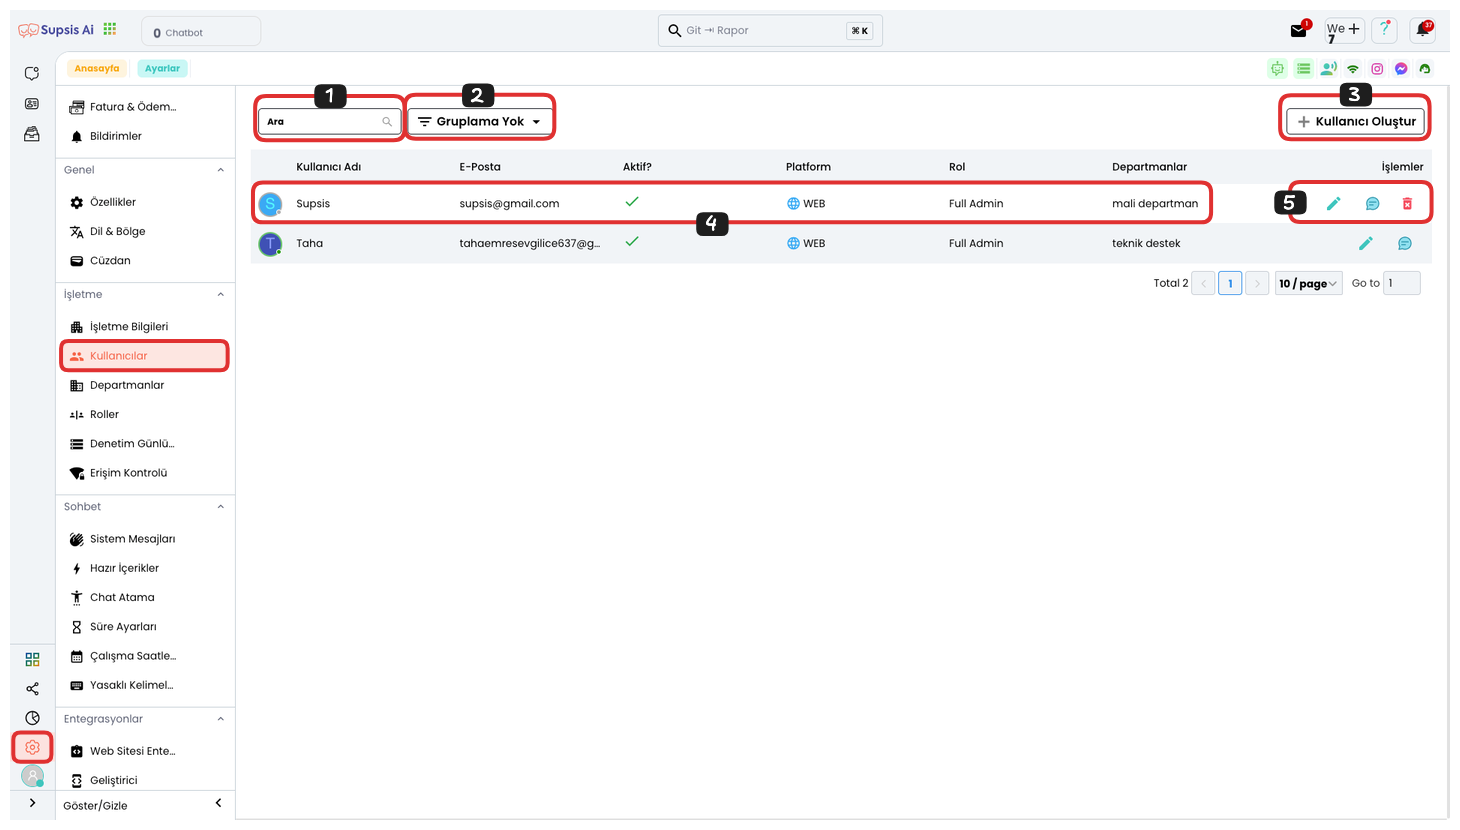
Users Elements:
- Search Box
- Grouping
- Create User
- User Features
- Operations
1-) Search Box
If you have many representatives or cannot find the representative you are looking for, you can easily find the representative you are looking for by searching for your representative's username from this field. This feature saves time and makes processes more efficient by allowing you to quickly reach the right representative in large teams.
2-) Grouping
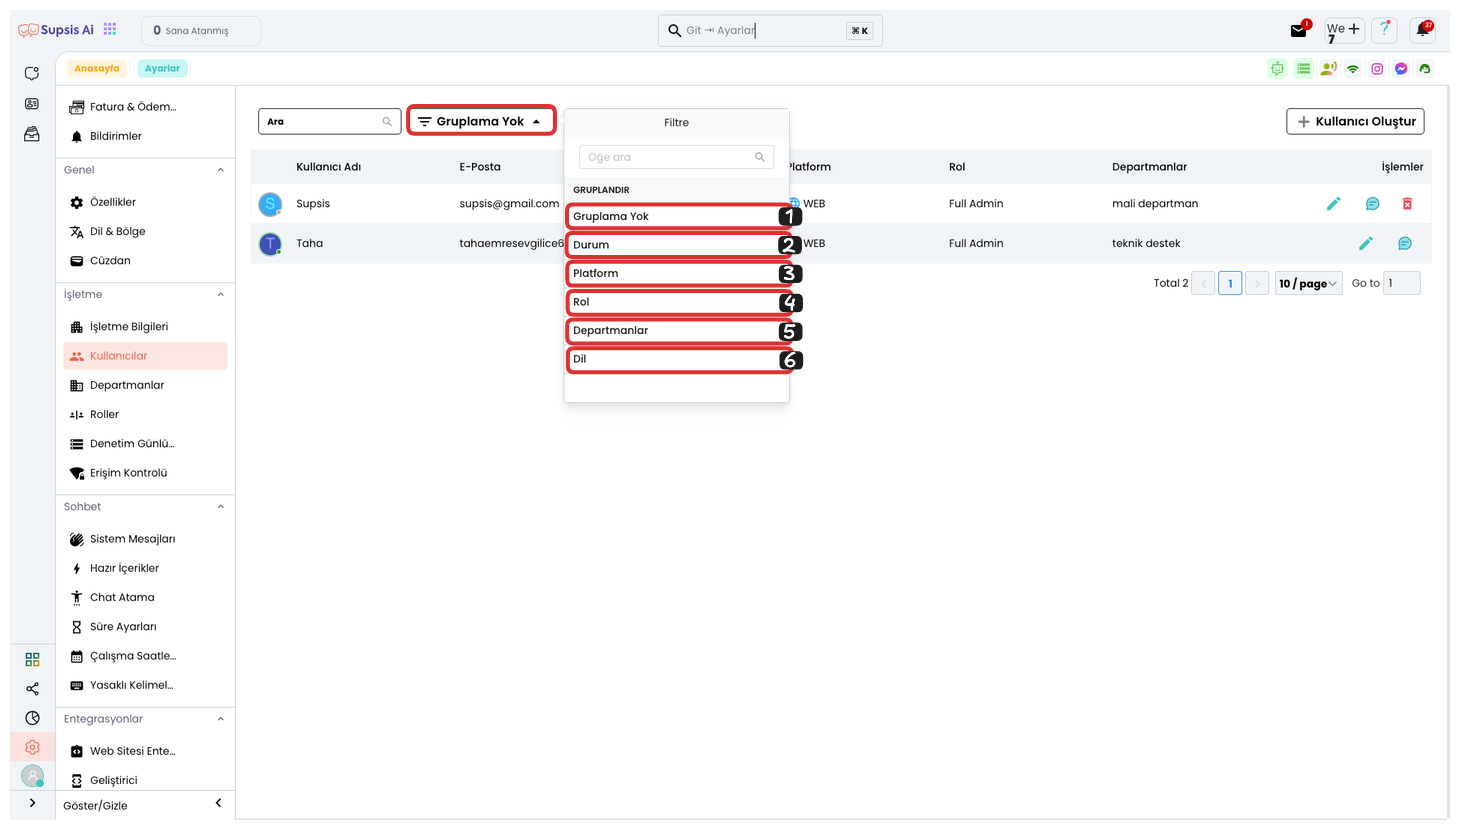
If you want to filter and group your users according to criteria such as status, platform, role, departments and language, you can select the grouping you want from this field. If you don't want grouping, you can select the "No Grouping" option. This feature allows you to manage your users in a more organized way and provides easier access according to specific categories.
3-) User Creation
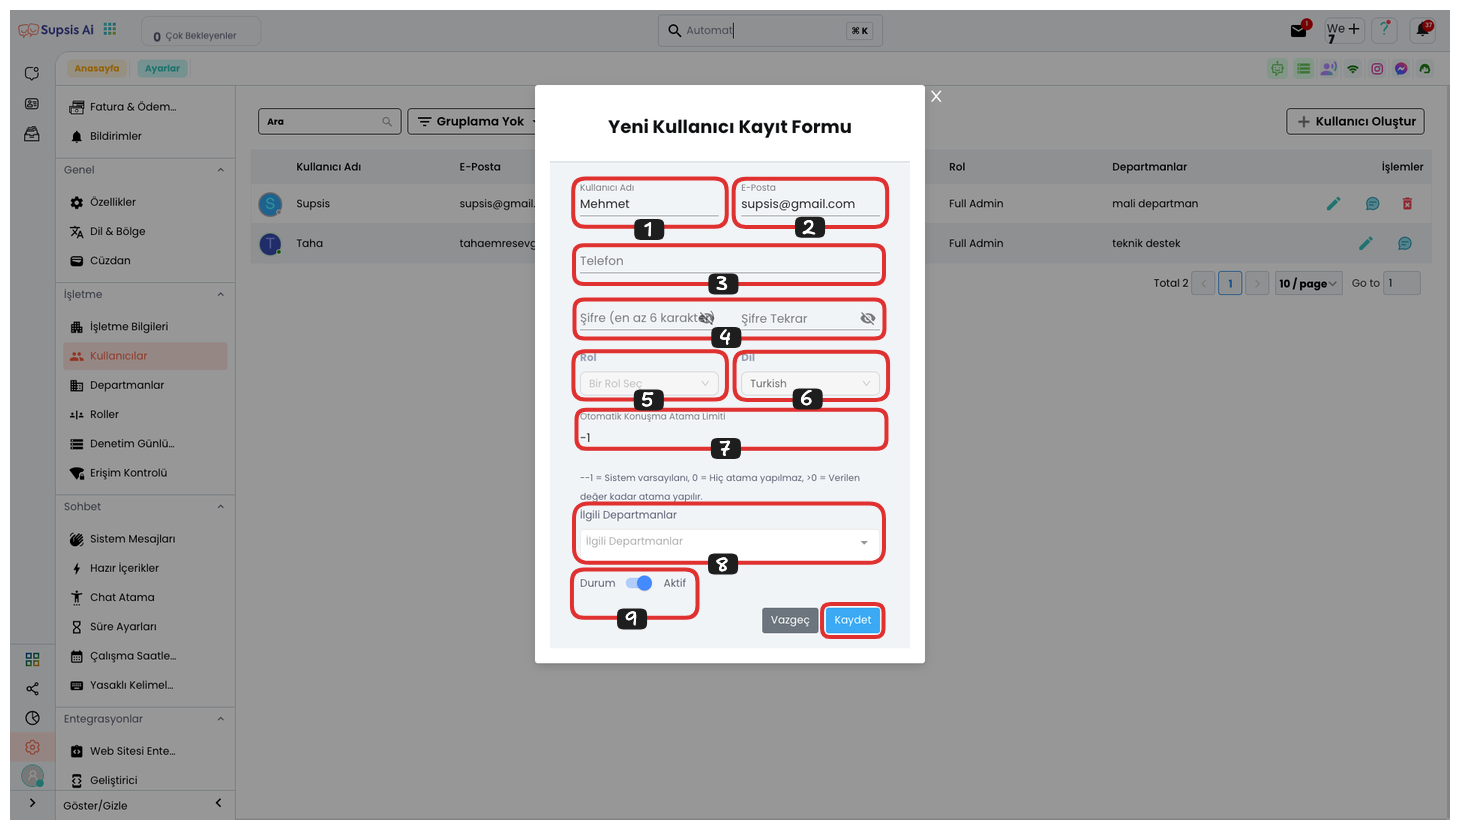
User Creation Elements:
- Username
- Password
- Phone
- Role
- Language
- Automatic Chat Assignment Limit
- Departments
- Status
1.) Username: From this field, you can determine the name of your user.
2.) Email: From this field, you can determine the email address of your user.
3.) Password: In this field, you can determine the password that your user will use when logging into the panel.
4.) Phone: In this field, you can determine the phone number of your user.
5.) Role: In this field, you can determine the role of your user, this feature determines your user's permissions.
6.) Language: In this field, you can determine the panel language that your user will use.
7.) Automatic Chat Assignment Limit: From this field, you can determine the automatic chat assignment limit of your user. If this value is -1, the system remains default, if it is greater than or equal to 0, assignment is made as many as the written number.
8.) Departments: From this field, you can determine the department of your user. These departments help you determine in which area your user works.
9.) Status: This field determines the status of the user, that is, if this user is not actively used, you can keep this feature closed. If this user is active, keep this option open.
Finally, after filling all these fields, you can complete your user creation process by saying "Save". This ensures that the new user is successfully added and all necessary information is saved.
4-) User Features
This area displays user information in the following columns respectively: "Username", "Email", "Phone", "Role", "Language", "Departments", "Status" and "Platform". This way, you can view and manage user data in a more organized way.
5-) Operations
From the Operations section, you can perform viewing, editing and deletion operations. This way, you can edit users, access them when needed or remove unnecessary content.