Department Redirection Methods
Department Redirection Methods makes communication faster and more efficient by directing customer messages and requests to specific departments. This way, relevant departments can manage processes more easily by viewing only the messages that belong to them.
Department Redirection Methods Elements:
- Via Chatbot
- Import Contacts
- Channel Settings
- Chat Screen
1.) Via Chatbot
Via Chatbot, you can perform department redirection by using the "Set Department" block within the chatbot you created. Thanks to this block, you can automatically direct users to specific departments according to incoming messages and manage the process more efficiently.
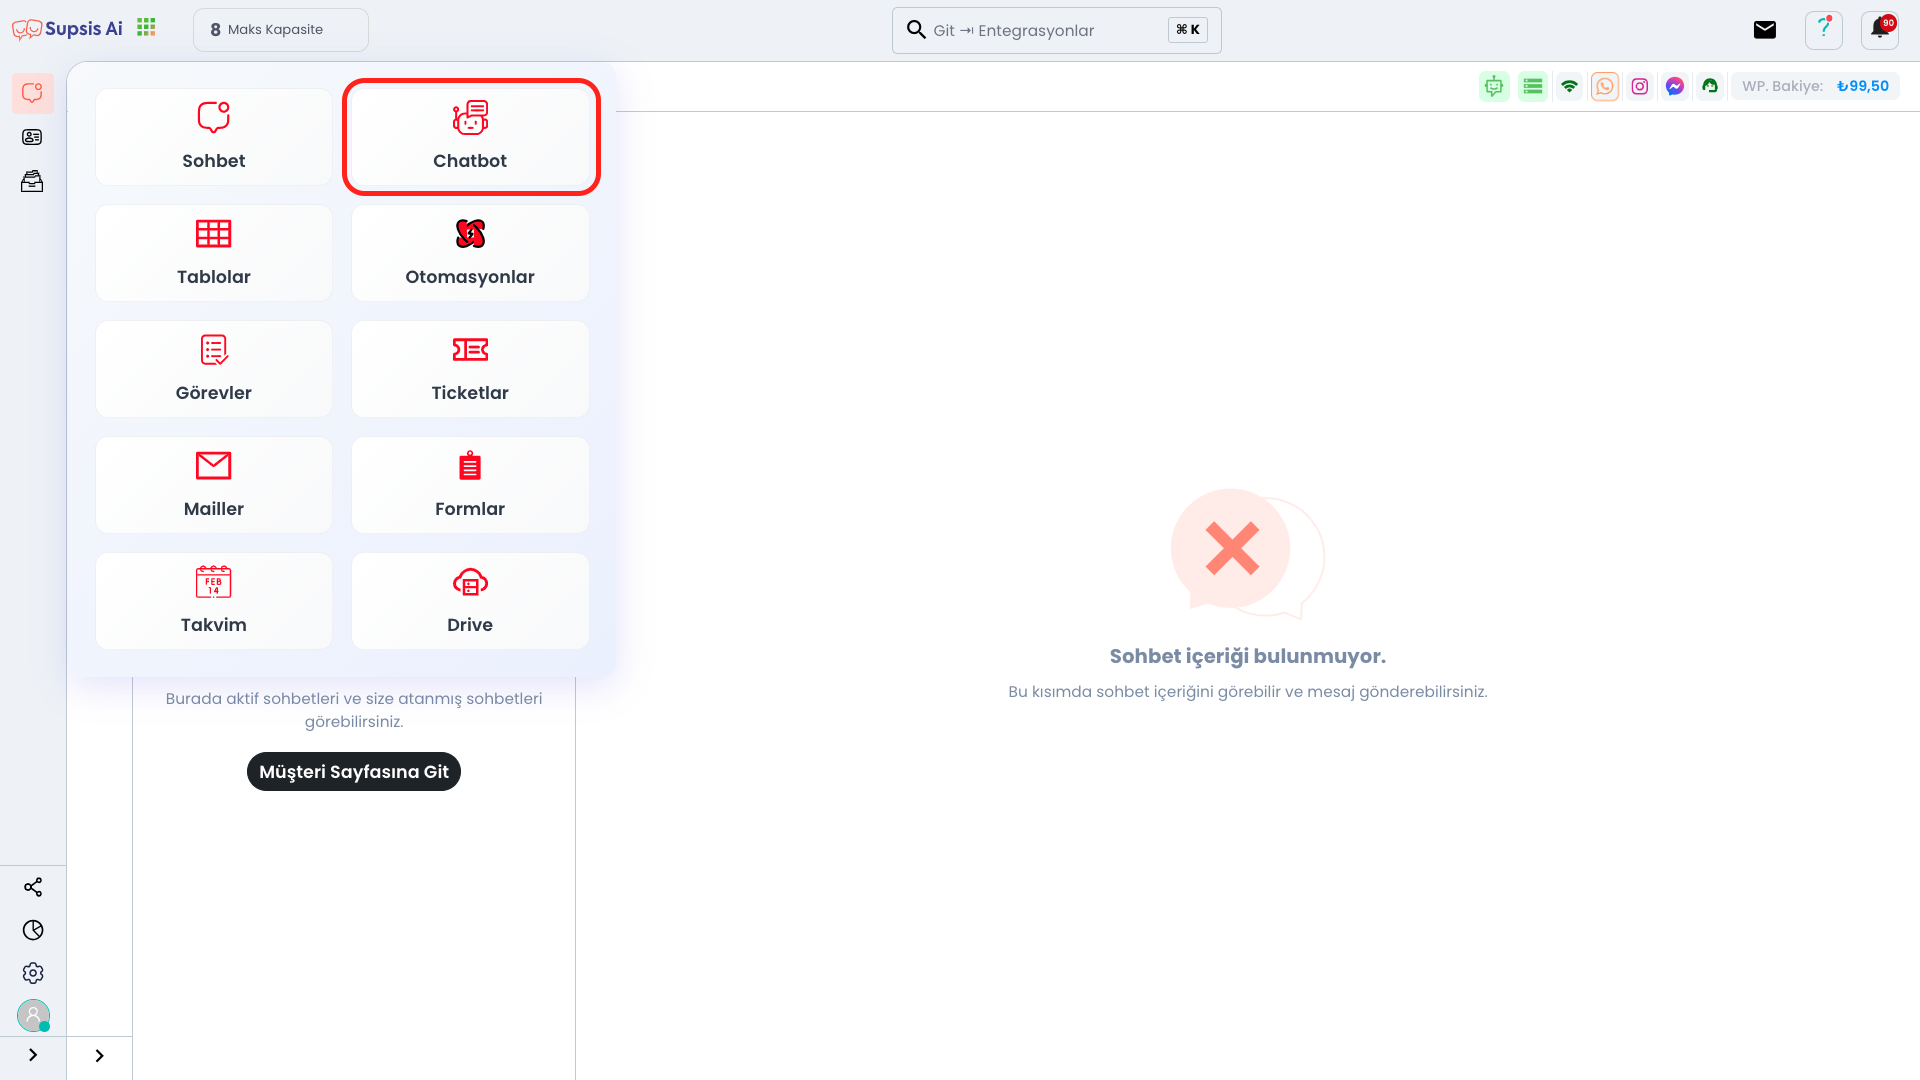
First, click the "Applications" icon located in the top left. From the opened menu, click the "Chatbot" option to switch to the Chatbot page.
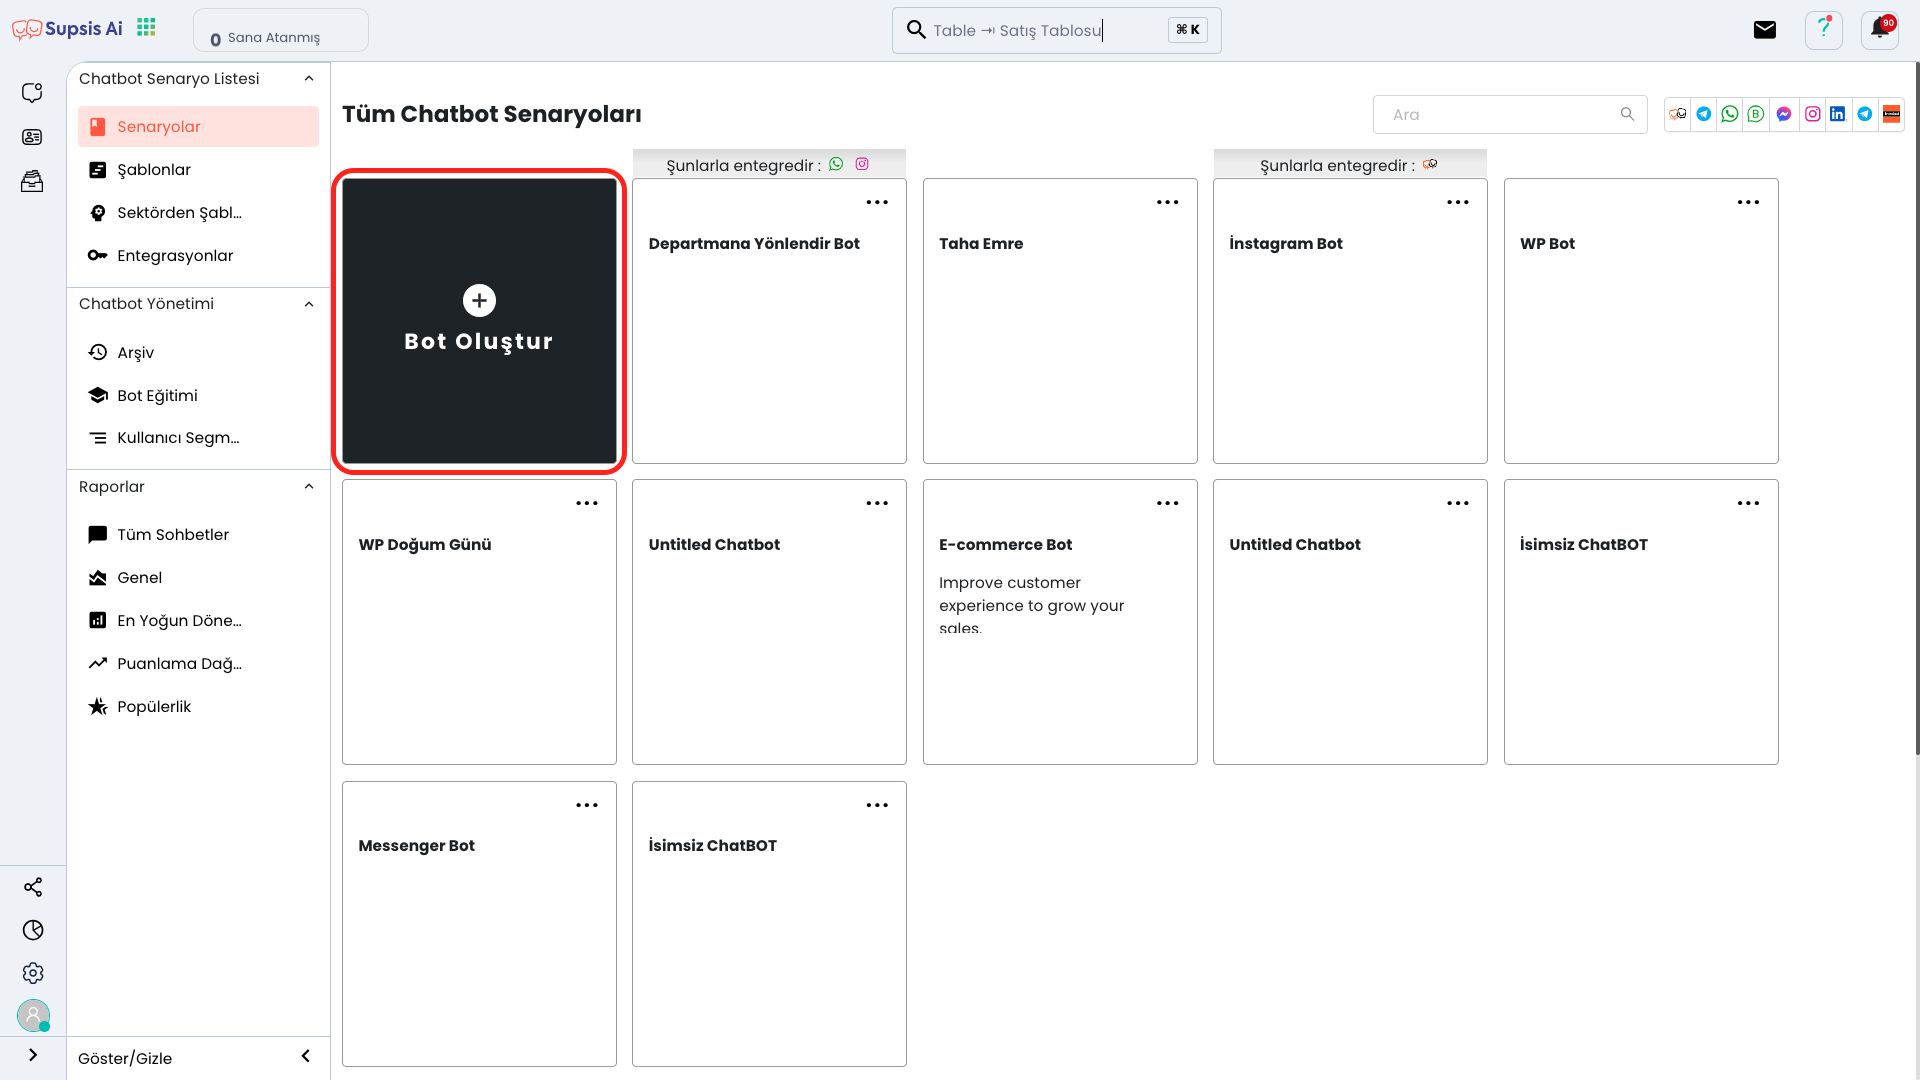
On the opened page, continue by clicking the "Create Bot" button. This step will be your starting point for creating a new chatbot.
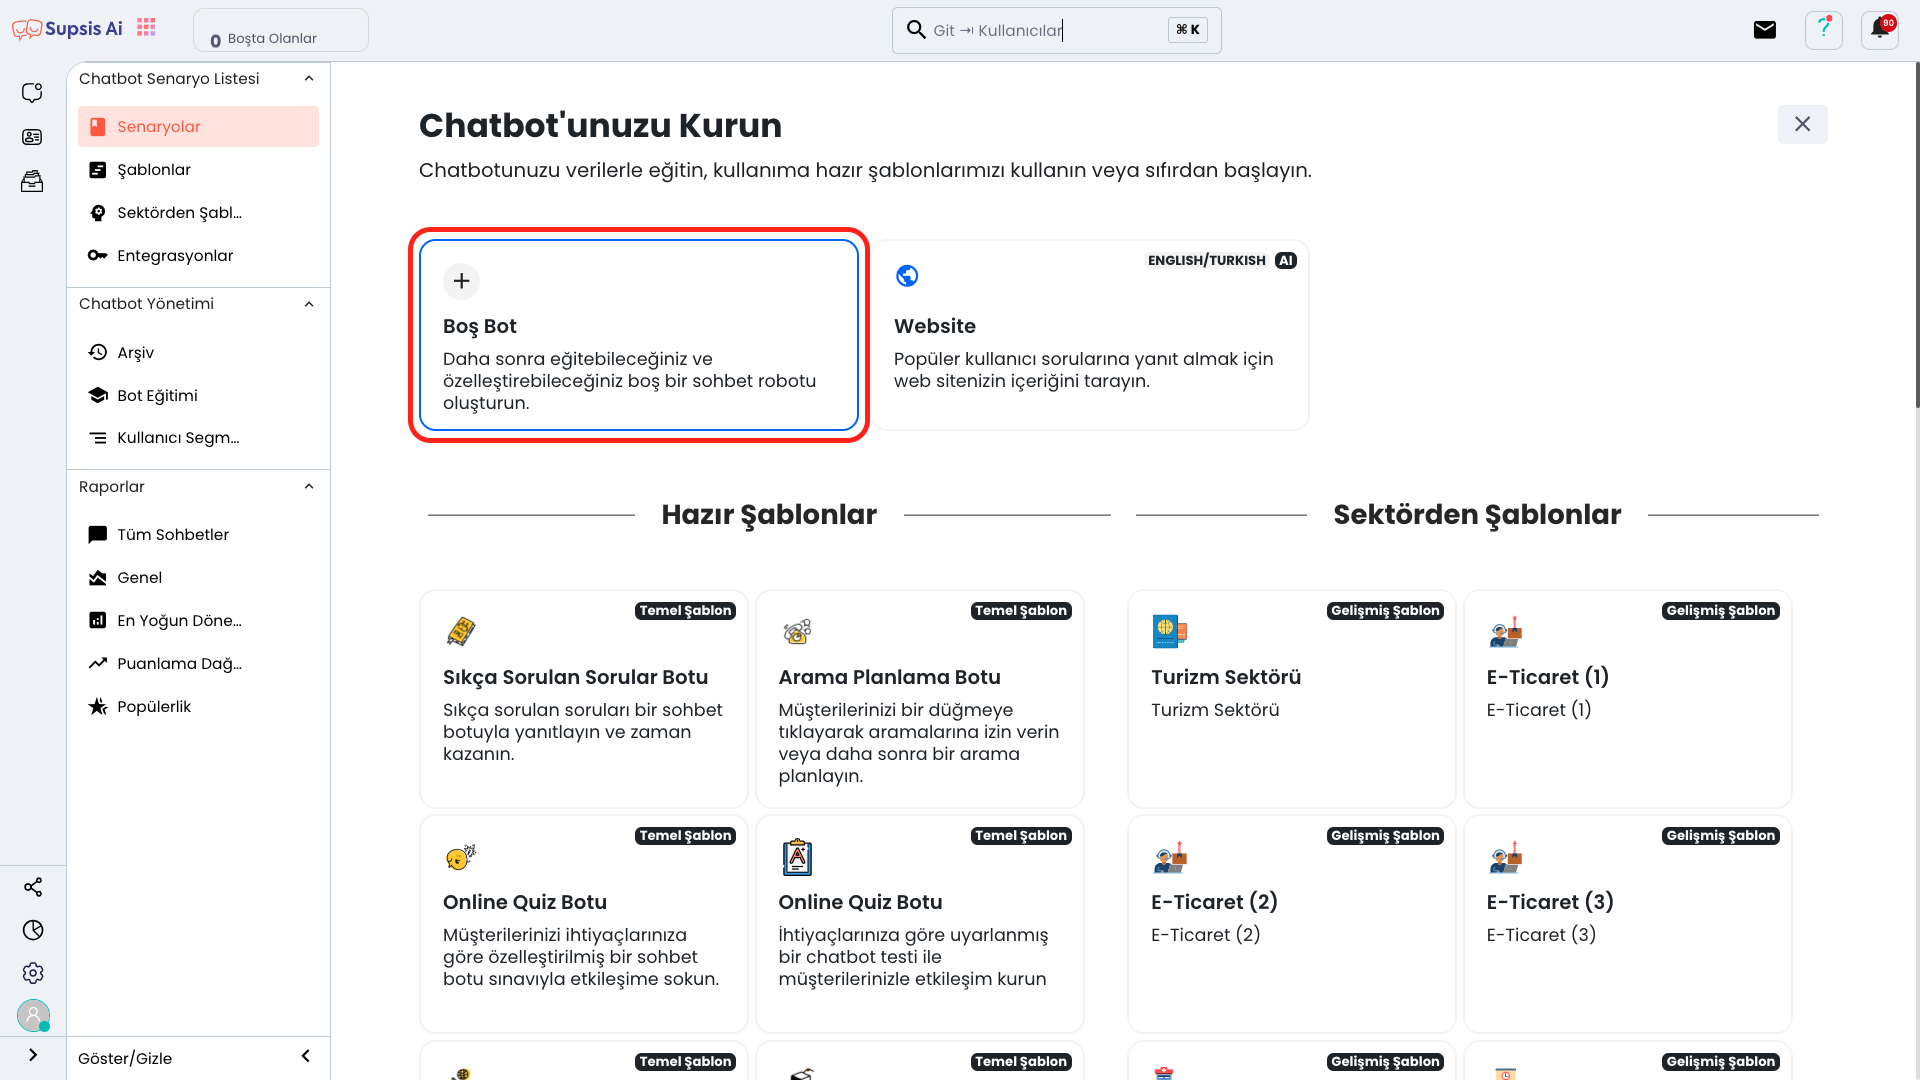
To create a new bot, click the "Empty Bot" option and continue. This option allows you to create a completely custom chatbot structure from scratch.

On the opened page, add the "Set Department" block to your chatbot flow by dragging and dropping. Thanks to this block, you can ensure that users are directed to a specific department according to incoming messages.
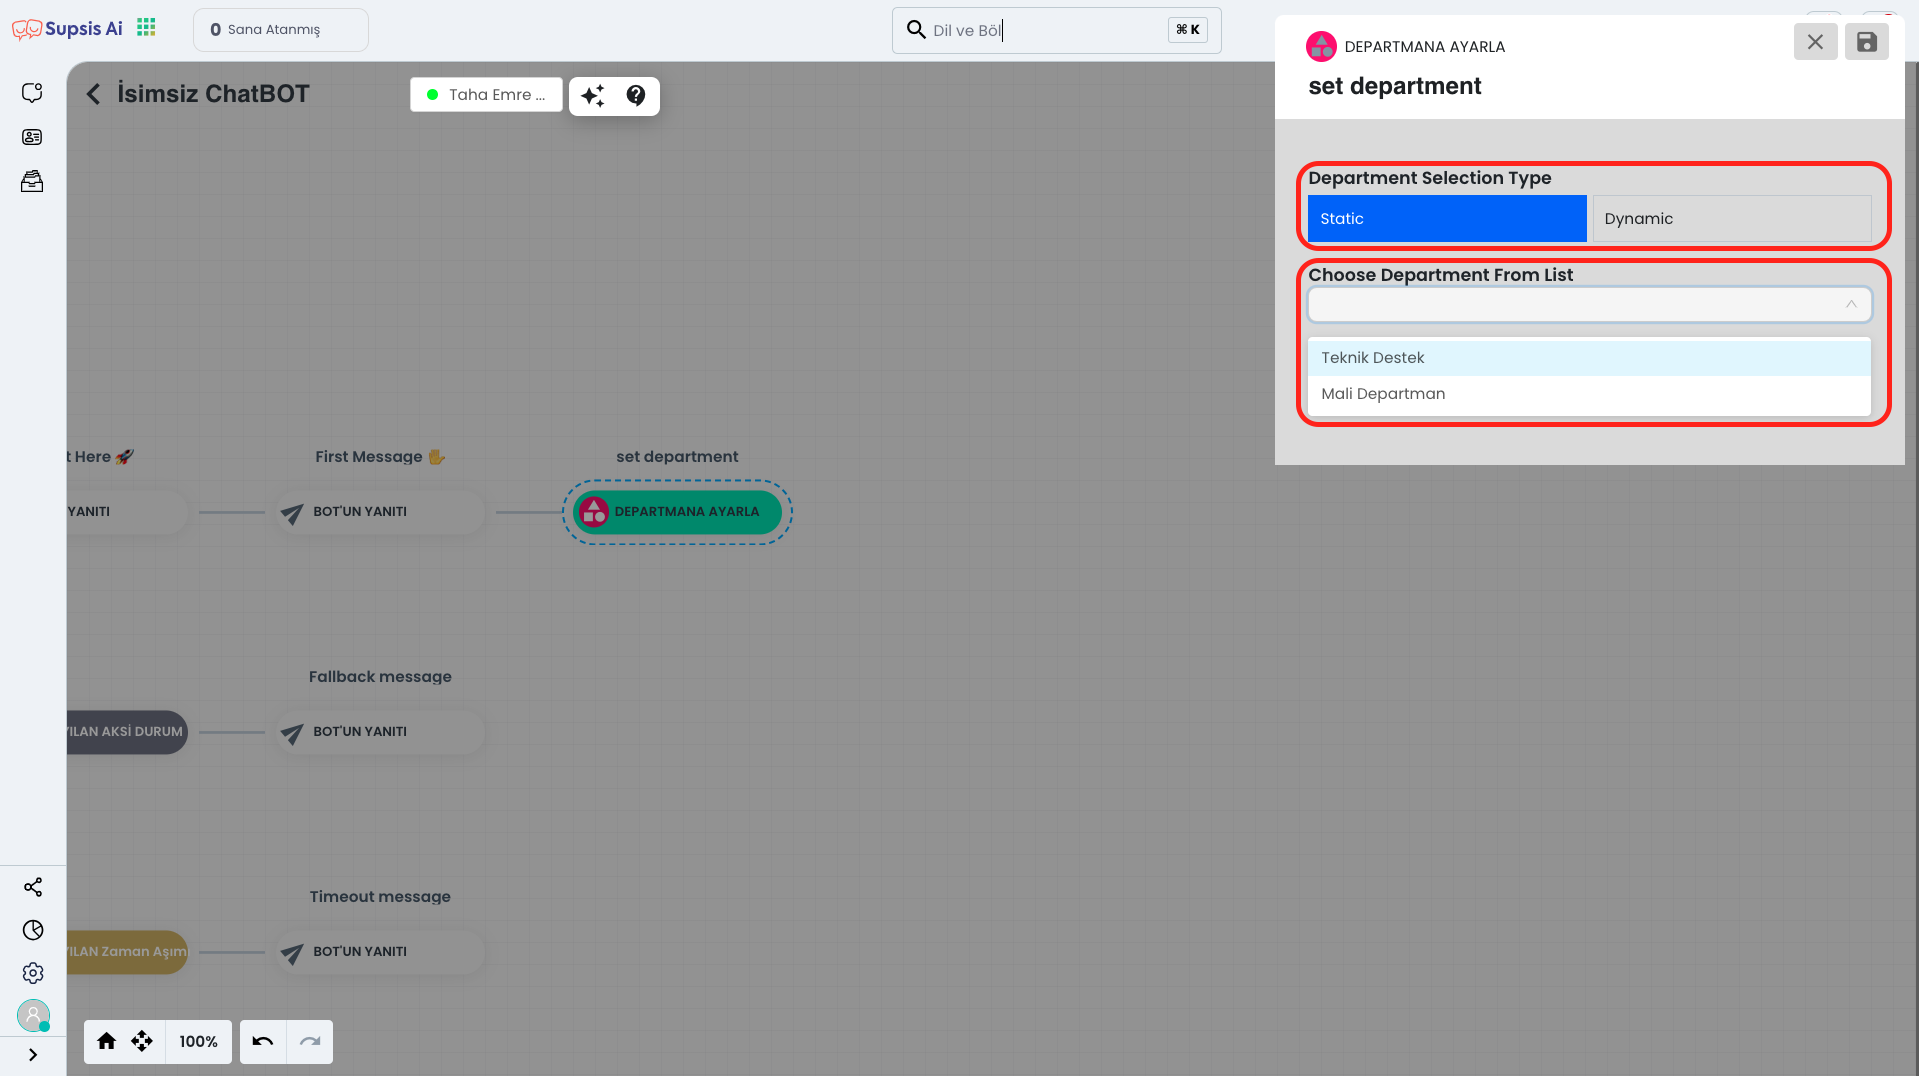
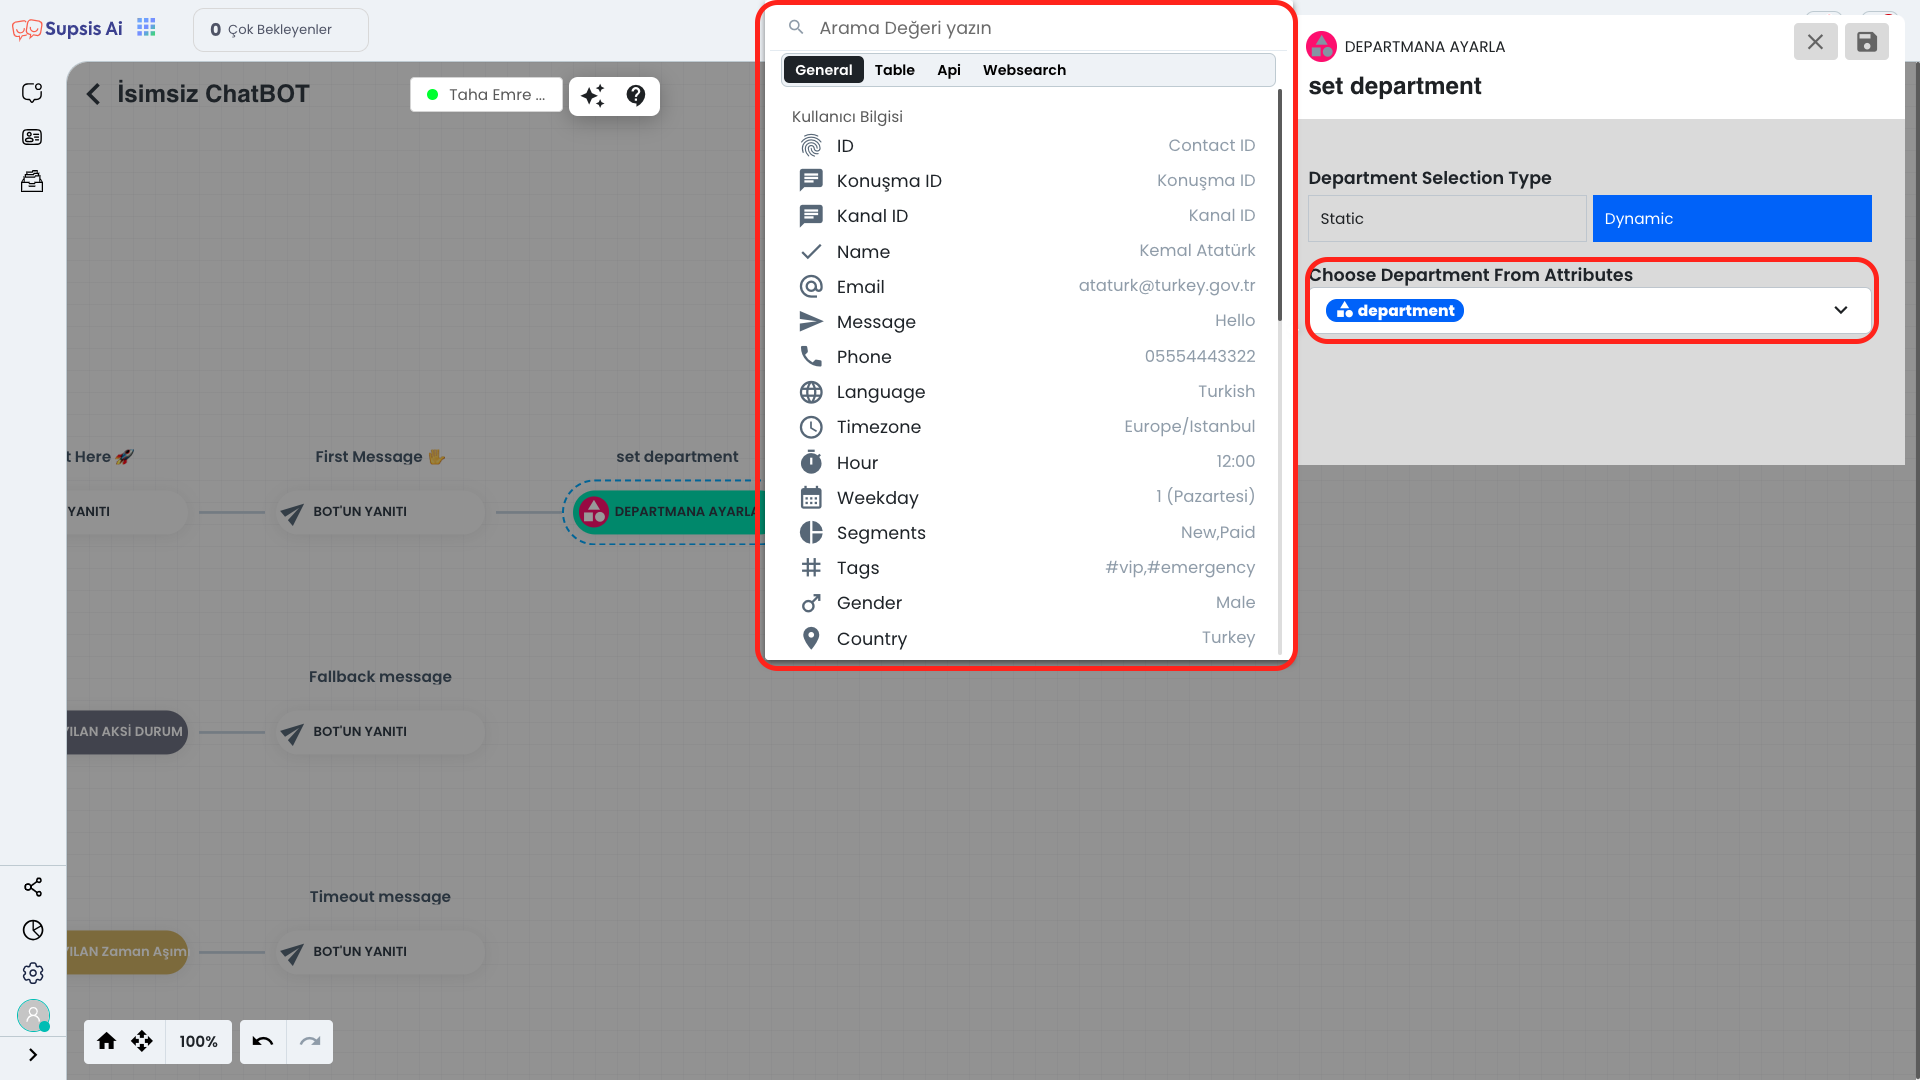
When you click on the "Set Department" block, you can perform department redirection statically or dynamically from the opened area.
In the static redirection option, all users are directed to a single department that you have fixedly determined.
Dynamic redirection, on the other hand, ensures that users are automatically directed to different departments according to specific parameters (such as person information, tags, custom fields). This method is ideal for more flexible and targeted redirections.

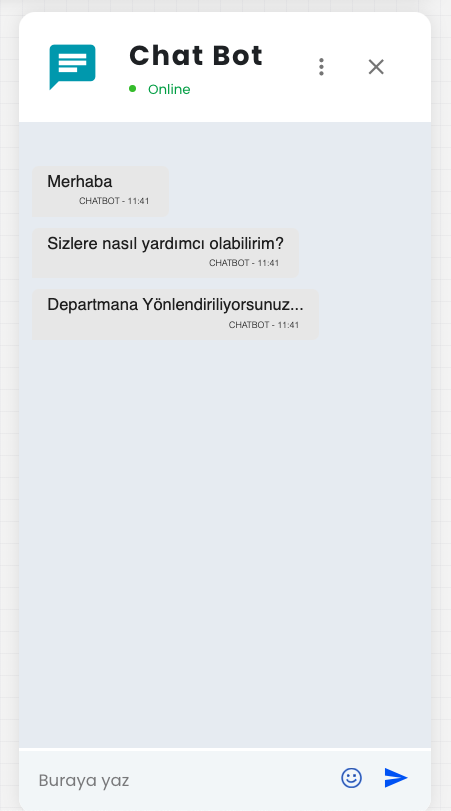
If you wish, you can also add a warning message to be shown to the user during the department redirection process. Thanks to this message, you can inform the user about the redirection or make the redirection process more understandable.

Finally, you can add the "Transfer Chat" block to your chatbot flow so that the conversation can actually be transferred to the relevant department. This block completes the redirection process and ensures that the conversation with the user reaches the right representative.
If you have completed these steps completely, your Department Redirection process has been successfully completed. Now incoming messages will be directed to the relevant department according to the rules you have determined.
2.) Import Contacts
Import Contacts, In this section, by importing contacts via WhatsApp, it allows you to direct each person in your contacts to a specific department as a special parameter.
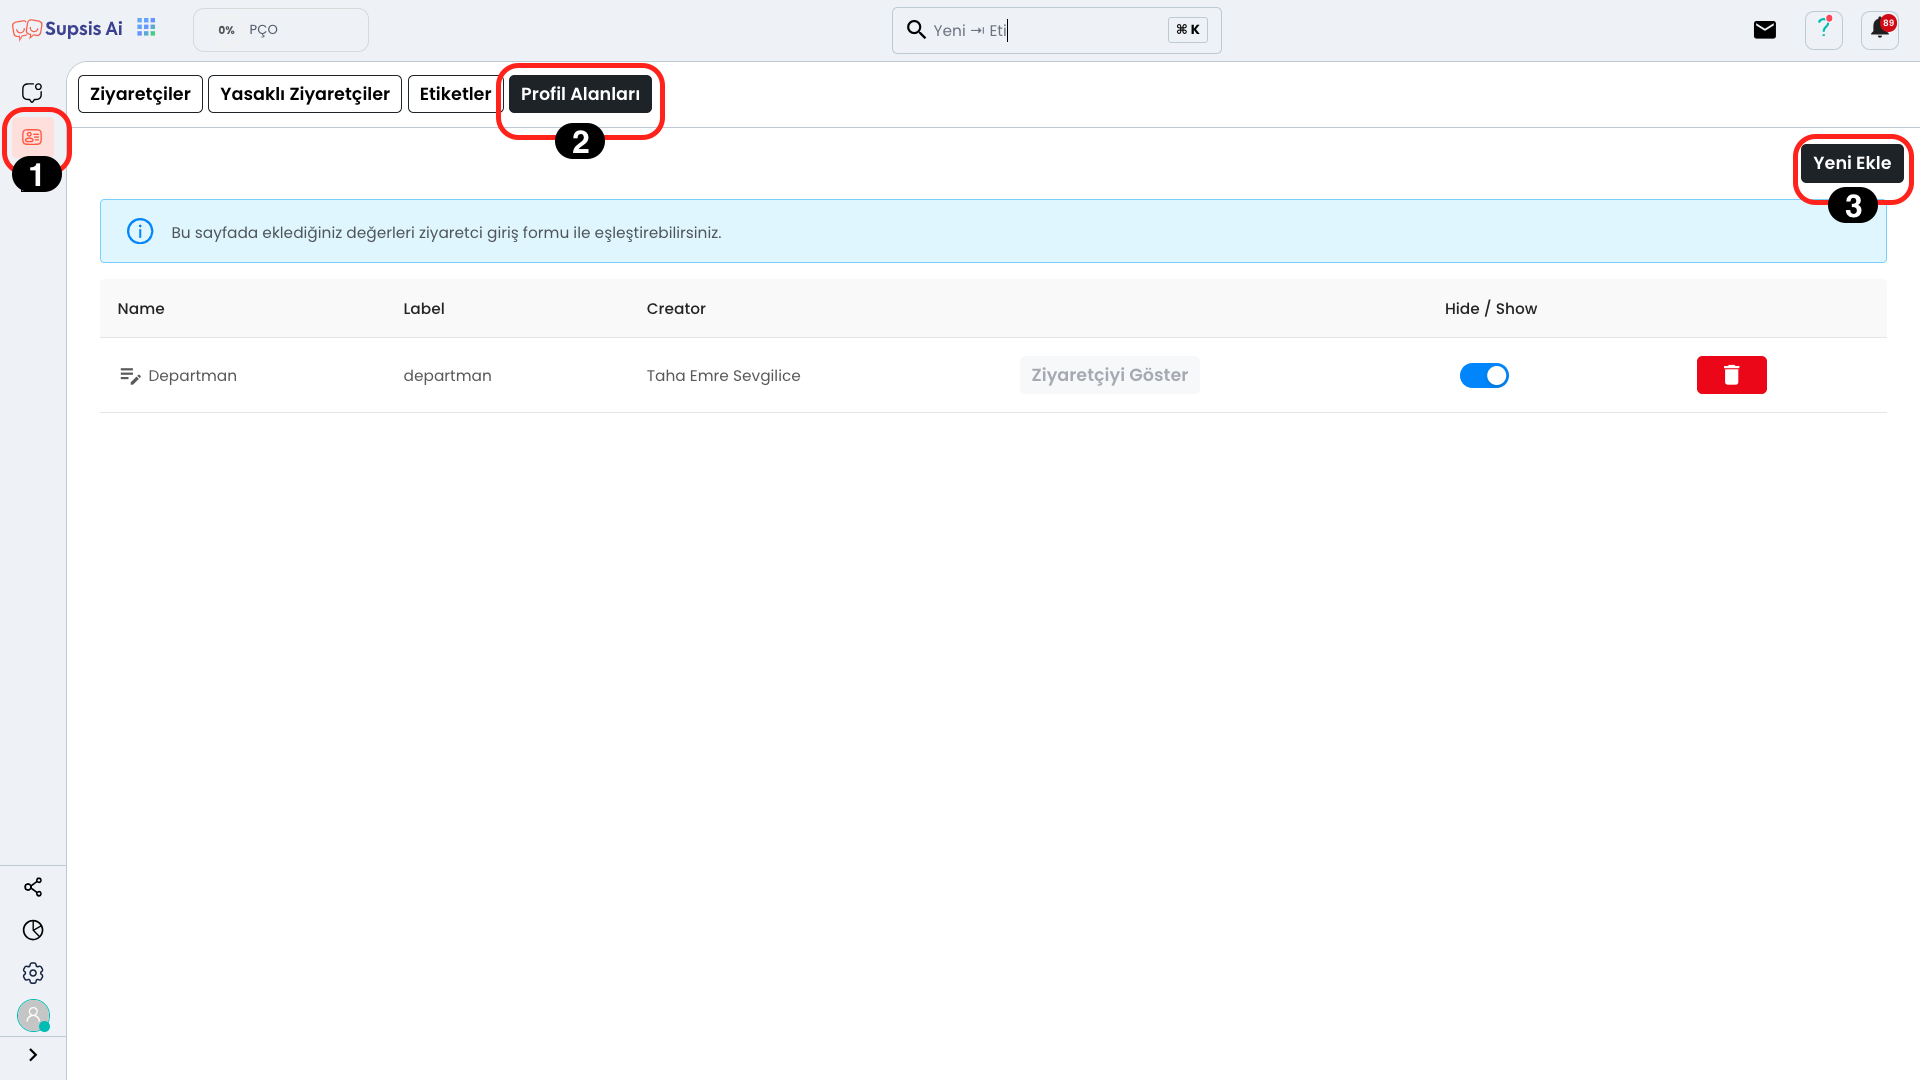
First, come to the "Contacts" page and click the "Profile Fields" button located in the top right. From the opened section, you can add a new column (parameter) to your contacts by clicking the "Add New" button. This way, you can define special information for each person and perform operations such as redirection according to this parameter.
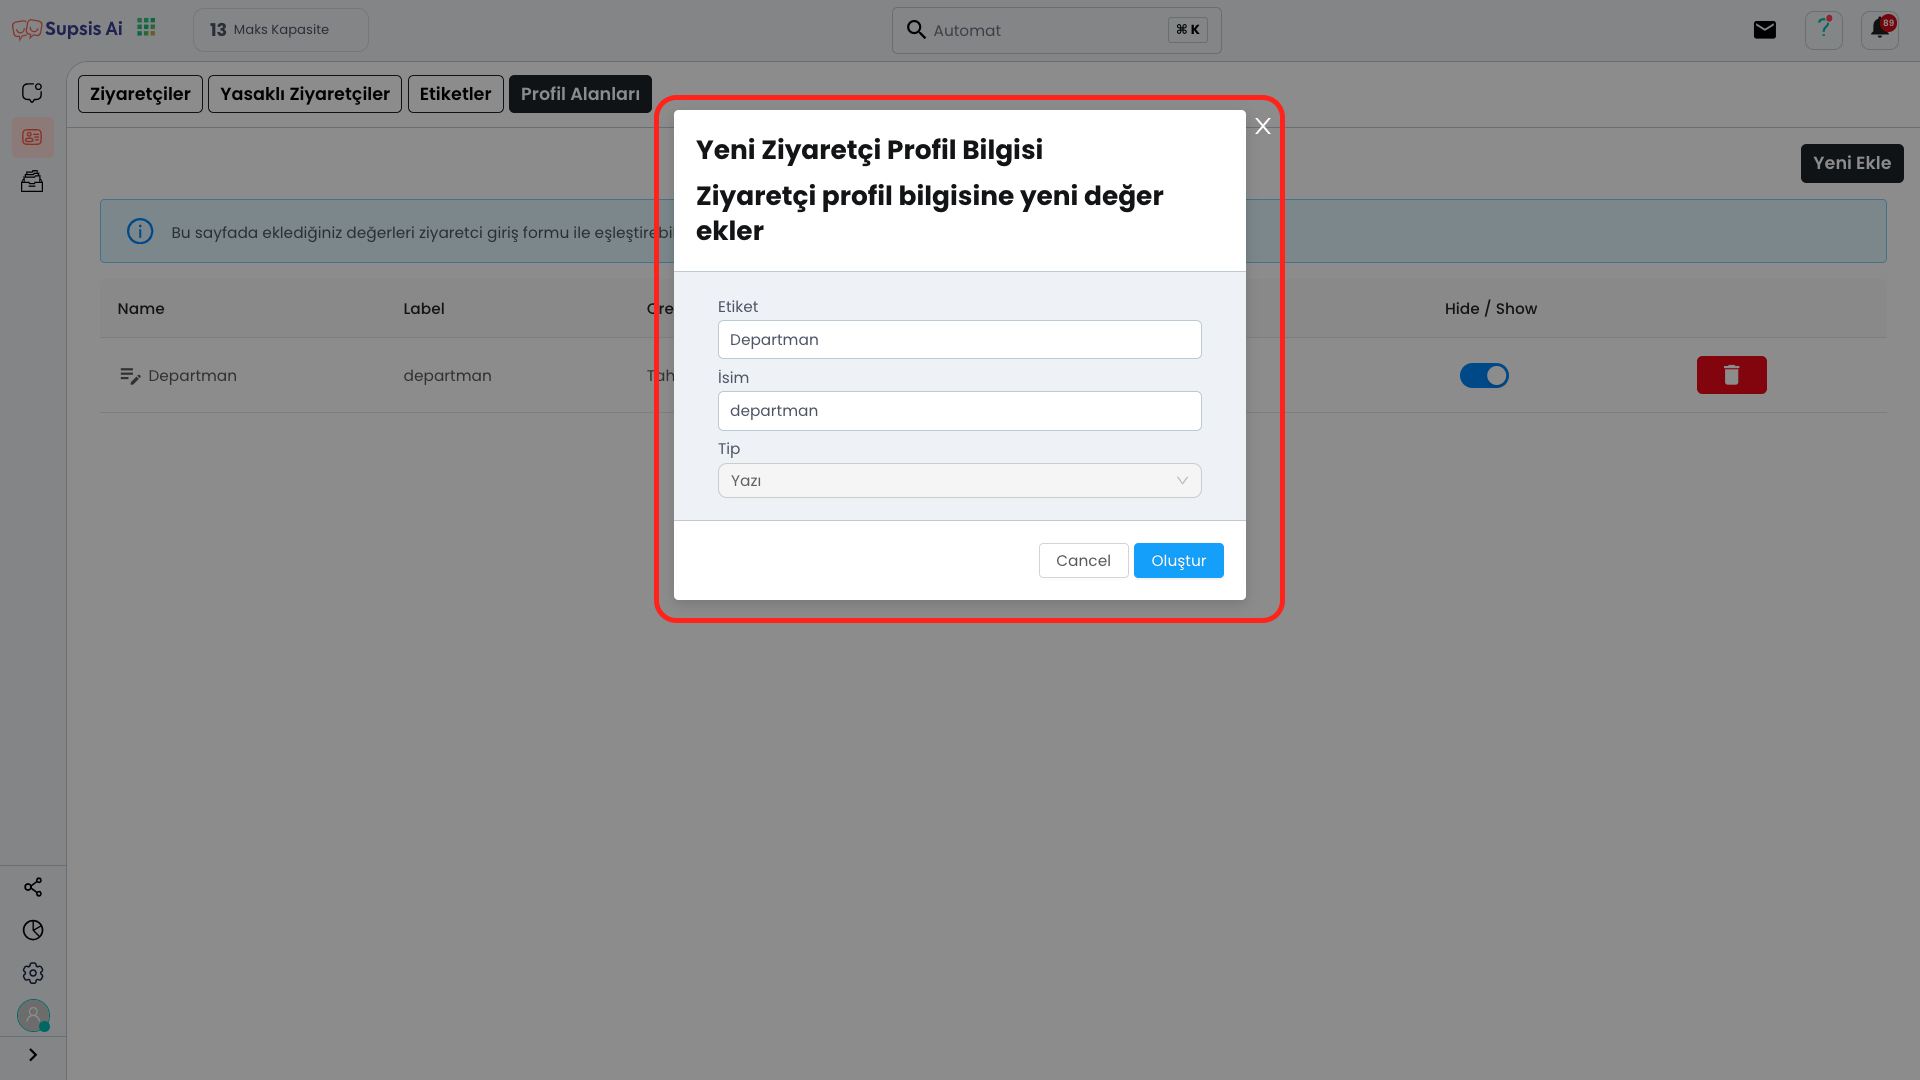
In the opened module, you can define a new parameter by filling in the "Tag Name" and "Name" fields. Also, you can determine the data type of this field by selecting the type (text, selection, number, etc.) according to your needs. Thanks to this setting, you can define more detailed information specific to people.
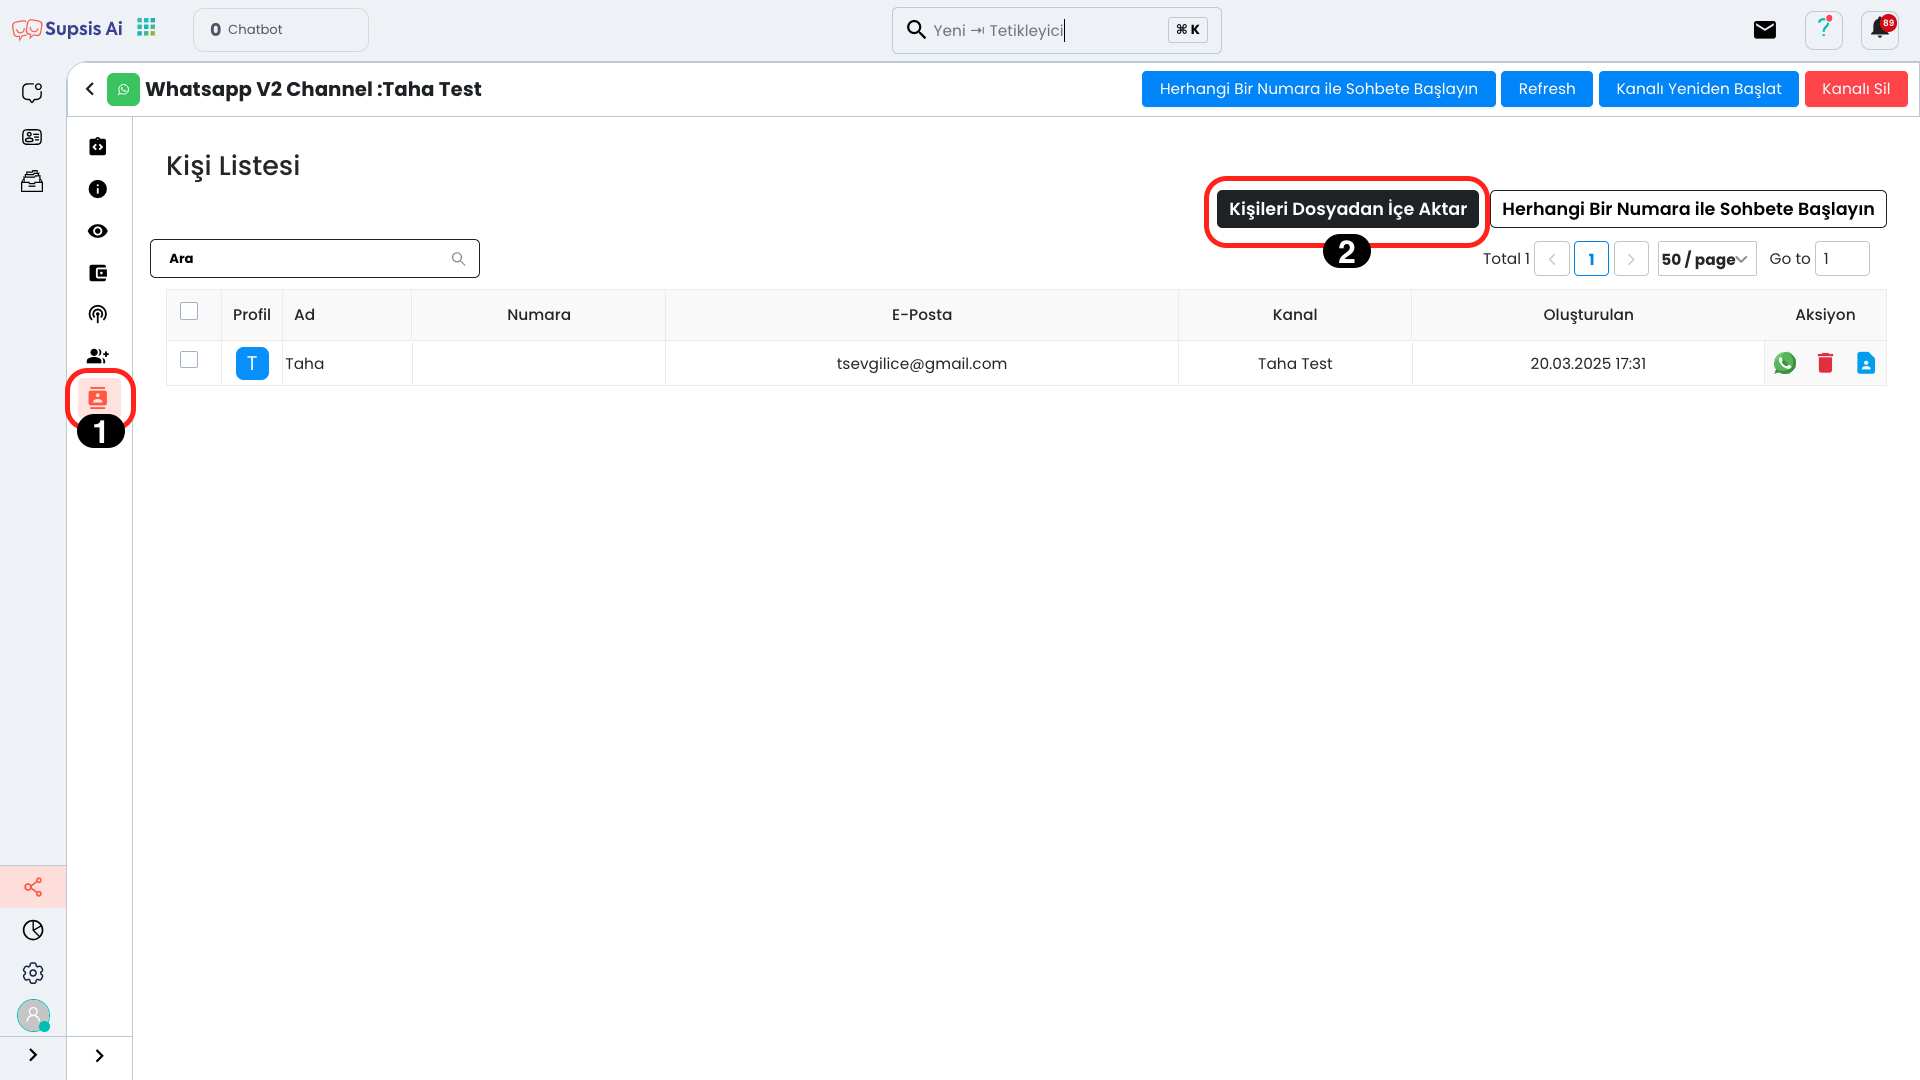
First, come to your WhatsApp channel and click the "All Contacts" section from the left menu. On the opened page, click the "Import Contacts from File" button. This field allows you to transfer contact lists you have prepared in Excel or CSV format to the platform. This way, you can easily upload contact information to your system in bulk.

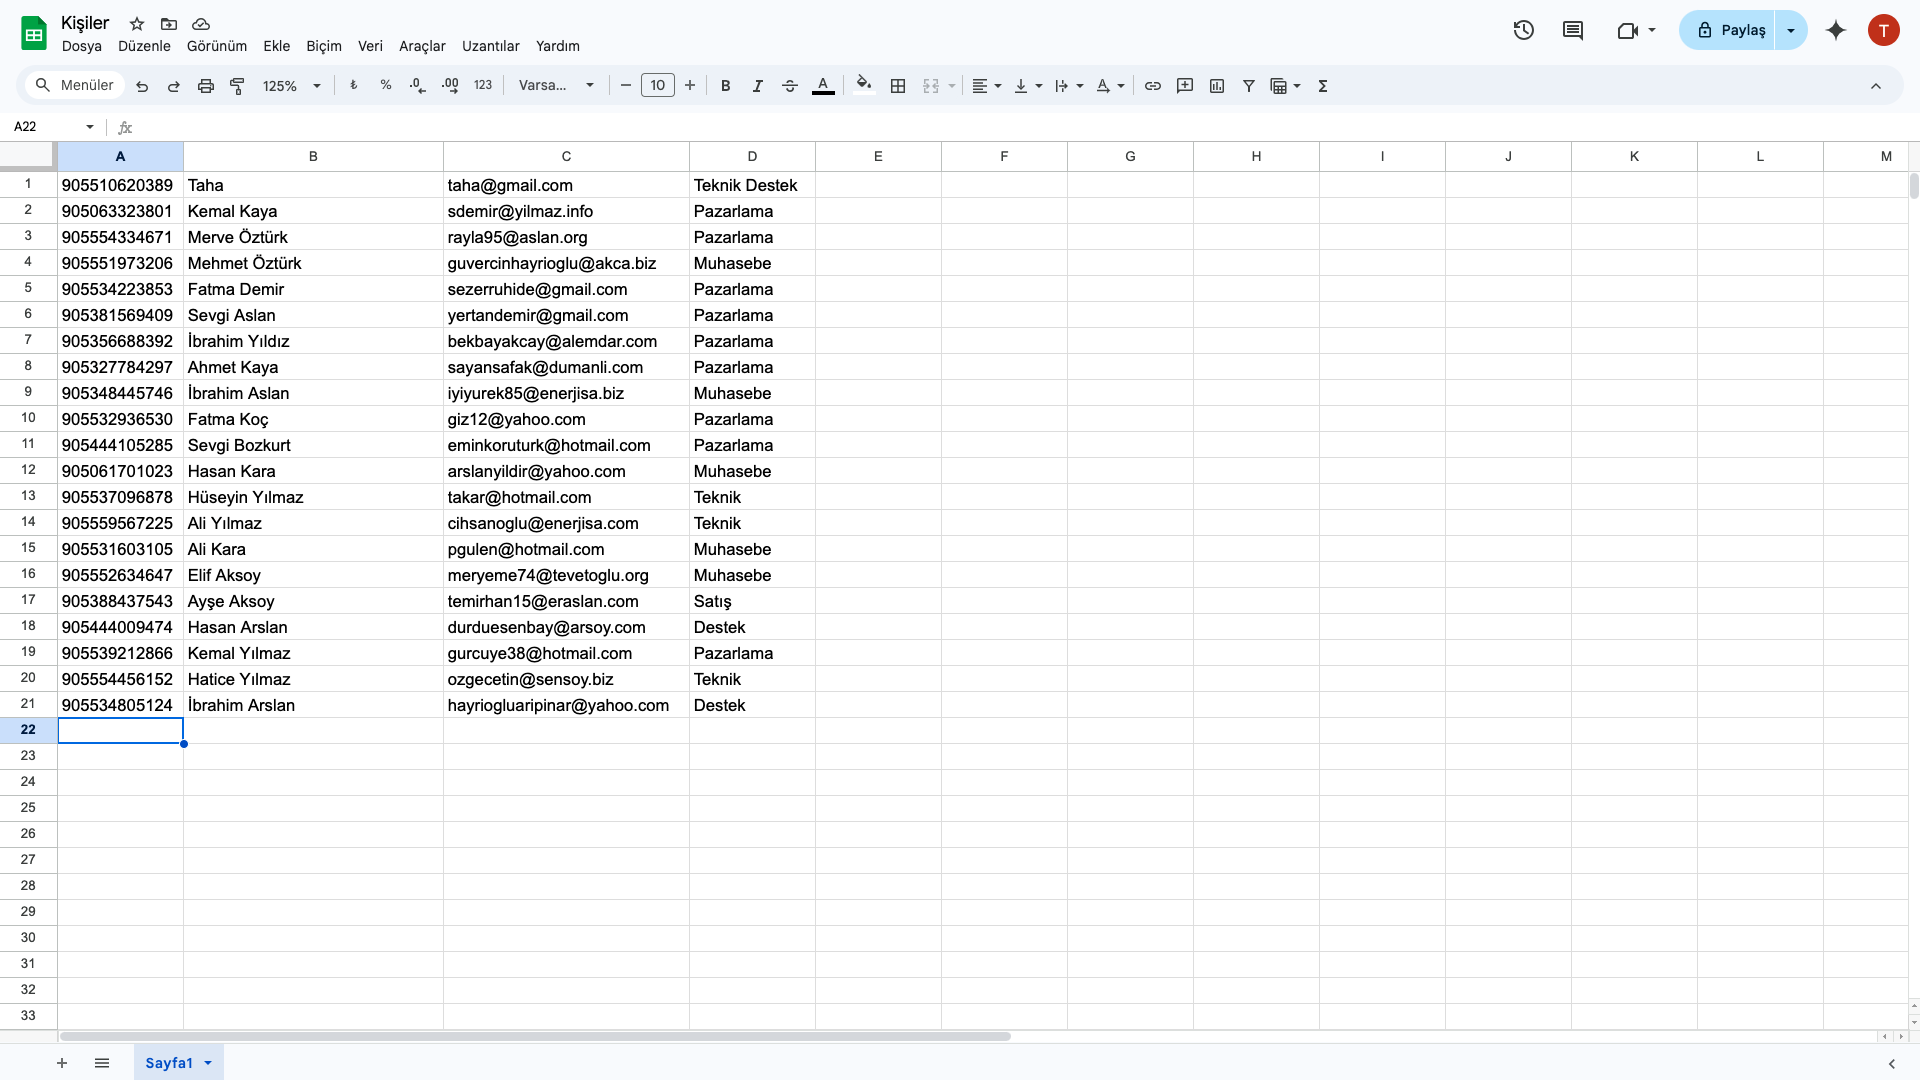
CSV - Excel Example
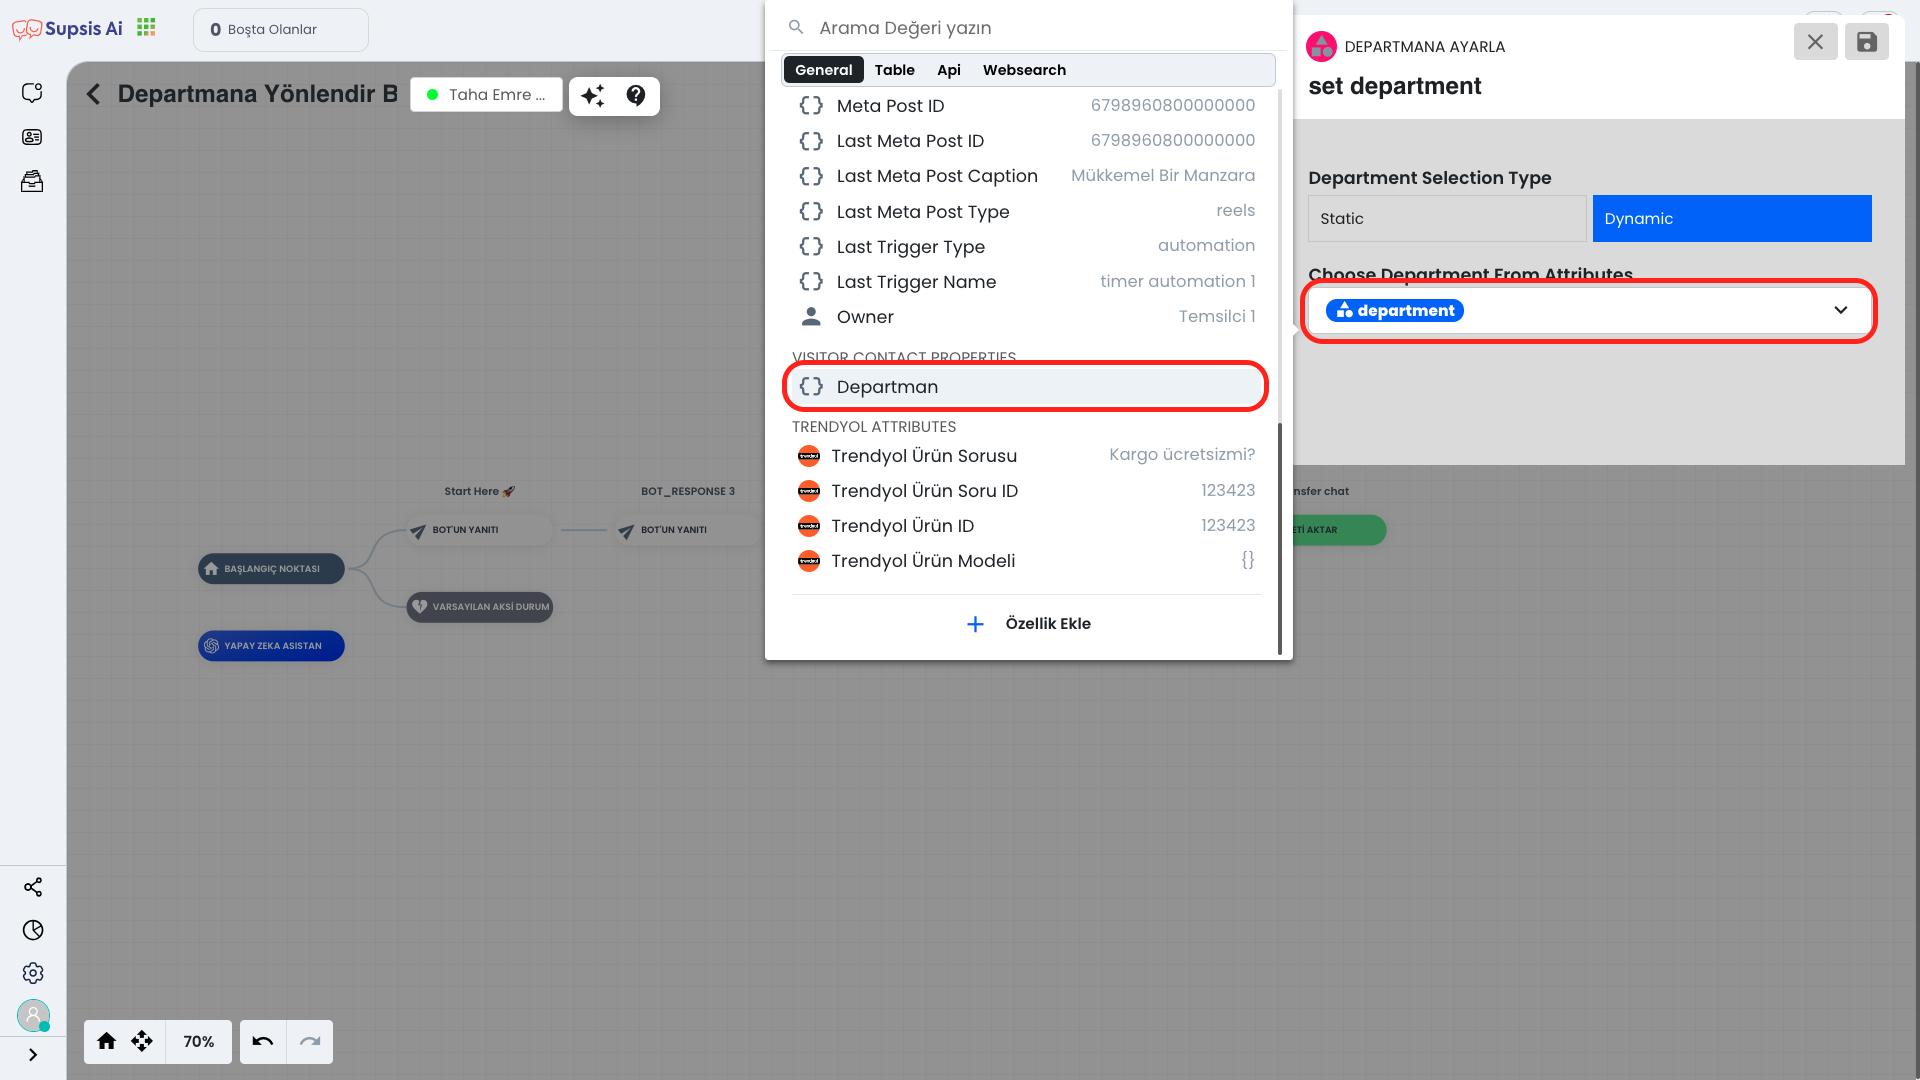
Then, in the "Set Department" block of the Chatbot you created, define the "Department" information as a parameter when giving the parameter dynamically and publish the bot. This way, each person in your contact list is directed to the relevant department specifically according to their own information.
If you have successfully completed these steps, the department redirection process has been successfully applied.
3.) Channel Settings
Department Redirection with Channel Settings is performed with the department redirection option found in the channel settings of some platforms on the Integrations page. This feature ensures that all chats coming to the relevant channel are automatically directed to the determined department, thus making message management more organized and efficient.
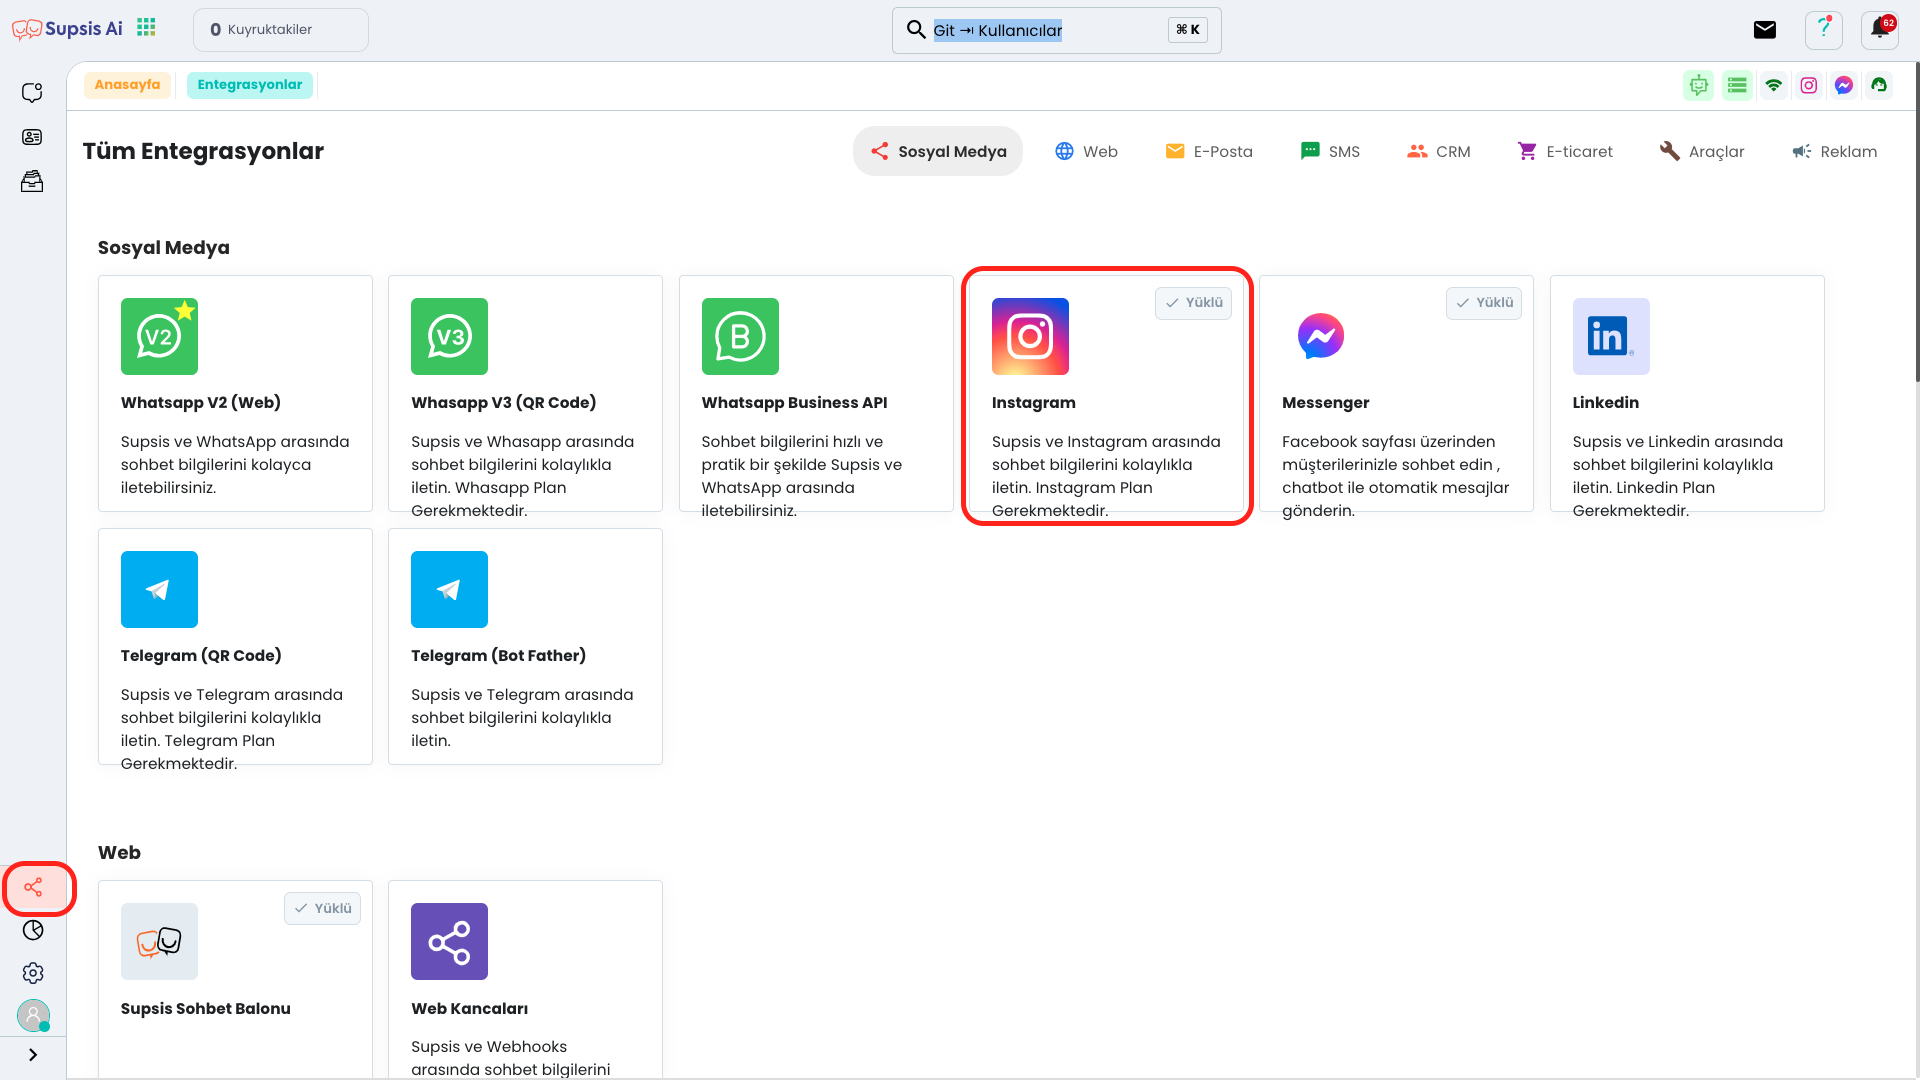
First, click the Integrations section on the left and then select the platform you want to set up.
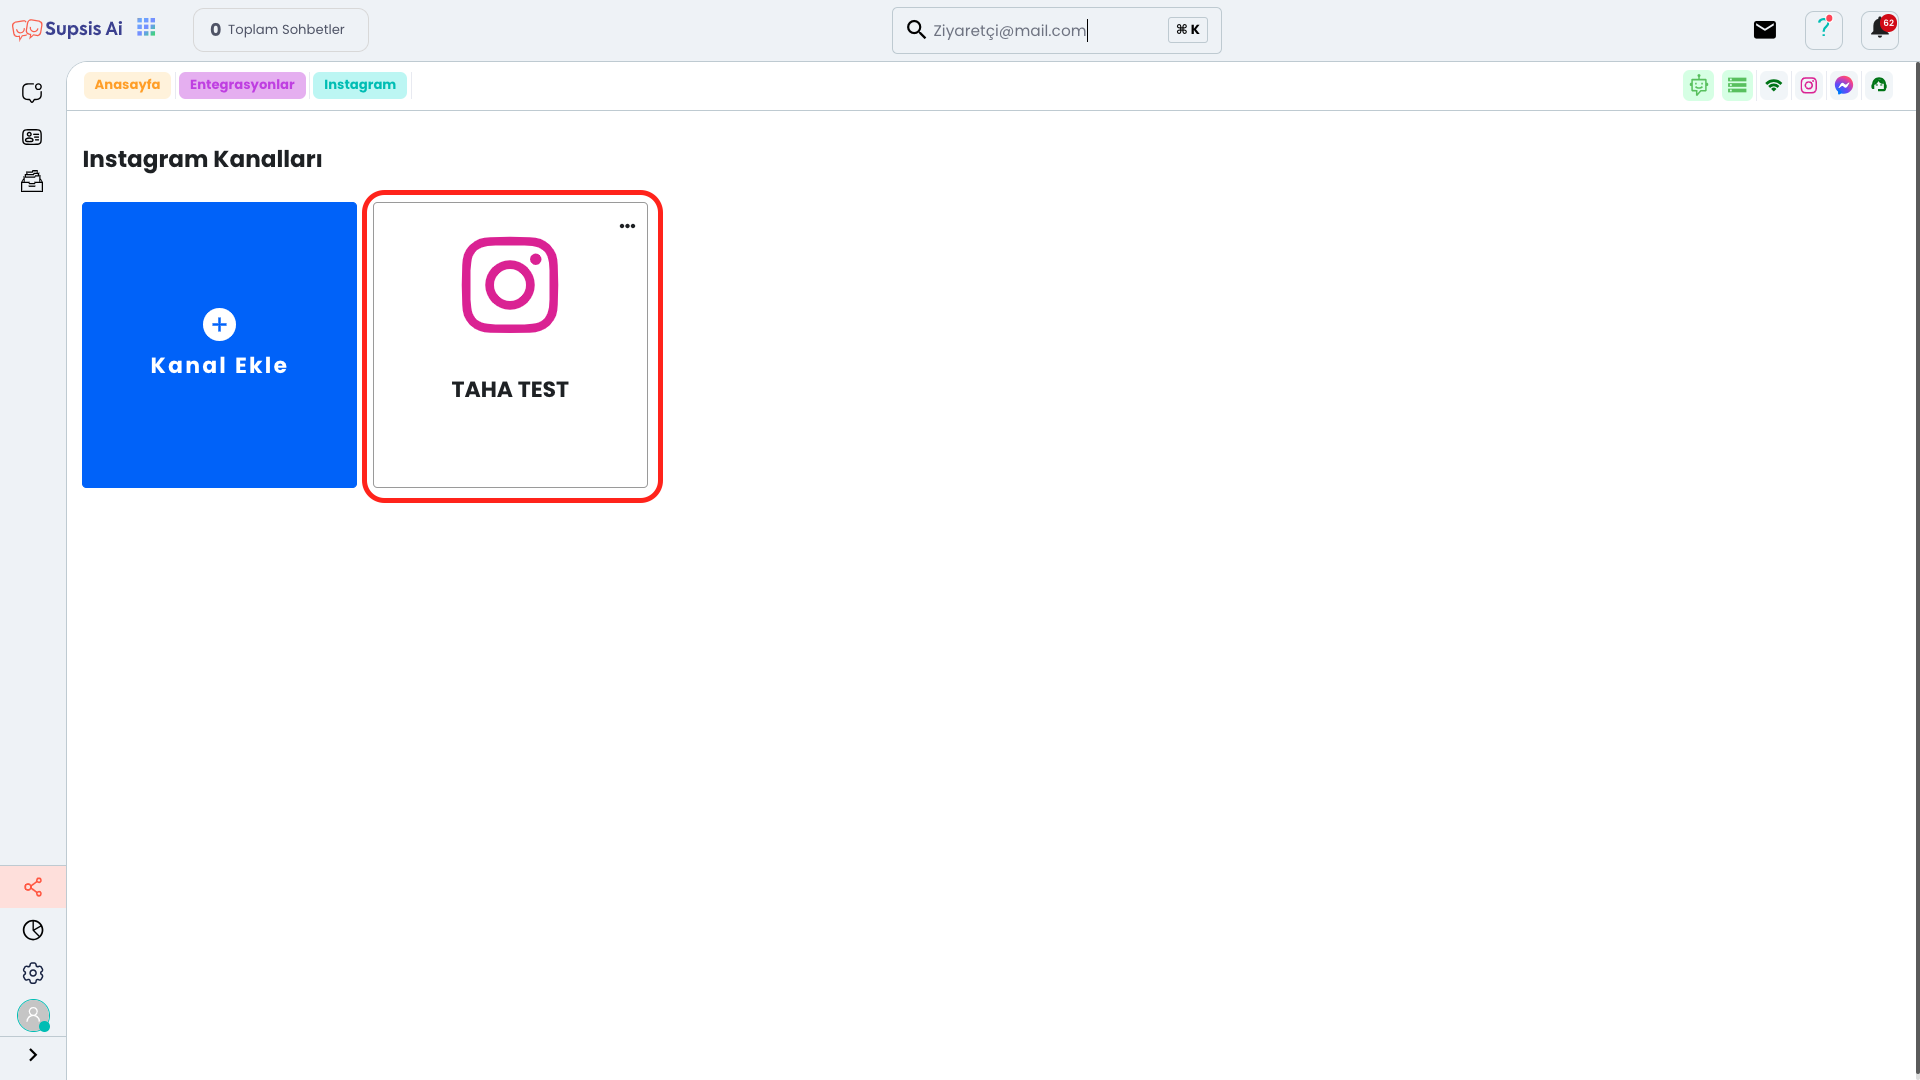
From the opened Channels page, select the channel you want to set up.
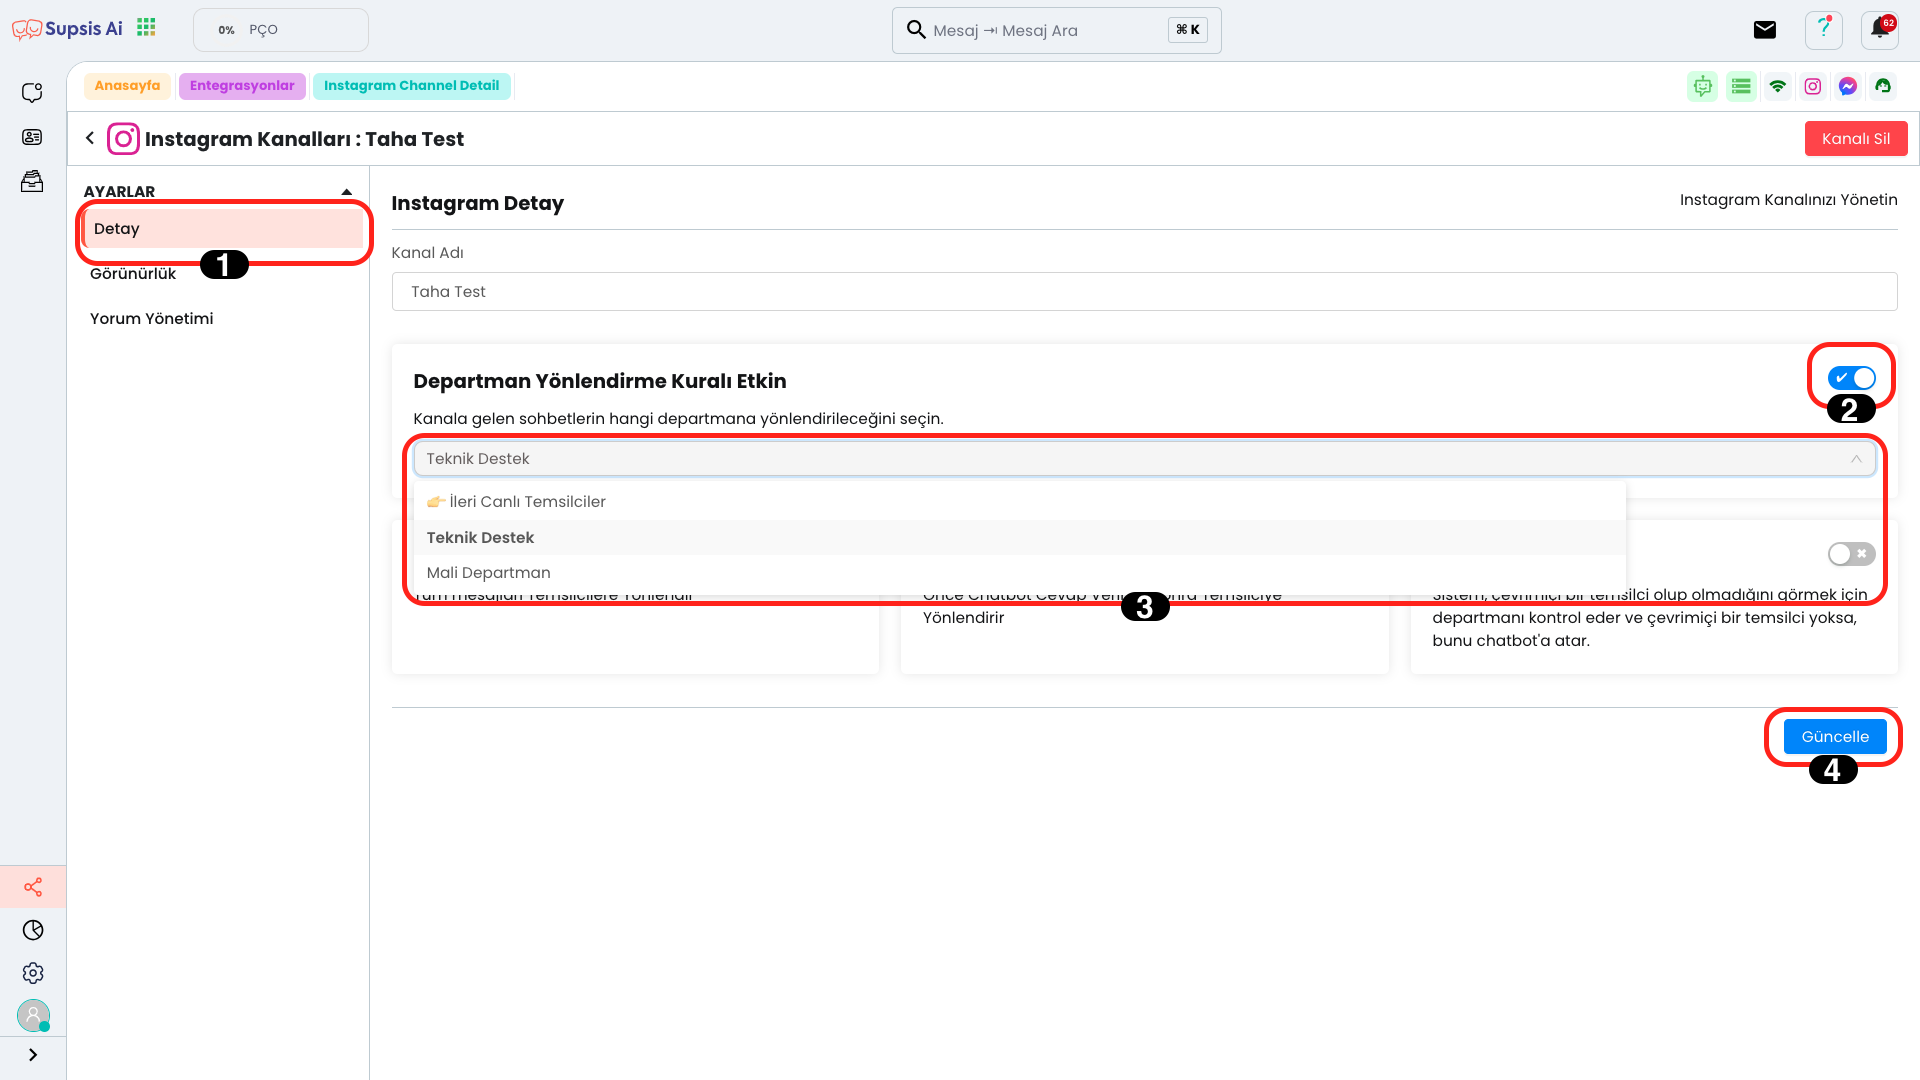
First, in the opened "Detail" page, activate the field that says "Department Redirection Rule Active" from the right side. Then, select the department you want to redirect to from the dropdown list and complete the process by clicking the "Update" button.
If you have successfully completed these steps, every message coming to this channel will be automatically directed to the department you selected.
4.) Chat Screen
Department Redirection from Chat Screen can be performed in two different ways.
The first is to redirect by clicking the three dots icon on the chat screen. The second is to transfer the message to the relevant department using the "Redirect" option from the Representative Details section. Thanks to these methods, you can quickly direct customer messages to the most appropriate team.
1.) Method
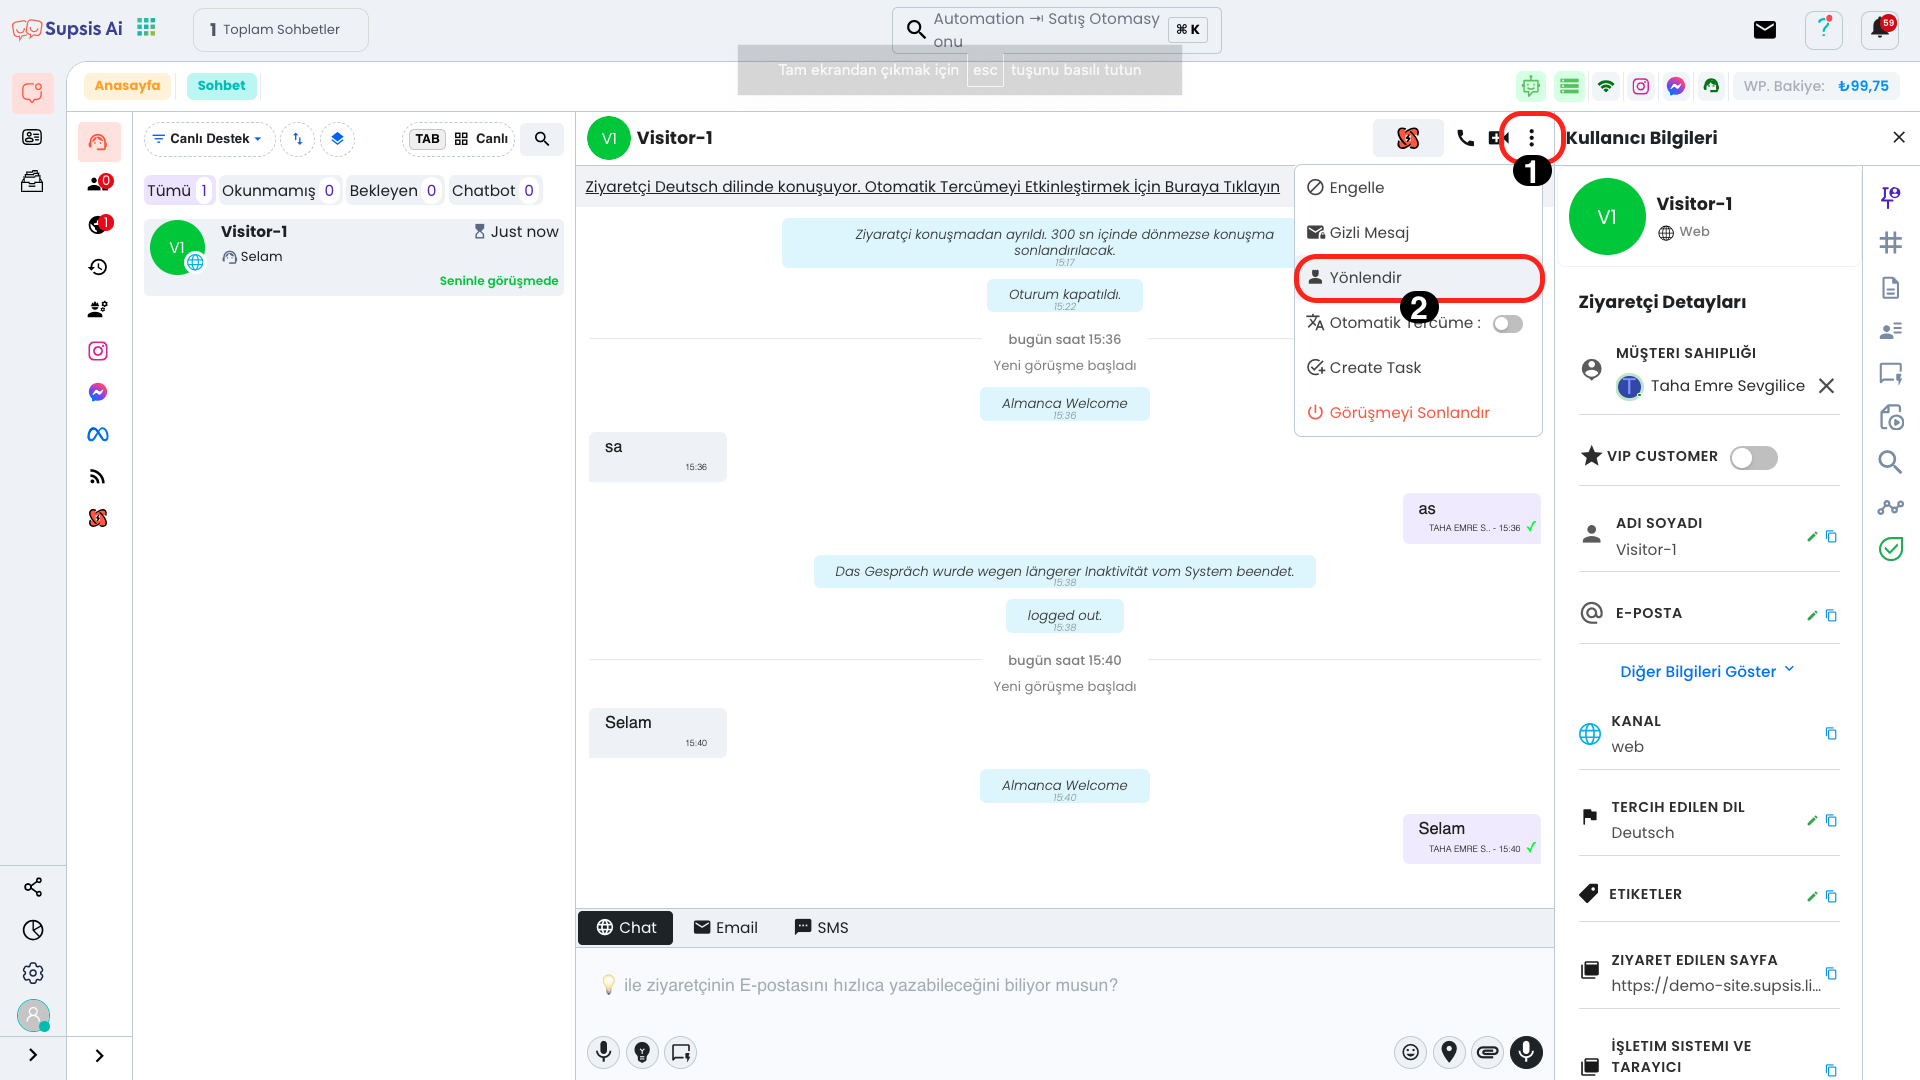
First, click the Three Dots icon on the chat screen and select the "Redirect" option from the opened menu.
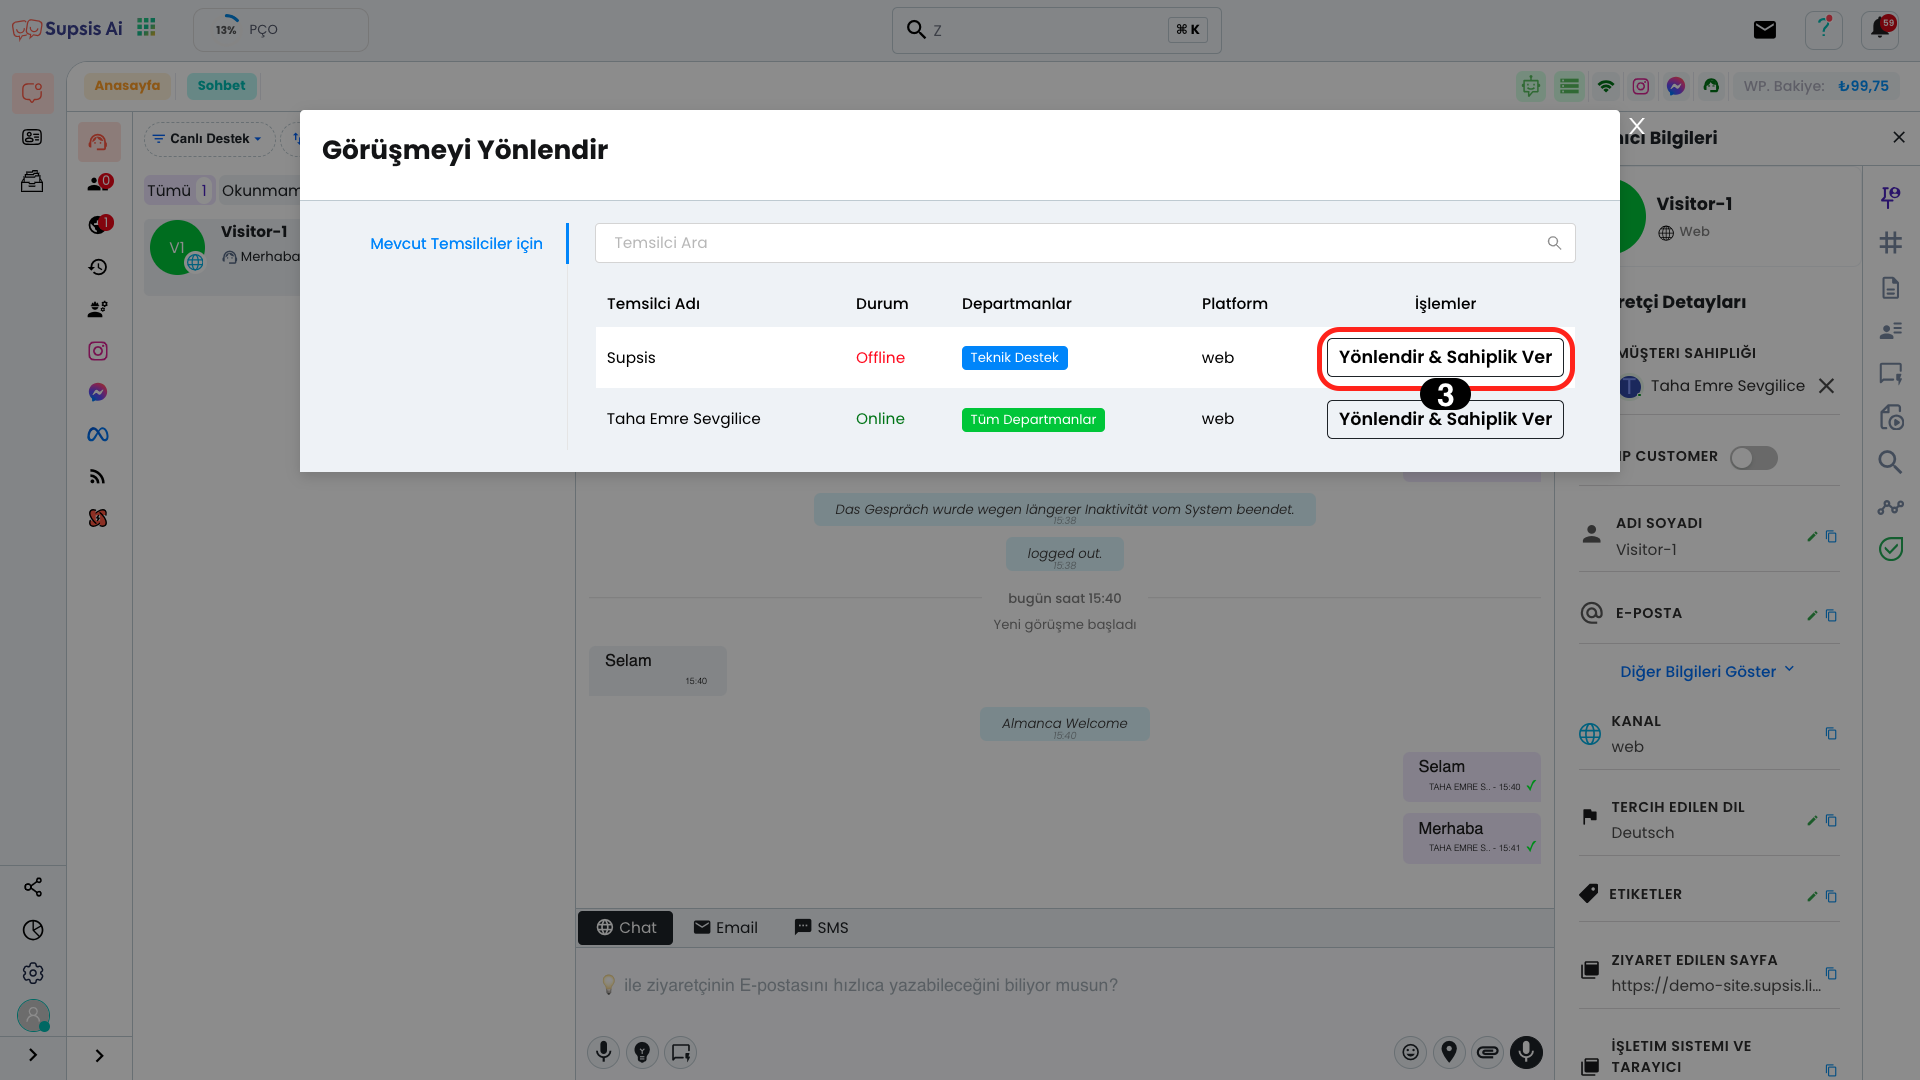
Click the "Redirect & Give Ownership" button in the Operations column of the department you want to transfer to.
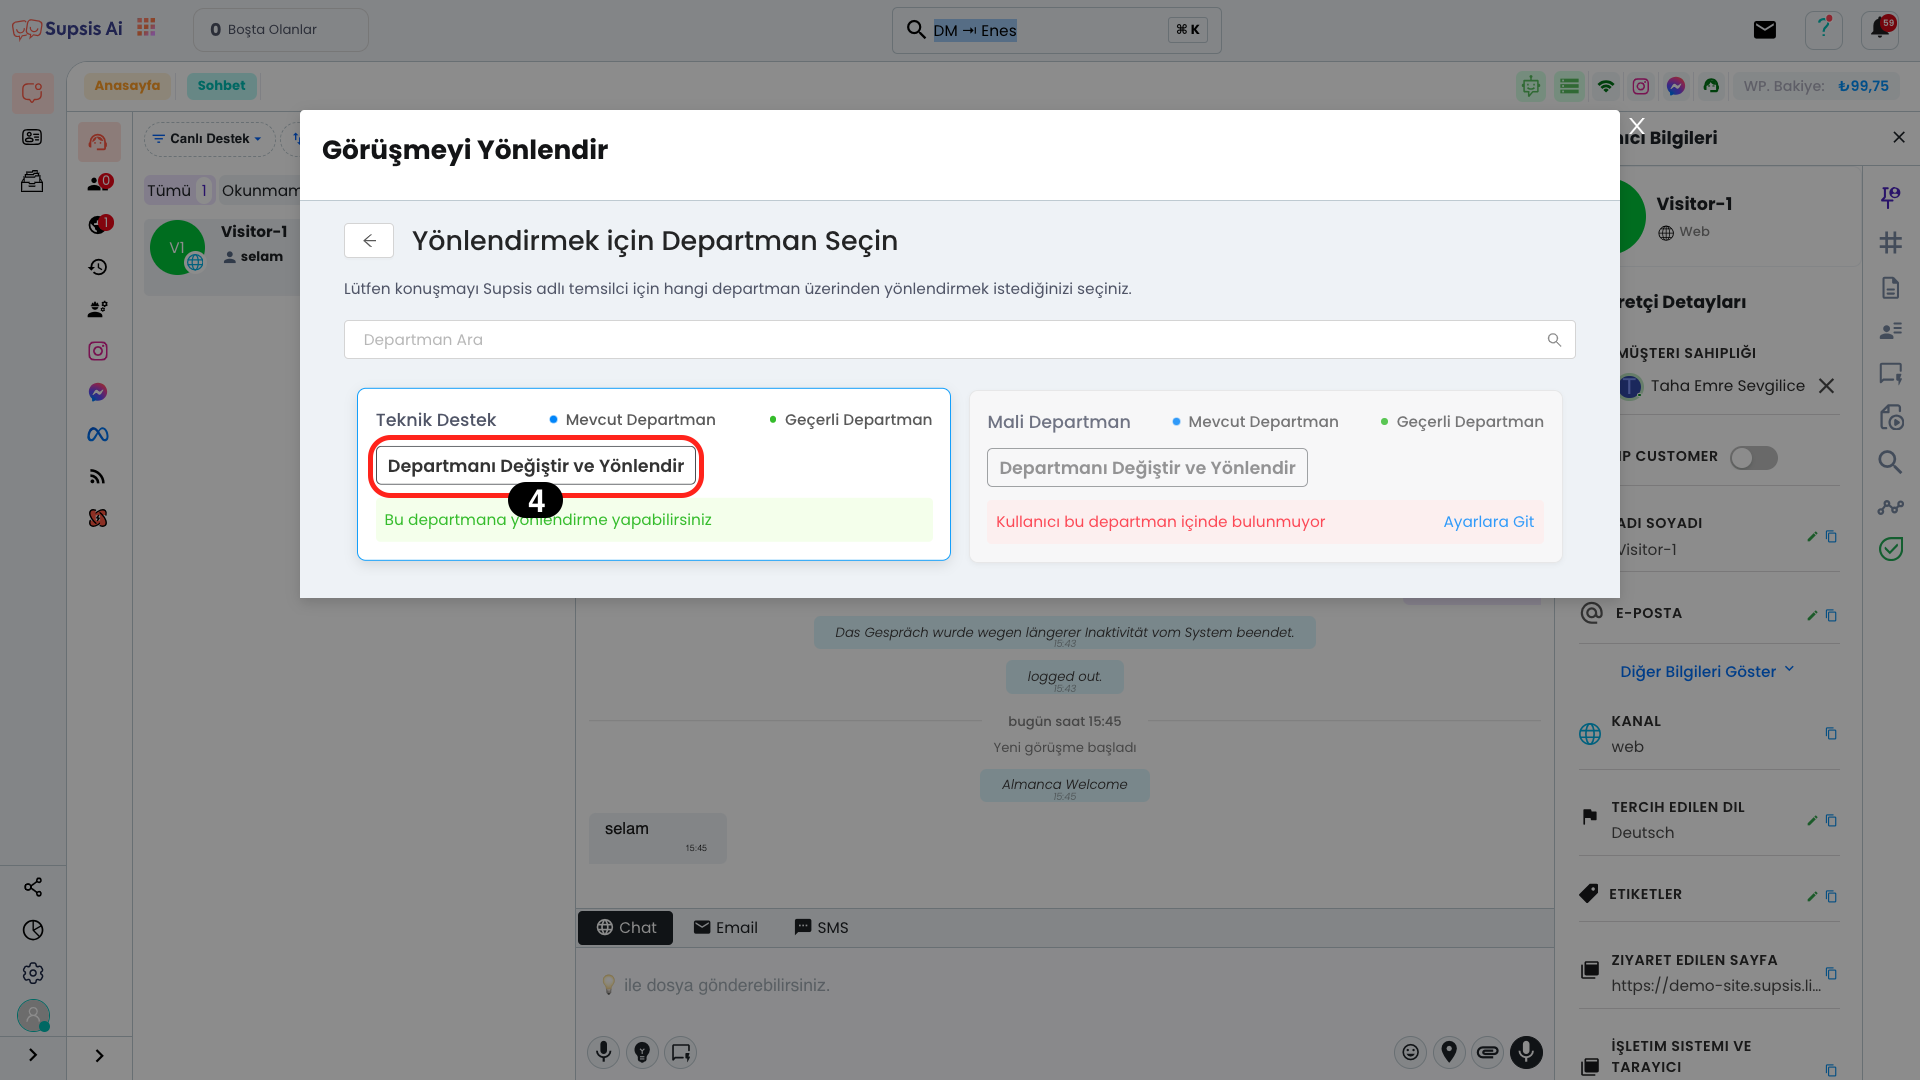
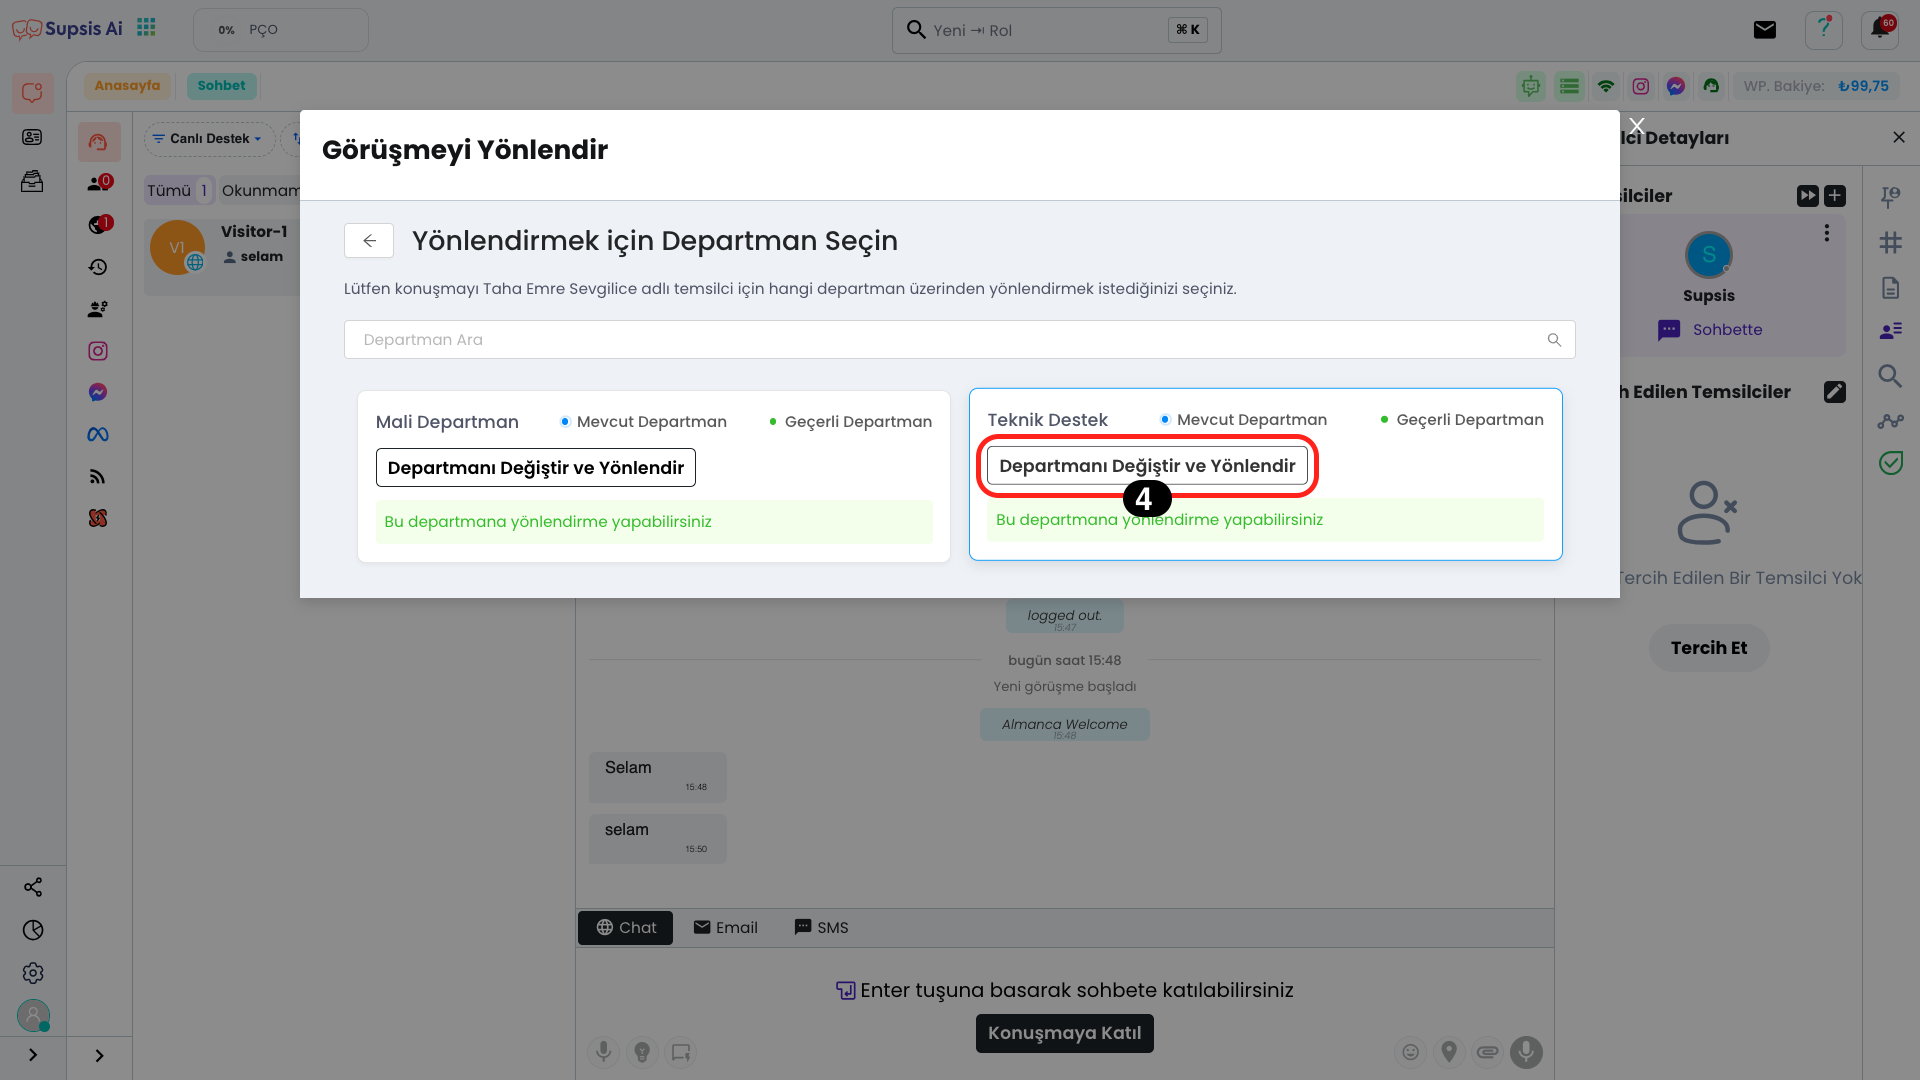
In the opened section, all your departments will be listed and there may be fields showing that some departments cannot be redirected. If the number of departments is high, you can quickly find the department you want using the search field at the top.
You can complete the process by clicking the "Change Department and Redirect" button of the department you want to redirect to.
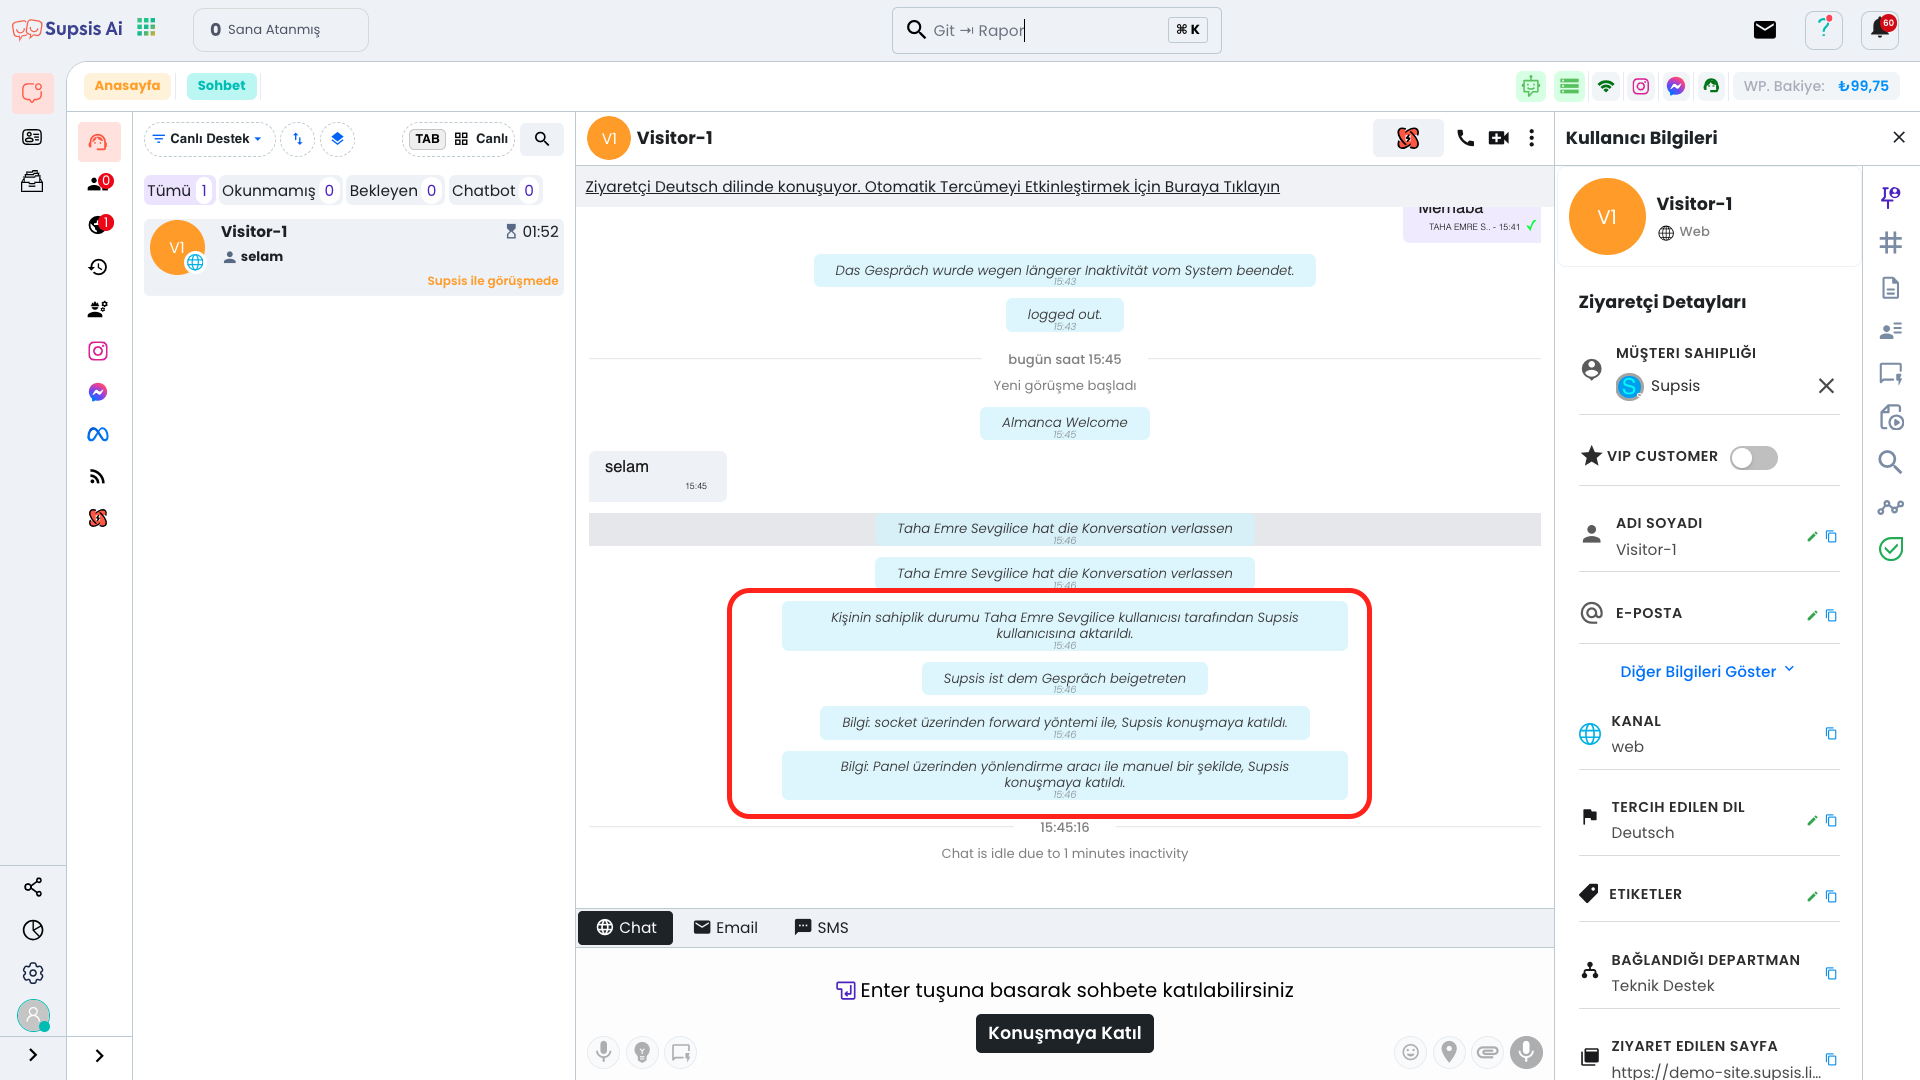
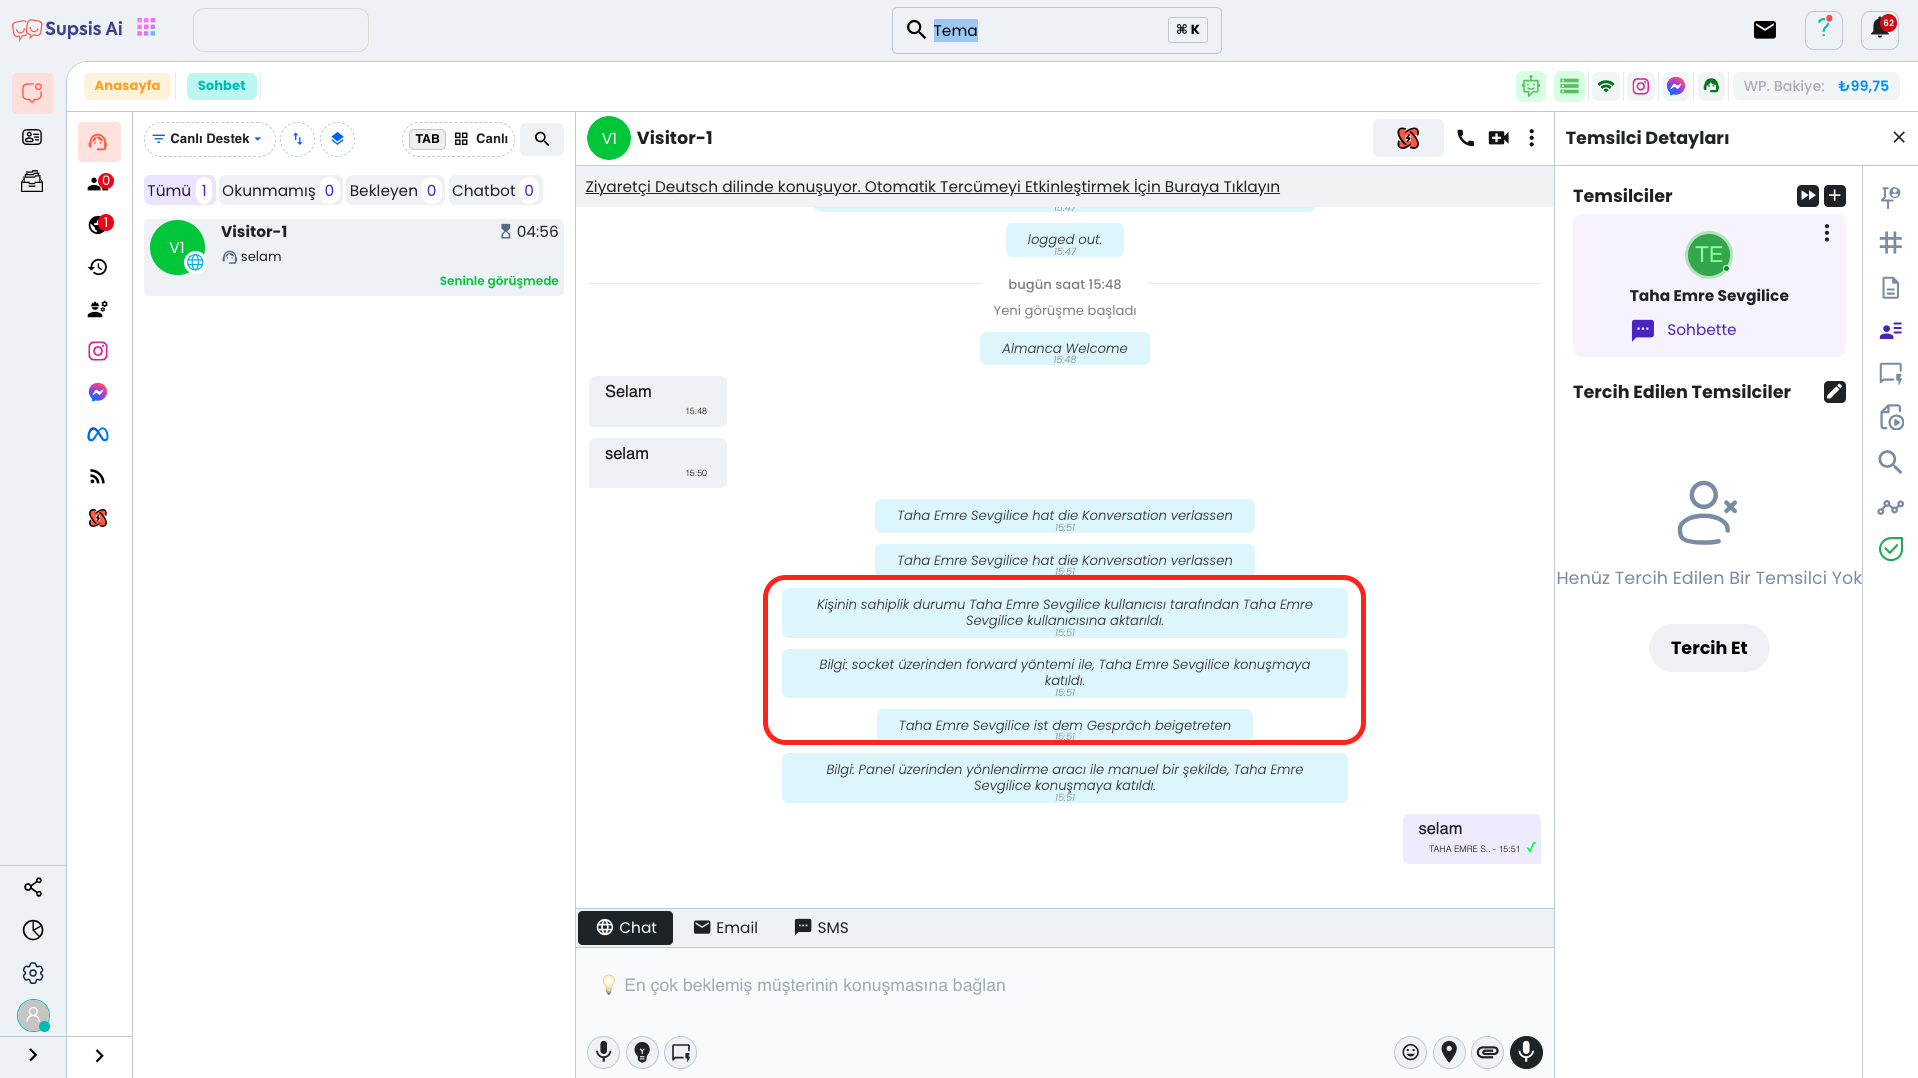
If you have successfully completed these steps and the screen is displayed correctly, your process has been successfully completed. Now the chat has been directed to the relevant department and the process has been successfully completed.
2.) Method
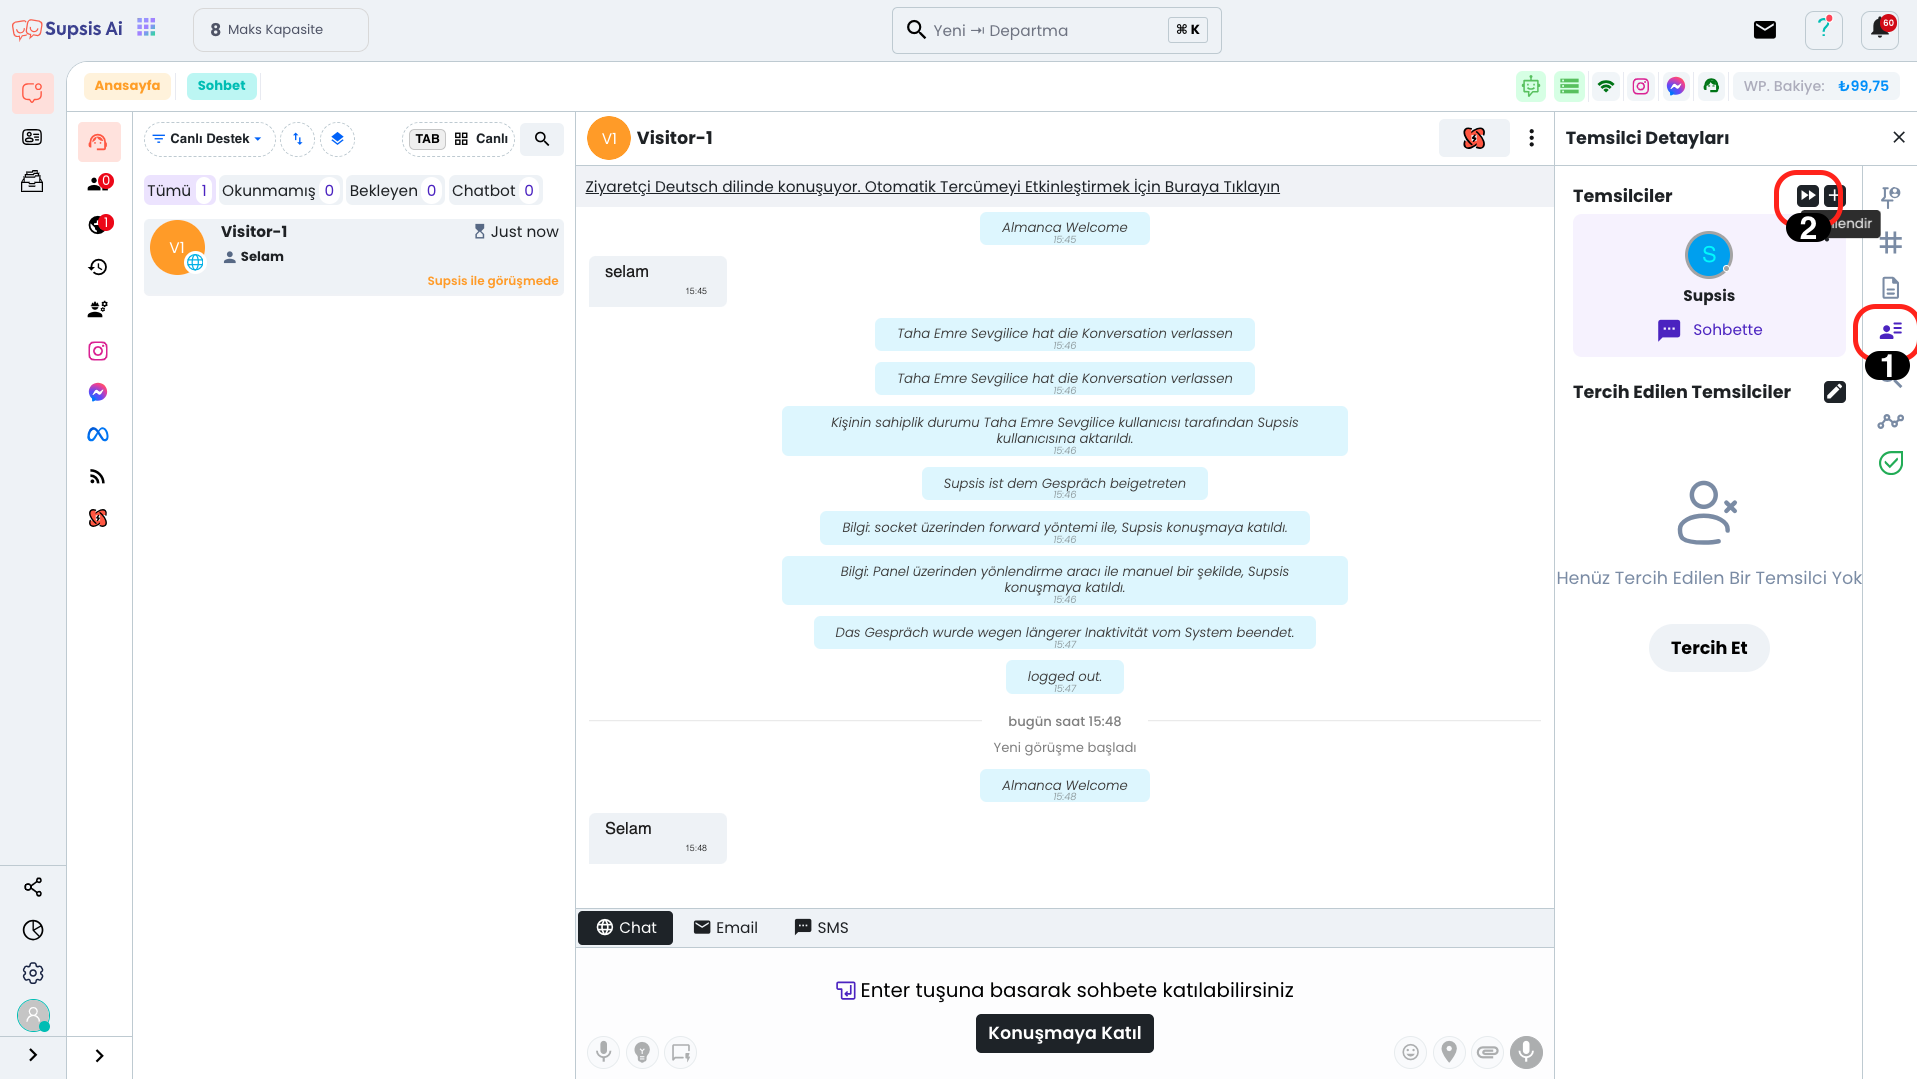
First, go to the Representative Details tab on the right and click the "Redirect" button.
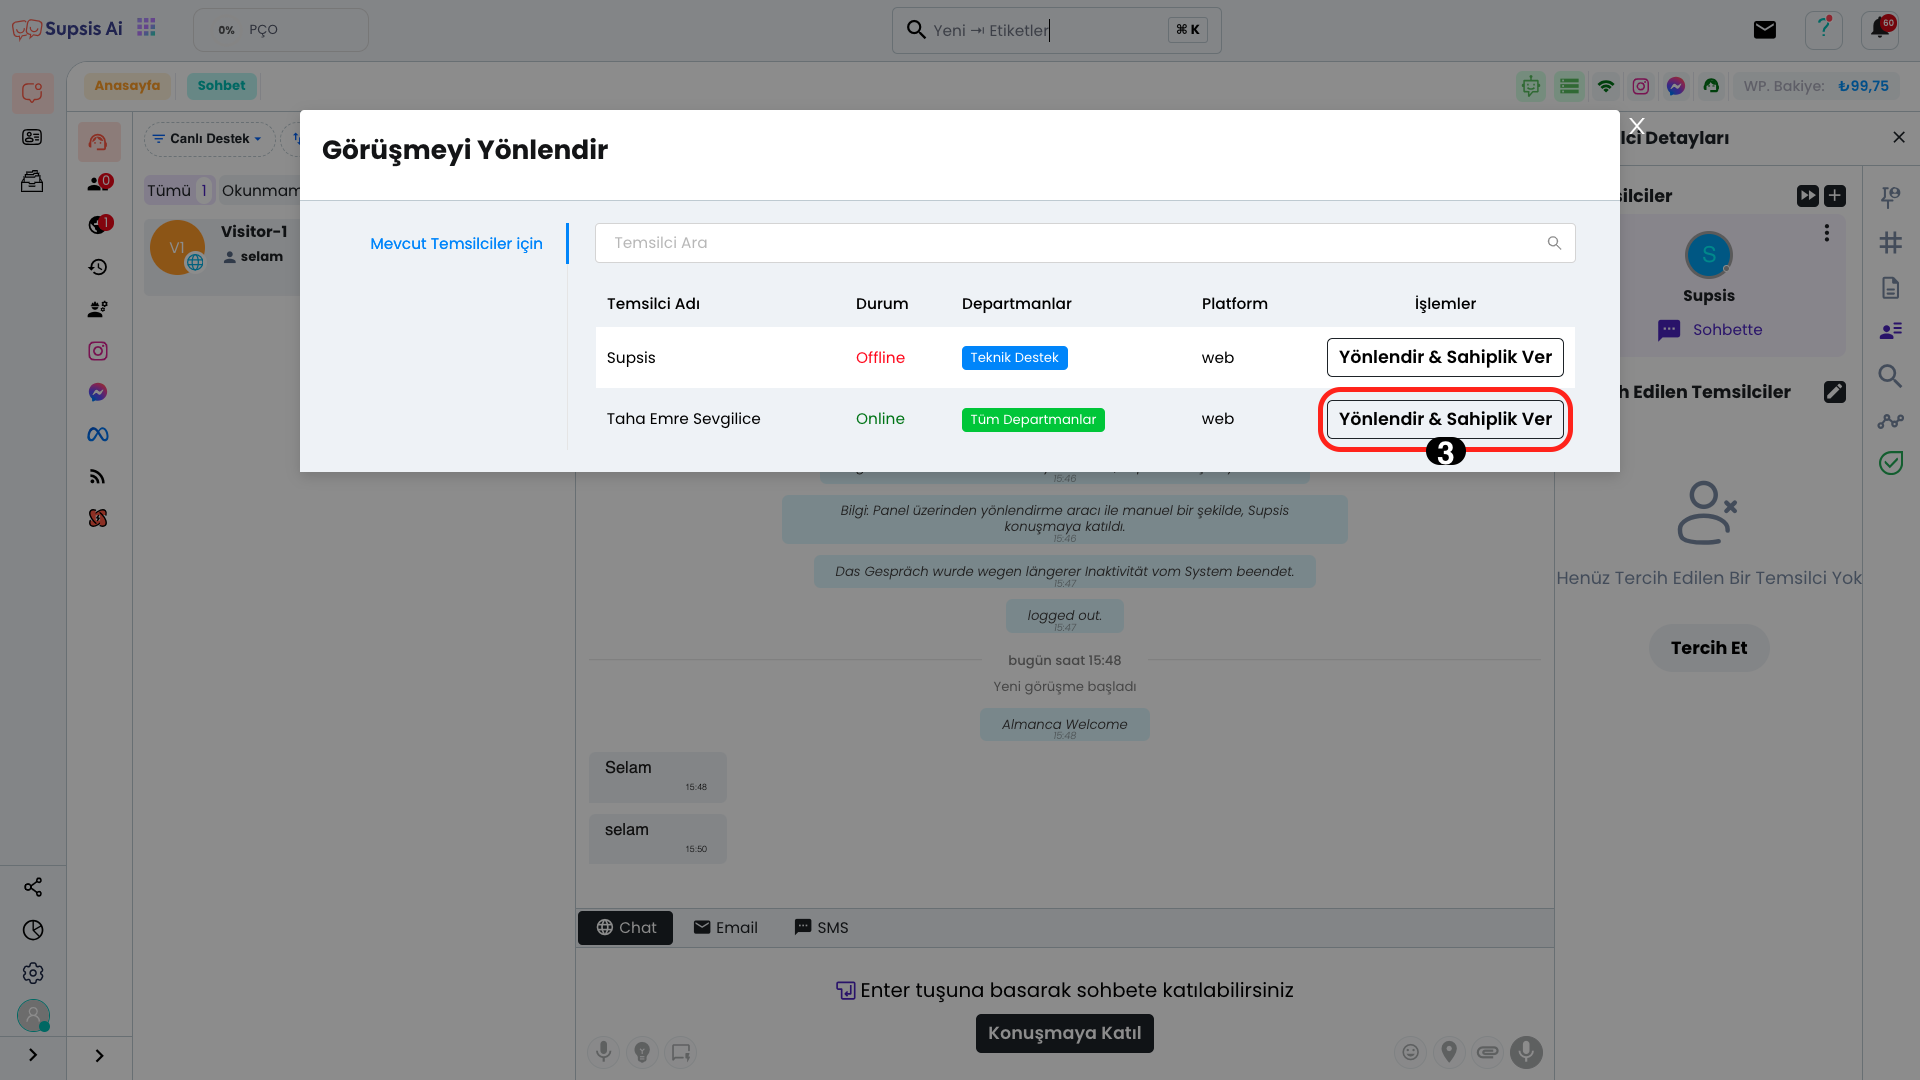
Click the "Redirect & Give Ownership" button in the Operations column of the department you want to transfer to.
In the opened section, all your departments will be listed and there may be fields showing that some departments cannot be redirected. If the number of departments is high, you can quickly find the department you want using the search field at the top.
You can complete the process by clicking the "Change Department and Redirect" button of the department you want to redirect to.
If you have successfully completed these steps and the screen is displayed correctly, your process has been successfully completed. Now the chat has been directed to the relevant department and the process has been successfully completed.