Users
Create User
There is a special user management screen for the purpose of managing, authorizing and editing users on the Supsis platform. Through this screen, you can access detailed information about existing users, add new users and update existing users' information.
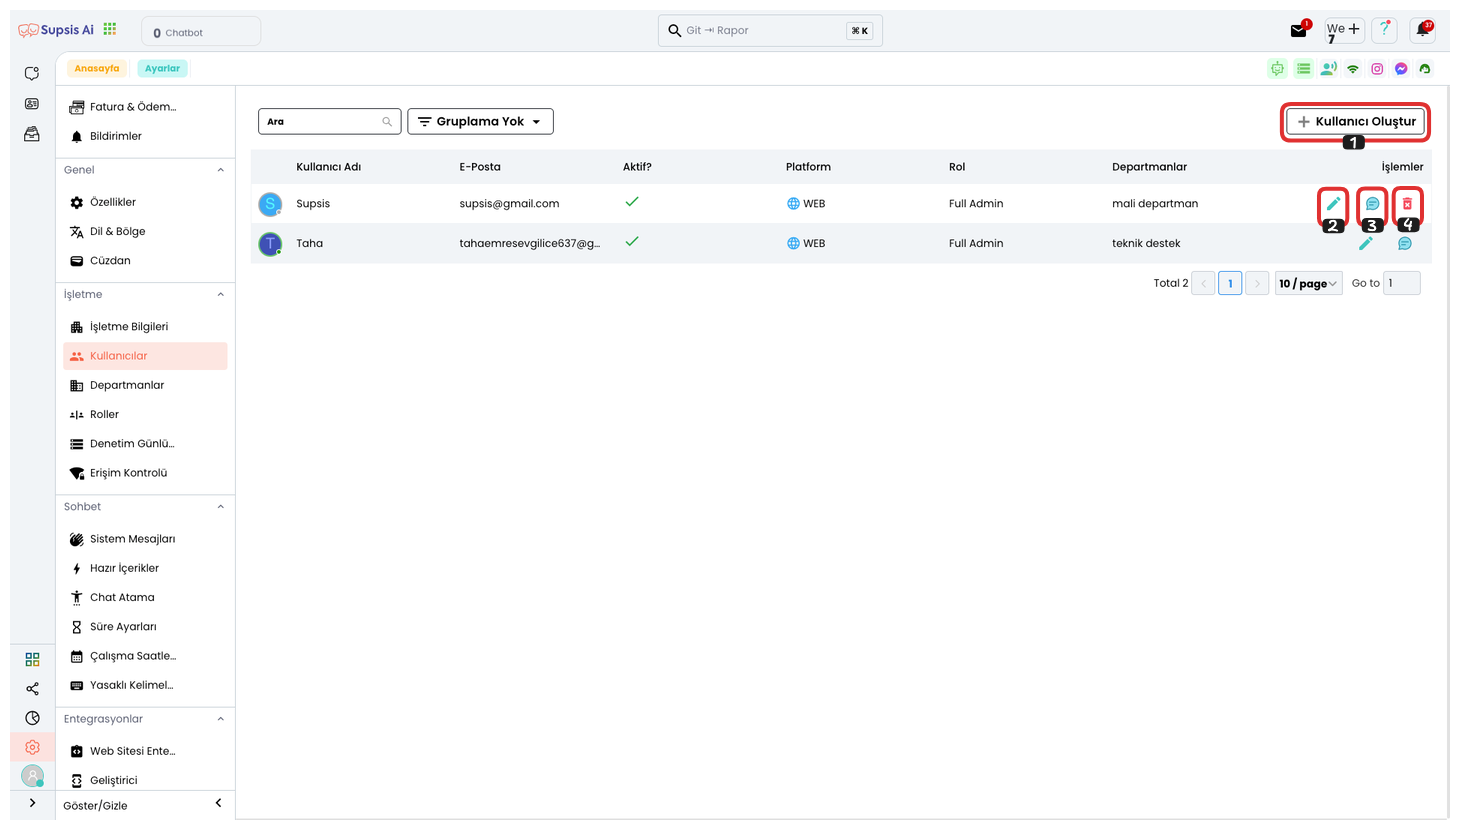
Menu Elements:
- Create User
- Edit User
- Send DM Message to User via Team Chat
- Delete User
1-) User Creation
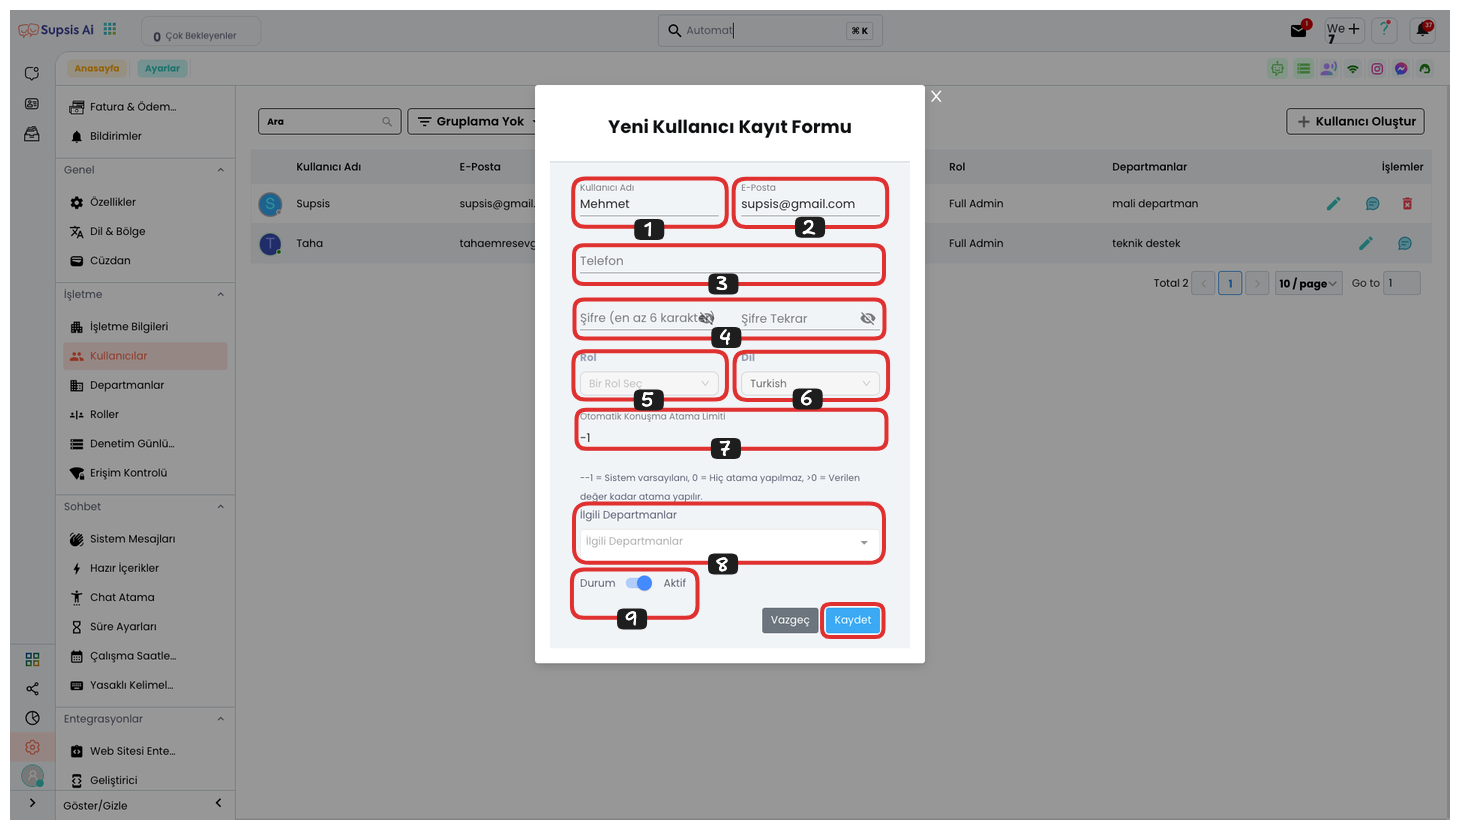
User Creation Elements:
- Username
- Password
- Phone
- Role
- Language
- Automatic Chat Assignment Limit
- Departments
- Status
1.) Username: From this field, you can determine the name of your user.
2.) Email: From this field, you can determine the email address of your user.
3.) Password: In this field, you can determine the password that your user will use when logging into the panel.
4.) Phone: In this field, you can determine the phone number of your user.
5.) Role: In this field, you can determine the role of your user, this feature determines your user's permissions.
6.) Language: In this field, you can determine the panel language that your user will use.
7.) Automatic Chat Assignment Limit: From this field, you can determine the automatic chat assignment limit of your user. If this value is -1, the system remains default, if it is greater than or equal to 0, assignment is made as many as the written number.
8.) Departments: From this field, you can determine the department of your user. These departments help you determine in which area your user works.
9.) Status: This field determines the status of the user, that is, if this user is not actively used, you can keep this feature closed. If this user is active, keep this option open.
Finally, after filling all these fields, you can complete your user creation process by saying "Save". This ensures that the new user is successfully added and all necessary information is saved.
b-) Edit User
Click the Pencil button to edit an existing user. This option allows you to update user information. Each edit directly affects the user's experience and access on the platform.
c-) Send DM Message to User via Team Chat
This feature allows you to send a direct message to a specific user via Team Chat. You can use it when the user needs to receive notifications or when you want to convey special information.
d-) Delete User
Use the Delete User option to remove an existing user from the system. This operation ensures that all user access is removed.
Important: Before deleting the user, make sure that necessary information is backed up to avoid data loss.