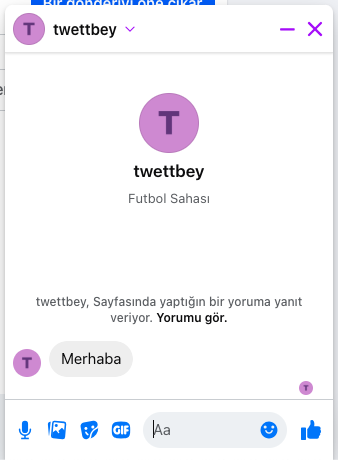
Messenger Tickets
Messenger Tickets allows you to make comment management more organized and efficient by redirecting comments from Facebook to the ticket system. Thanks to this feature, you can track comments from a single panel, manage customer requests more systematically and increase interaction by giving quick responses.

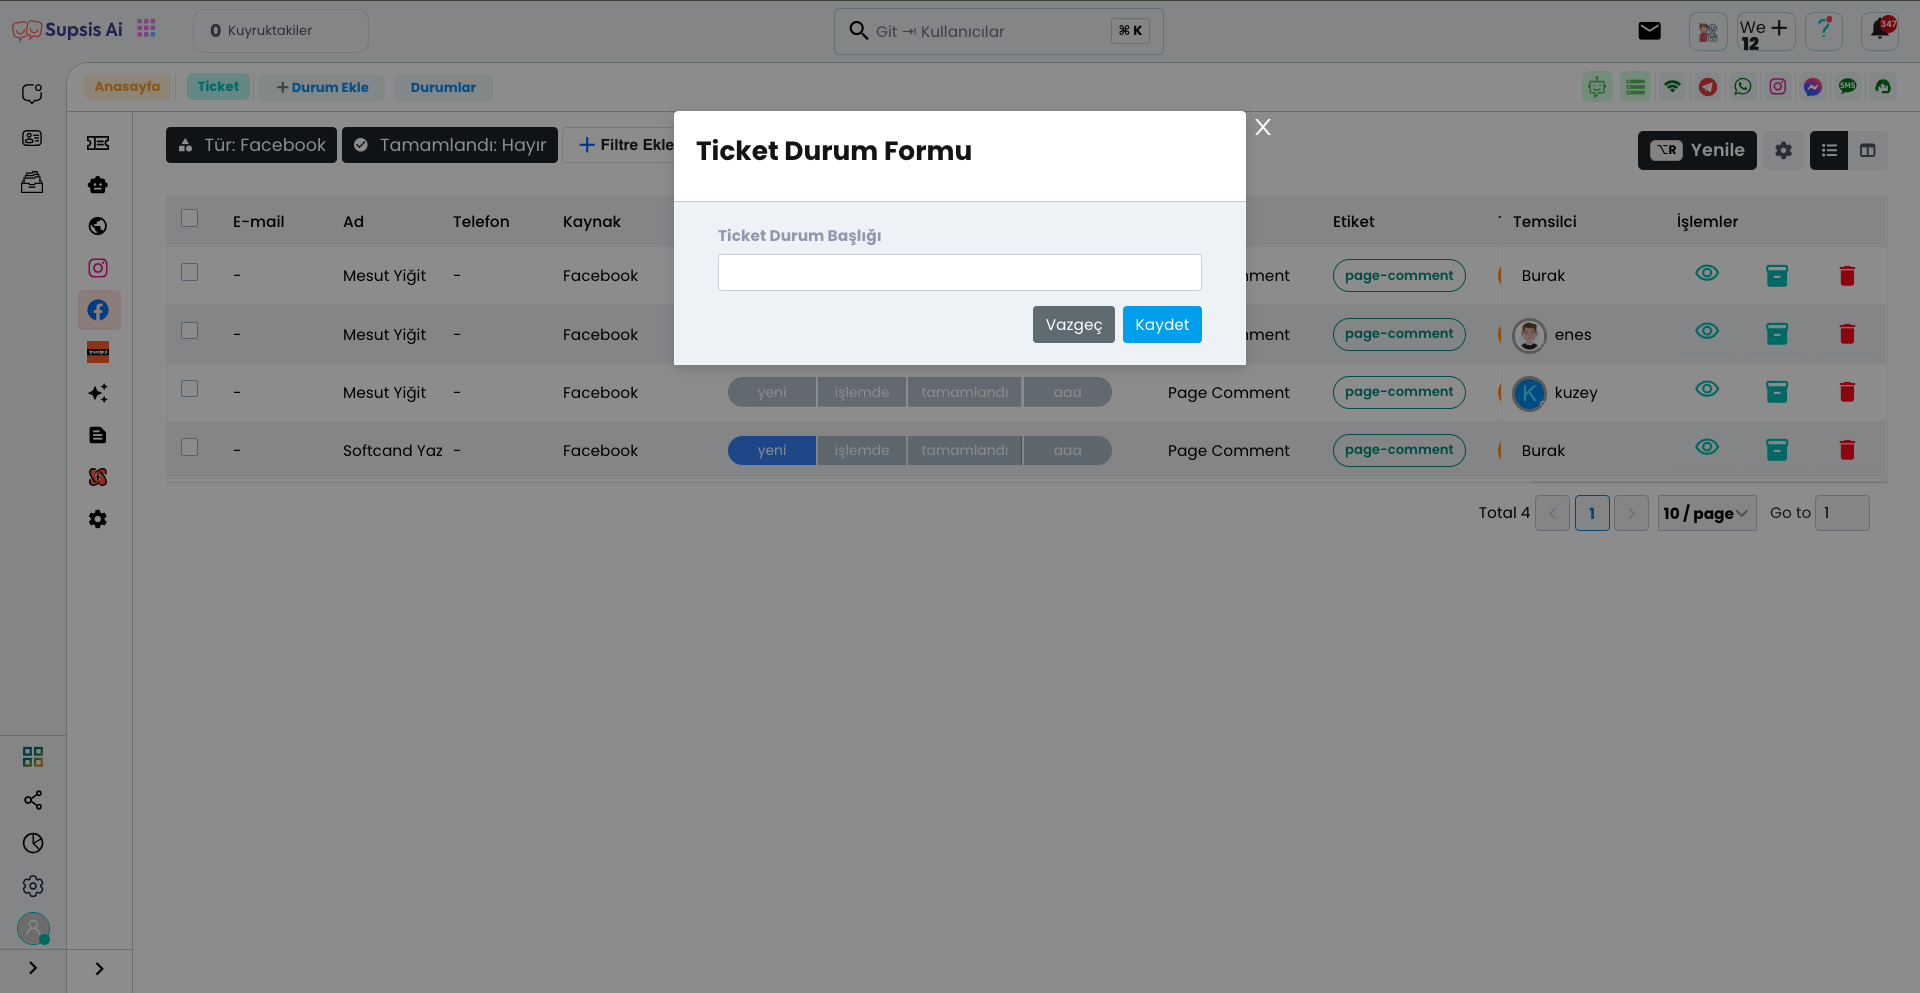
Messenger Ticket Elements:
- Messenger Tickets
- Add Status
- Filter
- User Information
- Status
- Subject
- Tag
- Representative
- Actions
1.) Messenger Tickets
You can switch to the Messenger Tickets page by clicking the "Messenger Comments" section from the left menu and manage incoming comments by redirecting them to the ticket system.
2.) Add Status
You can create a new status by clicking the "Add Status" option from this section. Additionally, you can view, delete or edit existing statuses by entering the "Statuses" section.
3.) Filter
From this section, you can determine which tickets you want to list by filtering according to criteria such as channel, tag, status, name. This way, you can perform your ticket management in a more organized and efficient way.
4.) User Information
In this area, user information is listed in the following columns respectively: "Email", "Name", "Phone" and "Source". This way, you can view and manage user data in a more organized way.
5.) Status
From this area, you can view the statuses you have added and update by selecting the current progress status. This way, you can track and manage processes in a more organized way.
6.) Subject
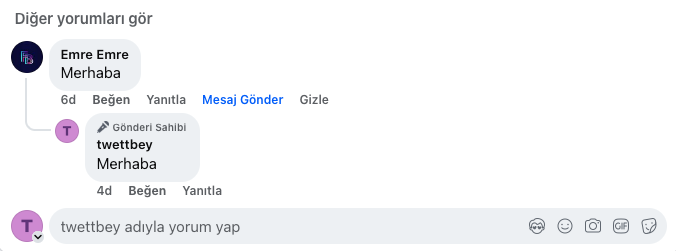
The subject of the comment is listed in this column, so you can categorize and manage comments more easily.
7.) Tag
From this area, you can categorize comments and make filtering easier by adding a tag related to the comment. This way, you can quickly reach comments related to specific topics.
8.) Representative
In this section, you can make task assignments by selecting the representative who will handle the comment. This way, you can ensure that comments are managed faster and more efficiently.
9.) Actions
From the Actions section, you can perform viewing, archiving and deletion operations. This way, you can edit comments, access them when needed or remove unnecessary content.
Also, make sure the ticket option is open in the Comment Management section of your Messenger Channel. Otherwise, incoming comments will not be redirected to the ticket system and your comment management process may be disrupted.
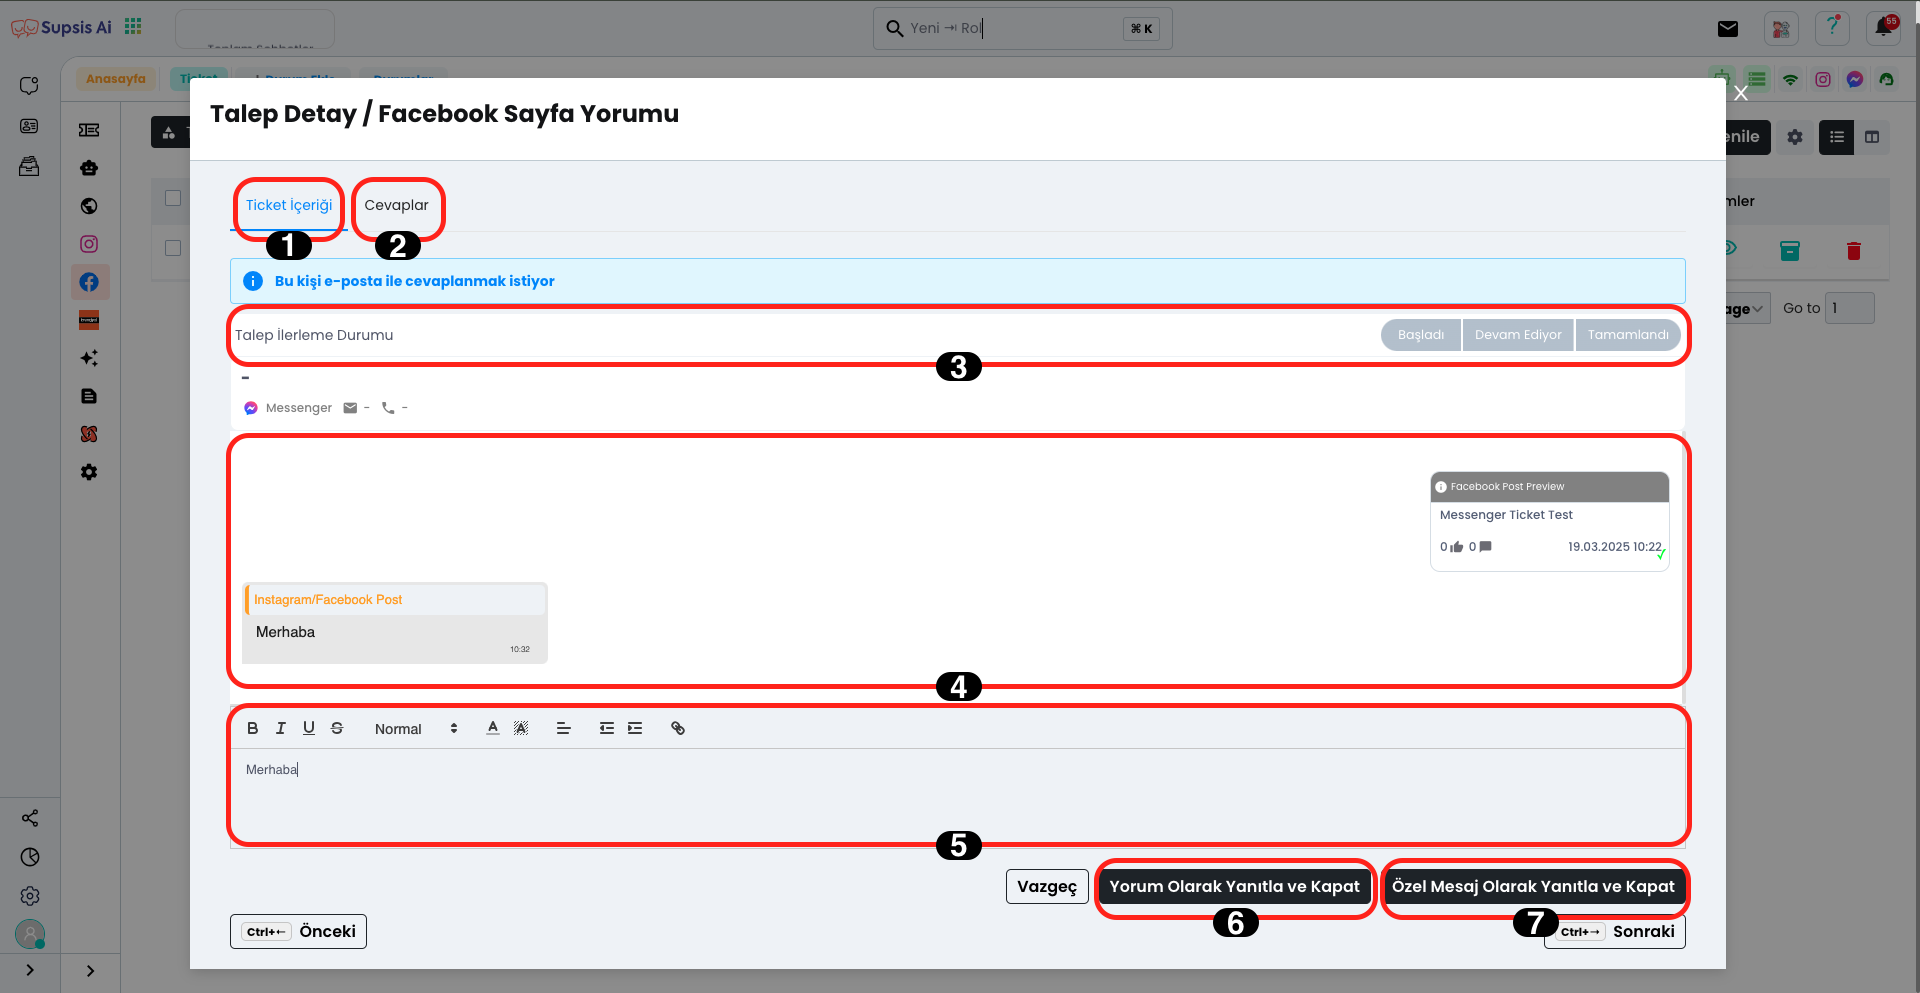
Messenger Ticket Elements:
- Ticket Content
- Responses
- Request Progress Status
- Comment Screen
- Response
- Respond as Comment
- Respond as Private Message
1.) Ticket Content
In the Ticket Content tab, all the necessary fields for managing Messenger comments are available. Through this tab, you can respond to comments, remove comments or track progress status.
2.) Responses
By coming to the Responses tab, you can view all responses to the ticket (comment). This way, you can track the given responses and manage them when needed.
3.) Request Progress Status

From the Request Progress Status section, you can track the progress process of the request specified in the comment and mark it by updating its status. This way, you can manage the process more organized and easily see at which stage the requests are.
4.) Comment Screen
From here, you can track and view all conversations in the comment within the ticket that comes to you. This way, you can access the comment history and manage the process more effectively.
5.) Response
From here, you can share the response you want to give to the comment by entering it in the box, either as a private message or as a direct response. This way, you can manage customer interaction more flexibly and efficiently.
6.) Respond as Comment
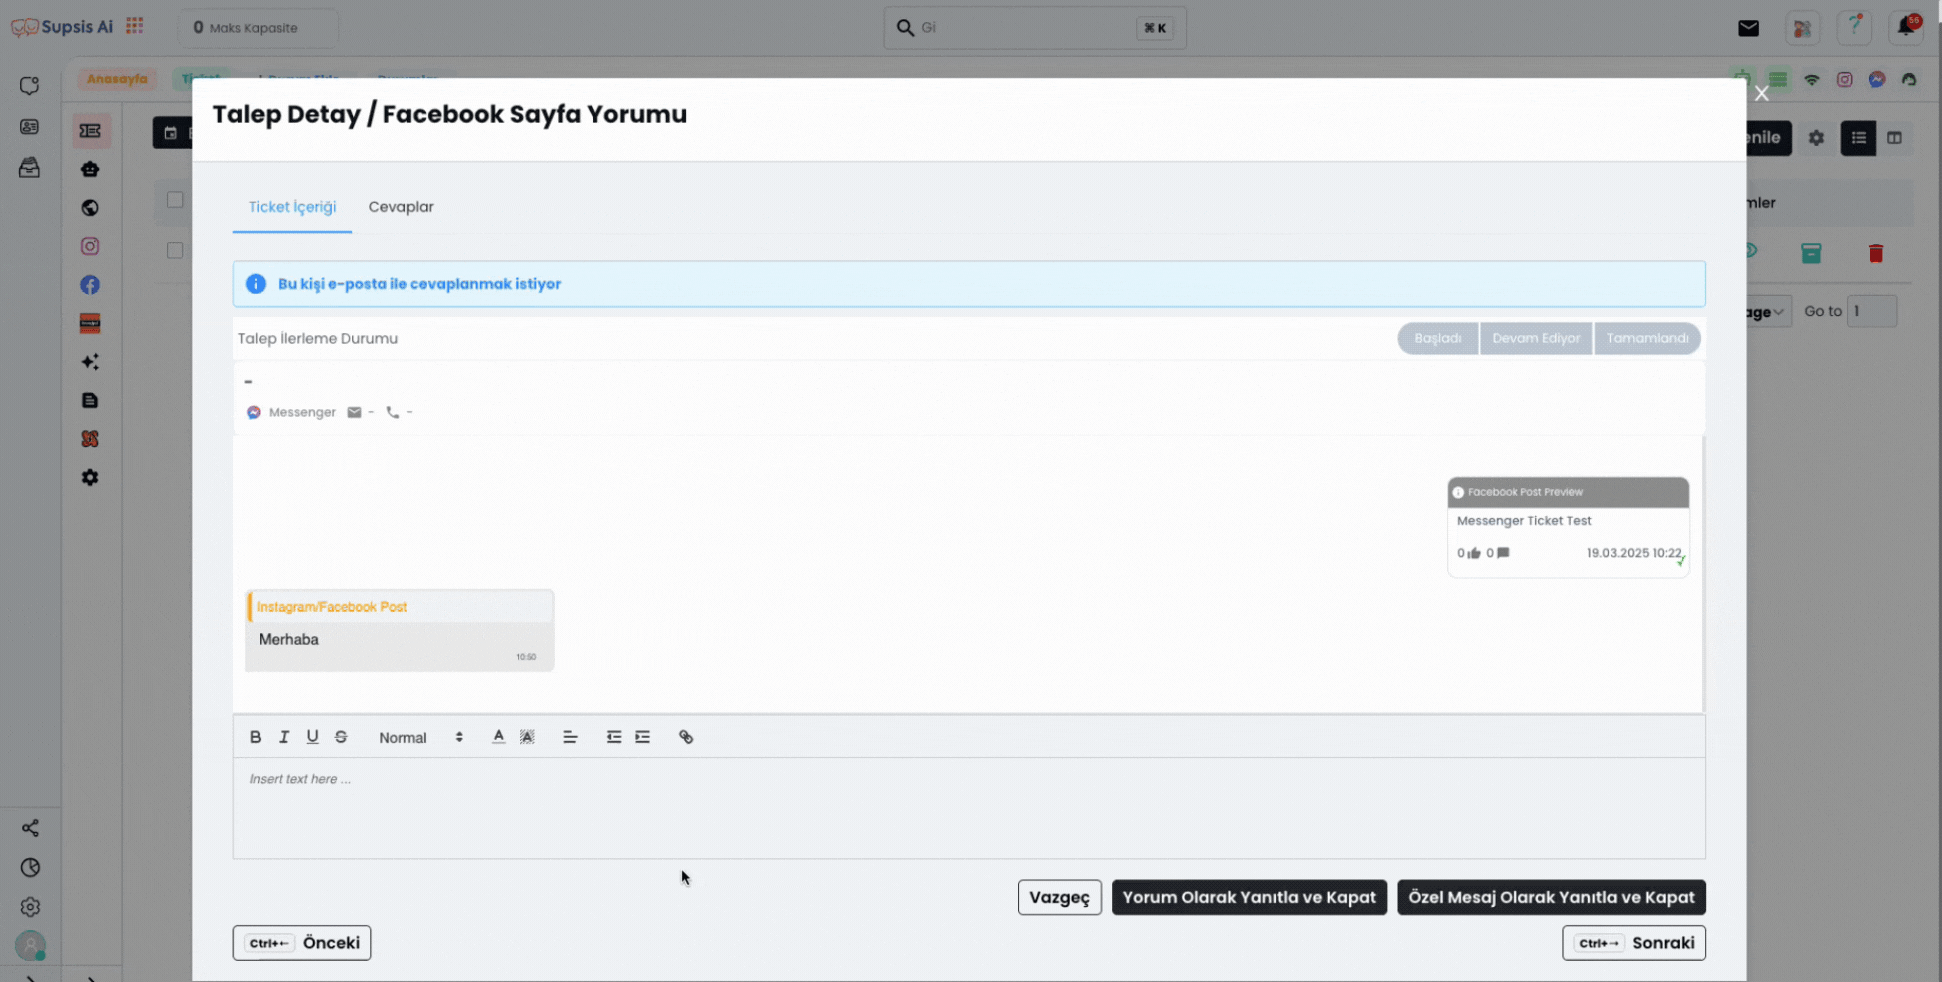
From here, you can respond to the comment and close the ticket by clicking the "Respond as Comment and Close" button. With this operation, you both complete the customer feedback and end the ticket process.
7.) Respond as Private Message
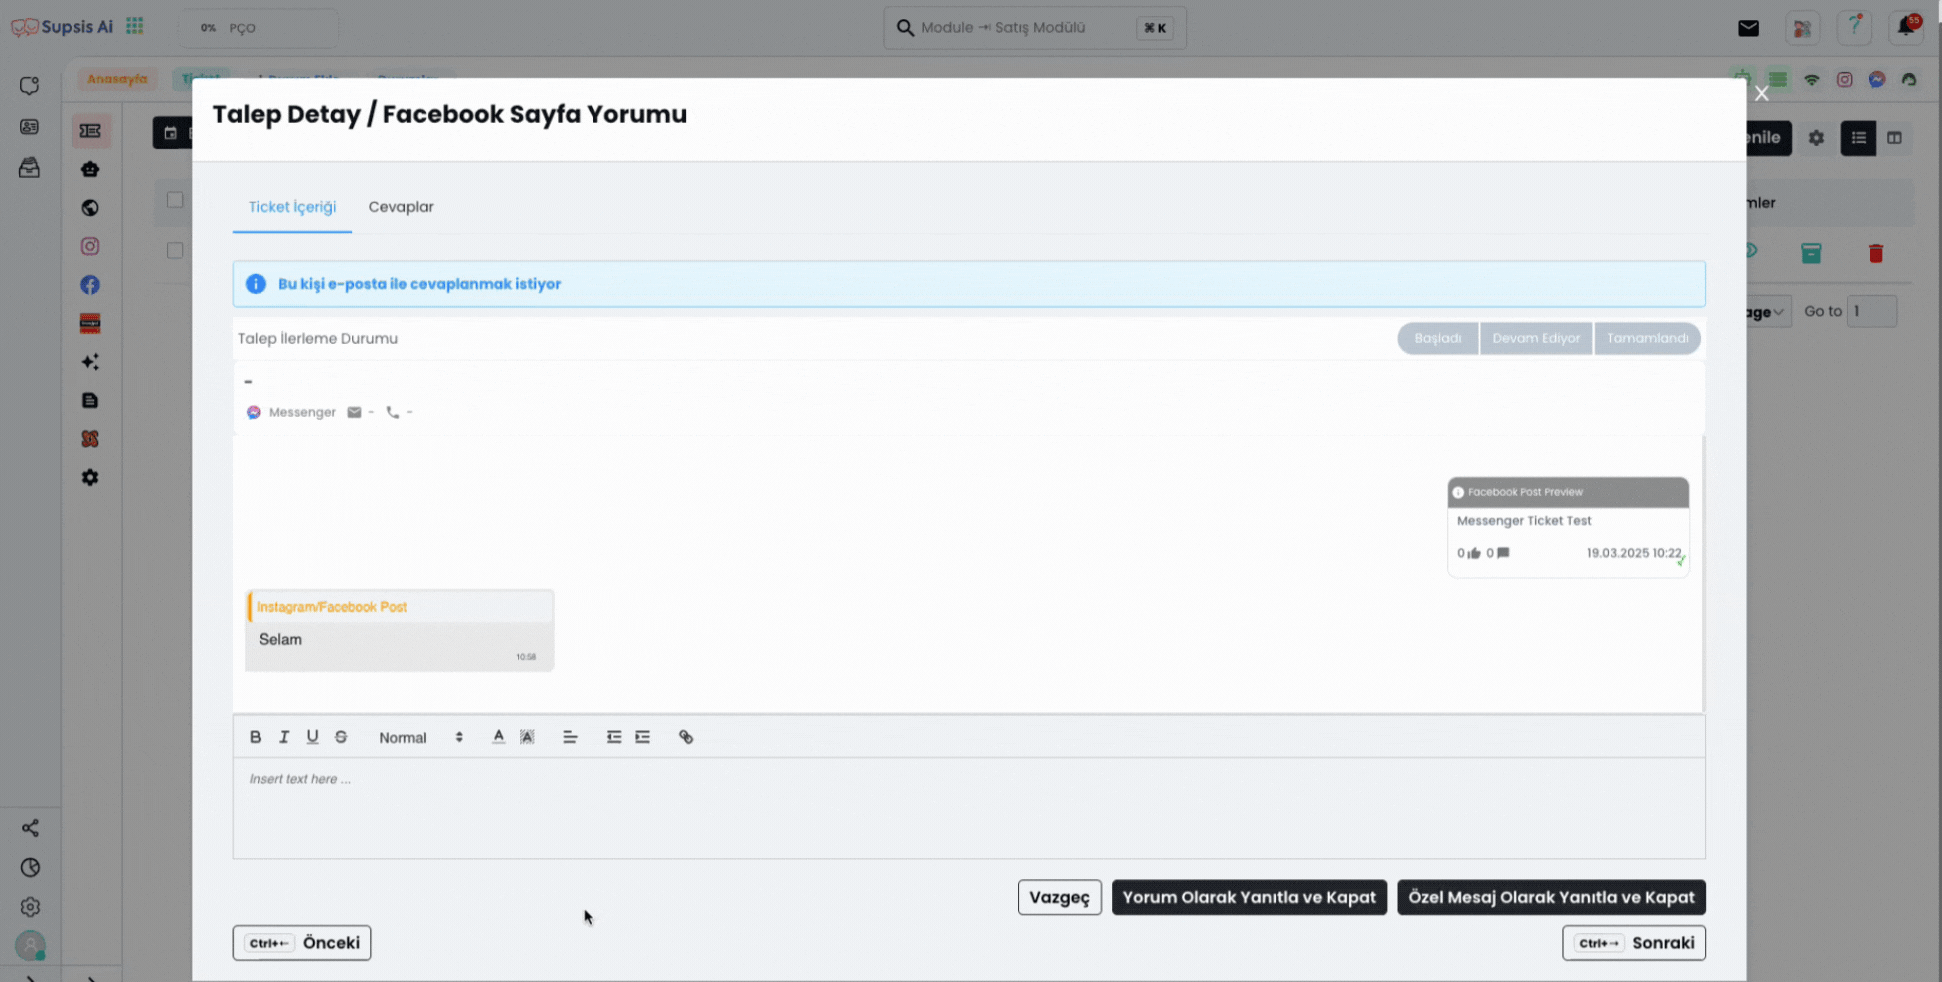
From here, you can respond to the comment and close the ticket by clicking the "Respond as Private Message and Close" button. With this operation, you both complete the customer feedback and end the ticket process.