Relationships
Relationships, This area enables your data structures to be shaped dynamically by establishing relationships between tables and between tables and modules. By establishing relationships, you can organize your data more flexibly and achieve more effective data management by connecting related data to each other. This way, it becomes possible to switch between tables, control data flow, and make data dynamic with related modules.
Relationship Elements:
- Relationships
- Create New Relationship
- Actions
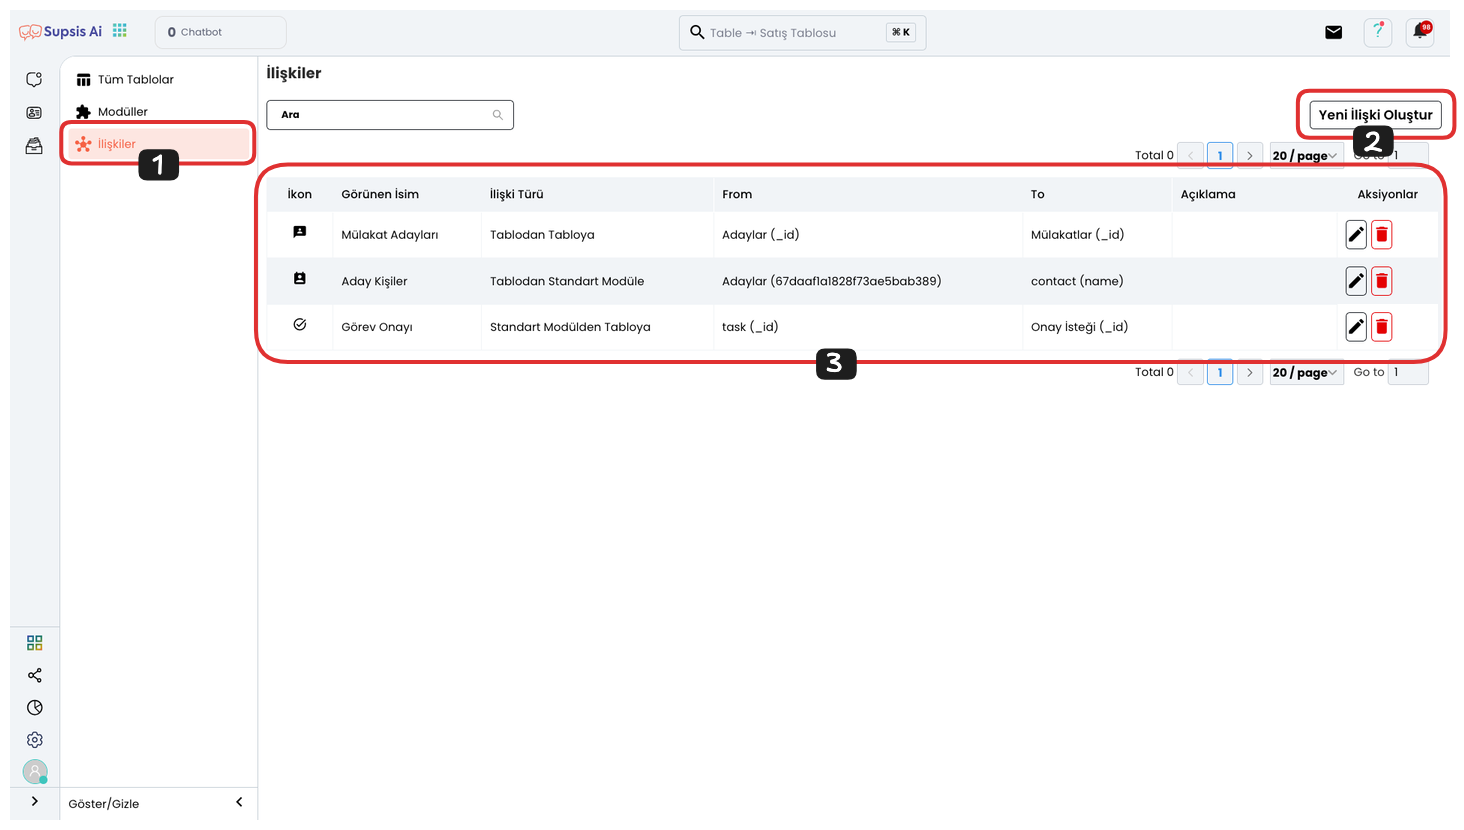
1.) Relationships
First, come to the relationships page by clicking the "Relationships" option from the left menu. Through this page, you can establish connections between tables and modules and manage your data in a more organized and related way.
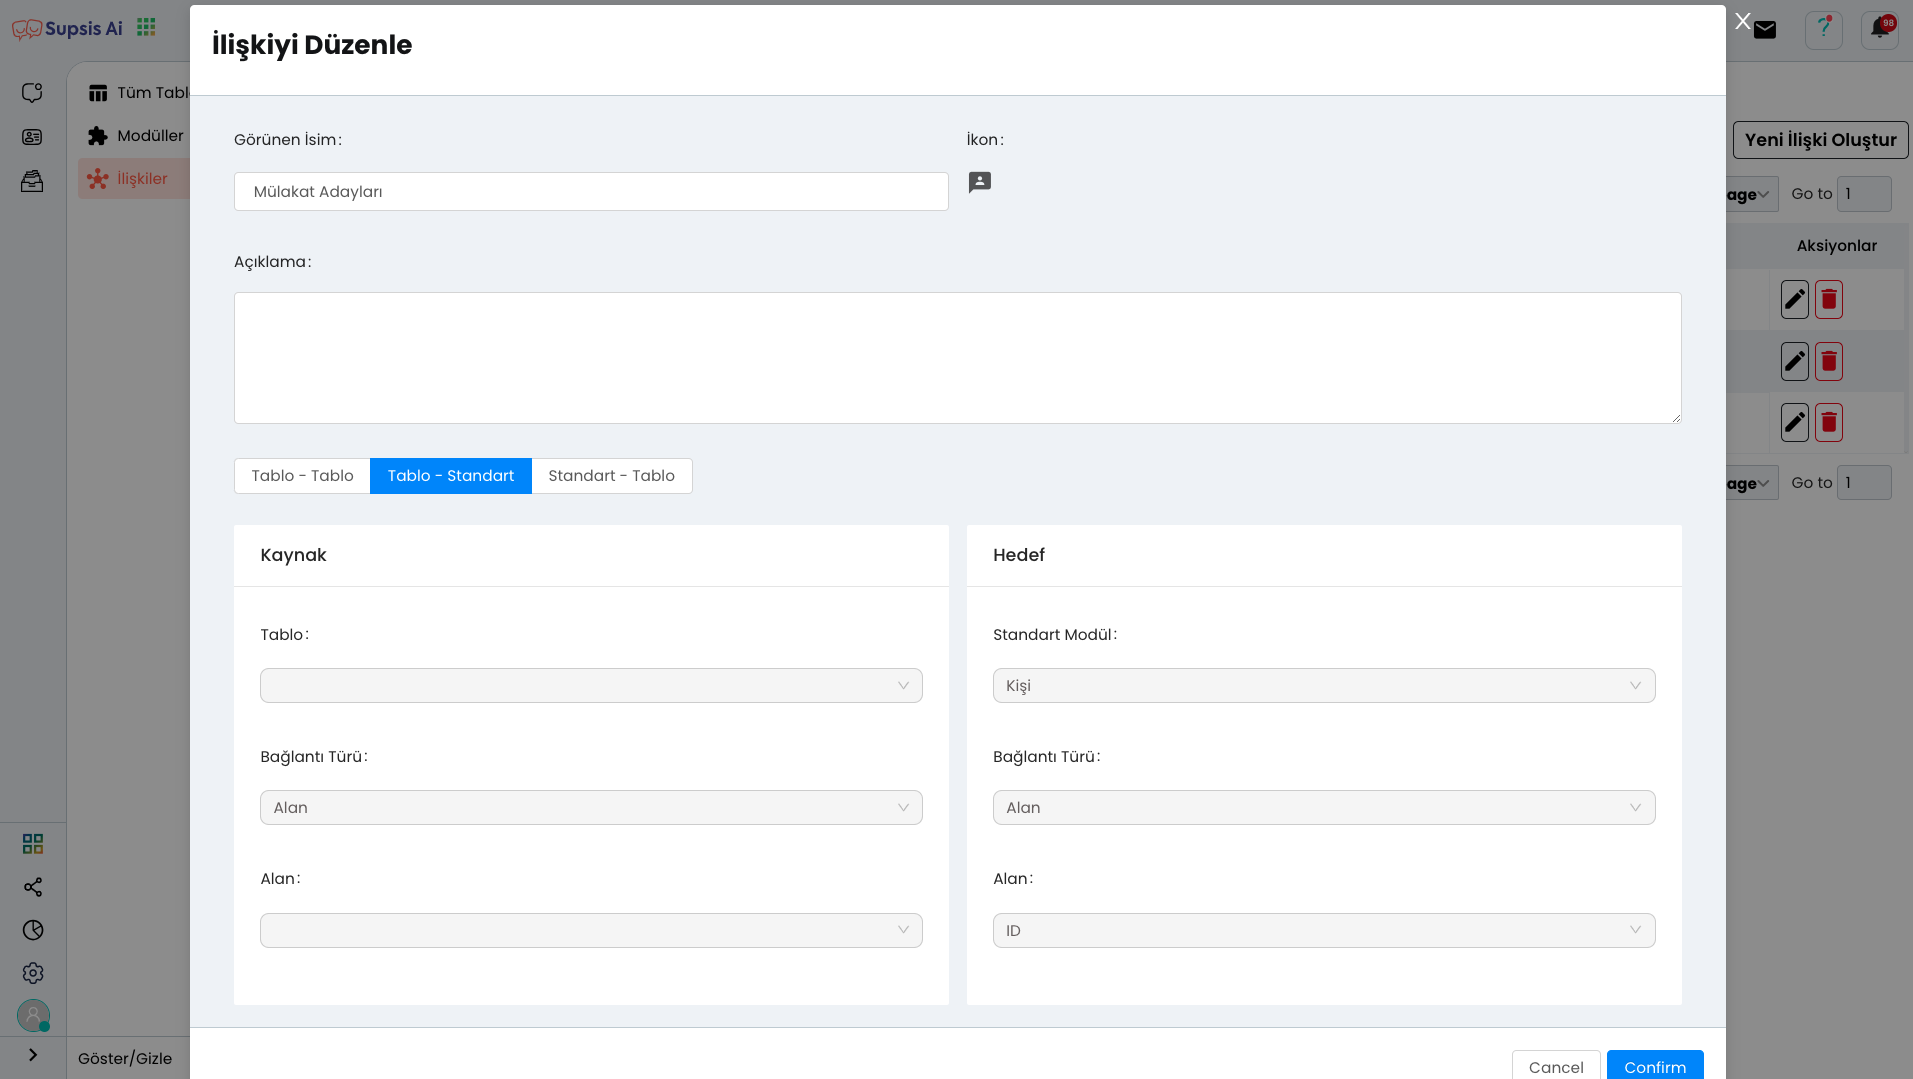
2.) Create New Relationship
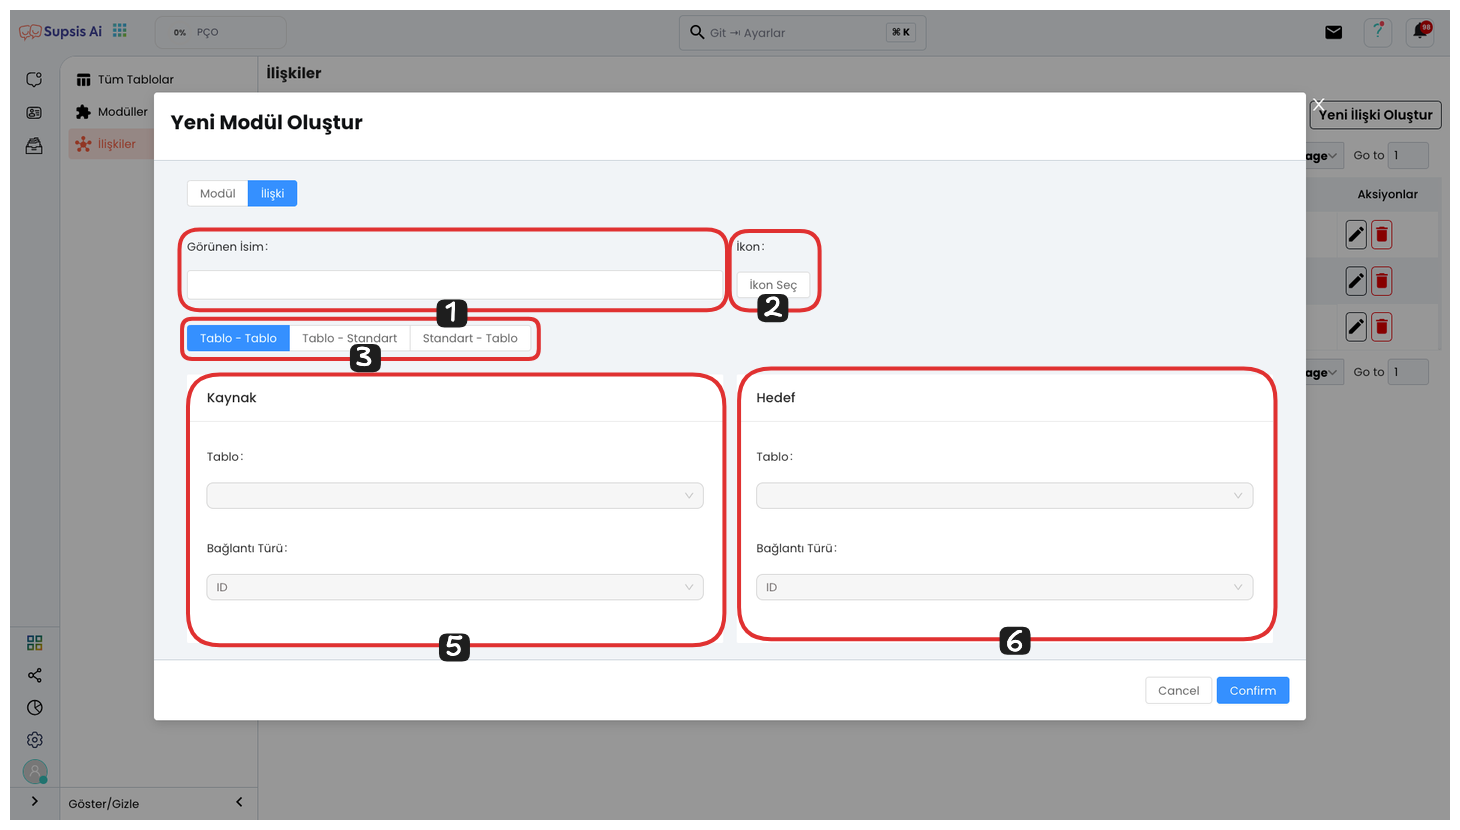
Click the "Create New Relationship" button to create a new relationship. From the opened modal, you can customize it by giving the relationship a name and icon. Then, select what type of relationship you want to establish:
-
Table - Table: If you want to establish a relationship between two tables, you can select this option.
-
Table - Standard: You can prefer this option to establish a relationship between a table and a module.
-
Standard - Table: You can use this option to establish a relationship between a module and a table.
These selections provide more efficient relationship and data management by connecting your data to each other.
2.1) Table - Table
To establish a relationship between one table and another table, you can select two different tables as "Source" and "Target".
-
Source Table: This is the table that will initiate the relationship. That is, the first table from which you will get data.
-
Target Table: This is the table that will receive or target the relationship. That is, the table to which the data in the source table will be directed.
This way, you can exchange data between two tables and establish a more effective relationship by connecting the data in both tables to each other.
2.2) Table - Module
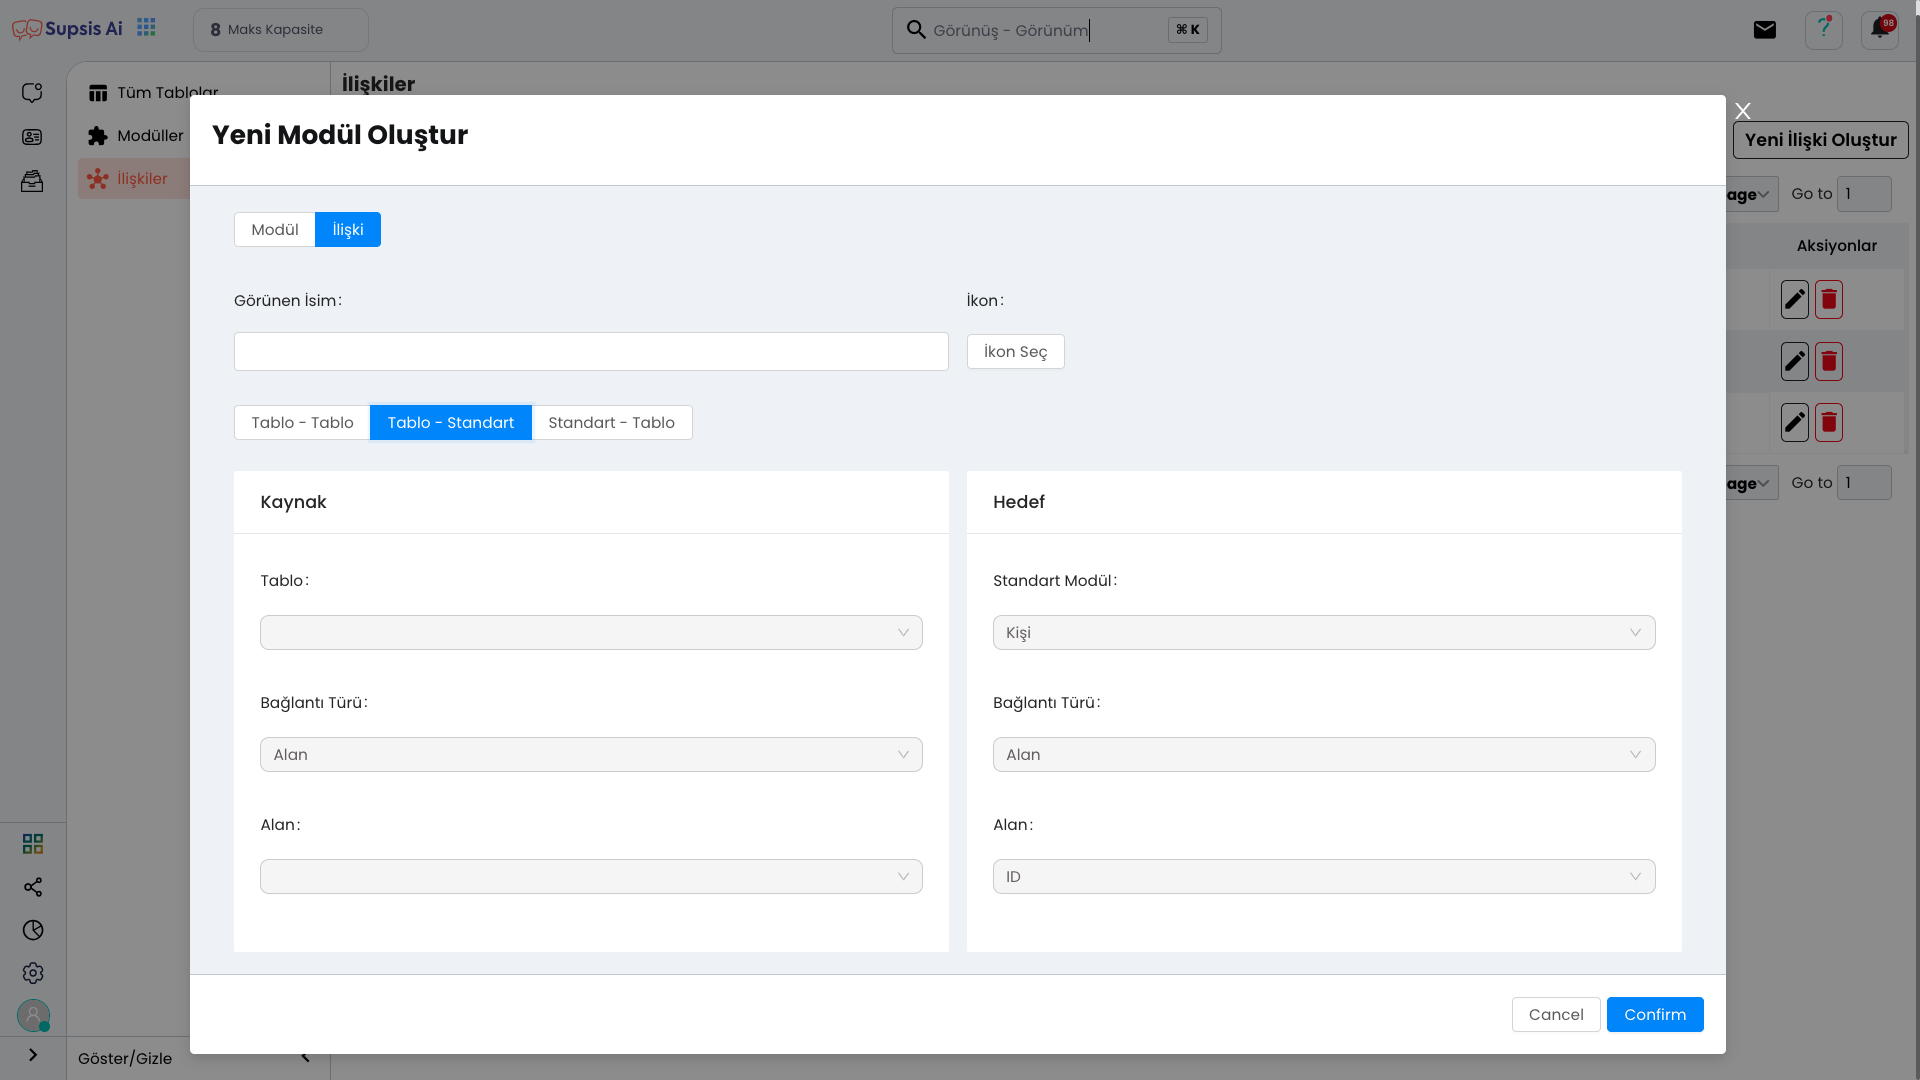
To establish a relationship between a table and a module, you can follow these steps:
-
Source: First, select the table you want to establish the relationship with. This is the first table from which data is taken or sent.
-
Connection Type: You need to select the type of data you will establish the relationship with in your source table. Here you can select one of the "Field" (Using a field in the table) or "Custom Field" (Establishing a relationship with a custom field) options.
-
Table Field Selection: Select which field you want to establish a relationship with from your source table. This is a specific field where data will be transferred.
-
Target: Then, select the target you want to establish a relationship with as a module. That is, the module where data will be sent or received.
-
Connection Type: You will also need to select a connection type in your target module. Just like in the source table, you can select one of the "Field" or "Custom Field" options here.
-
Module Field Selection: In the target module, select the field you want to establish a relationship with. This is the field where data transfer will be made.
By following these steps, you can establish a relationship between table and module and ensure that data is connected to each other.
2.3) Module - Table
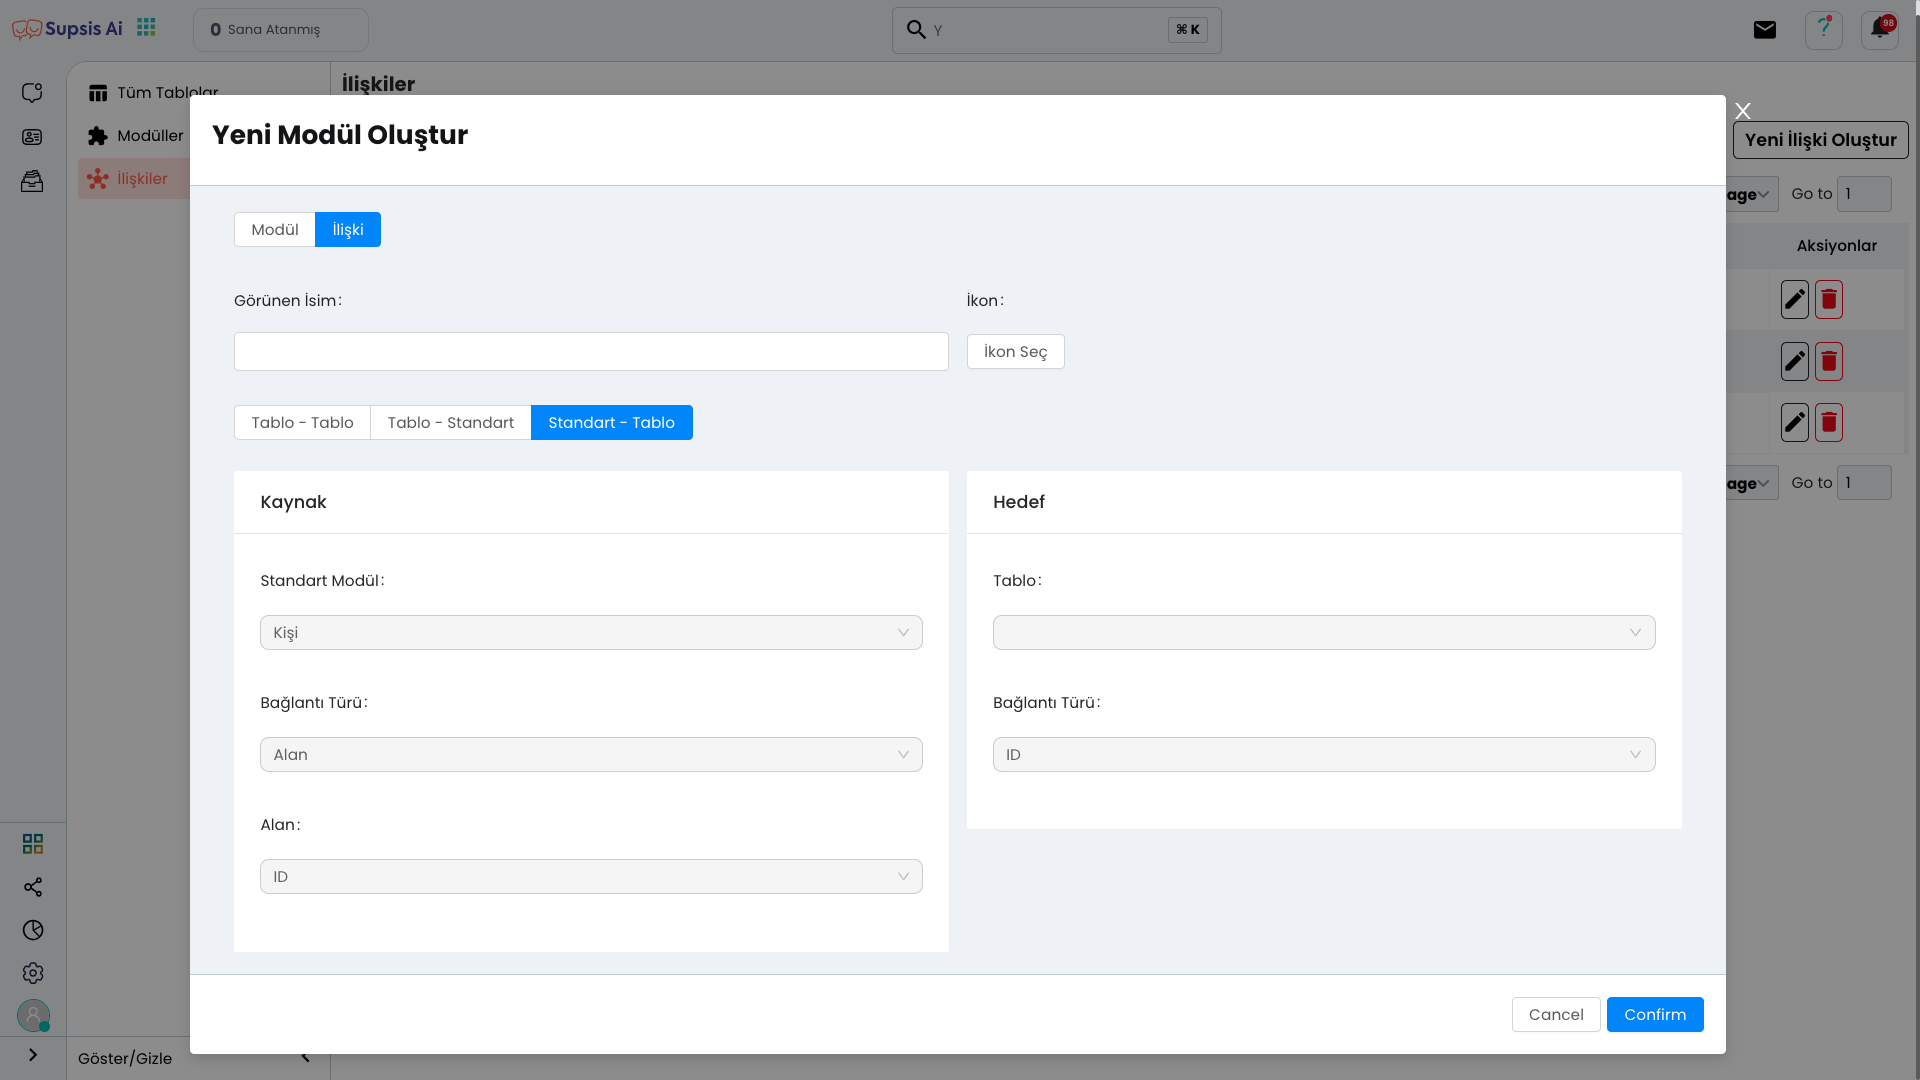
To establish a relationship between a module and a table, you can follow these steps:
-
Source: First, select the module you want to establish a relationship with. This is the module where data will be sent or received.
-
Connection Type: In your source module, select a connection type to determine the type of data to be transferred. Here you can select the "Field" (using a field in the module) or "Custom Field" (using a custom field) options.
-
Module Field Selection: From your module, select the specific field you want to establish a relationship with. This is the field where data will be connected.
-
Target: Then, determine the table option. This is the target table where data will be transferred.
-
Connection Type: You will also need to select a connection type in your target table. Here you can also determine one of the "Field" or "Custom Field" options.
By following these steps, you can establish a successful relationship between a module and a table. This way, you ensure that data is connected to each other and associated dynamically.
3.) Actions
Actions, in this section, you can delete and update your table using the Delete and Edit buttons located next to the table features you view.
-
Delete Button: You can use this button to delete the table. This operation cannot be undone, so it is important to be careful.
-
Edit Button: You can use this button to update the table, edit the table, add new fields or change existing fields.
This way, you can take action on your tables and update them according to your needs.
When you click the Edit Button, you can edit all the features of the relationship you have created. In this area, you can update the existing relationship, change table or module selections and add new connection types. Additionally, you can add a description to better explain the purpose or function of the relationship.
Thanks to this feature, you can make your relationships more understandable and provide more efficient use with the arrangements made.