Invoice & Payment
Invoice & Payment is the page where you make in-package purchases of modules on Supsis and track your invoice transactions. This section allows you to examine your payment history, view your invoices, and easily manage your payment transactions. Additionally, it allows you to regularly track payment processes and quickly resolve any errors or delays.
Packages
To use each module on the Supsis AI platform, you need to purchase the relevant packages. From the "Invoice & Payment" page, you can view your current plans and the plans section, and perform the necessary purchase transactions by selecting packages suitable for your needs.
Additionally, you can try all our packages with a 1-week free trial period. This way, you can access all the features offered by the platform, choose the plan most suitable for your needs, and complete your payment transactions securely.

To perform package purchase transactions, click the Settings icon in the left menu. By selecting the "Invoice & Payment" option at the top of the opened menu, you can reach the Plans and Packages page and purchase the package suitable for your needs.
Package Elements:
- Supsis Packages
- Customer Table Packages
- Automation Packages
- Email Packages
- Task Packages
- Form Packages
- AI Voice Agent Packages
- WhatsApp QR Packages
- WhatsApp Business Packages
- Chatbot Packages
- Instagram Packages
- Messenger Packages
- Trendyol Packages
- Meta Lead Packages
- LinkedIn Packages
- Artificial Intelligence Packages
- Telegram Packages
- Additional Packages
Adding Payment Method
During your 1-week demo period, you can use all our packages for free without any restrictions. However, to continue your uninterrupted and smooth use after the demo period ends and to benefit from advanced services such as the free initial setup support offered by our technical team, you need to add your invoice address and card information to the system.
Invoice Address and Payment Method Addition Steps
First, find the "Invoice and Payment Method" menu marked with card number 1 through your panel and log in.
Payment Method Addition Elements:
- Invoice Address
- Payment Method
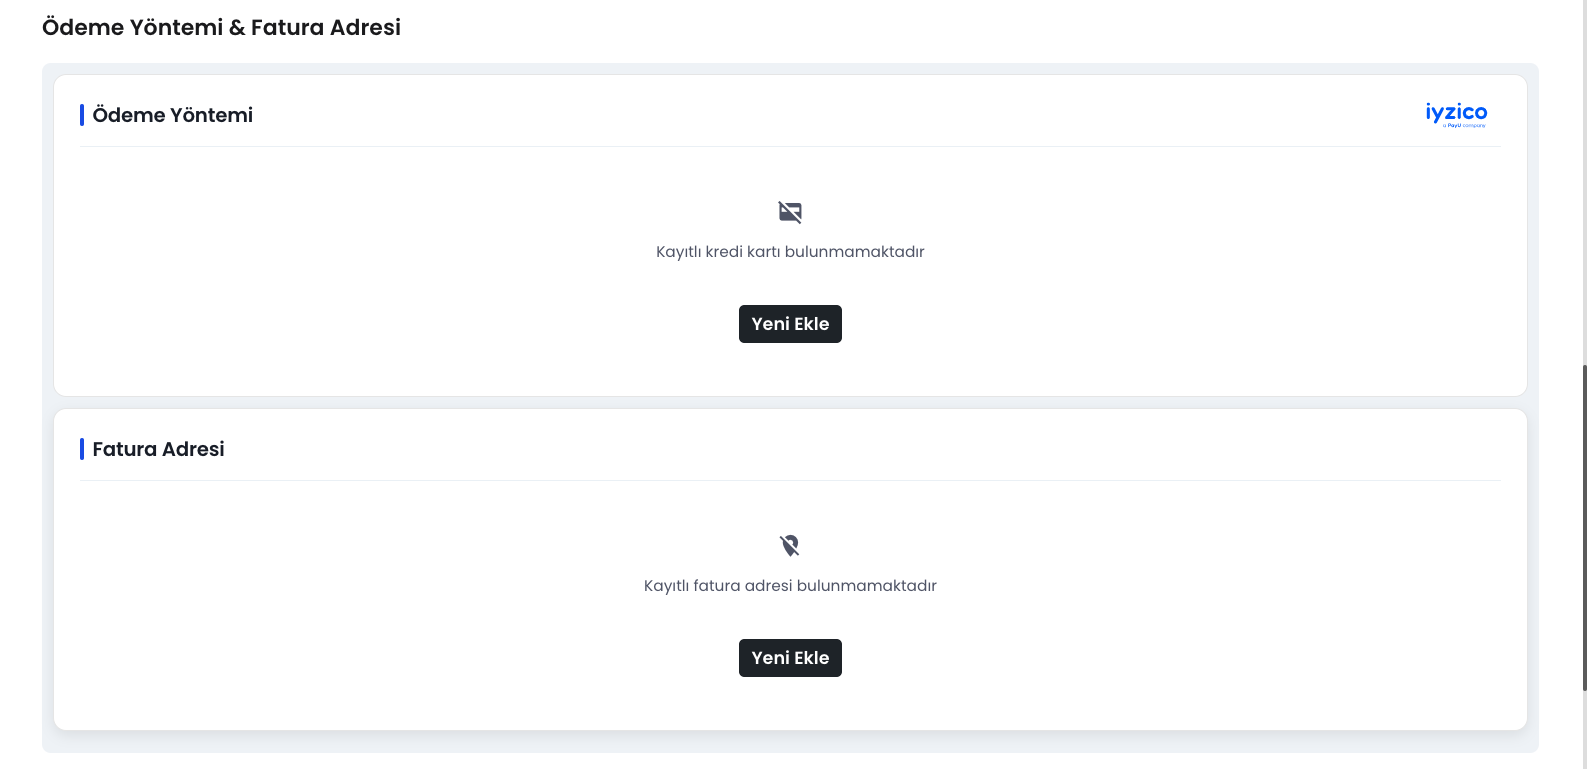
1-) Invoice Address
The invoice address represents the address where invoices will be issued for payments made through the system. - Add New: If you don't have an address registered in the system, you can add your invoice address using this button. - Update Invoice Information: If you have a currently registered address, you can make updates using this button to change the invoice issuance address.
Note: Payment method cannot be added without entering invoice address information.
2-) Payment Method
To add a payment method, you must first fill out the Invoice Address section completely. After completing this step, to add the card information where fees will be collected to the system: - Add New: If there is no payment method registered in the system, you can add a new card using this button. - Change: You can use this button to change your current payment method.
Note: Supsis uses Iyzico infrastructure for card information security and payment transactions. If you get an error while adding your card information, check the following points: 1. Accuracy of your card information. 2. Internet shopping permission status. 3. Balance adequacy. 4. Completeness of information in your invoice address. If you still get an error despite all conditions being met, contact our support team.
Technical Installations
After entering your payment information into the system, the packages you will use must be selected for technical installation processes to begin. You can contact your sales representative for information about package selection and installation process.
Special Cases
If you want to make your payments through a different method such as Wire Transfer/EFT or cryptocurrency instead of your card information, you can contact your sales representative or the Supsis live support team.
Contact with Support Team
If you want help or information during these steps, you can contact the Supsis support team by following the instructions below. Our experts will guide you to complete all processes smoothly.
How Does Our Billing System Work?
Our Billing System is configured as monthly or annual according to the type of packages you purchase. You can view your invoices through our panel or download them in PDF format. To purchase packages and create invoices, you must first add your invoice address and payment method.
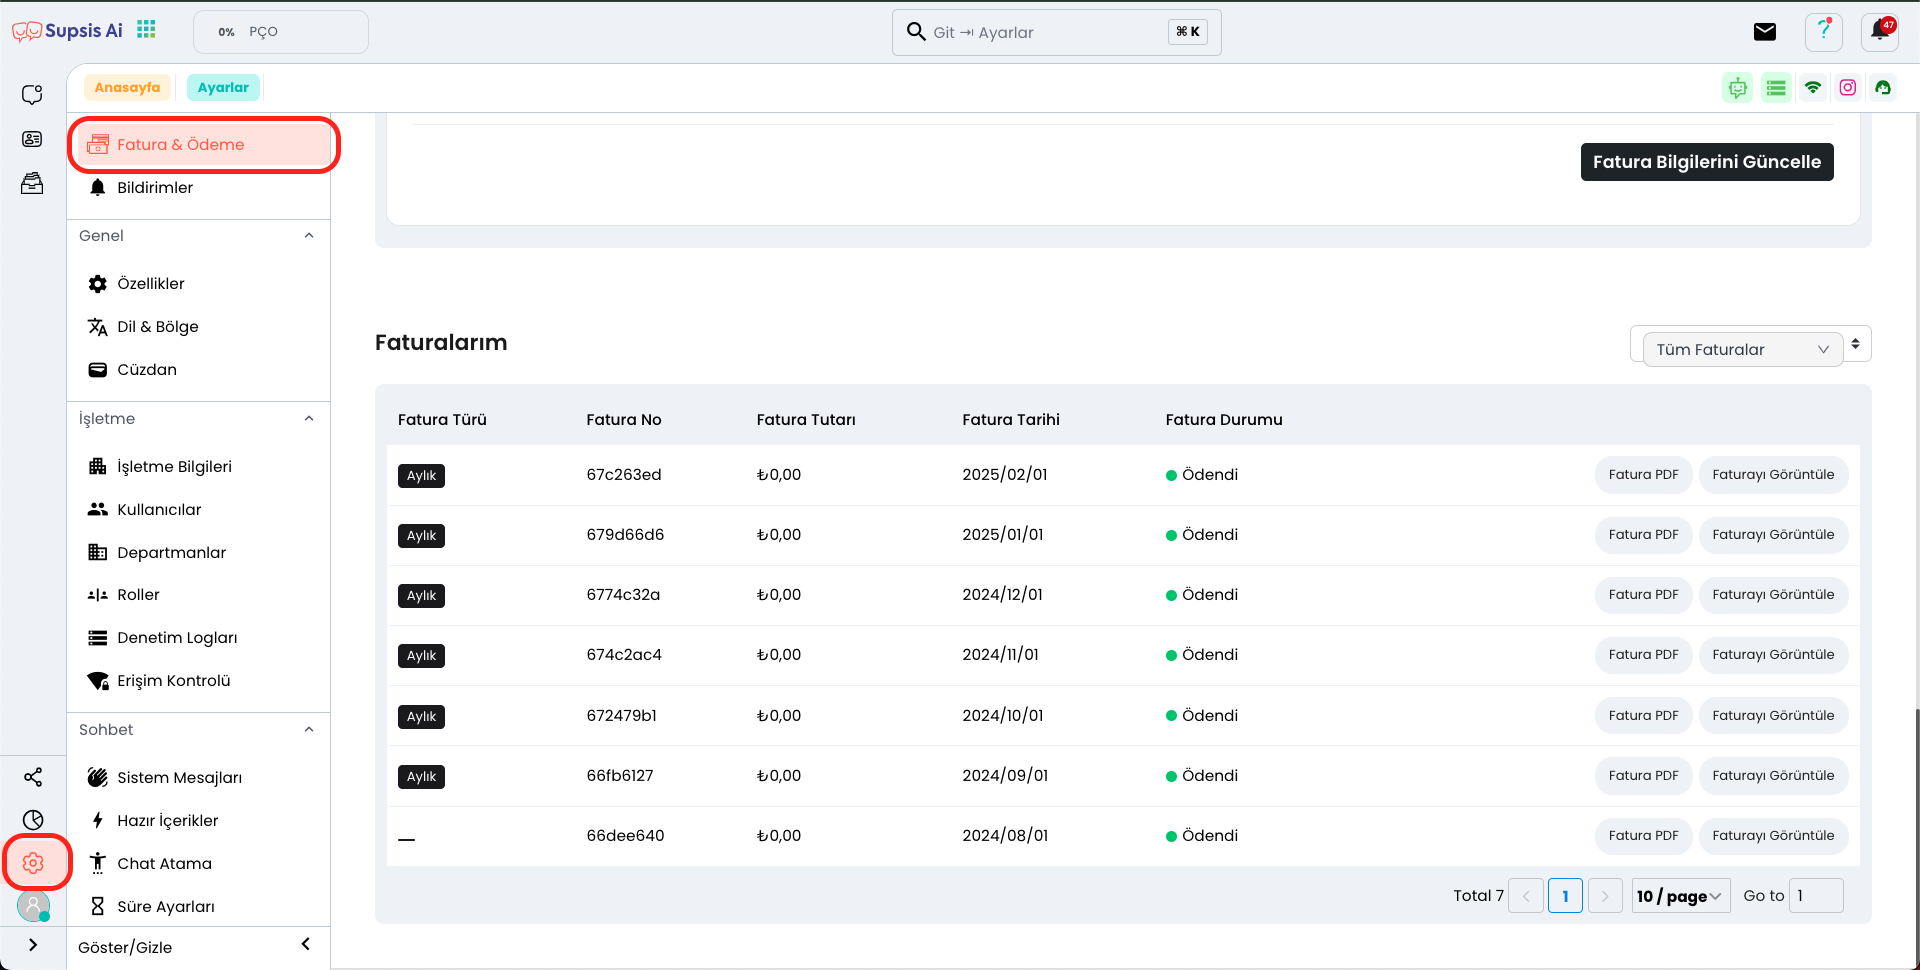
First, click the Settings icon in the left menu. Select the "Invoice & Payment" option from the opened menu and go to the bottom of the page to view the "My Invoices" section. Here, you can easily track the latest status and details of your created invoices.
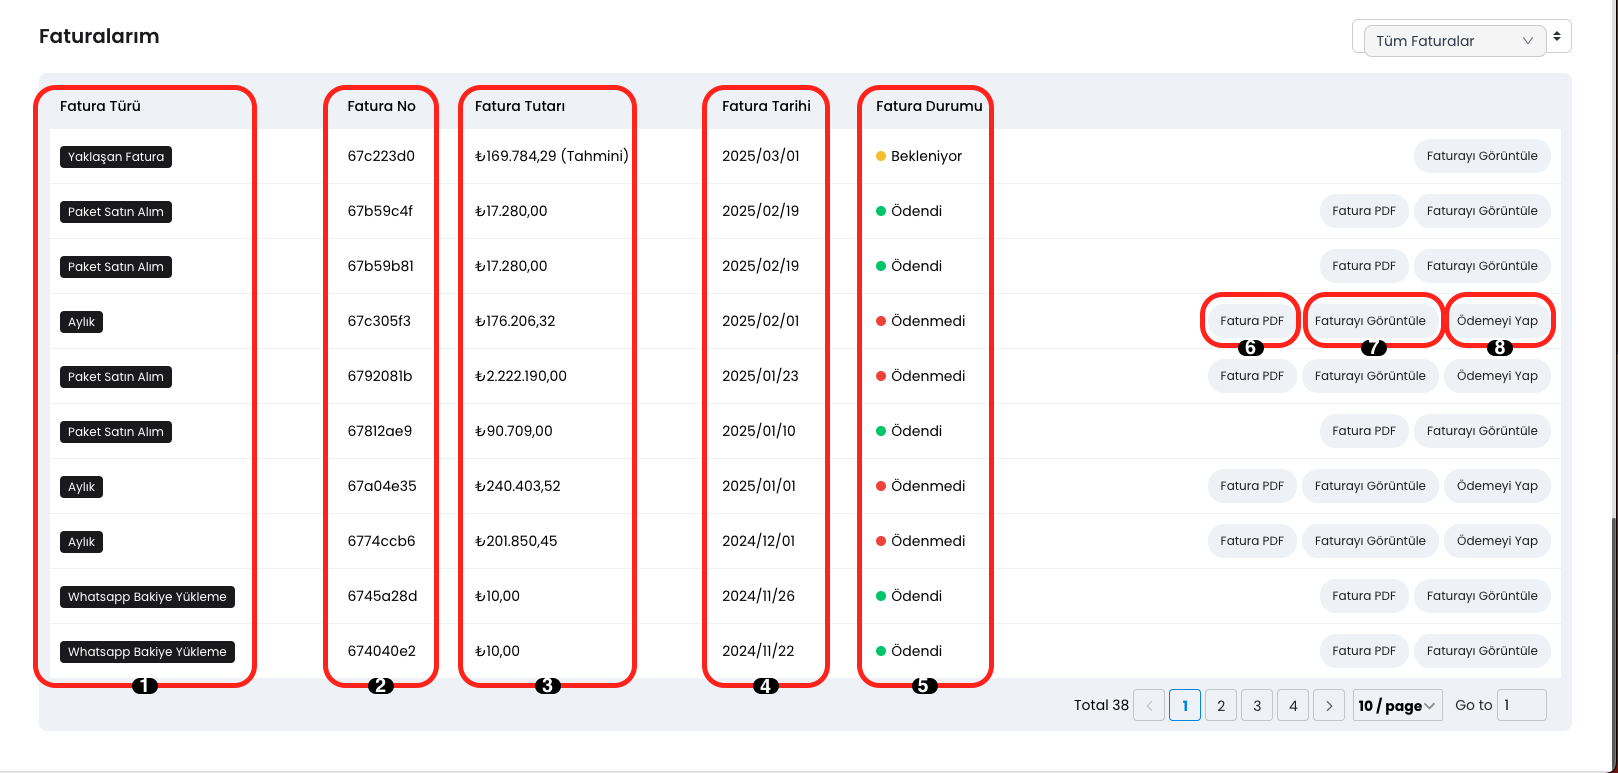
Billing Elements:
- Invoice Type
- Invoice No
- Invoice Amount
- Invoice Date
- Invoice Status
- Invoice PDF
- View Invoice
- Make Payment
1.) Invoice Type
In this area, you can view that your invoice is configured as "Monthly" or "Annual" and invoice types such as "Package Purchase", "Upcoming Invoice", "WhatsApp Balance Loading".
2.) Invoice No
In this area, the Invoice Number belonging to your created invoices is located and you can track your invoices through this number.
3.) Invoice Amount
In this area, the Invoice amount is located, so you can easily see the amount you paid or will pay.
4.) Invoice Date
In this area, the Invoice Date is located, so you can track the issuance date of your invoices.
5.) Invoice Status
In this area, the latest status of your invoice is located and can be displayed as "Pending", "Paid" or "Unpaid".
6.) Invoice PDF
In this area, you can view and download your invoice in PDF format.
7.) View Invoice
In this area, you can view all details of your invoice. You can examine how much was spent on which packages, tax rates, and all other invoice details from this section.
8.) Make Payment
In this area, you can view your unpaid invoices and quickly complete your payment transaction by clicking the "Make Payment" button.