Application Elements
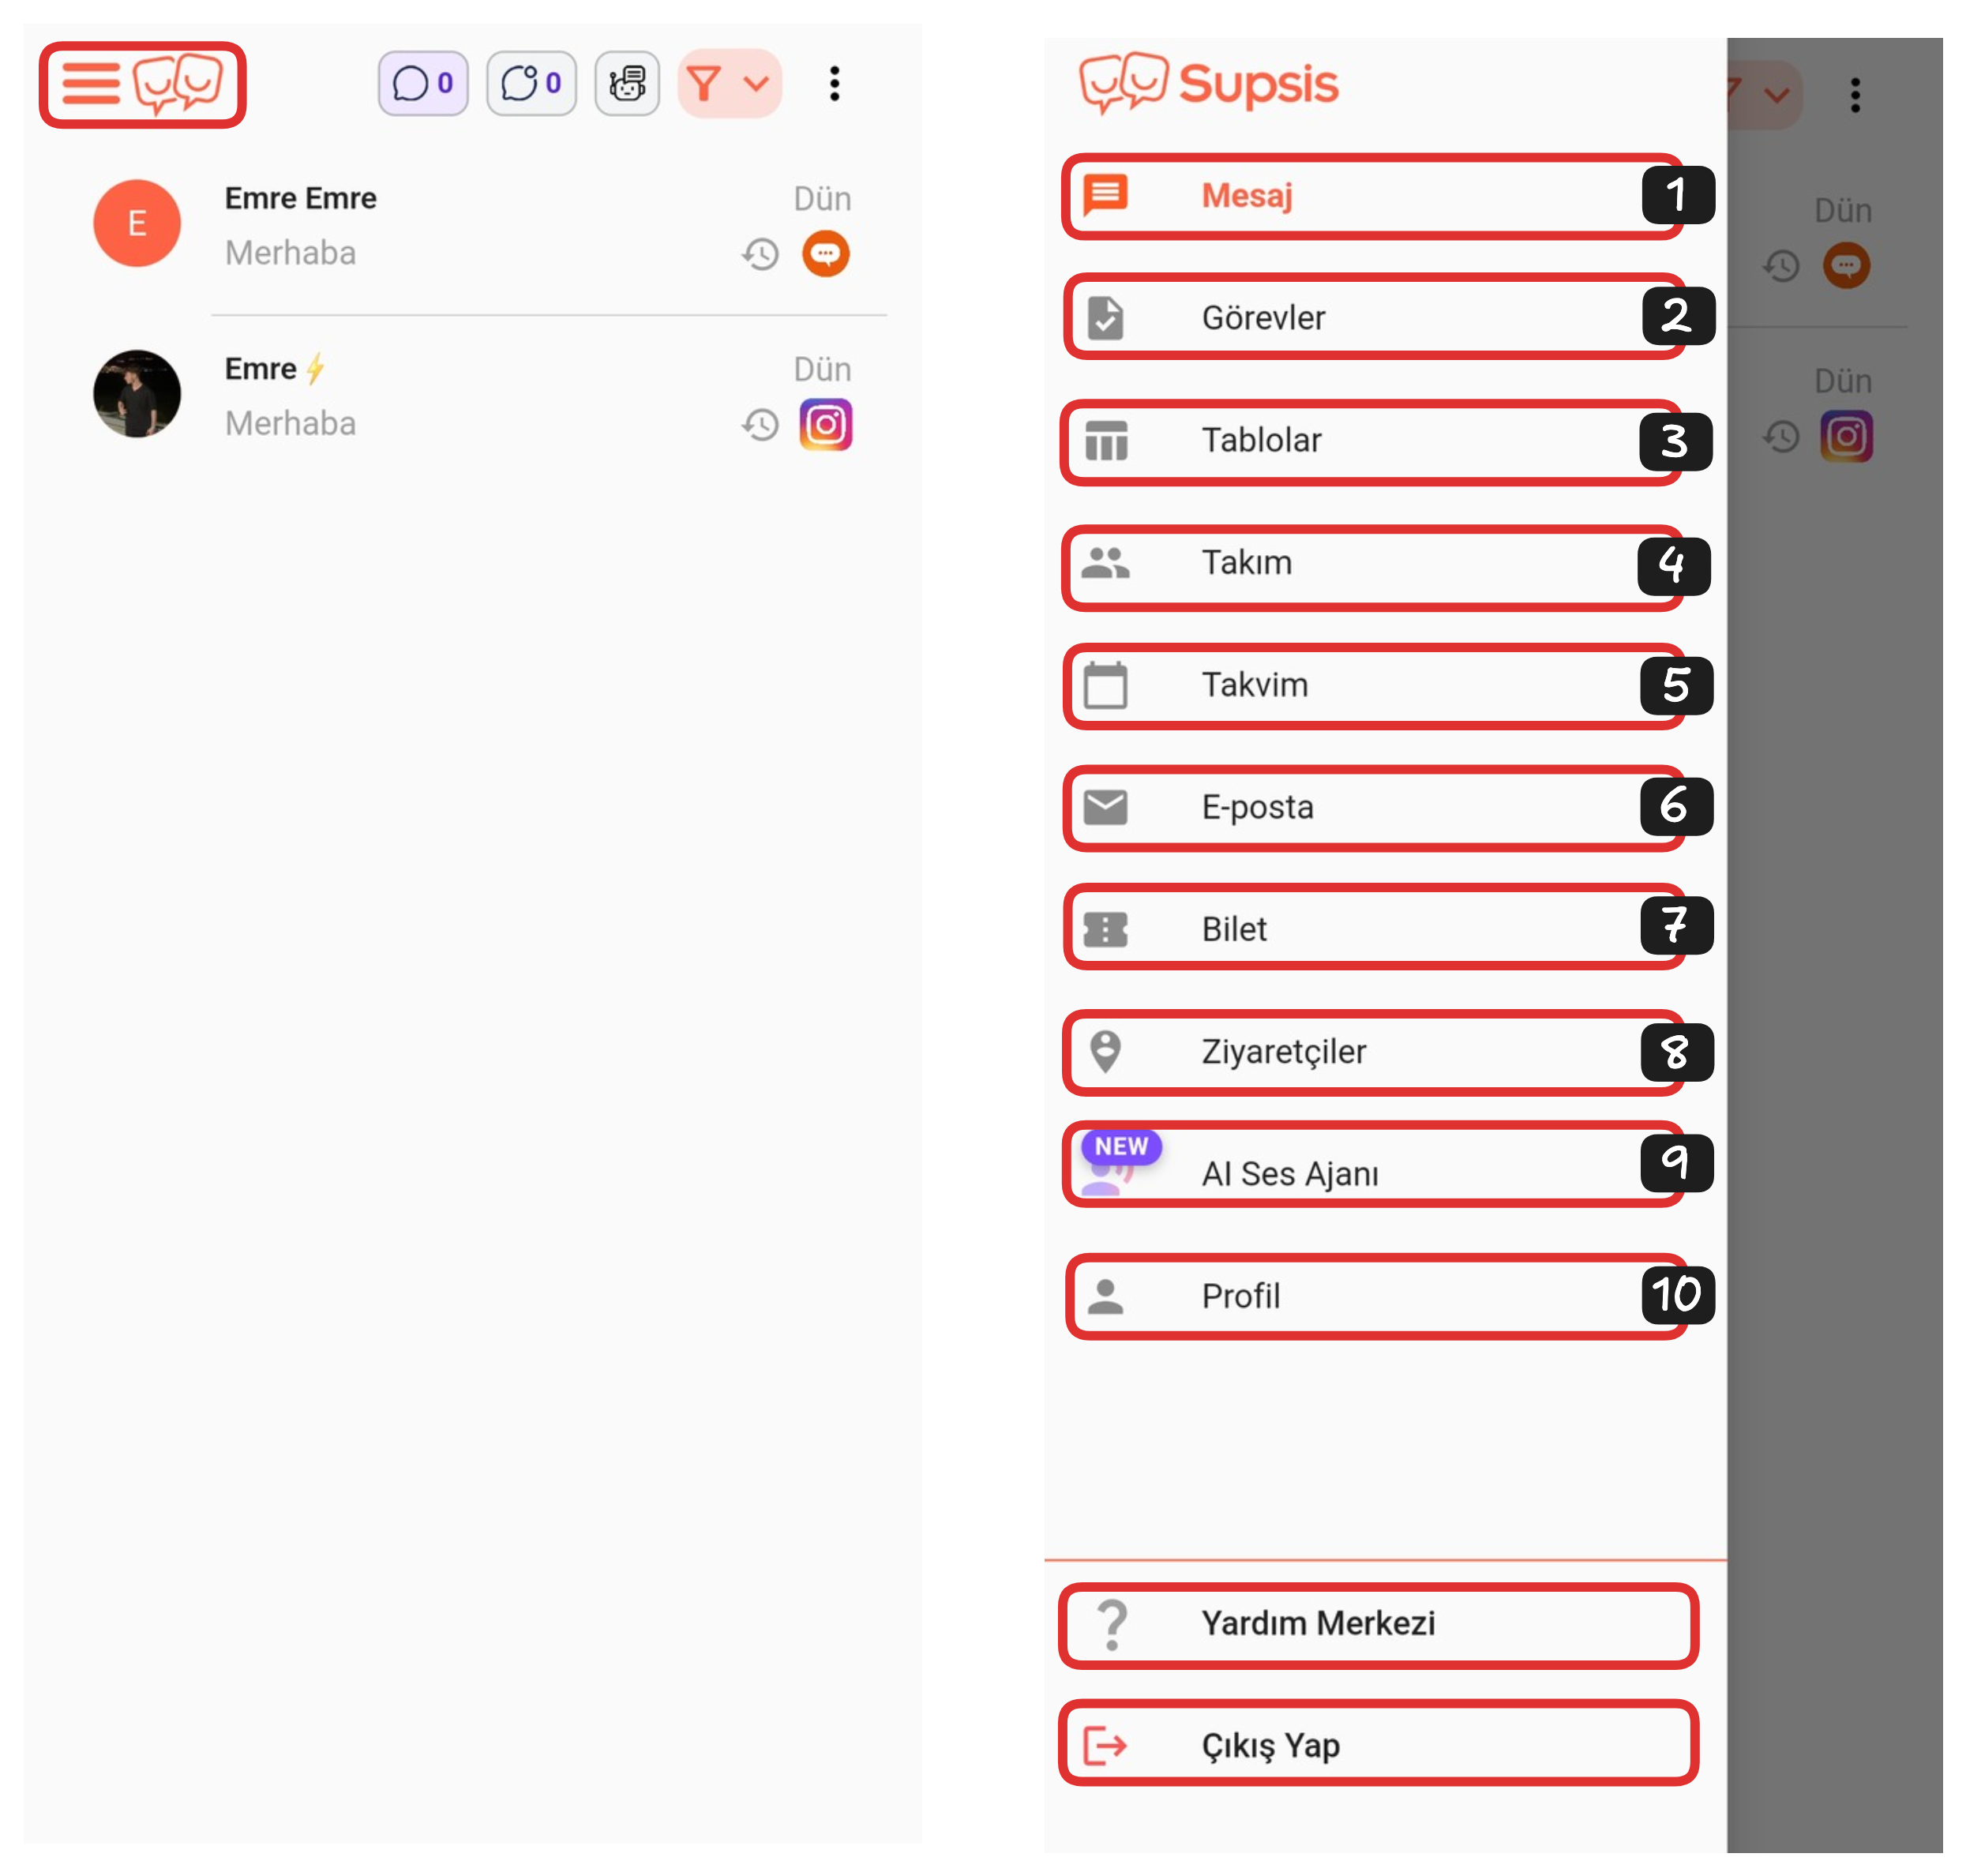
Application Elements:
- Message
- Tasks
- Tables
- Team
- Calendar
- Ticket
- Visitors
- AI Voice Agent
- Profile
7-) Ticket

Ticket Page:
- Completed
- Tickets
- Instagram Tickets
- Supsis Form Tickets
- Incoming Tickets
1-) Completed
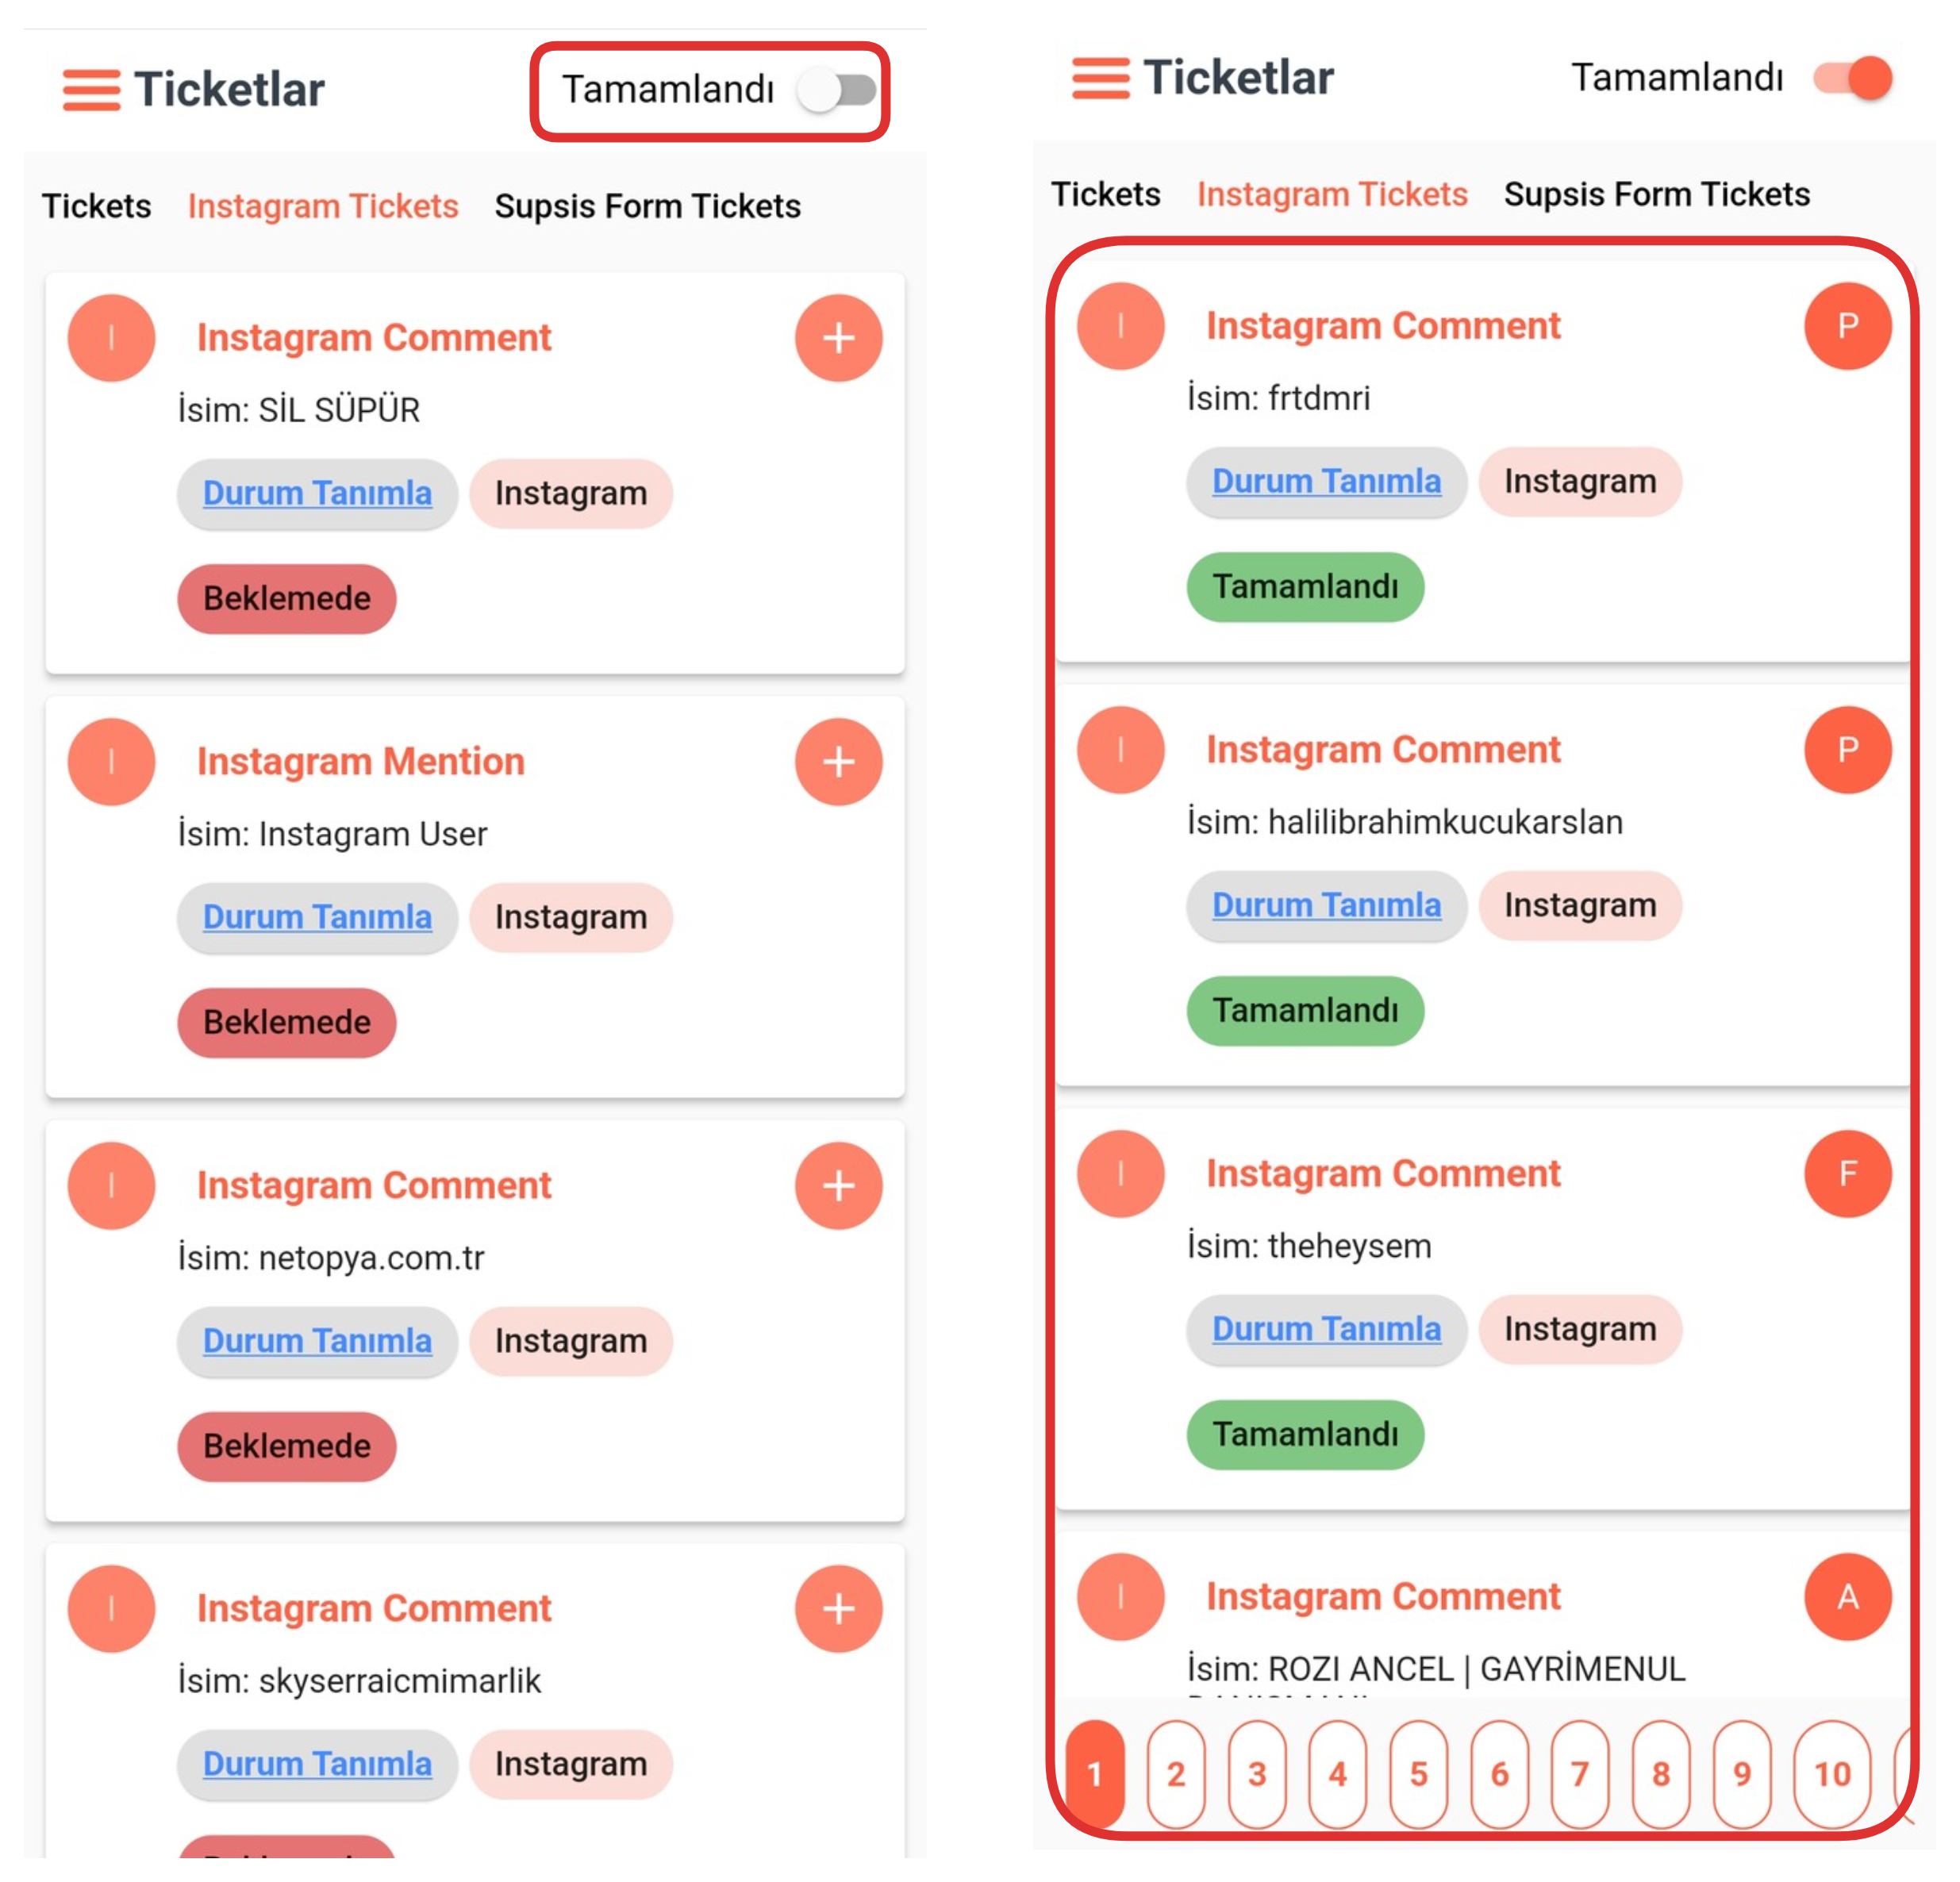
When you activate this section, your previously completed support requests (tickets) are listed. This way you can easily view your past operations and quickly access your previous records. Completed tickets are beneficial for tracking your operation history and using them as reference when needed.
2-) Tickets
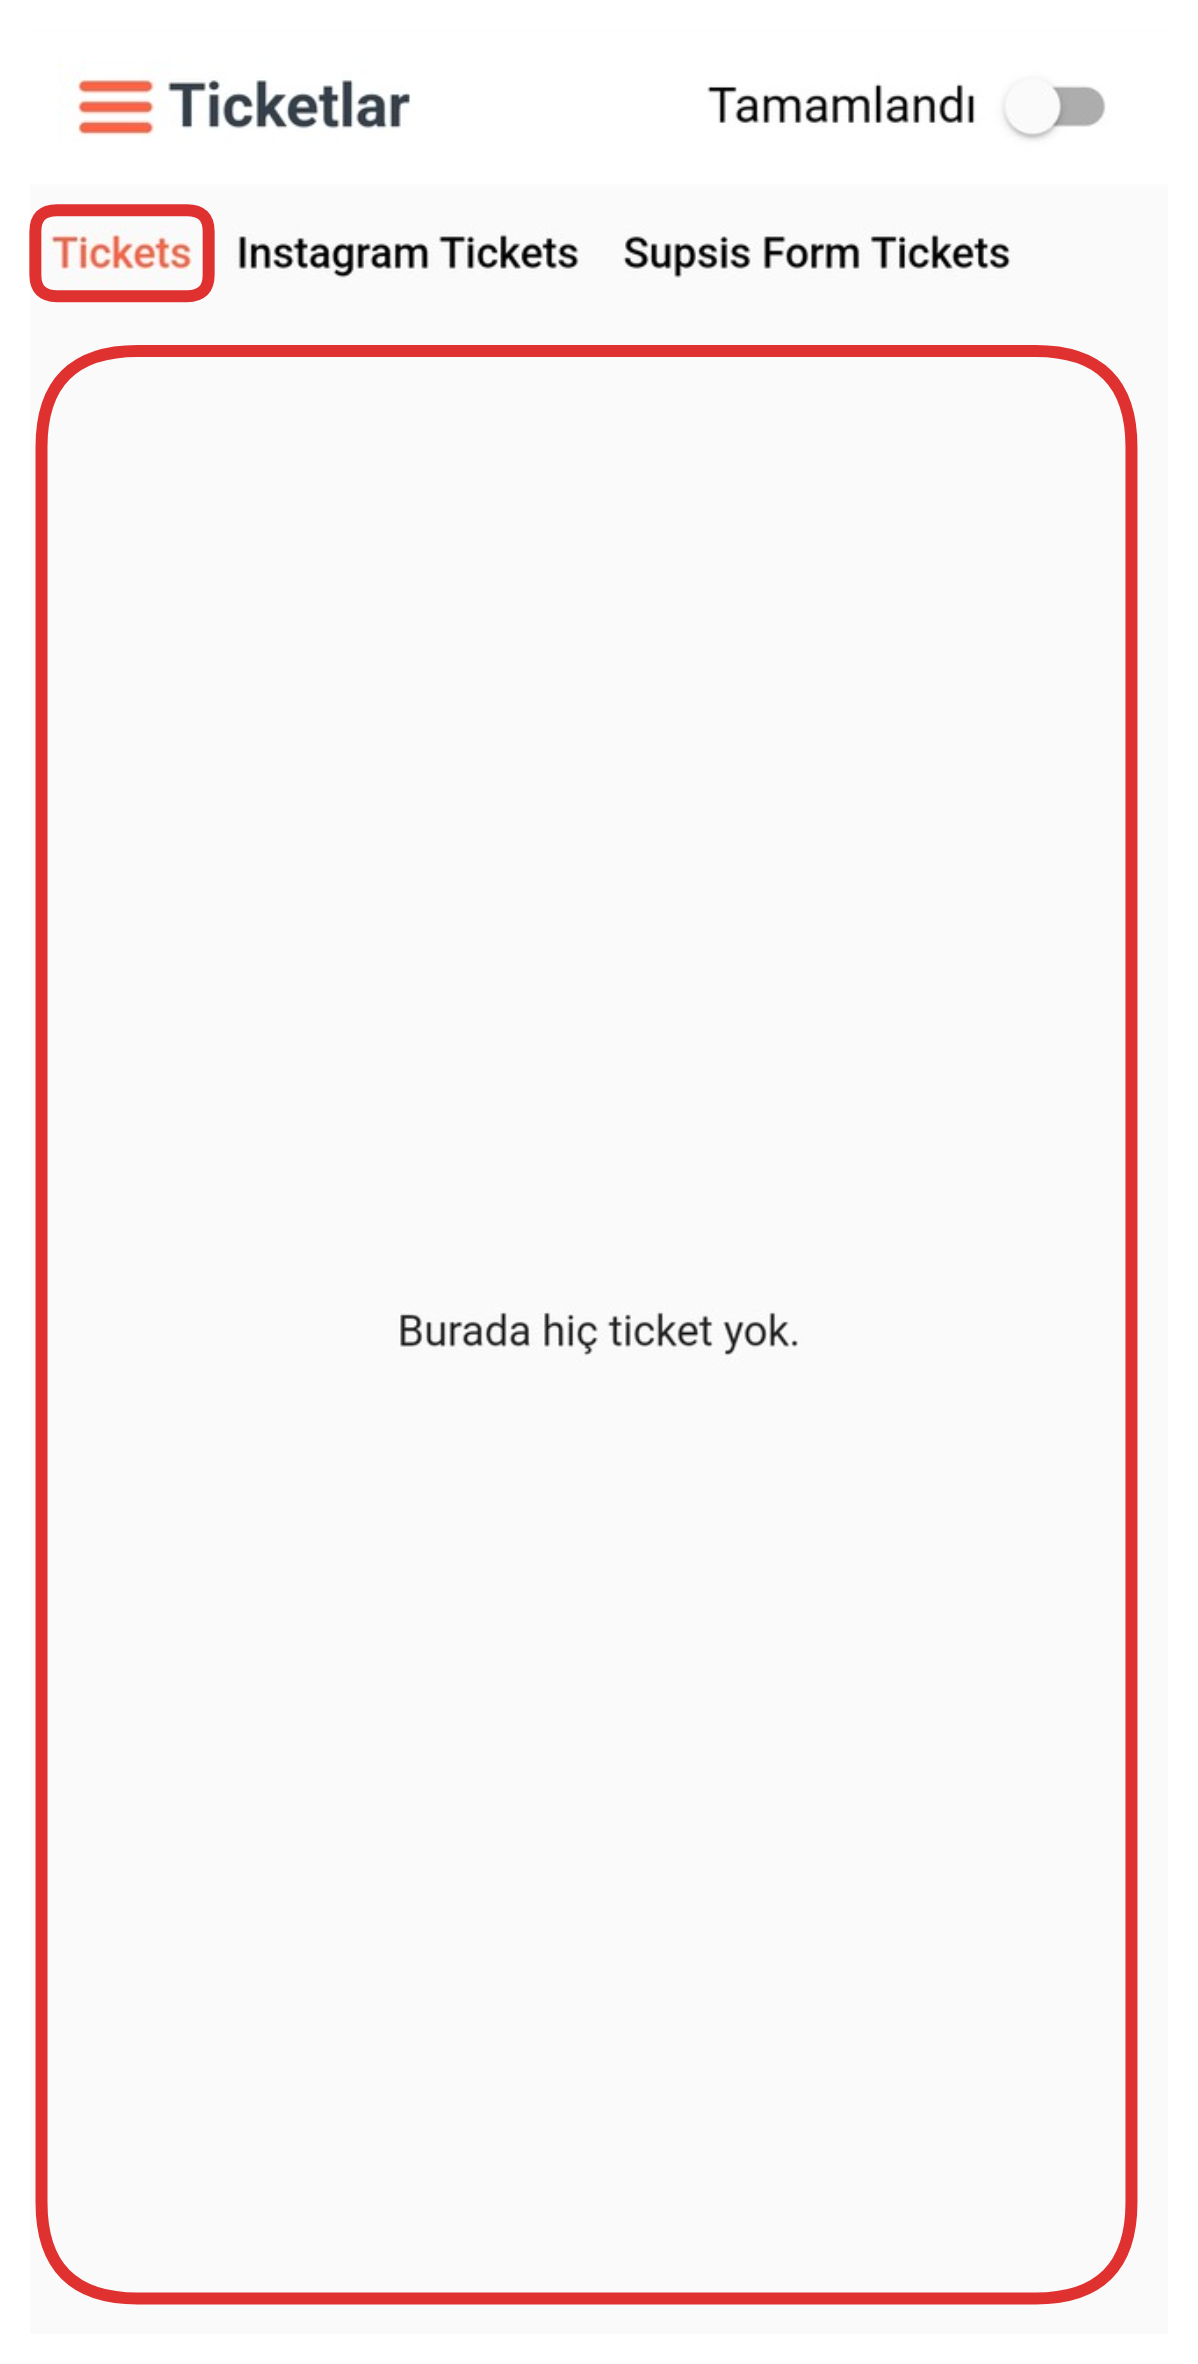
Through this section, you can view all support requests (tickets) coming to you. The system lists incoming requests chronologically and allows you to easily access each ticket. This way, you can track which requests have been submitted and quickly start the necessary operations. All incoming tickets are centrally collected in this area.
3-) Instagram Tickets
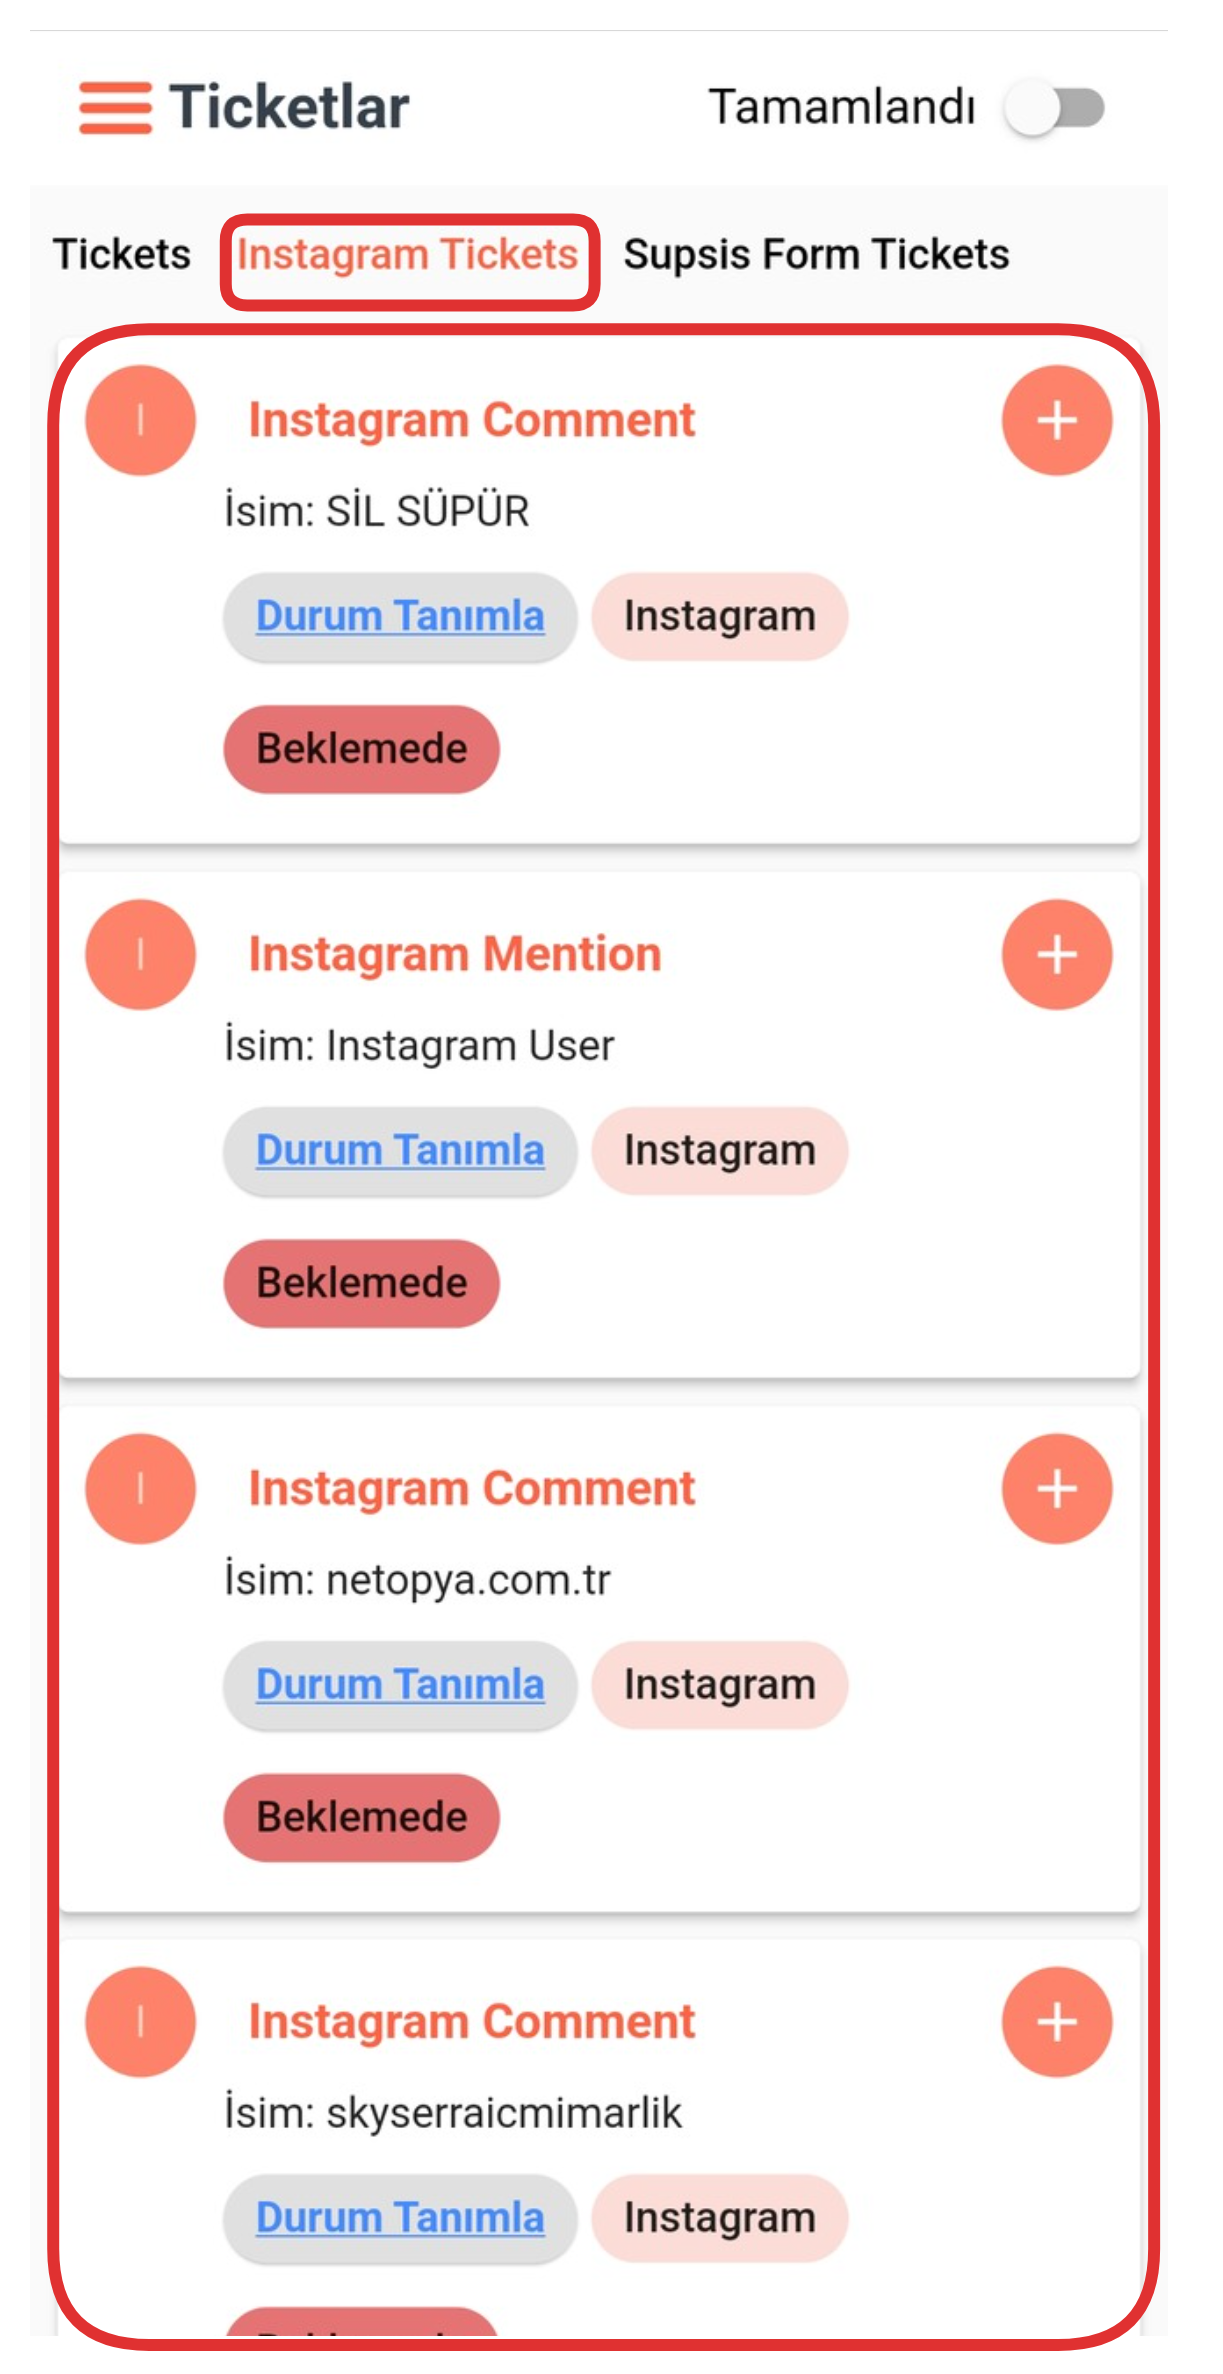
In this section, you can view only your support requests (tickets) coming through Instagram. The system separates requests from different platforms and collects Instagram-sourced tickets under a separate heading. This way, you can manage user notifications coming through social media in a more organized and focused manner.
4-) Supsis Form Tickets
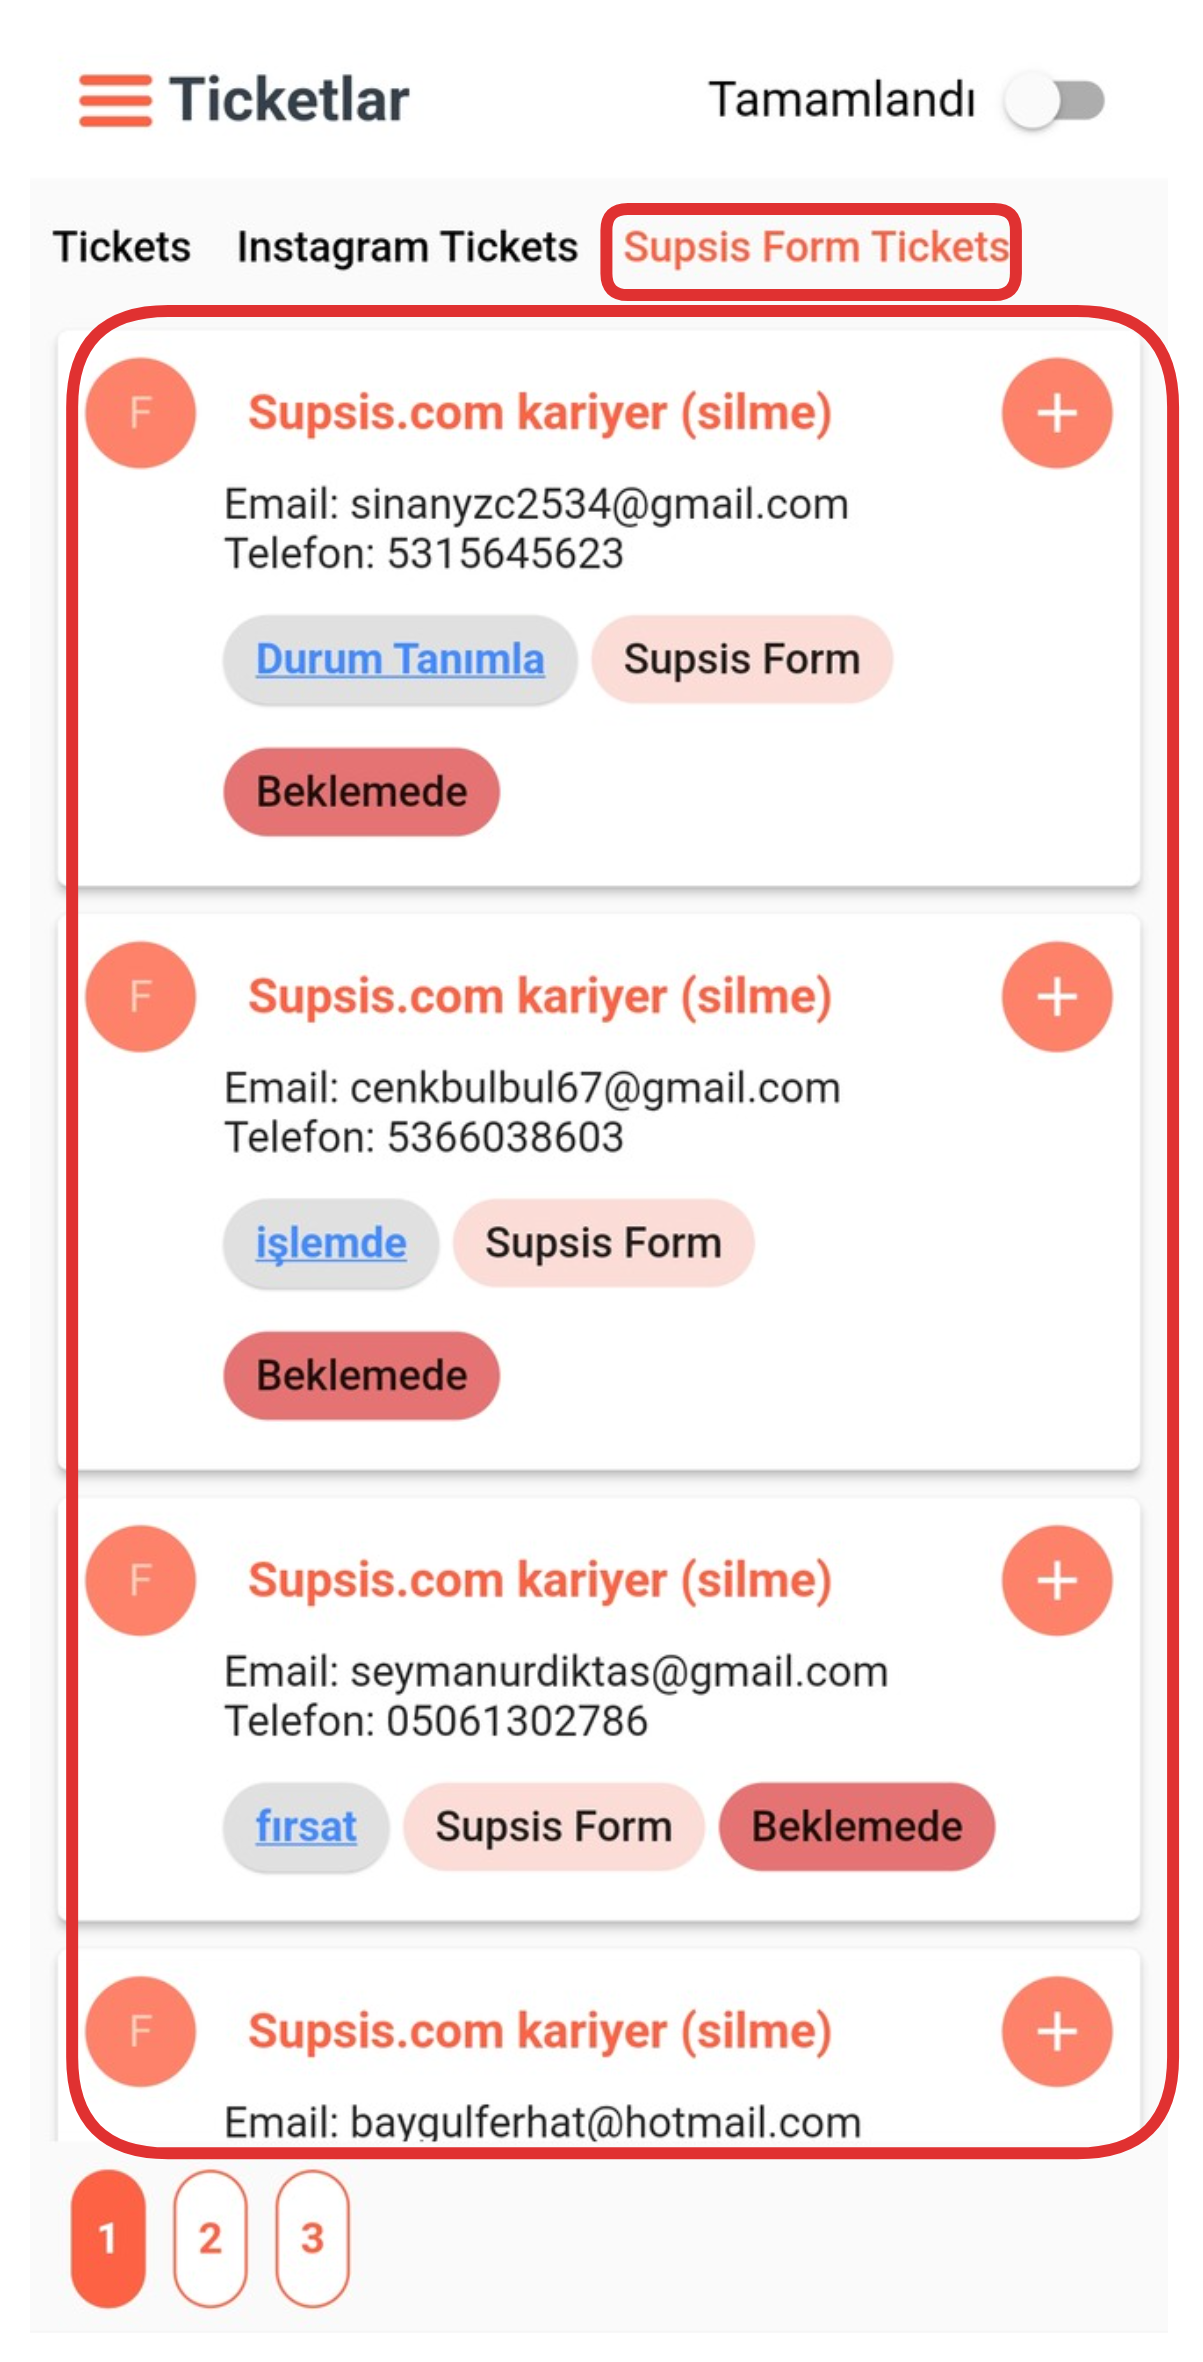
In this section, you can view only support requests (tickets) submitted through Supsis Form. Applications coming through Supsis Form are classified separately by the system and listed in this area. This way, you can more easily track feedback and requests made through forms and quickly start related operations.
5-) Incoming Tickets

Ticket Elements:
- Ticket
- Assign Representative
- Define Status
- Source Platform
- Status
1-) Ticket
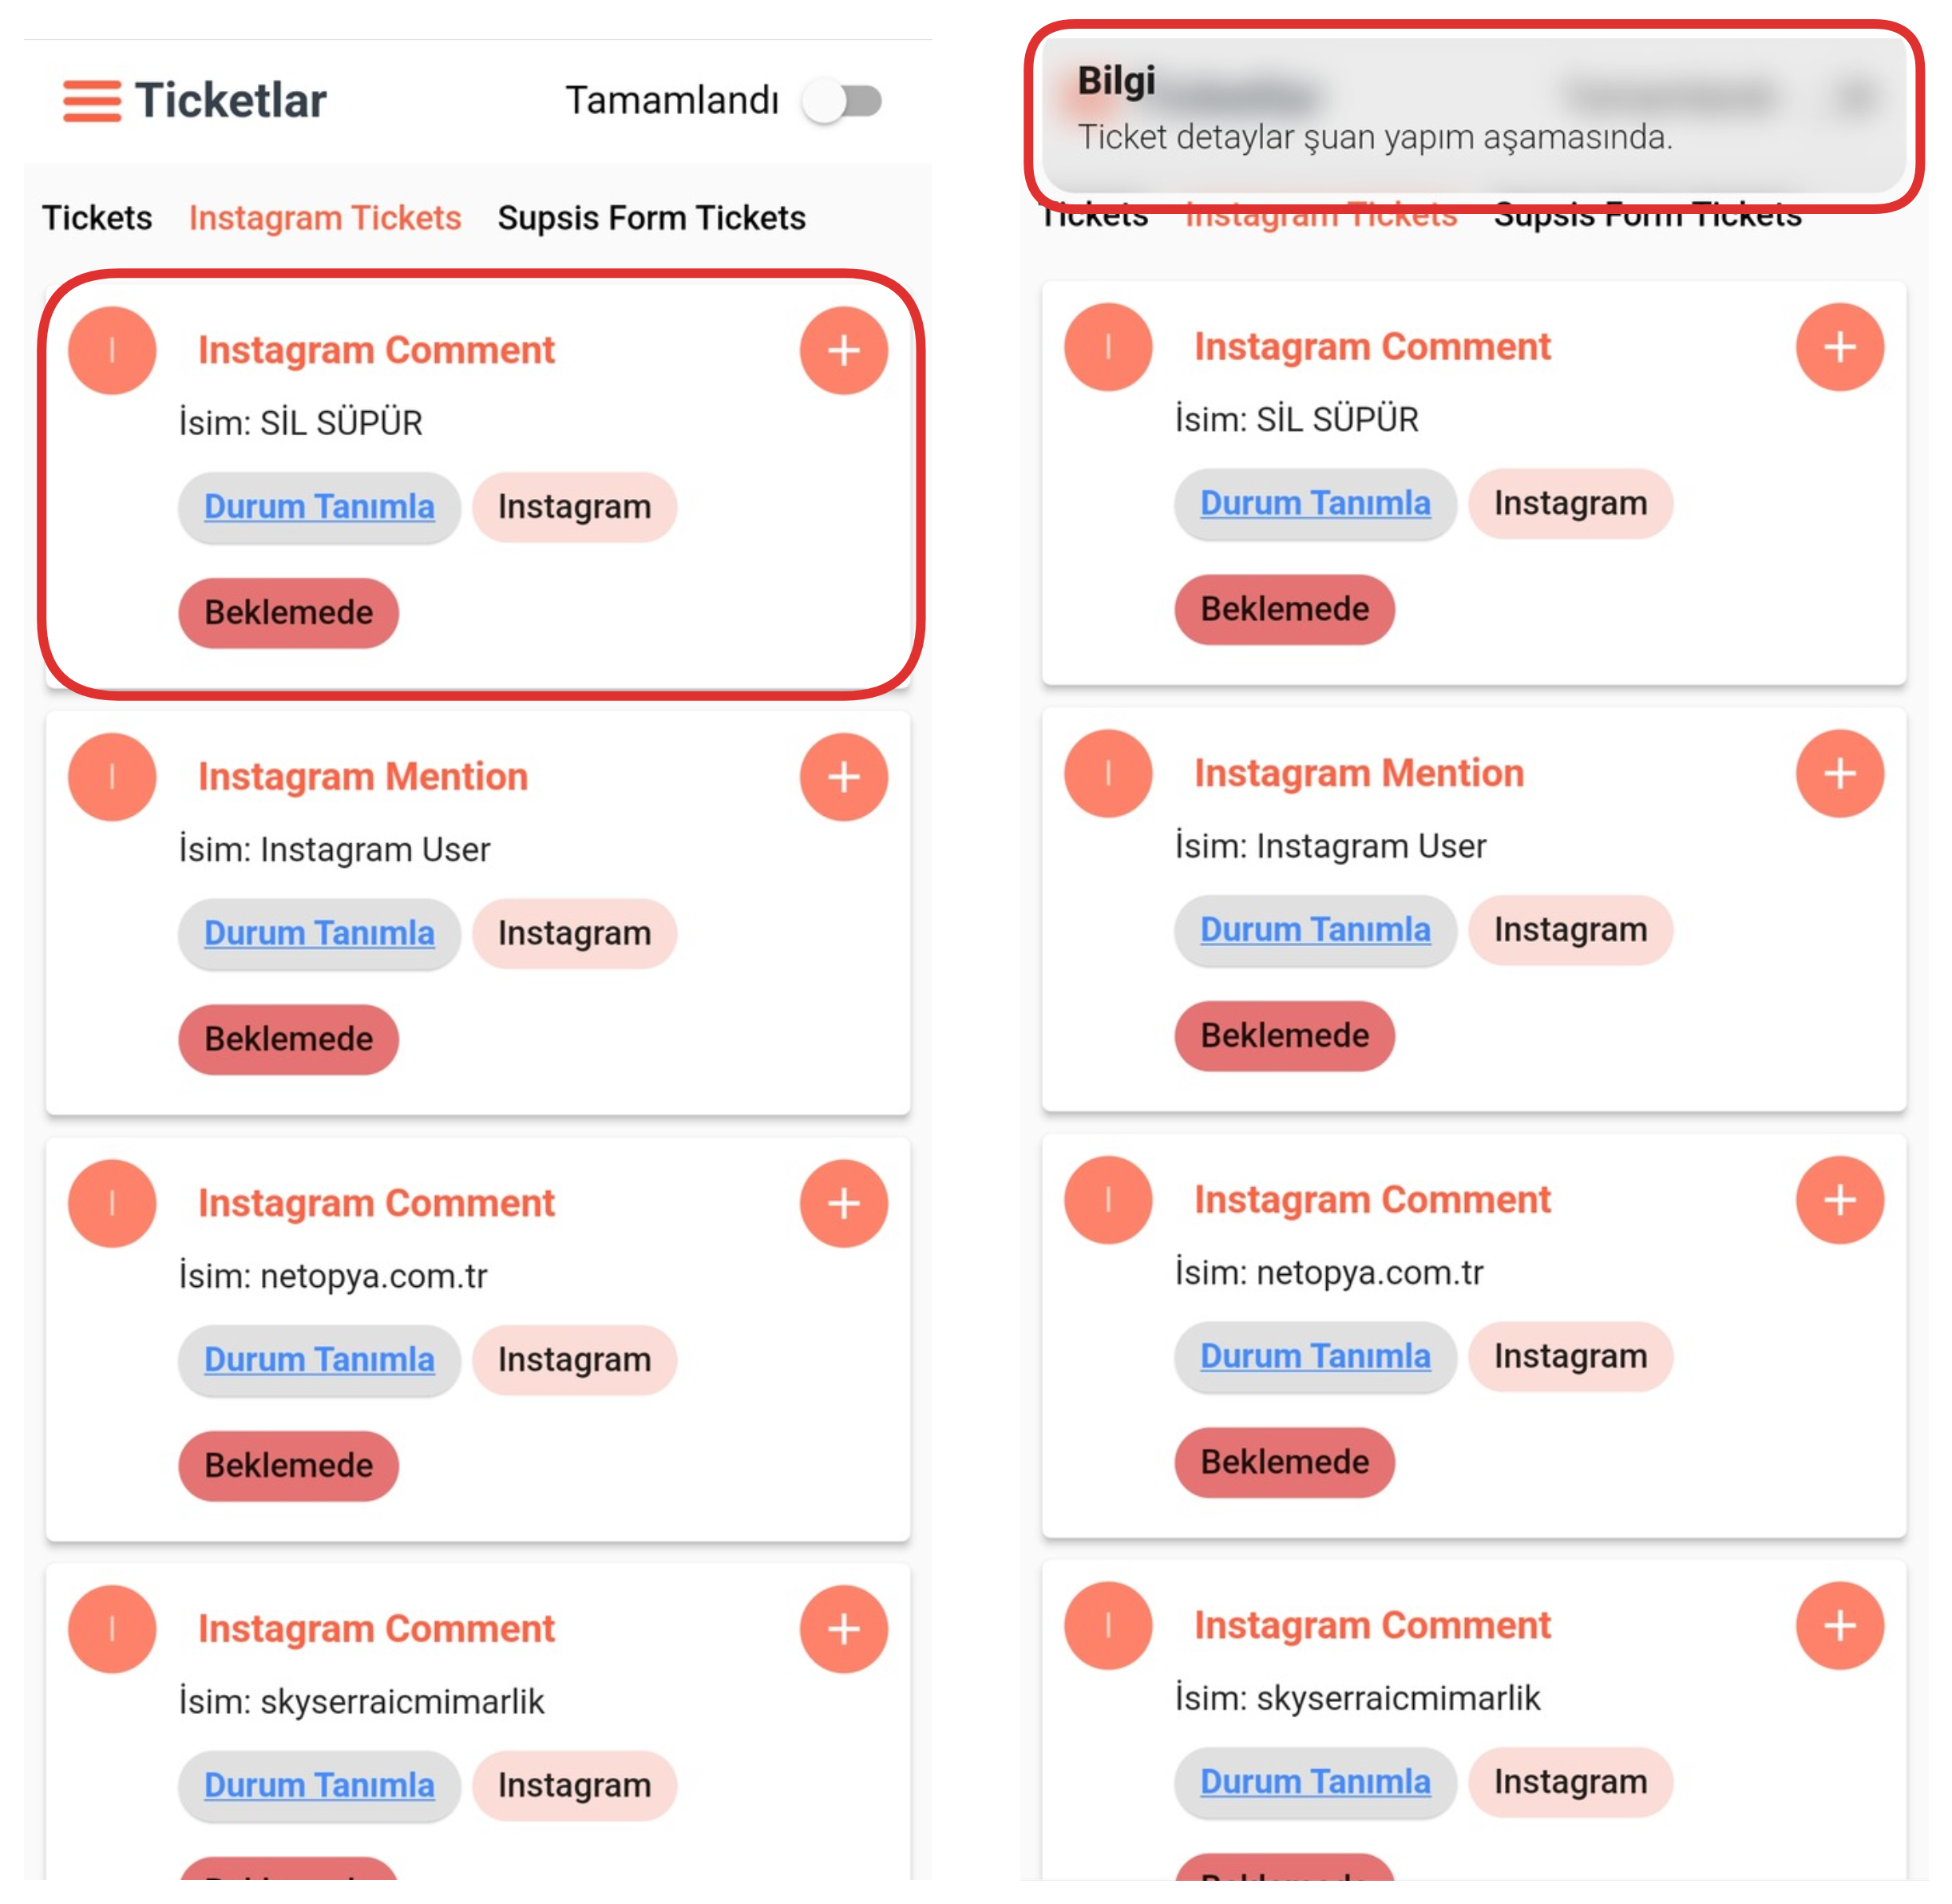
If you click on a ticket to view its details, a notification titled "Information" appears. This notification contains the expression "Ticket Details are currently under development". This message indicates that the relevant detail viewing feature is still in the development process. It also shows that our mobile application is constantly updated and new features are regularly added.
2-) Assign Representative
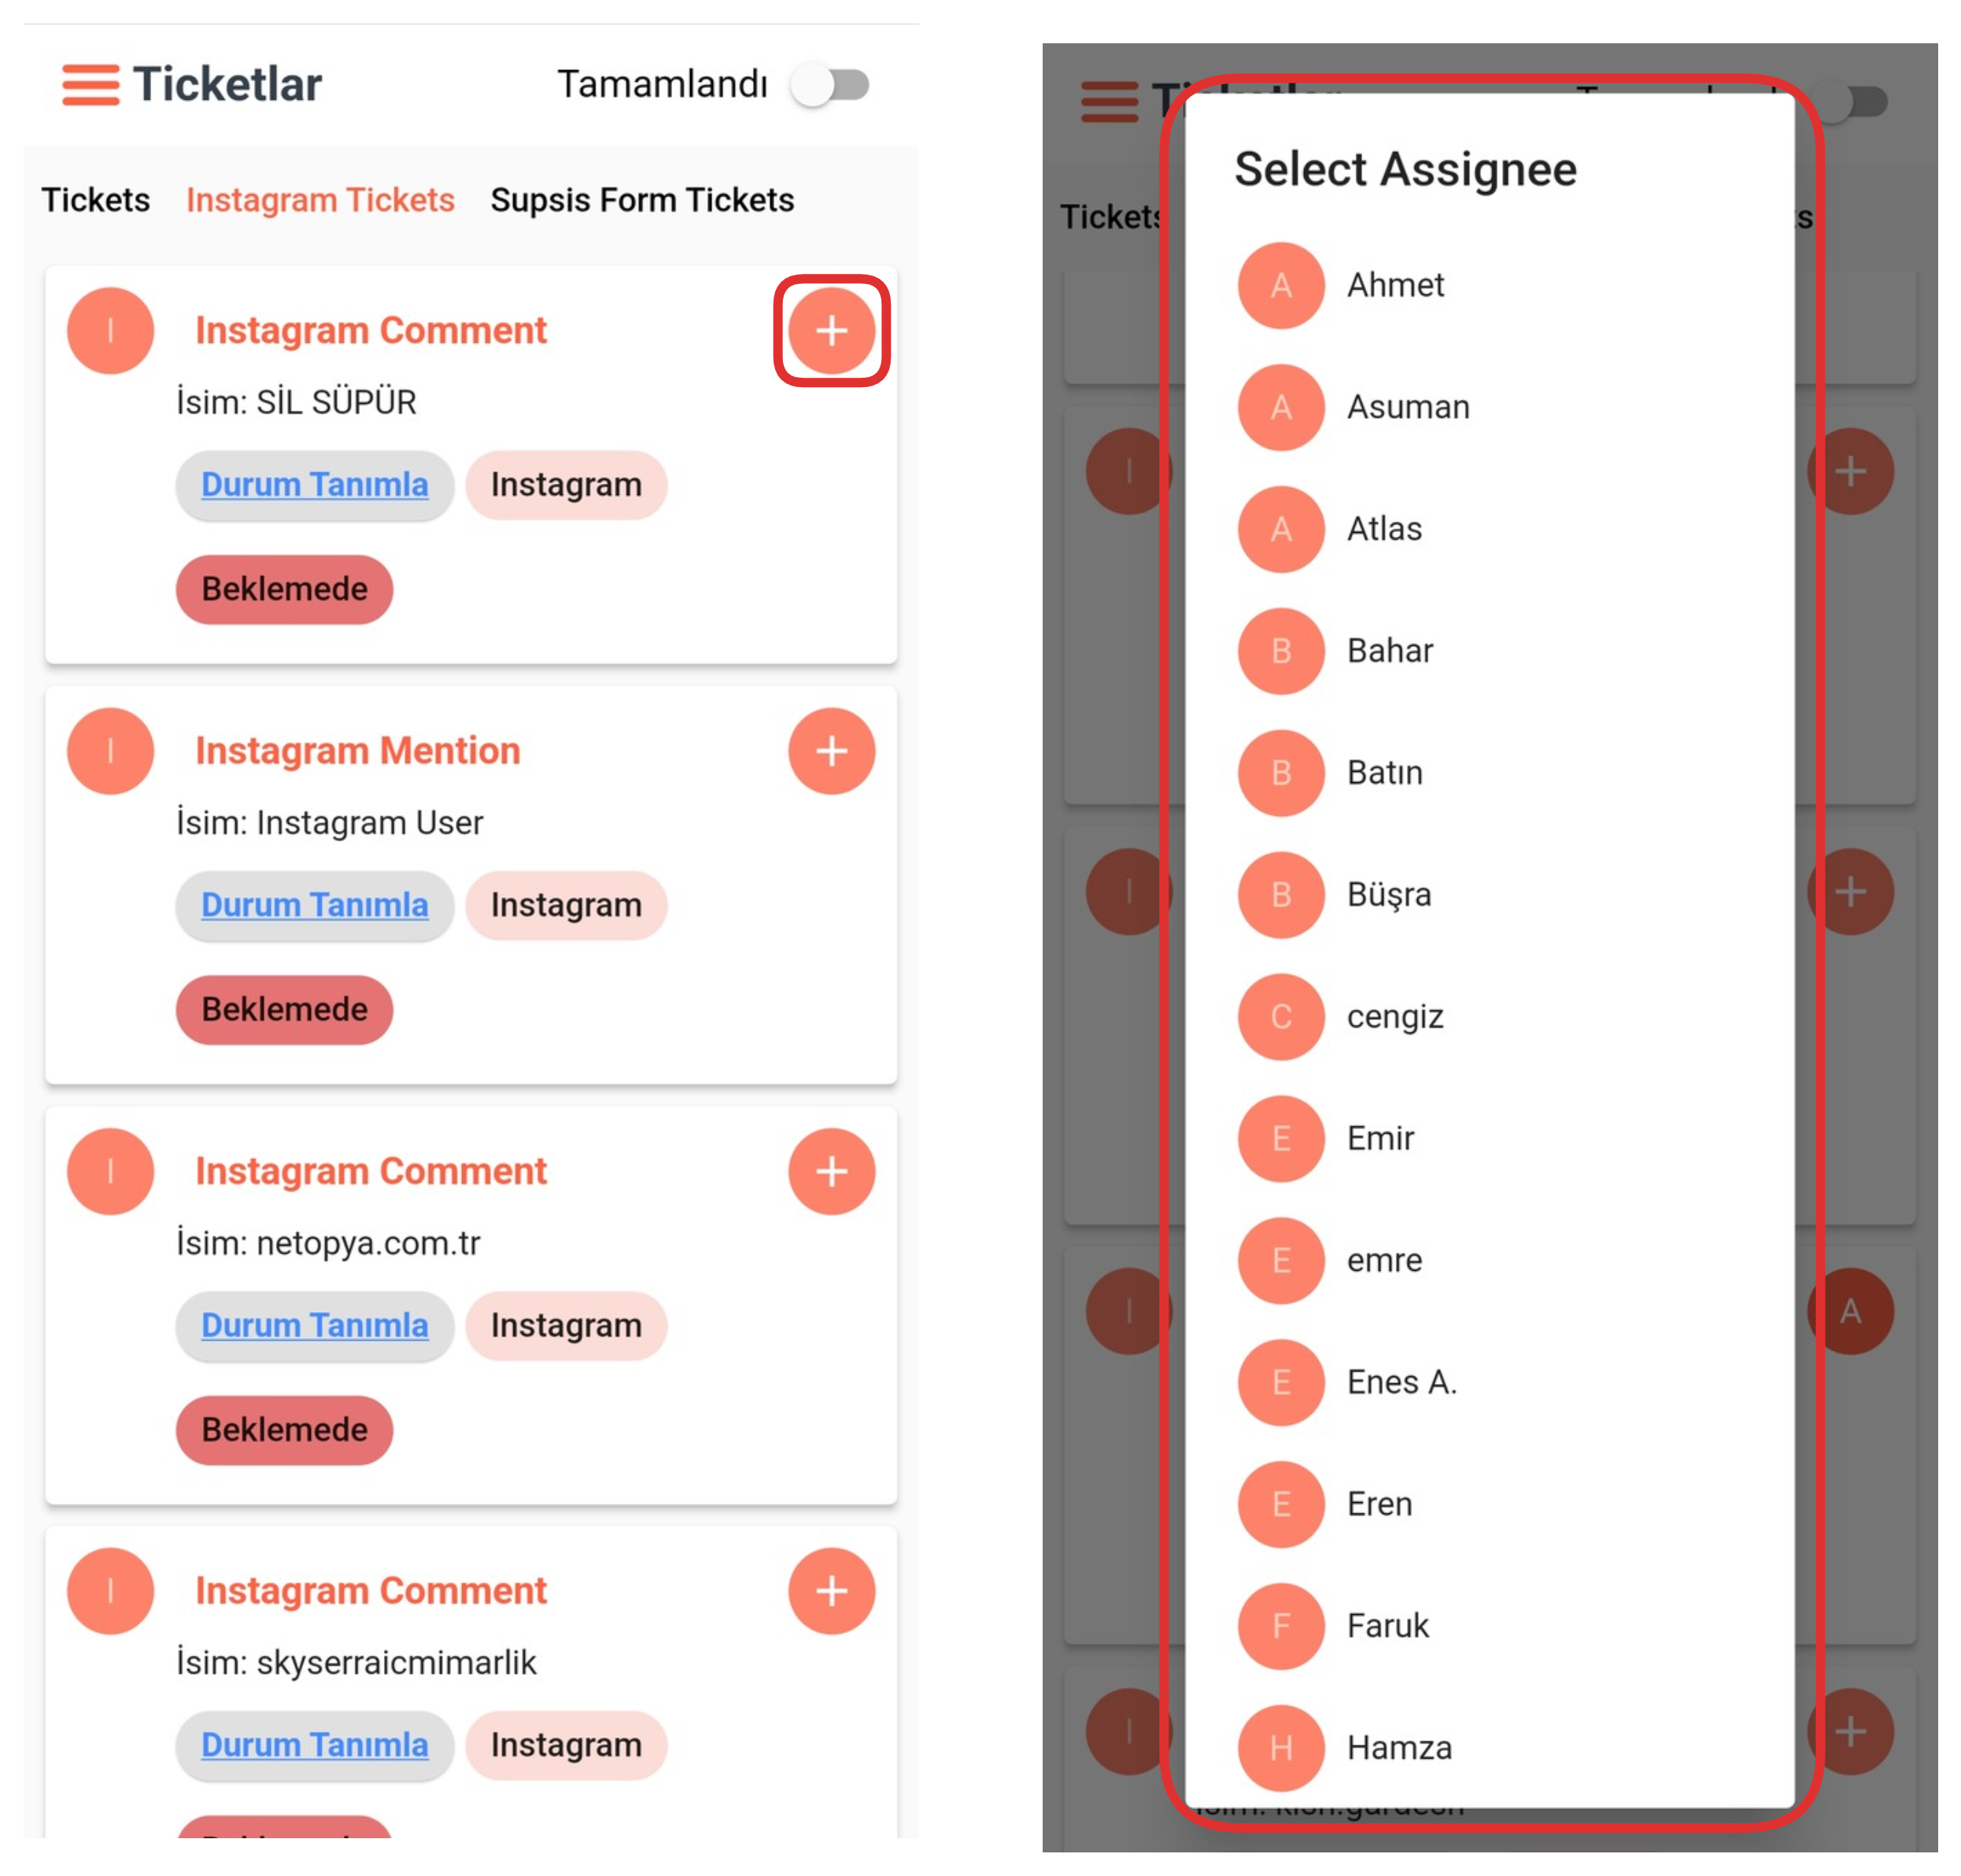
From this section, you can assign a representative to your ticket. After clicking the "+" button, you just need to select the representative you want to handle the relevant ticket from the opened list. This operation ensures that the ticket is followed by a specific person and helps the support process progress more regularly.
3-) Define Status
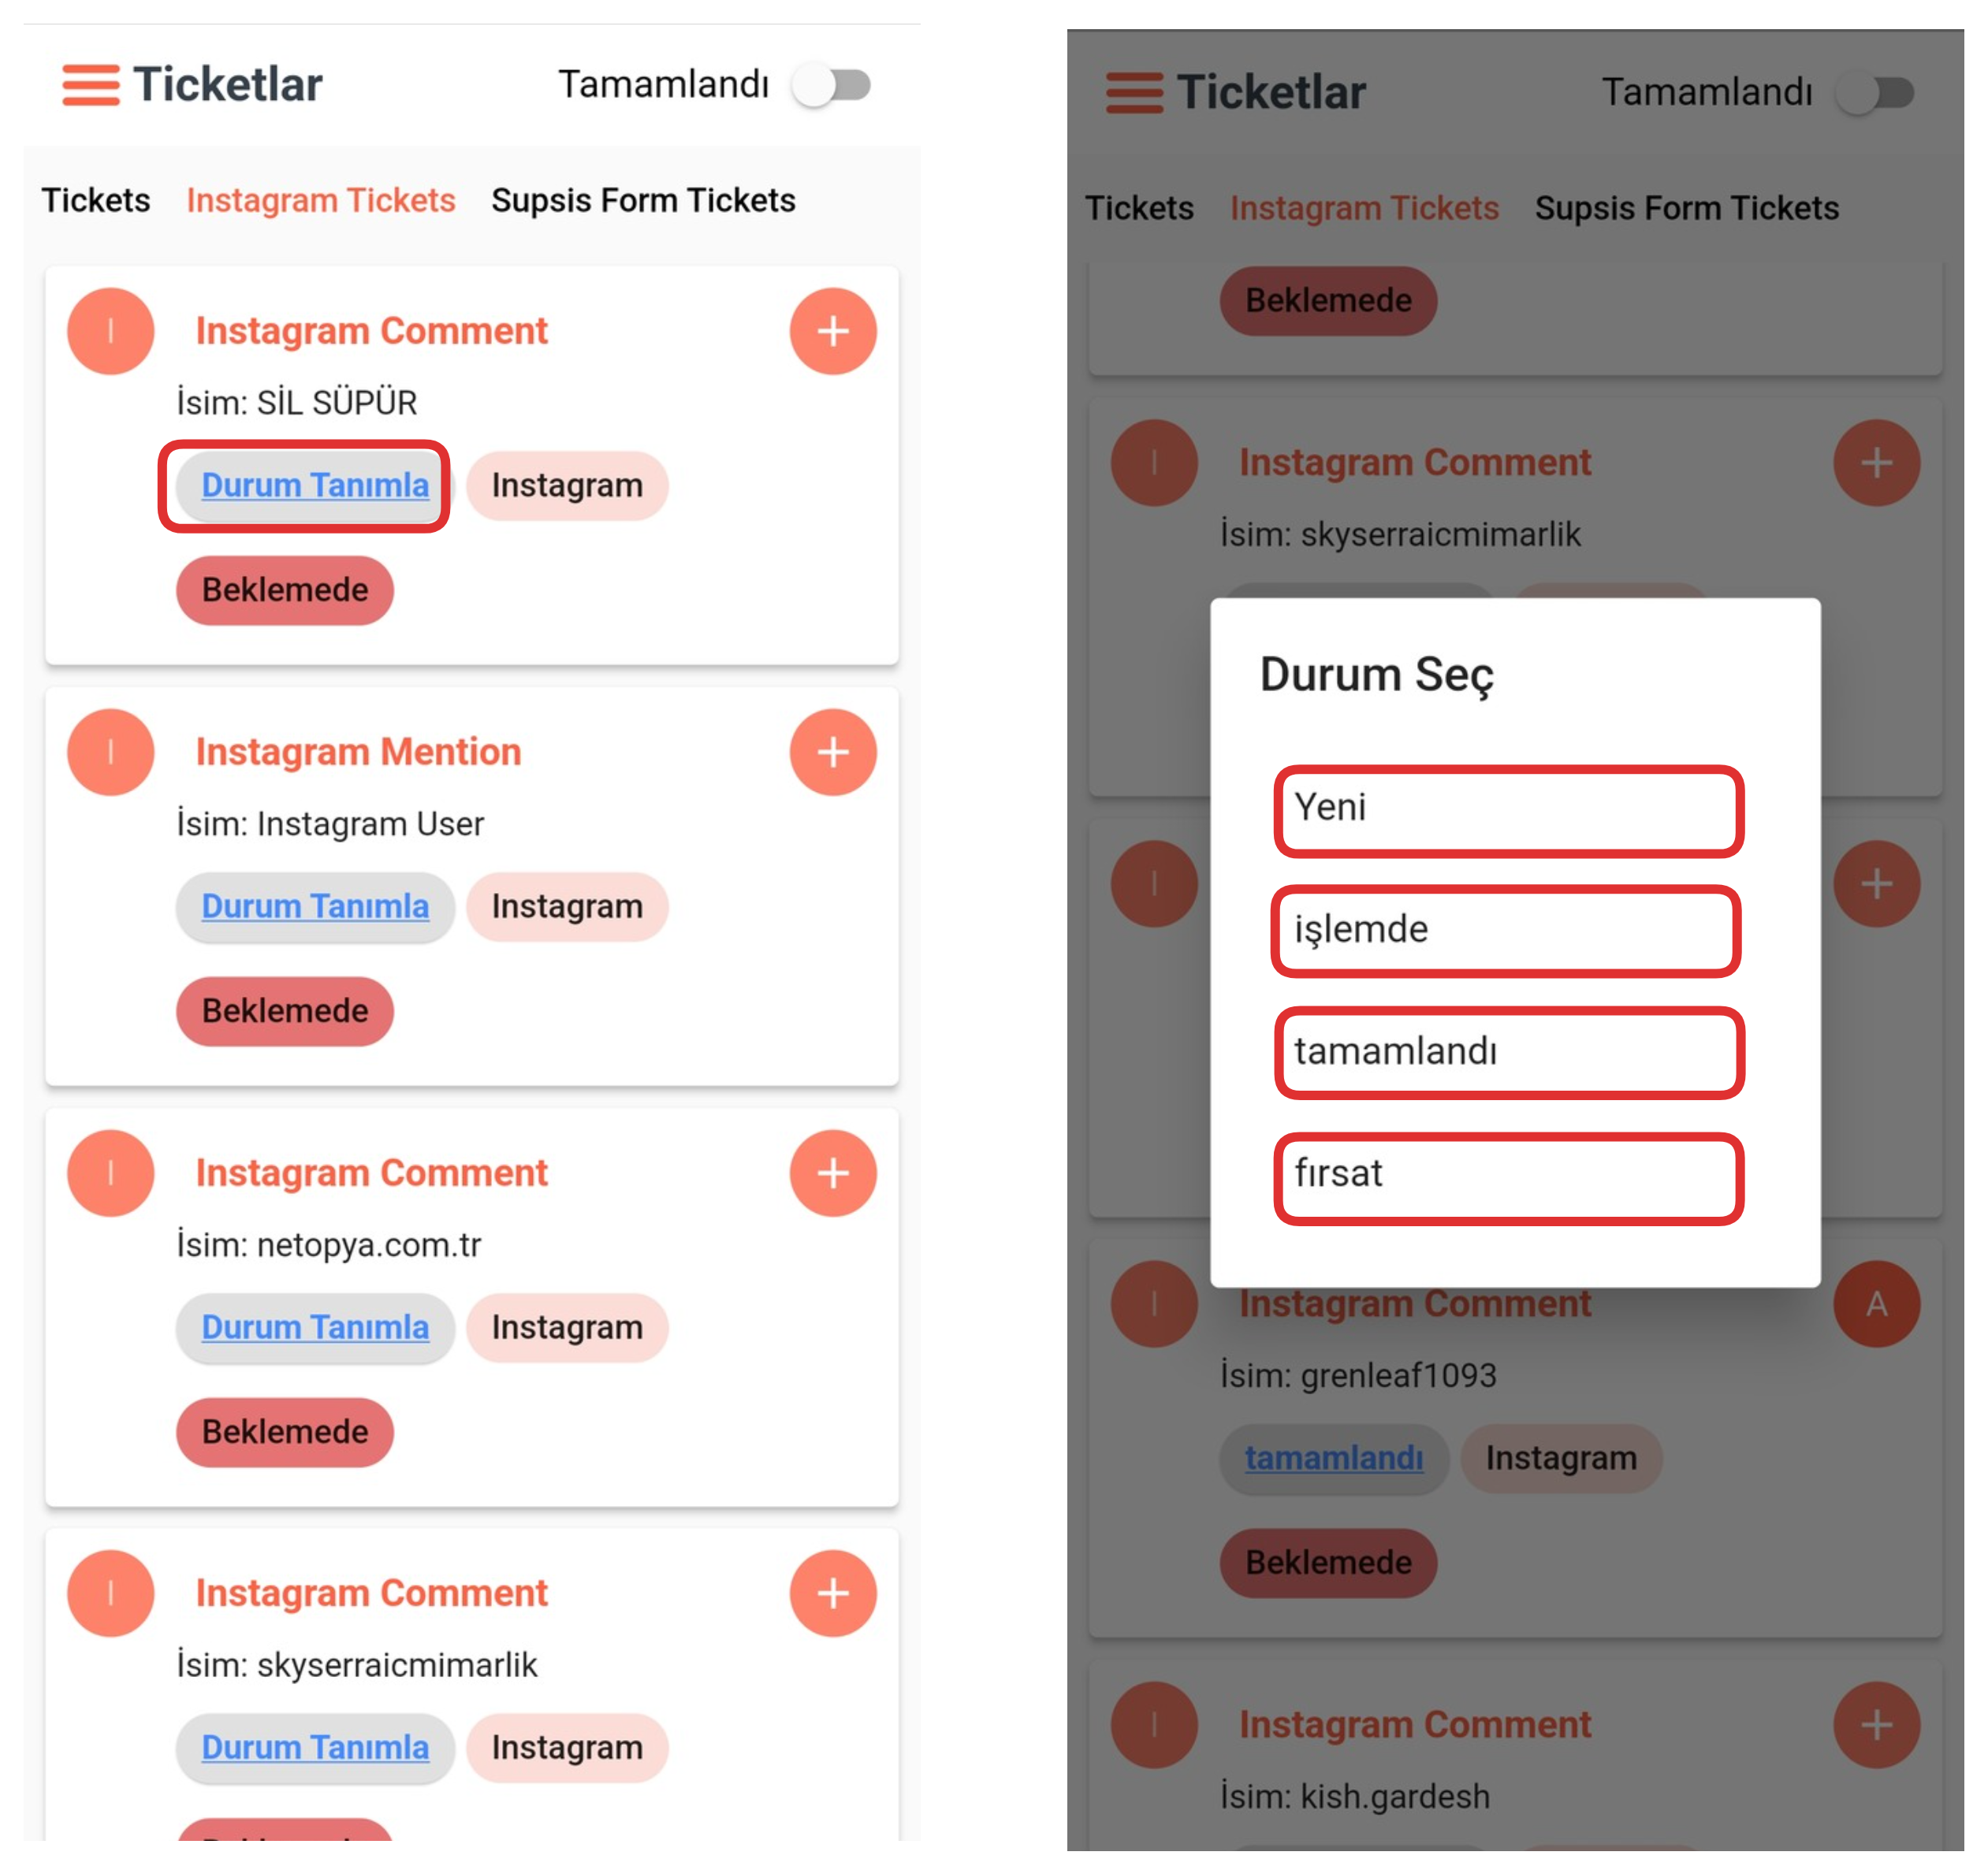
From this section, you can define a ticket status. Among the definable statuses are "New", "In Progress", "Completed" and "Opportunity" options. This way, you can determine which stage each ticket is in and perform process tracking more efficiently. Status updates facilitate intra-team coordination and workflow management.
4-) Source Platform
This section contains information about which platform or method the ticket was submitted from. The source of the ticket – for example Instagram, Supsis Form or other communication channels – is clearly stated in this area. This way, you can easily identify which channel the requests come from and manage the process accordingly.
5-) Status
In this section, the current status of your ticket is displayed. Statuses such as "Pending", "Completed" are located here. This information allows you to understand the position of the ticket in the processing process and easily track which requests are still in progress.