Application Elements
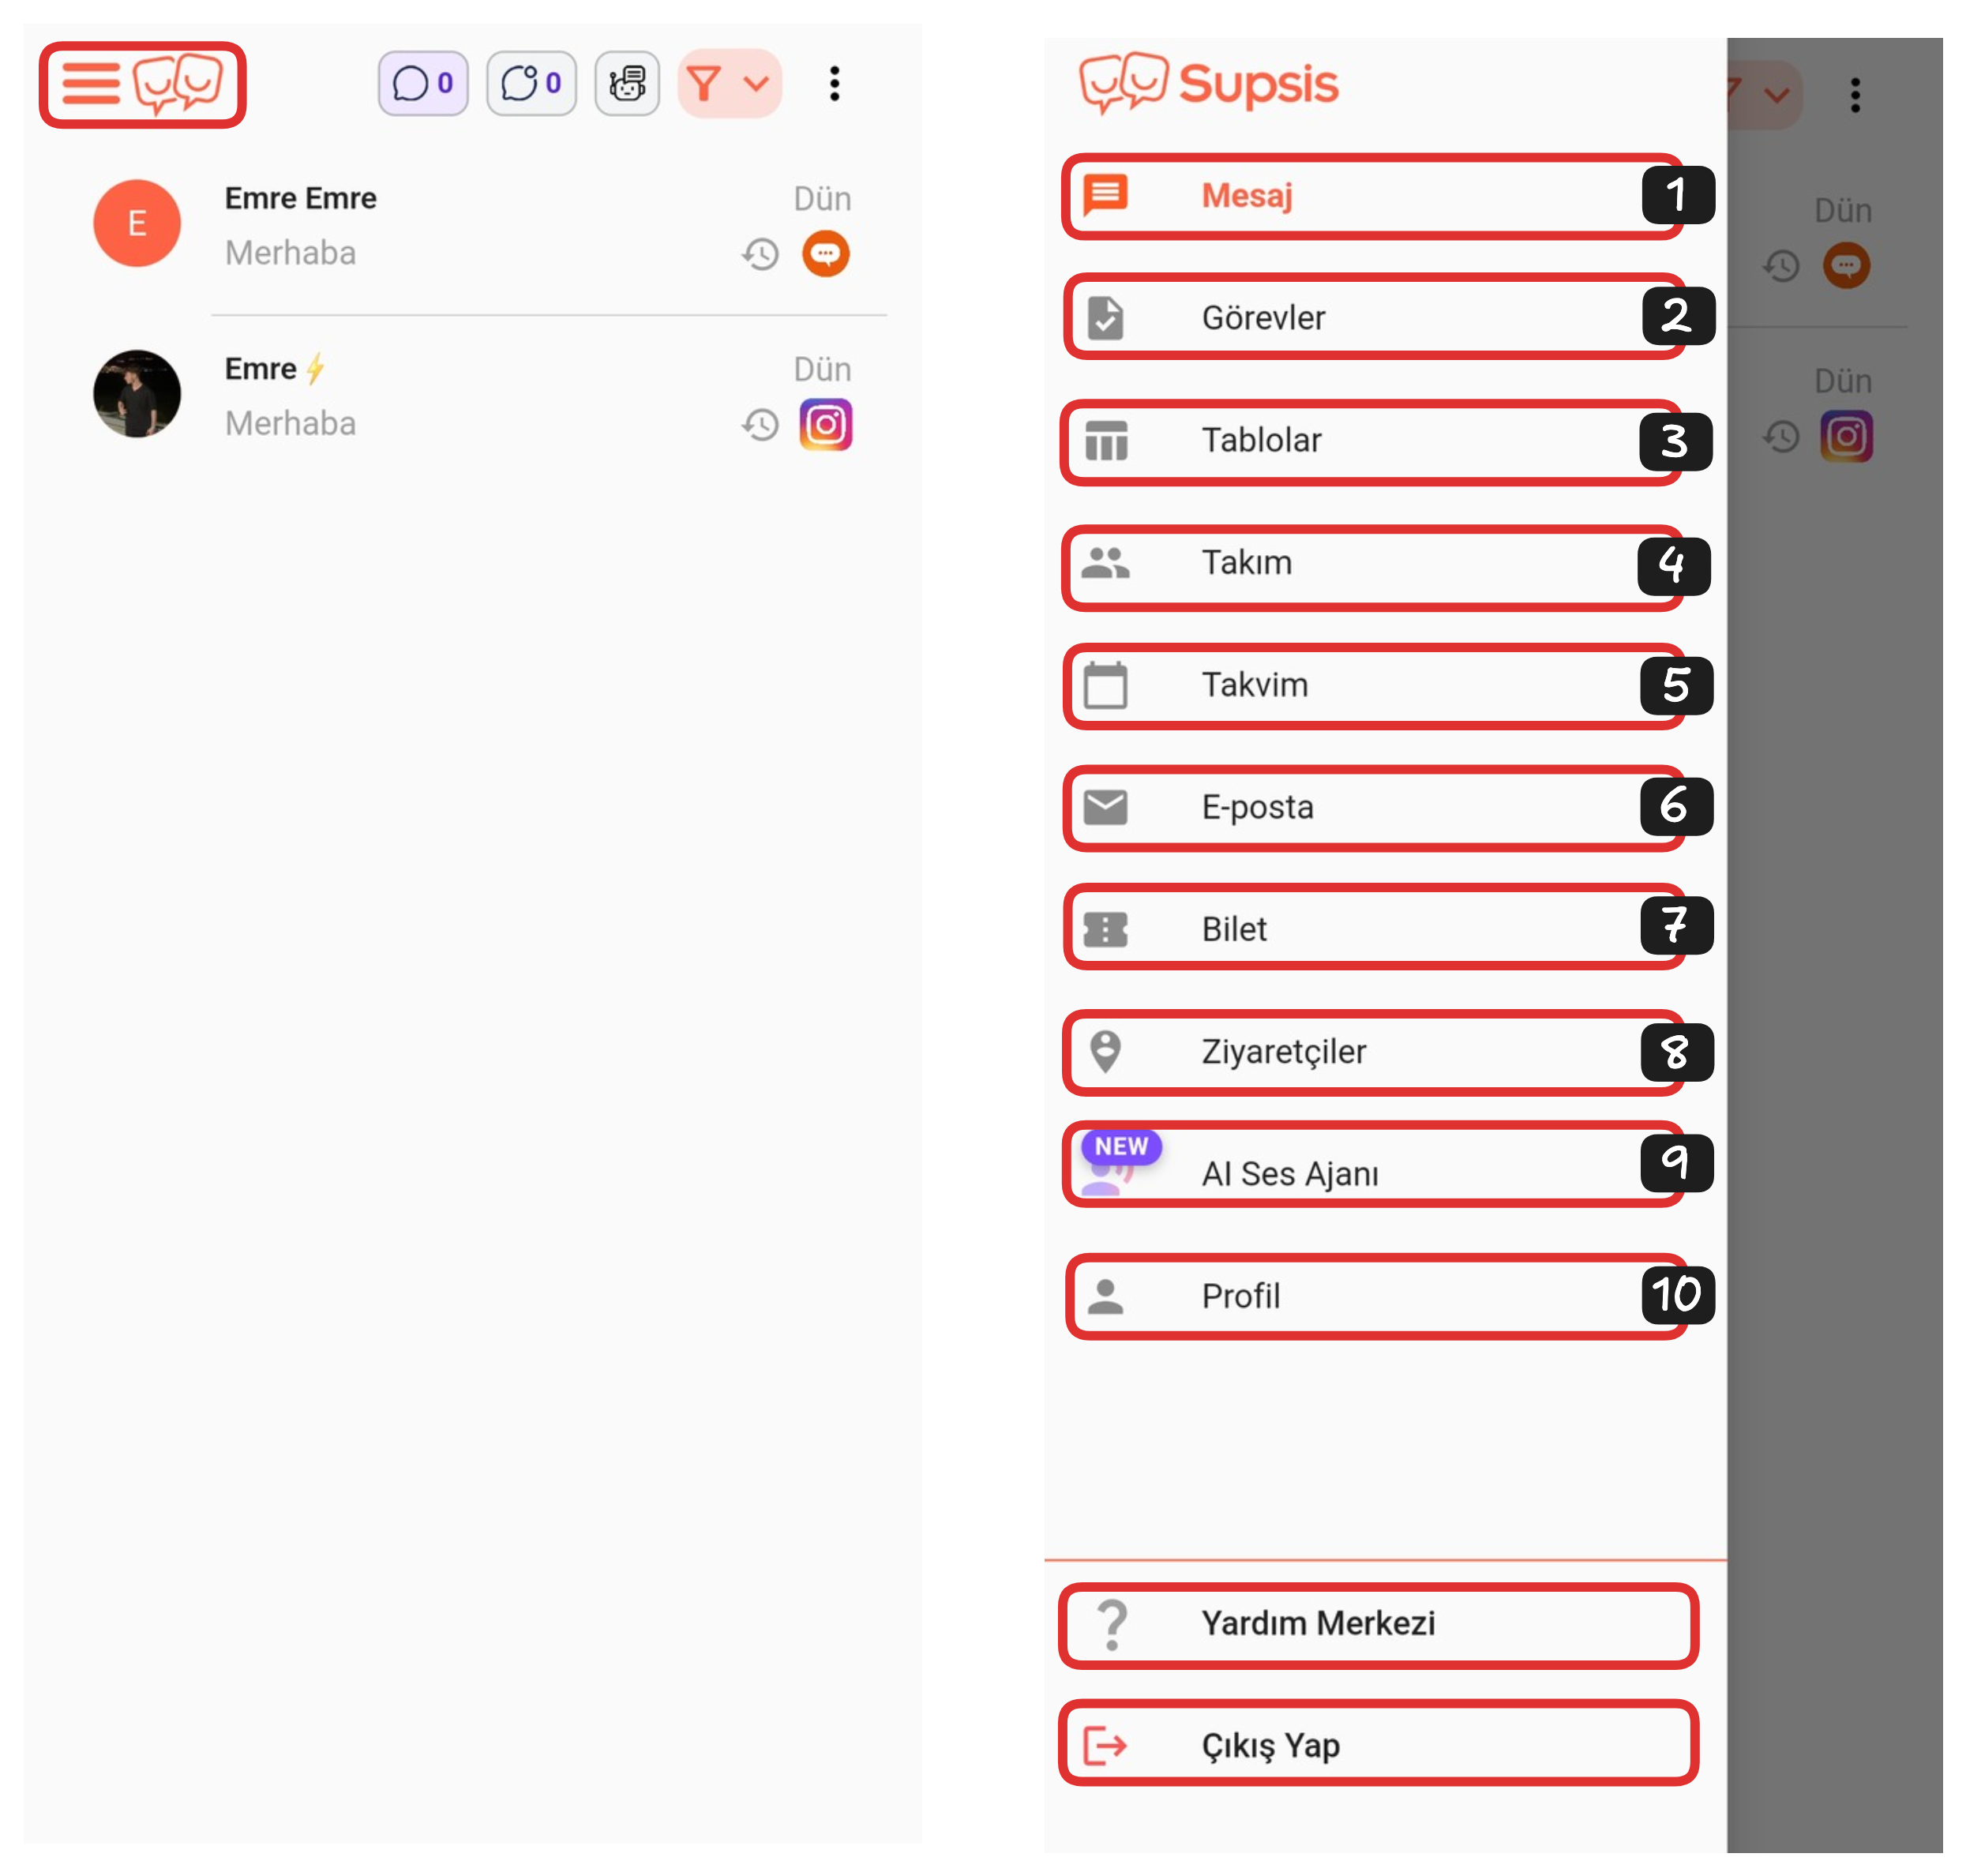
Application Elements:
- Message
- Tasks
- Tables
- Team
- Calendar
- Ticket
- Visitors
- AI Voice Agent
- Profile
3-) Tables
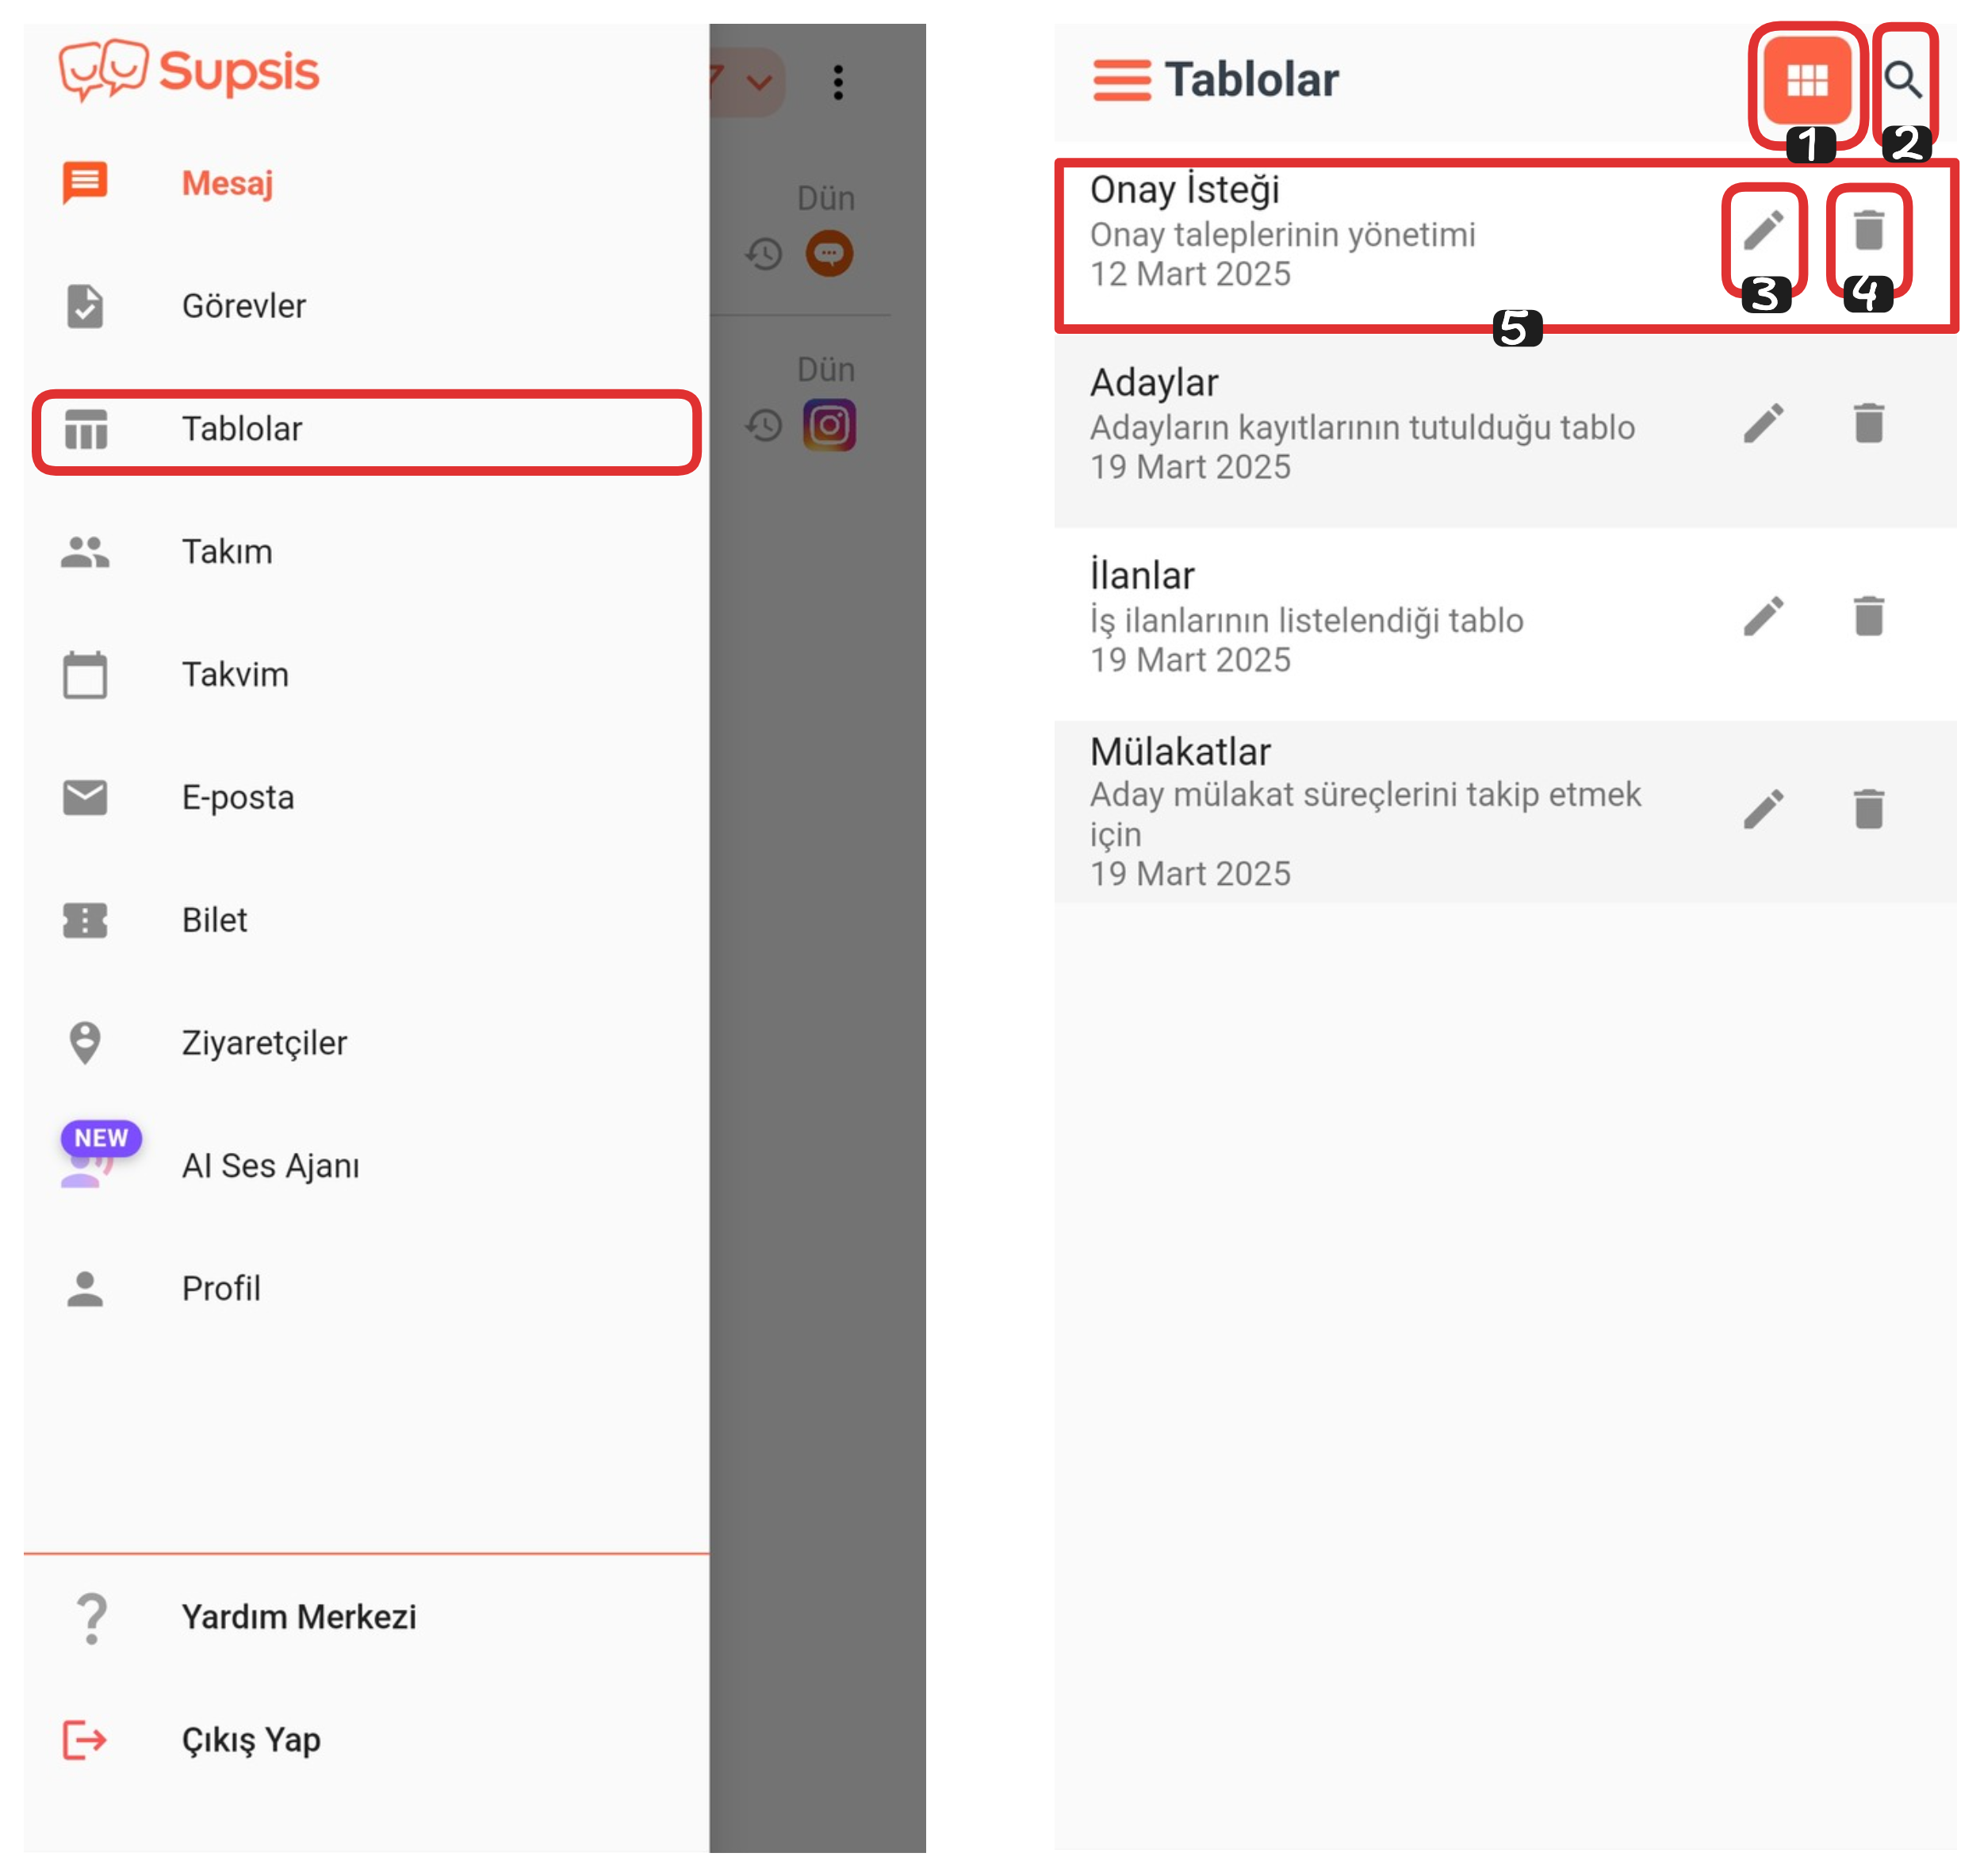
Table Elements:
- Modules
- Search
- Edit
- Delete
- Table
1-) Modules
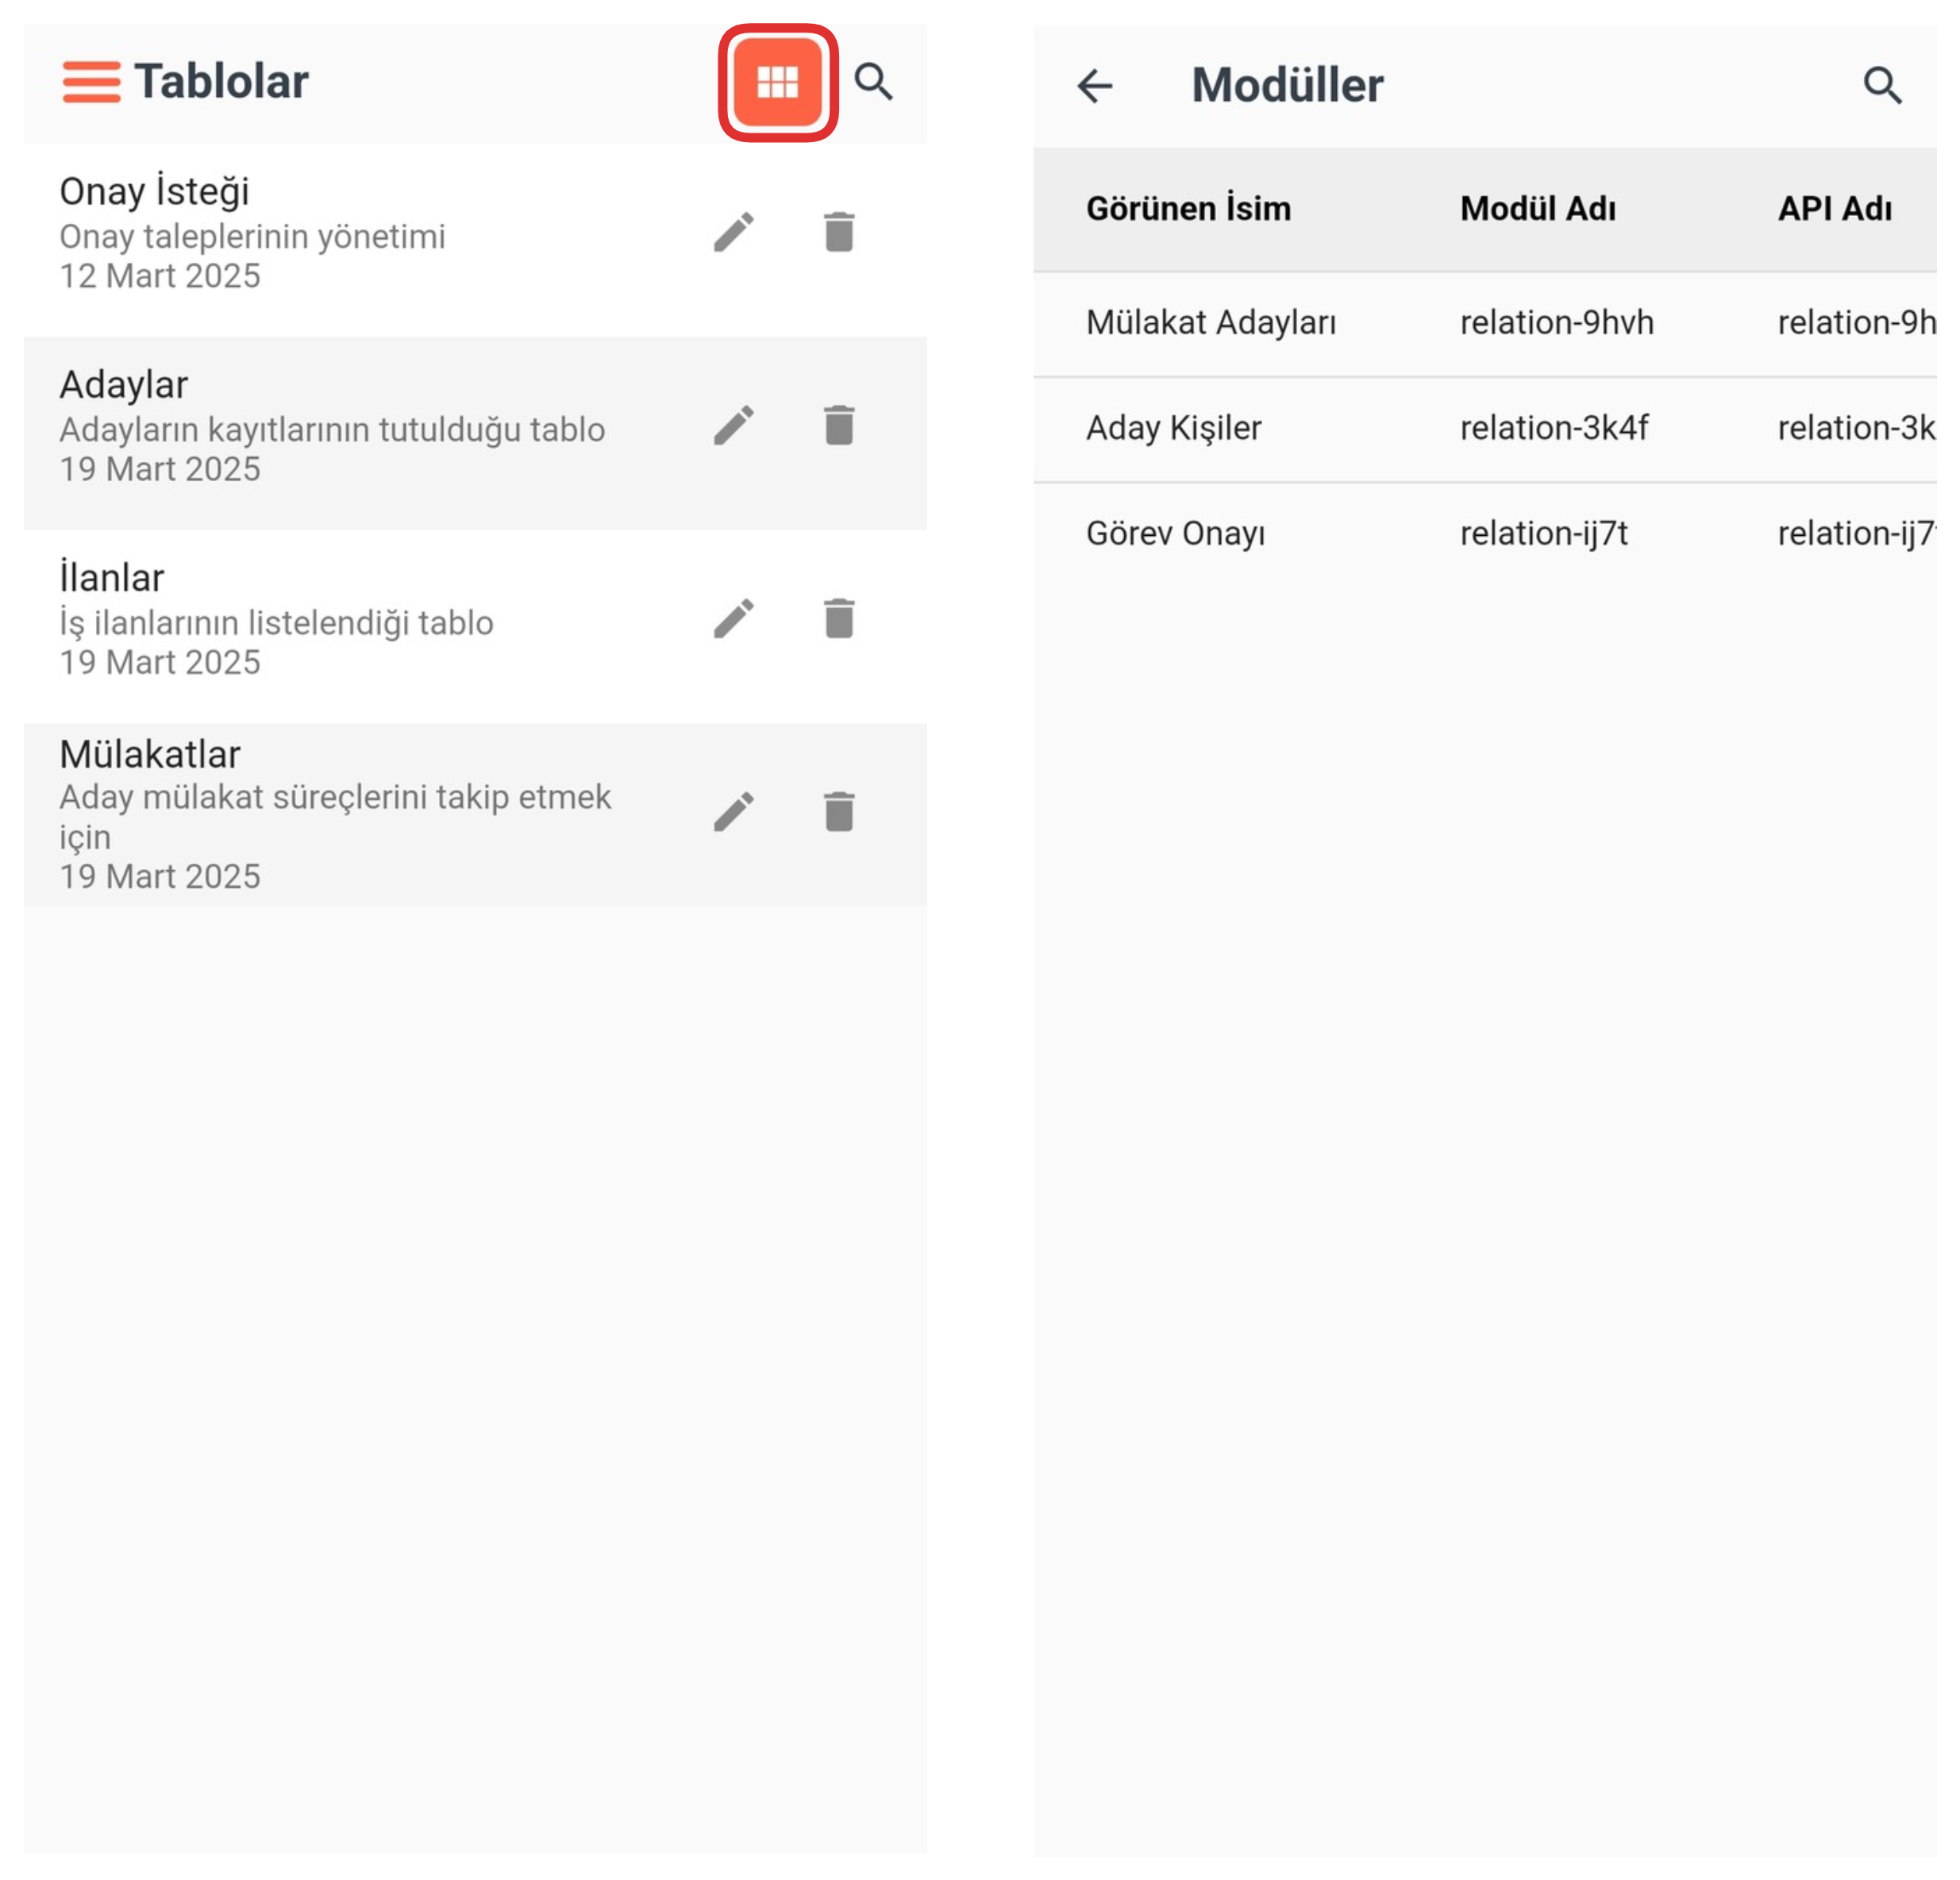
From this section, you can view your currently defined modules. You can access the content of each module, examine configurations and make necessary arrangements.
2-) Search
From this section, you can easily search for the table you are looking for and find it quickly. Just type the table name in the search bar; the system instantly lists matching results.
3-) Edit
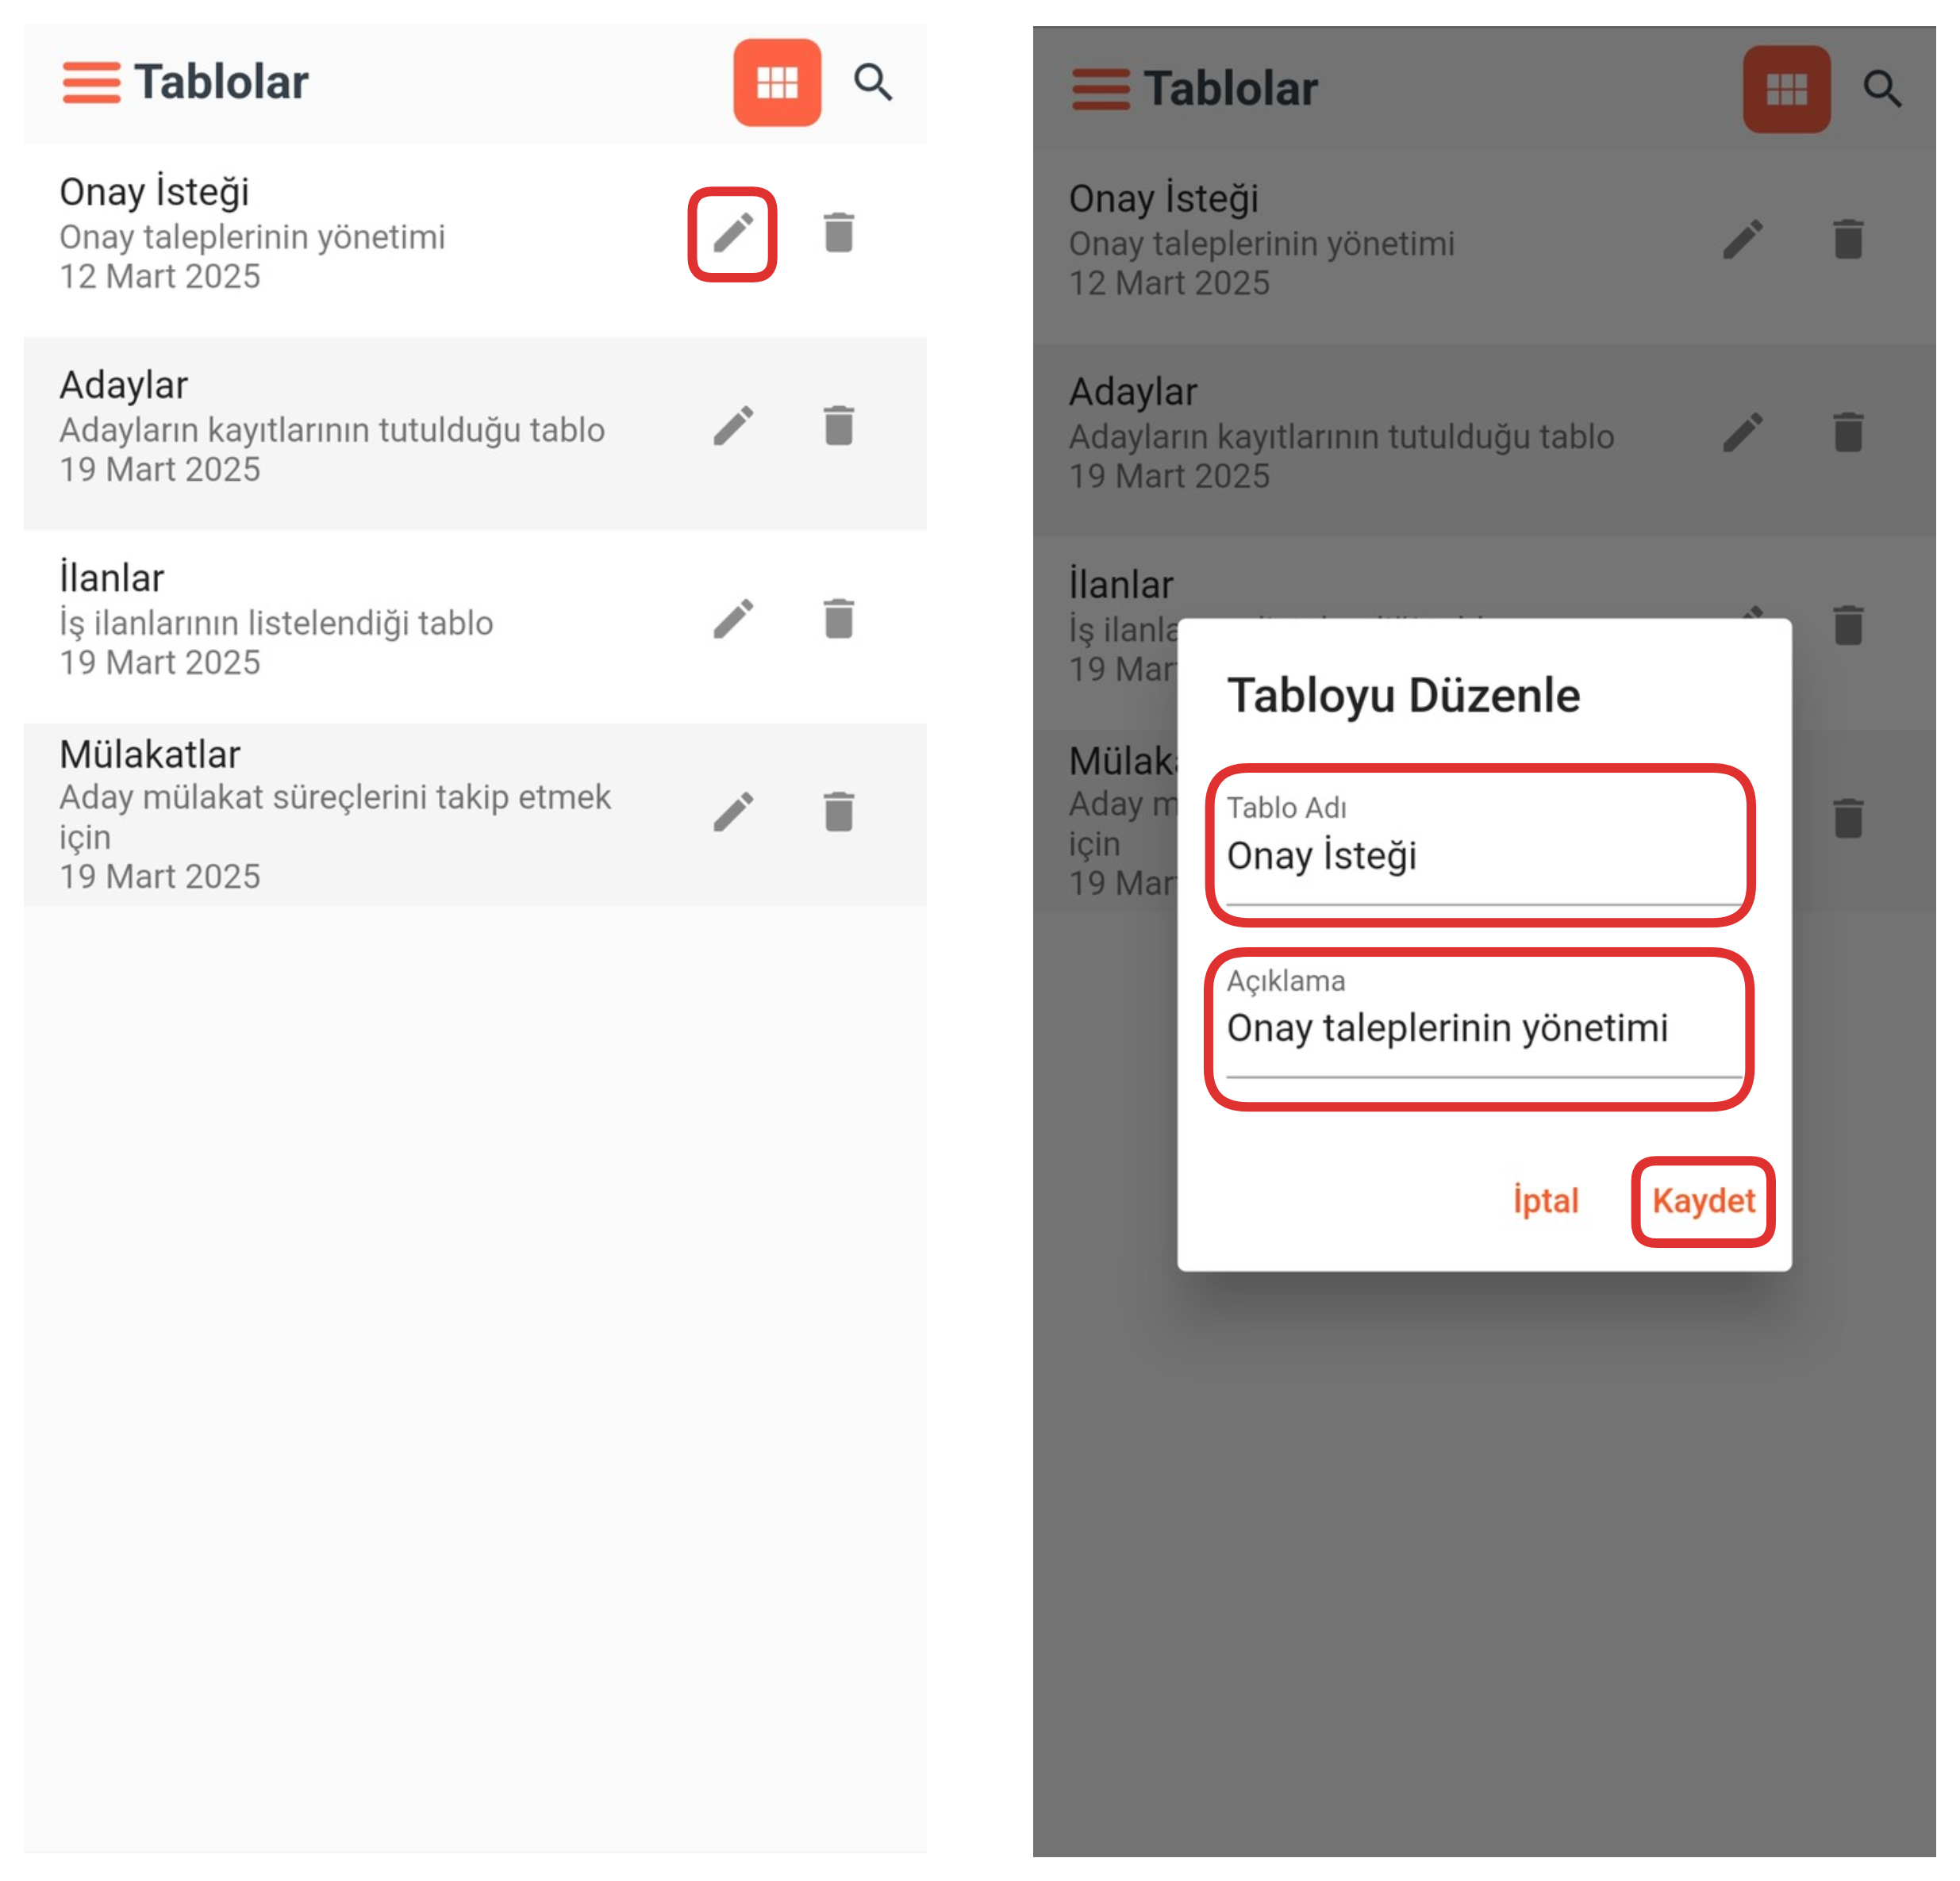
From this section, you can quickly edit the table name and description. The changes you make are saved instantly, allowing you to keep table information current and understandable.
4-) Delete
From this section, you can completely delete the relevant table. Since the deletion operation is irreversible, it is recommended that you check the content before removing the table.
5-) Table
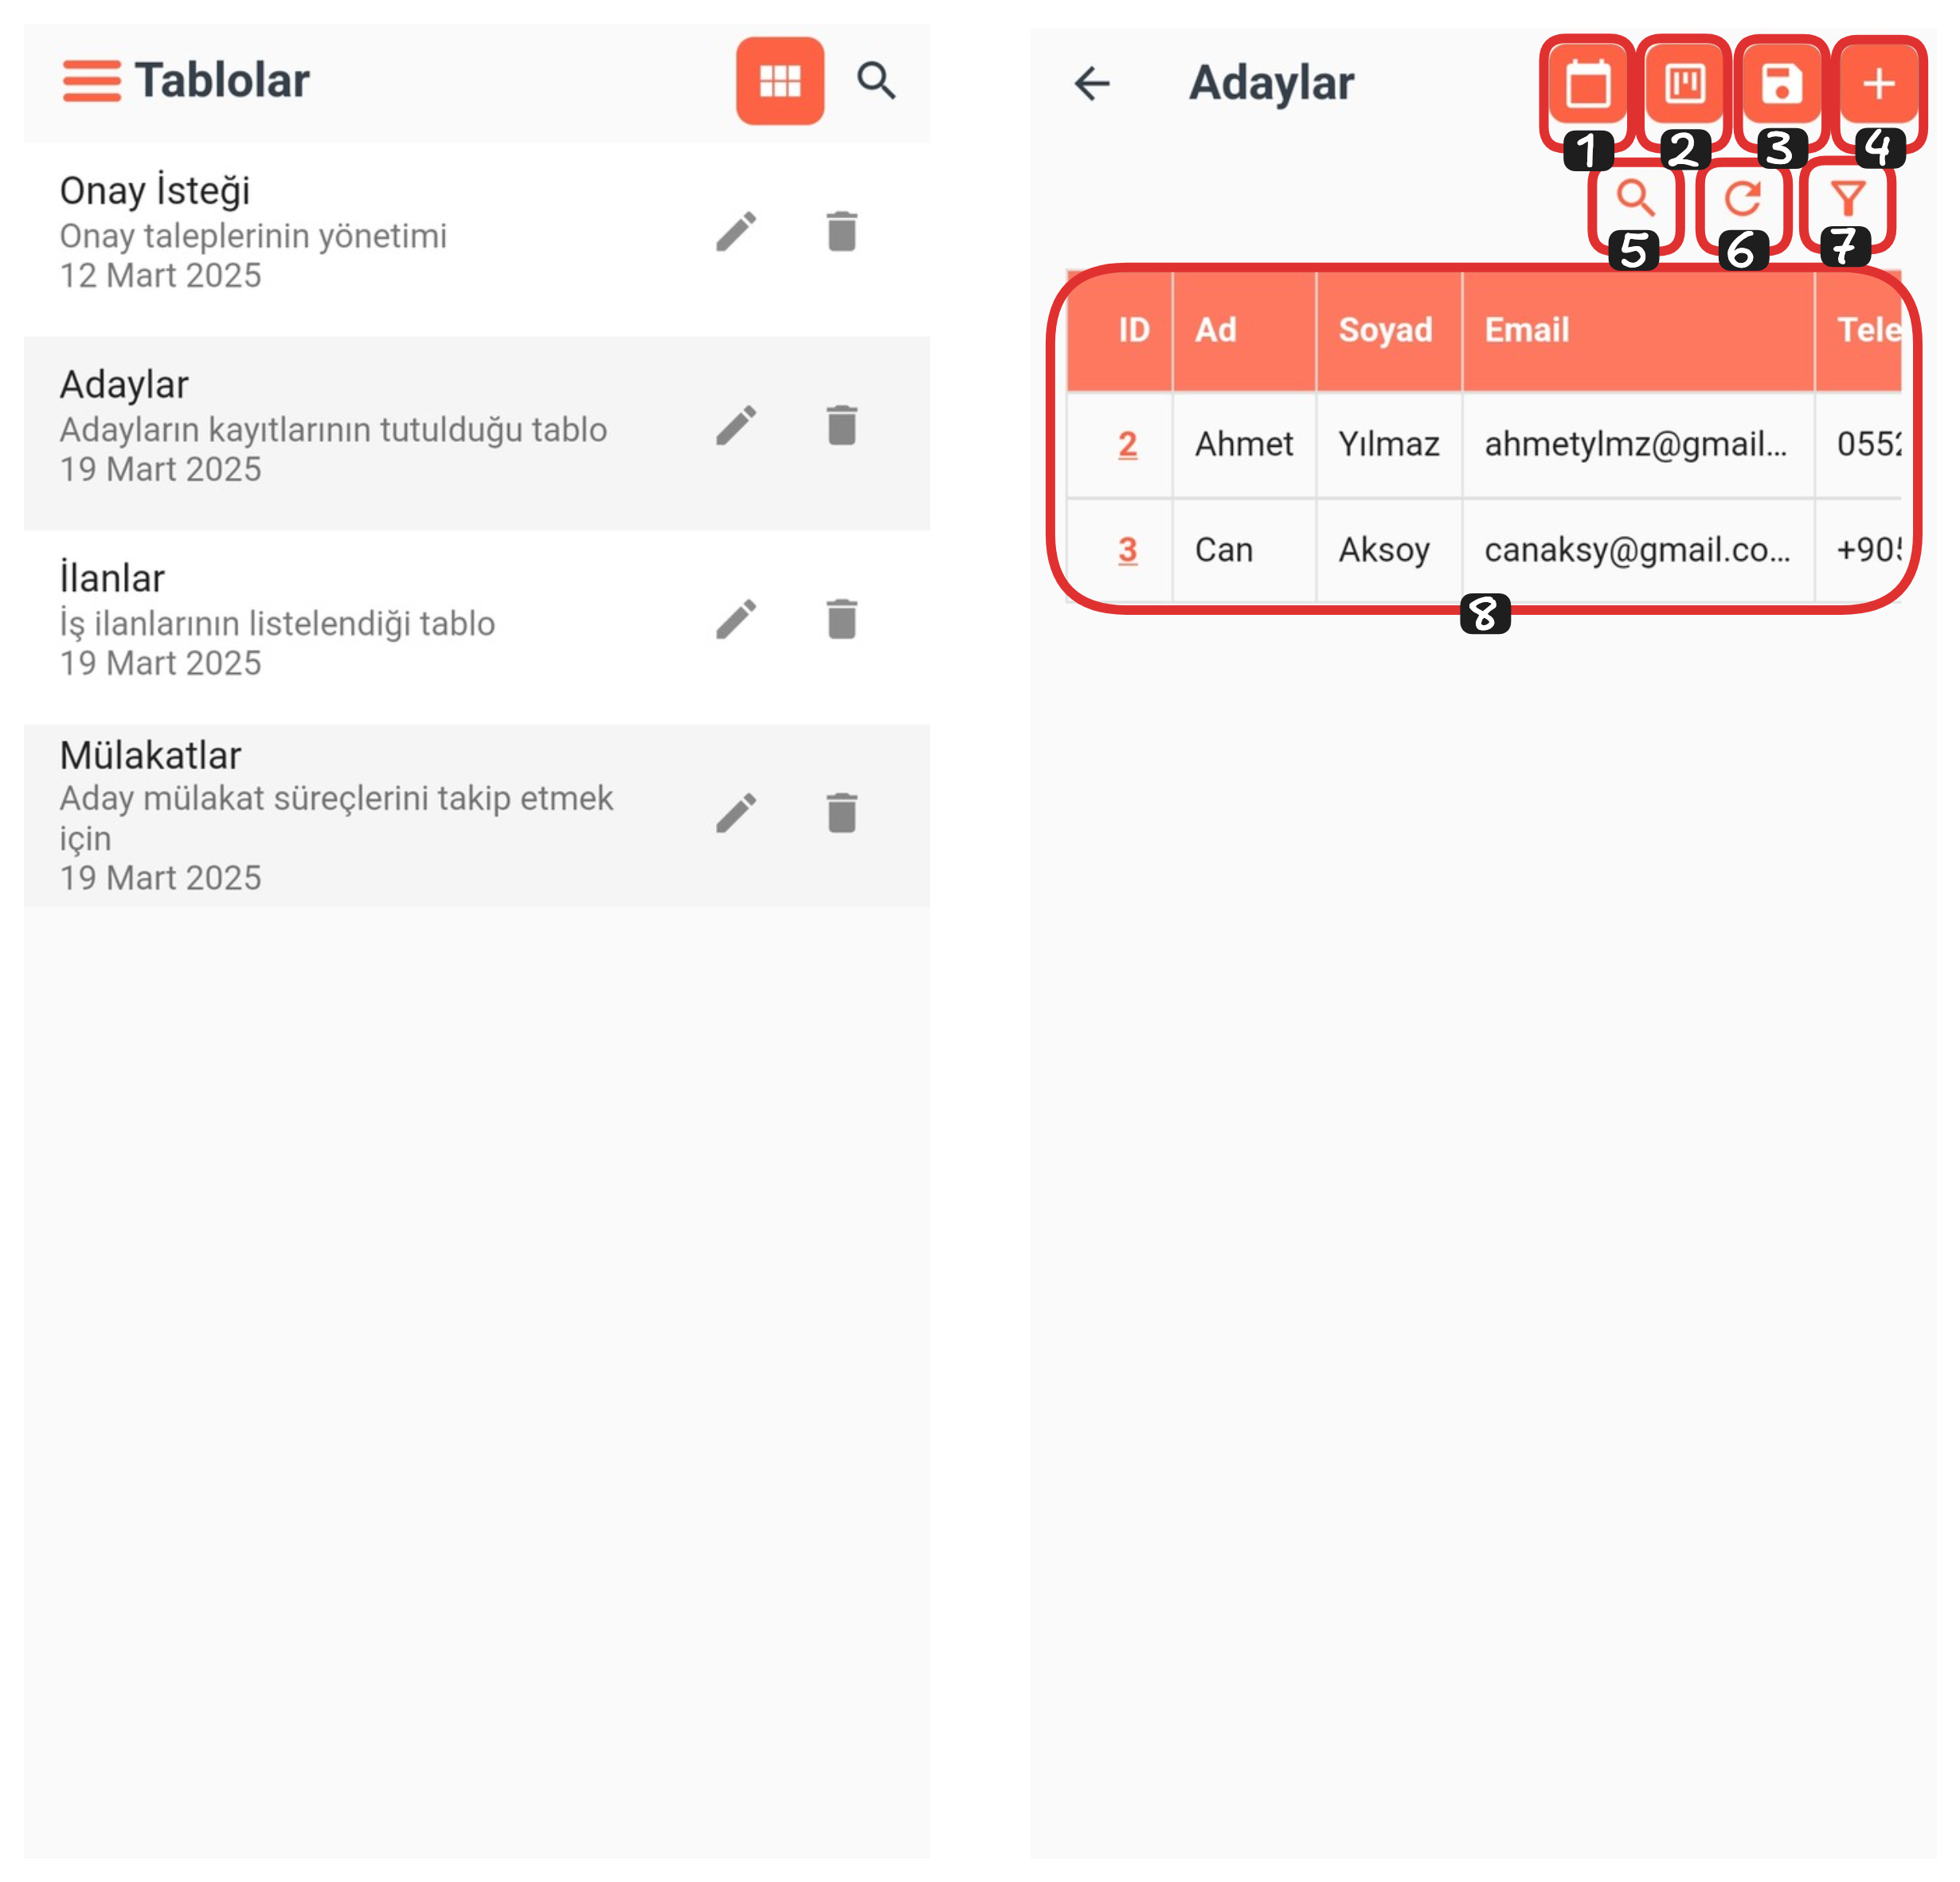
Table Elements:
- Calendar
- Kanban
- Save
- Create Record
- Search
- Refresh
- Filter
- Table Records
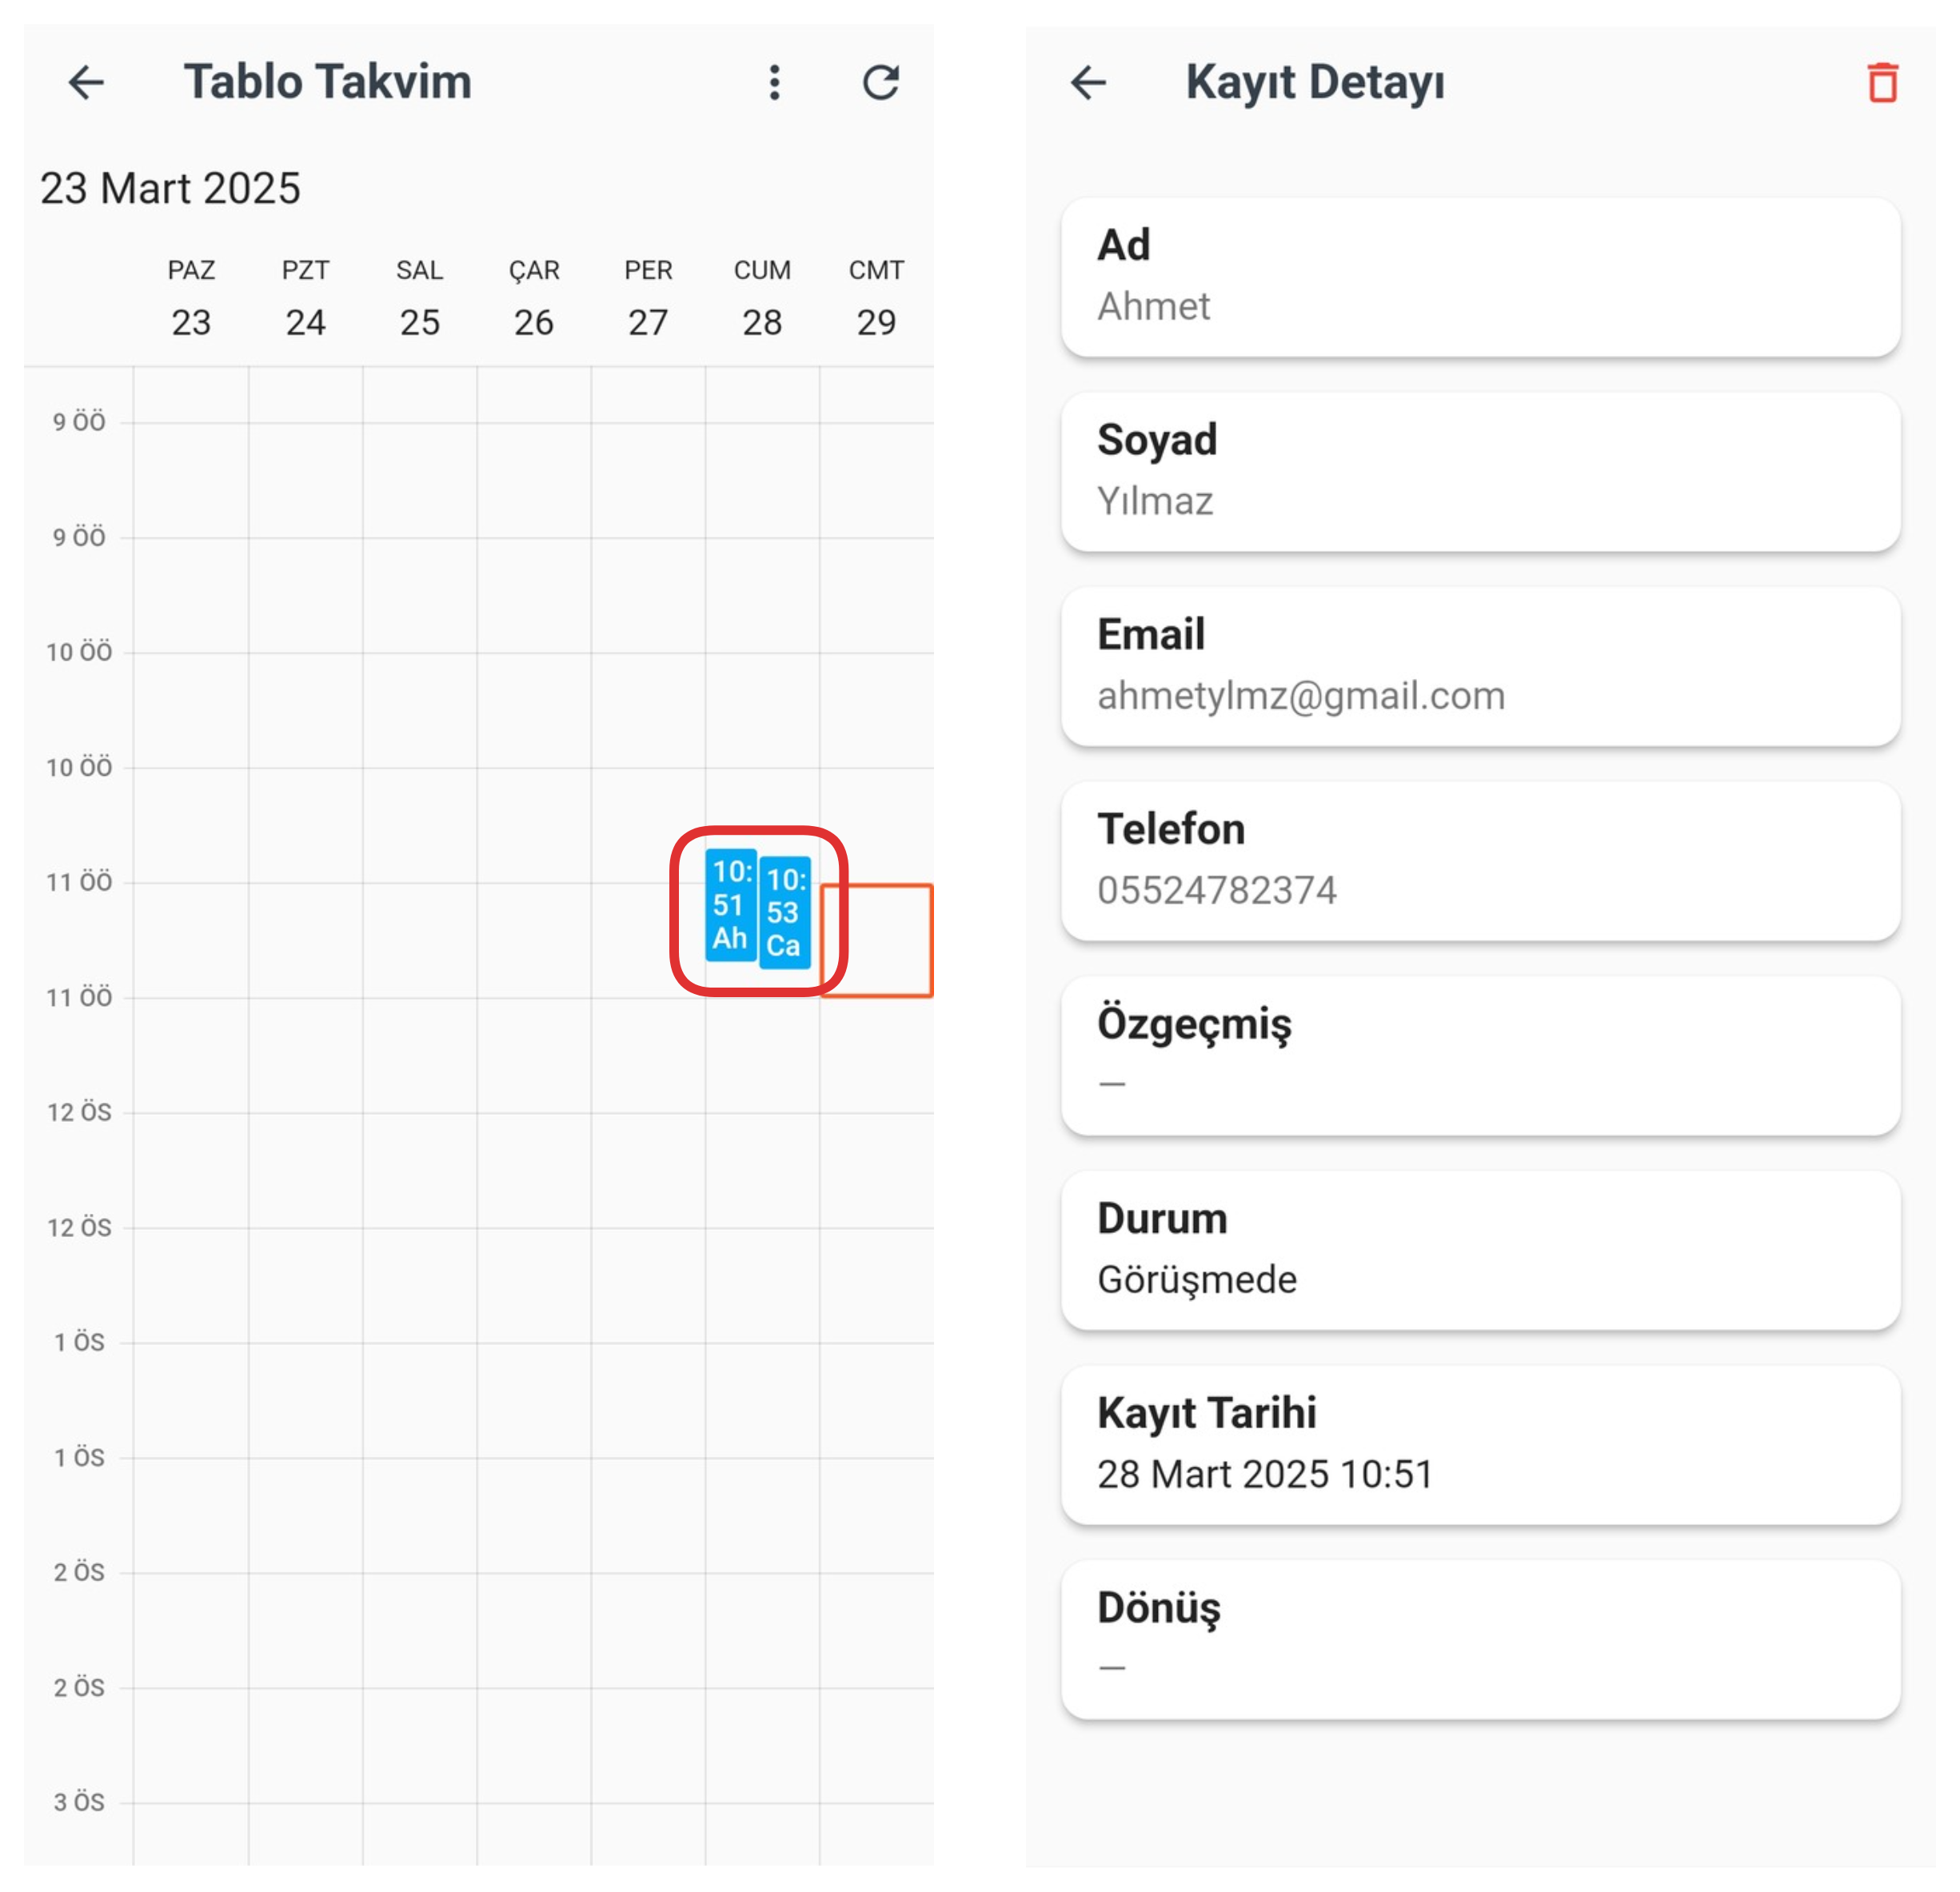
1-) Calendar
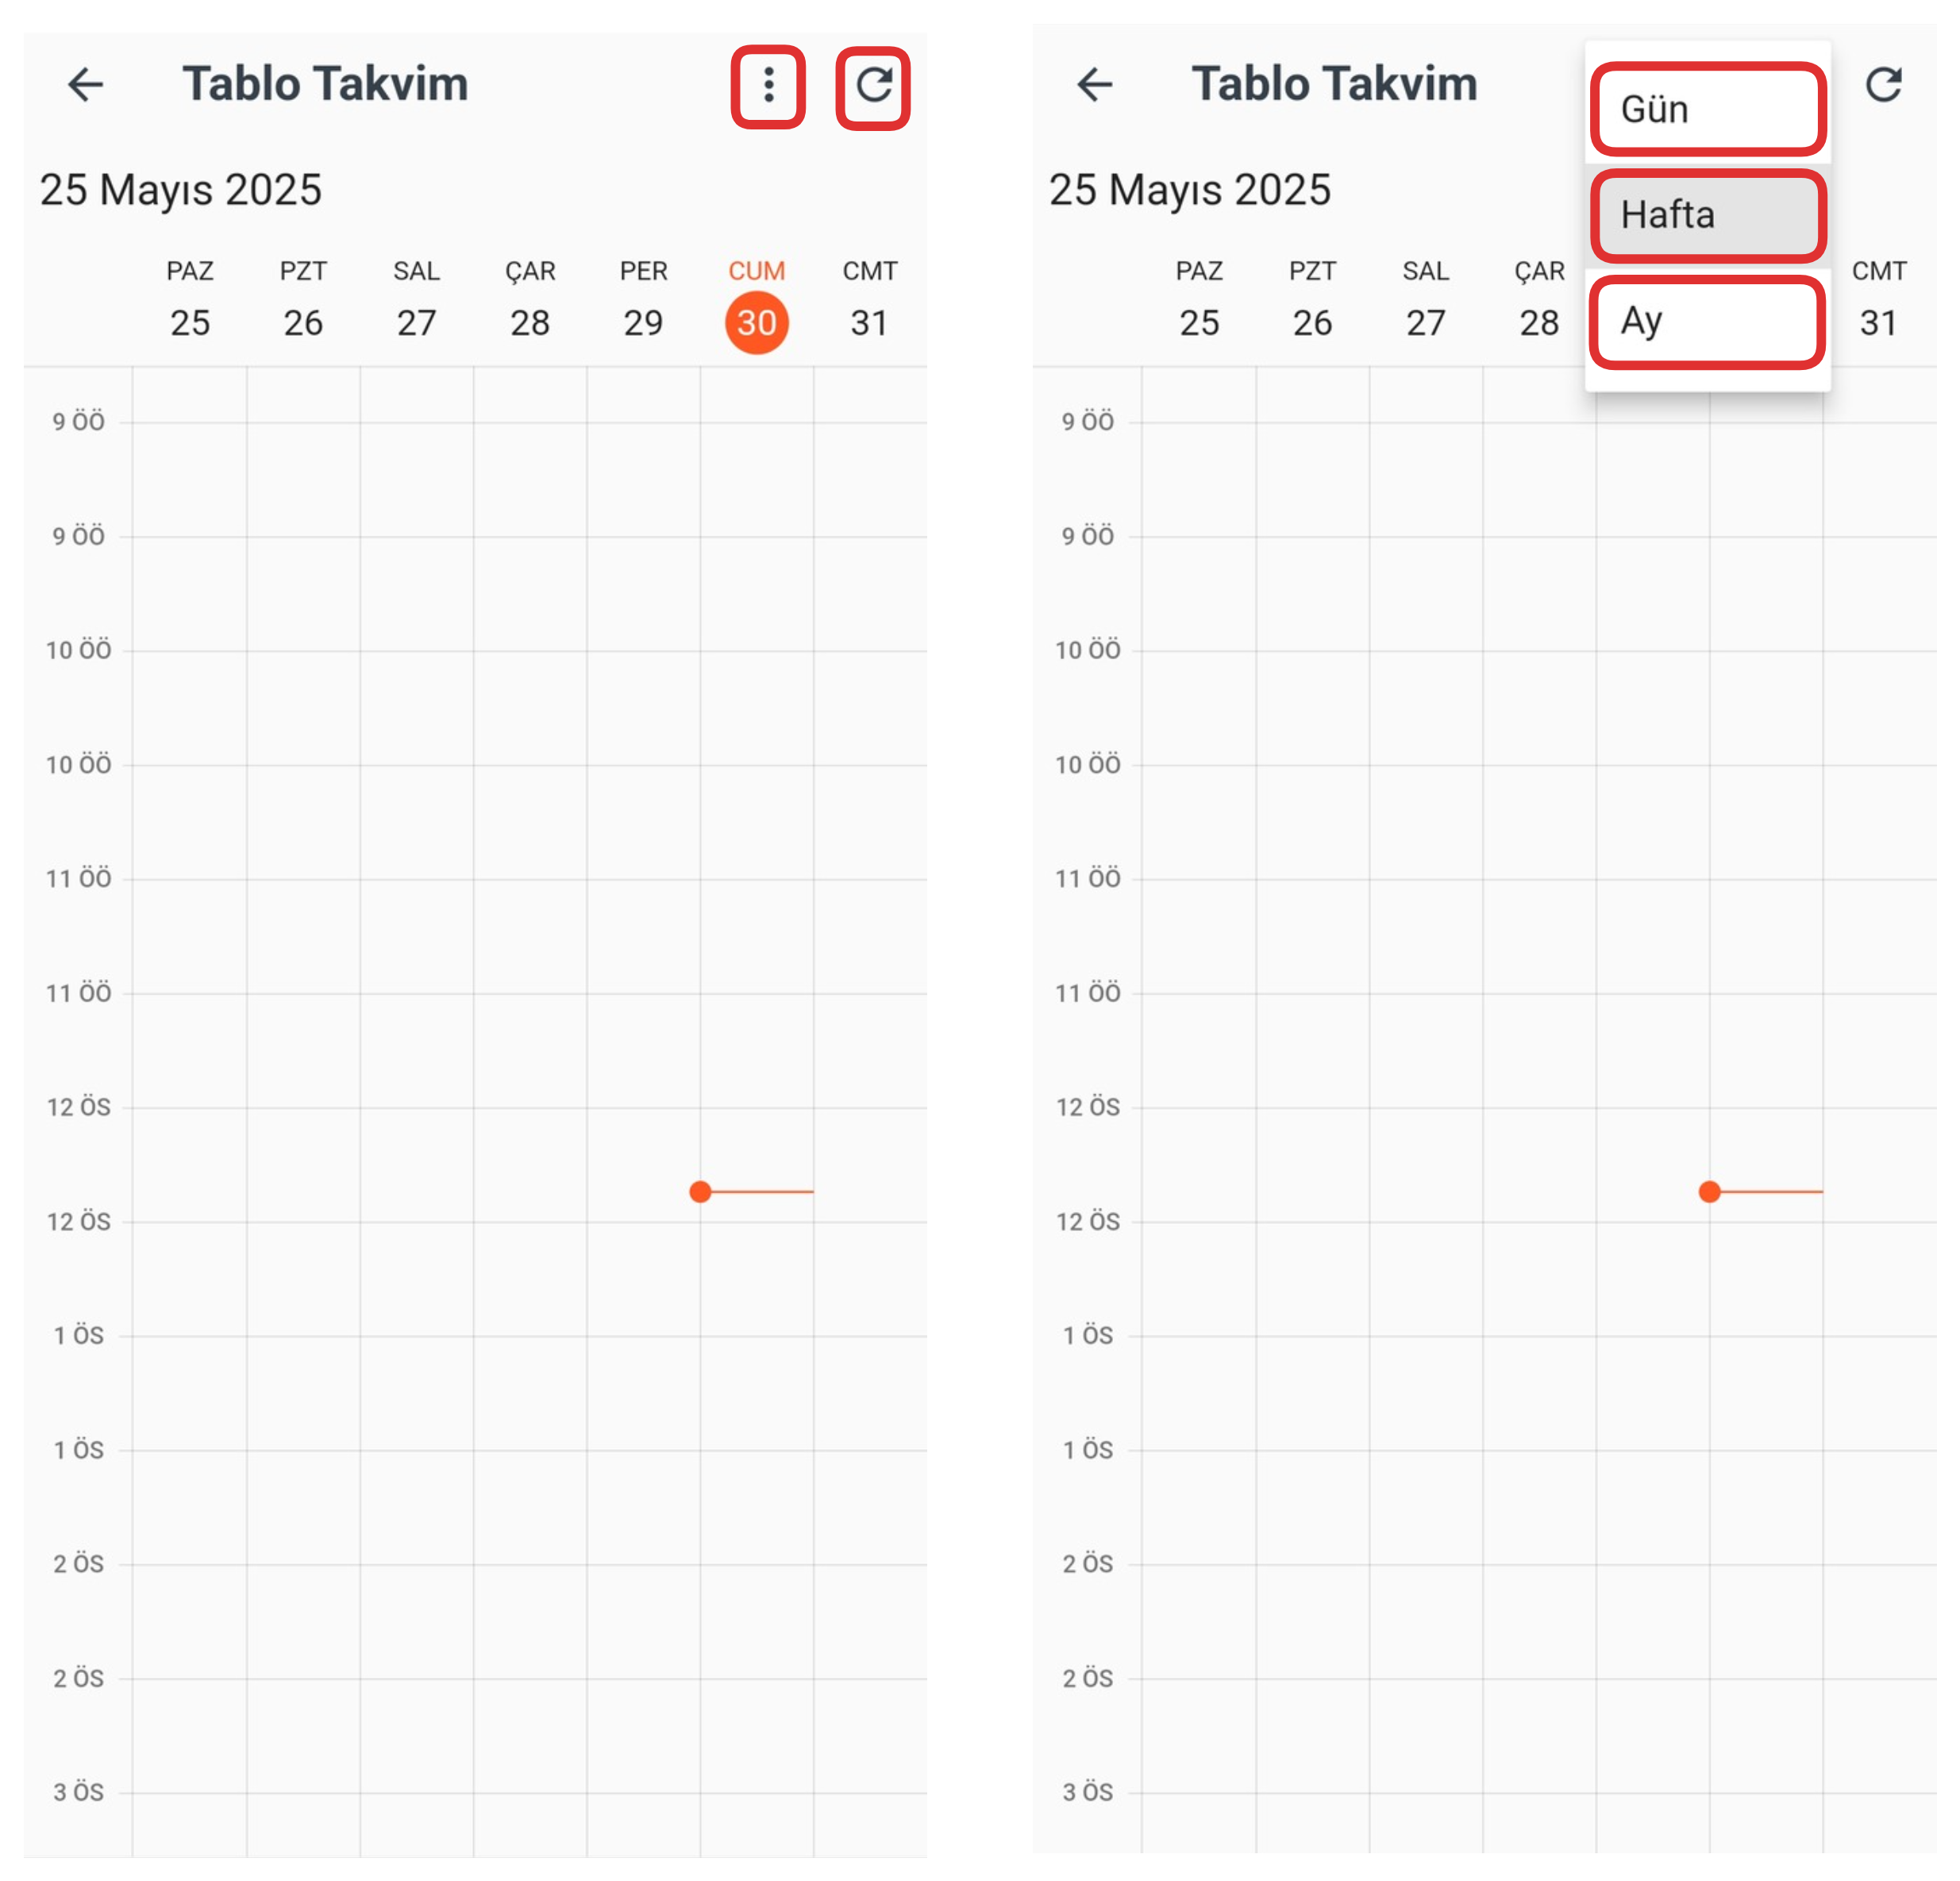
This feature allows you to view your records in table format. This way, you can examine each record in a more organized and readable way. You can also filter by record dates and quickly access the details of relevant records.
2-) Kanban
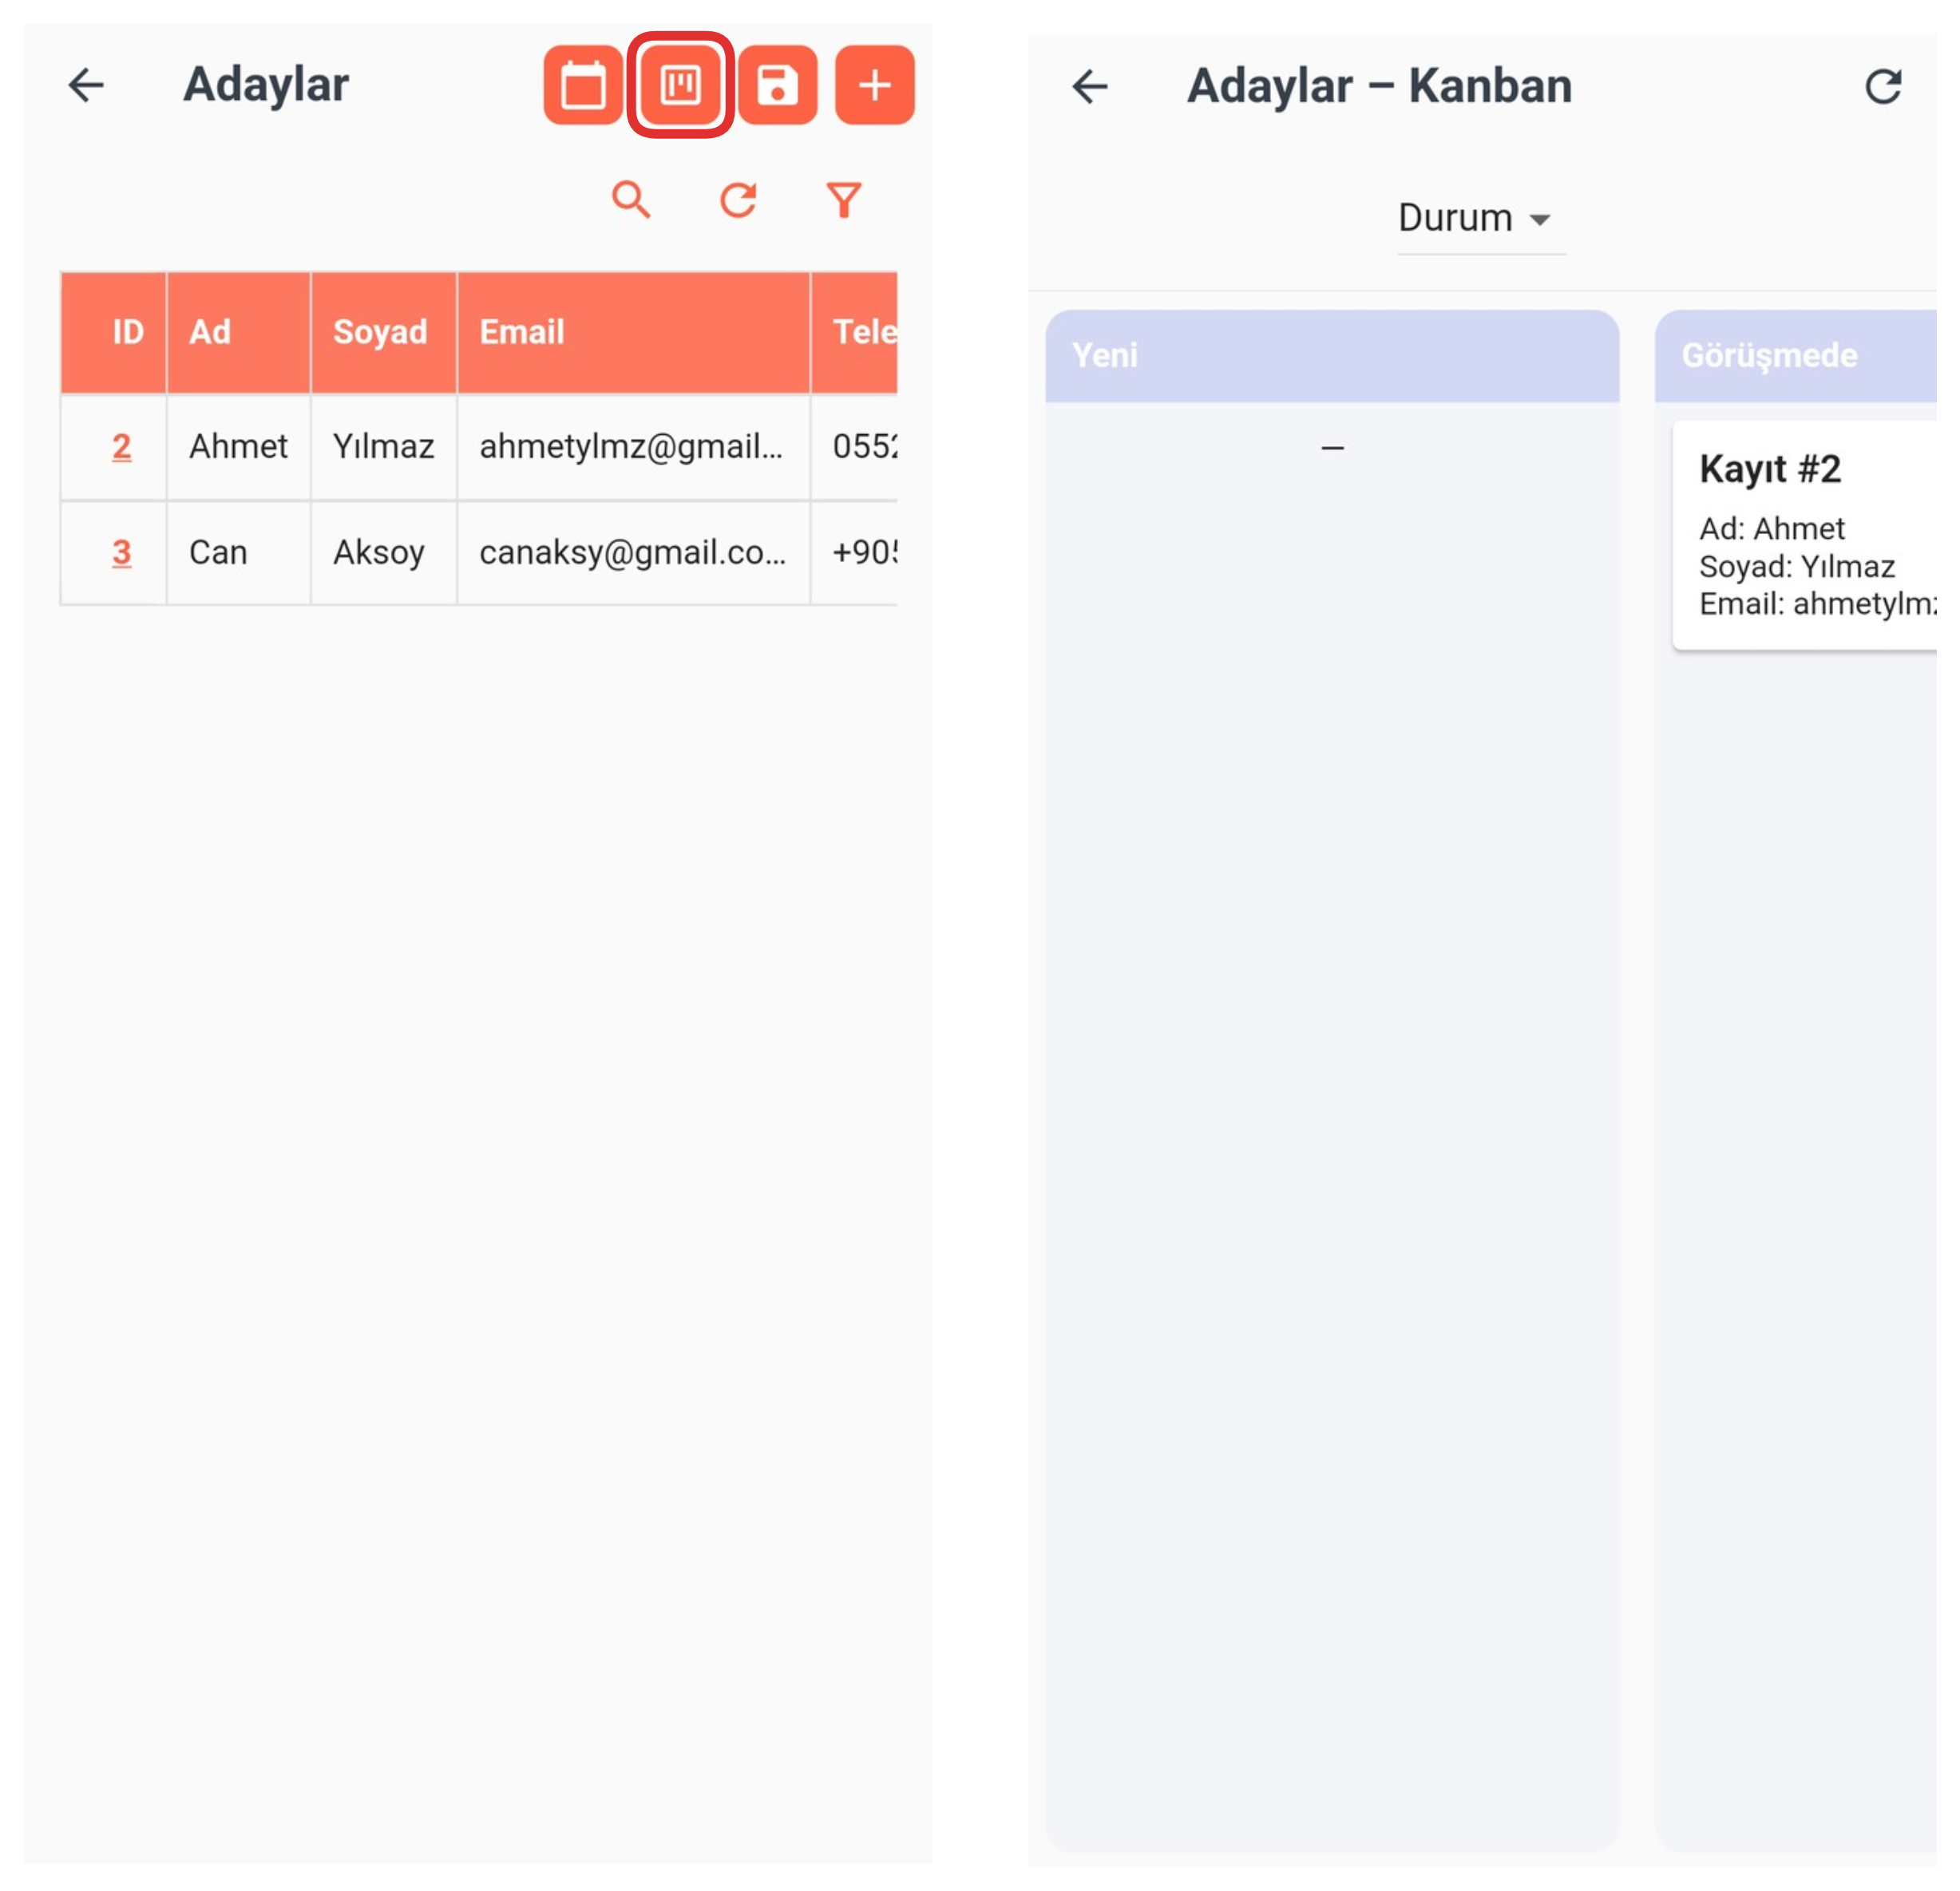
From this section, you can view table records in kanban format, easily track and manage the status of each record. You can organize your workflow in a more visual and organized way by moving records to different stages using the drag-and-drop method.
3-) Save
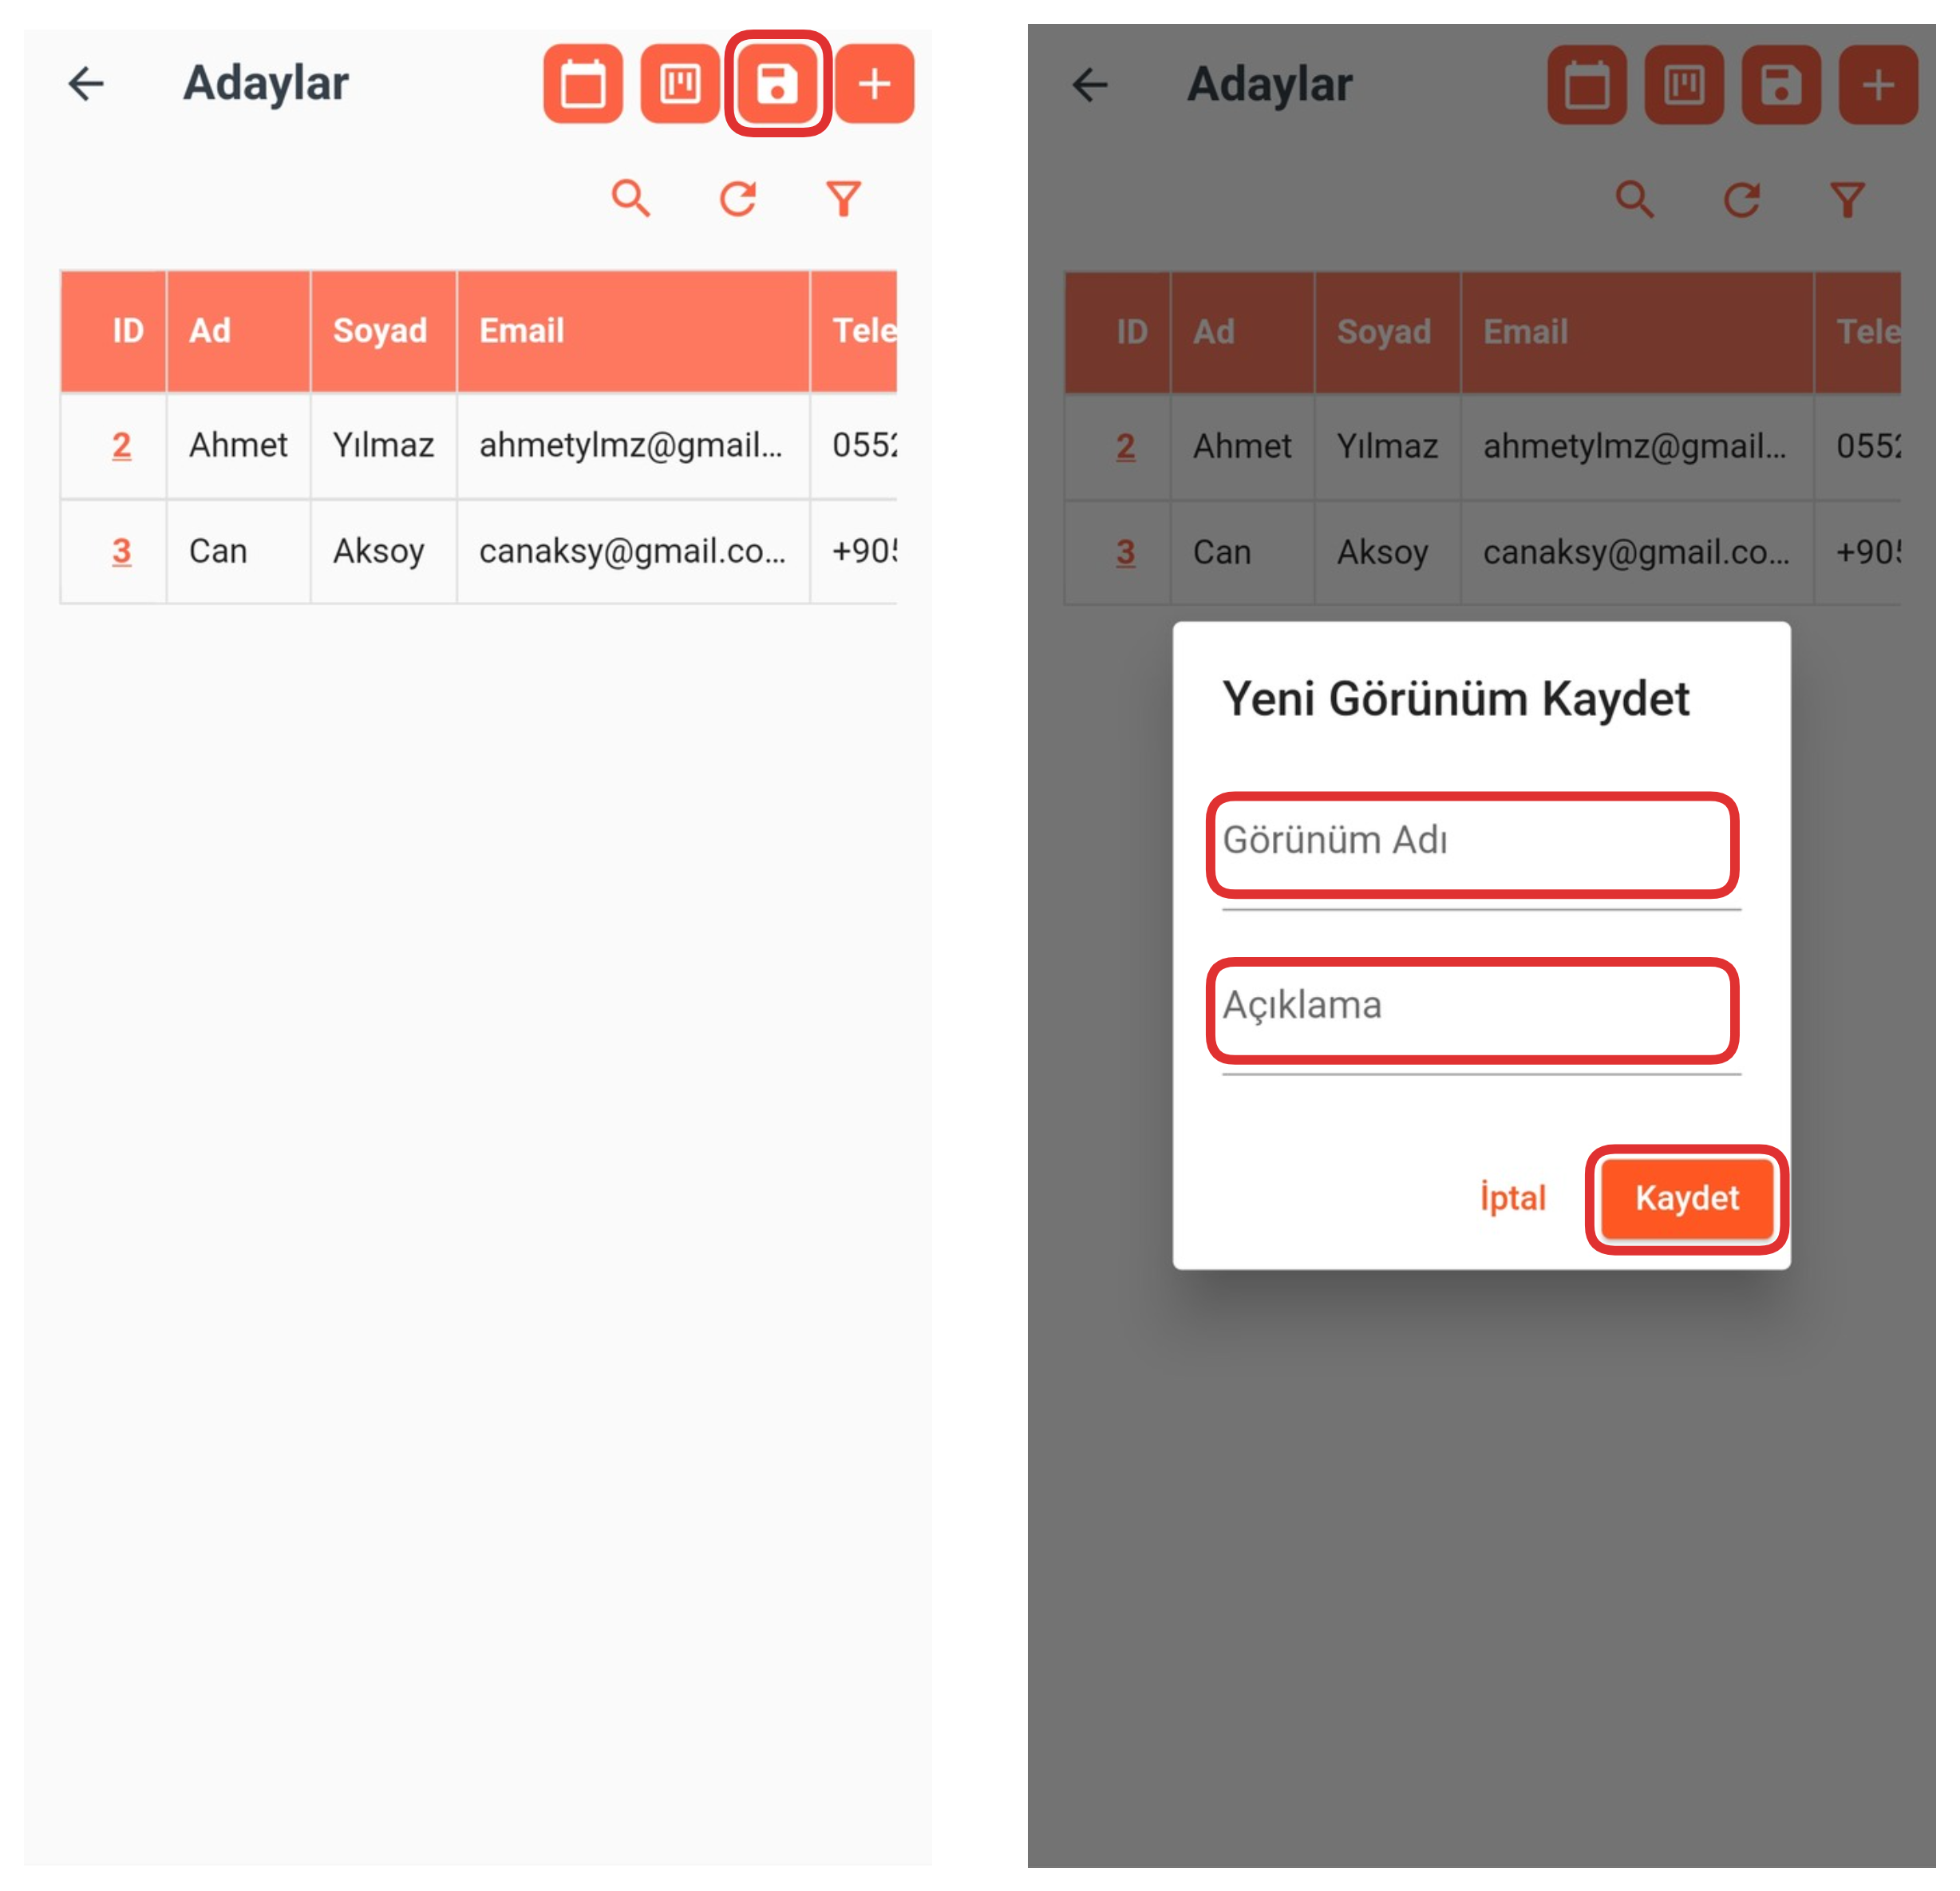
Using this feature, you can save the final state of your table as a view. For this, click the "Save" button, then fill in the "View Name" and "Description" fields from the opened modal. After entering all the information, you can complete the process by clicking the "Save" button again. This way, you can save your customized view to easily access it later.
4-) Create Record
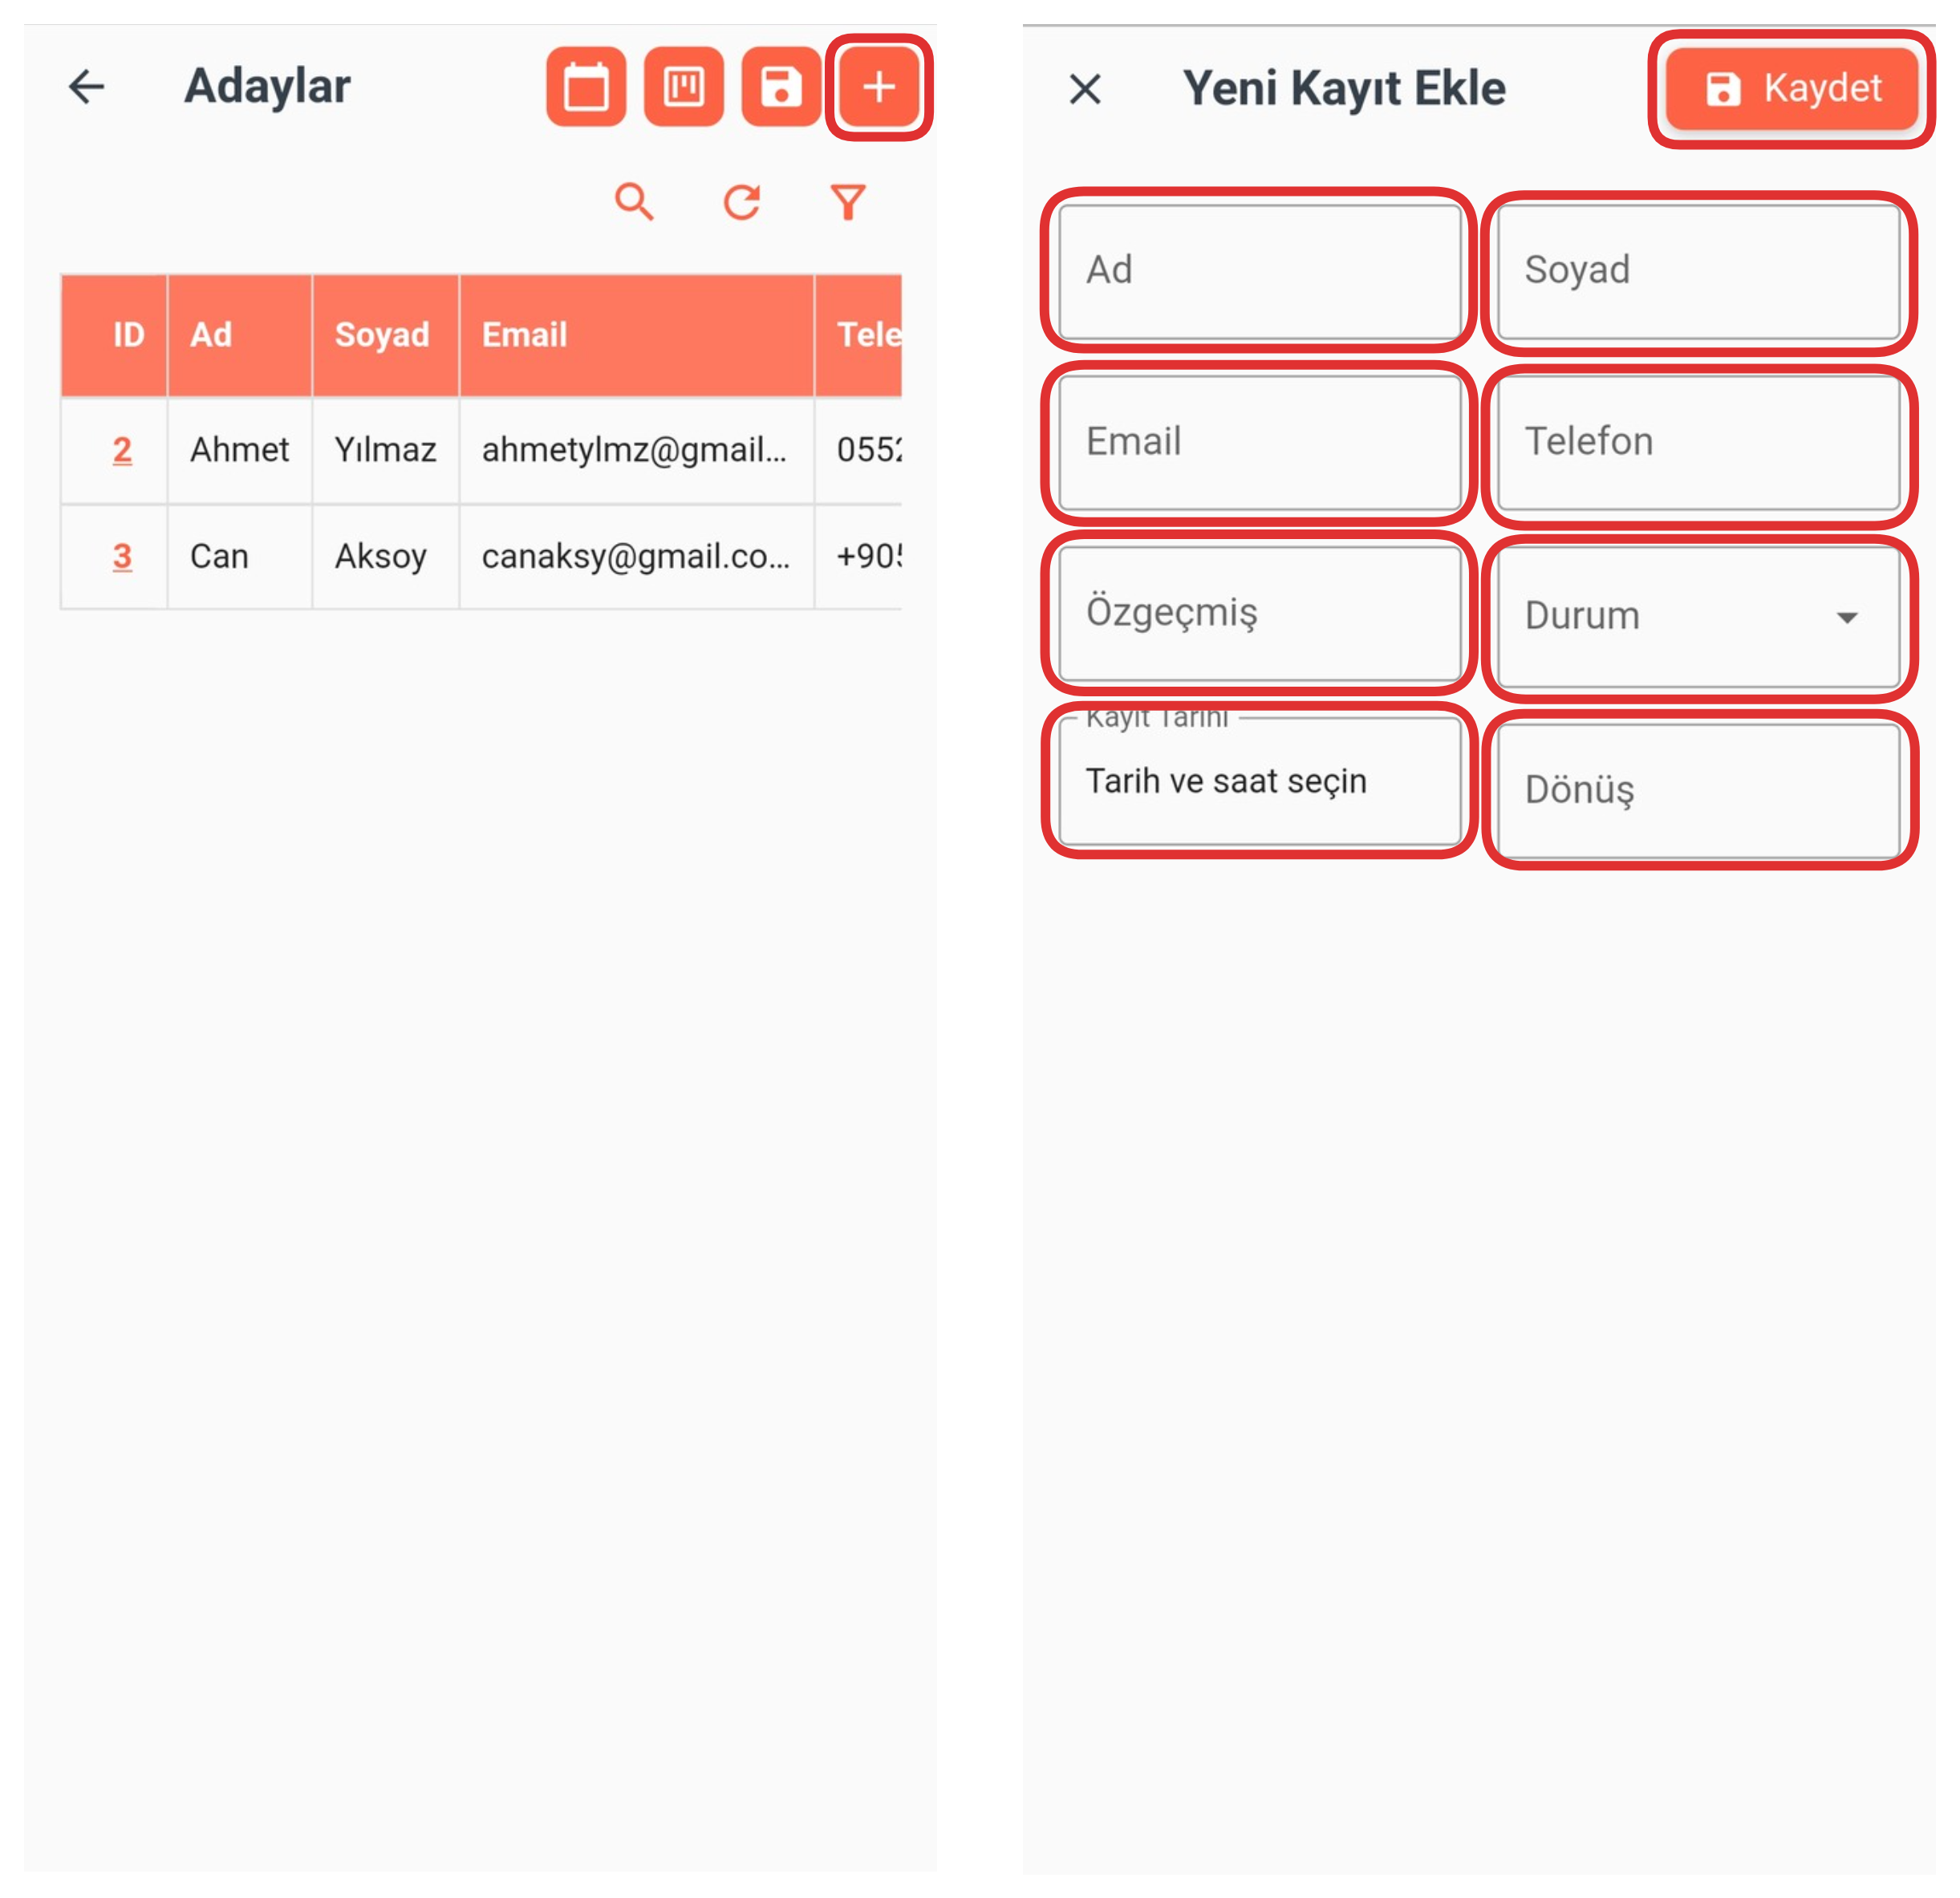
To create a new record in the table, click the "+" button. From the opened section, fill in the necessary fields for the record to be created in your table. After entering all the information, you can complete the record creation process by clicking the "Save" button.
5-) Search
Click the "Search" button to easily find the record you are looking for. By entering information about the record in the opened area, you can quickly and practically reach the record you are looking for.
6-) Refresh
Thanks to this feature, you can refresh your table and view updates or changes made to the table instantly. This allows you to track the most current state of the data.
7-) Filter
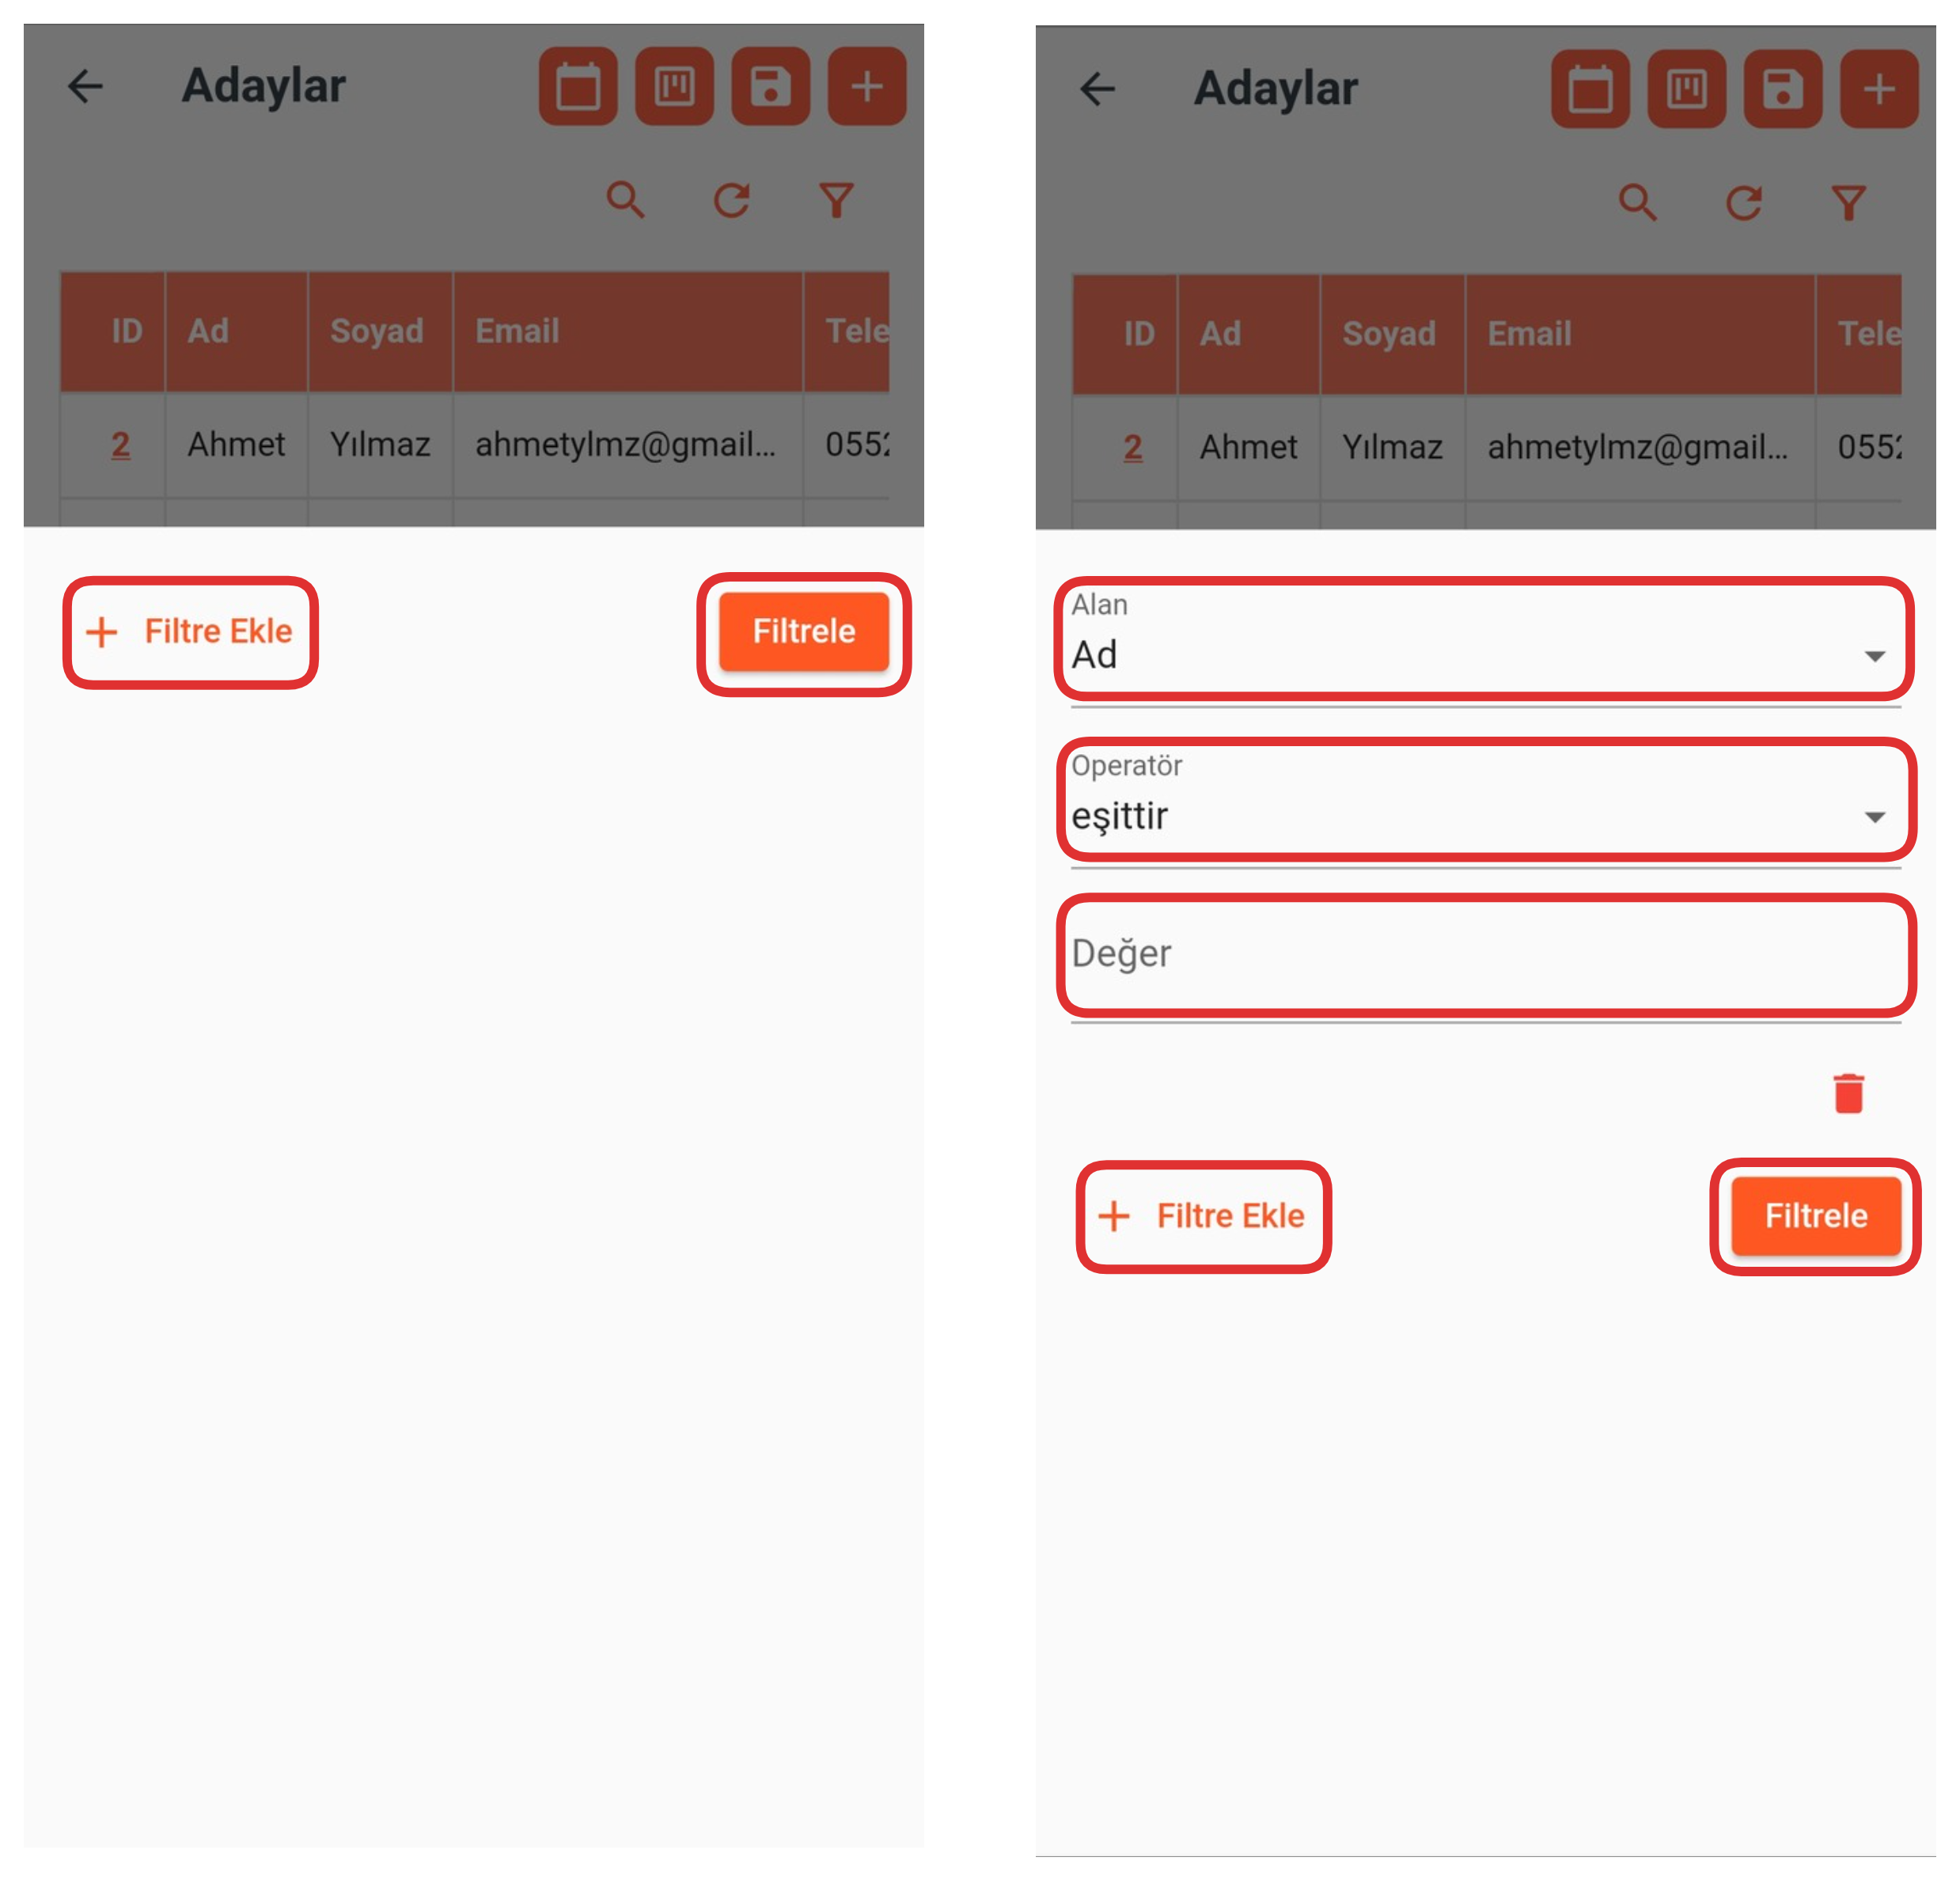
After clicking the "Filter" icon, in the opened area, if you don't have a previously created filter, click the "Add Filter" button. Then, in the opened section, fill in the "Field", "Operator" and "Value" fields to perform the filtering you want. This way, you can view only the records in the table that match your specified criteria.
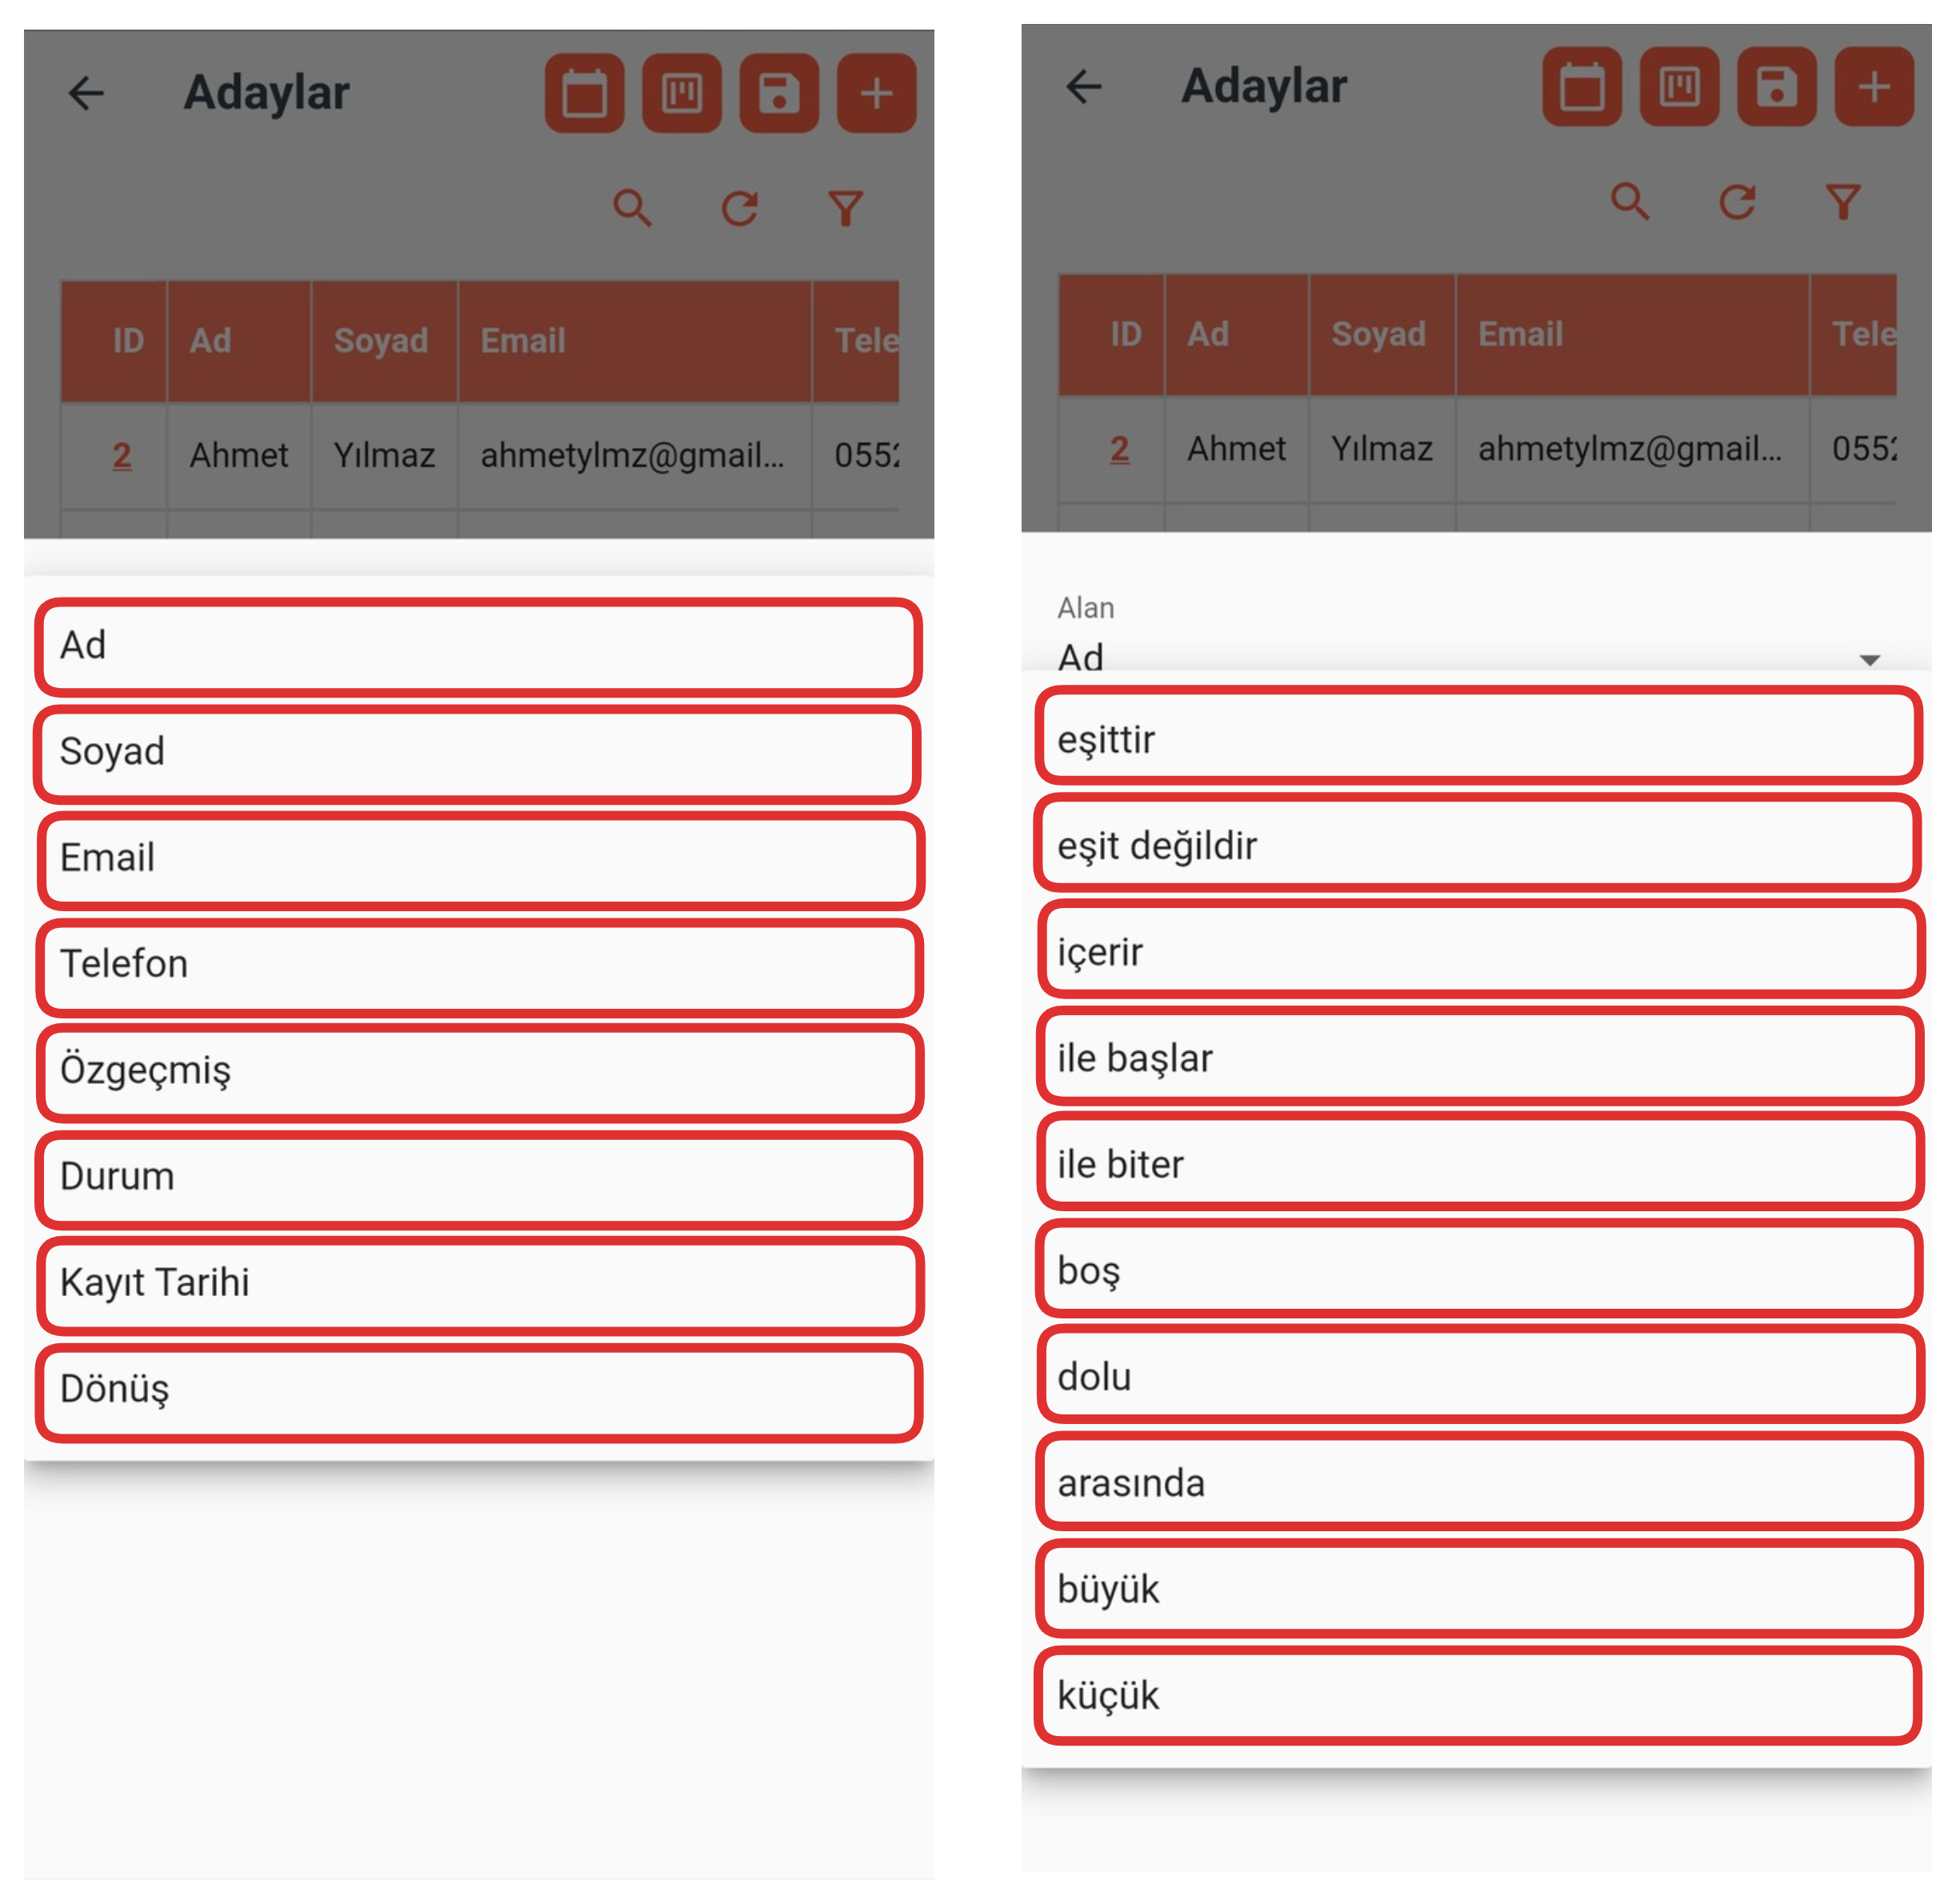
In the Field section, select a table field from the dropdown list. For example: You can choose one of fields like "Name, Surname, Email, Phone, Status". This selection determines which field the filtering will be performed on.
Then, select an operator like "Equals, Not Equals, Contains, Starts With". The operator you choose defines how filtering will be performed based on the value you enter.
Finally, enter the content you want to filter in the Value section and then click the "Filter" button to complete the process.
When you apply these steps, your table records will be displayed filtered according to only the criteria you specified.
8-) Table Records
In this section, you can view all record details about your table. You can examine the content of each record in detail and easily access the relevant data. This feature allows you to perform detailed analysis on records.