Application Elements
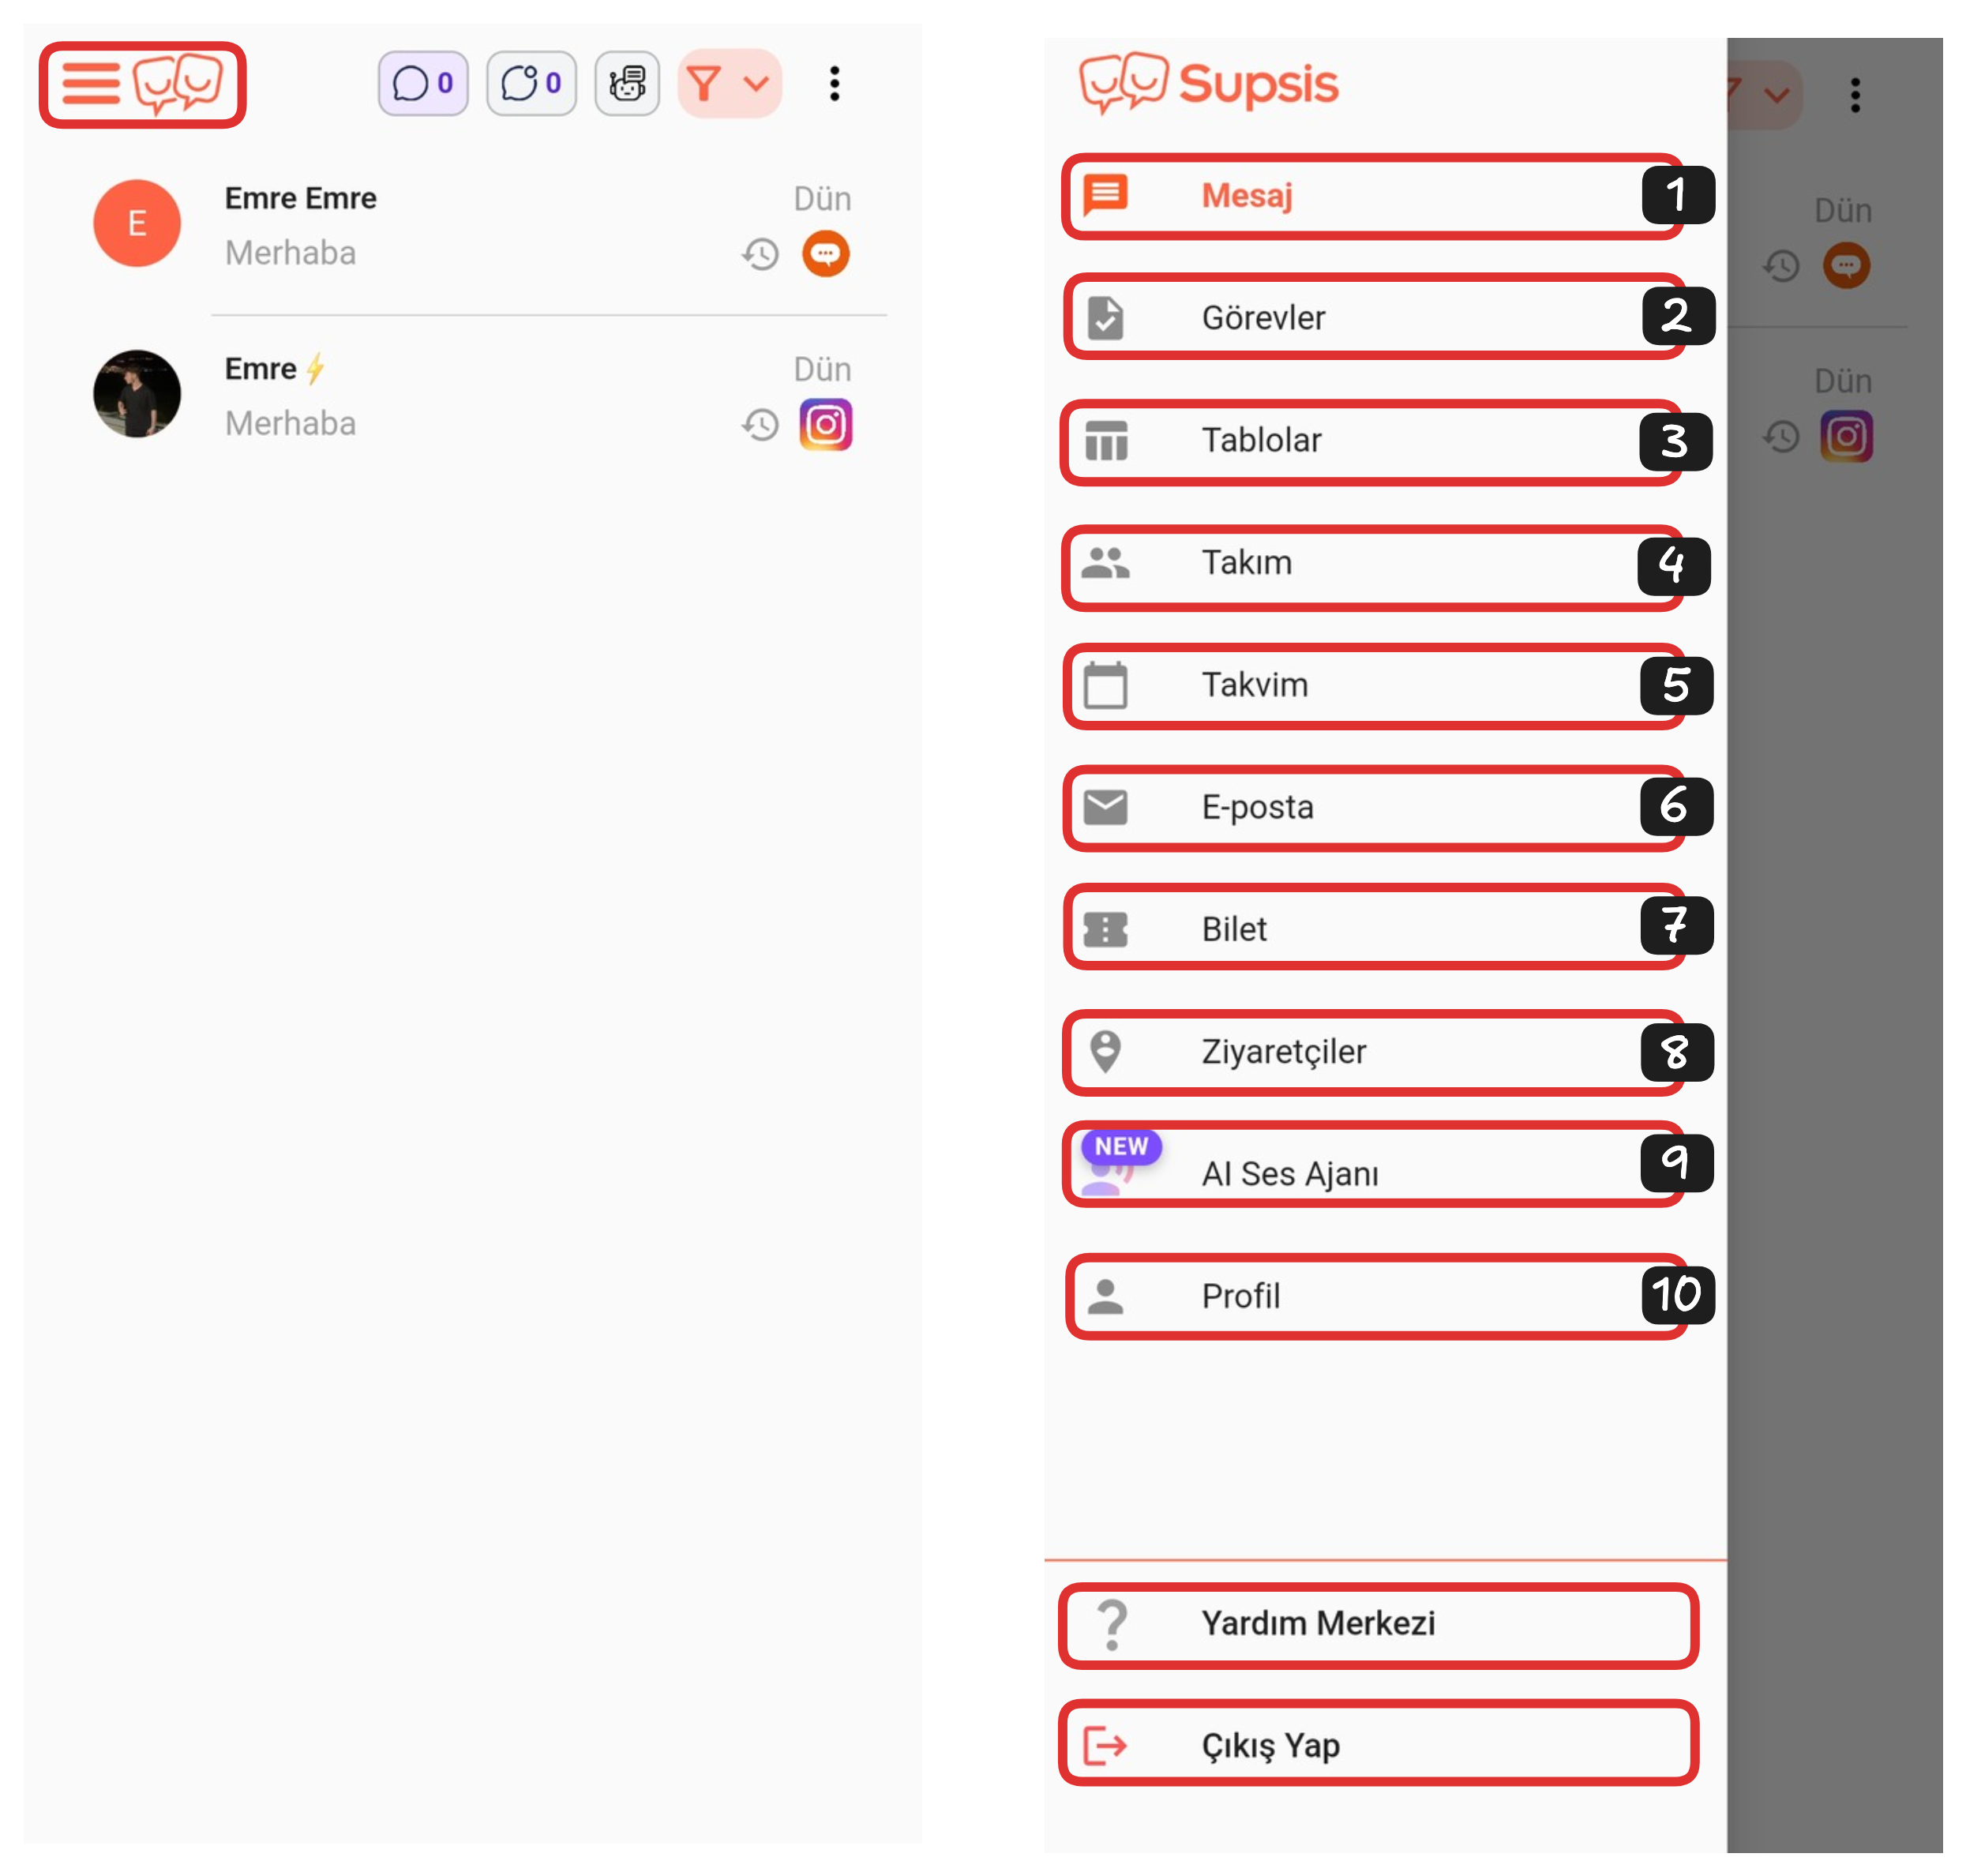
Application Elements:
- Message
- Tasks
- Tables
- Team
- Calendar
- Ticket
- Visitors
- AI Voice Agent
- Profile
10-) Profile
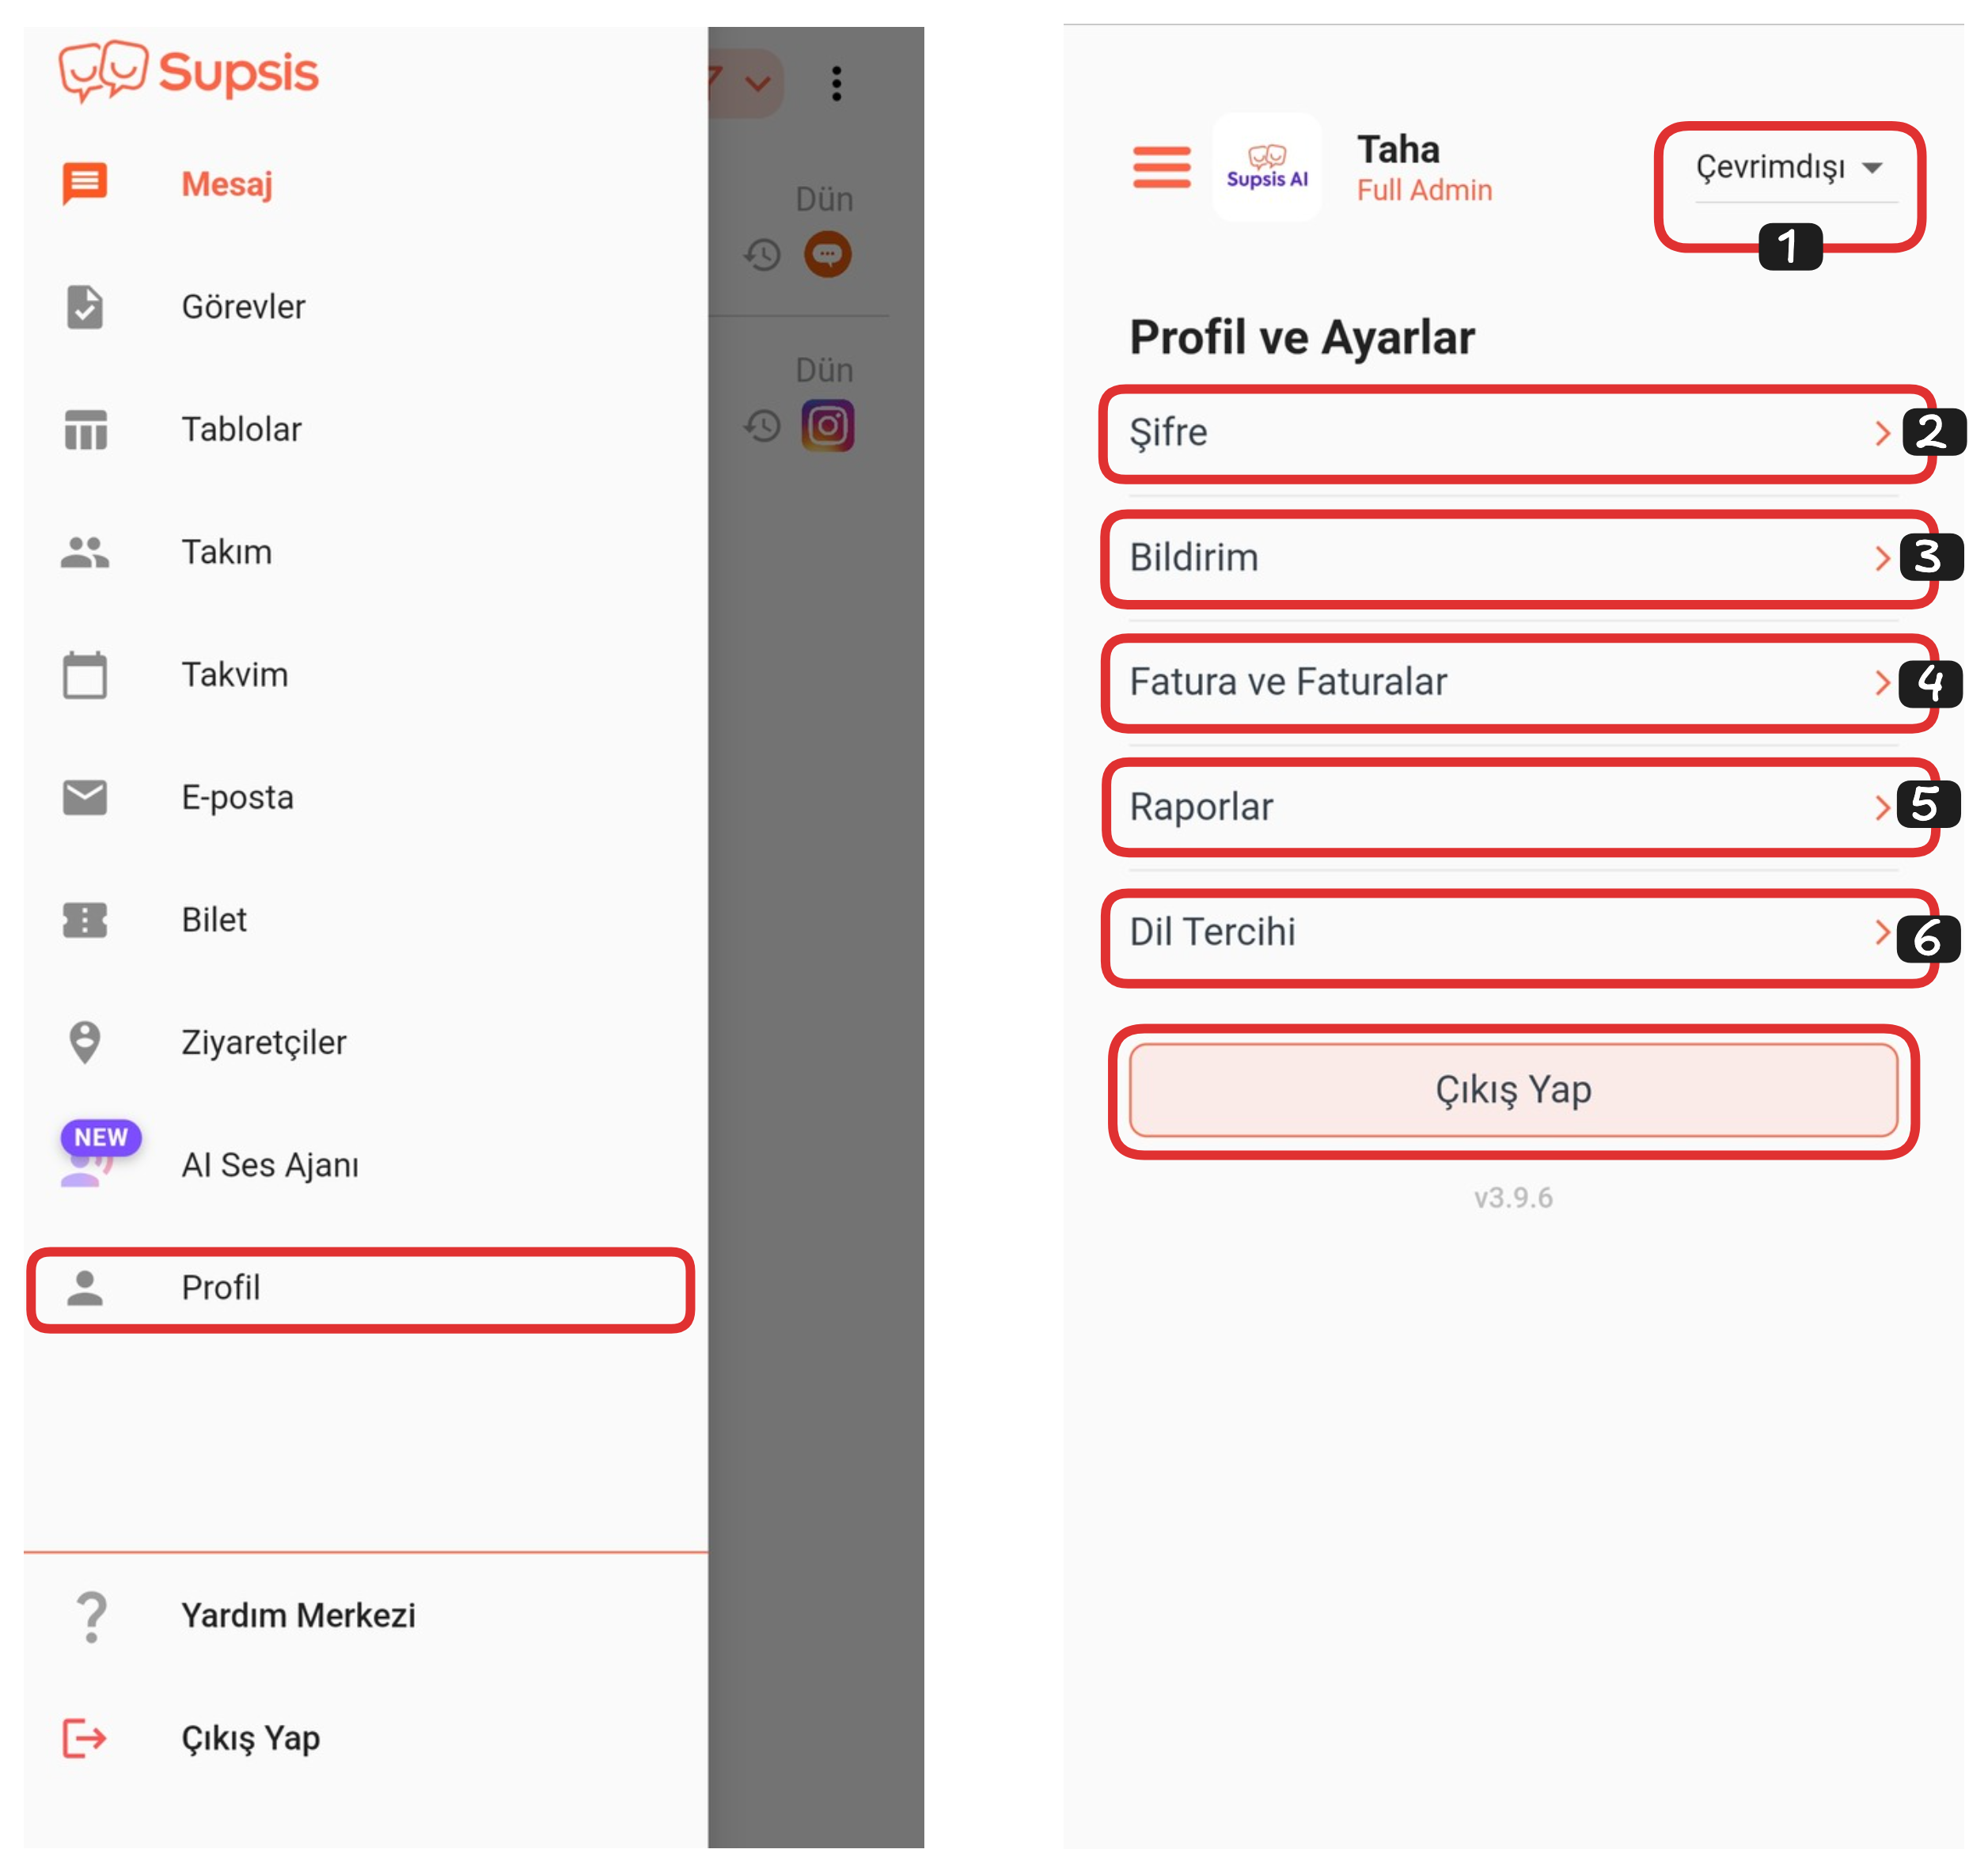
First, log into your Supsis panel. In the opened screen, click on the "Profile" area from the menu on the left. When the profile page opens, you can determine your online status through the option in the upper right corner. You can also update your personal information and arrange various settings in detail through the areas at the bottom of the page. This section offers all the necessary settings for customizing your account.
Profile Page:
- Online Status
- Password
- Notification
- Invoice & Invoices
- Reports
- Language Preference
1-) Online Status
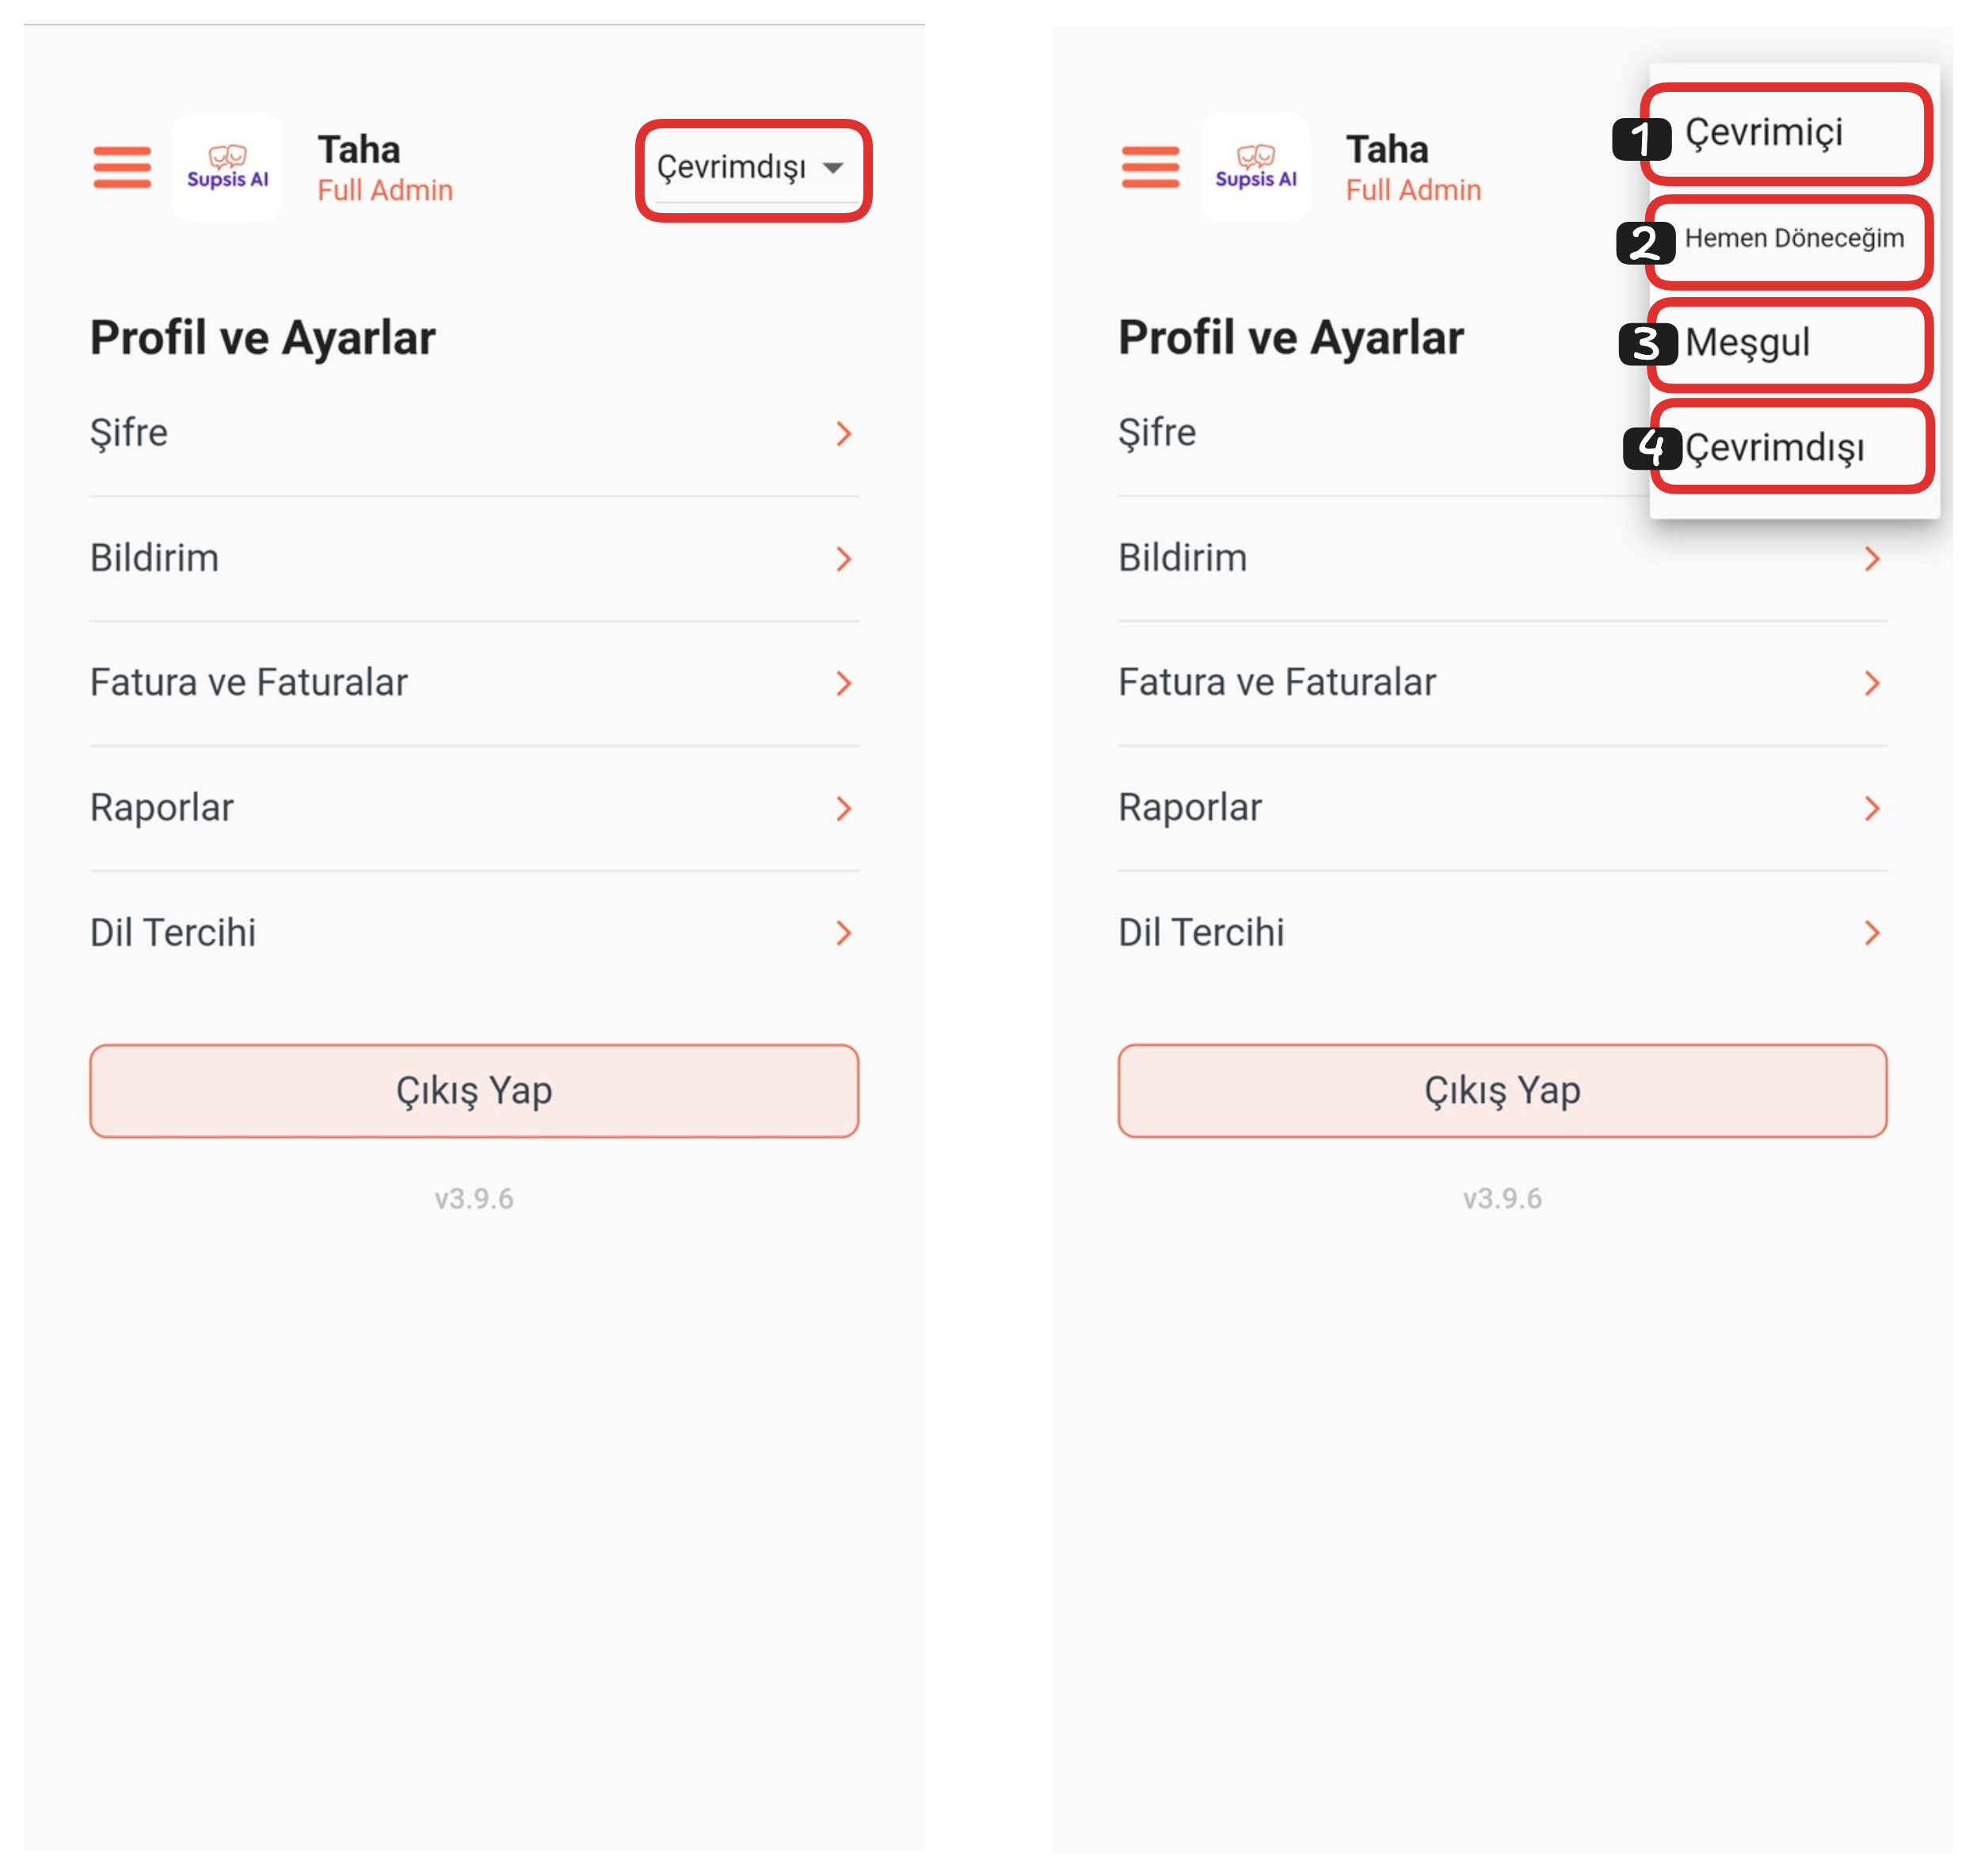
From this section, you can easily set your online status. For this, click on the area where your current status is written, for example "Offline" option. From the opened list, you can choose any of the status options such as "Offline", "Be Right Back", "Busy" and "Online". This setting allows other users to see your availability status and directs the communication process accordingly.
2-) Password
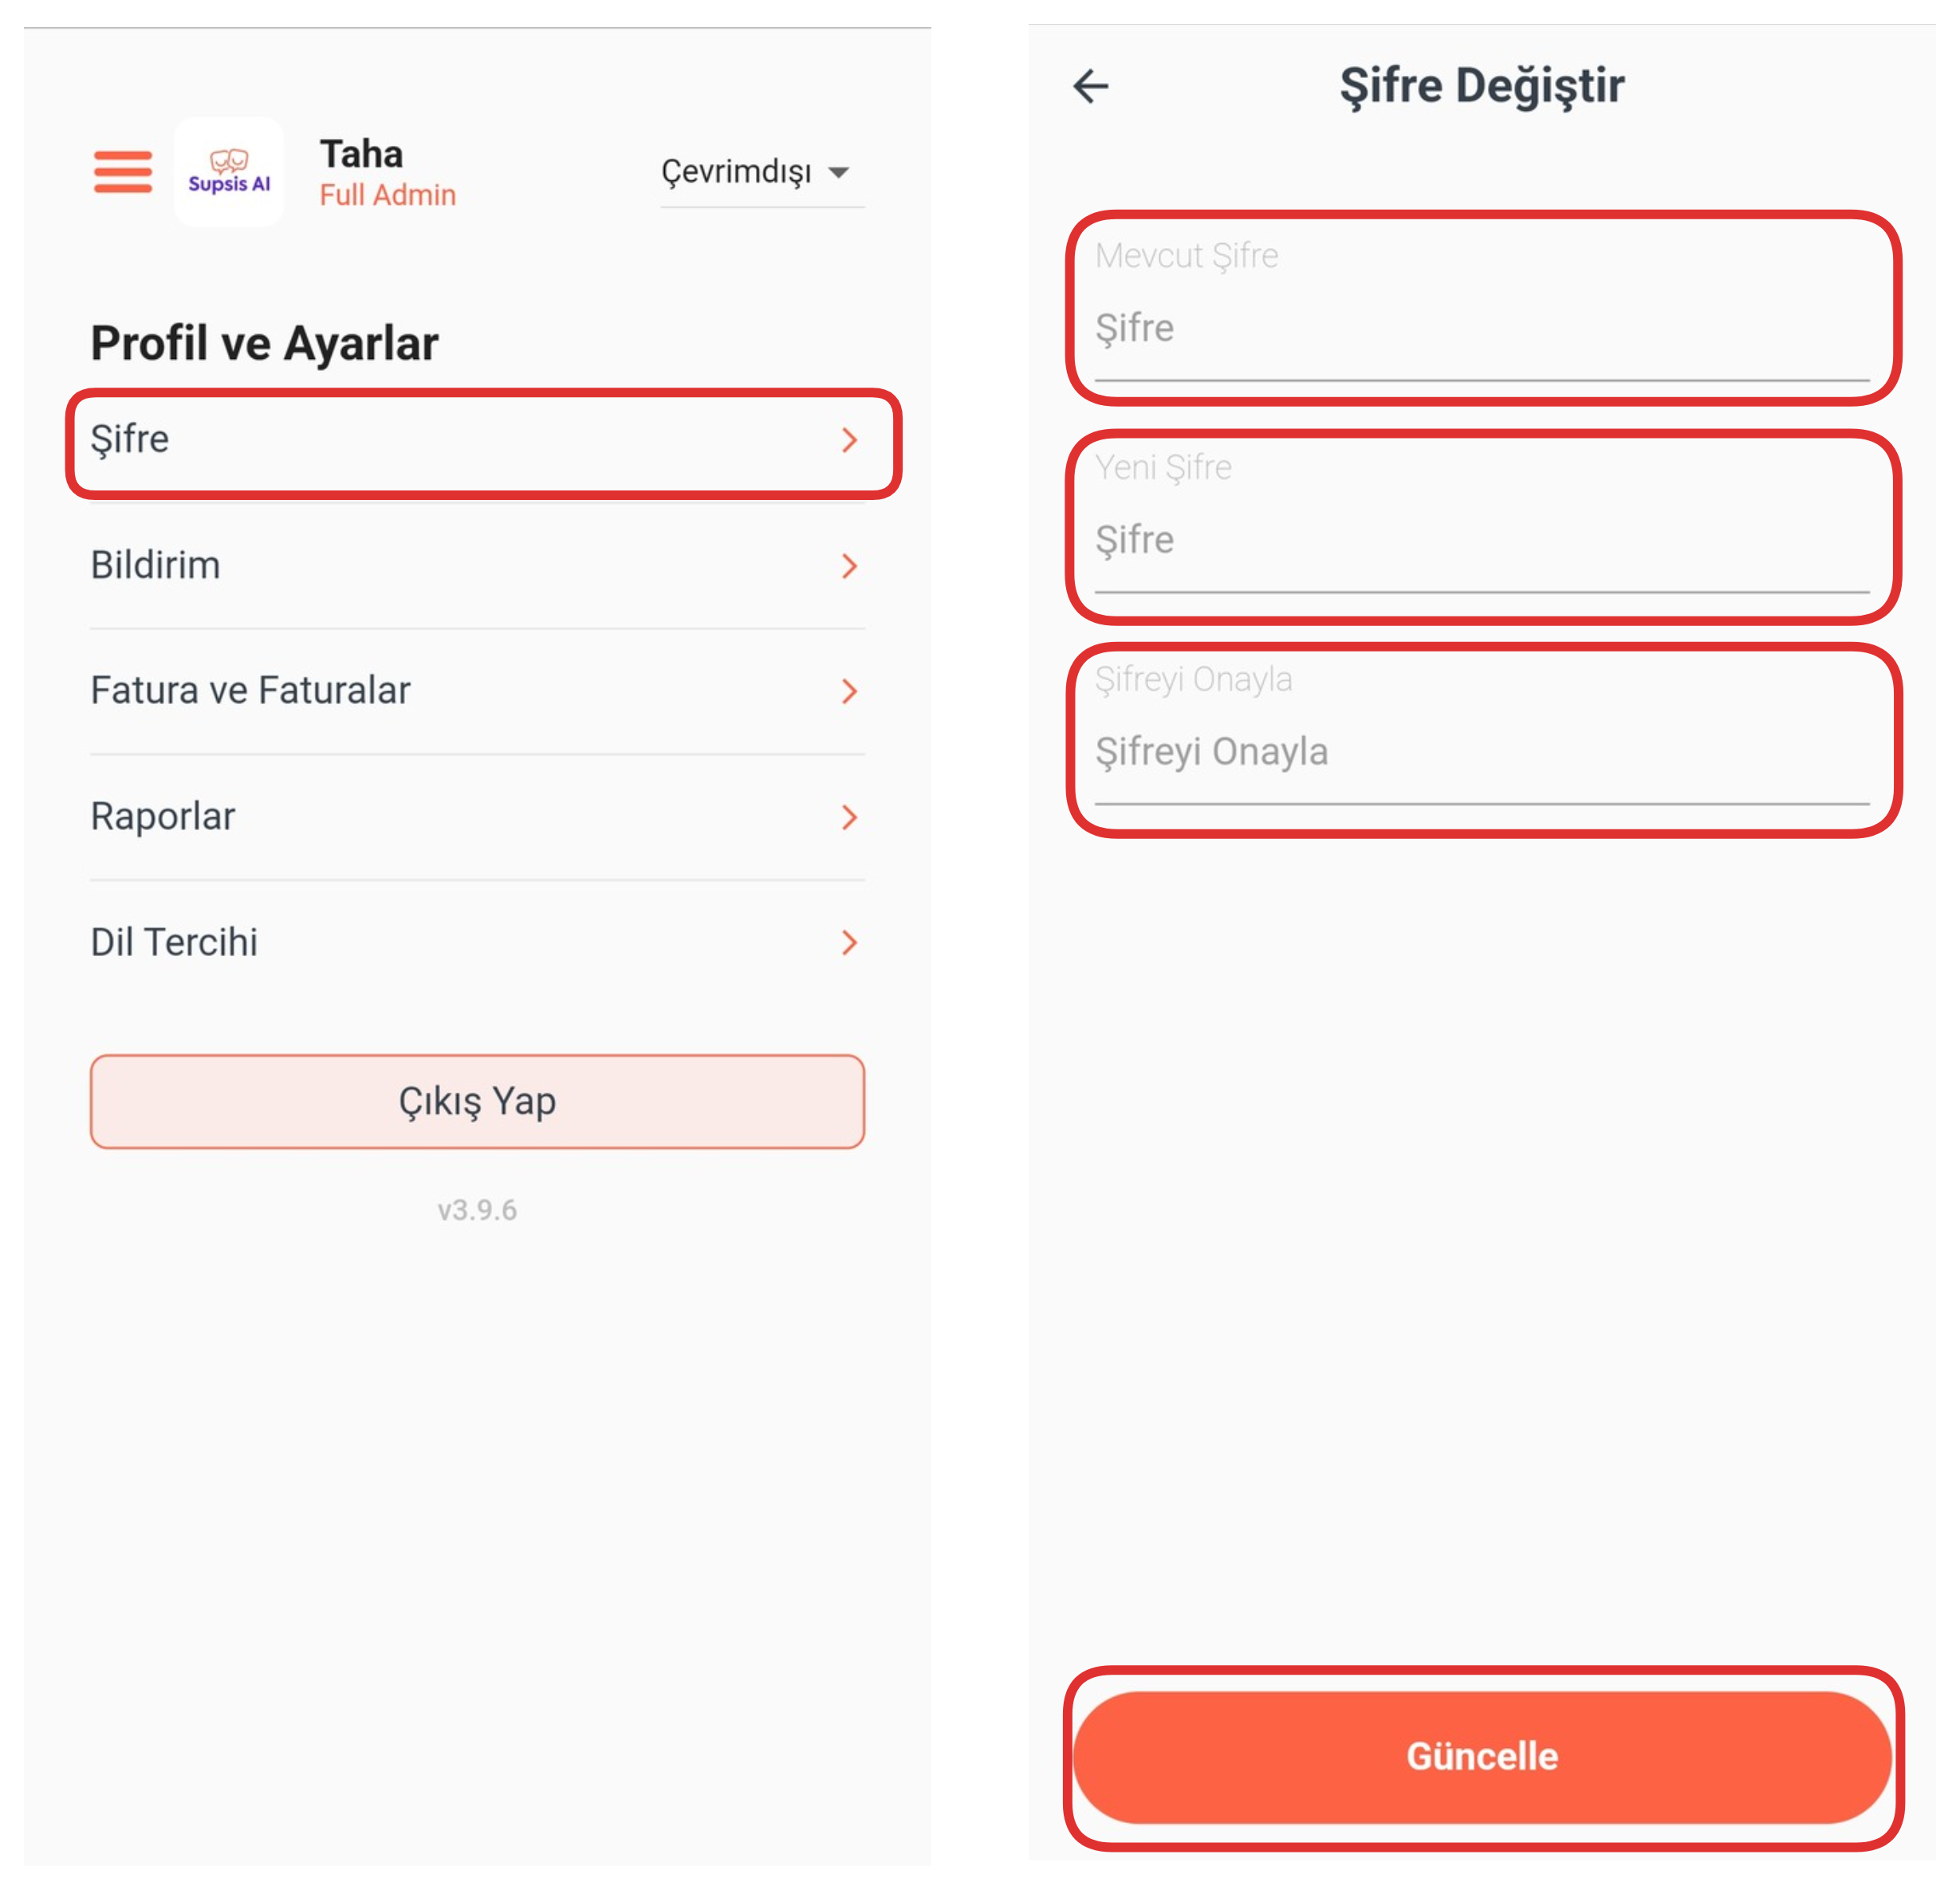
If you want to renew your password, click on the "Password" option from the Profile menu. In the opened screen, first enter your current password in the "Current Password" field. Then write the new password you want to set in the "New Password" field below. In the "Confirm Password" section right below, enter your new password again. After filling all fields completely, click the "Update" button. If your old password is correct and you entered your new password correctly in the confirmation section, your password will be successfully updated.
3-) Notification
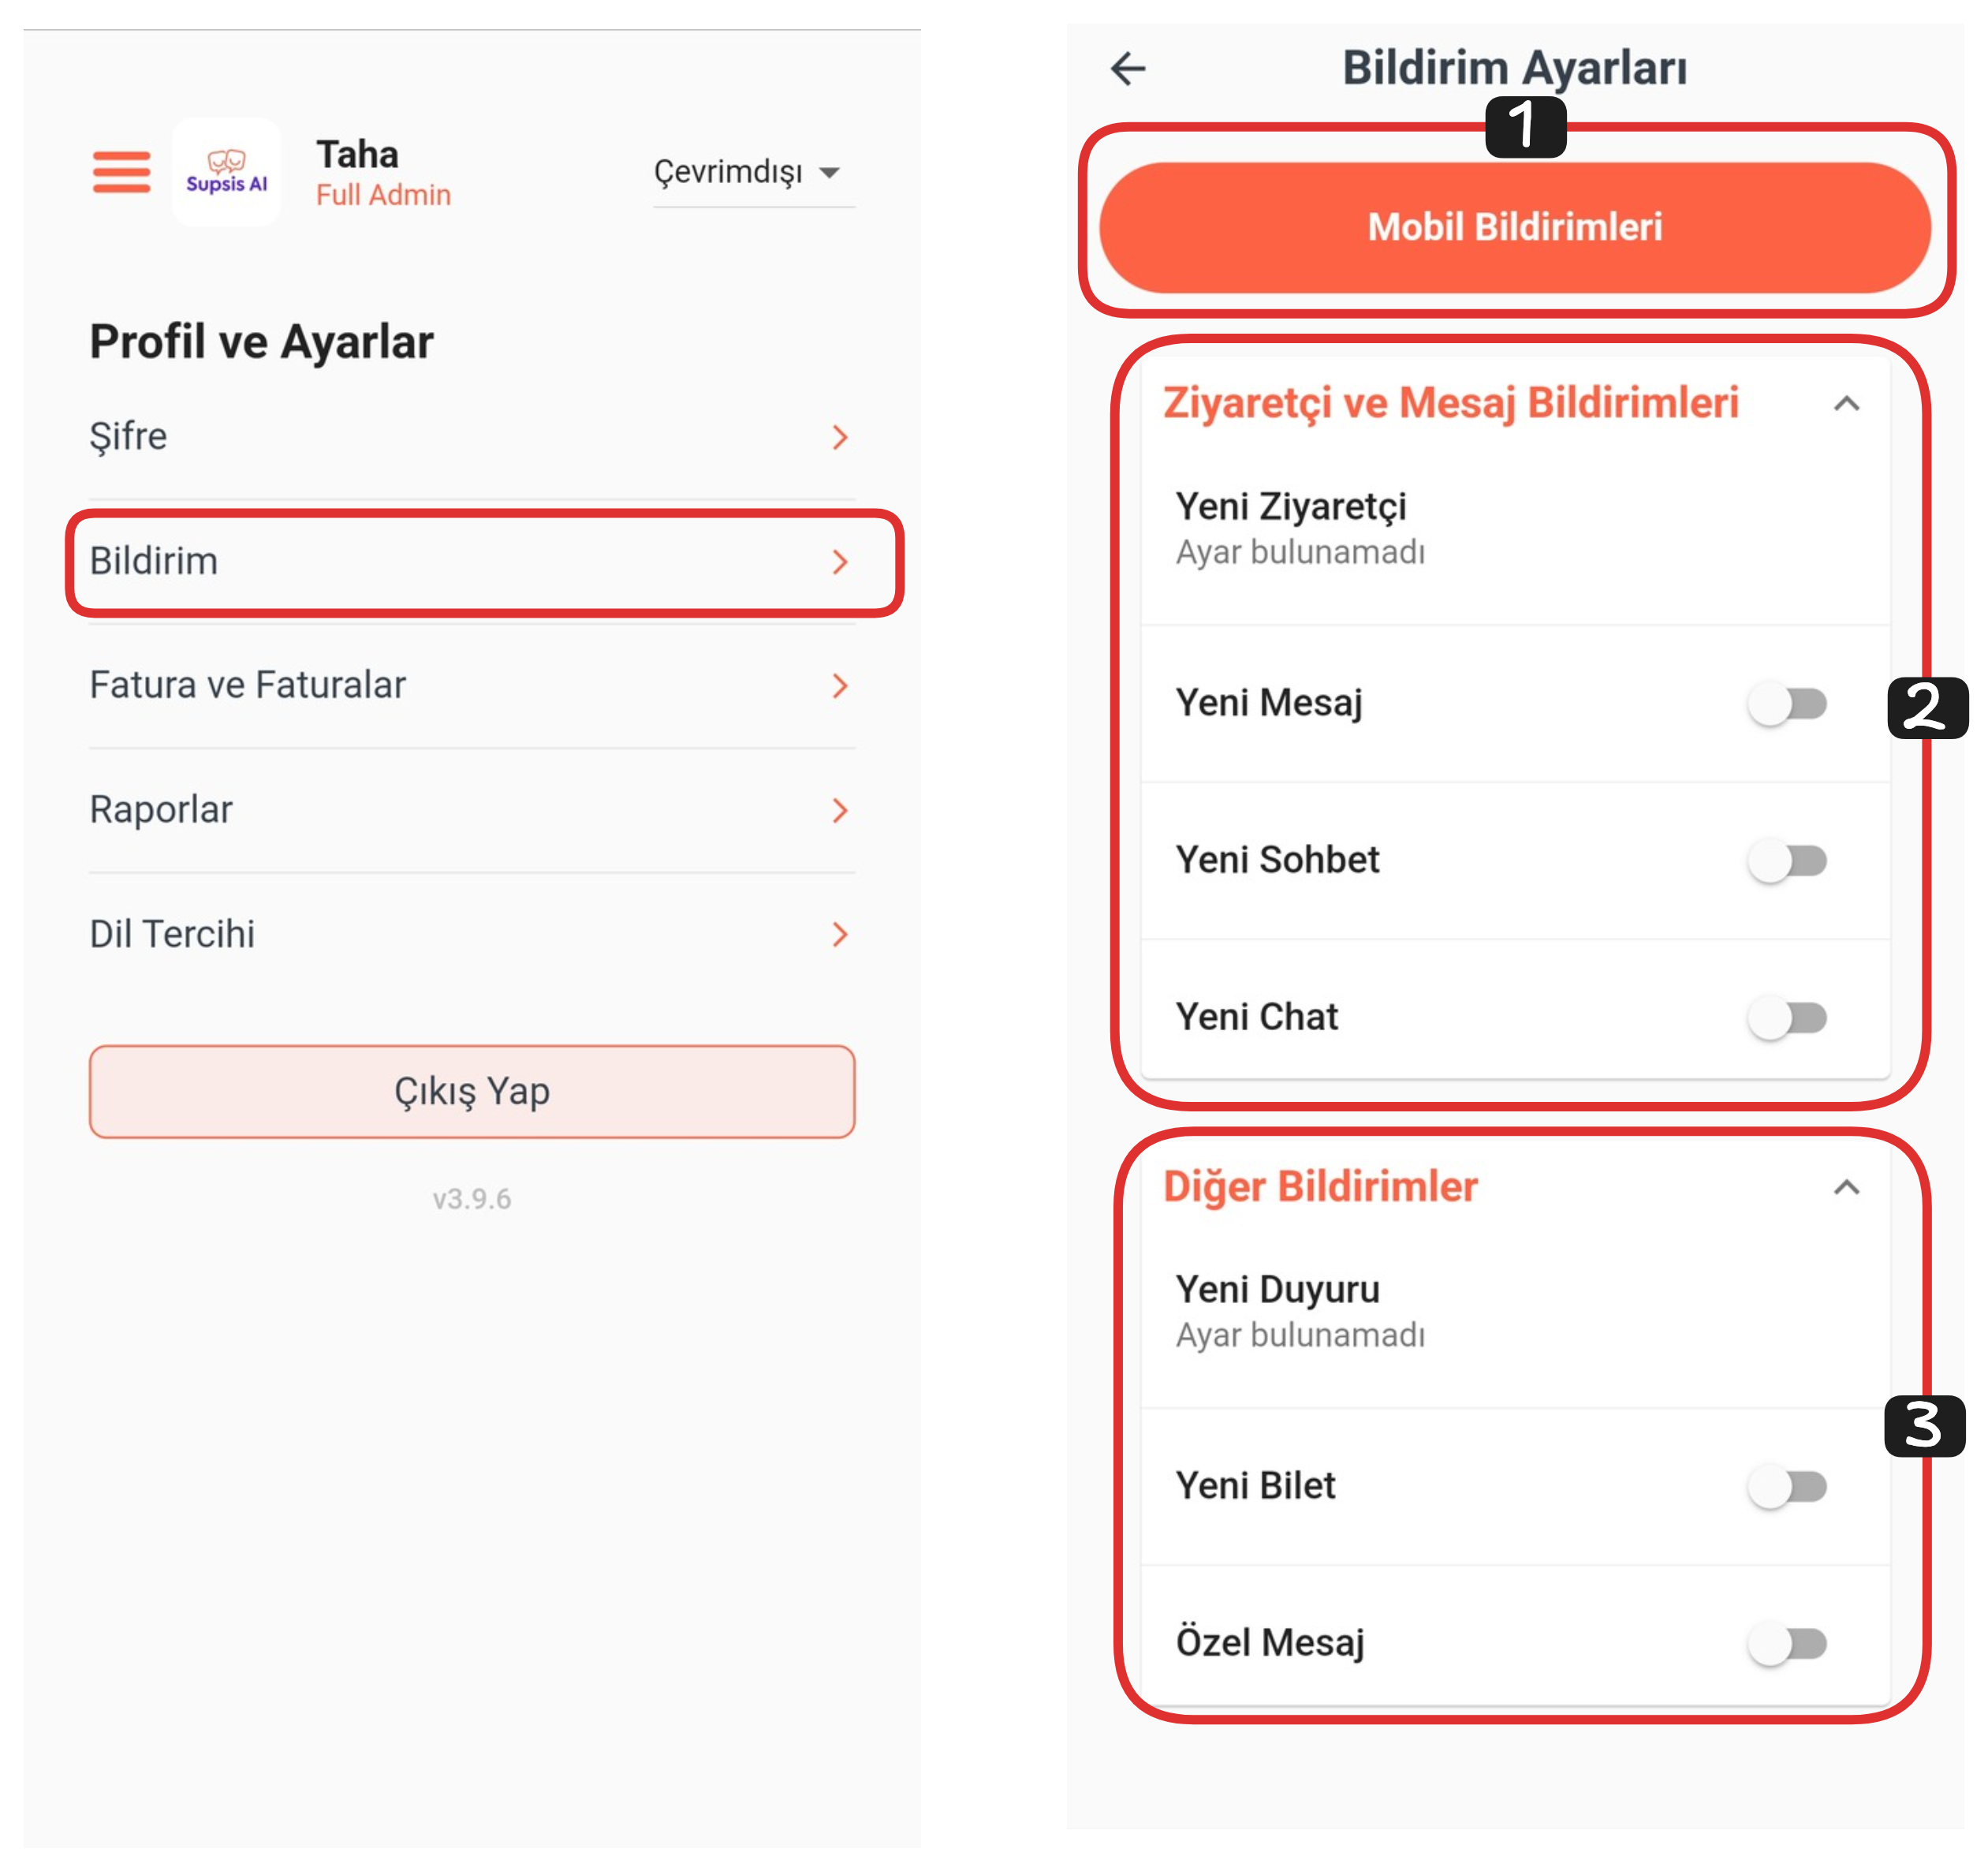
First, click on the "Notification" option from the "Profile" menu. This operation directs you to the notification settings page. In the opened screen, you can determine what kind of notifications the system will send you and customize these settings according to your preference. You can shape your notification experience according to your needs by managing email, in-app notification or mobile notification options from this section.
Notification Page:
- Mobile Notifications
- Visitor and Message Notifications
- Other Notifications
1-) Mobile Notifications
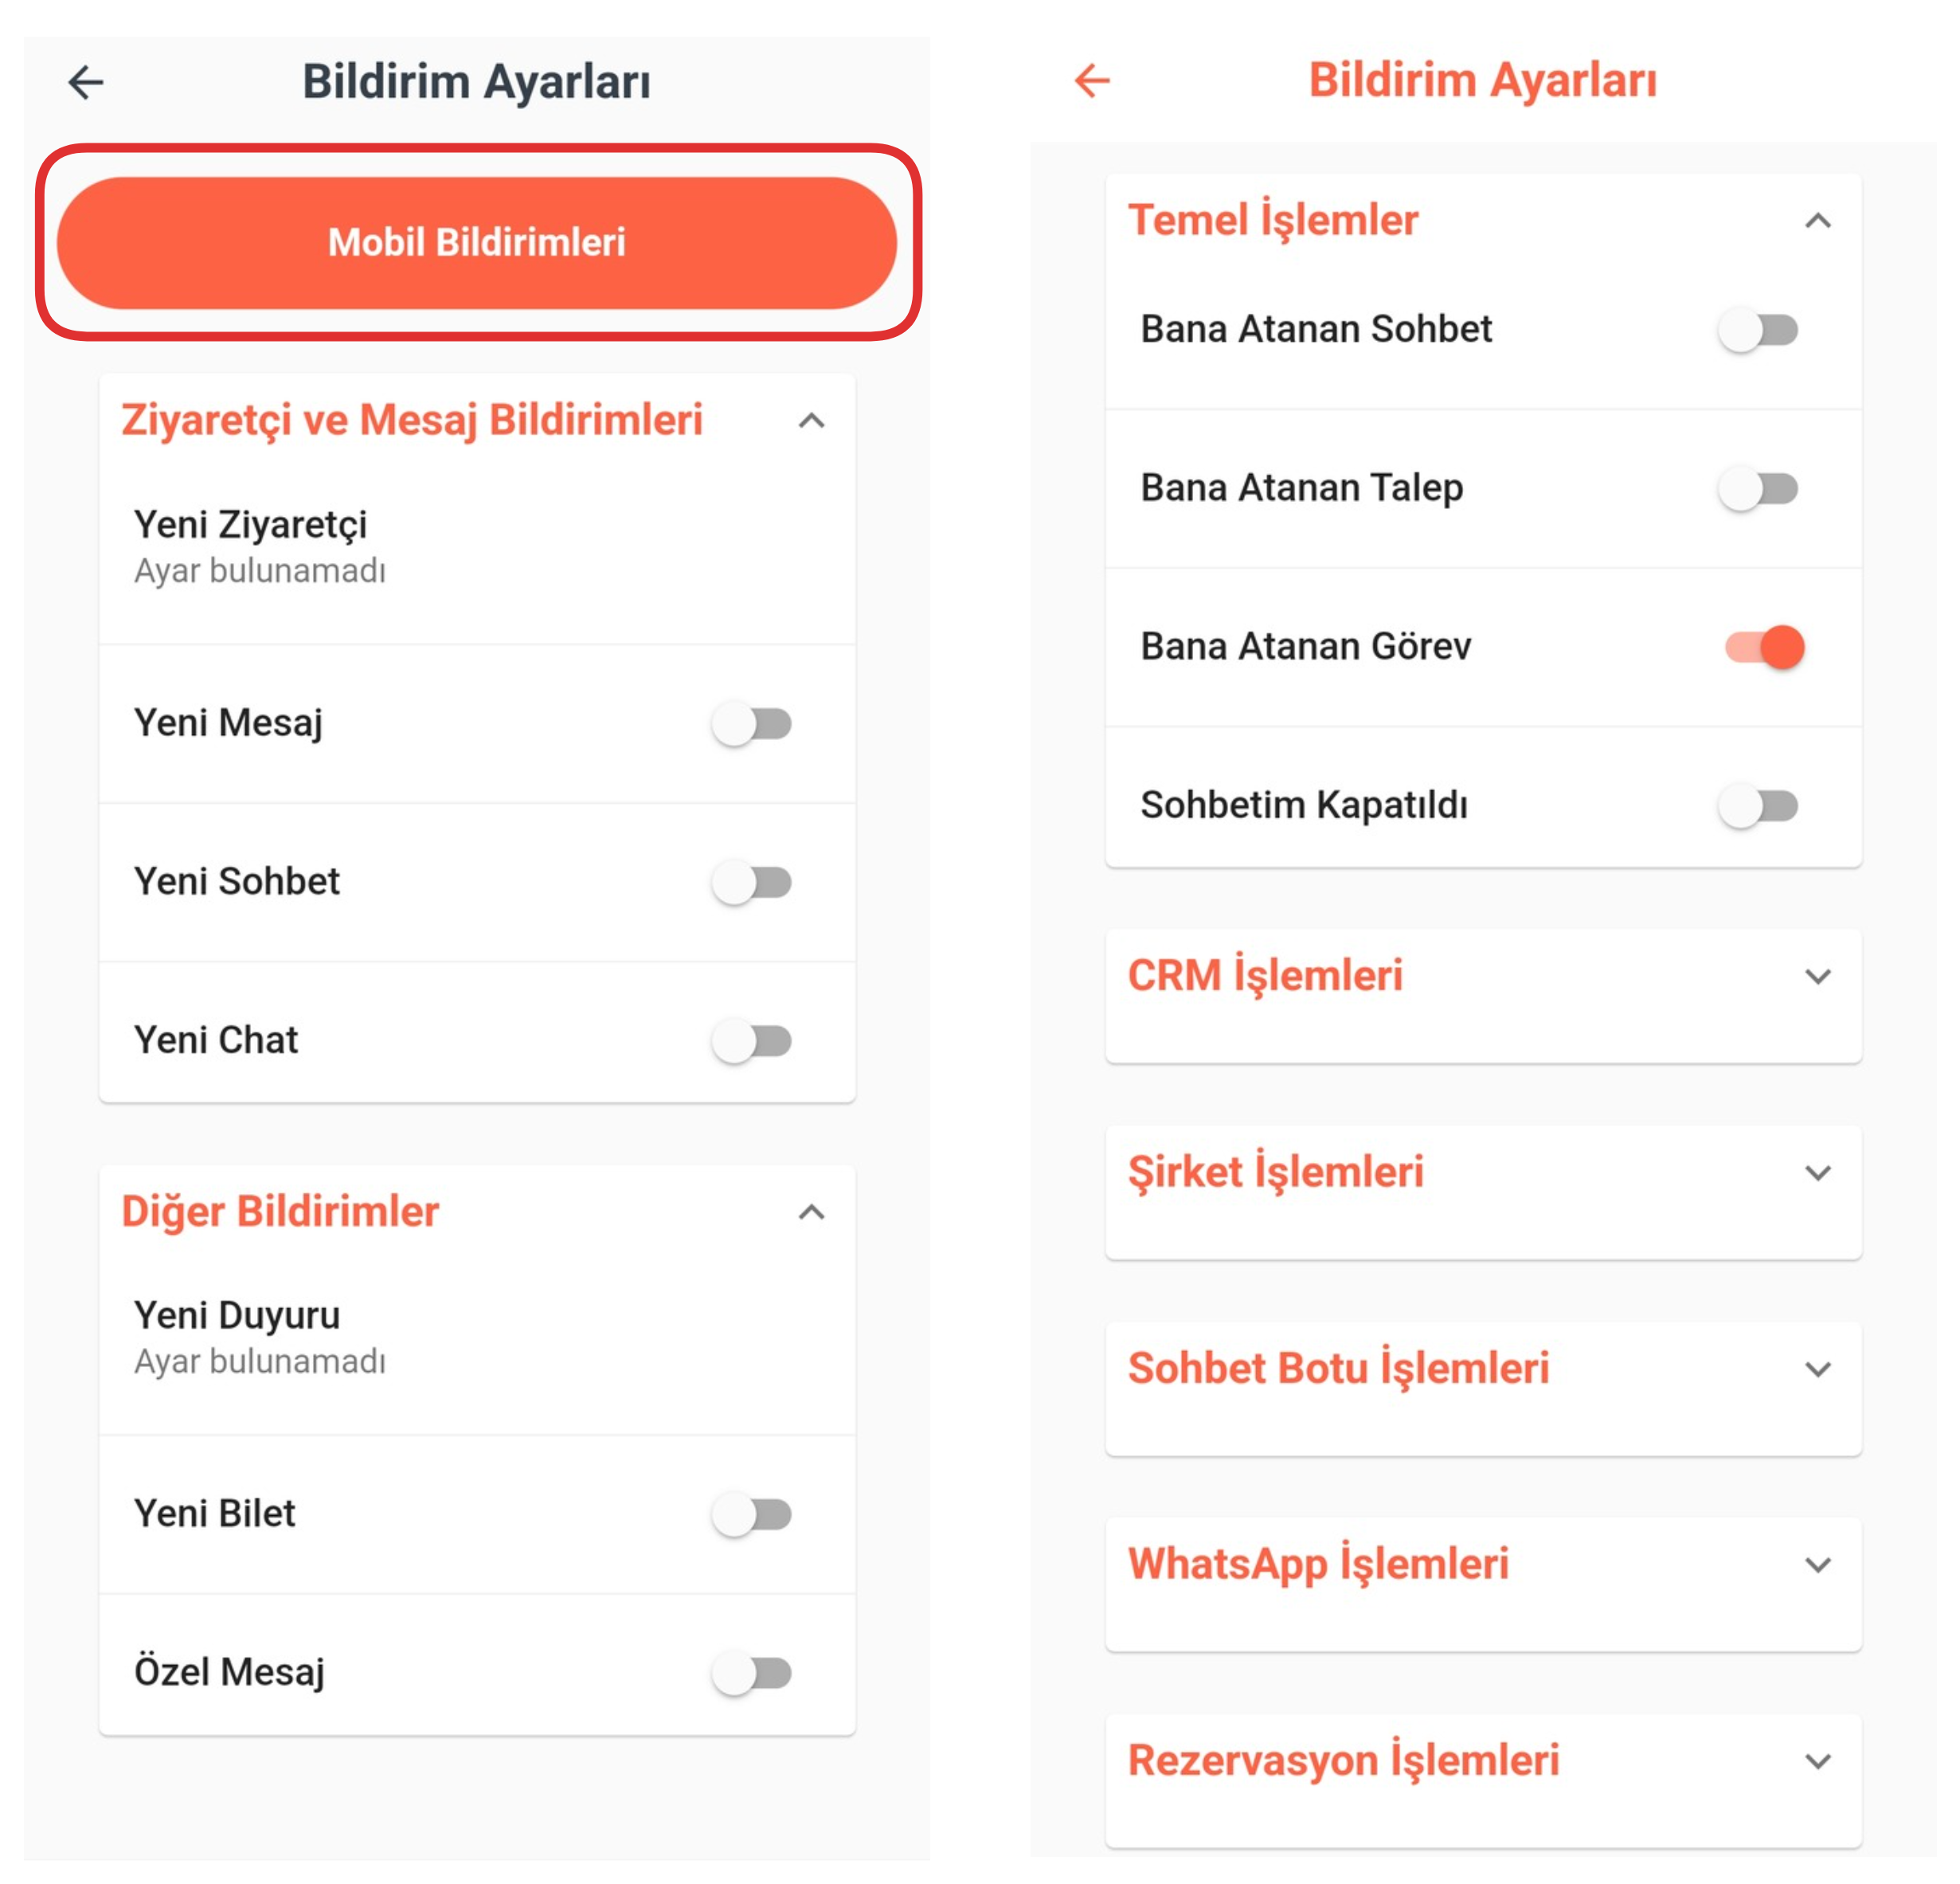
First, enter the notification settings section and click on the "Mobile Notifications" option. In the opened screen, you can customize your mobile notifications in detail. Among the options in this area are; Basic Functions, CRM Operations, Company Operations, Chat Bot Operations, WhatsApp Operations and Reservation Operations. Under each heading, you can optimize which notifications will be sent to your mobile device according to your needs by activating or deactivating the relevant notification types.
2-) Visitor and Message Notifications
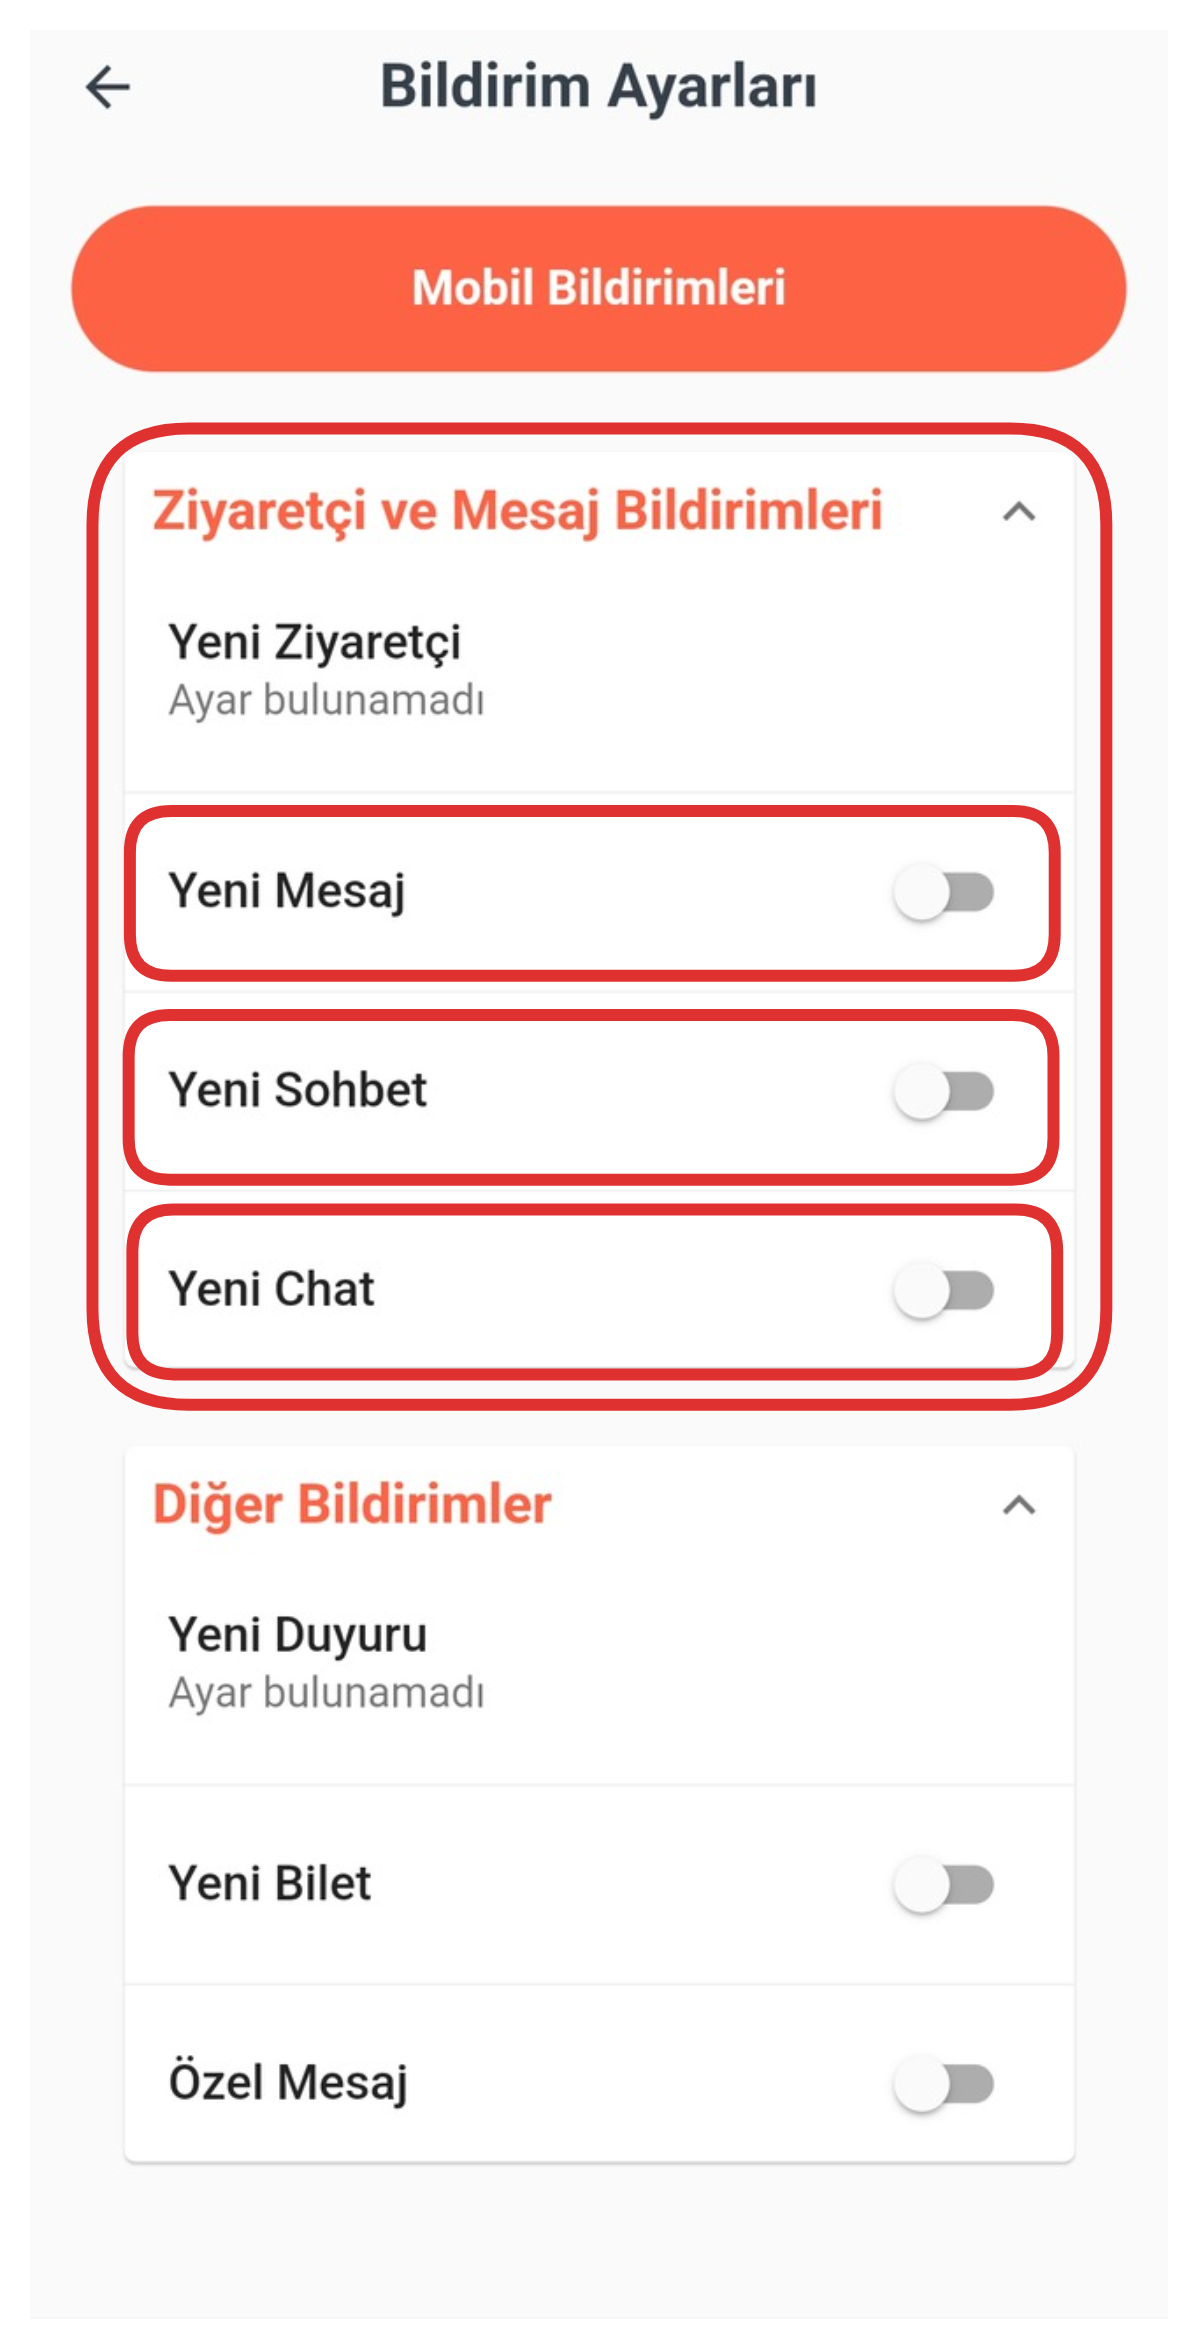
Visitor and Message notifications can be managed from this section. You can determine from this area whether you will receive notifications when events such as "New Message", "New Chat" and "New Chat" occur. If you activate the relevant options, notifications will be sent to your mobile device when such developments occur. This way, you can track incoming messages and chats instantly.
3-) Other Notifications
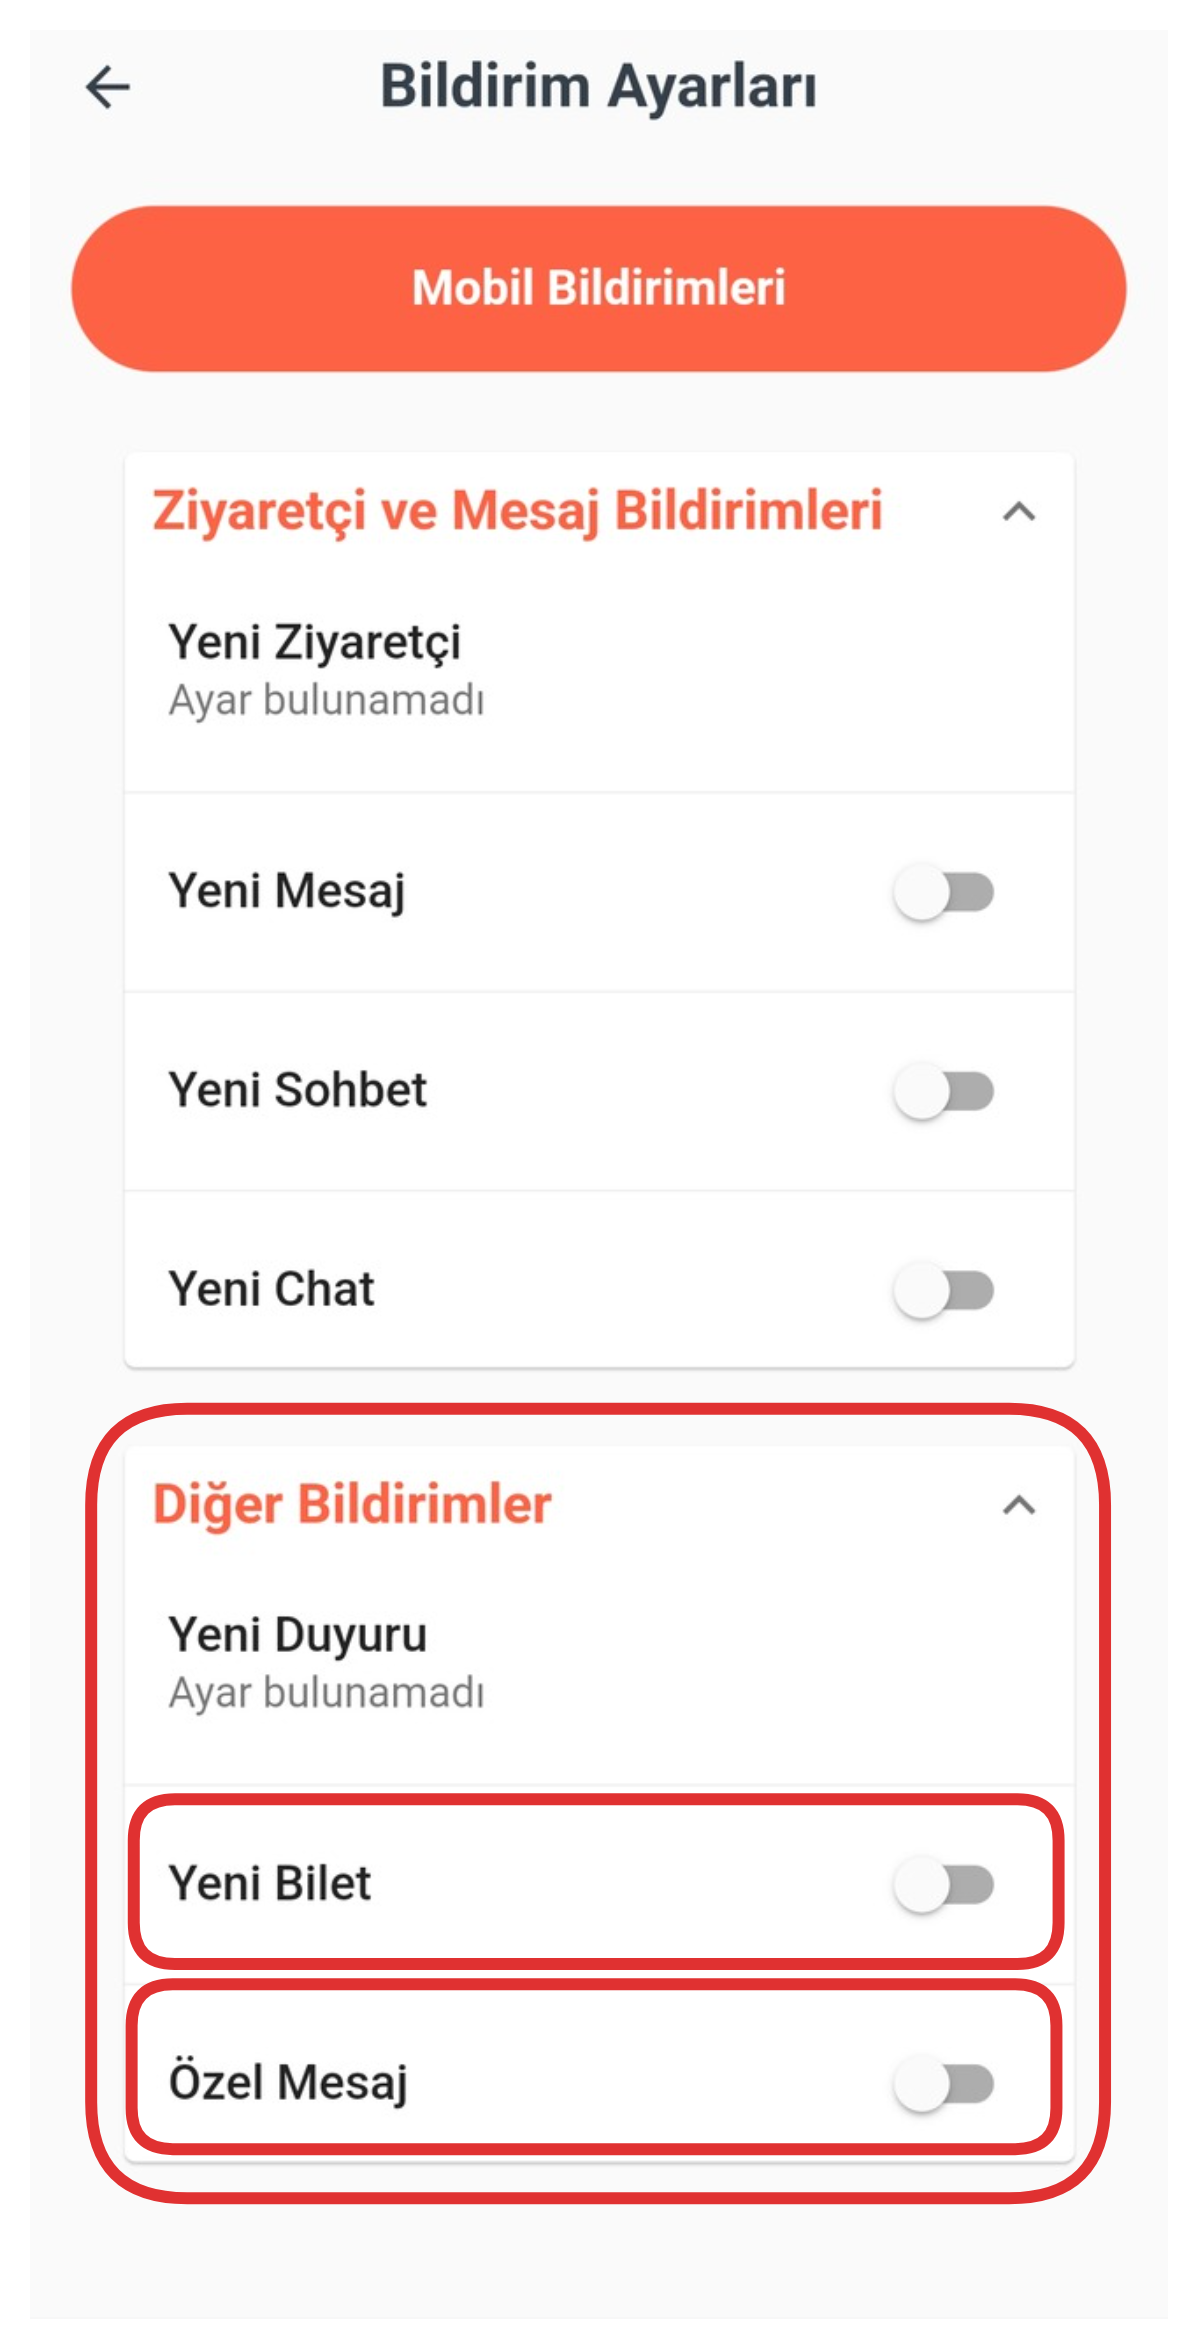
The Other Notifications section allows you to manage notification preferences outside of basic settings. From this section, you can determine whether you will receive notifications when a new ticket is created or when a special message is sent to you. By activating the relevant options, you can track such developments instantly; by deactivating them, you can stop receiving notifications. This area is useful for controlling more specific notifications.
4-) Invoice & Invoices
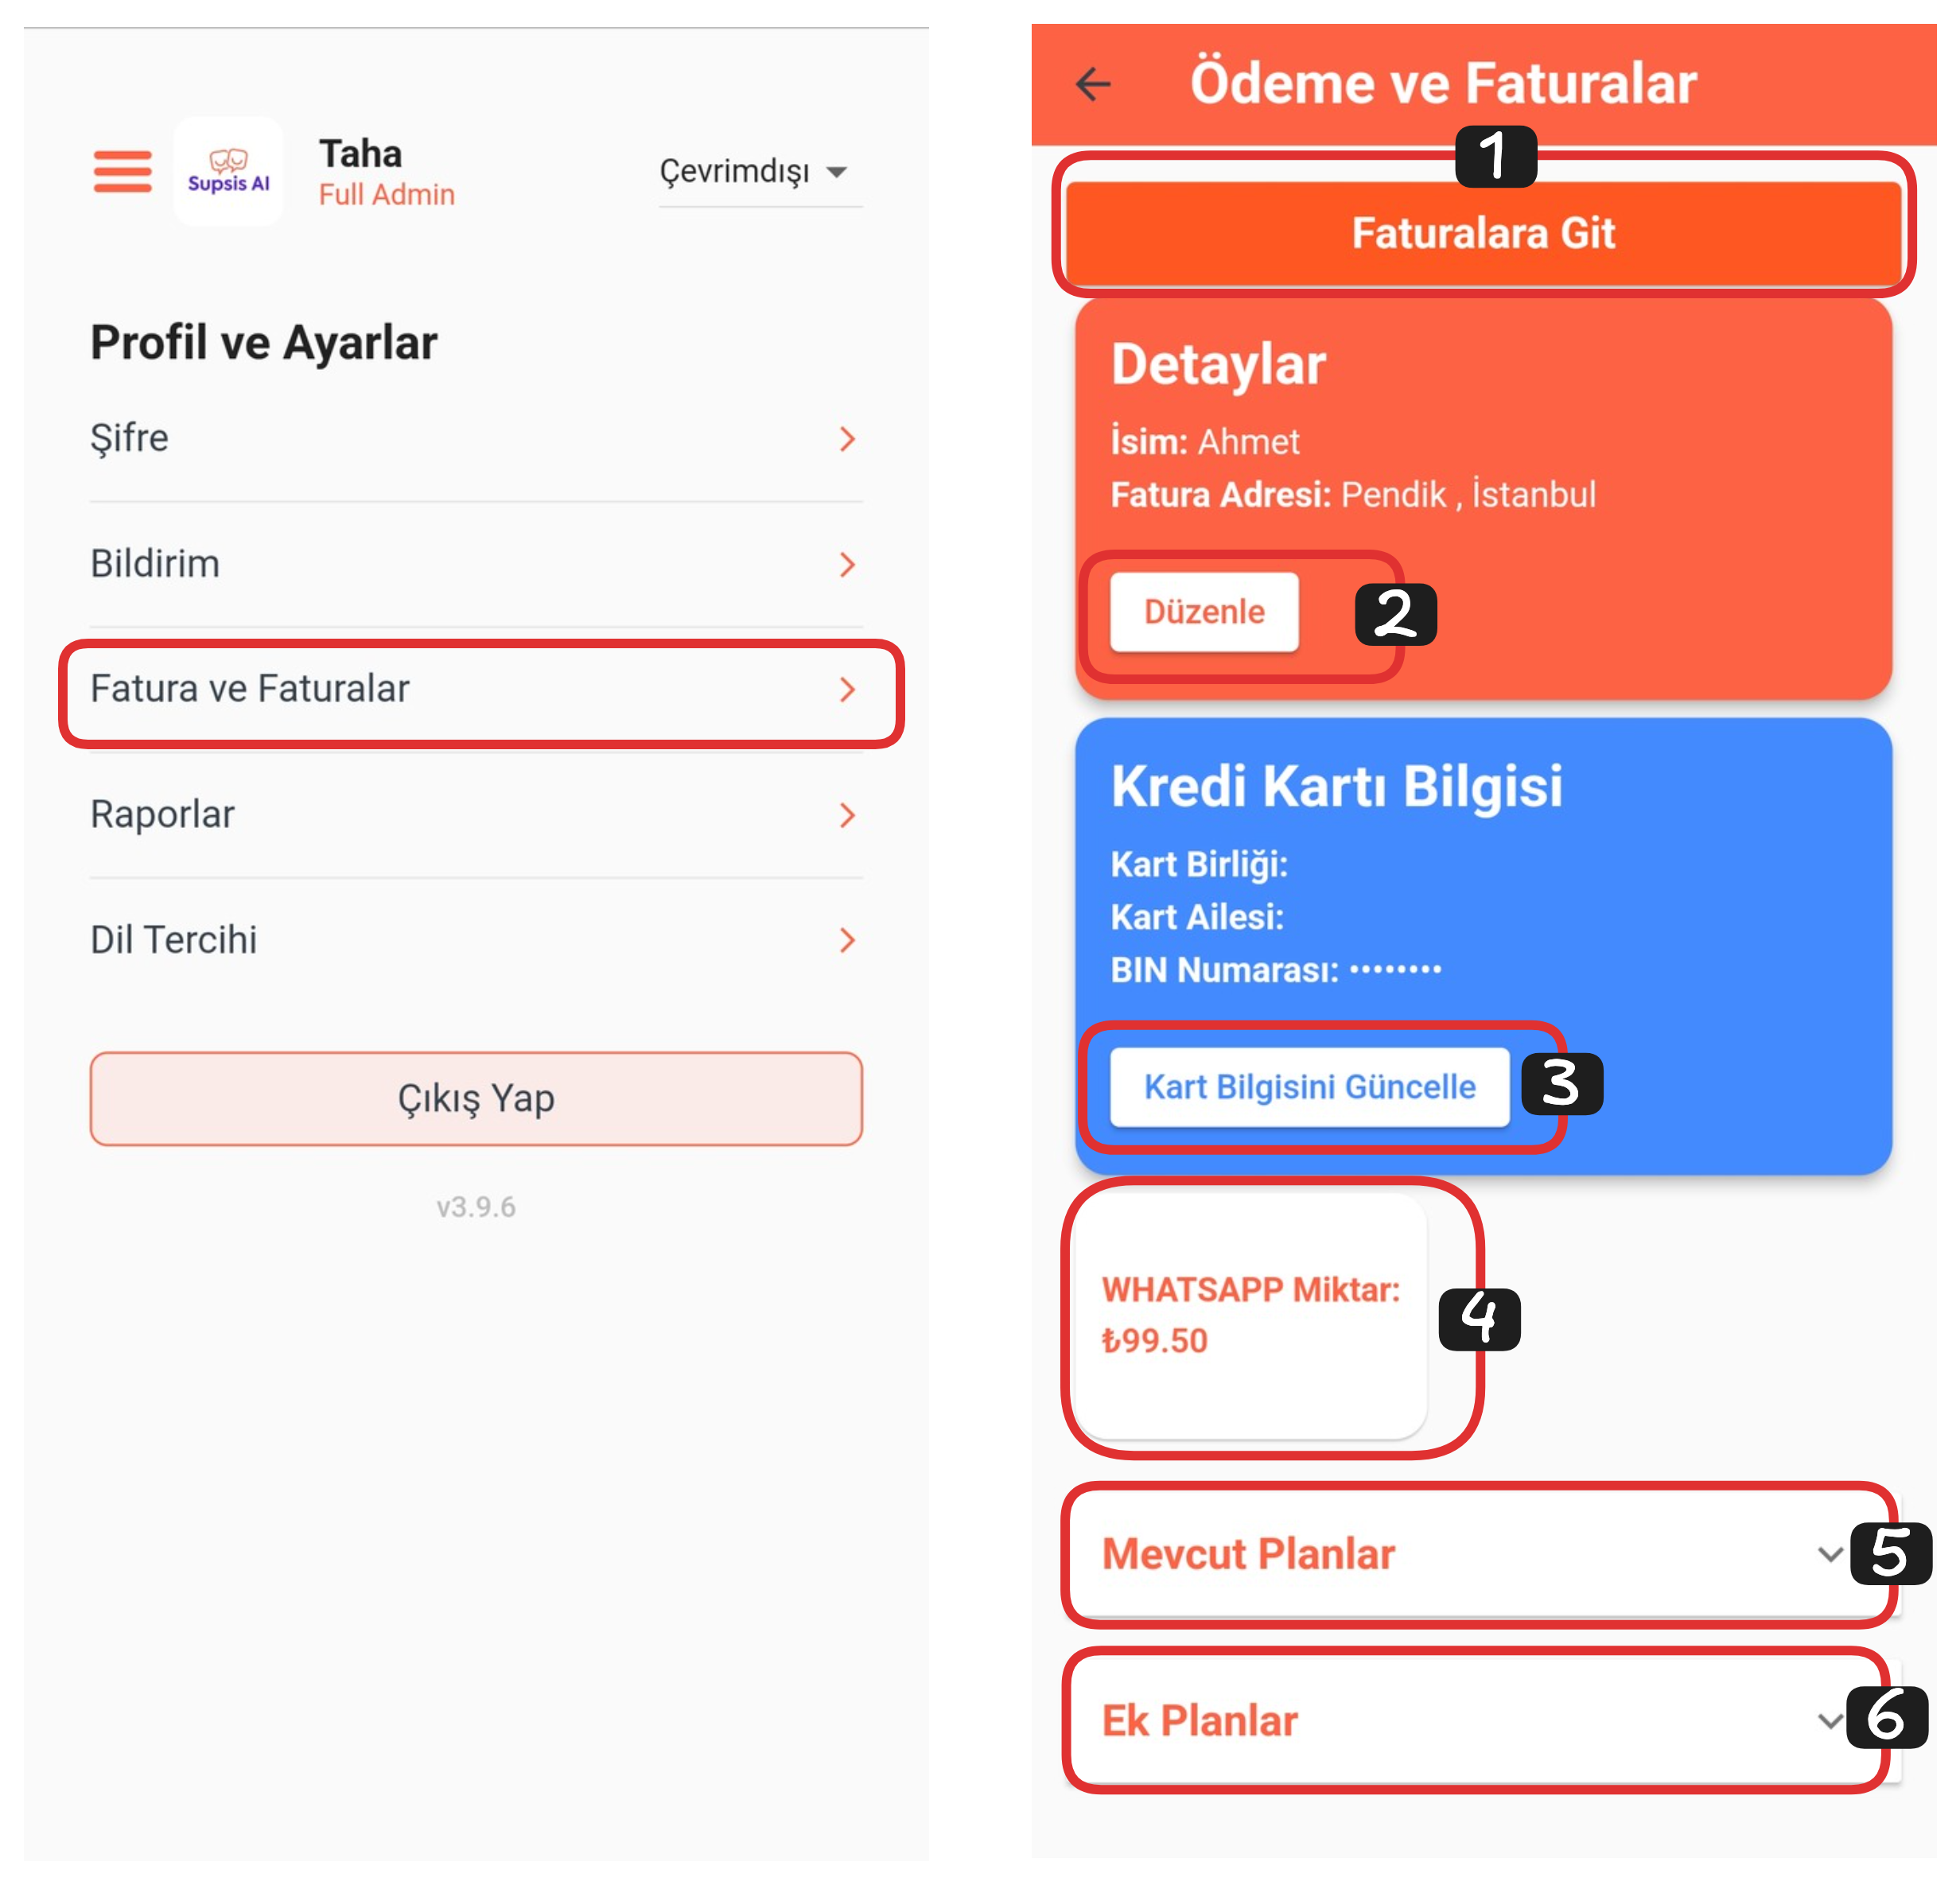
First, click on the "Invoice and Invoices" section from the "Profile" menu. On the opened page, you can access basic invoice settings. In this area, you can view, edit your invoice information and access your invoice history defined in the system. Invoice settings are an important management area for your payment processes to proceed regularly and smoothly.
Invoices Page:
- Go to Invoices
- Invoice Details
- Update Card Information
- WhatsApp Amount
- Current Plans
- Additional Plans
1-) Go to Invoices
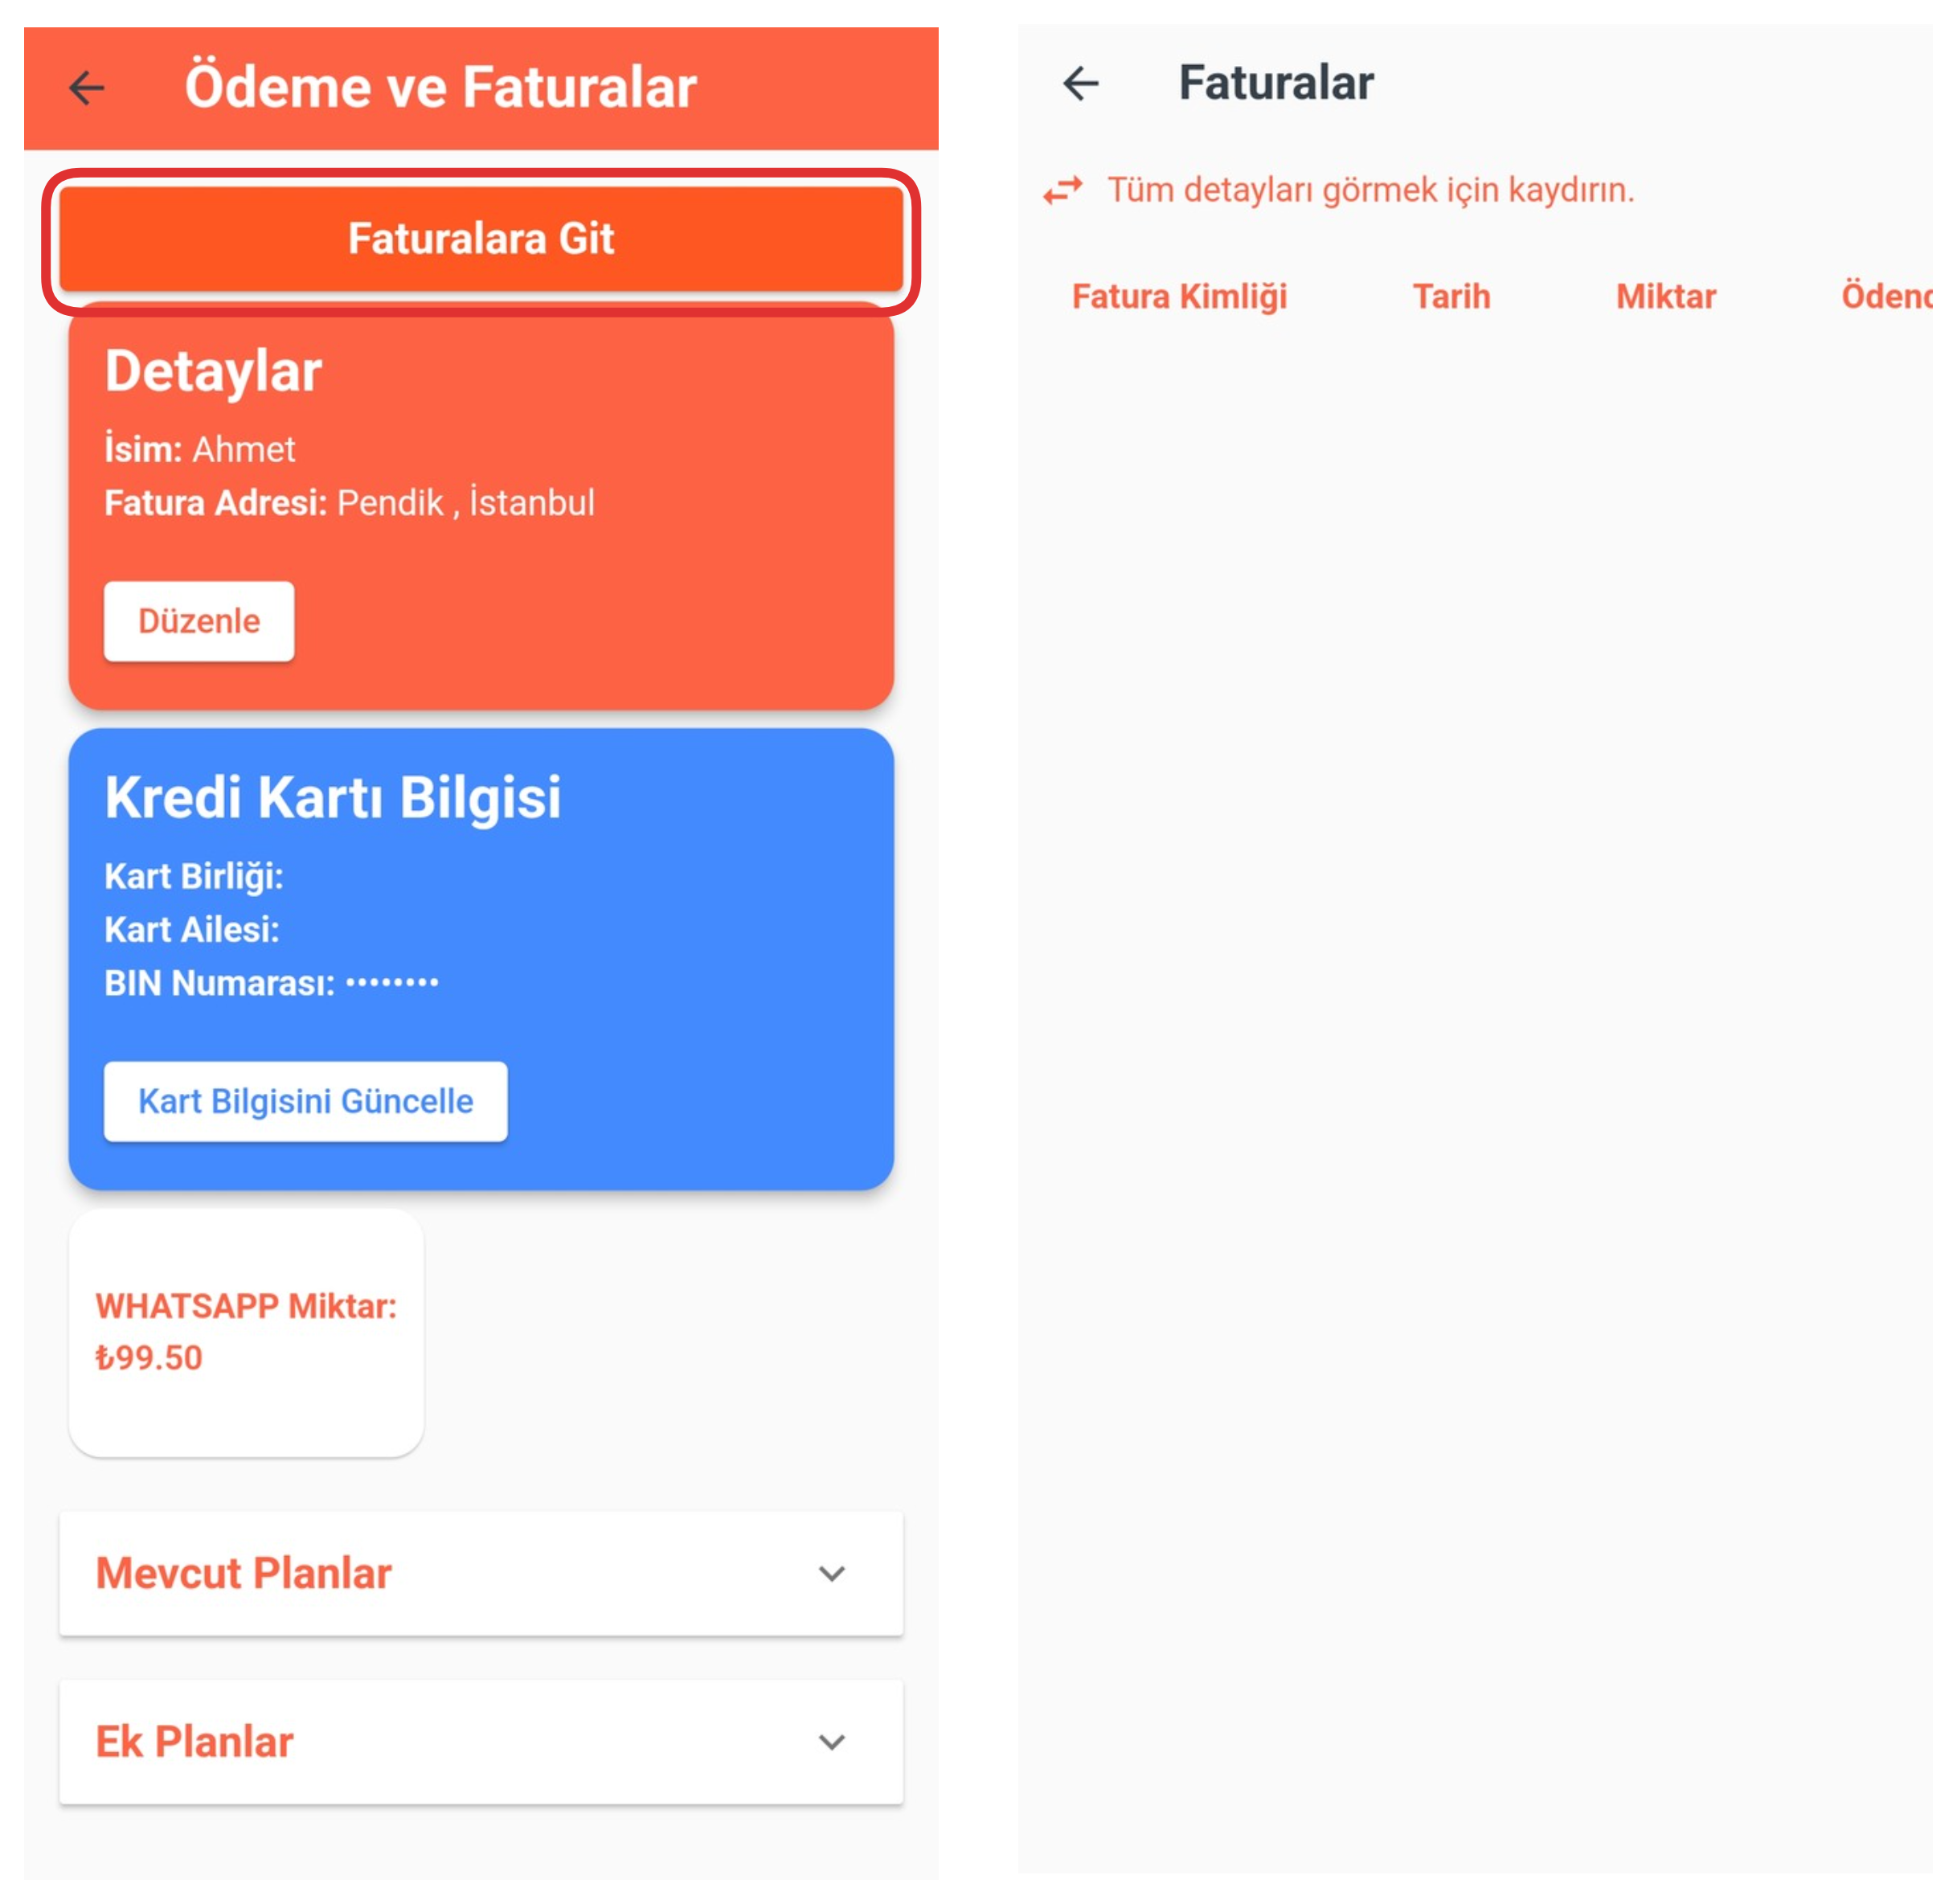
In this section, if you have a current invoice defined in the system, the relevant invoices are listed here. To reach this page, go to the "Payment and Invoices" menu and then click the "Go to Invoices" button. This operation directs you to the page where invoice details are located. You can view your current invoices from here and track your past operations.
2-) Invoice Details
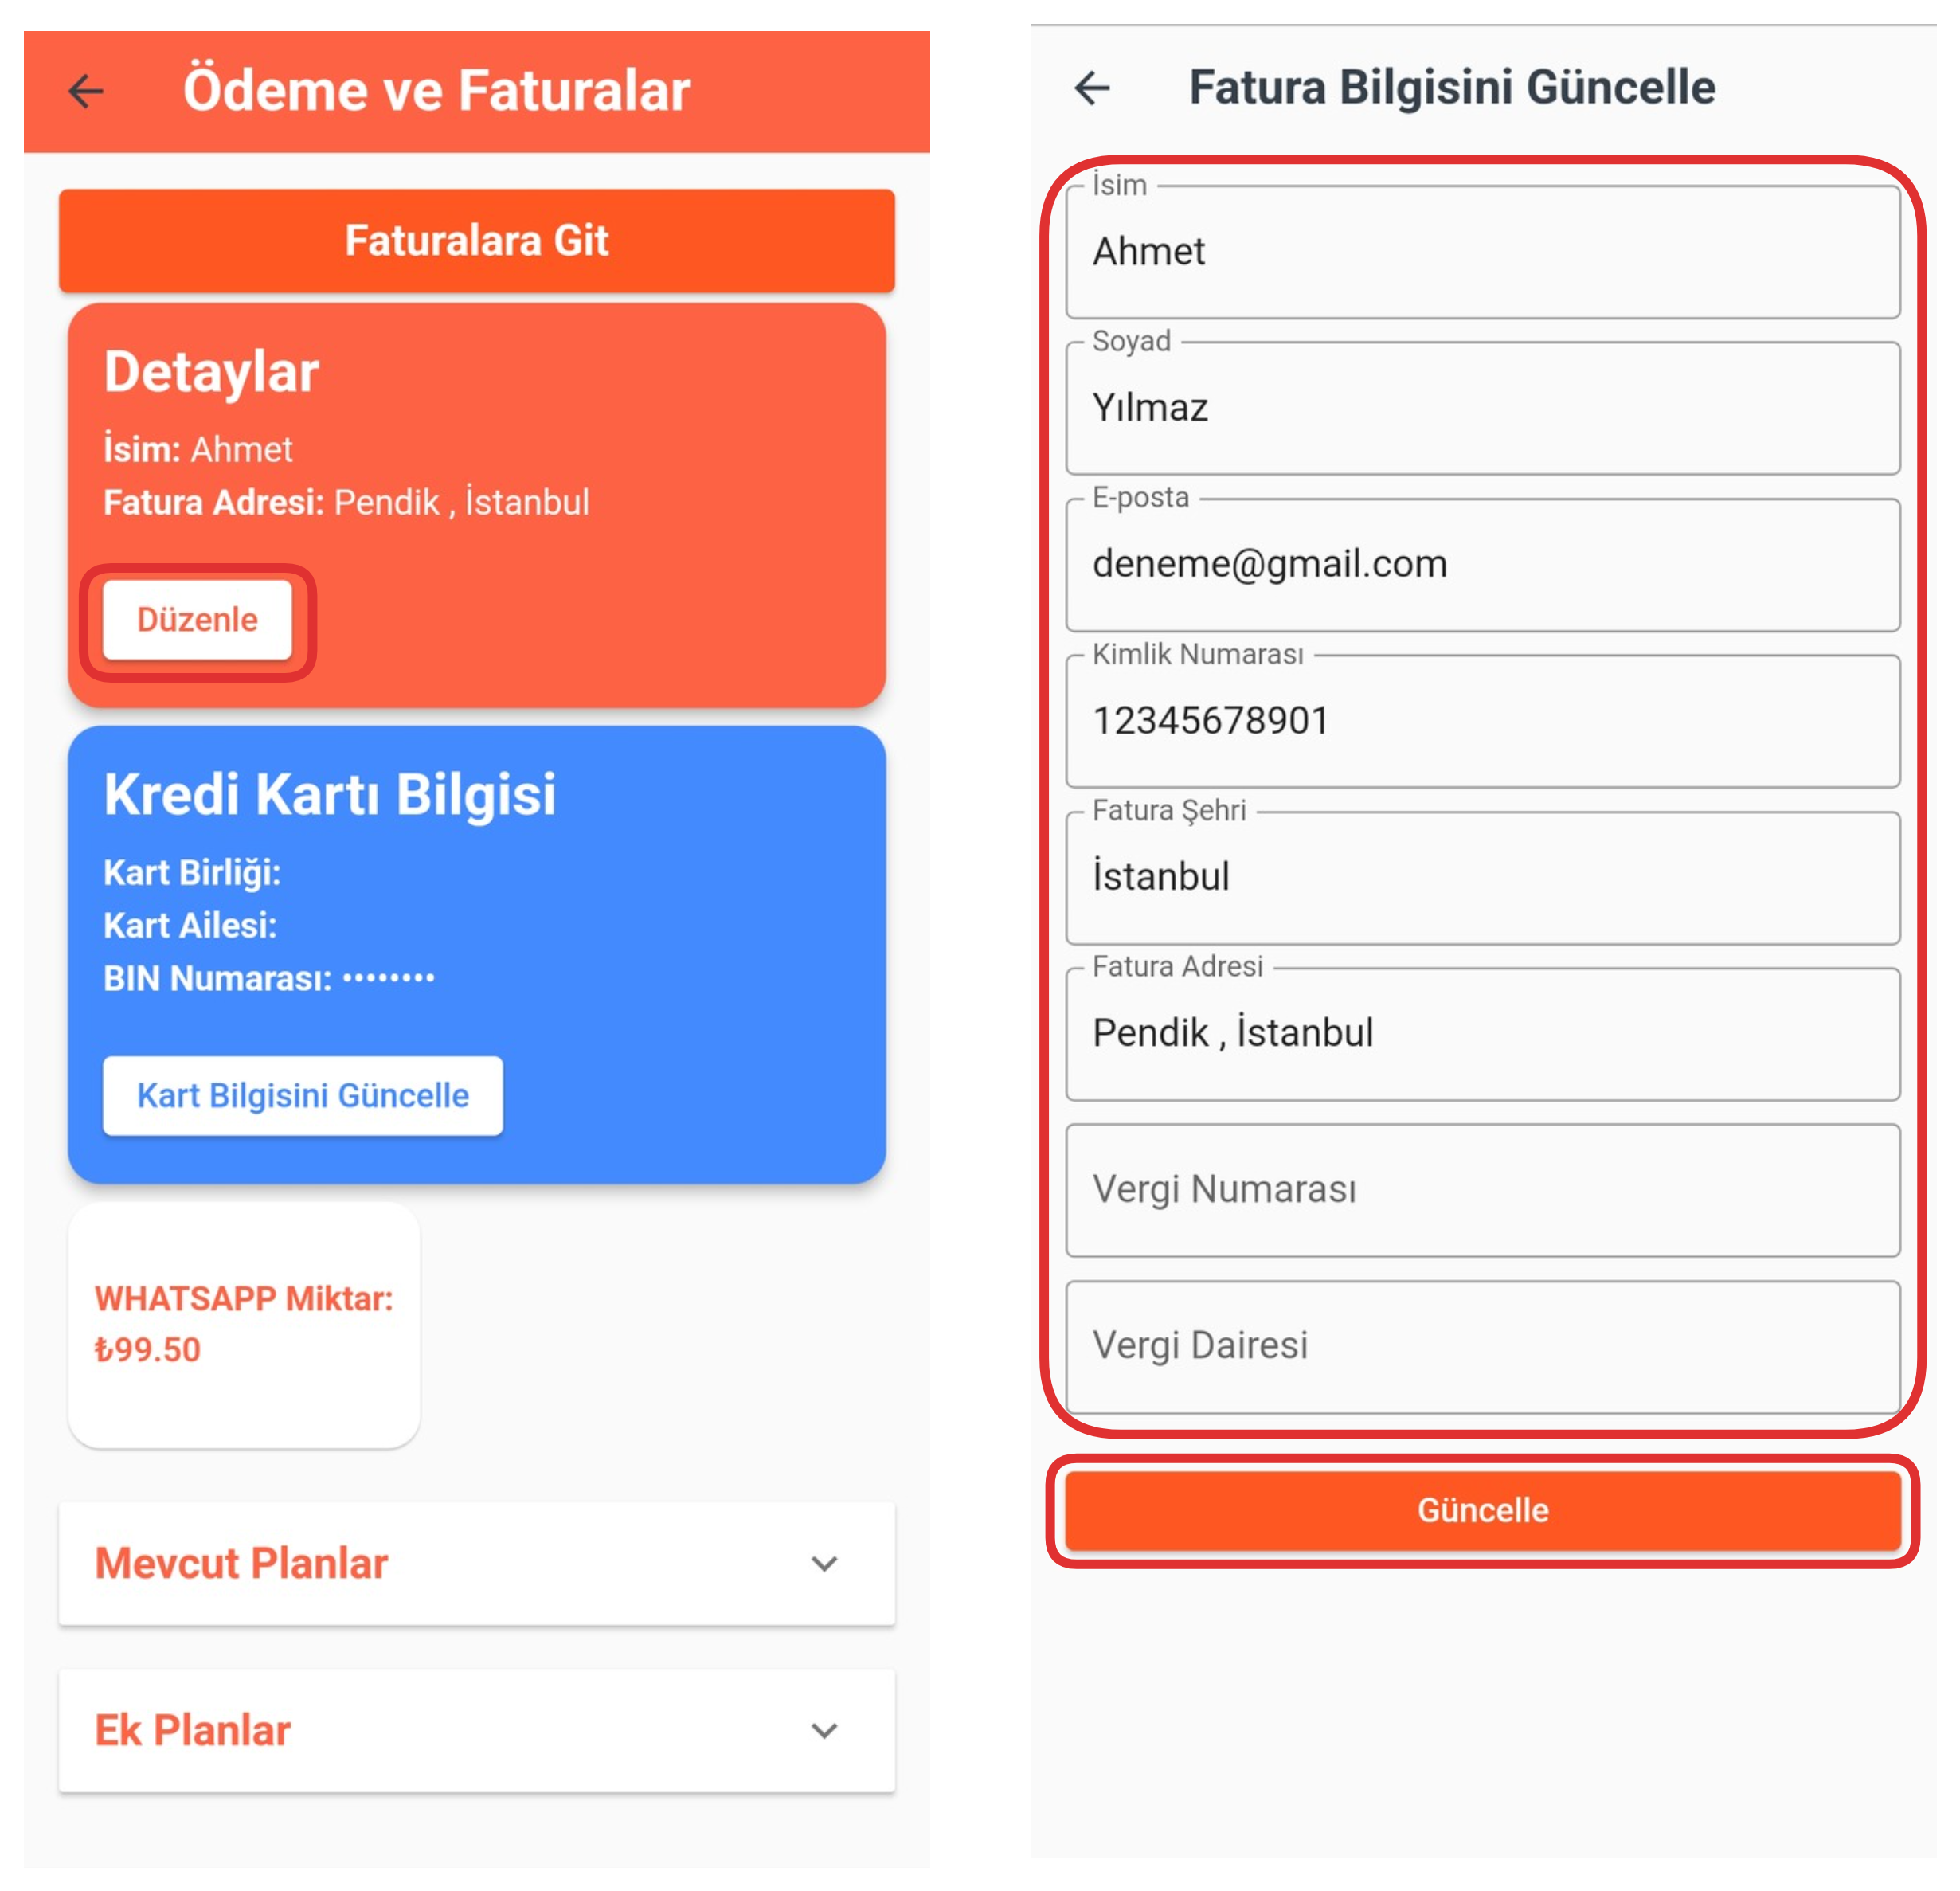
From this section, you can update your invoice details. For this, click the "Edit" button on the relevant page. After updating your invoice information through the opened form, you can complete the process by pressing the "Update" button. This way, you can ensure that your invoice information is always correct and up-to-date.
3-) Update Card Information
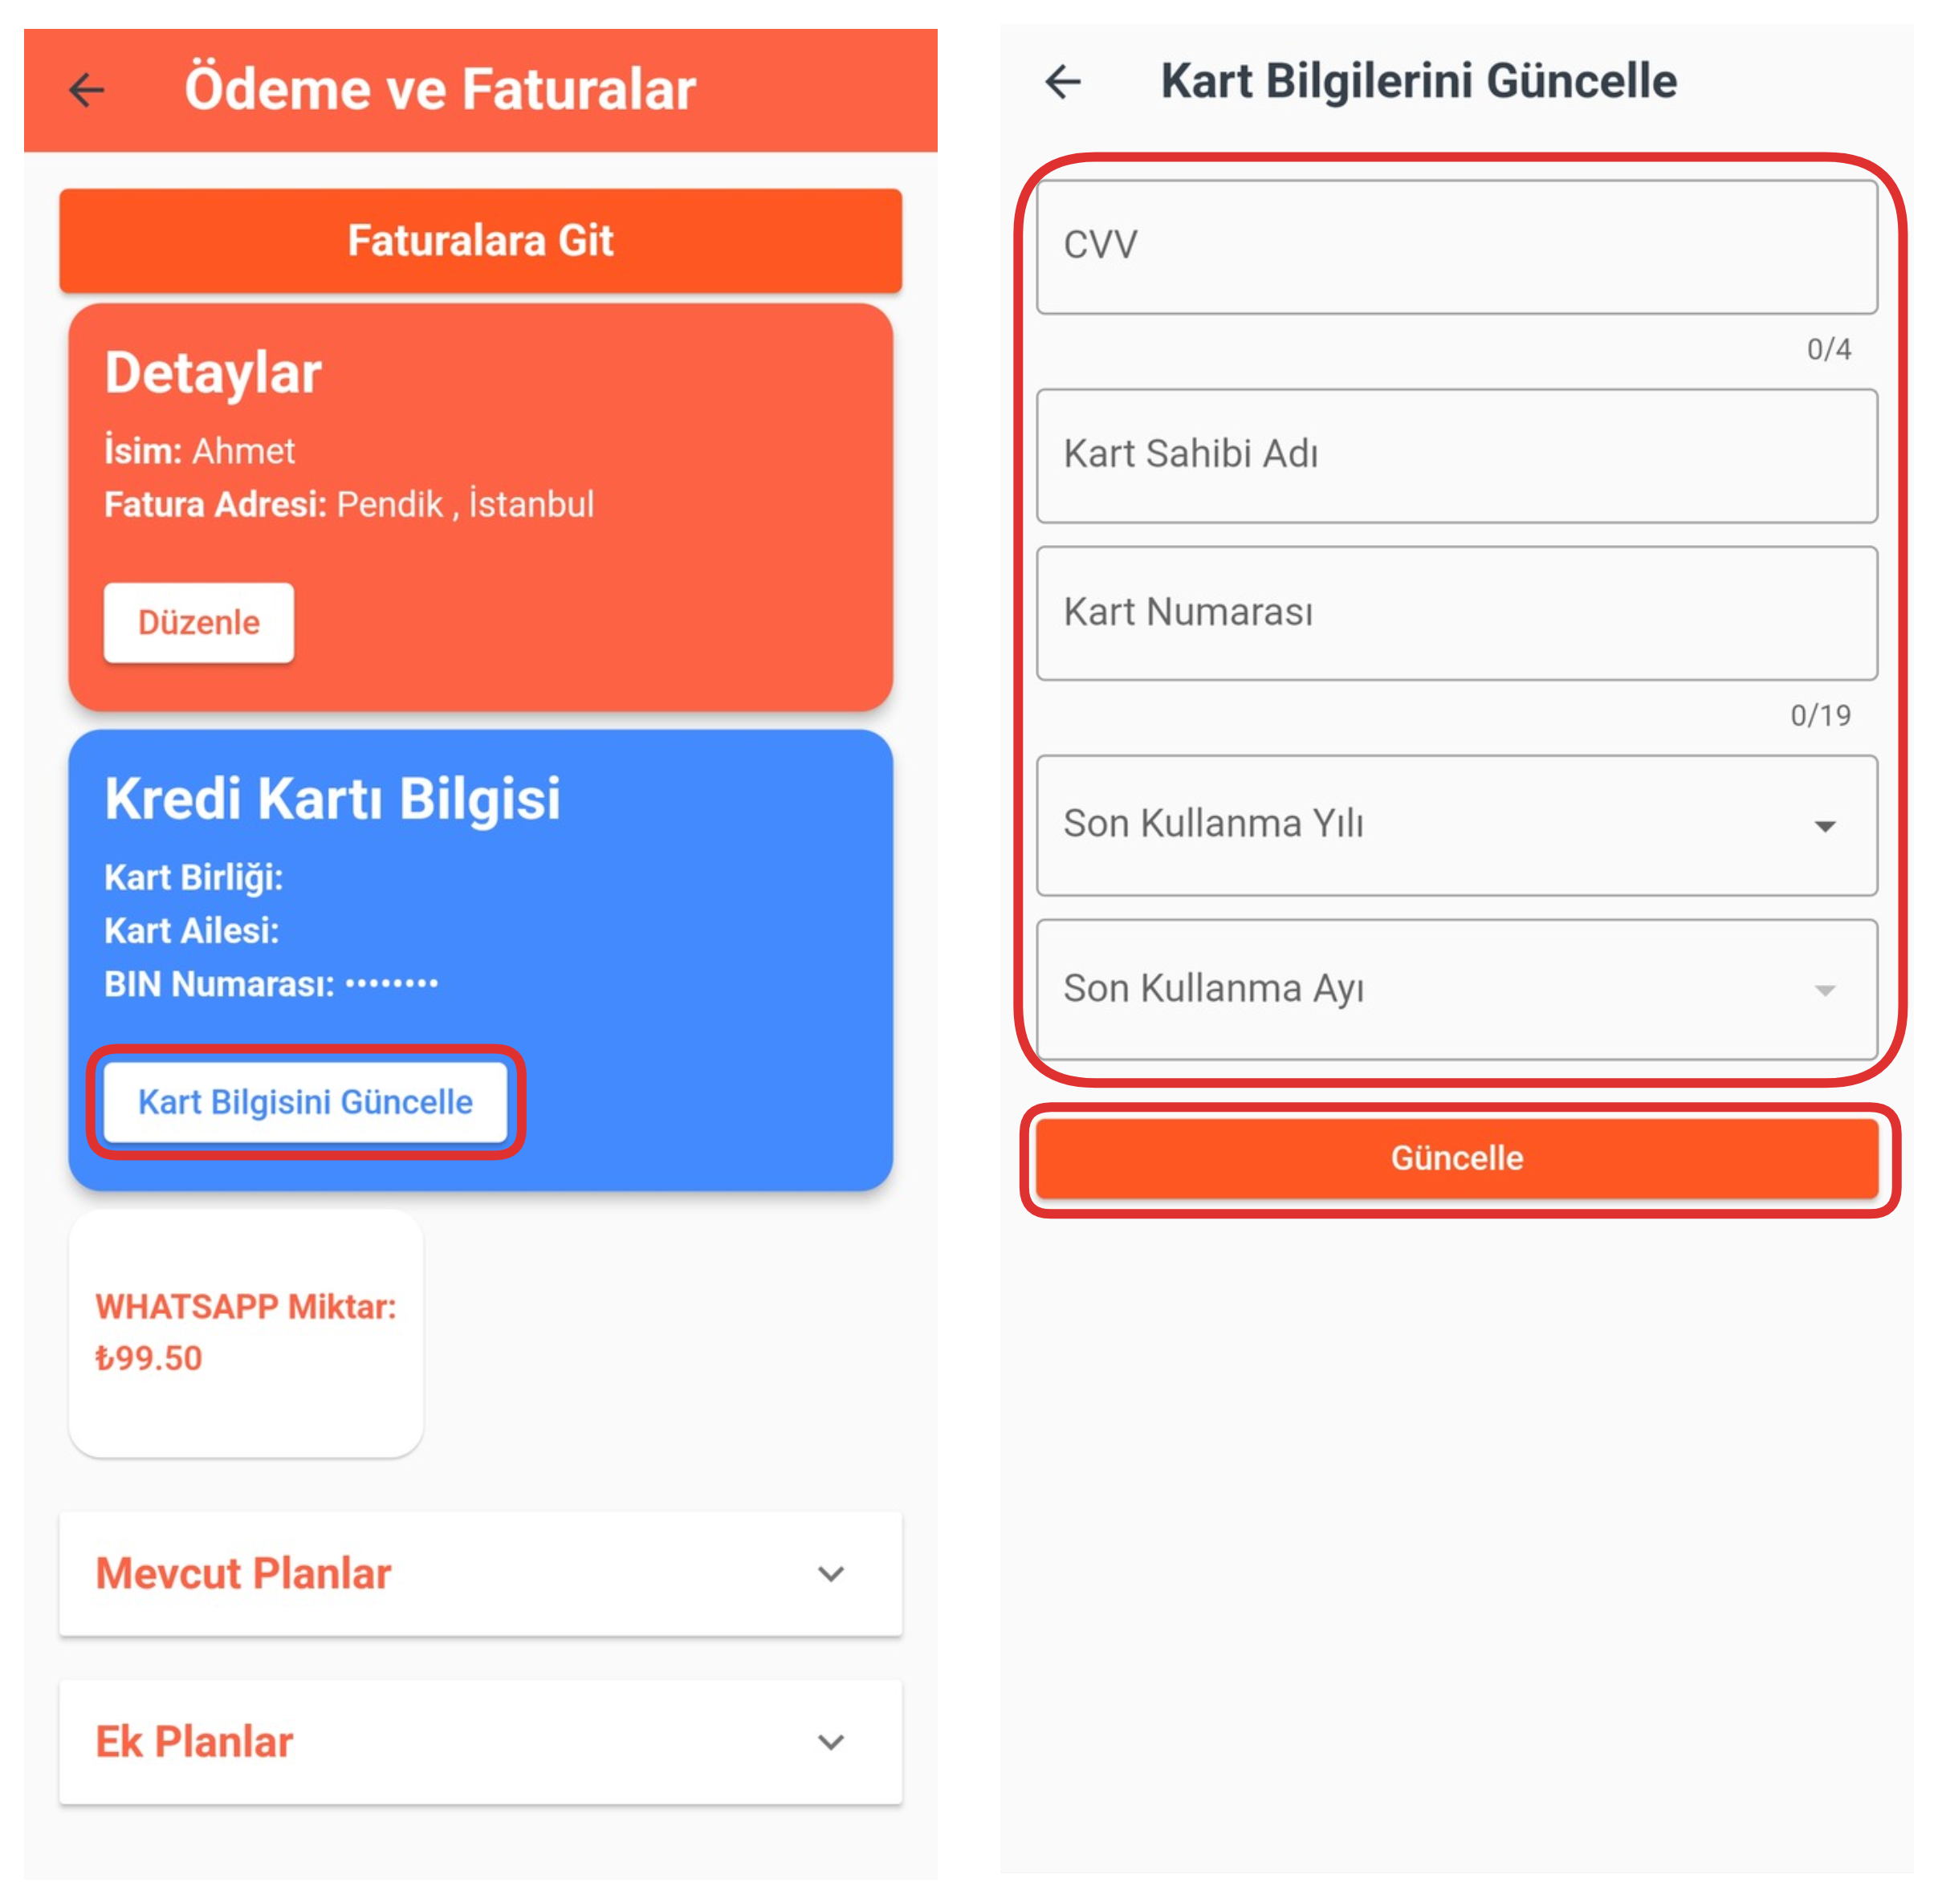
From this section, you can edit your credit card information. For this, click the "Update Card Information" button. In the opened screen, update your current card information and then complete the process by pressing the "Update" button. This way, you can keep the card information to be used in your payment transactions secure and accurate.
4-) WhatsApp Amount
From this section, you can view your current WhatsApp balance. The system shows the available balance defined in your account in this area. This way, you can easily track how much usage right you have left for WhatsApp services.
5-) Current Plans
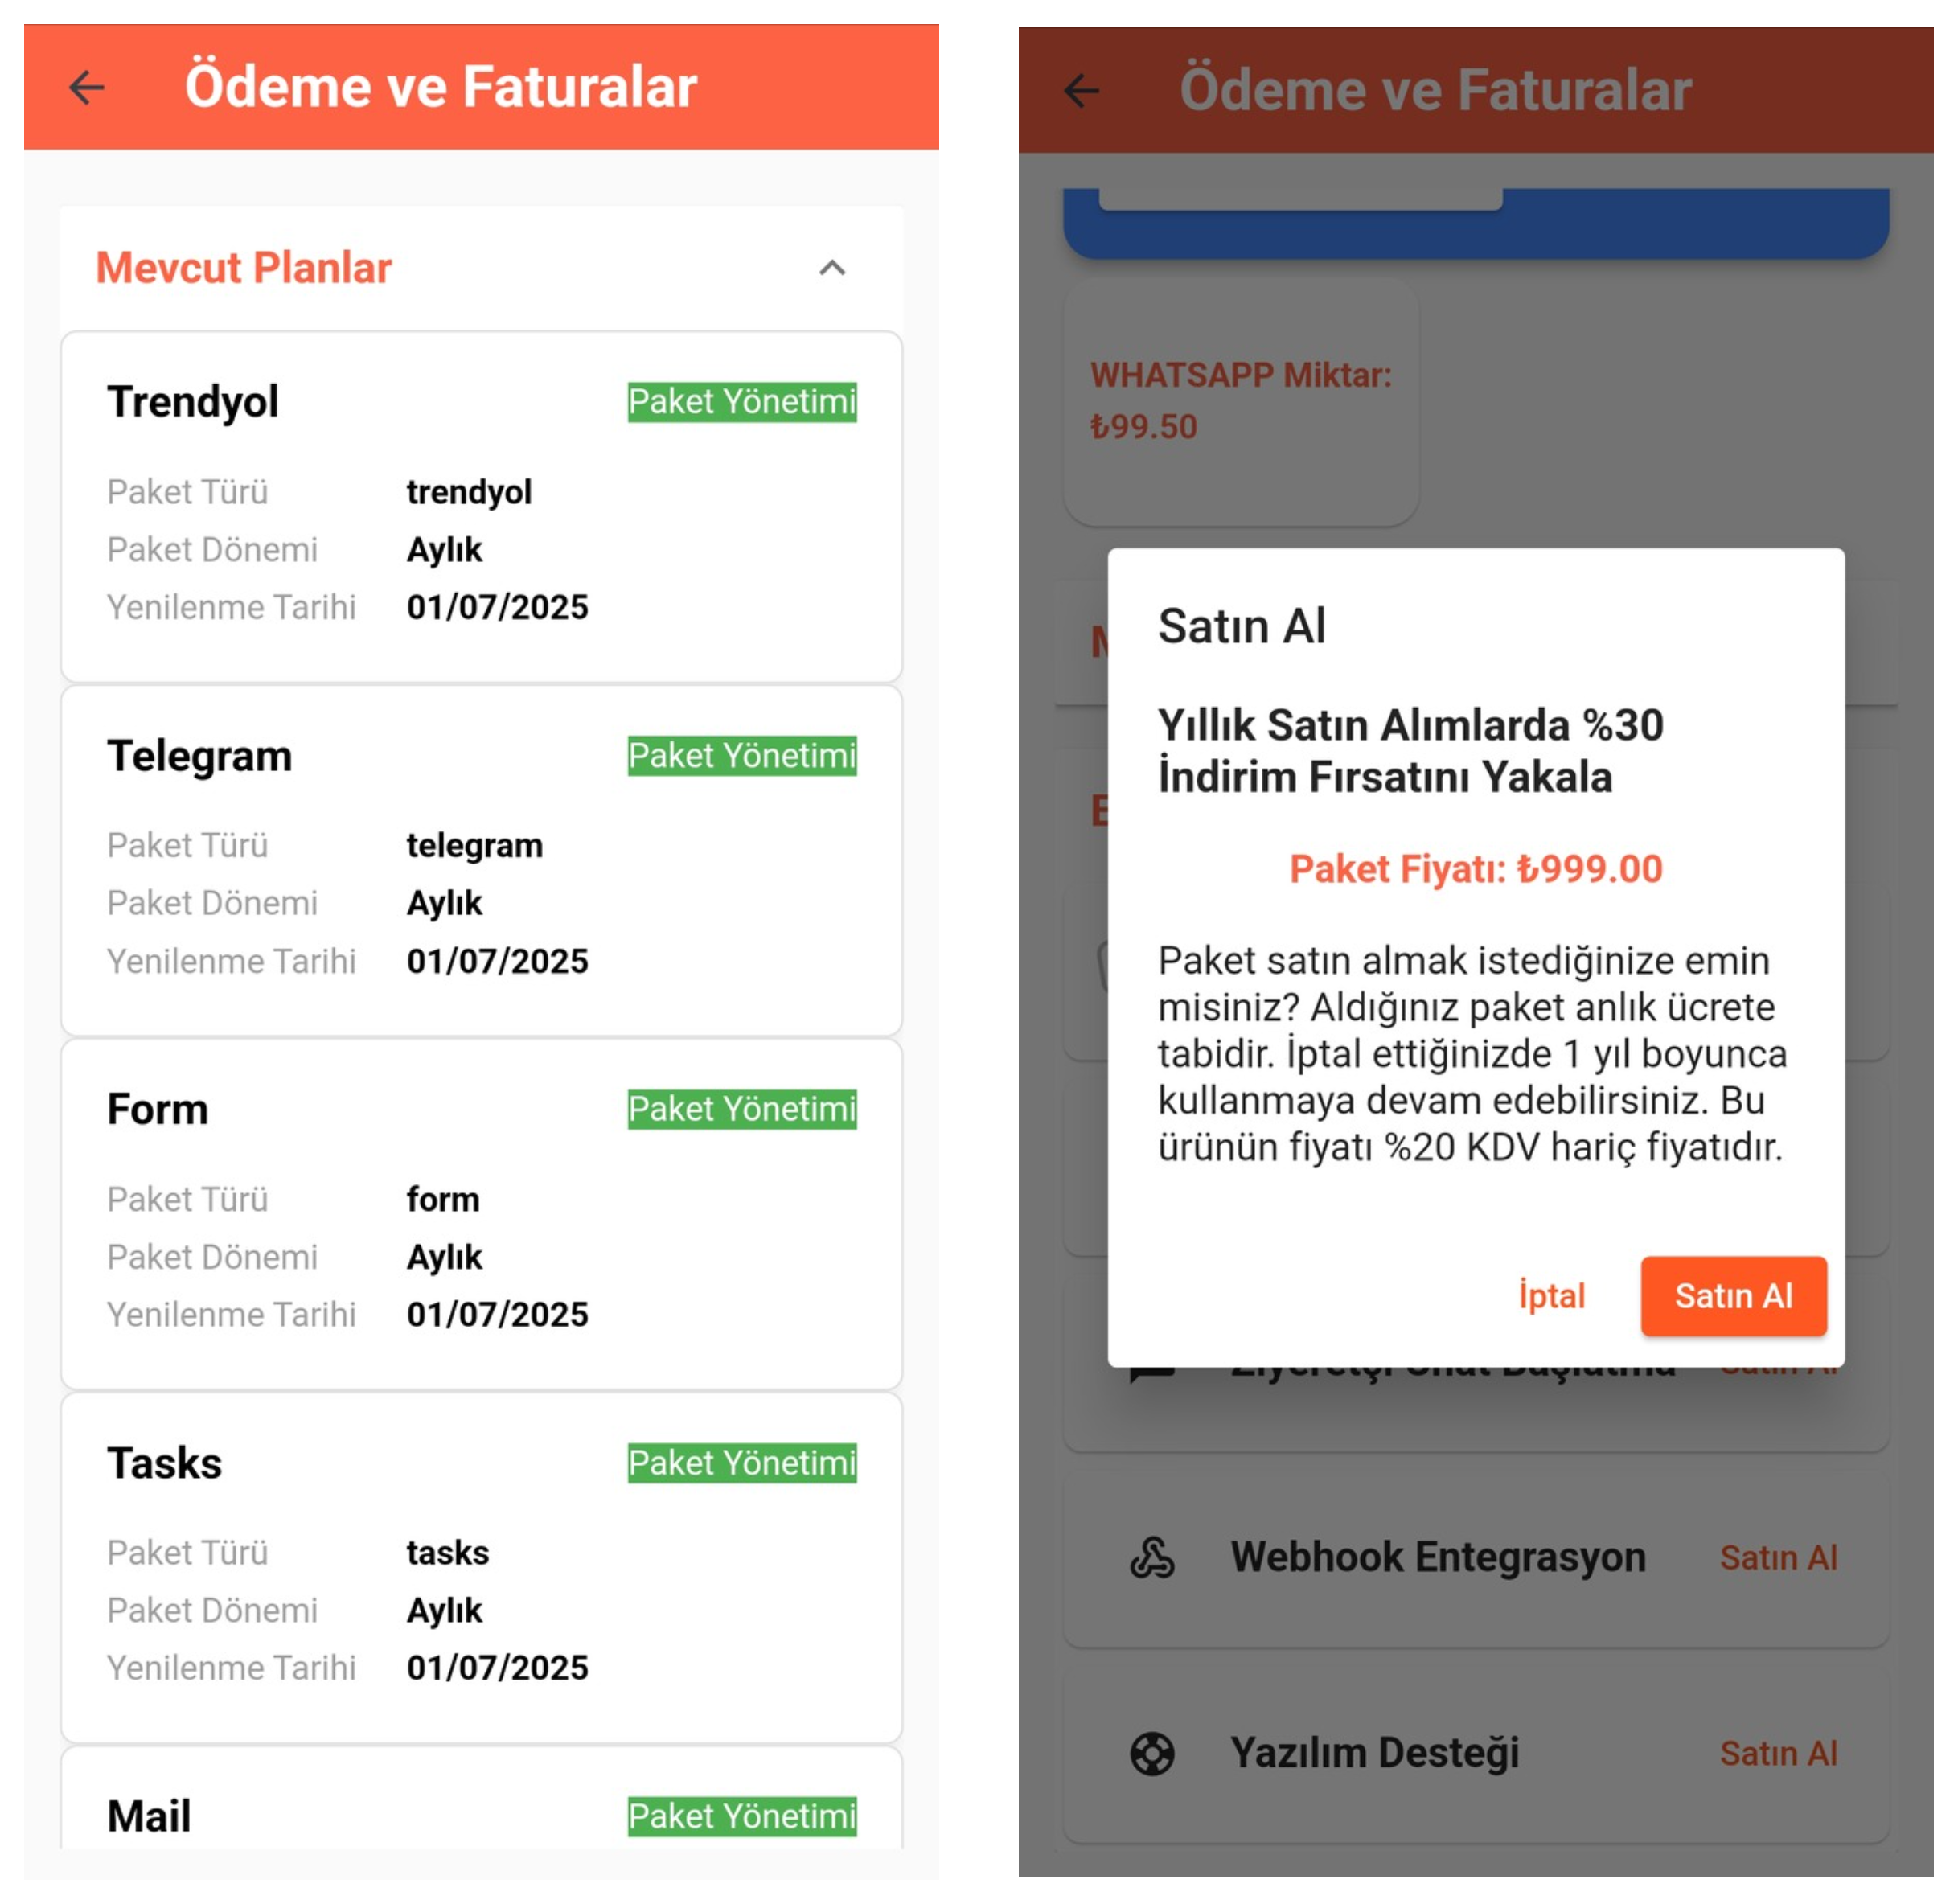
From this section, you can view your current packages and access information such as usage time and content details. You can also perform a new package purchase operation from this area if you wish. Thanks to package management, you can plan your service usage according to your needs.
6-) Additional Plans
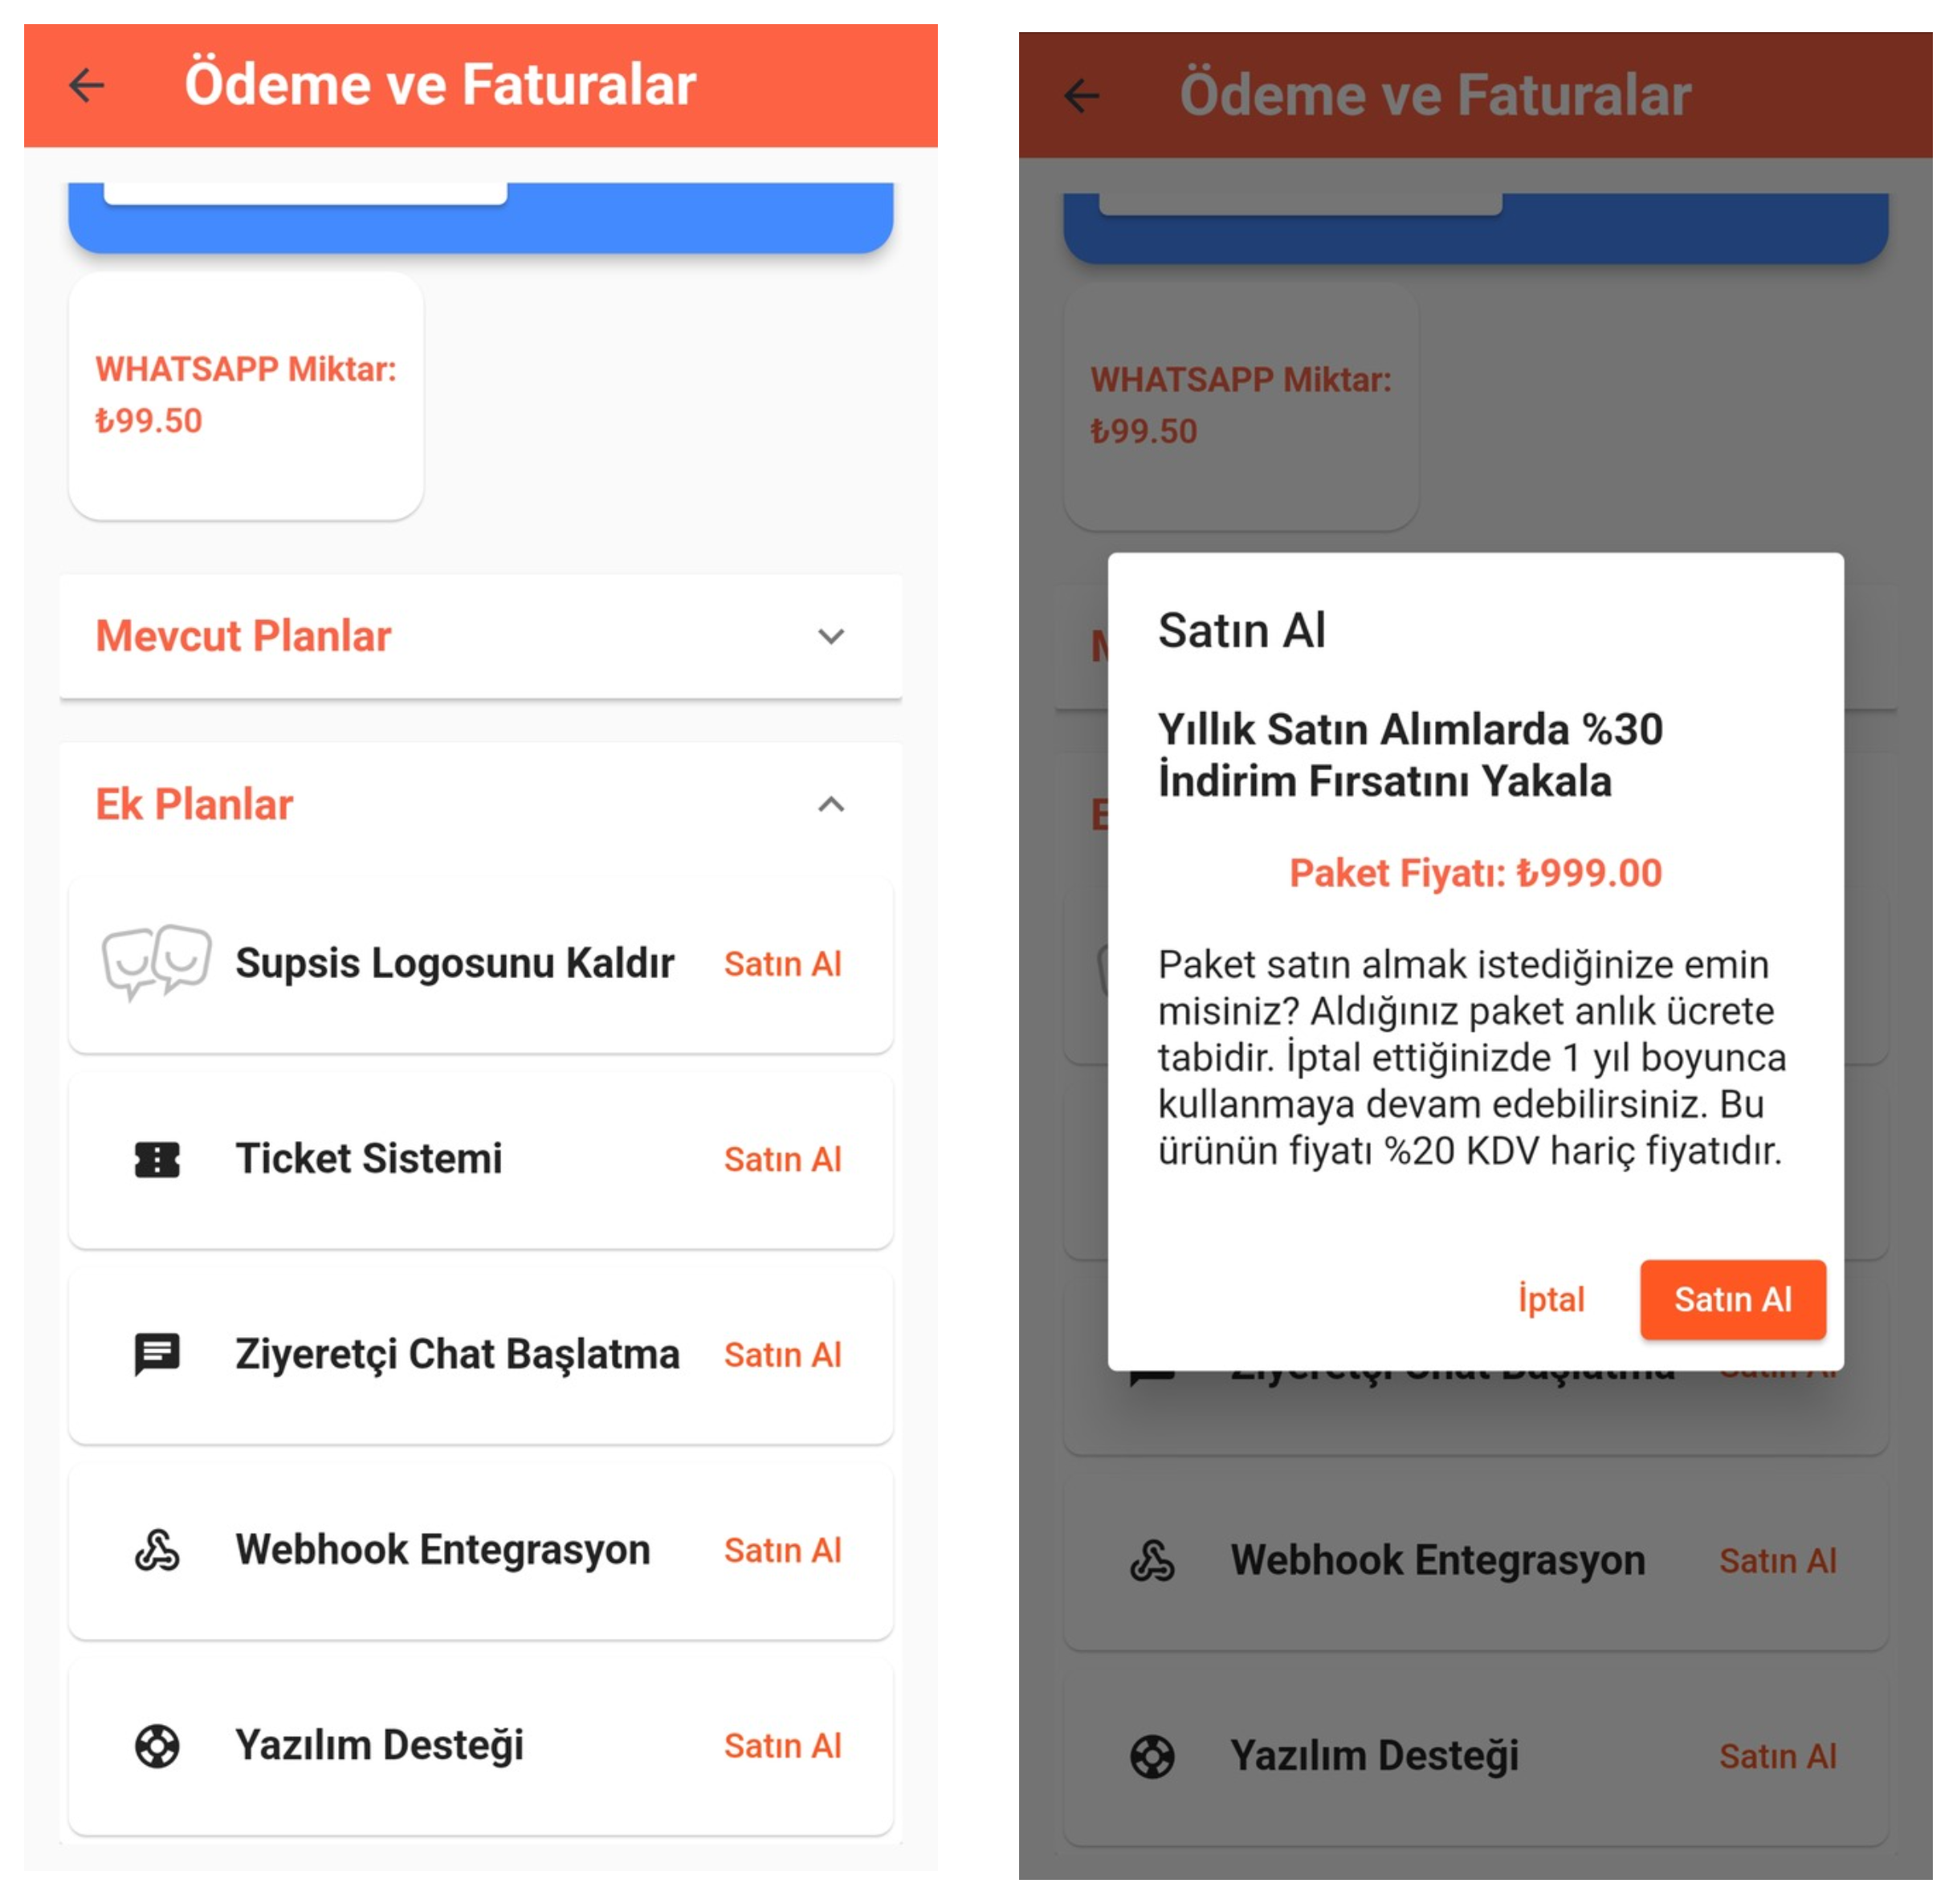
From this section, you can view your current additional packages. You can access the content and usage information of additional packages from here. You can also easily perform a new additional package purchase operation from this area according to your needs. This way, you can flexibly increase your service capacity.
5-) Reports
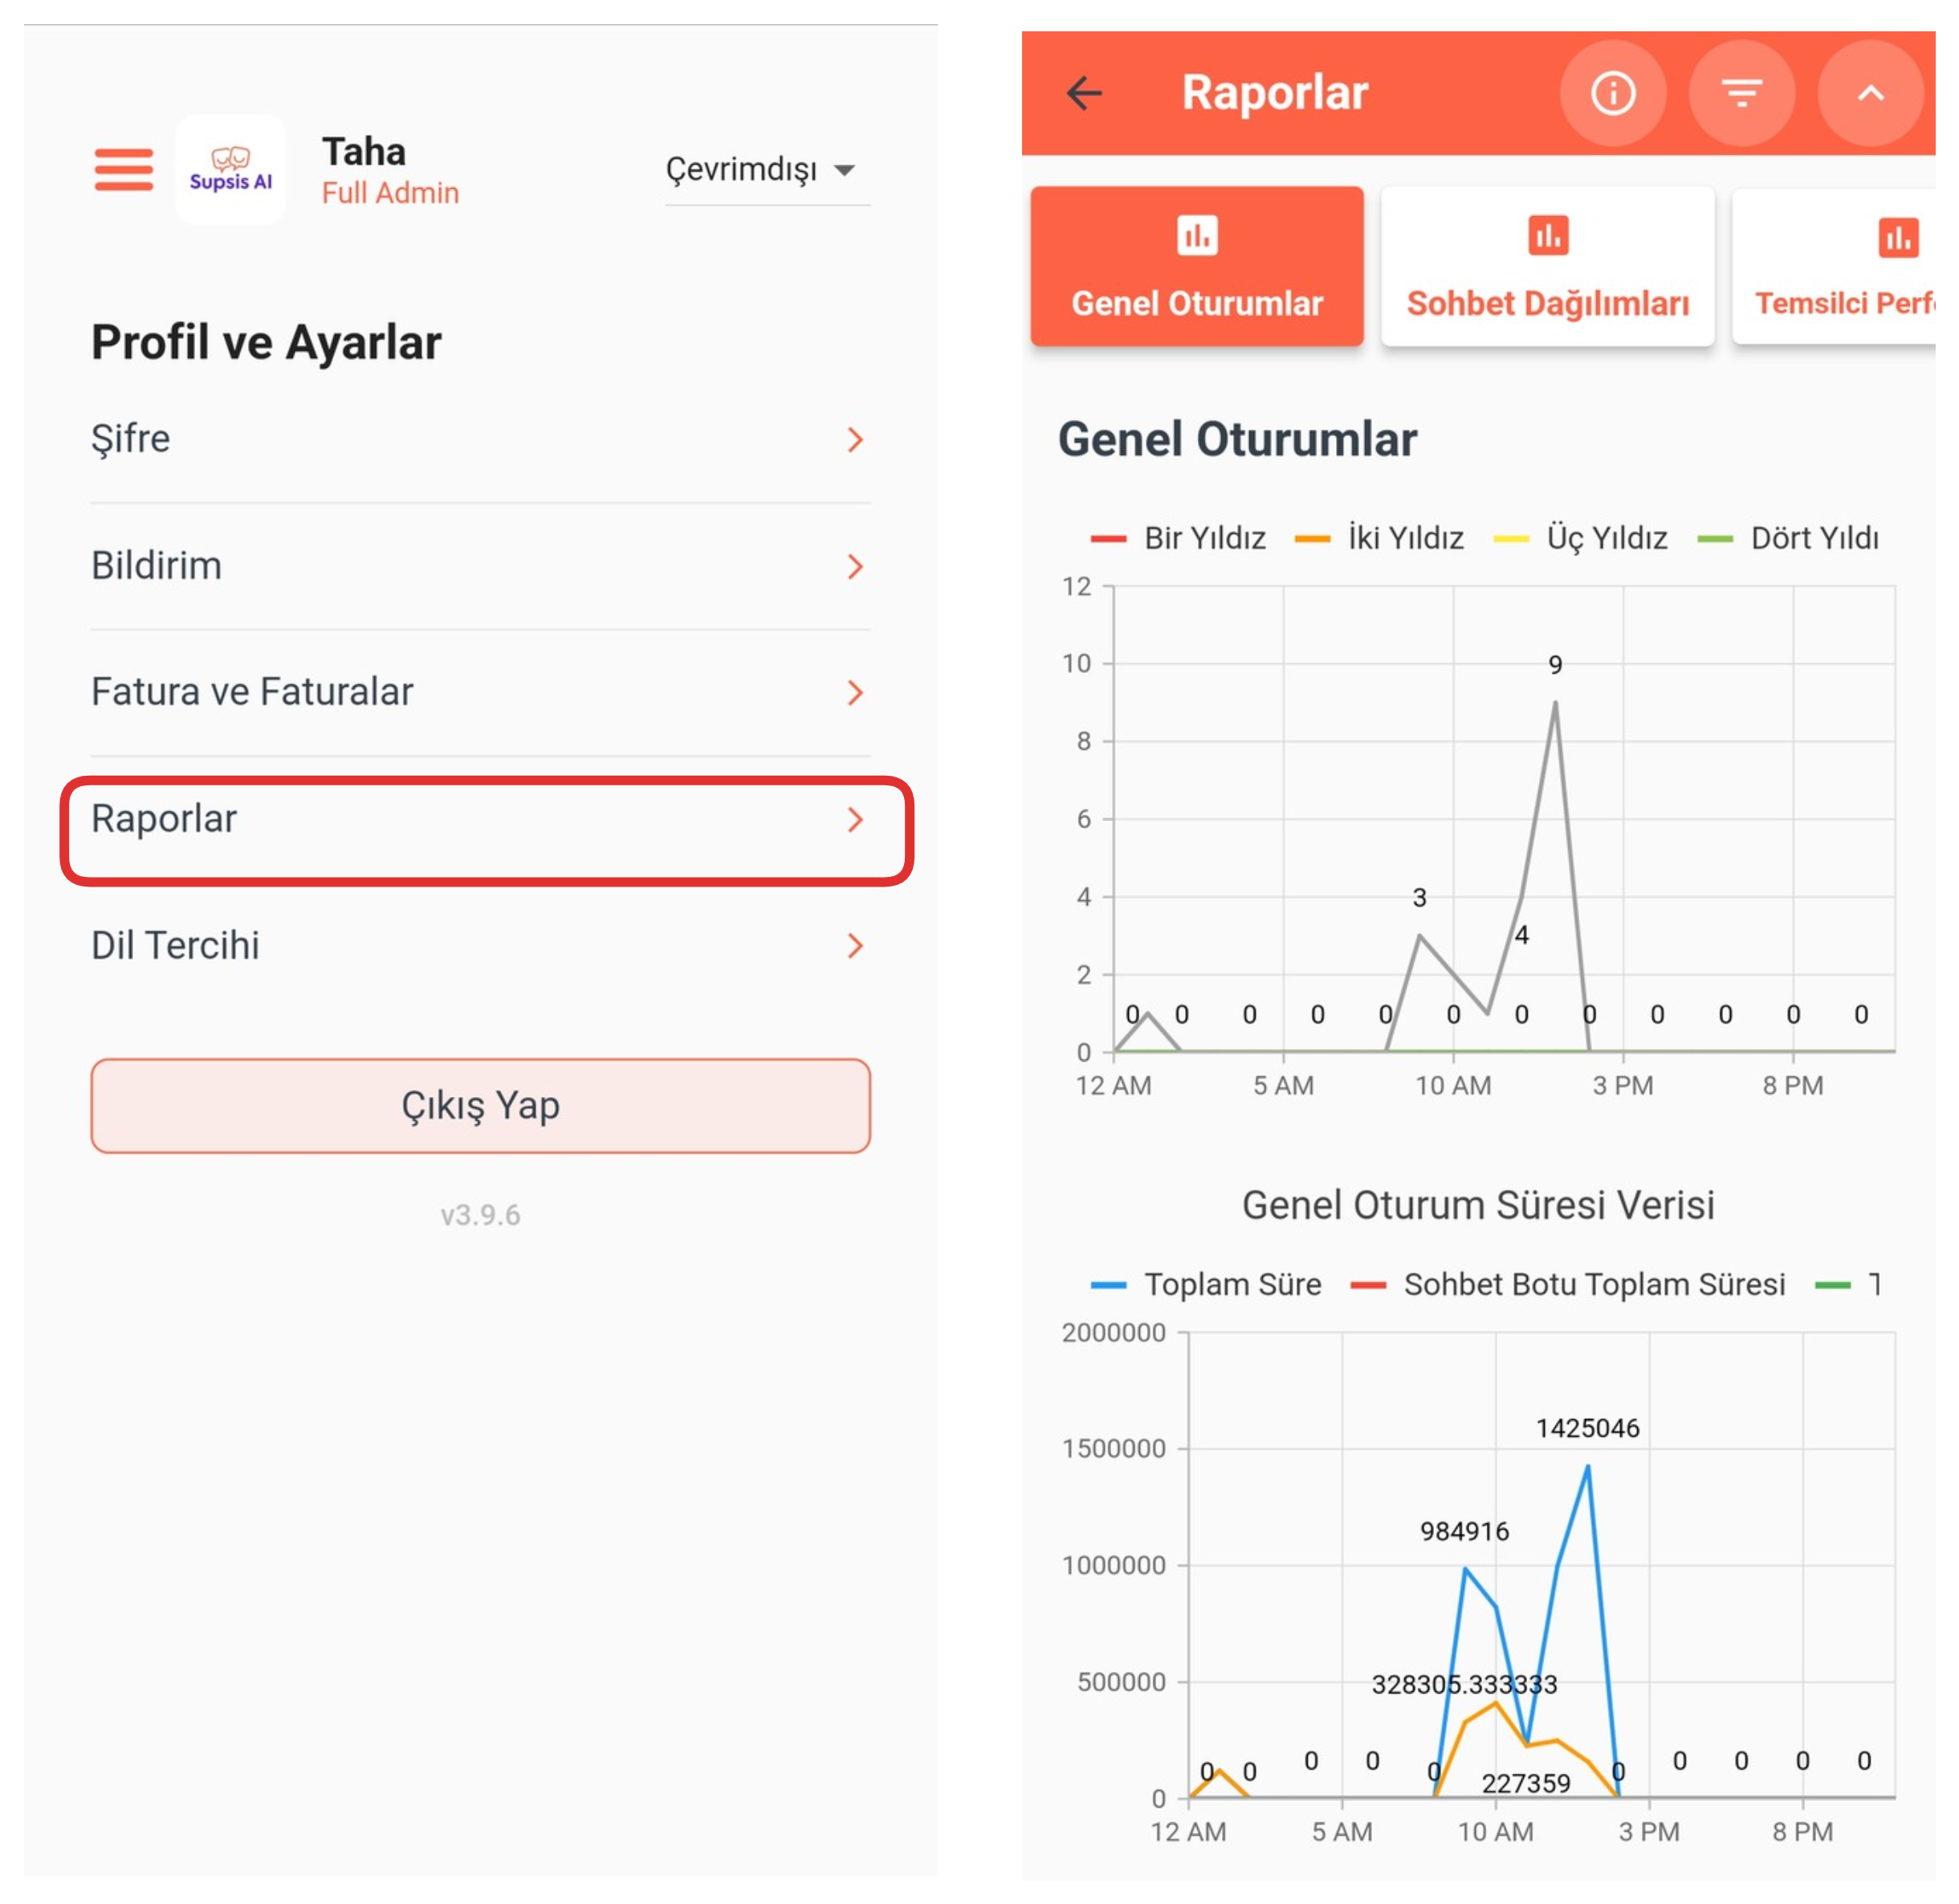
First, click on the "Reports" option from the "Profile" menu. On the opened page, you can examine your reports in the system in detail. Through this section, you can access many different reports such as call history, messaging data, representative performance, and analyze the data as you wish with filtering options. Reports are an important resource for evaluating your system usage and optimizing processes.
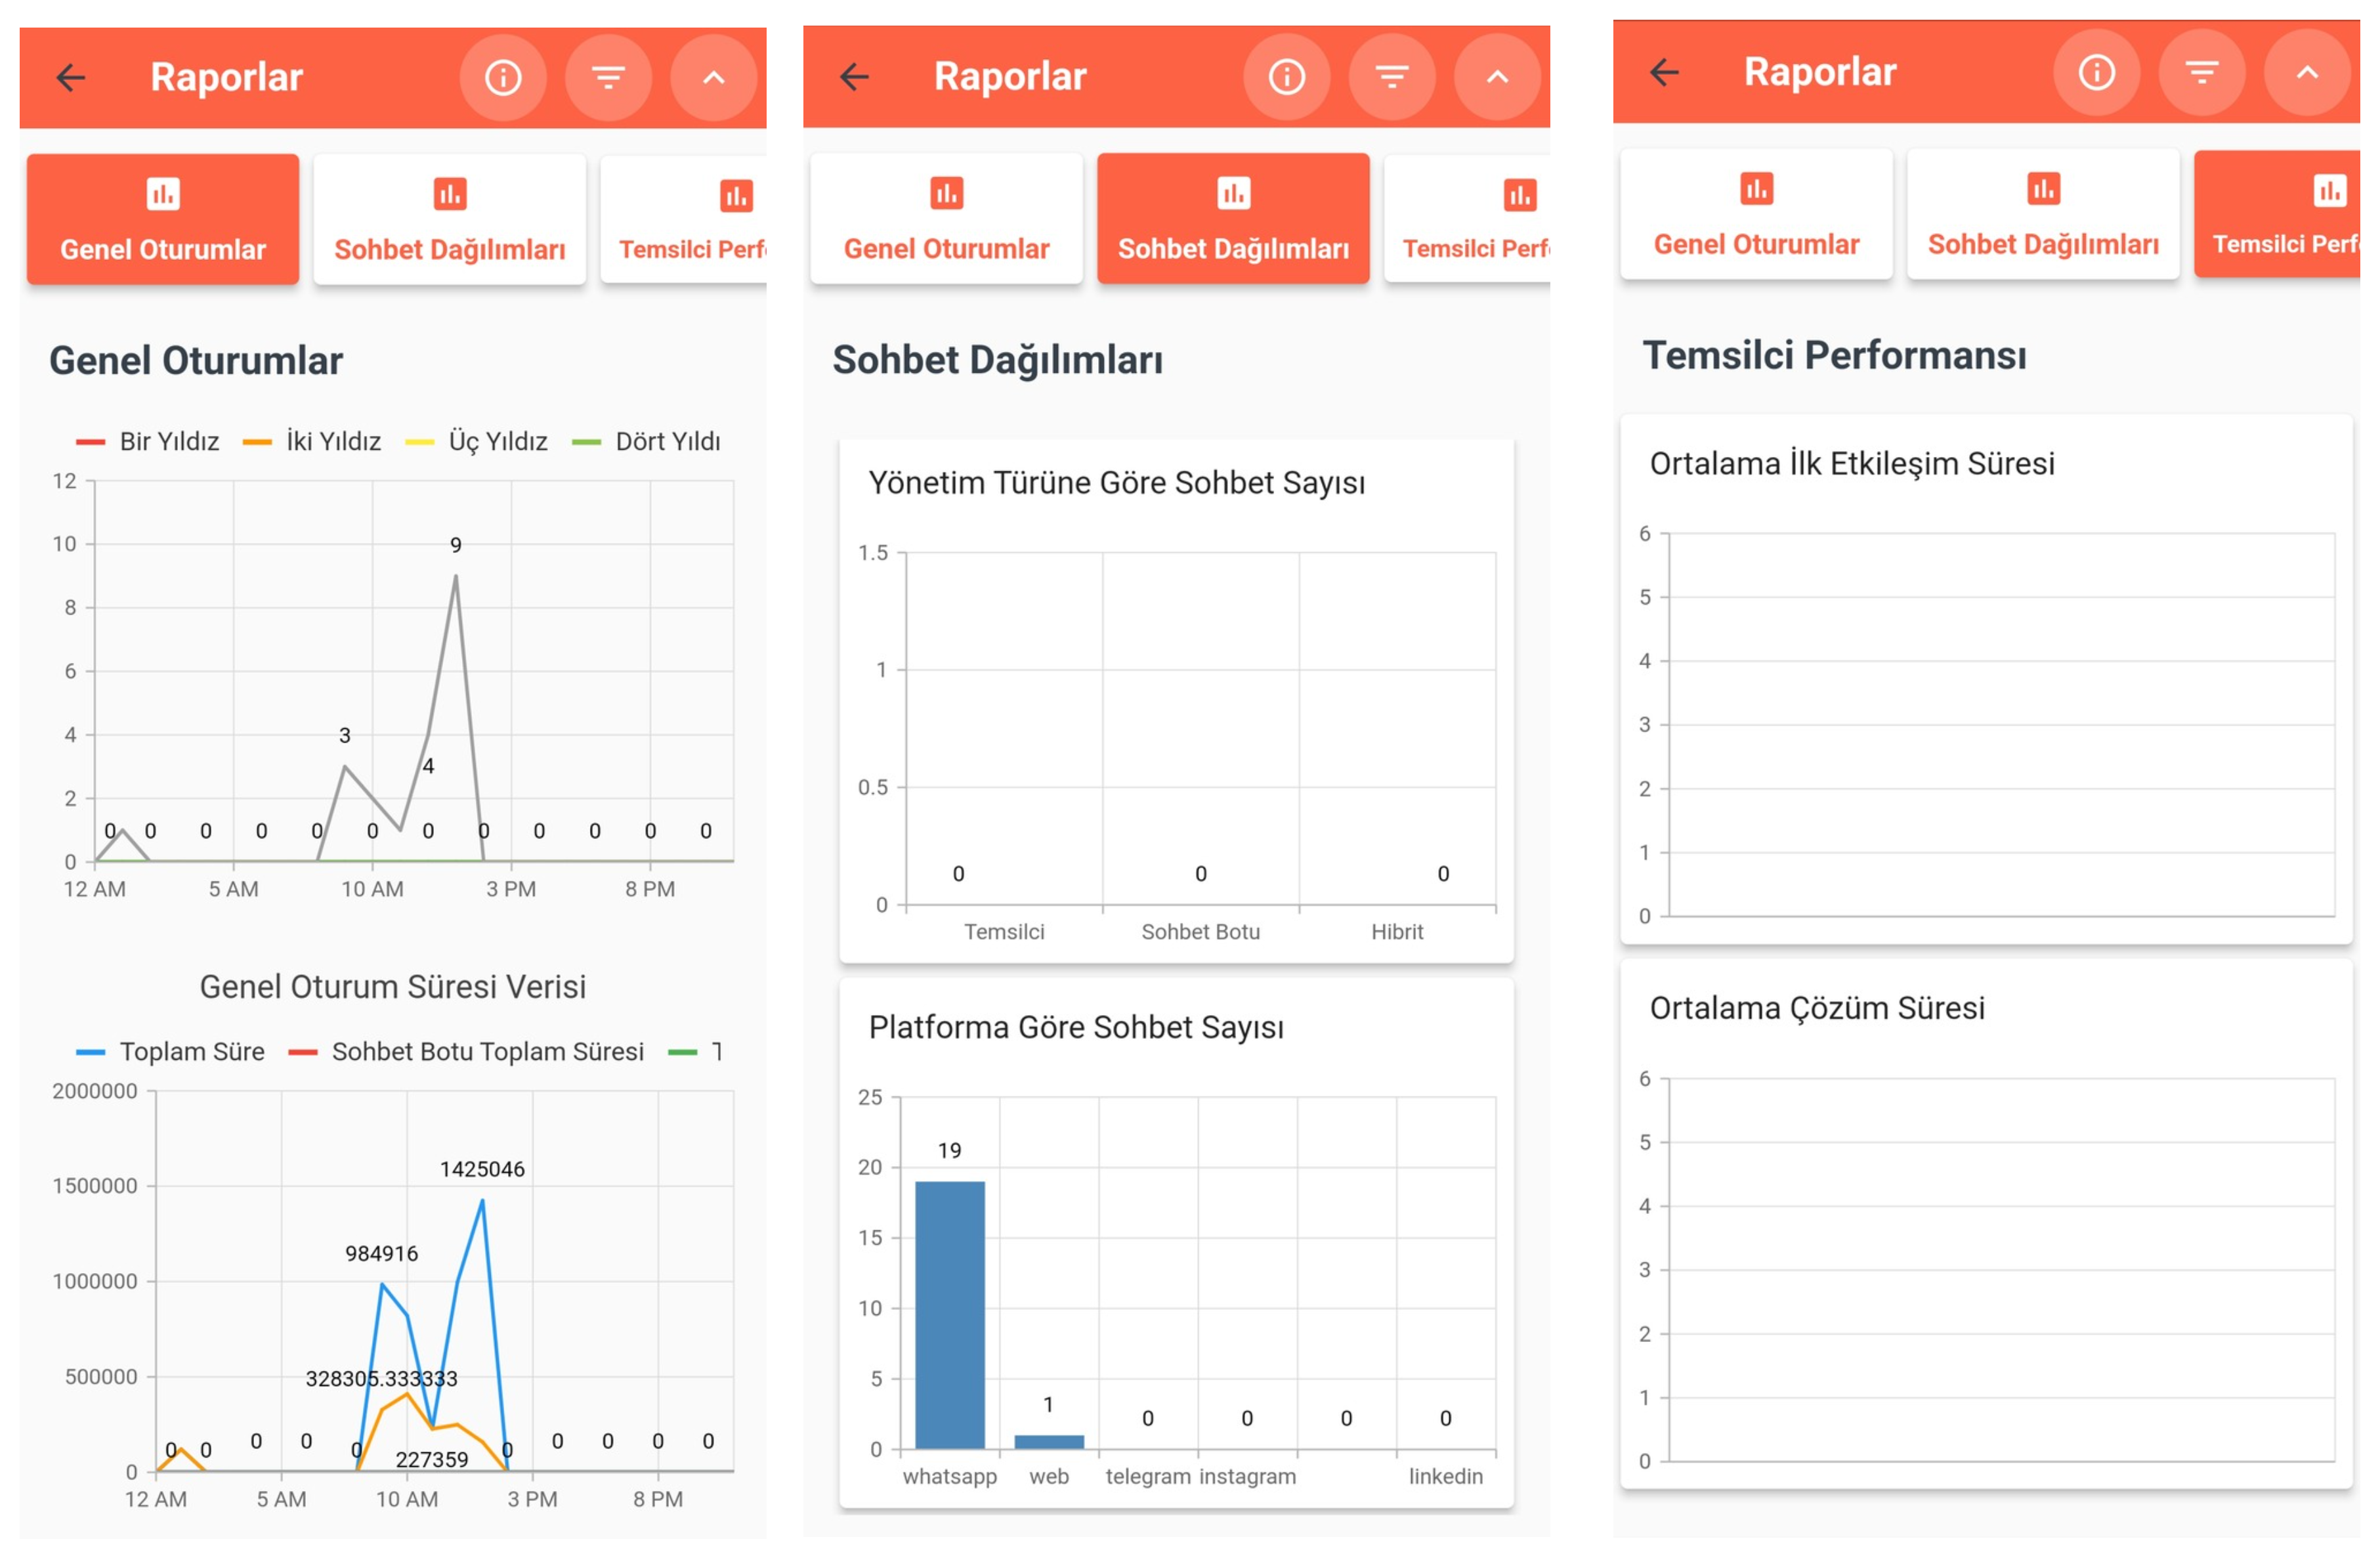
Thanks to these reports, you can analyze your important data such as general session numbers, chat distributions and representative performance in detail. The obtained data provides useful information for evaluating team performance, monitoring customer interactions and increasing general system efficiency. Reports can be used as an effective tool in making strategic decisions.
6-) Language Preference
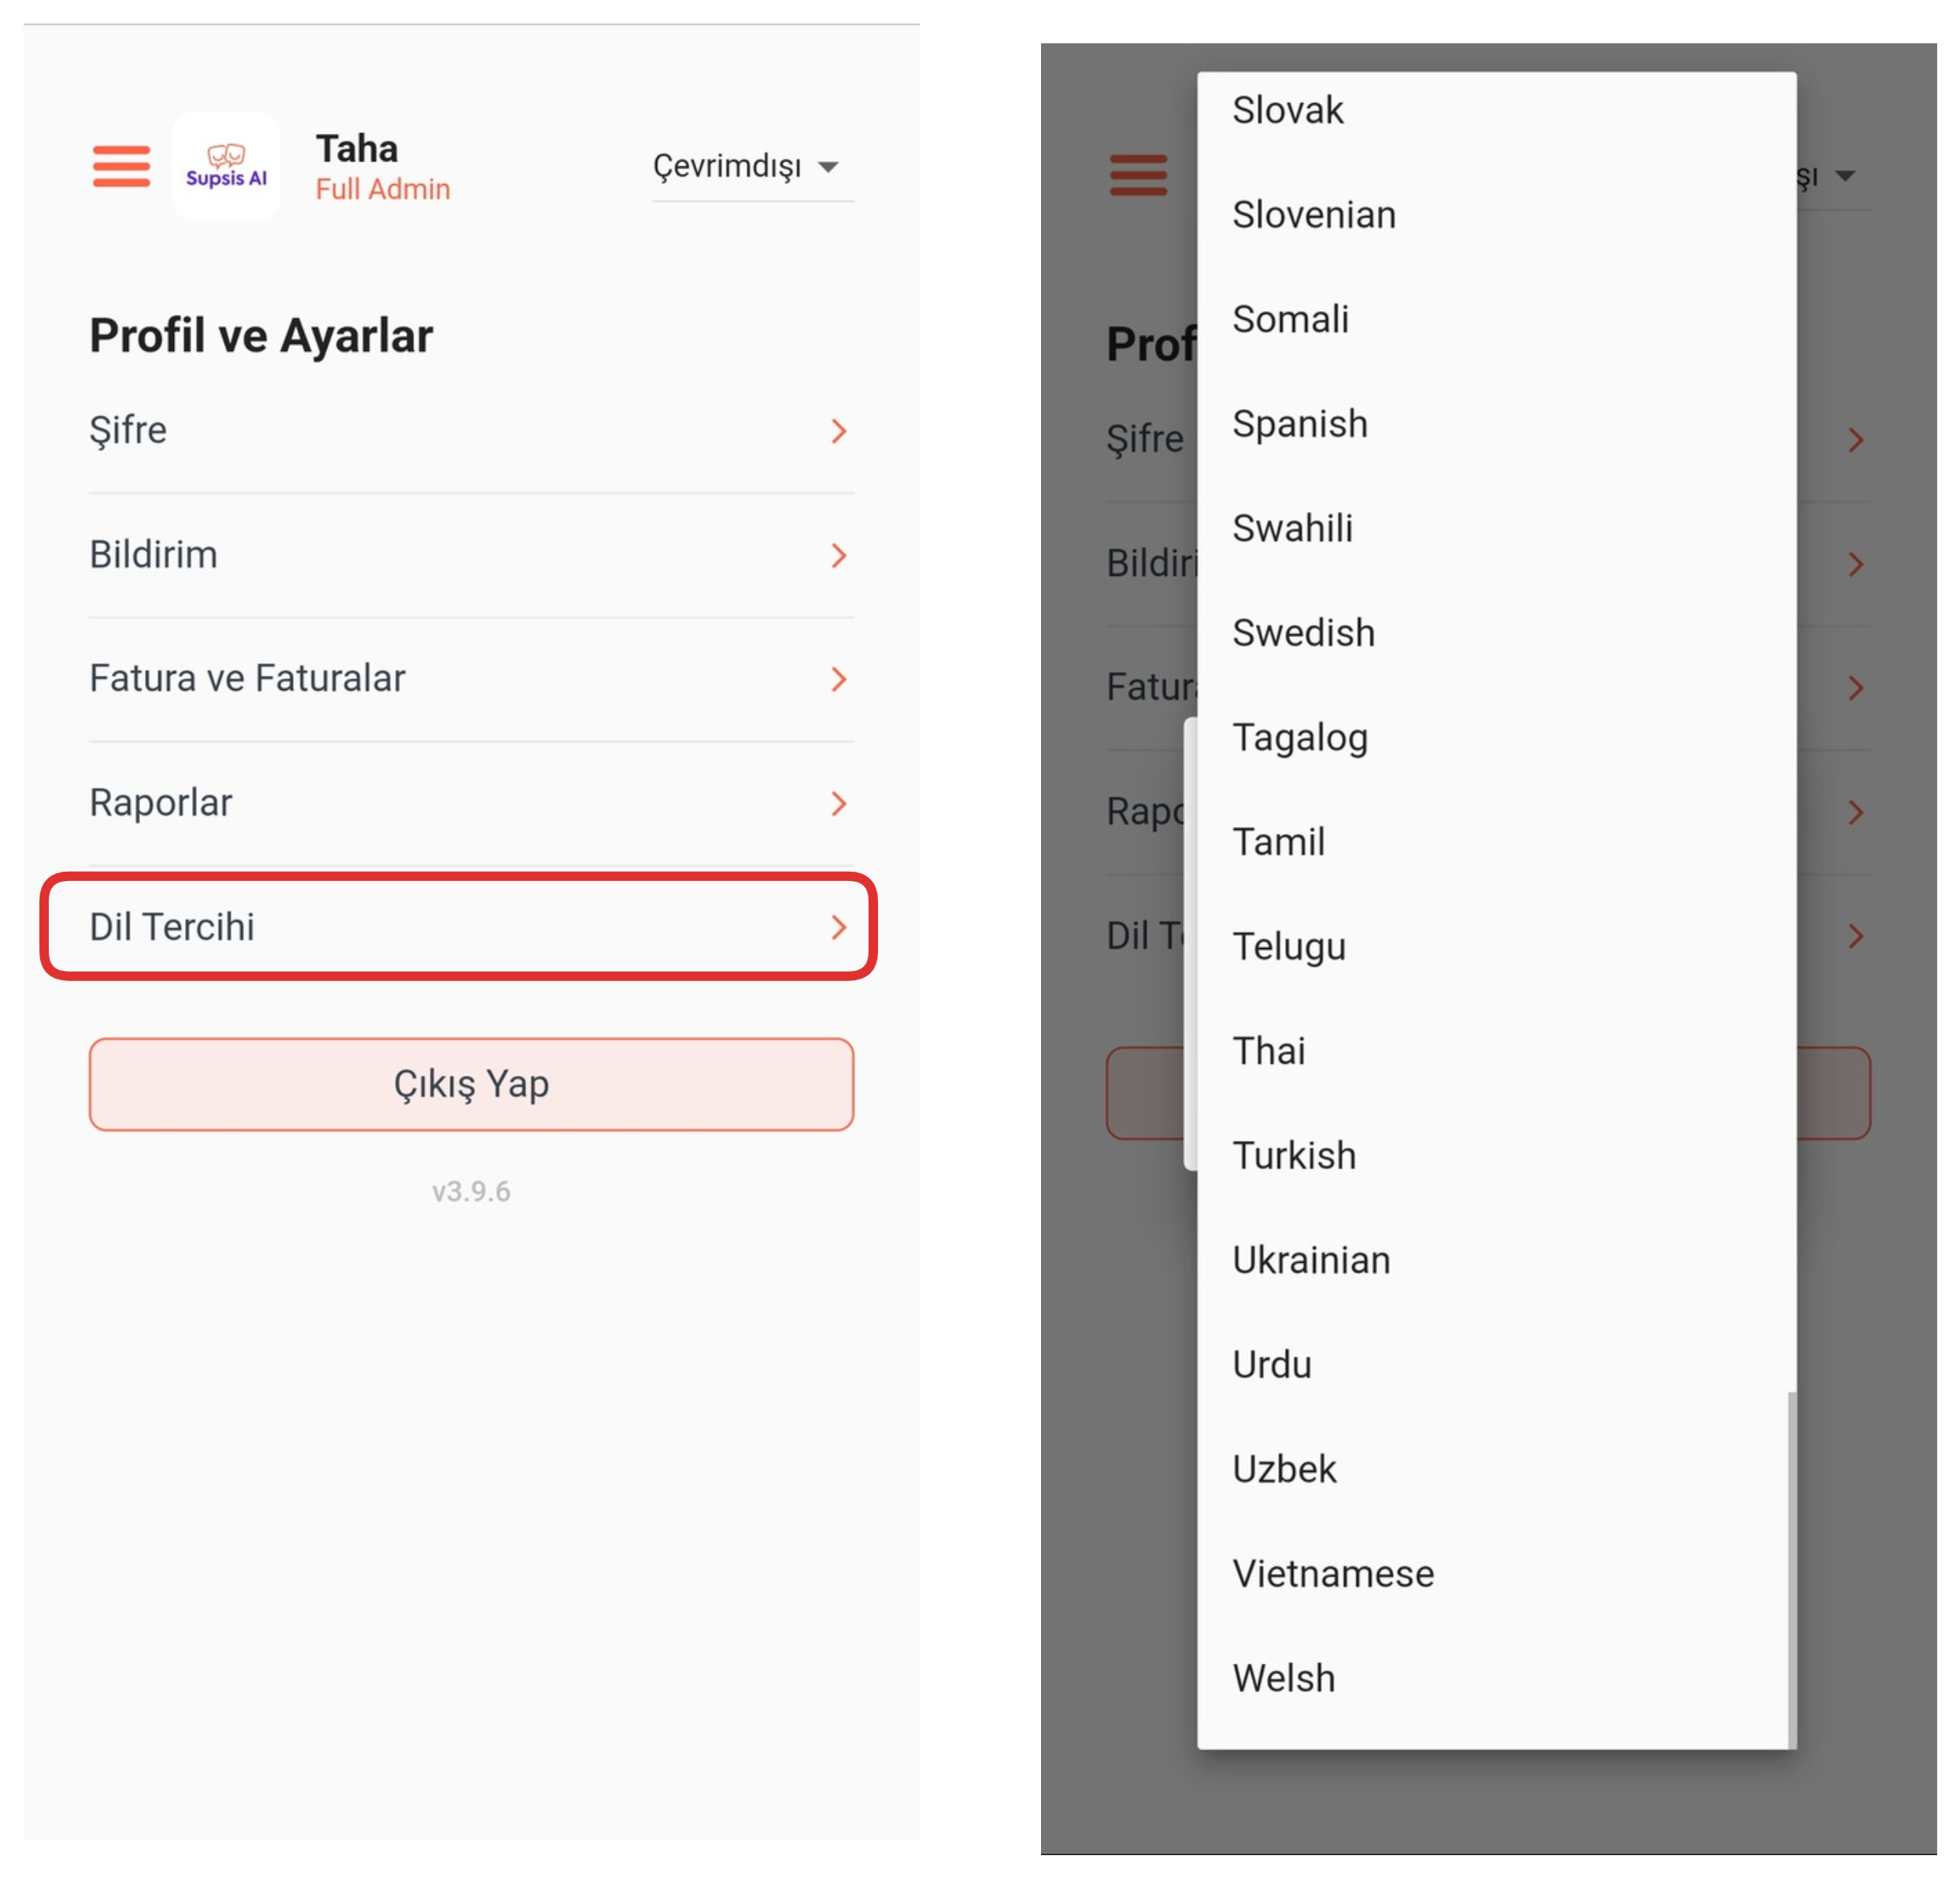
From this section, you can change your default language and determine your language preference. For this, click on the "Language Preference" option from the "Profile" menu. In the opened screen, you can save your preferences by selecting the language you want from the languages available in the system. This operation allows you to display the application interface according to the language you choose.