Application Elements
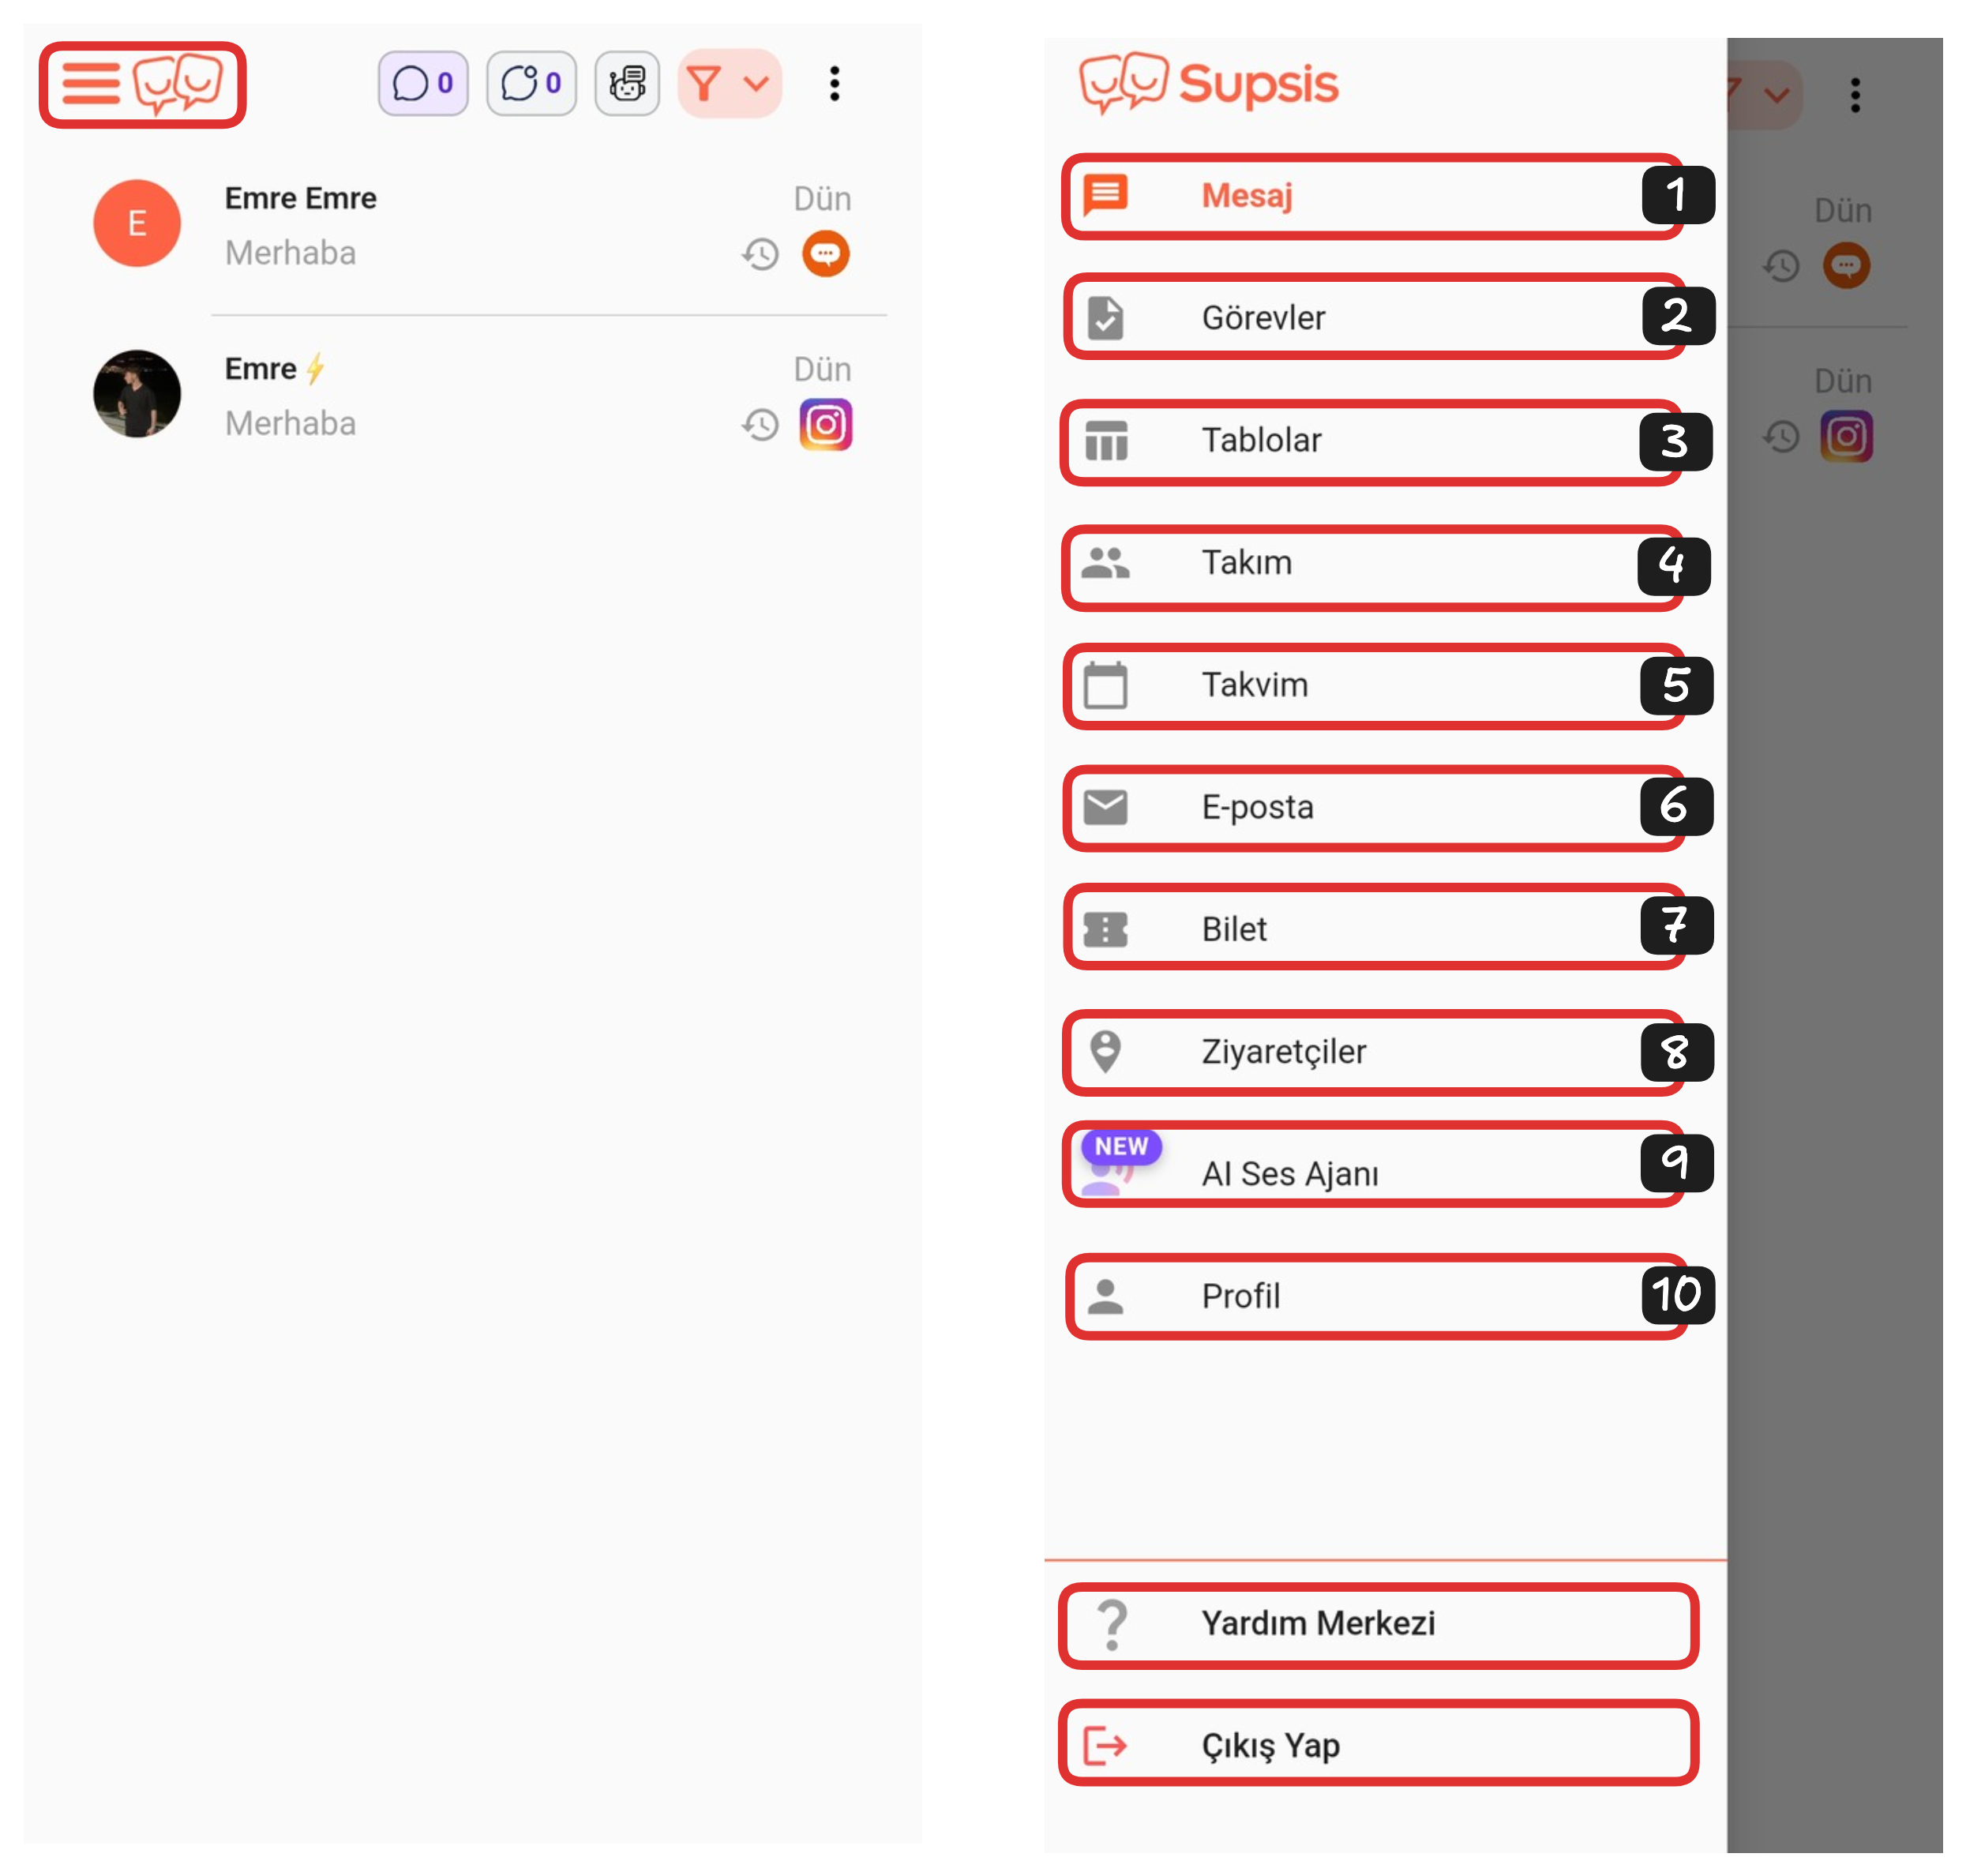
Application Elements:
- Message
- Tasks
- Tables
- Team
- Calendar
- Ticket
- Visitors
- AI Voice Agent
- Profile
2-) Tasks
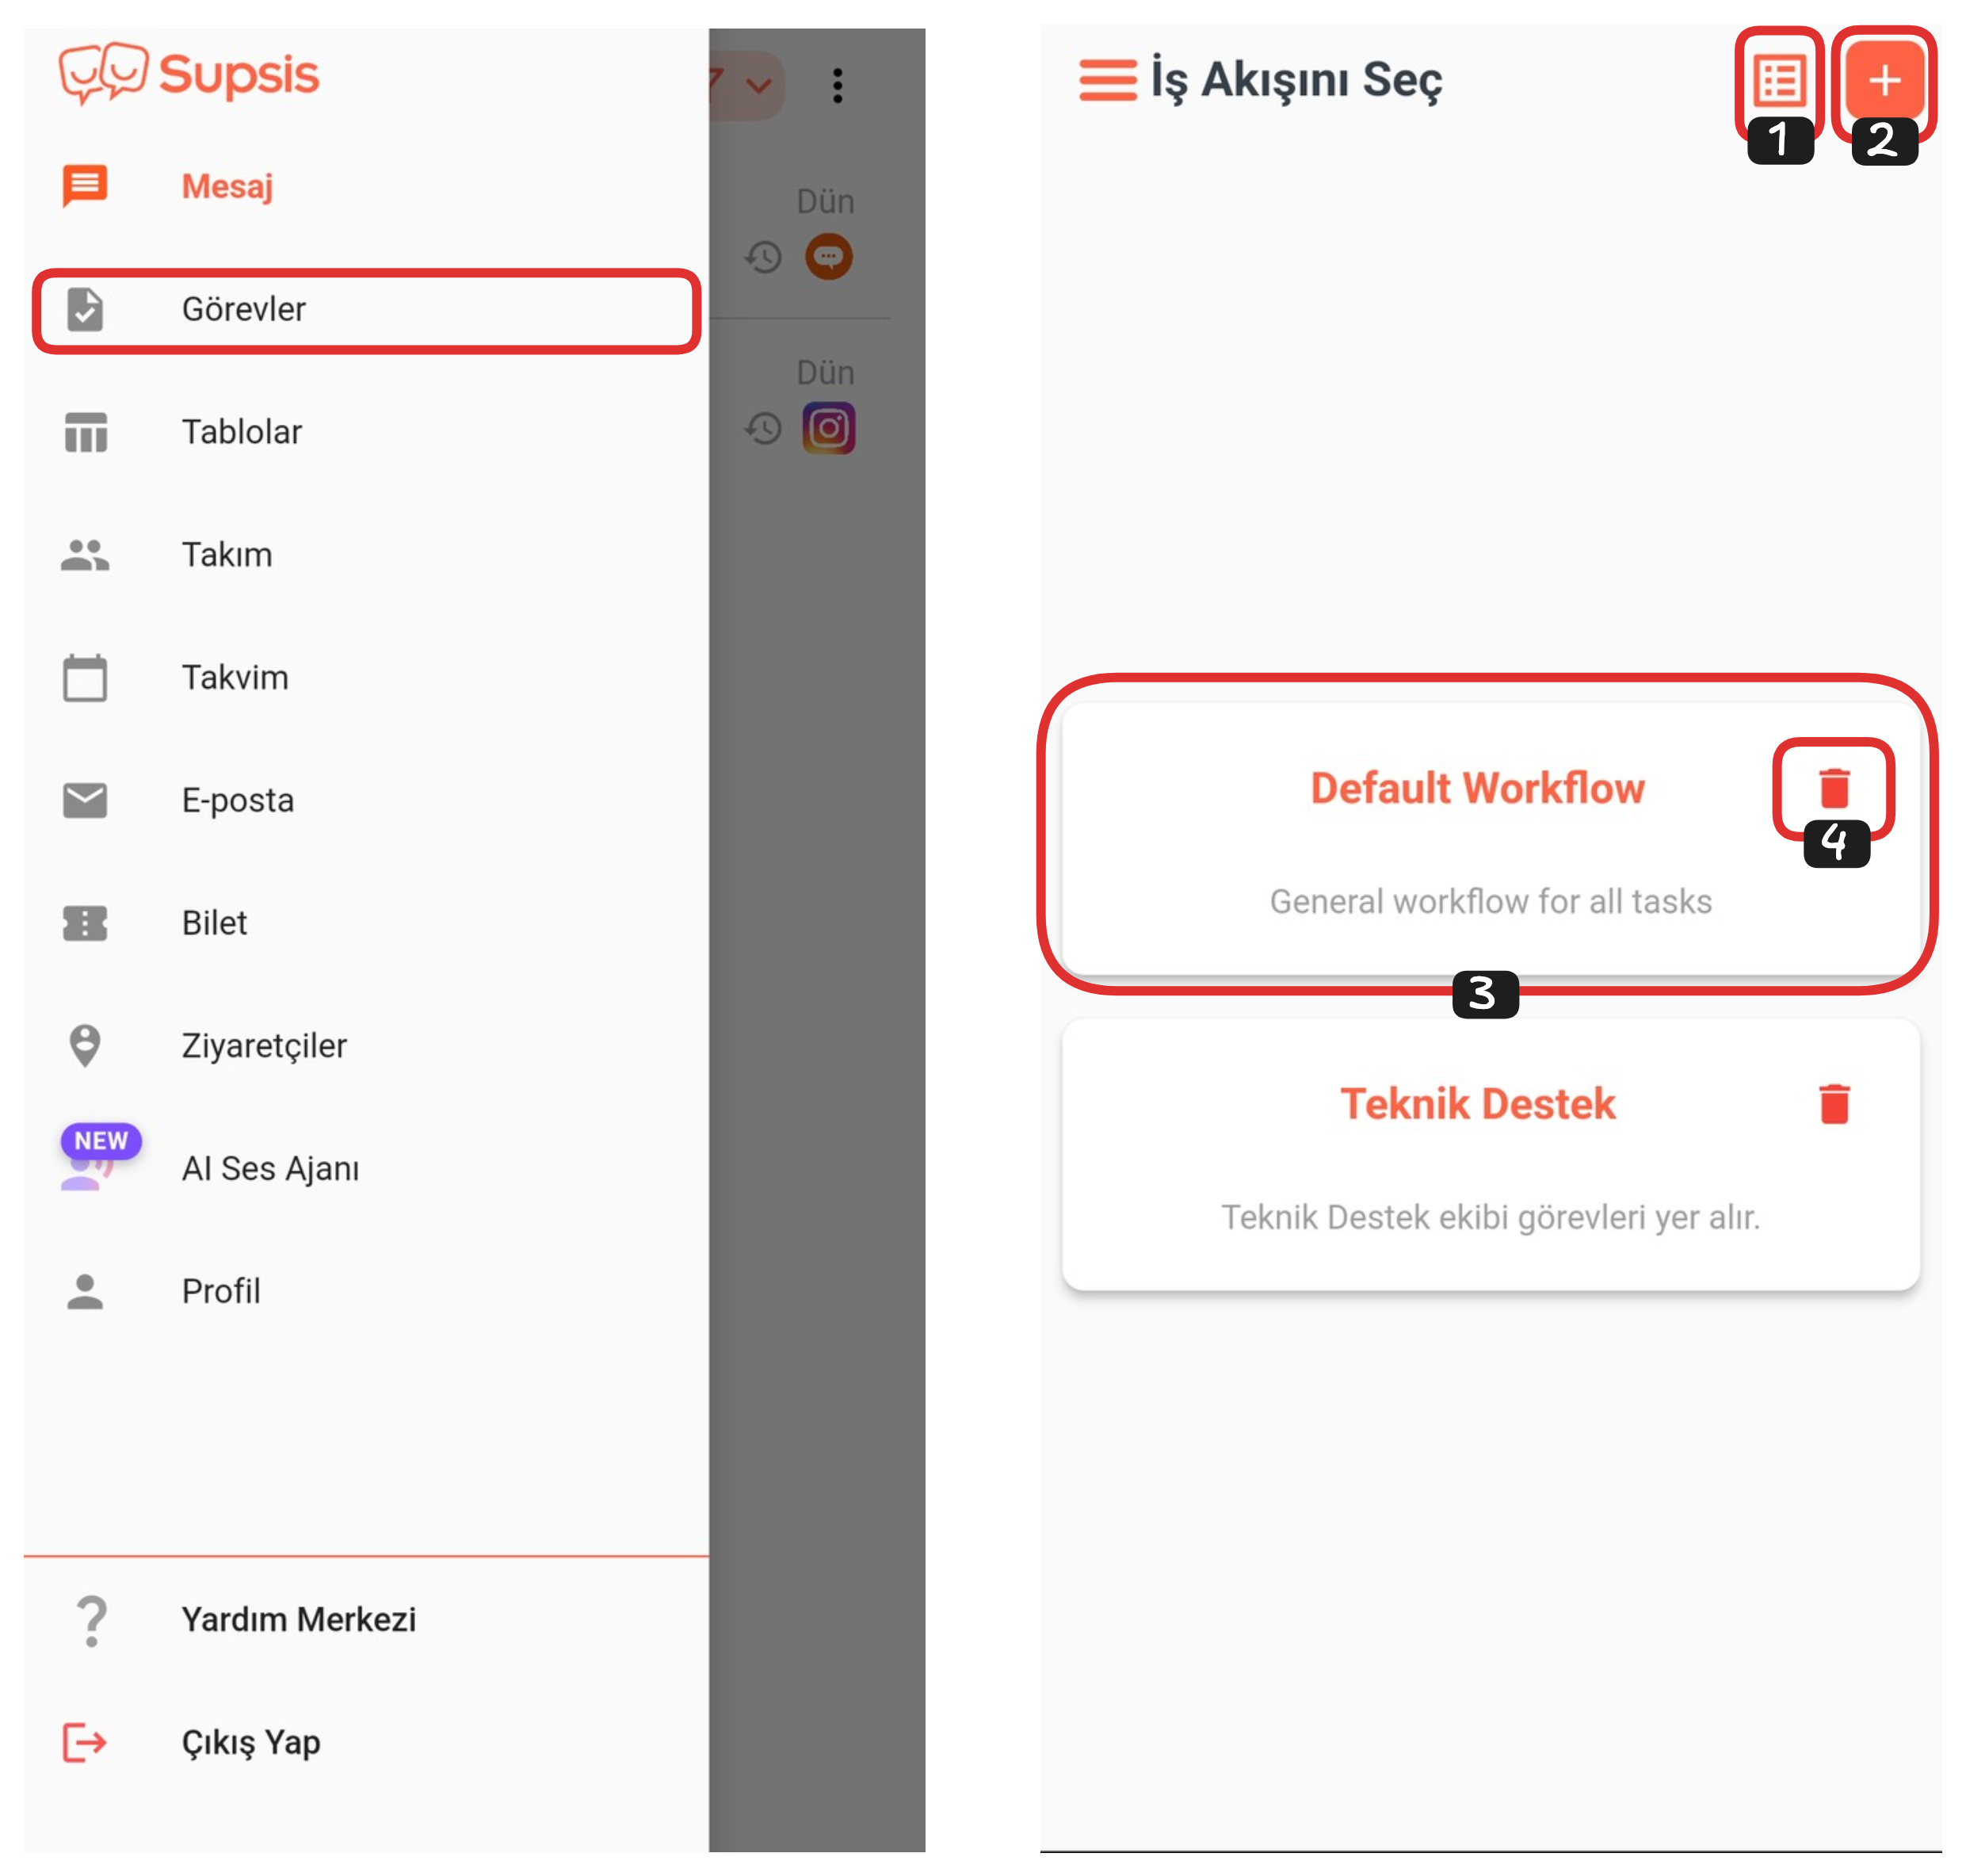
The Tasks page allows you to create workflows and manage all your tasks in a planned manner. This way, you can distribute tasks among representatives, track tasks, and run your operational processes in a more organized way.
First, log in to the Supsis AI Mobile application. On the opened page, click the menu icon in the upper left corner. From the menu, select "Tasks" to navigate to the tasks page. In this area, you can view your tasks, create new tasks, or make edits to existing tasks.
1-) List View
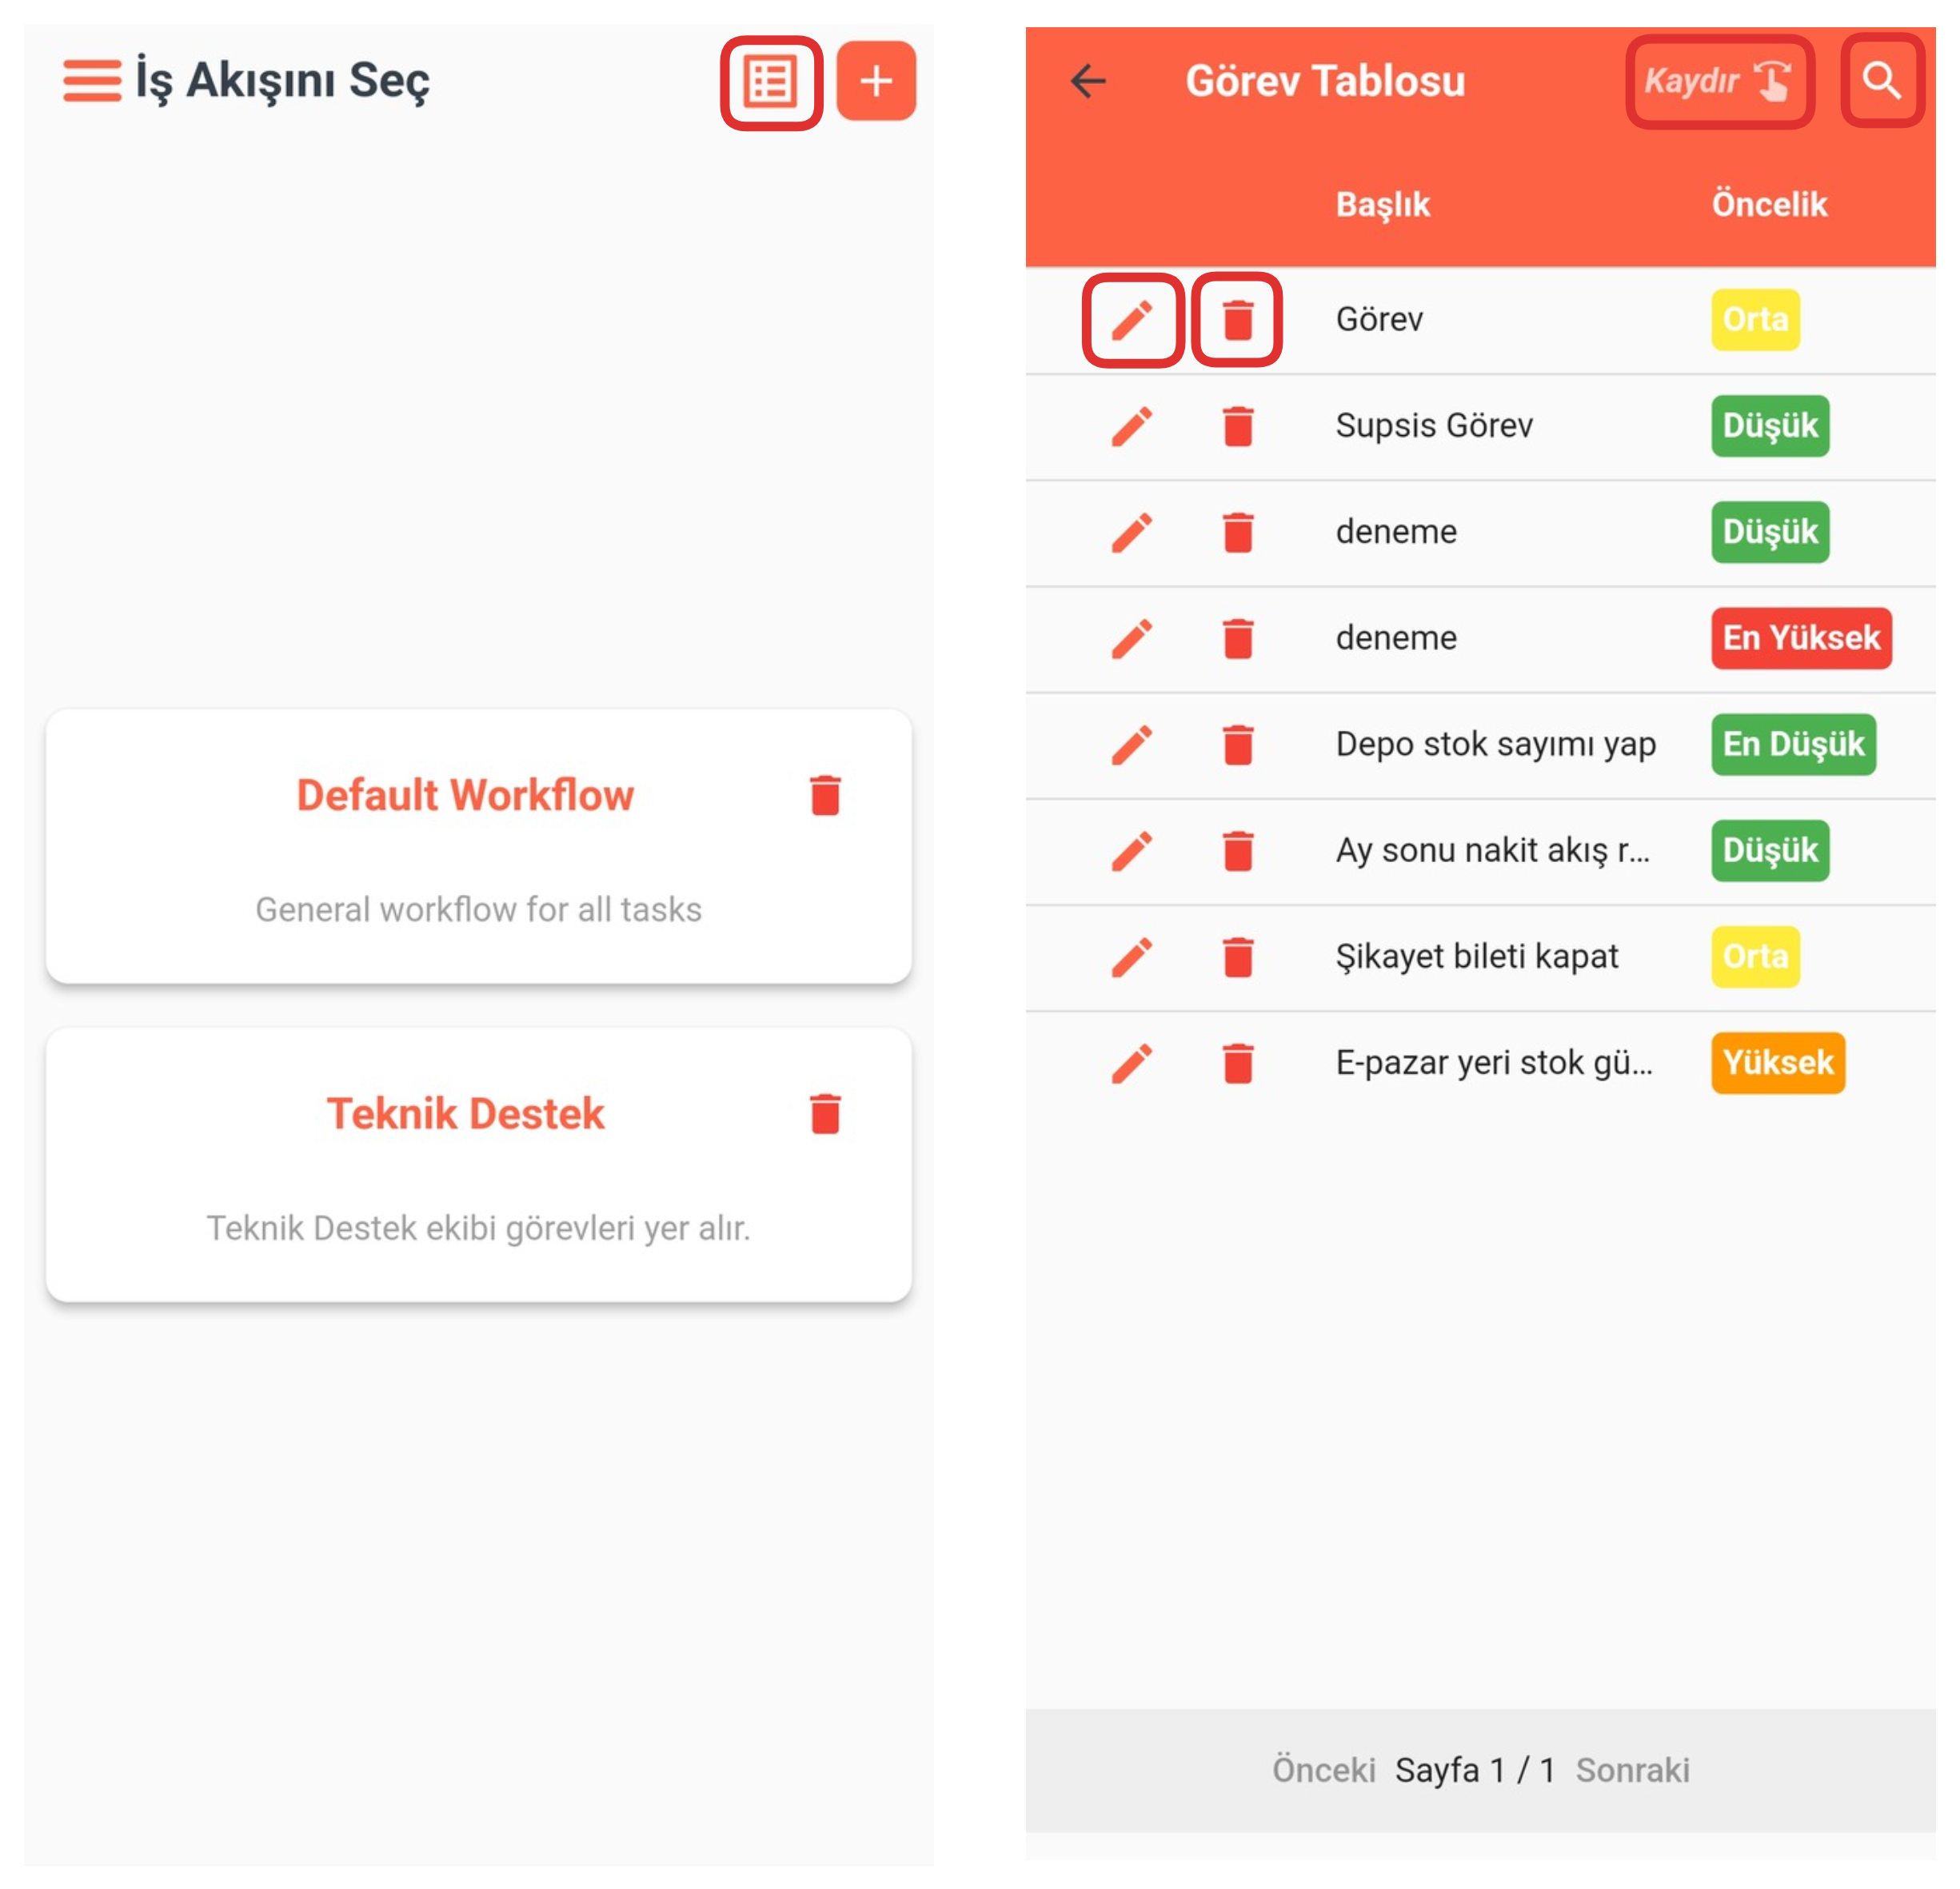
By clicking the "List View" button in the upper right section, you can view all your tasks in list format. On the opened page, you can examine task details by swiping right. Additionally, you can edit the task by clicking the pencil icon next to each task, or delete the task by clicking the trash icon. These operations allow you to manage your tasks quickly and practically.
2-) Create Workflow
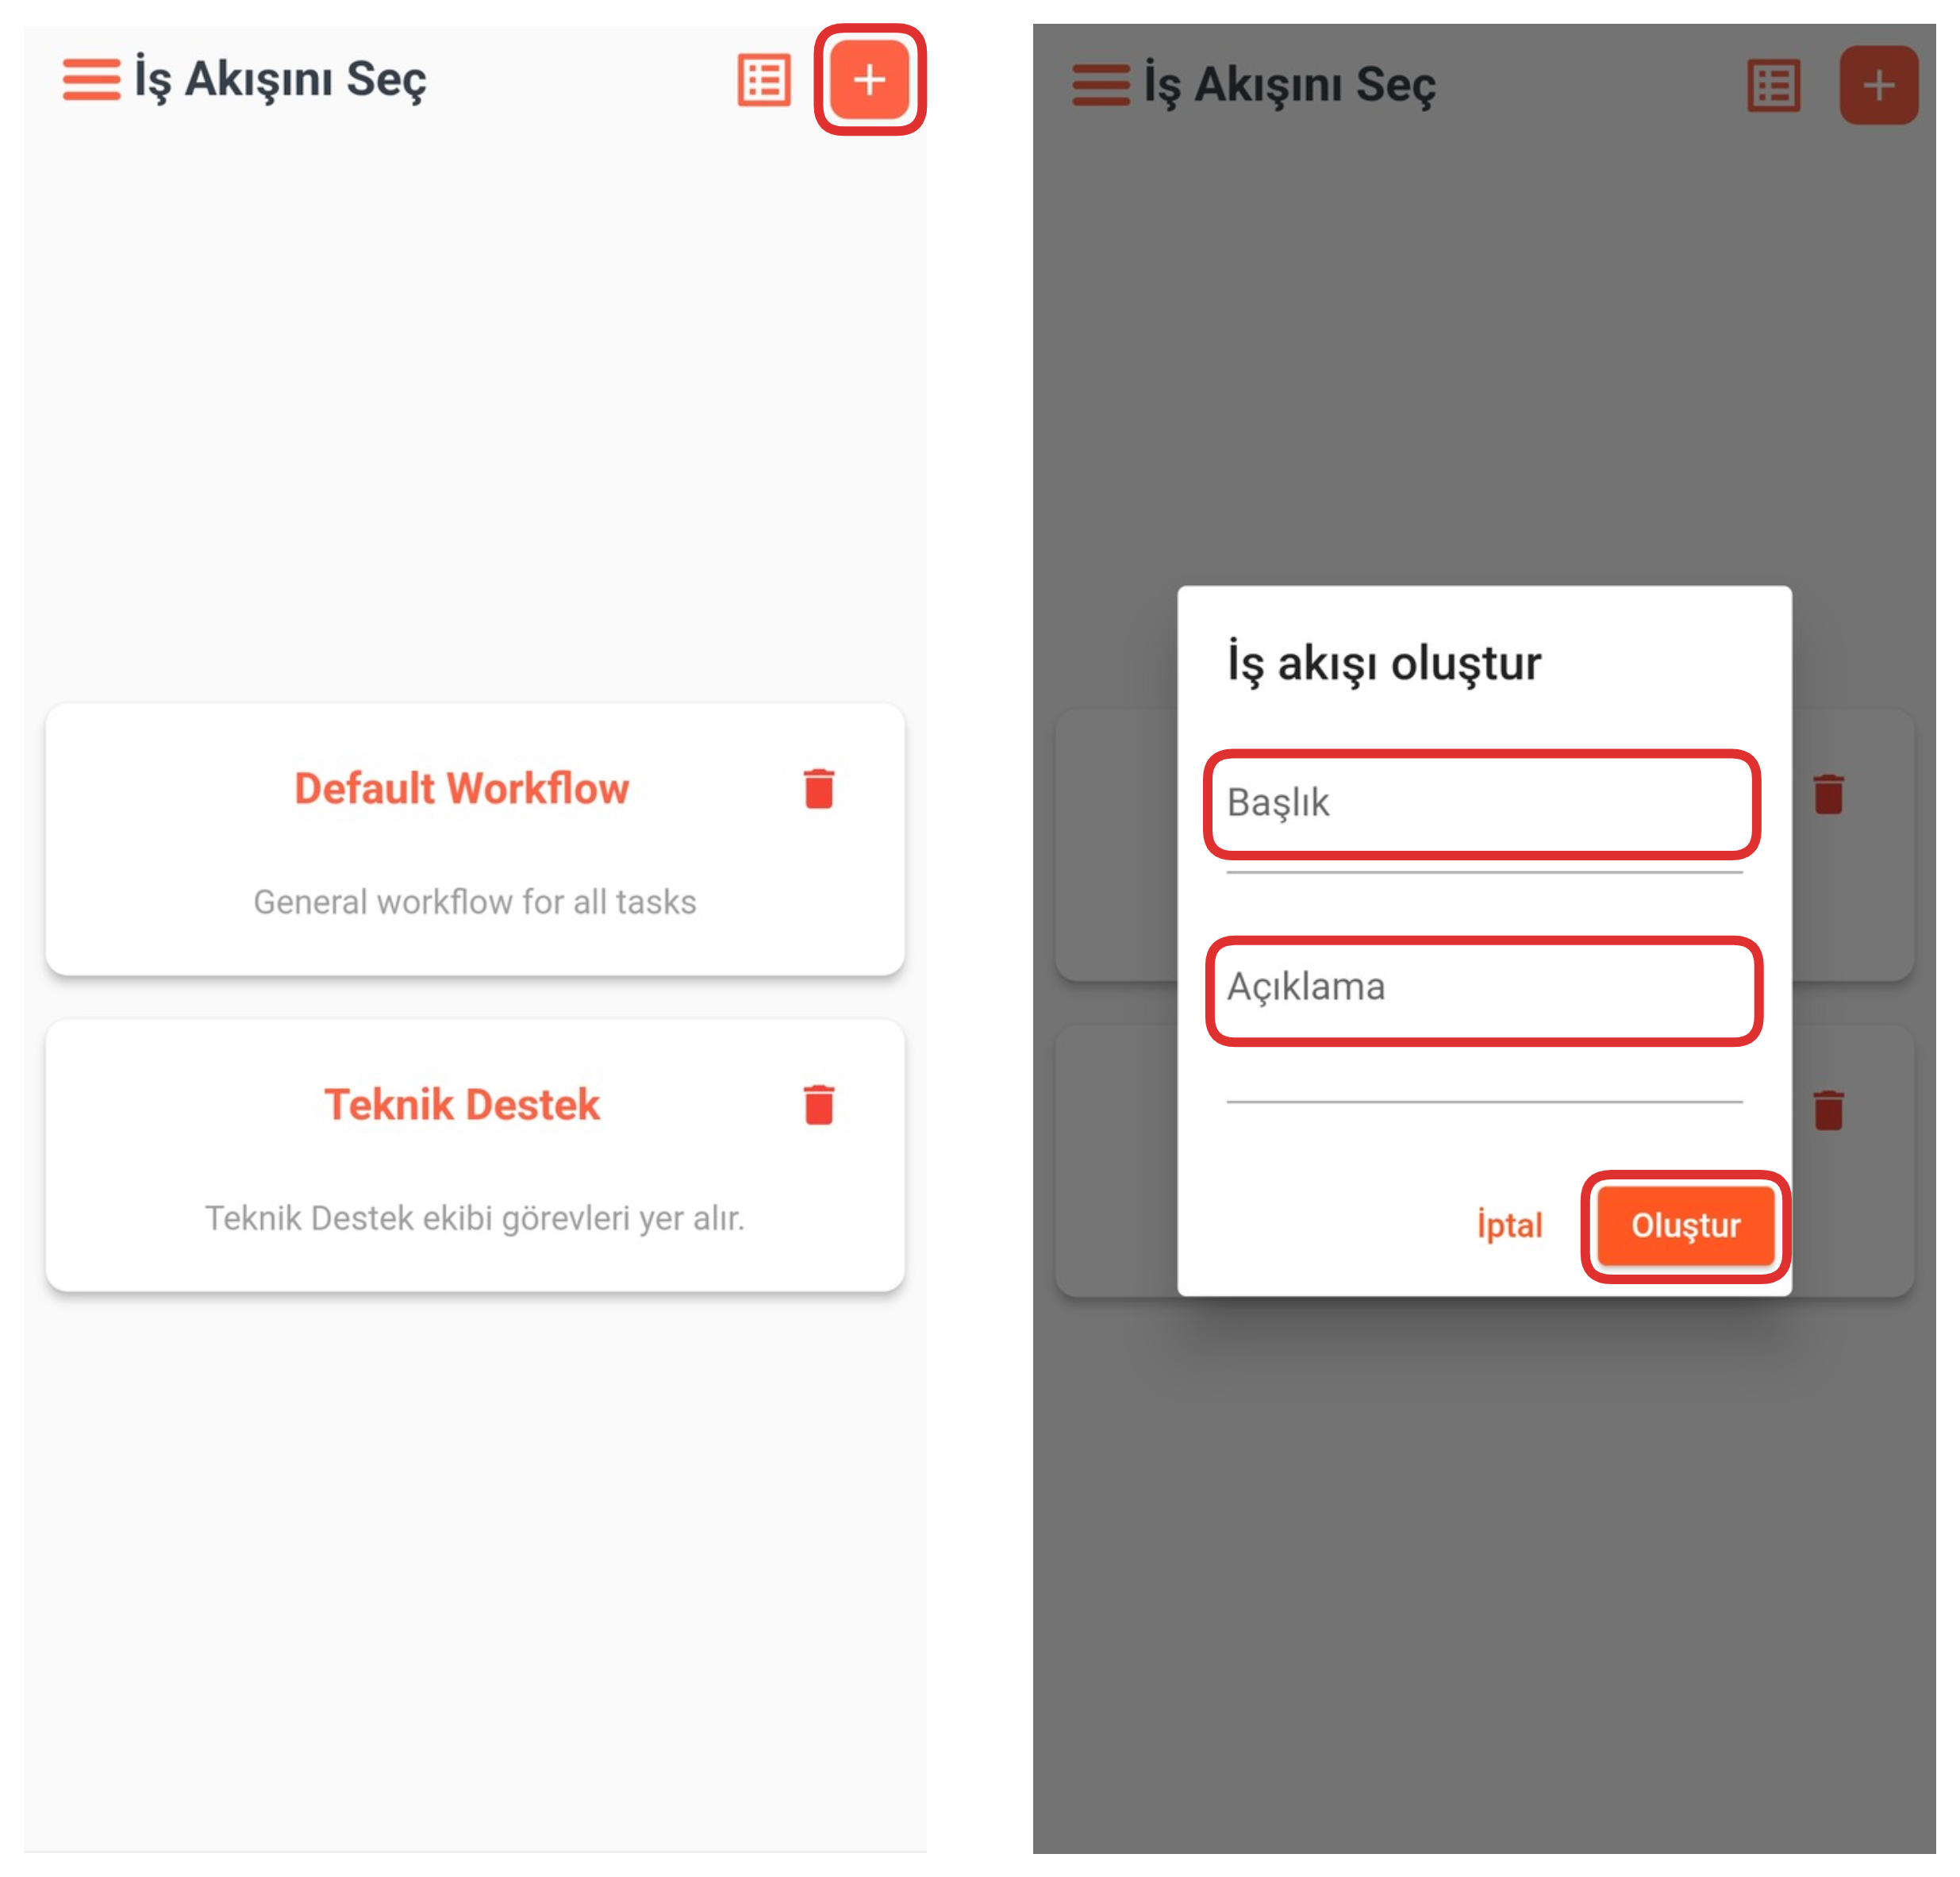
By clicking the "+" icon in the upper right section, you can create a new workflow. You just need to enter the title and description information in the opened modal. After completing these steps, click the "Create" button to successfully create your workflow.
3-) Workflow
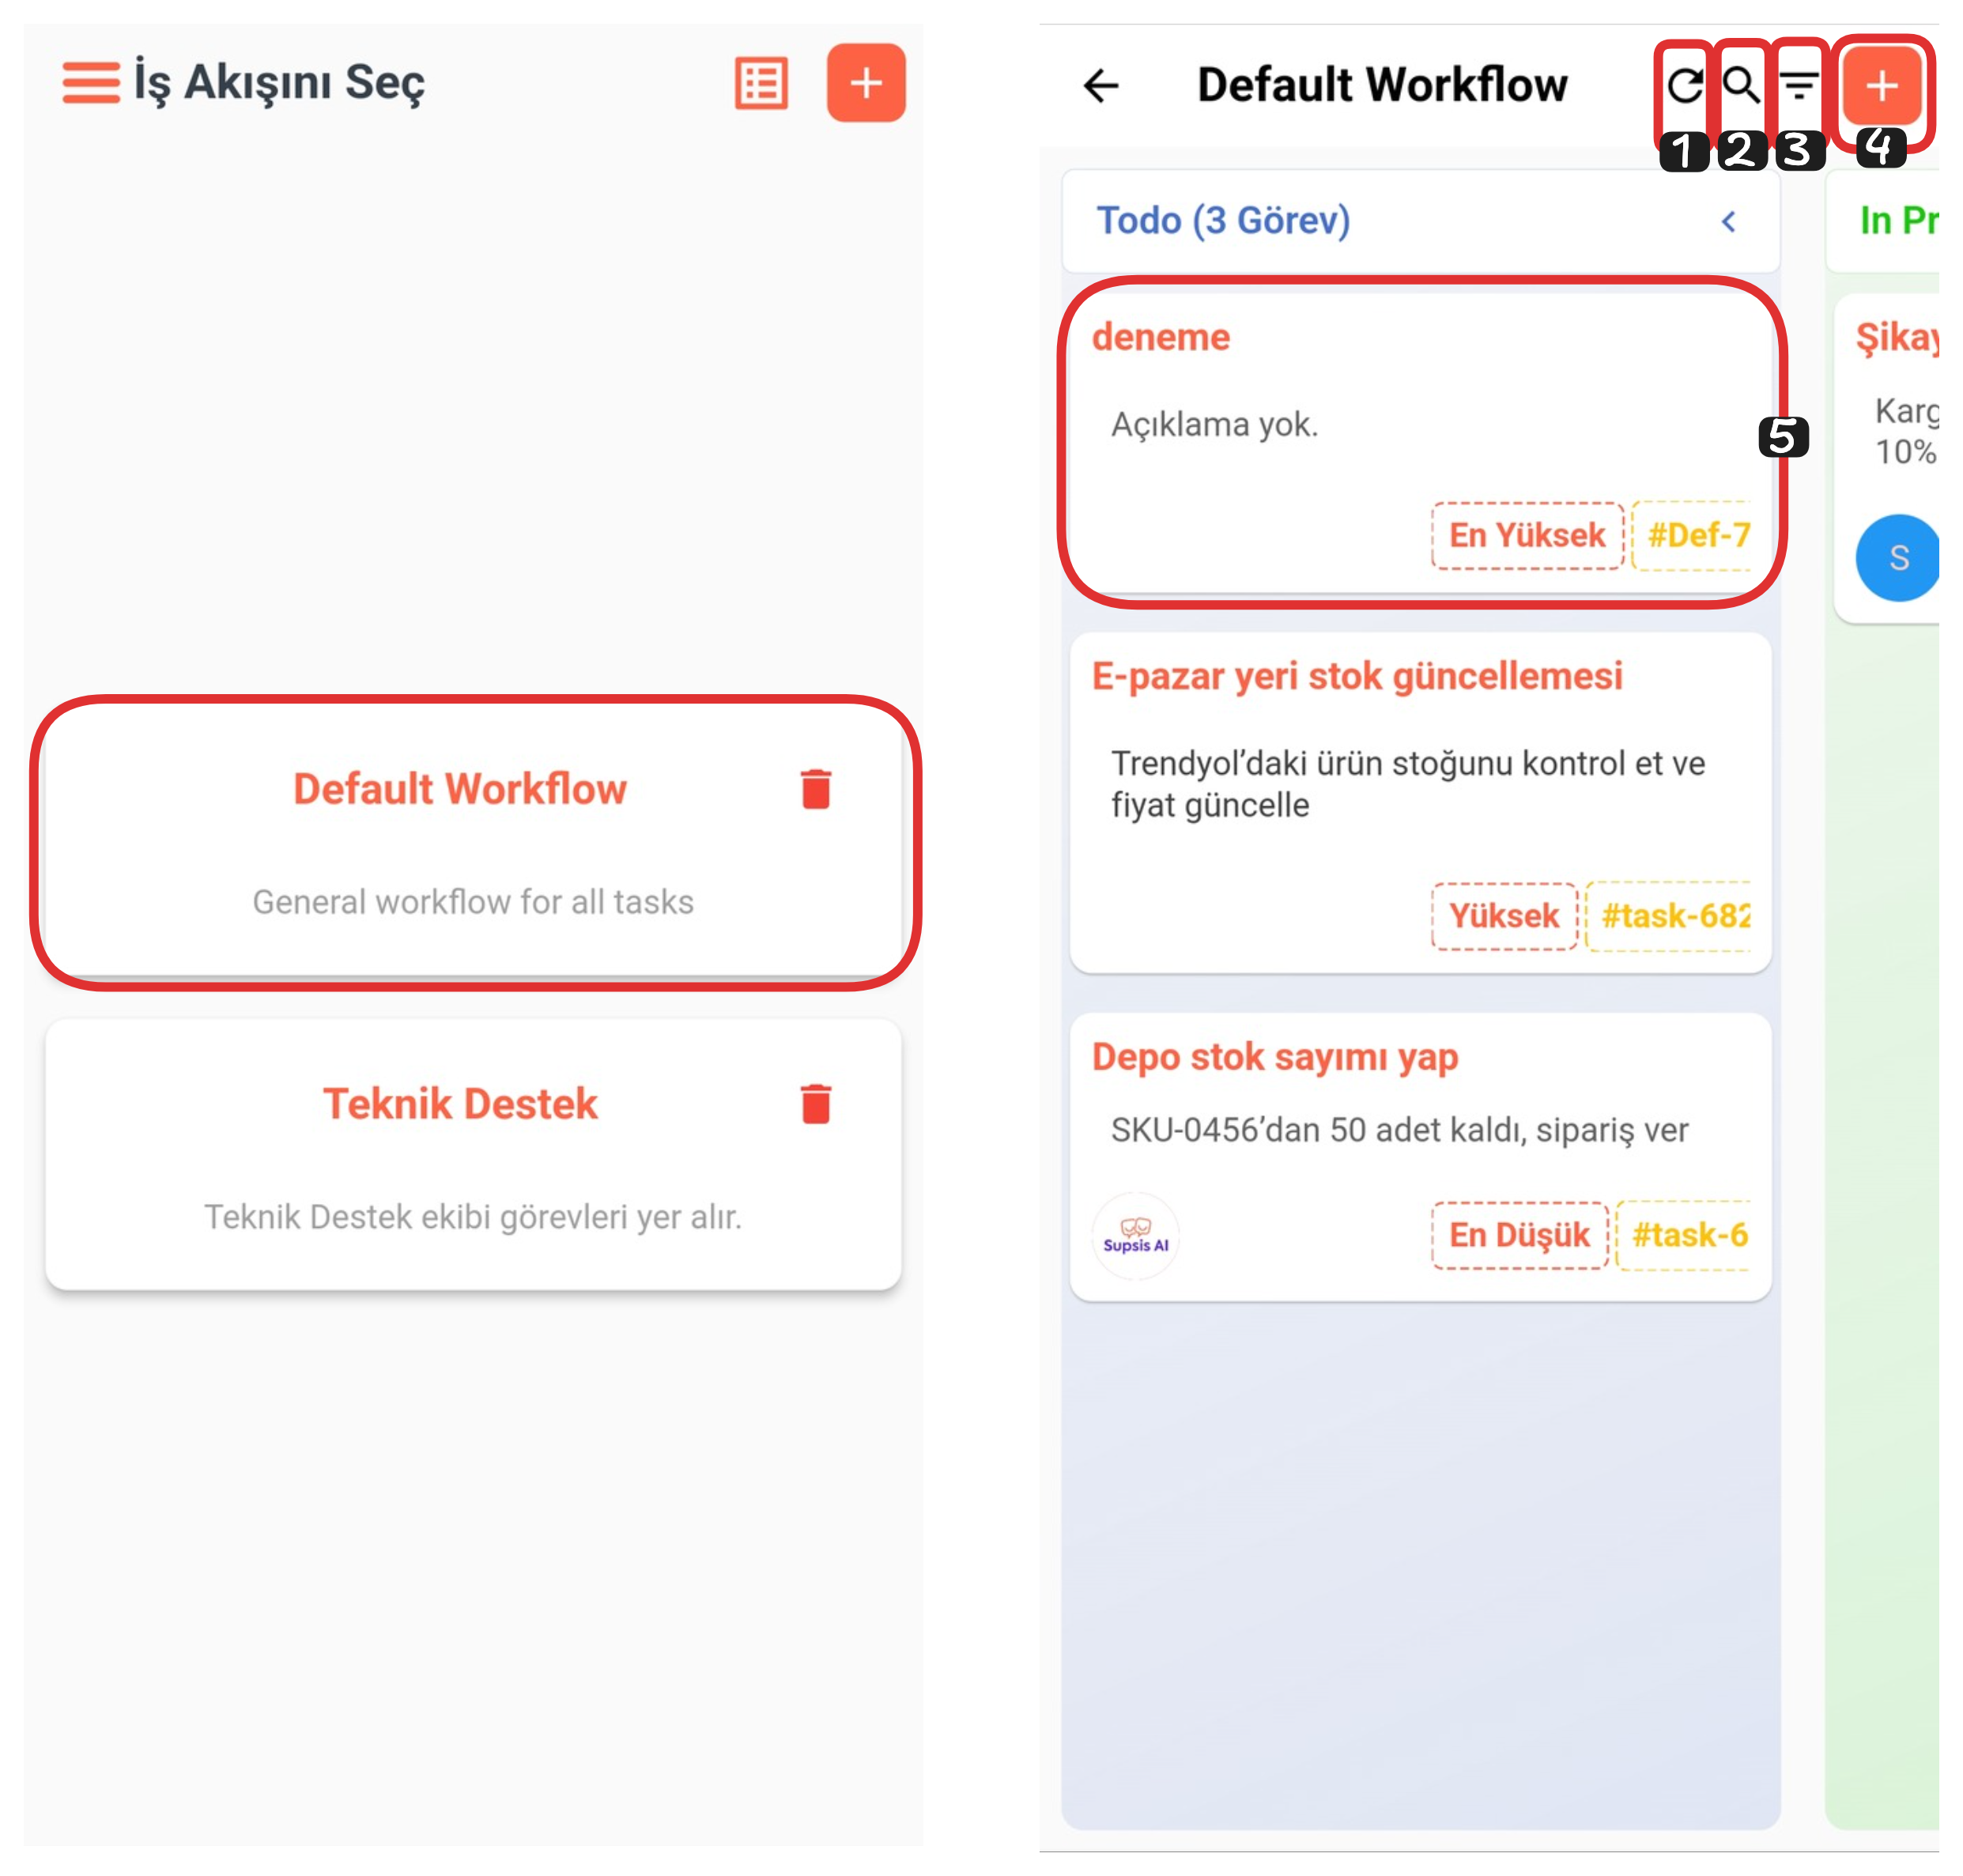
By clicking on your workflow, you can view the tasks belonging to that flow. The Kanban method is used in this section. Thanks to Kanban, you can divide your tasks into specific stages and track each stage in a more organized way. You can easily manage your business processes by moving task cards from one stage to another using the drag-and-drop method.
Workflow Elements:
- Refresh
- Search
- Filter
- Create
- Task
1-) Refresh
With this feature, you can refresh your workflow and view your workflow in its current state. This ensures that changes are reflected instantly and helps you reach the most accurate task status.
2-) Search
From this section, you can easily access the relevant tasks by searching for the titles of the tasks you cannot find. The search feature provides quick access among many tasks and saves time.
3-) Filter
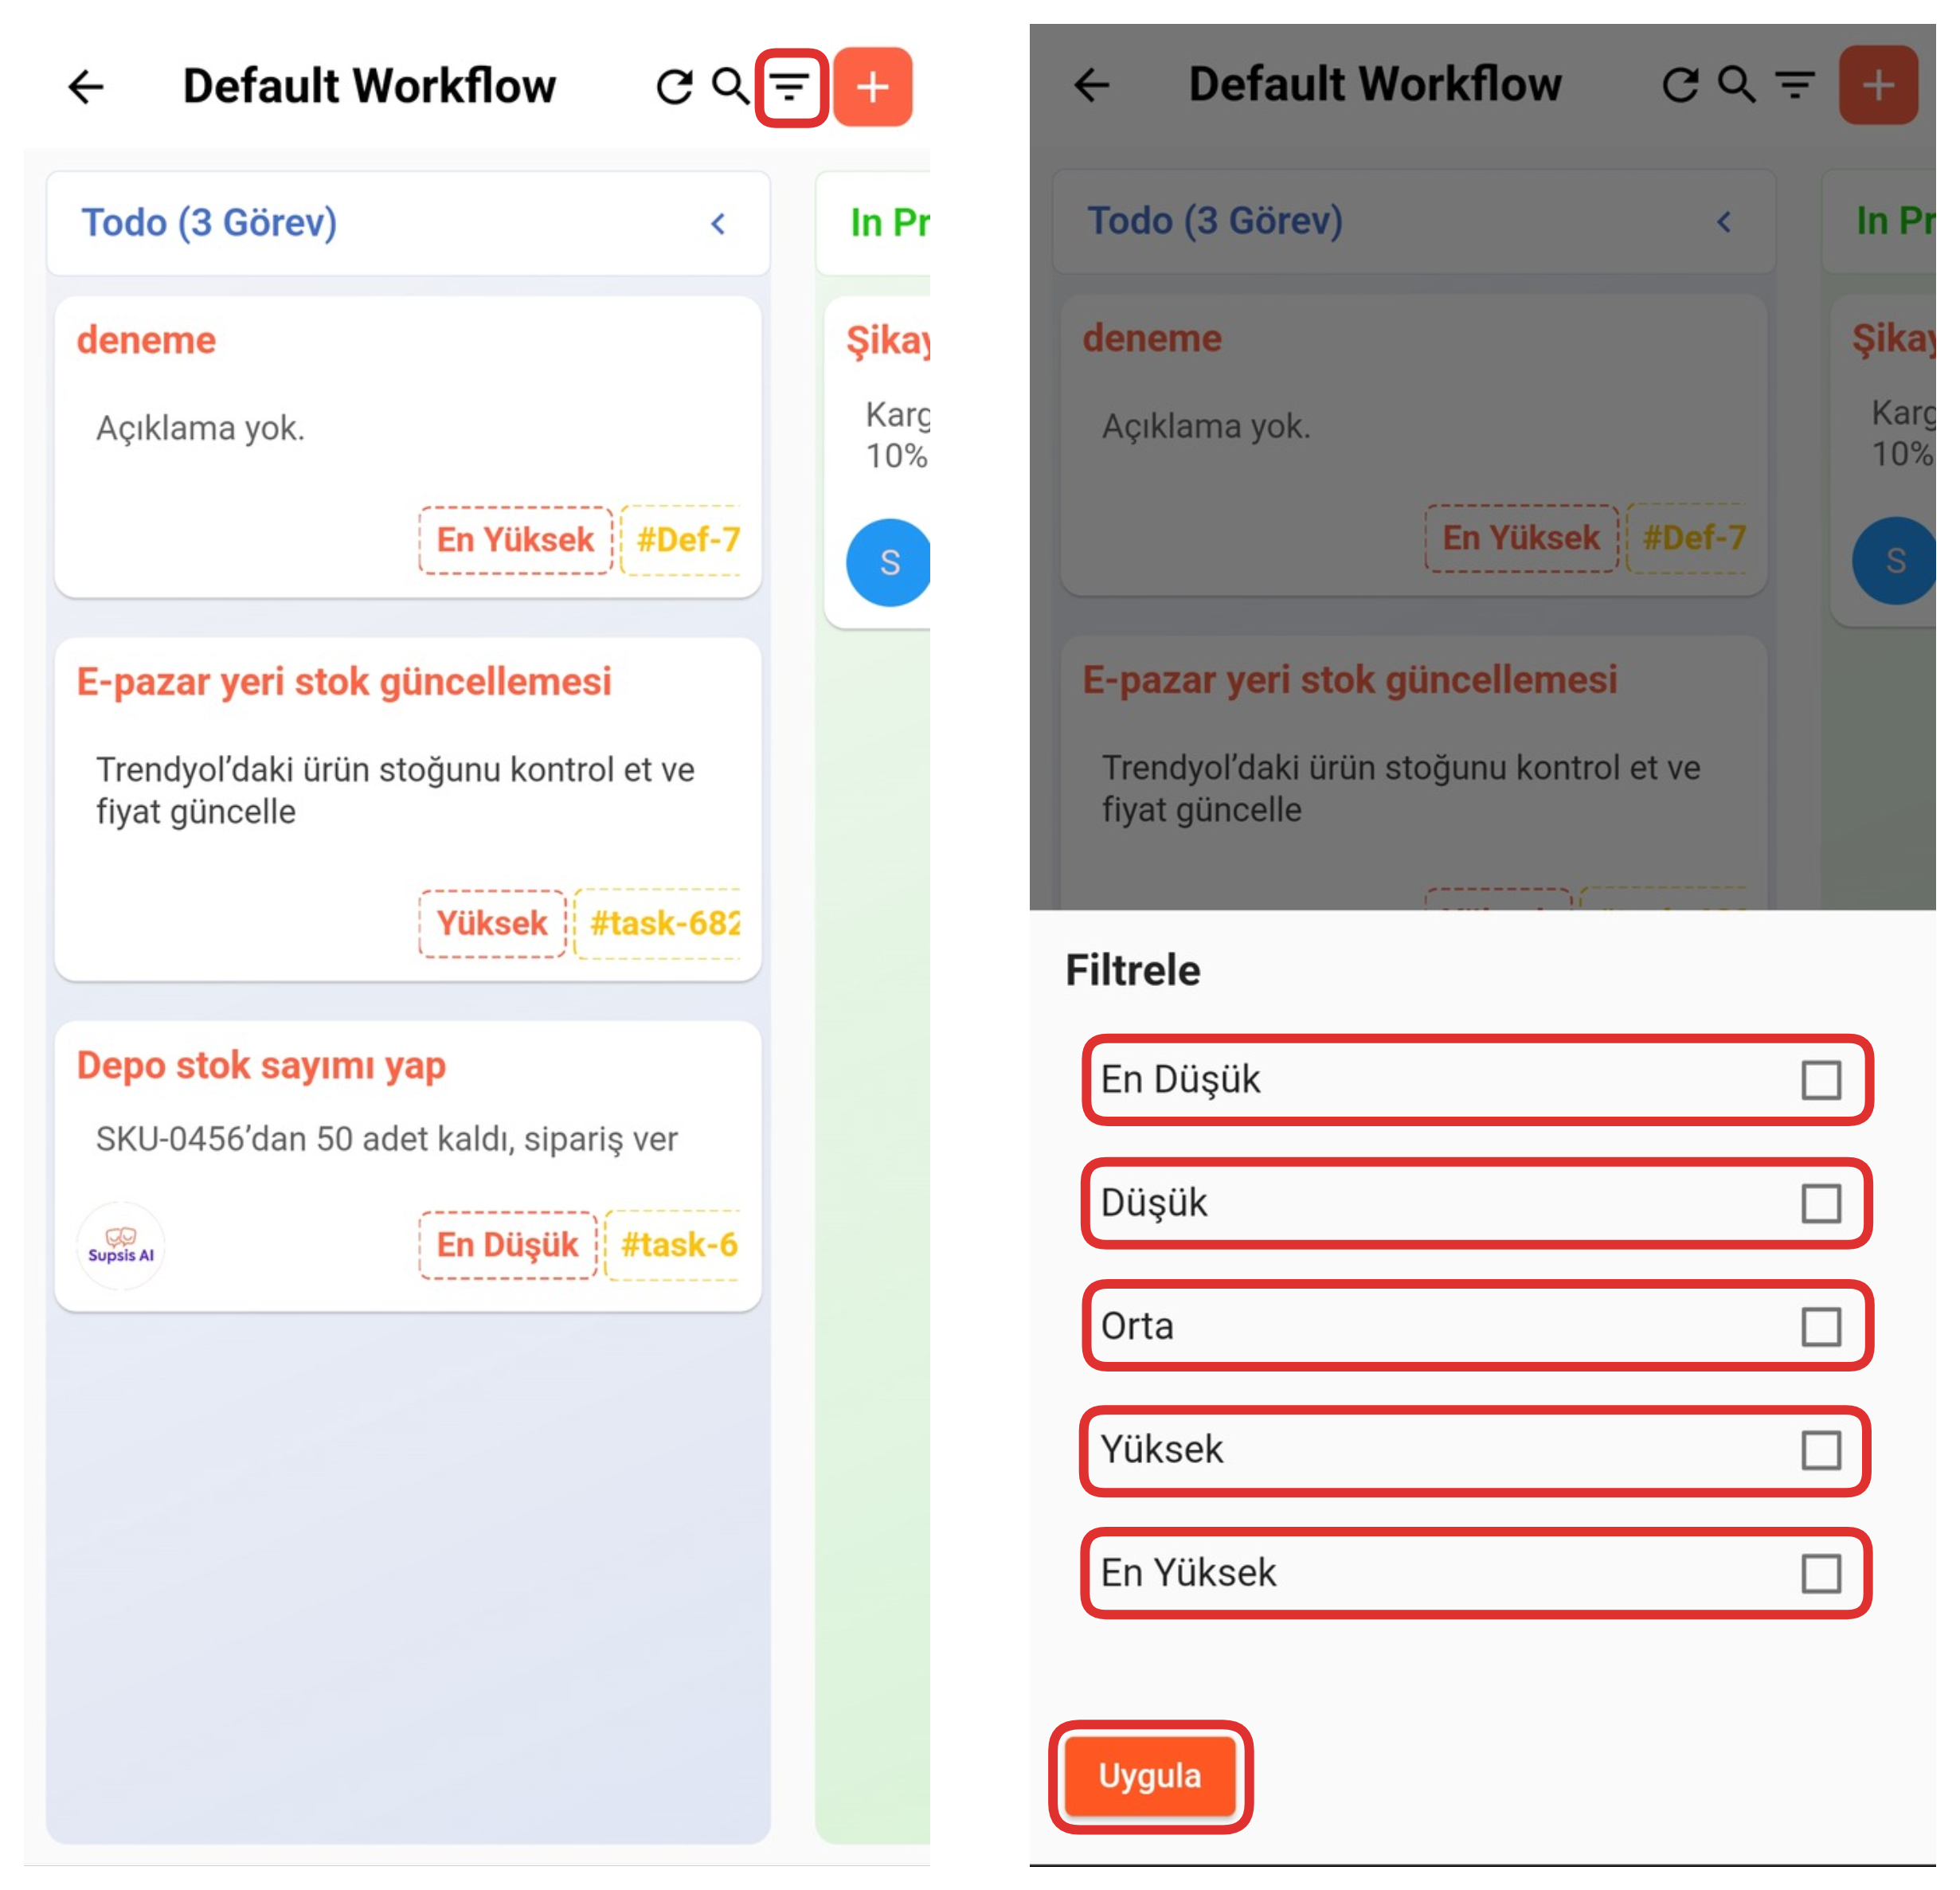
From this section, you can filter your tasks by priority level. Click the "Filter" icon in the upper right corner. In the opened area, check the boxes for the priority levels you want to view. After completing your selections, click the "Apply" button to view only the tasks with the priority you specified. This way, you can sort and manage your tasks more effectively.
4-) Create Task
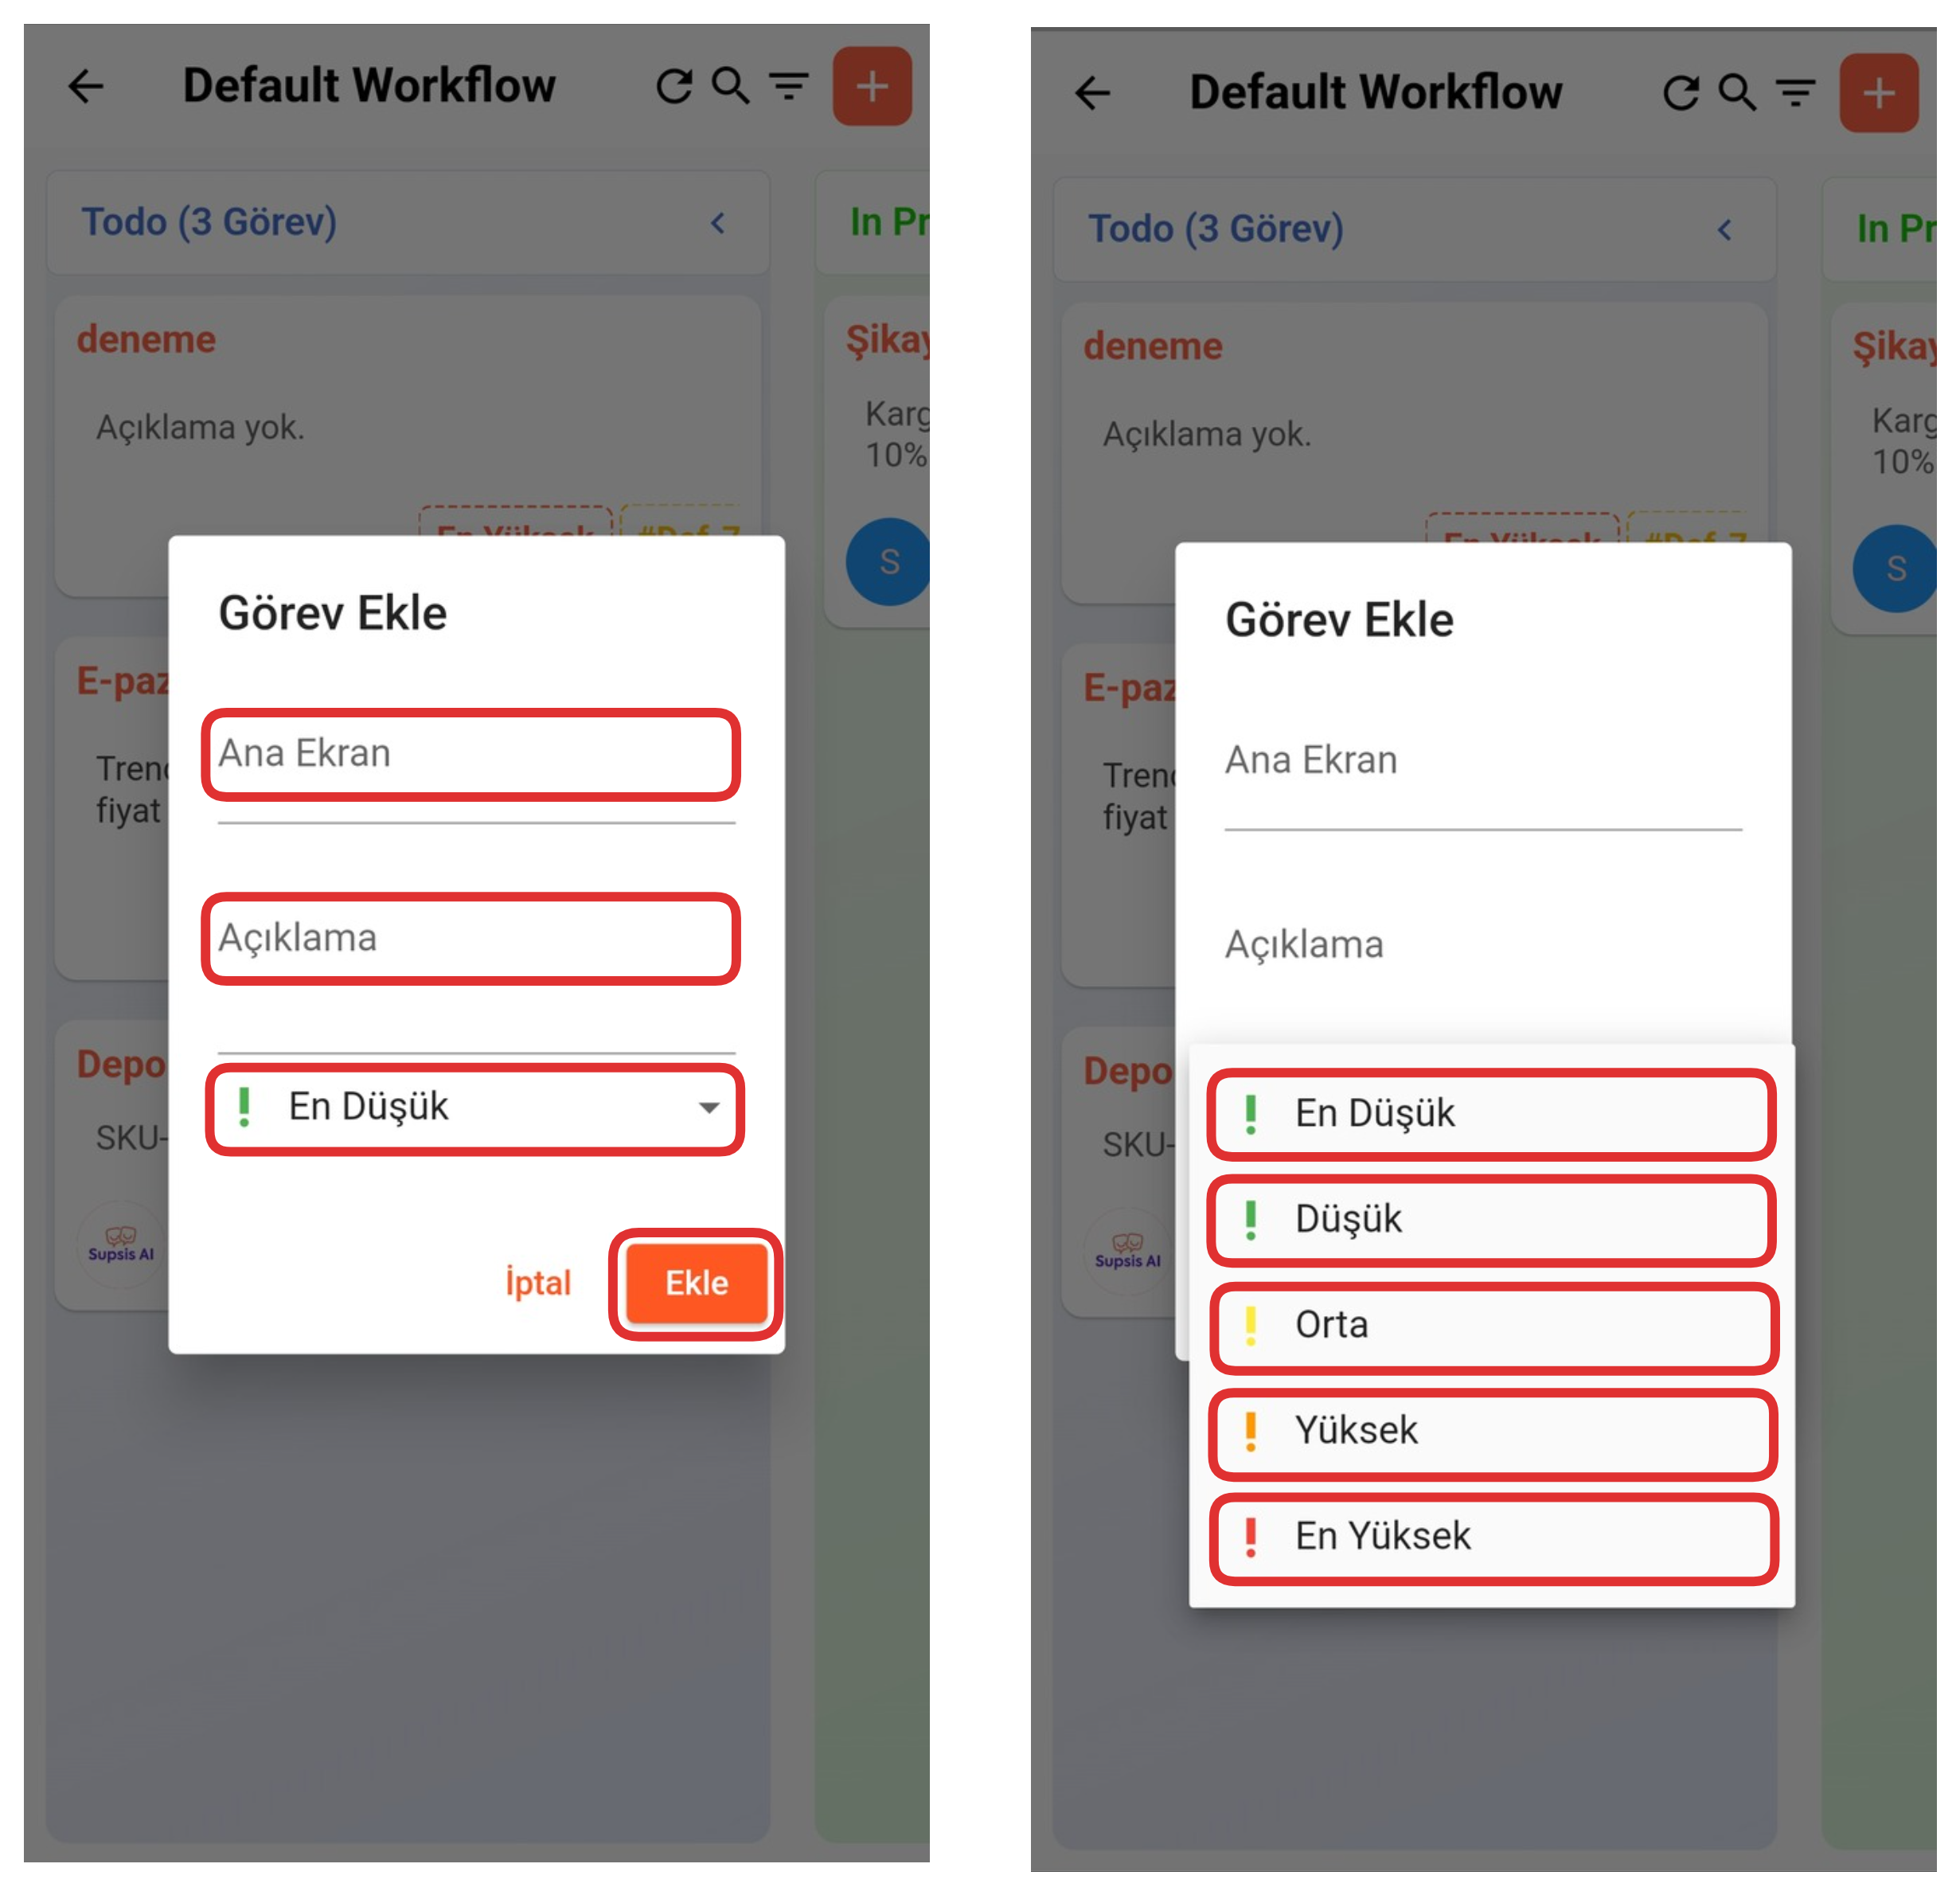
After clicking the "+" sign in the upper right section, enter the name and description of the task you want to create from the opened modal. Then select the task priority from the bottom section. After filling in all fields, you can complete the task creation process by clicking the "Add" button.
5-) Task
If you want to view and edit task details, clicking on the task you want to edit is sufficient. With this operation, you can see all the details of the task and update it by making necessary changes.
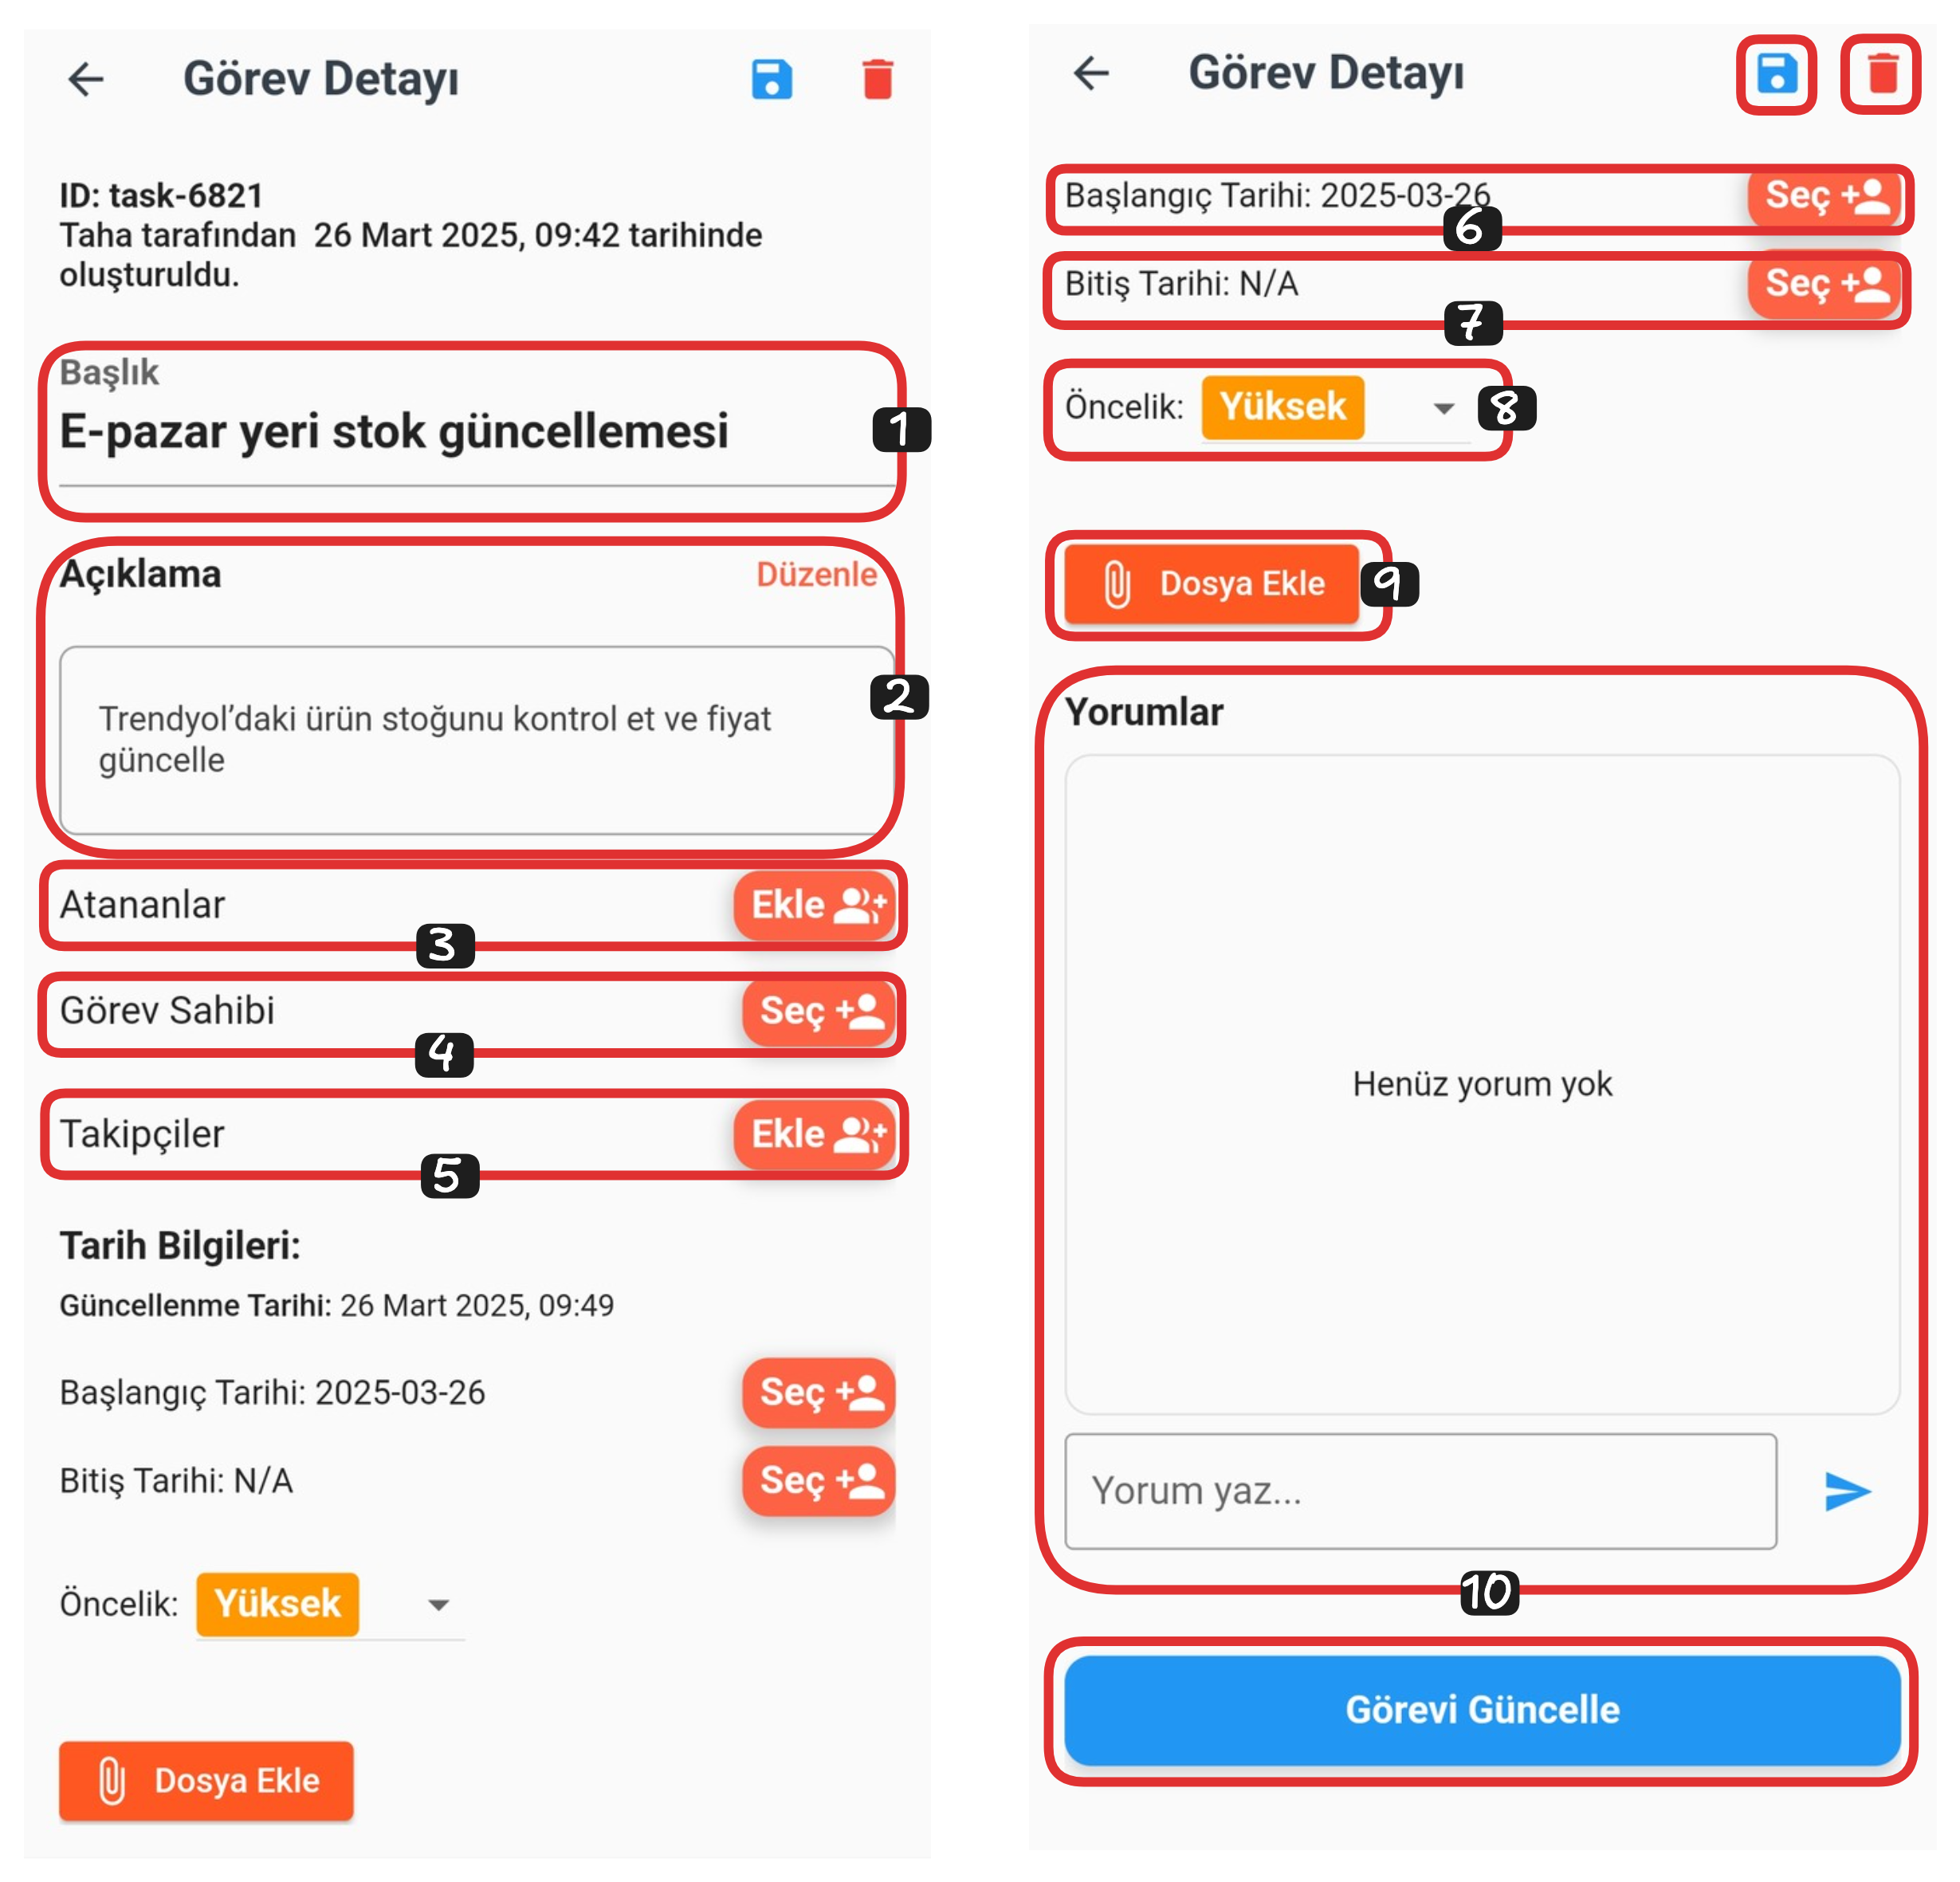
Task Details:
- Title
- Description
- Assignees
- Task Owner
- Followers
- Start Date
- End Date
- Priority
- Add File
- Comments
1-) Title
From this section, you can edit the title of your task. You can rename the task by changing the current title as you wish.
2-) Description
From this section, you can edit the description of your task. You can make the details related to the task more descriptive and clear by updating them.
3-) Assignees
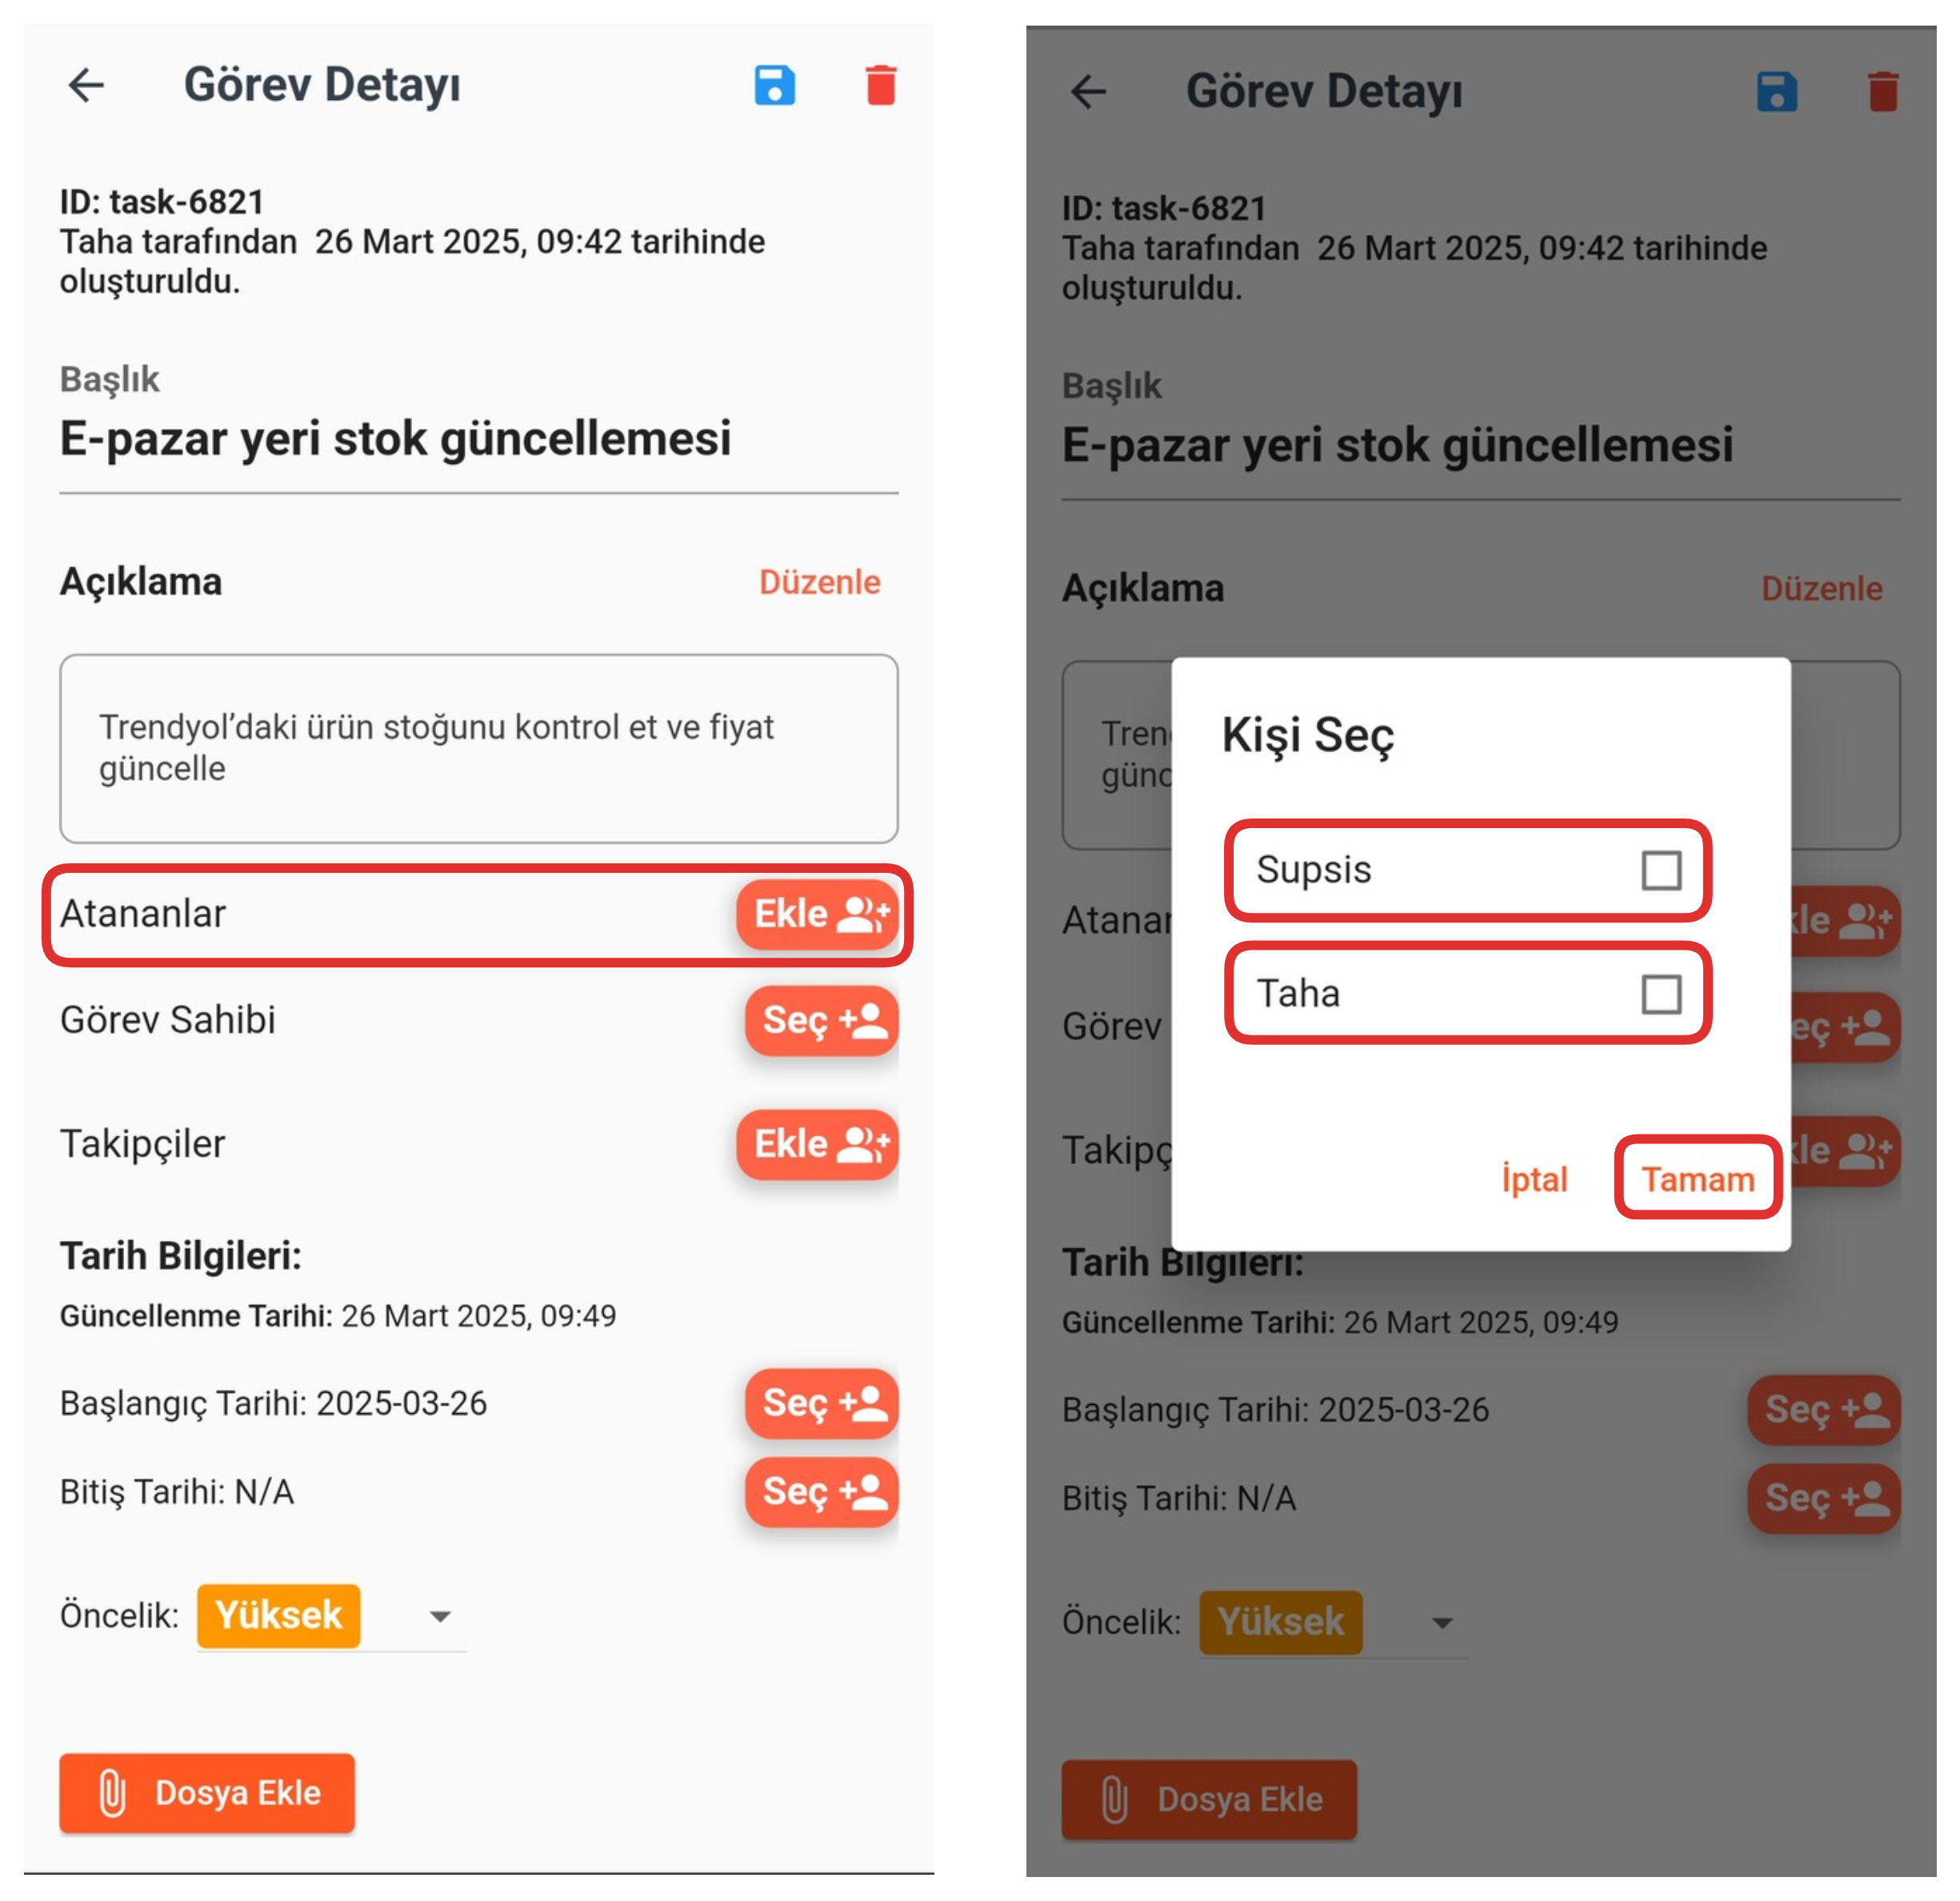
The Assignees section includes the representatives you assign to fulfill the task. From this area, click the "Add" button and select the representative or representatives you want to assign the task to from the opened modal. After completing the selection process, you can complete the assignment process by clicking the "OK" button.
4-) Task Owner
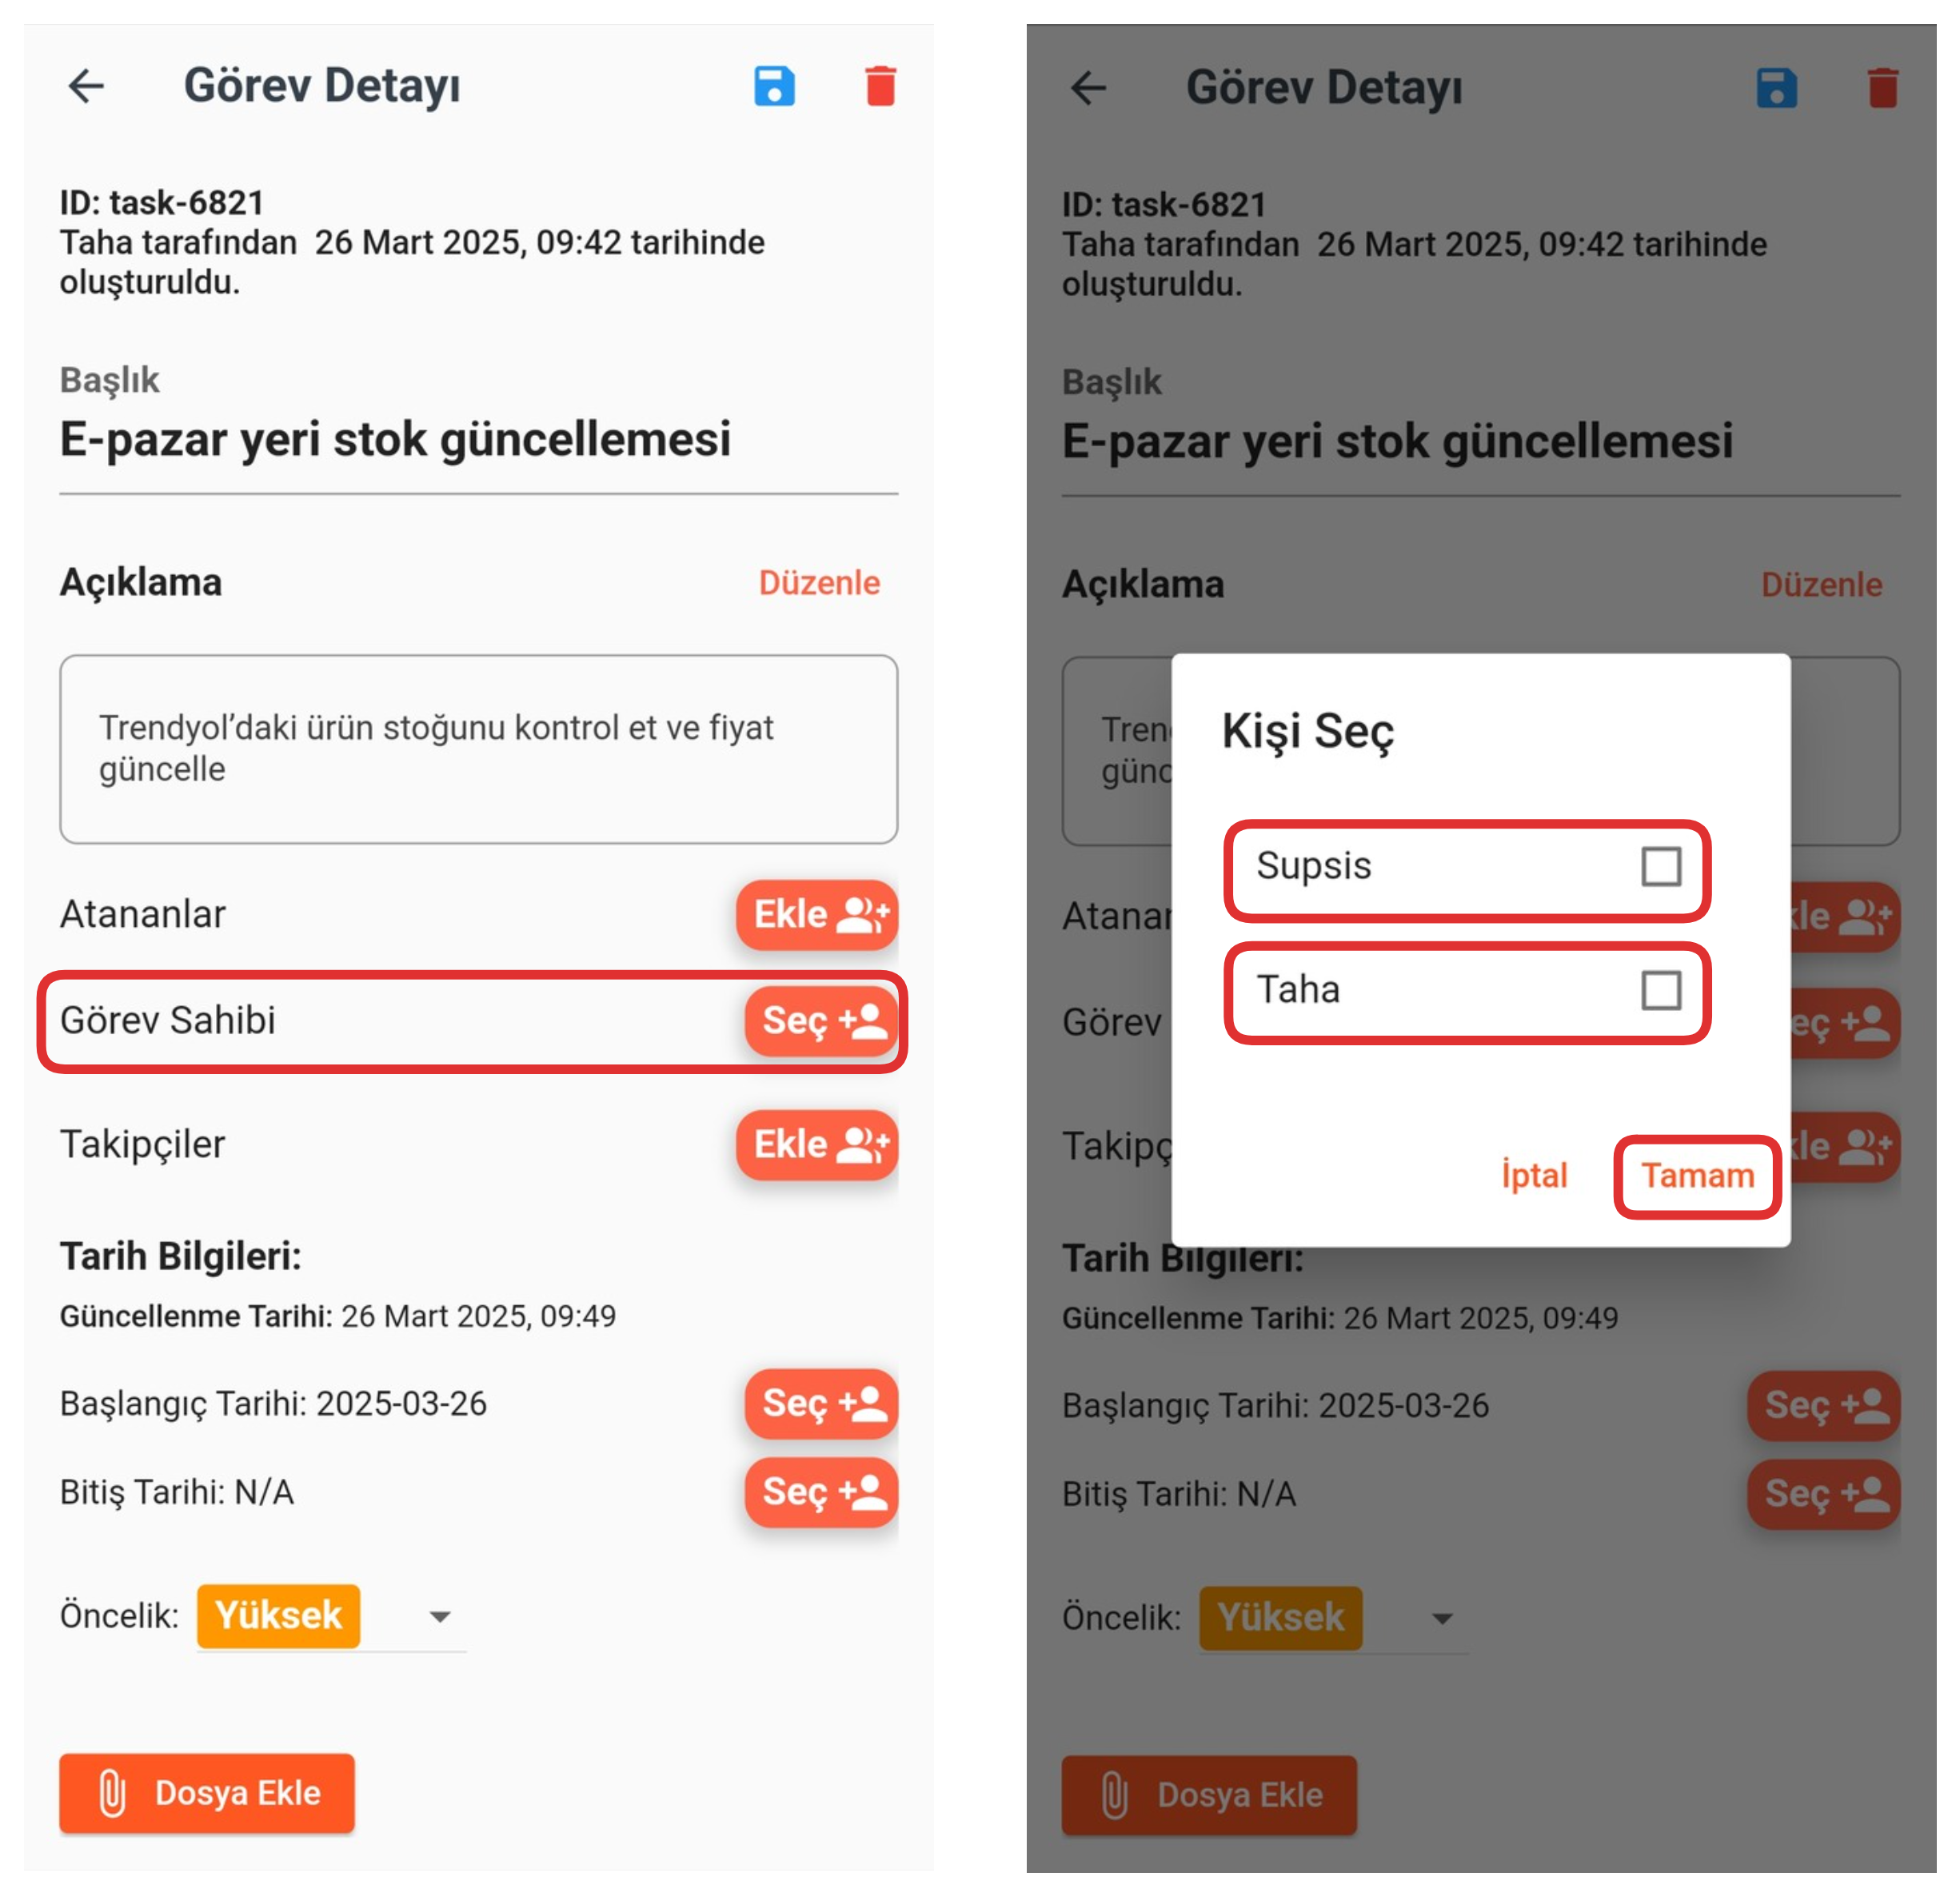
The Task Owner section includes the representatives you assign to own the task. From this area, click the "Add" button and select the representative or representatives you want to assign the task to from the opened modal. After completing the selection process, you can complete the assignment process by clicking the "OK" button.
5-) Followers
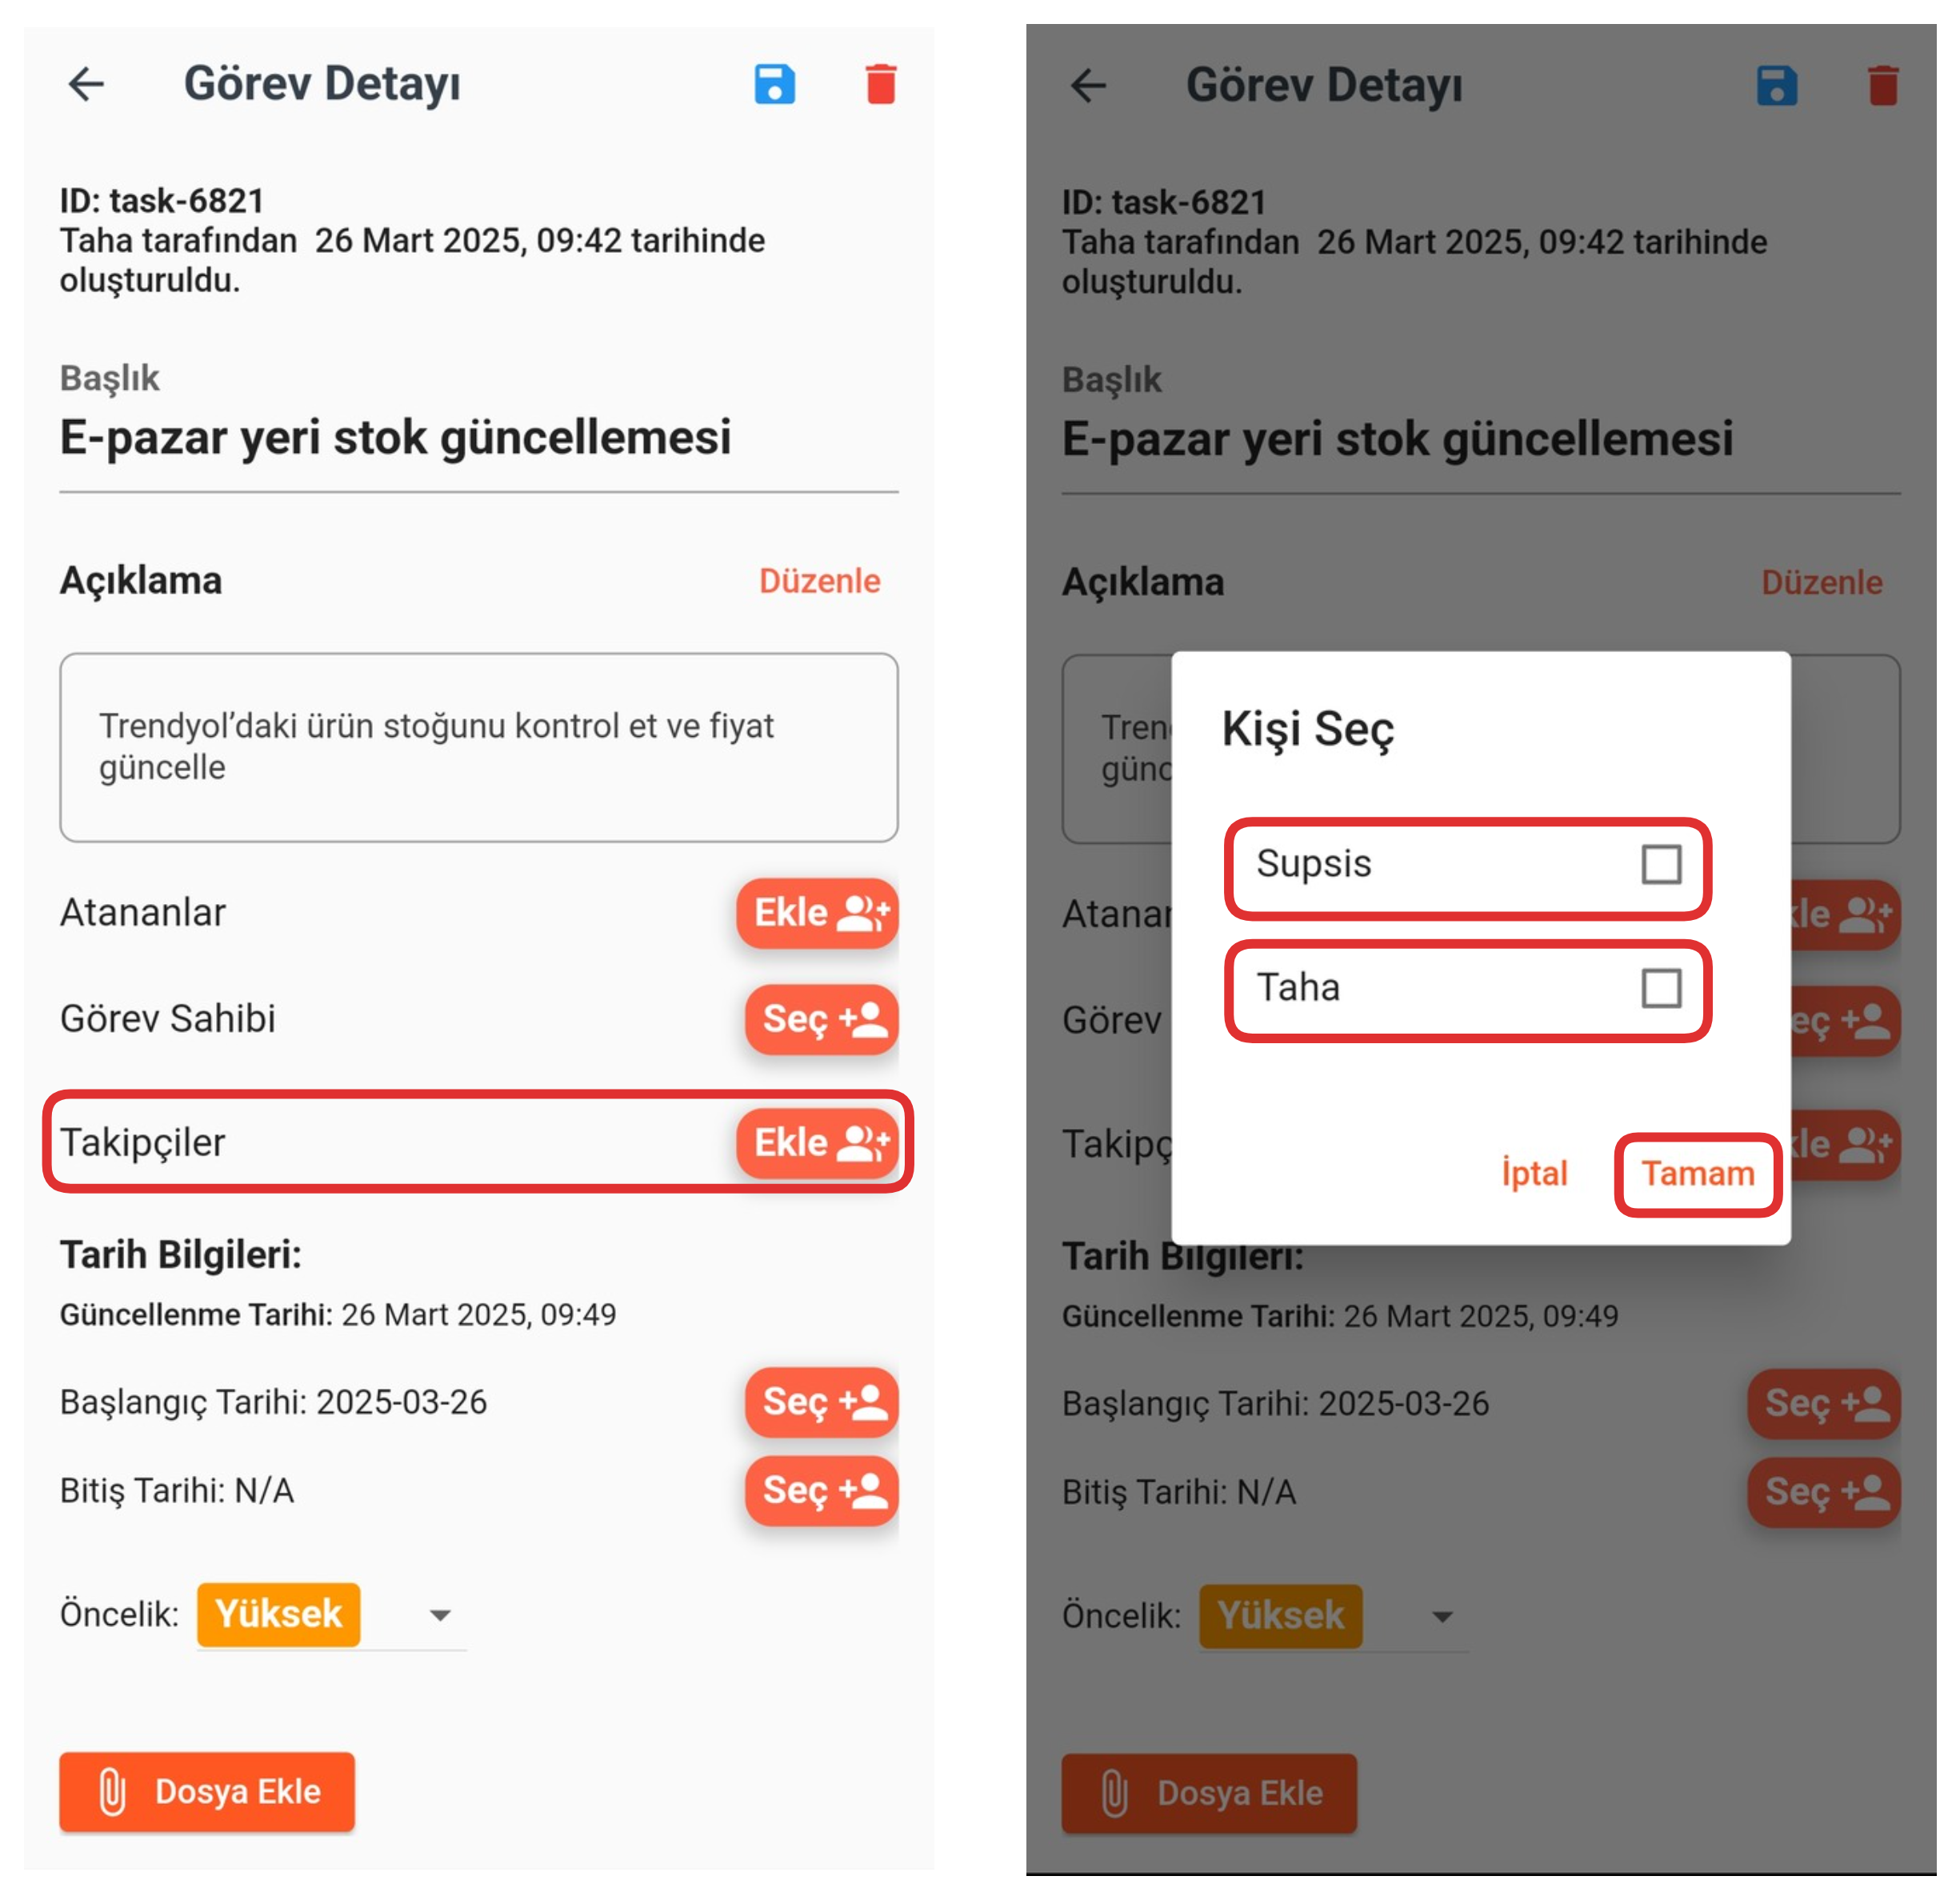
The Followers section includes the representatives you assign to follow the task. From this area, click the "Add" button and select the representative or representatives you want to assign the task to from the opened modal. After completing the selection process, you can complete the assignment process by clicking the "OK" button.
6-) Start Date
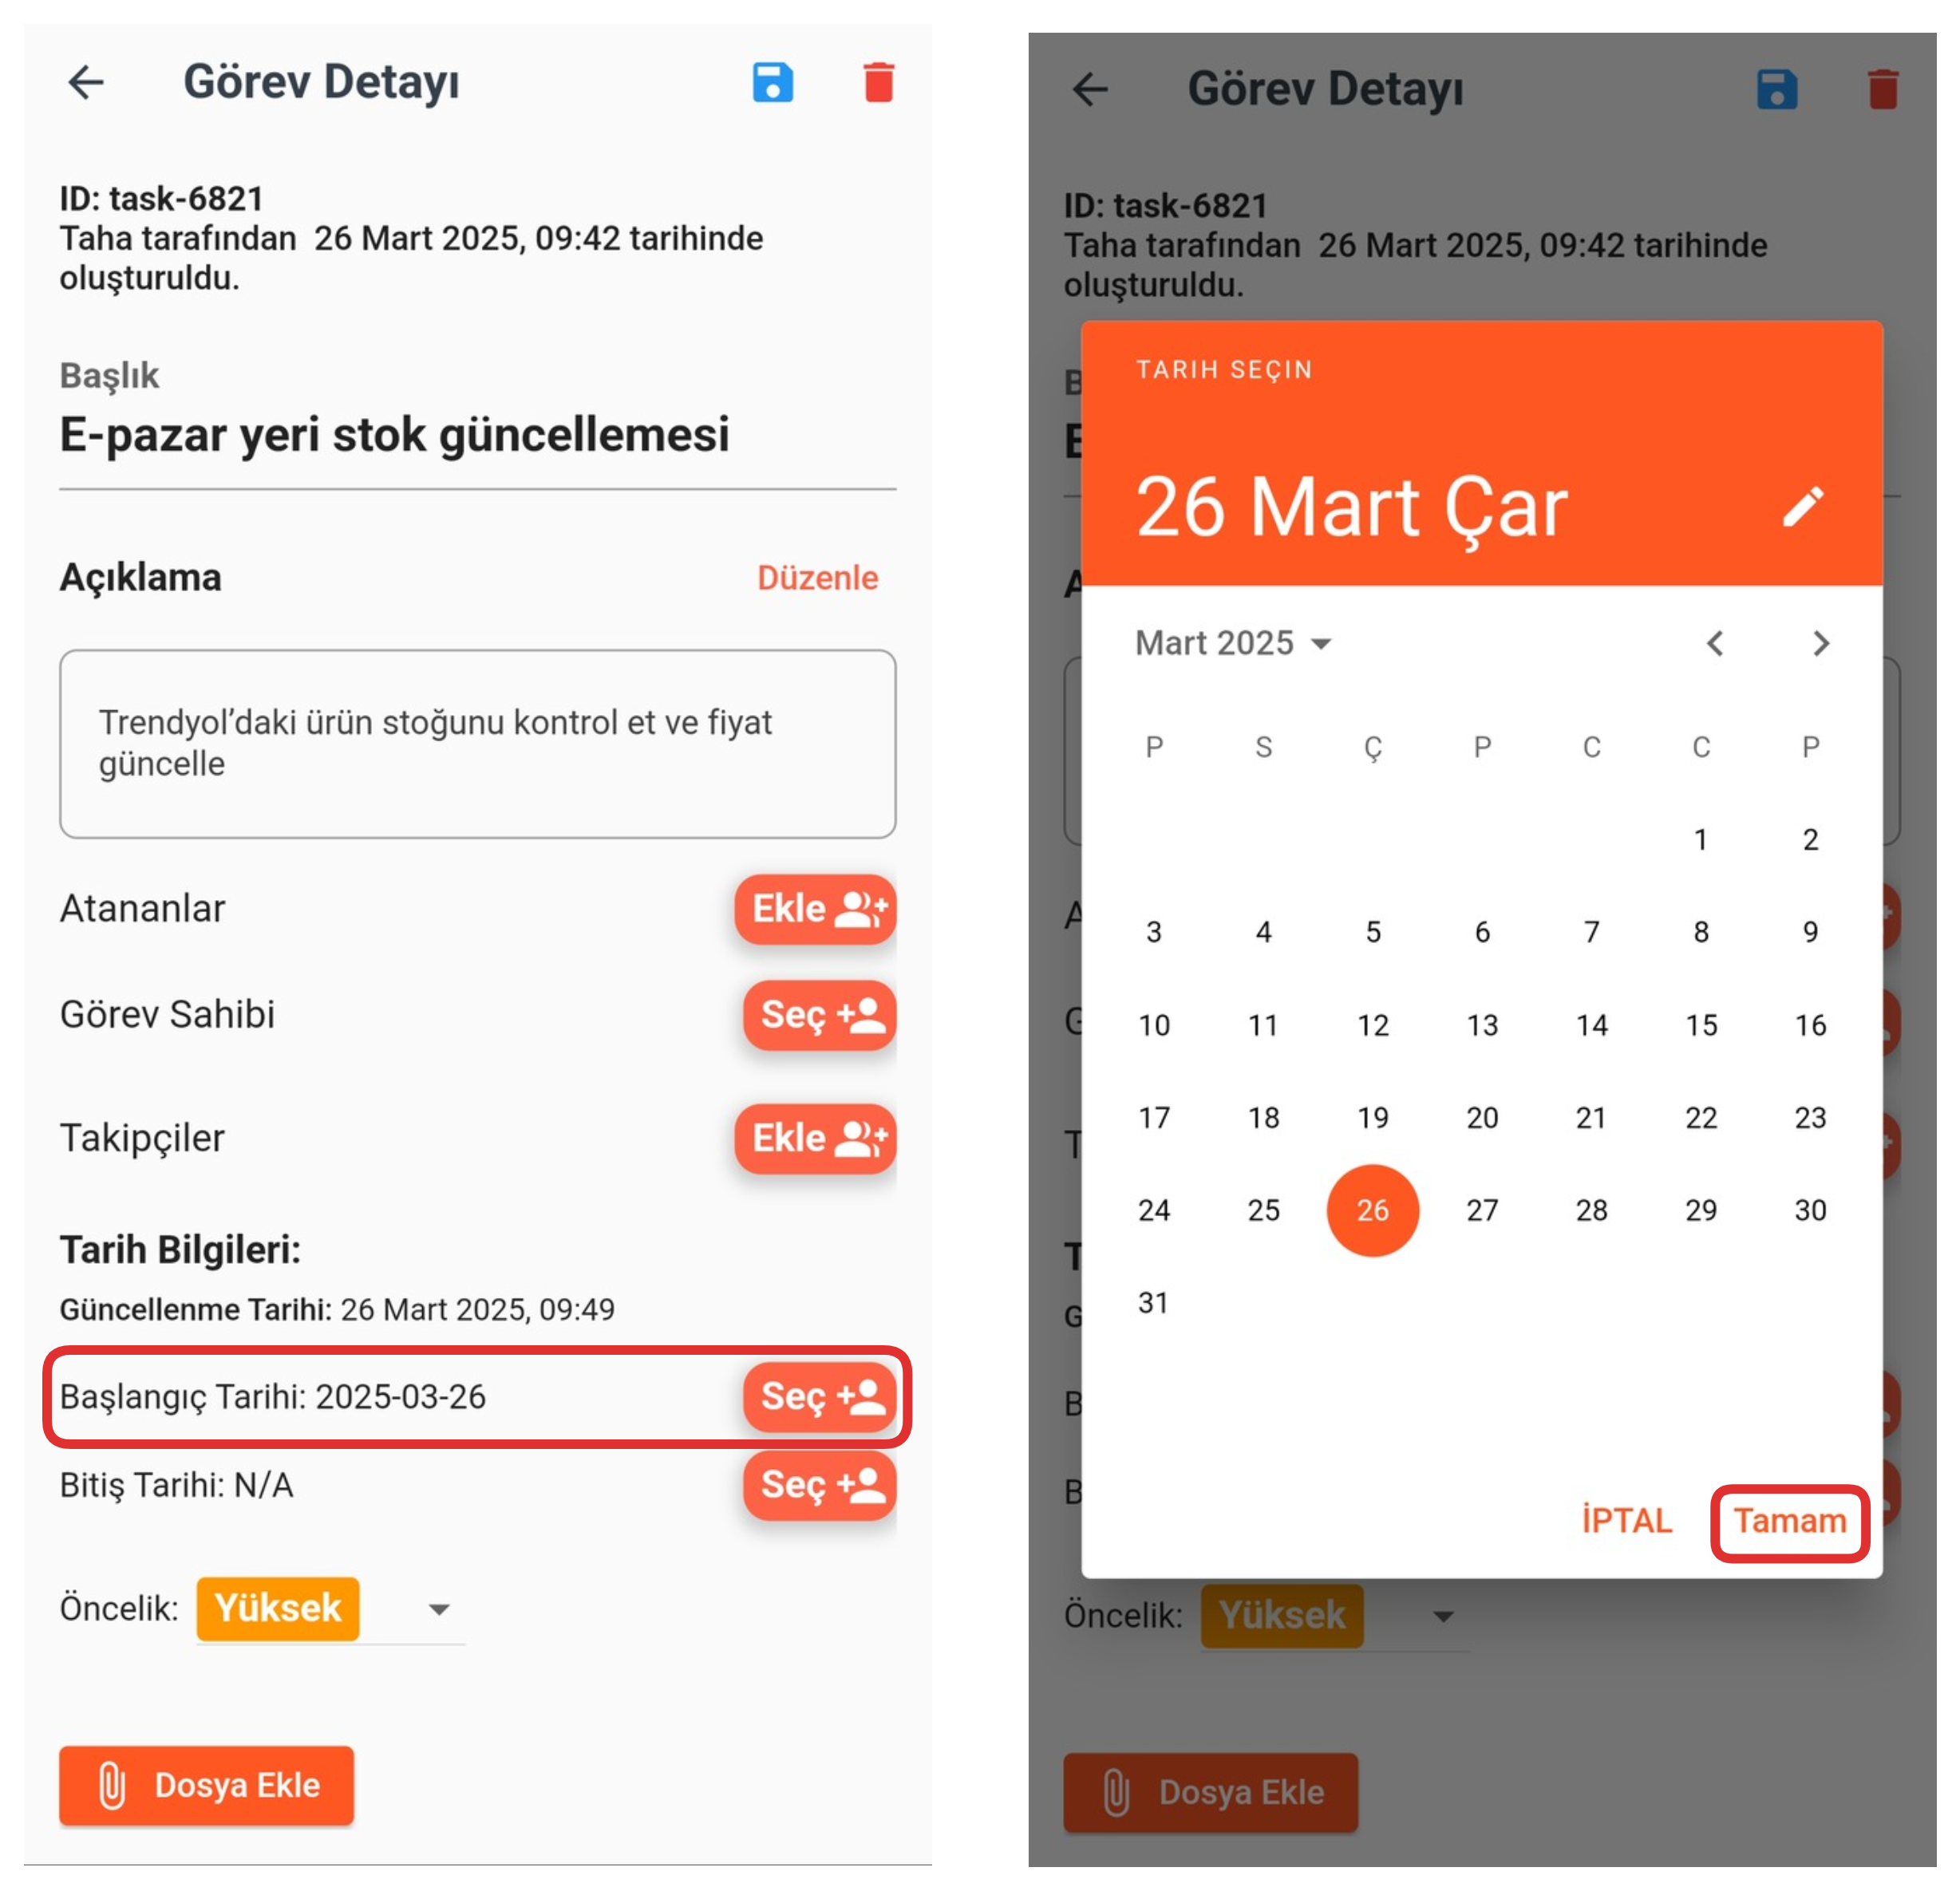
From this section, you can determine the start date of the task. After clicking the "Select" button, select the date you want from the opened calendar screen. Then you can complete the process by pressing the "OK" button. This date is used to specify when the task will start.
7-) End Date
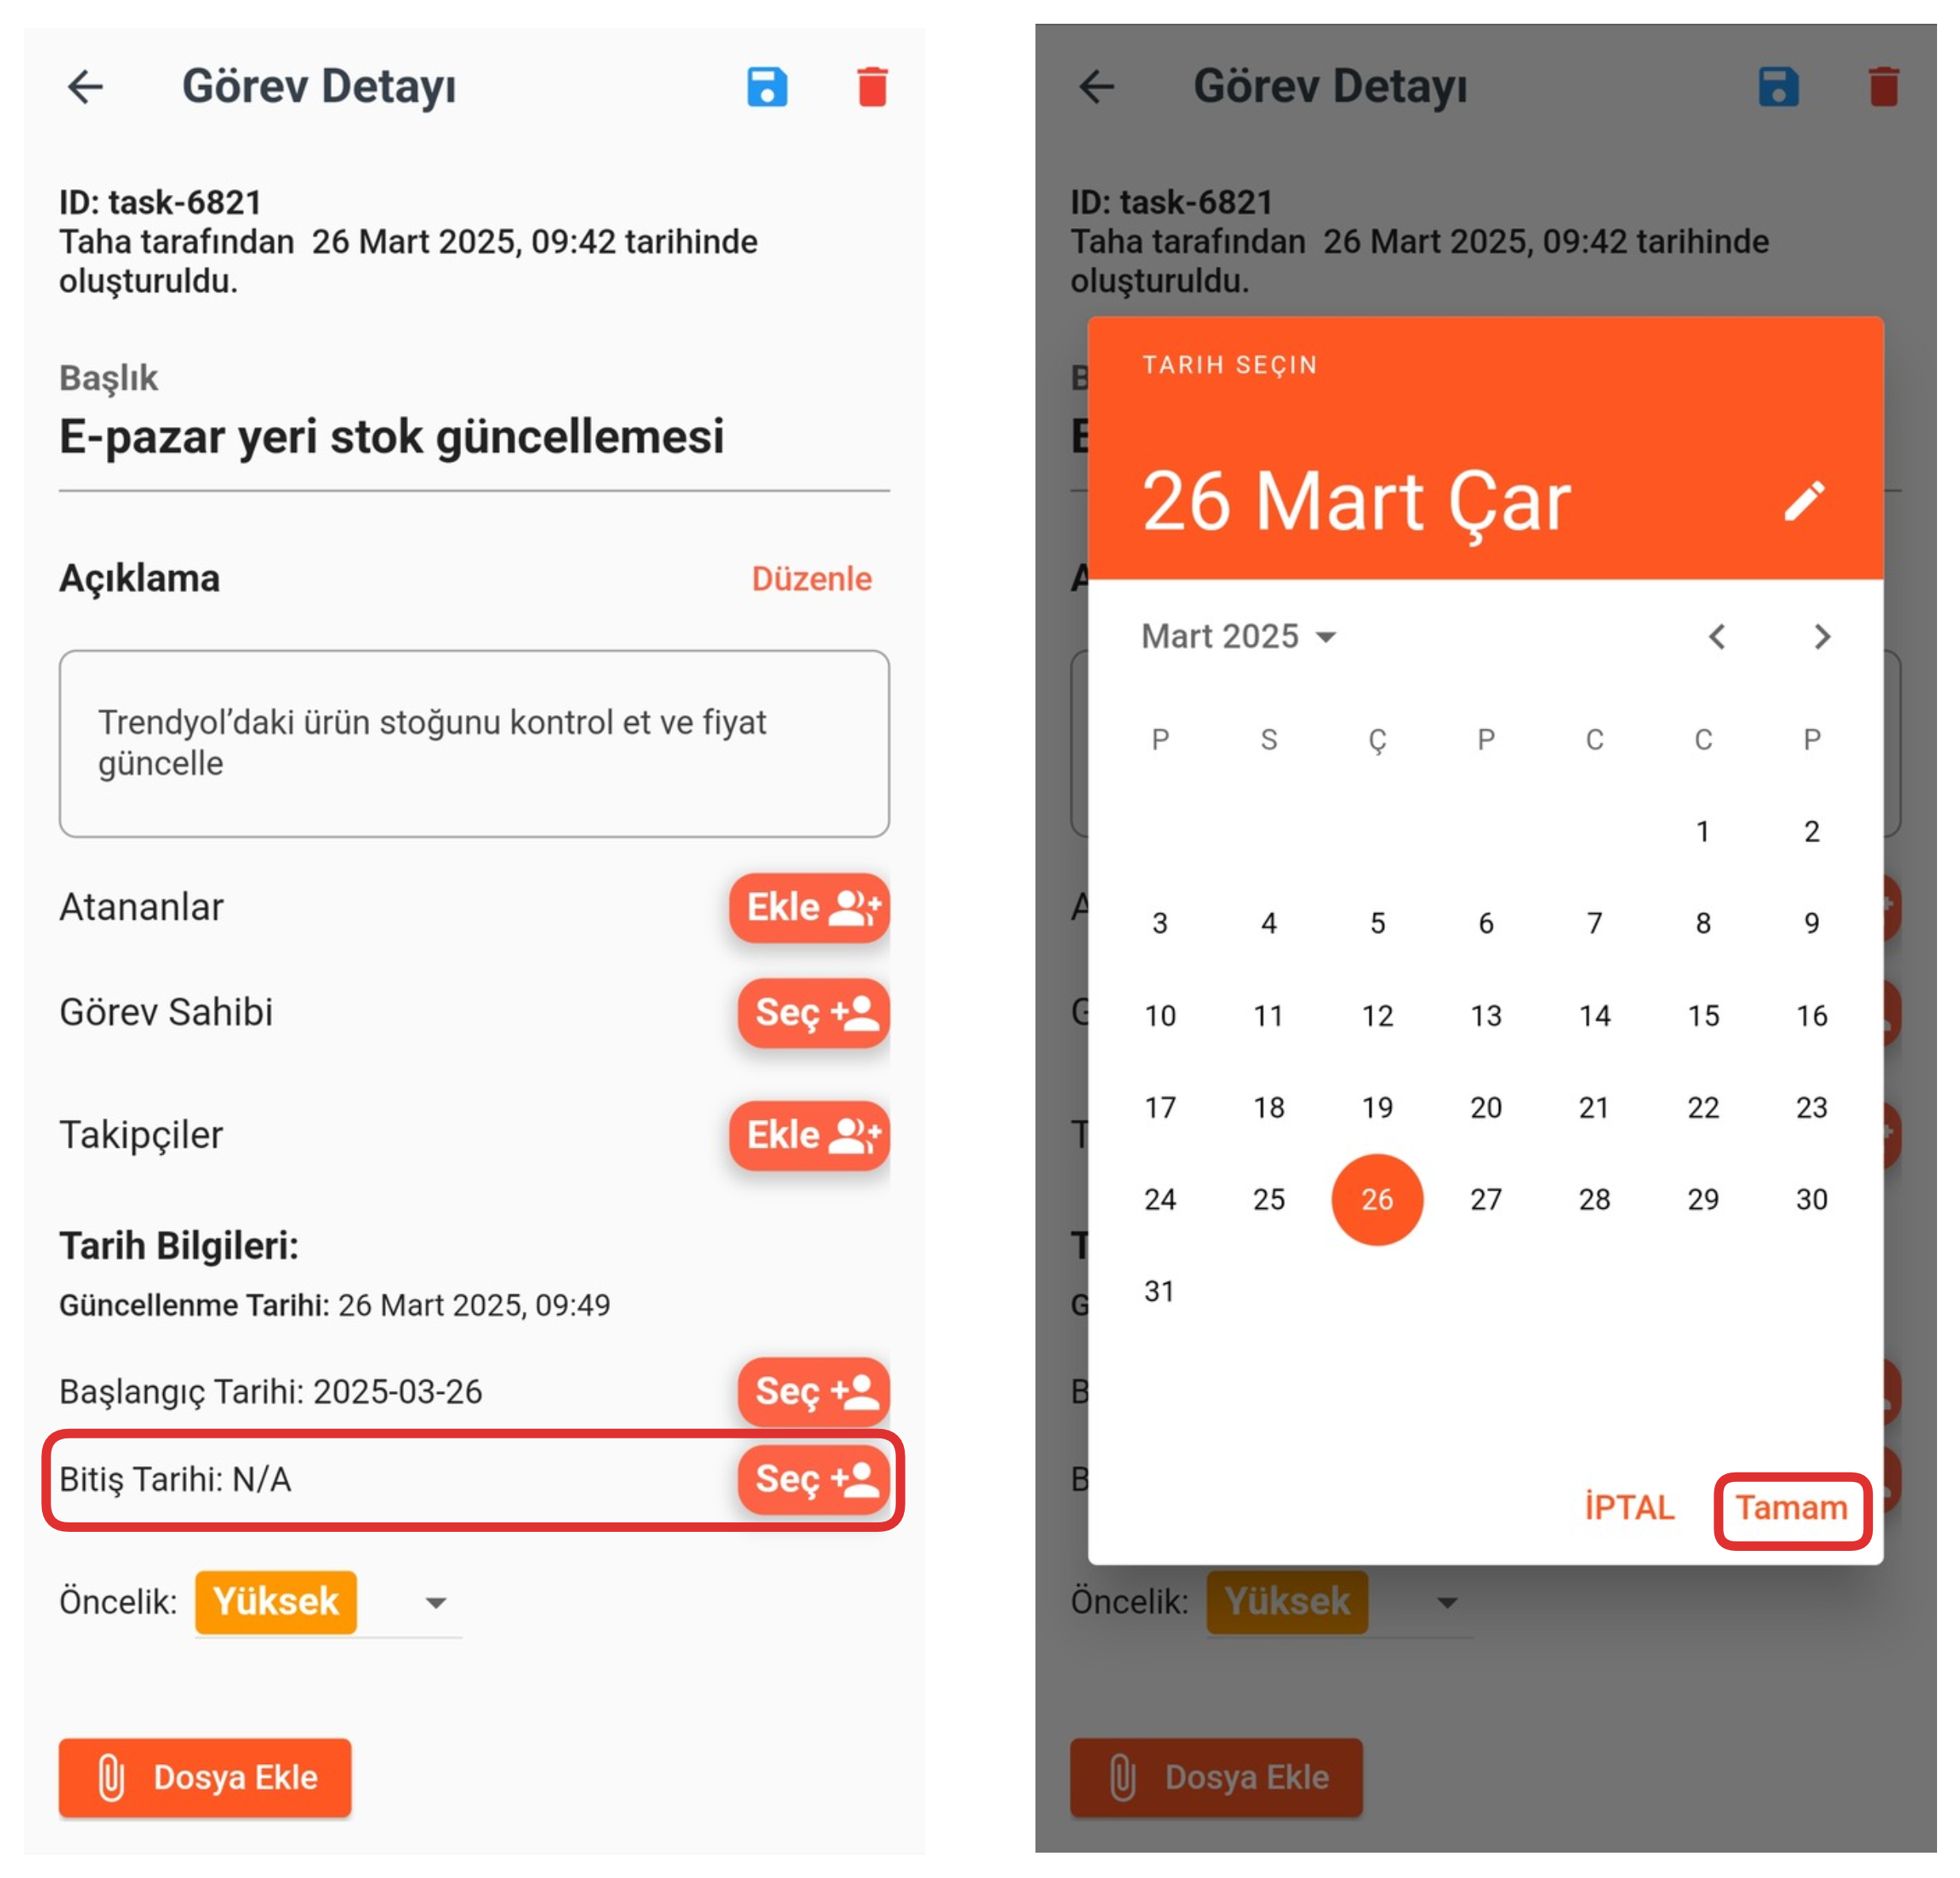
From this section, you can determine the end date of the task. After clicking the "Select" button, select the date you want from the opened calendar screen. Then you can complete the process by pressing the "OK" button. This date is used to specify when the task will end.
8-) Priority
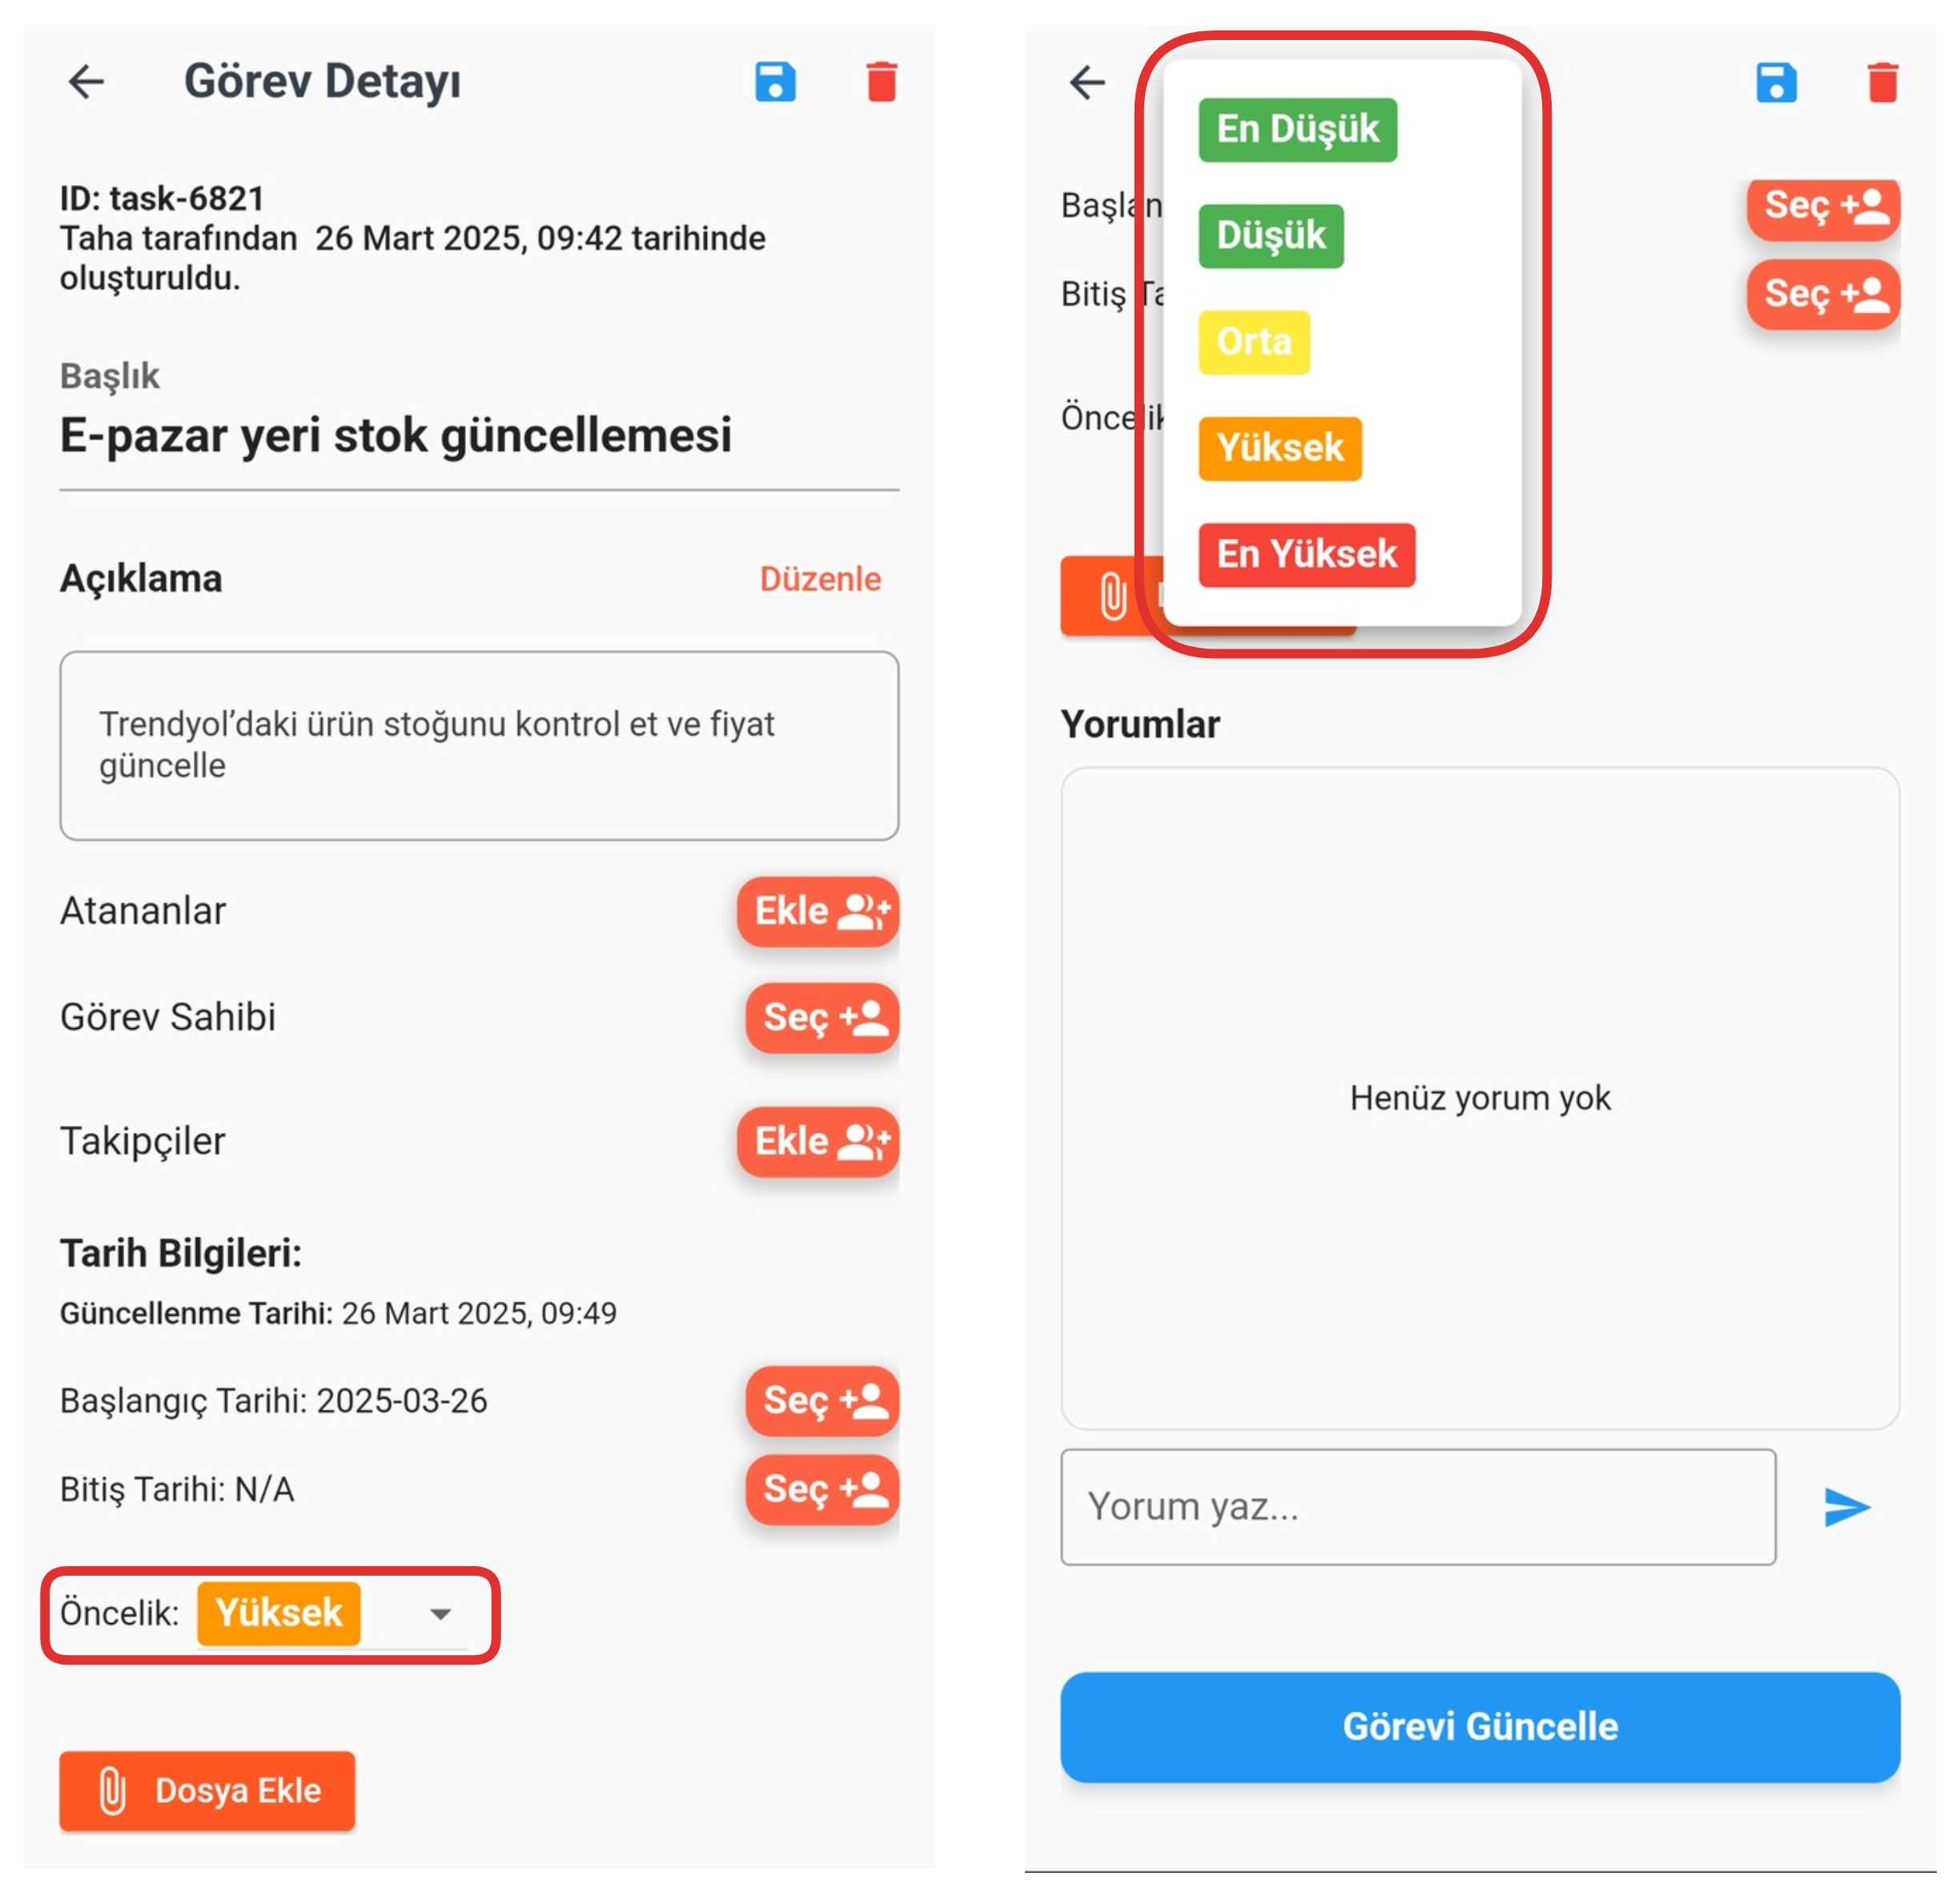
From this section, you can determine the priority of your task. Click on the "Priority" field and select one of the Lowest, Low, Medium, High, or Highest levels from the opened options to set the importance level of the task. This way, you can prioritize your tasks more effectively and organize your work plan accordingly.
9-) Add File
From this section, you can add files to your task. You can make the task details more comprehensive and accessible by uploading documents, images, or other file types related to the task to this area.
10-) Comments
From this section, you can view the comments received on your task and, if you wish, add new comments to share your opinions. This area is used to manage internal team communication and feedback related to the task.
After filling in all these sections, you can save your changes and update your task by clicking the "Update Task" button or the "Save" button at the top. Additionally, you can delete the relevant task by clicking the "Trash" icon in the upper right corner. This way, you can maintain task management effectively and practically.