Application Elements
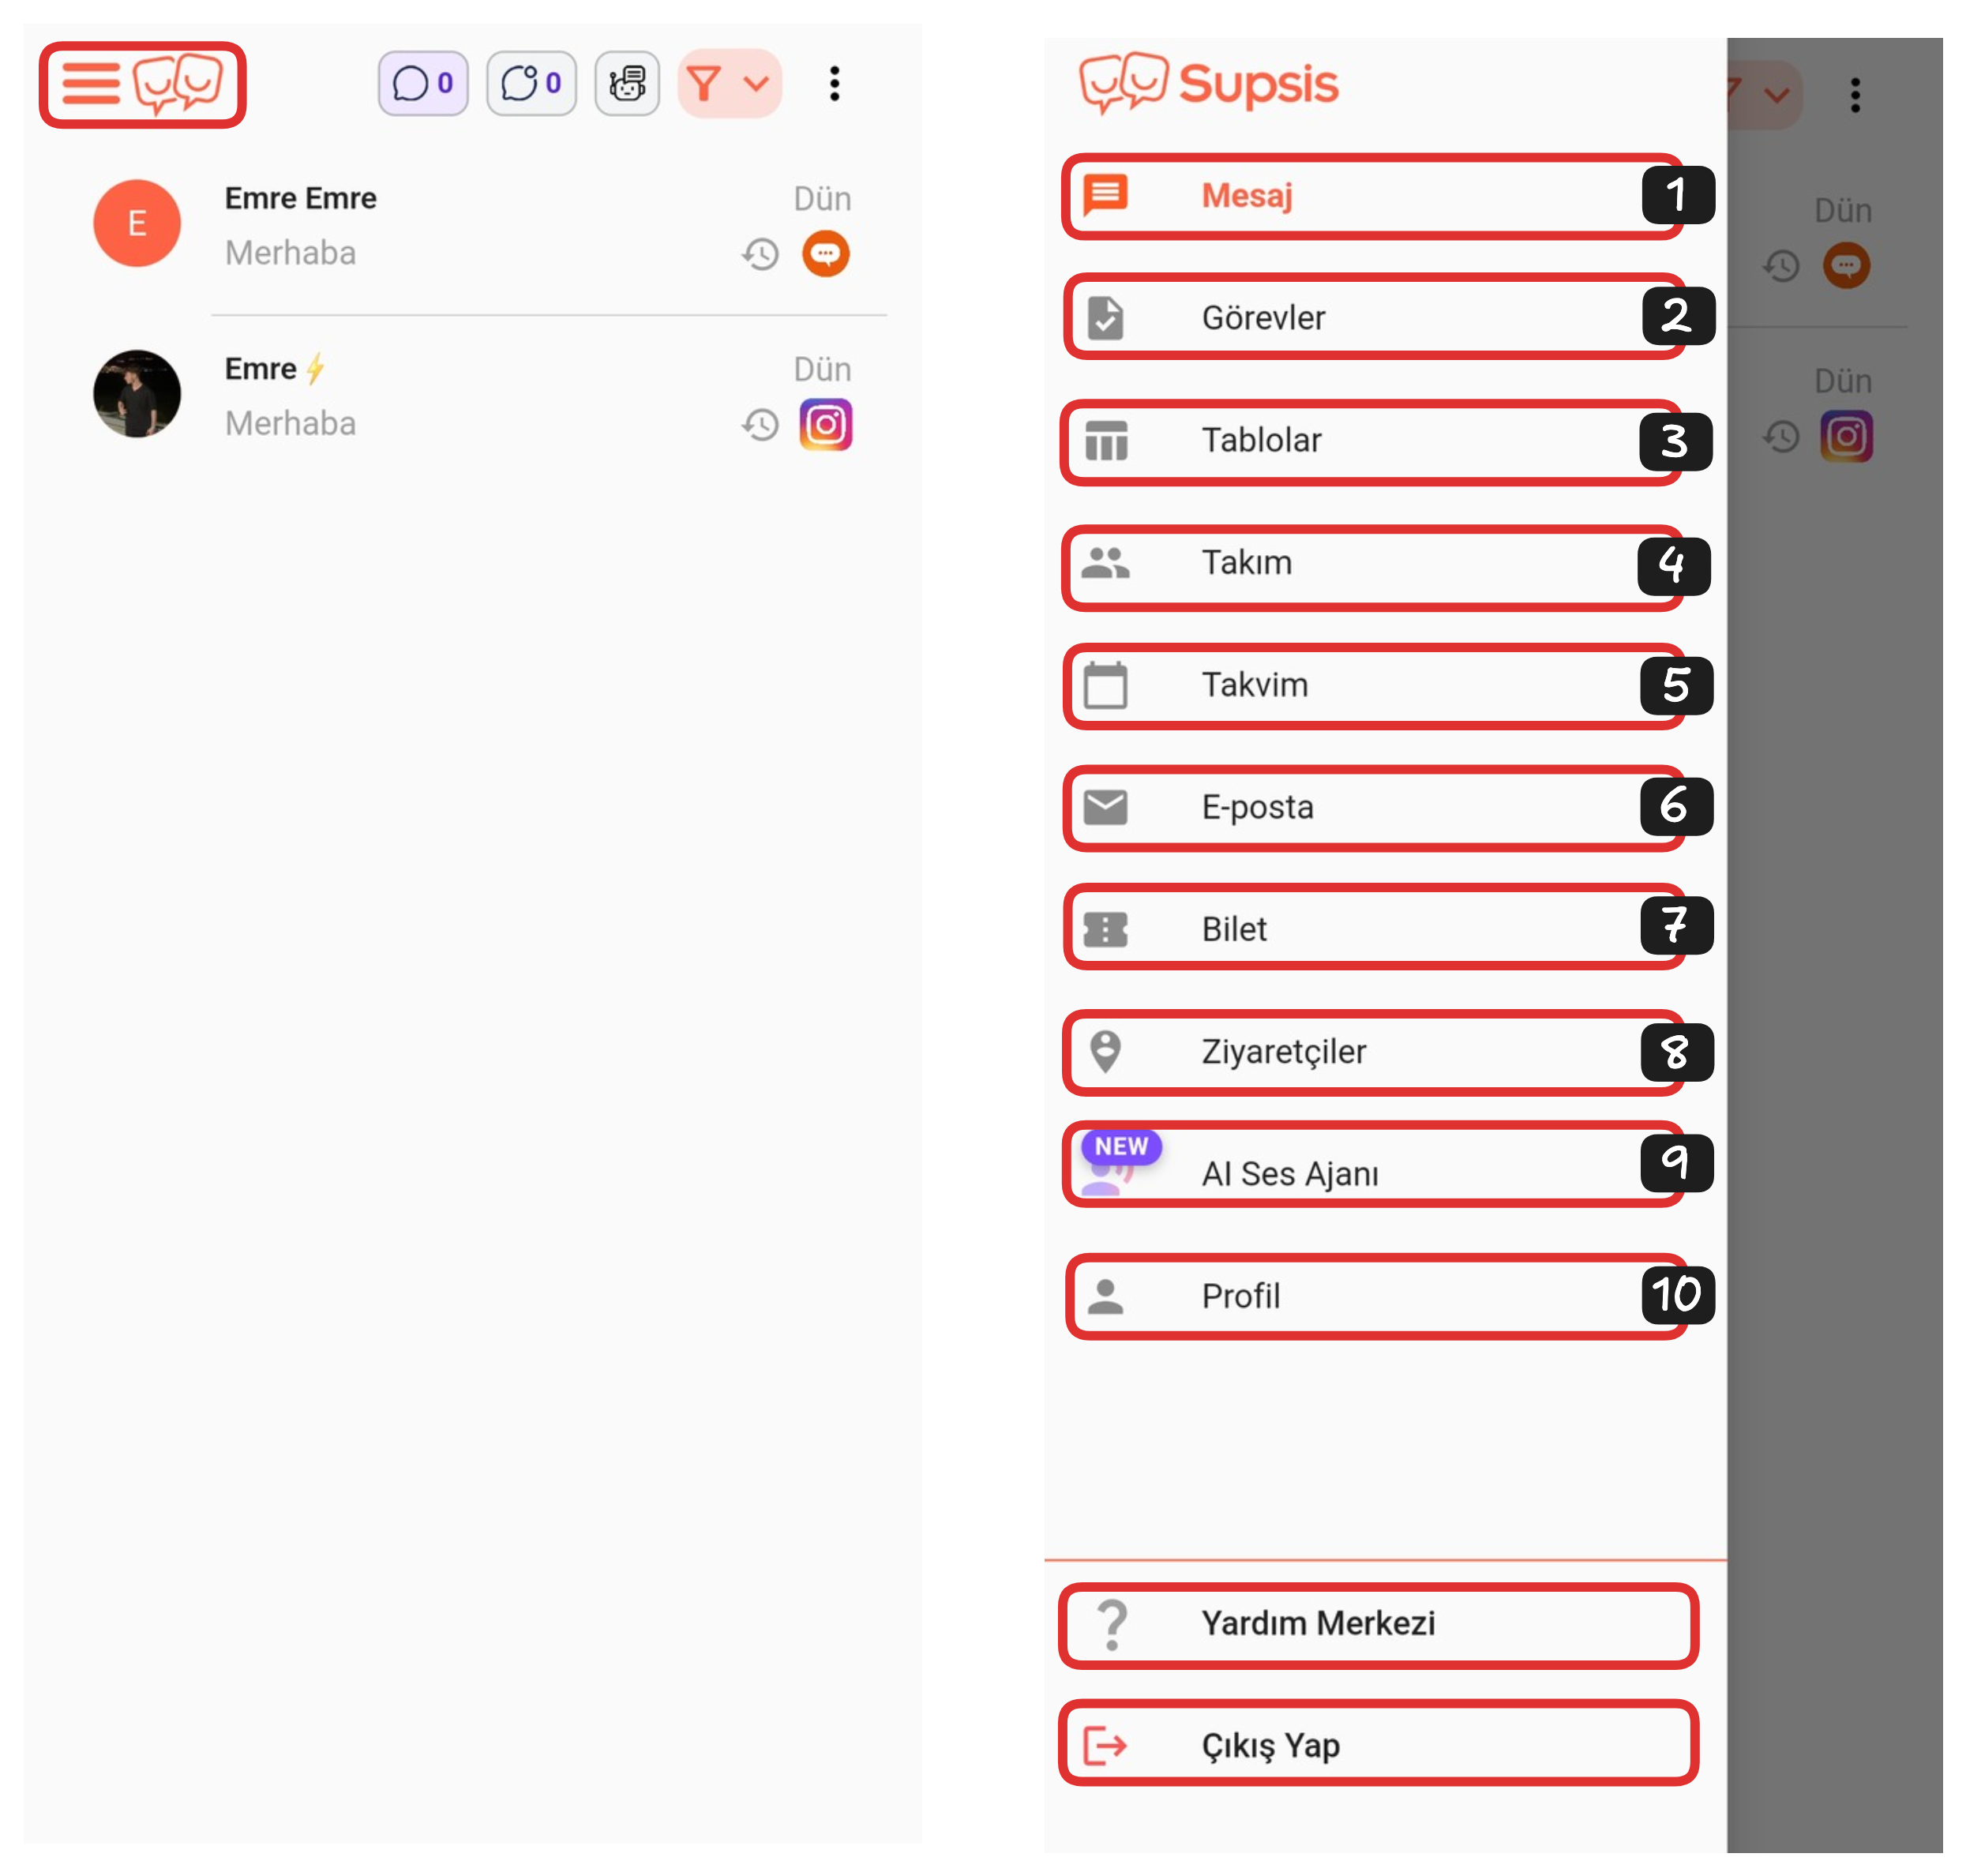
Application Elements:
- Message
- Tasks
- Tables
- Team
- Calendar
- Ticket
- Visitors
- AI Voice Agent
- Profile
1-) Message
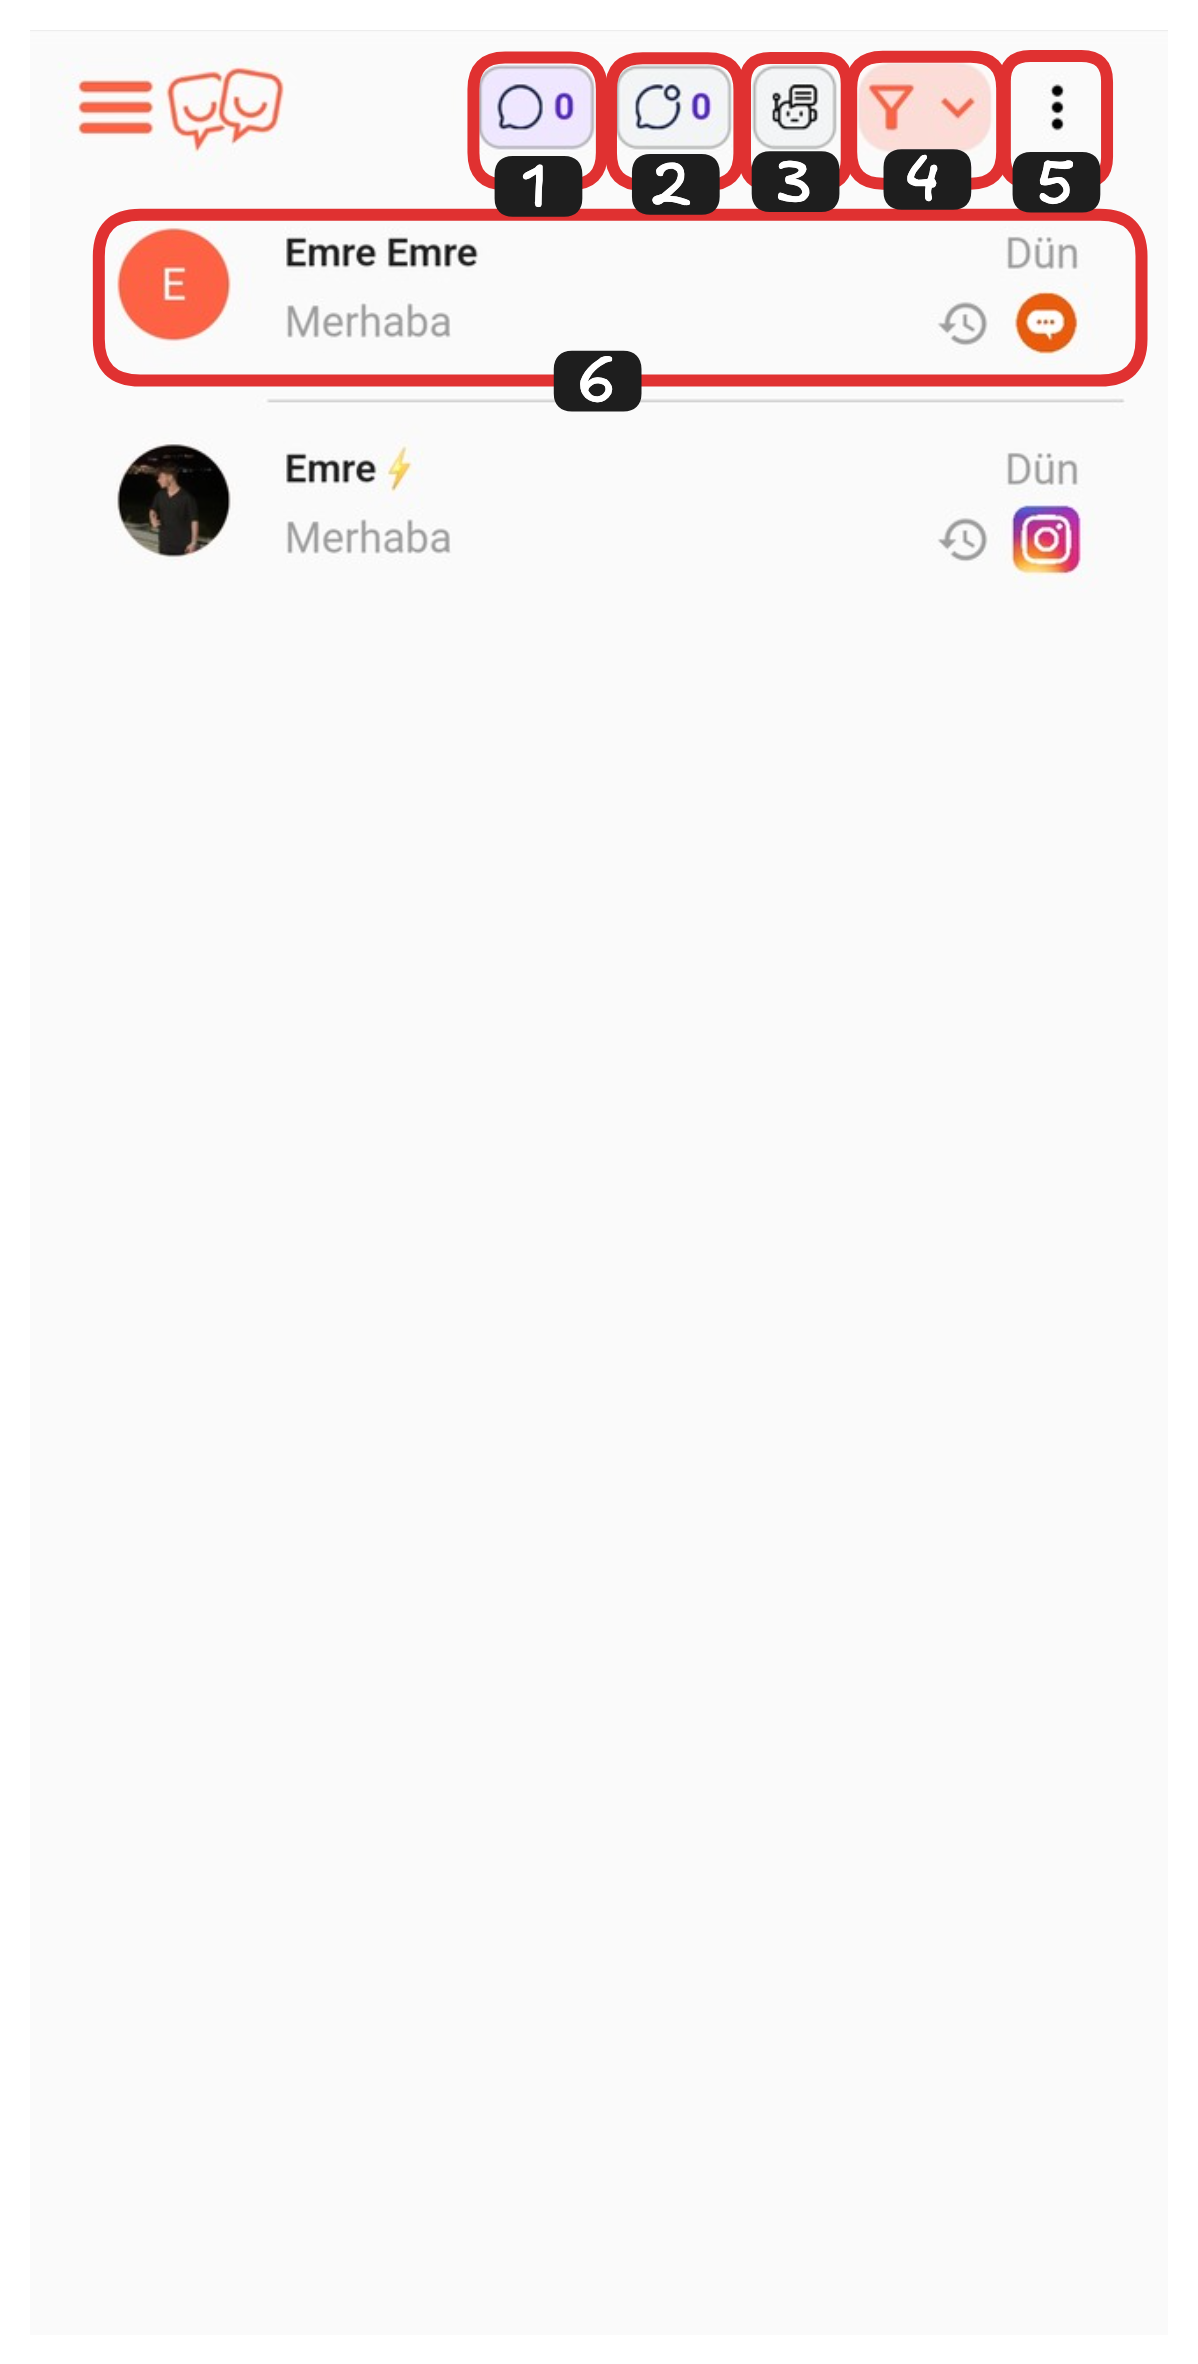
Message Elements:
- All Chats
- Unread Chats
- Chatbot Chats
- Filters
- Settings
- Chat
1-) All Chats

In this tab, you can view all chats together. If you want to enter a chat, just click on the relevant chat.
2-) Unread Chats
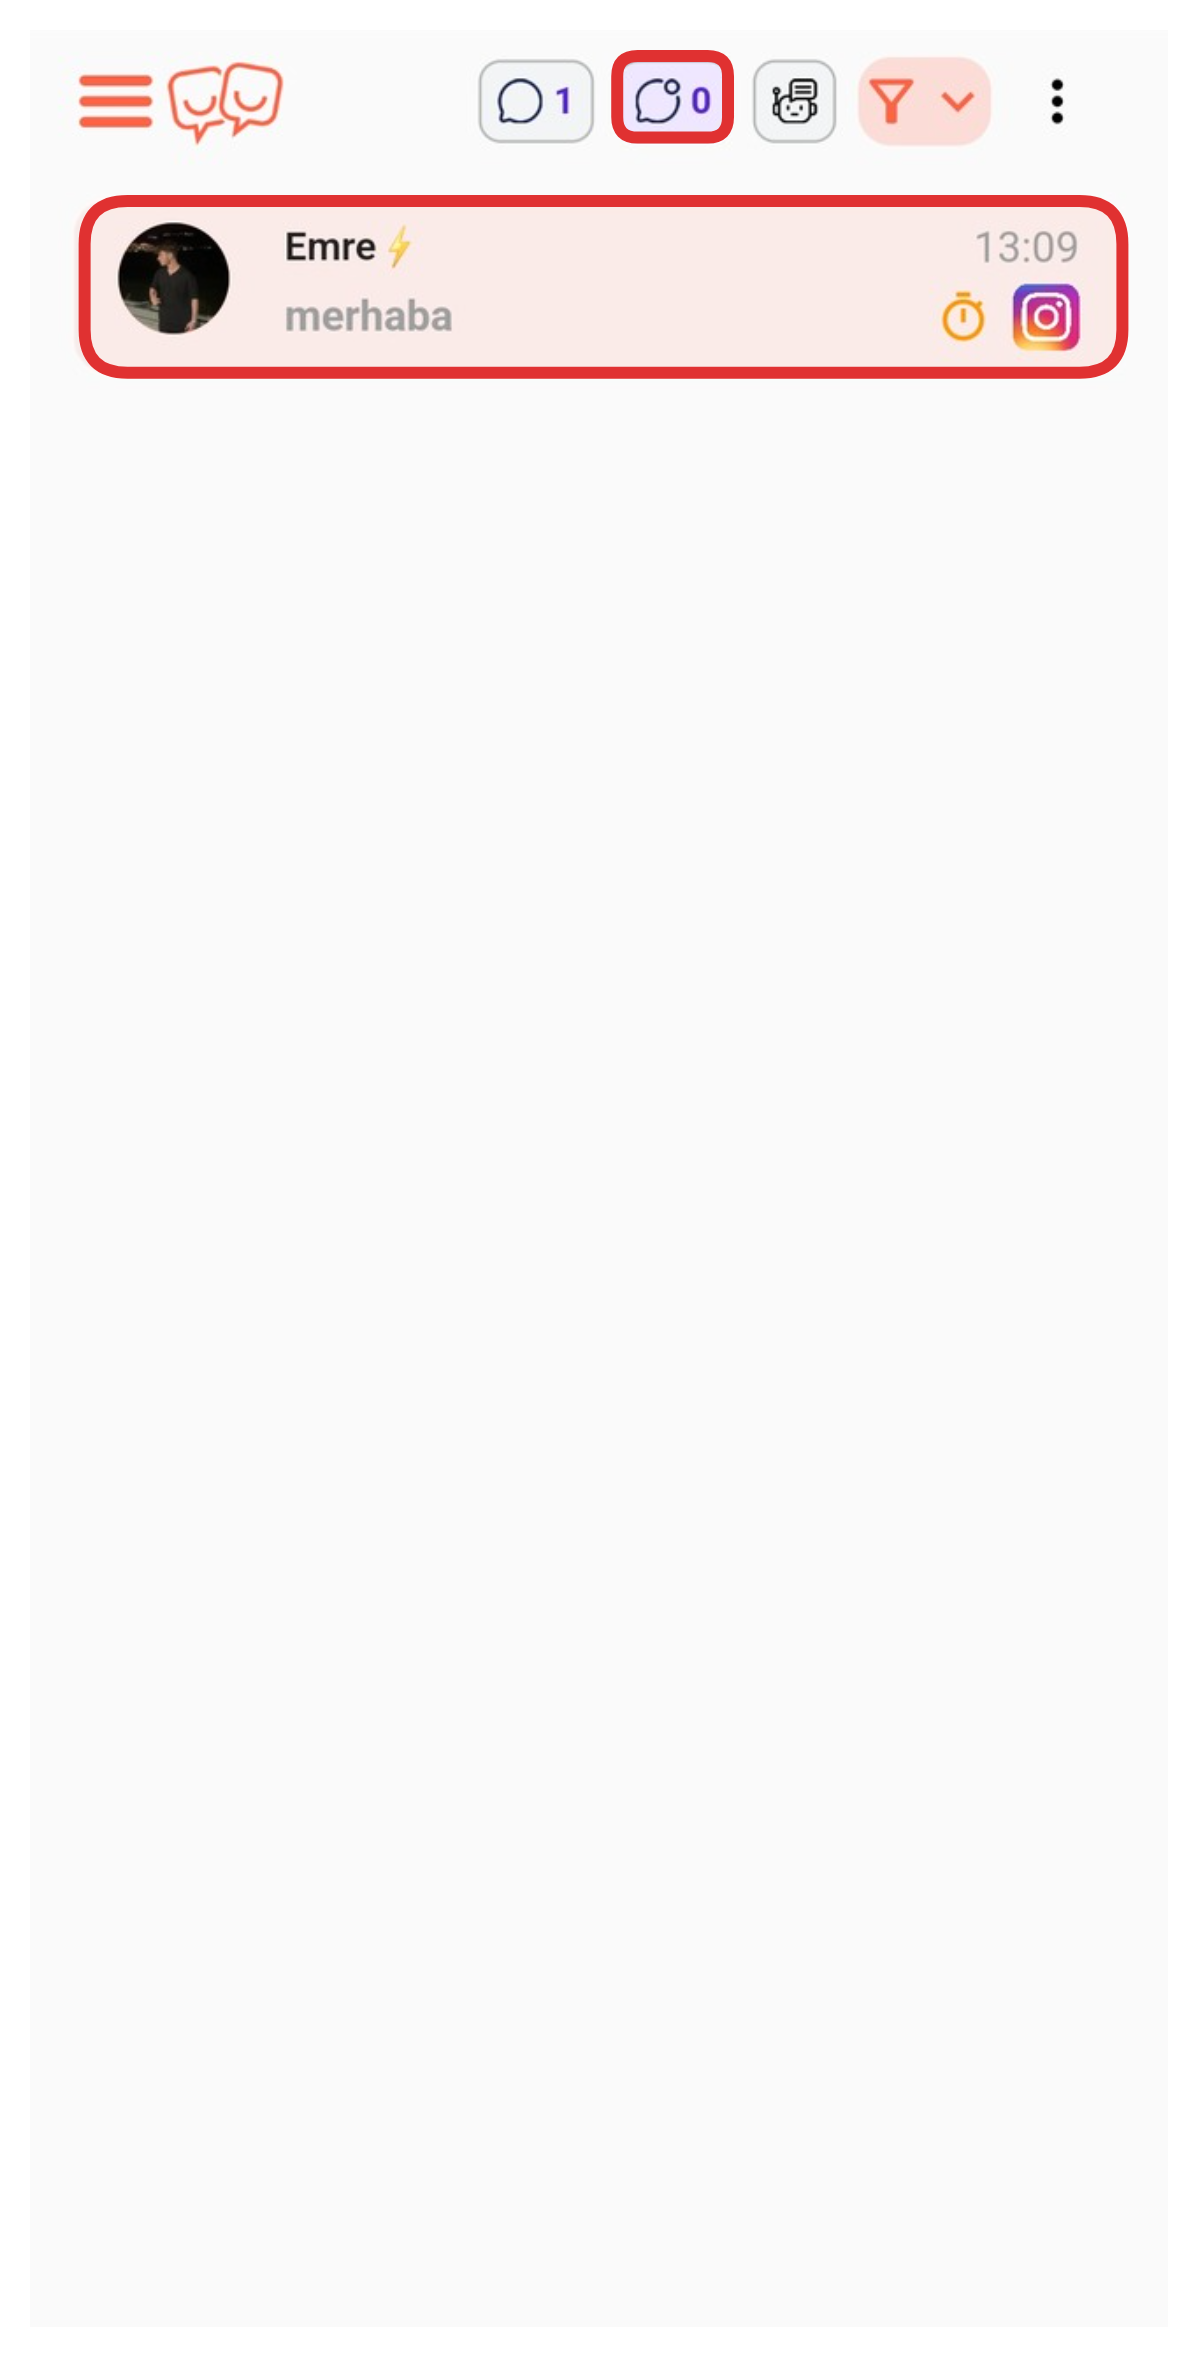
If you want to view only your unread chats, you can list only your unread chats by clicking on the tab in the marked section.
3-) Chatbot Chats
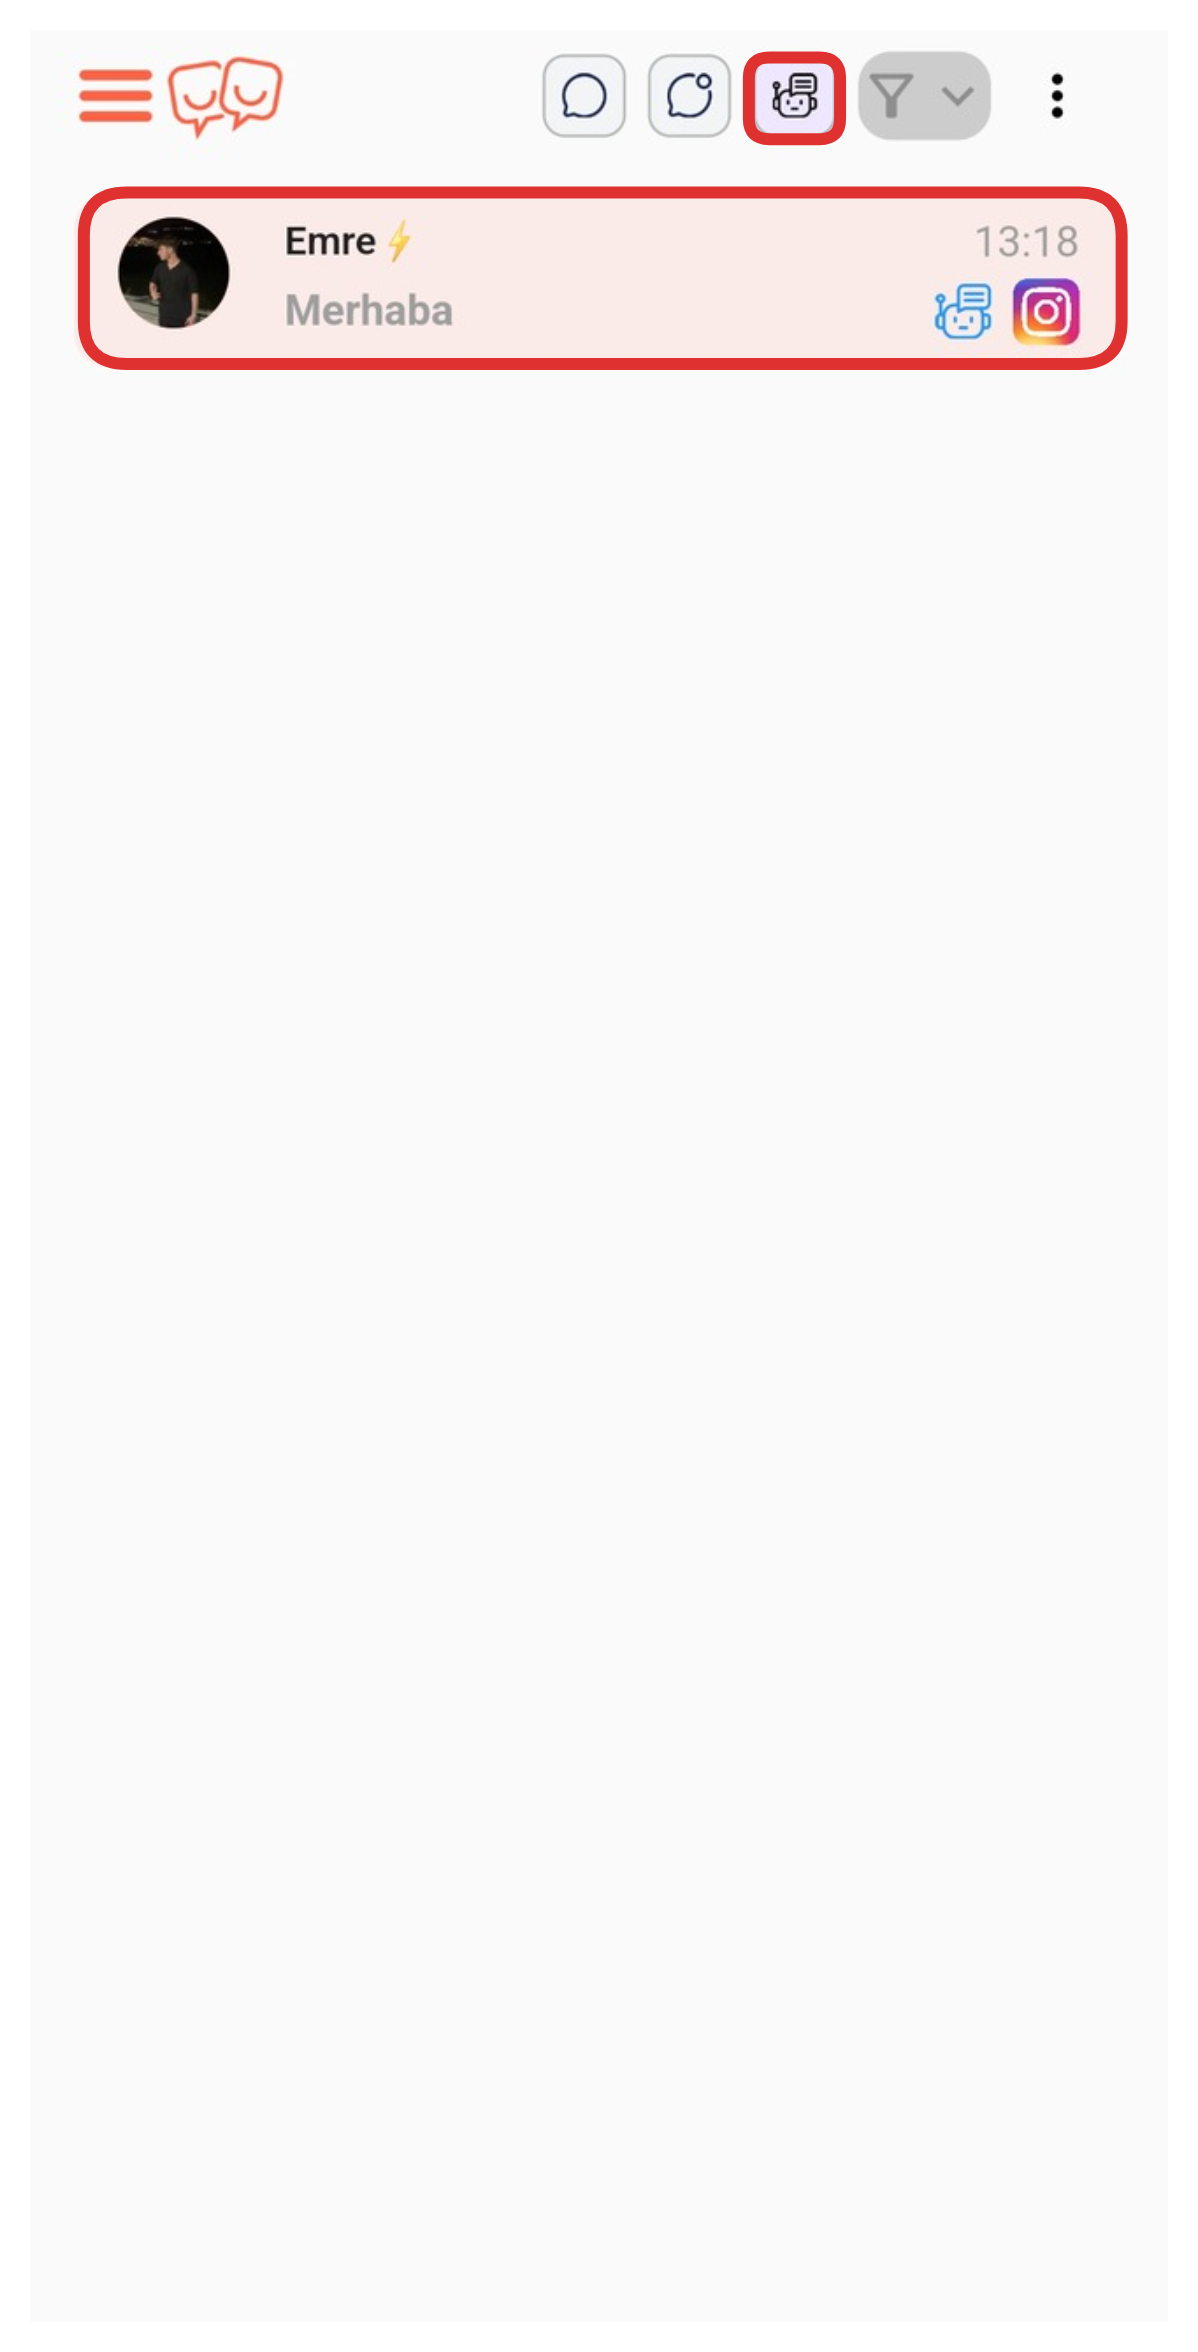
If you want to list only your chats that are under chatbot control, you can track only your chatbot conversations by clicking on the marked tab. Additionally, you can view the content of the chat by clicking on the chat you want.
4-) Filters
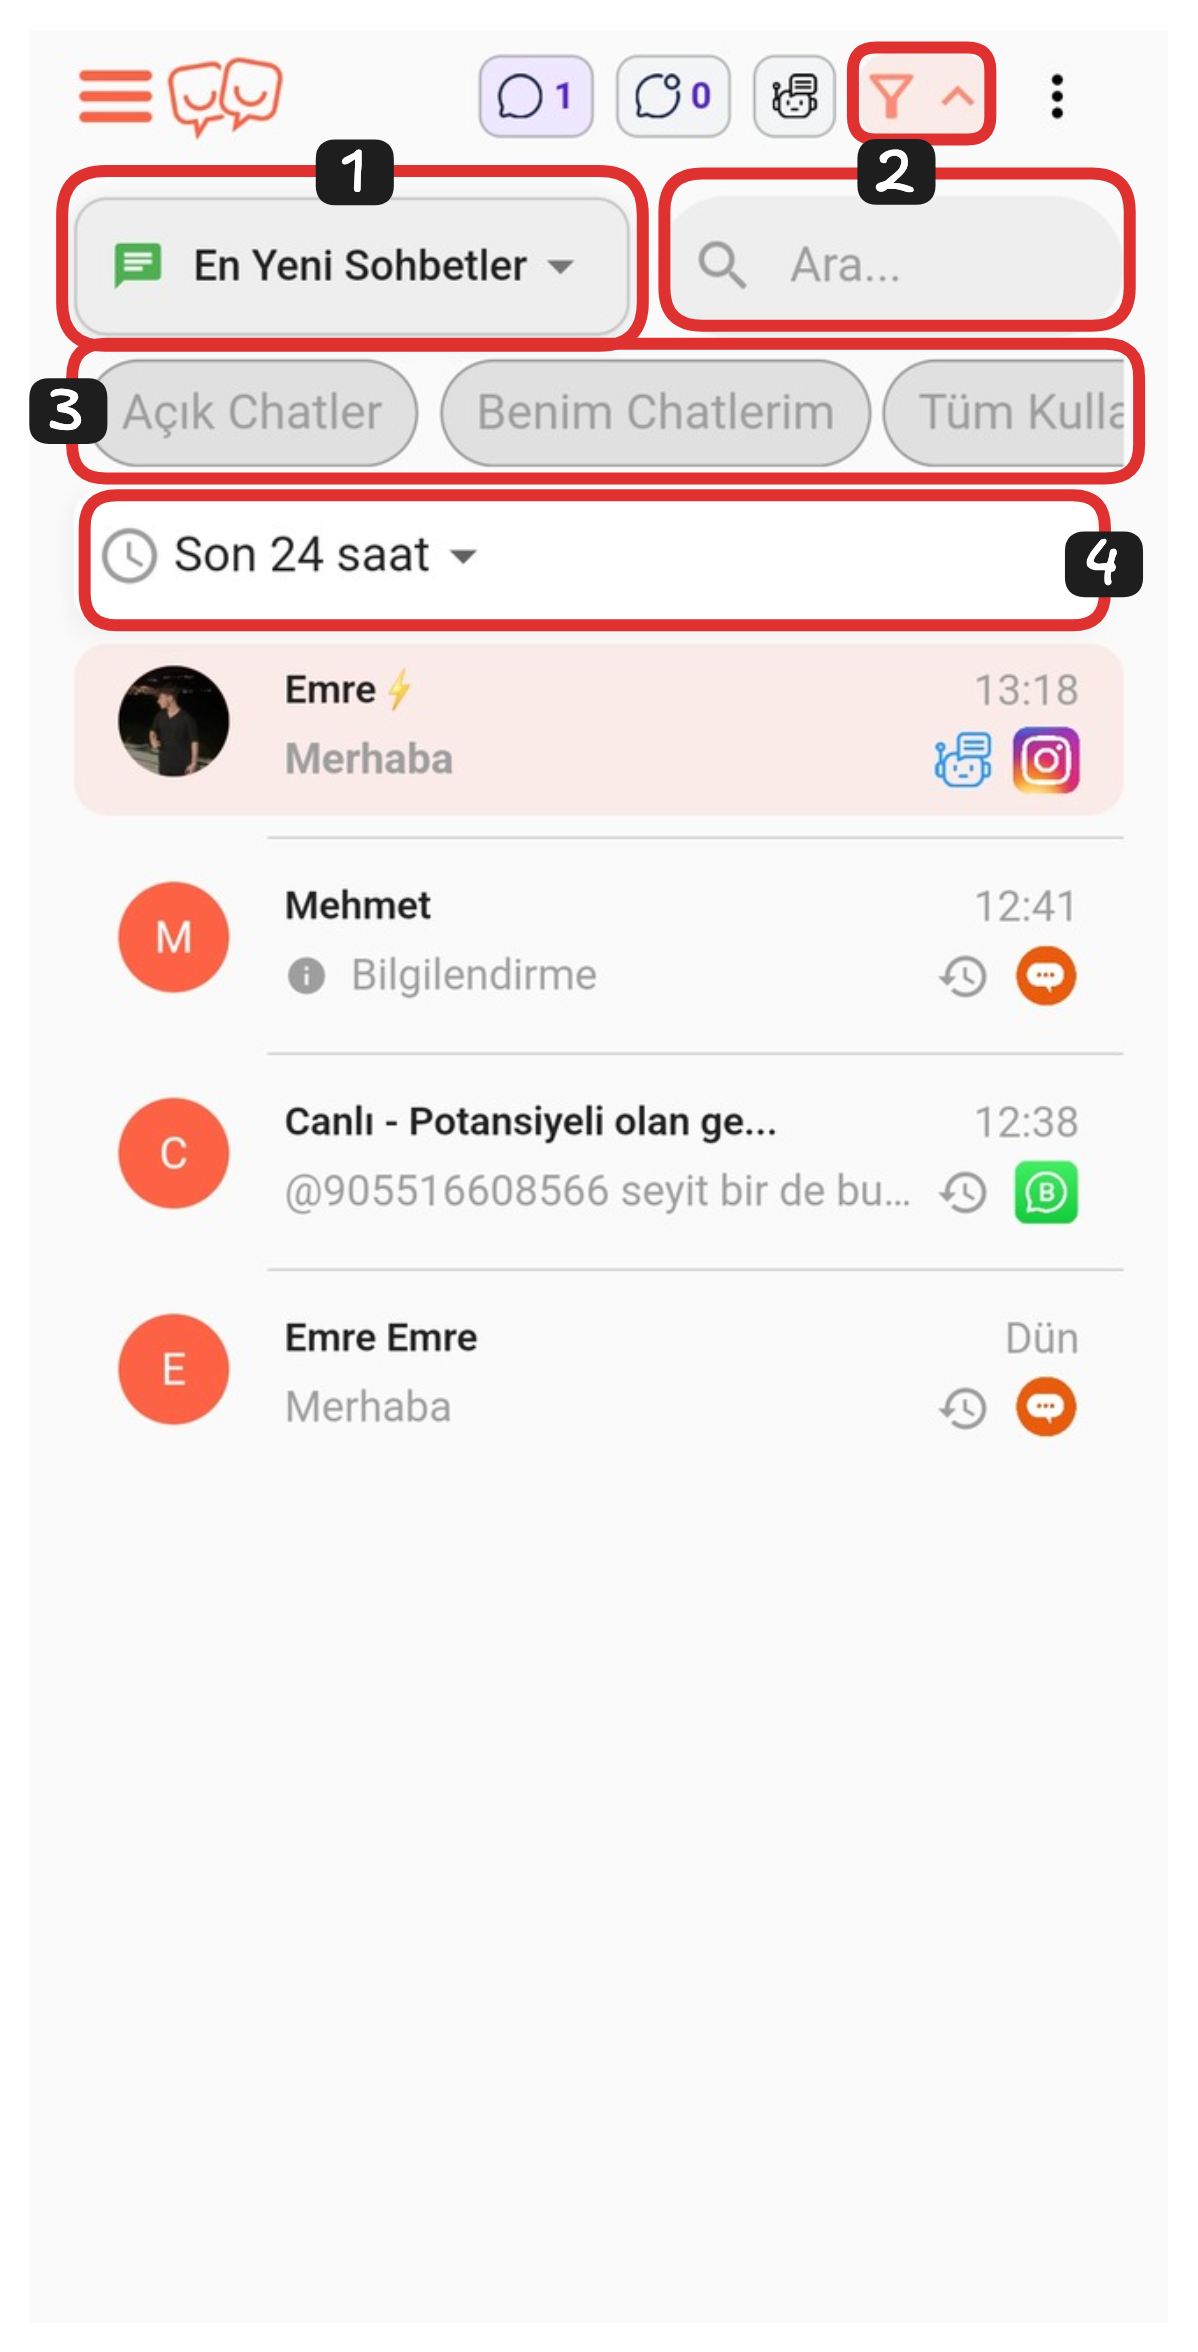
You can find the chats you're looking for more easily by using filters. Among the filters you can apply are Sorting, Search Bar, Custom Filters, and Date Filter. Thanks to these filters, you can quickly list your chats according to specific criteria.
Filter Elements:
- Sorting
- Search Bar
- Custom Filters
- Date Filter
1.) Sorting
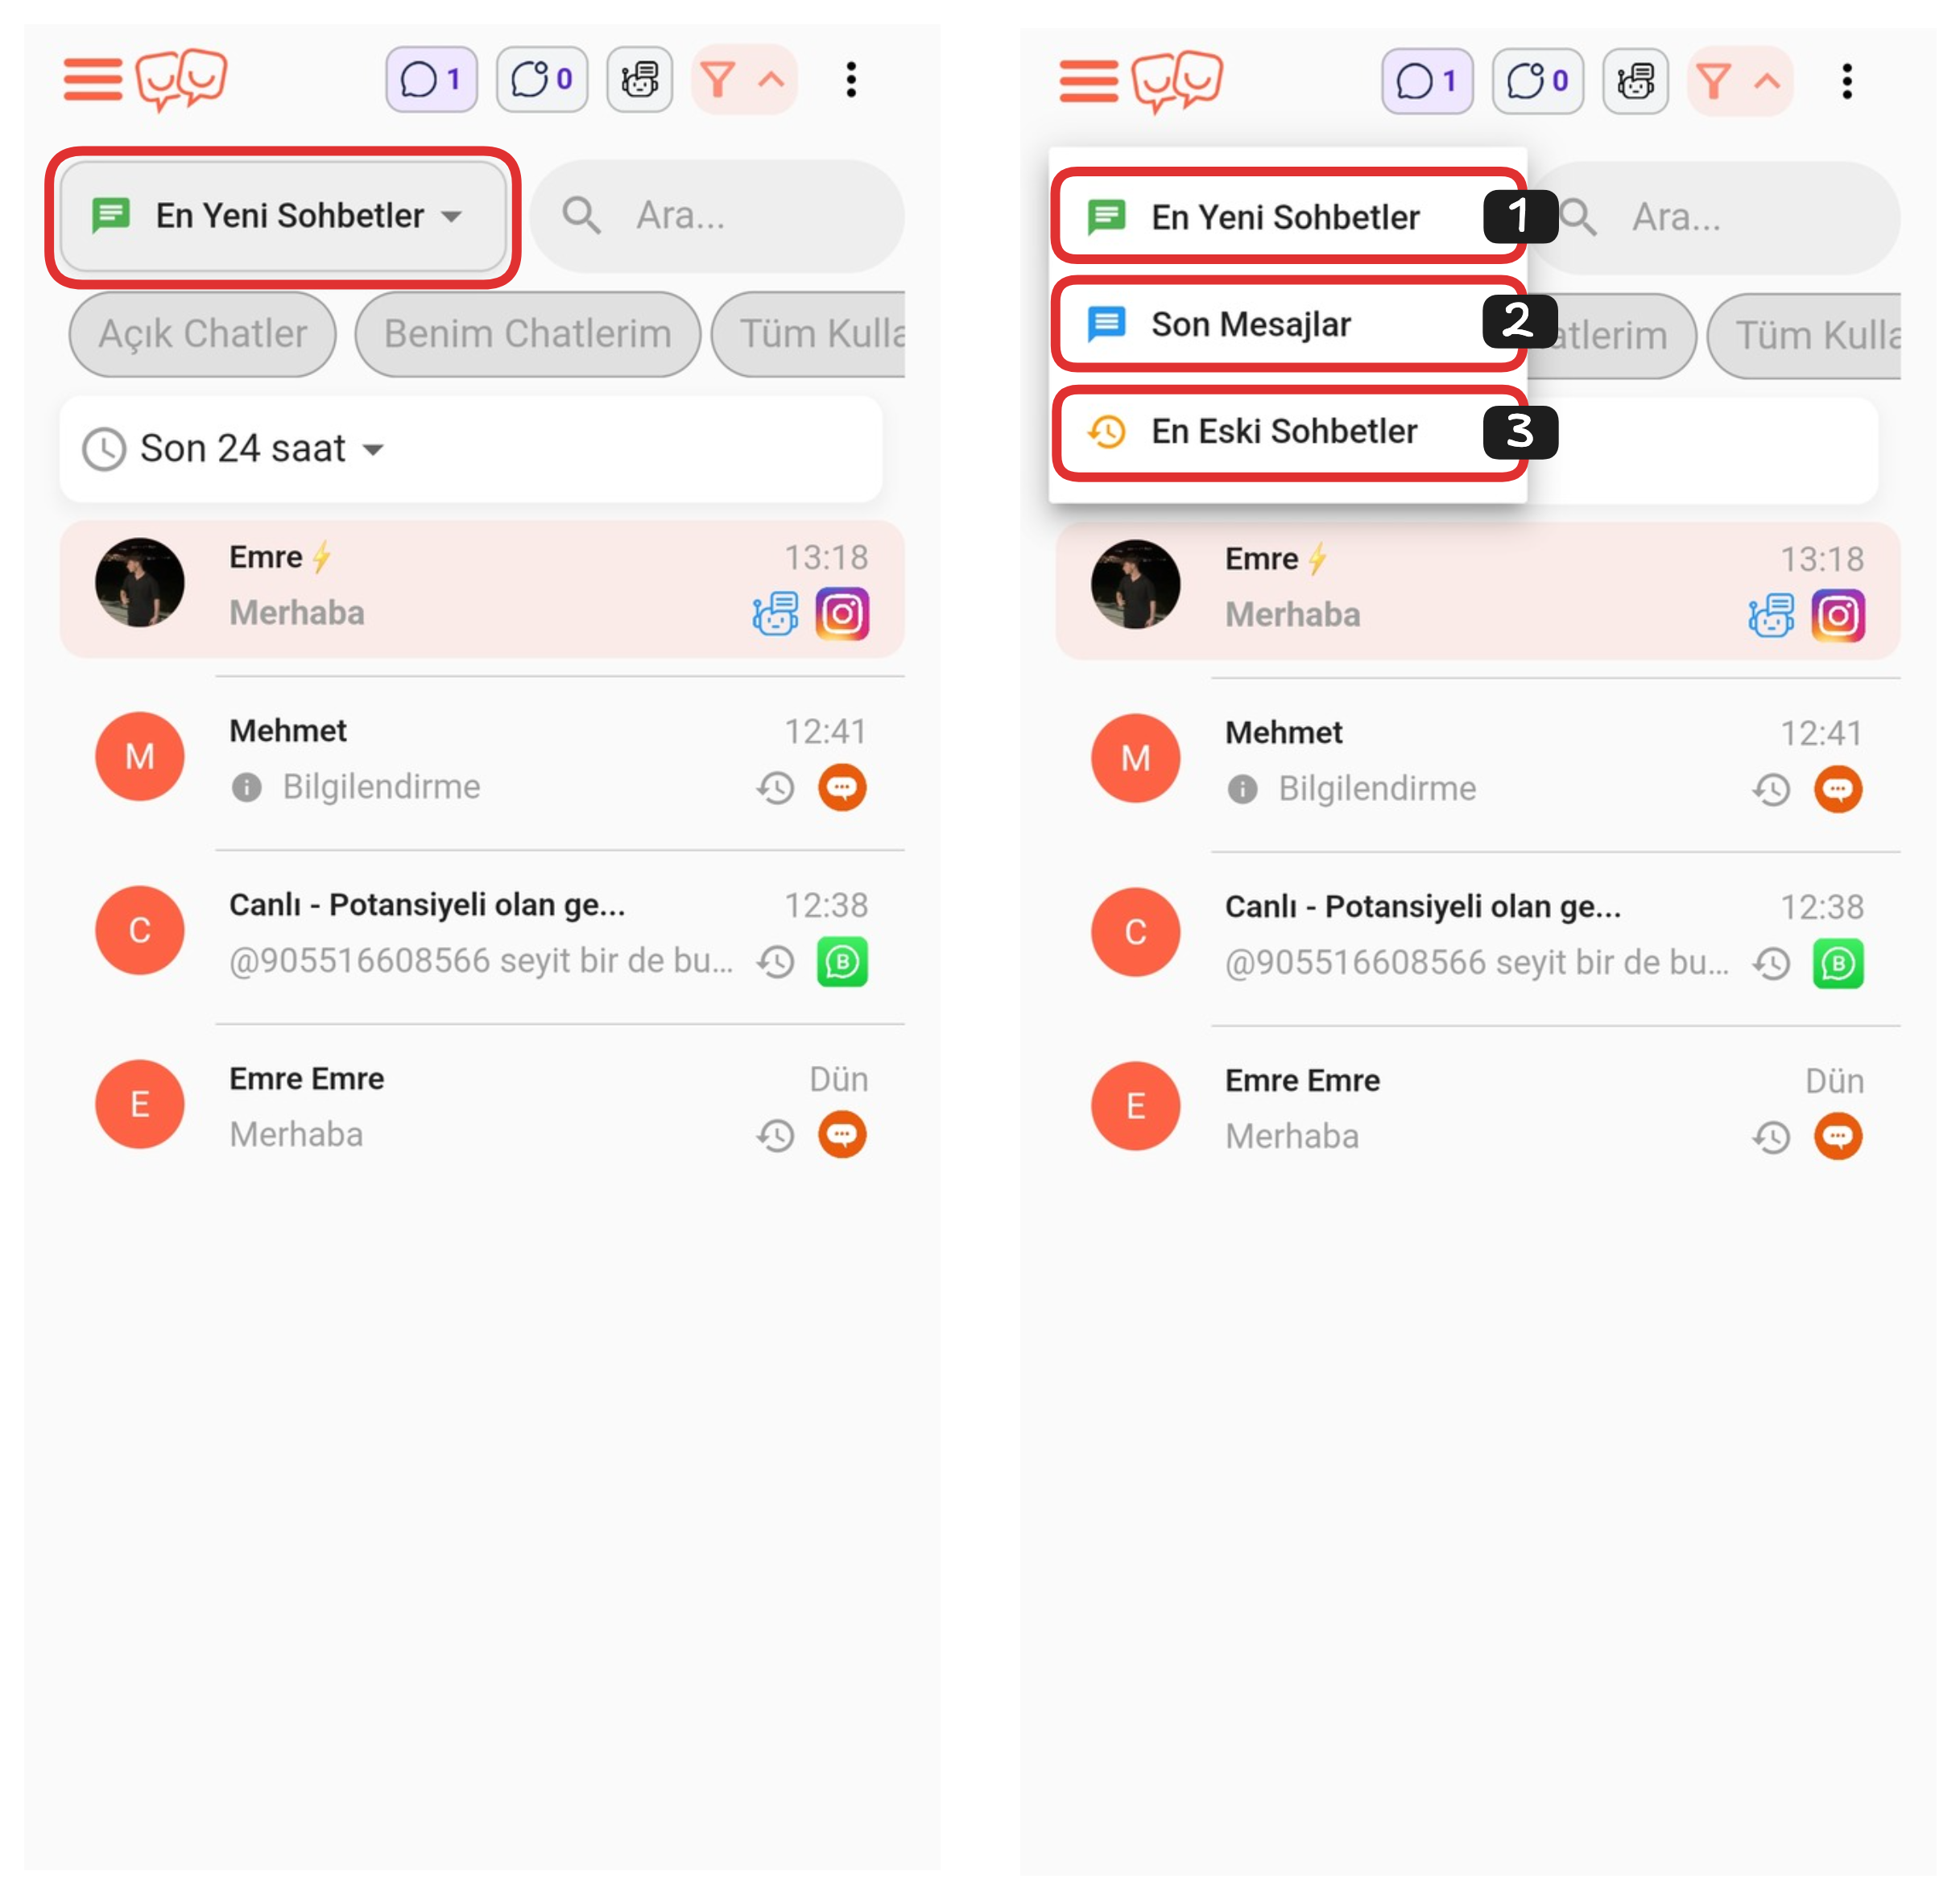
Using this feature, you can sort your chats as Newest to Oldest, Latest Messages, or Oldest to Newest. For this, it's sufficient to click on the marked area and determine your desired sorting option.
2.) Search Bar
Using the search bar, you can easily find the relevant chat by typing the person's name, phone number, etc. in the chat you're looking for.
3.) Custom Filters
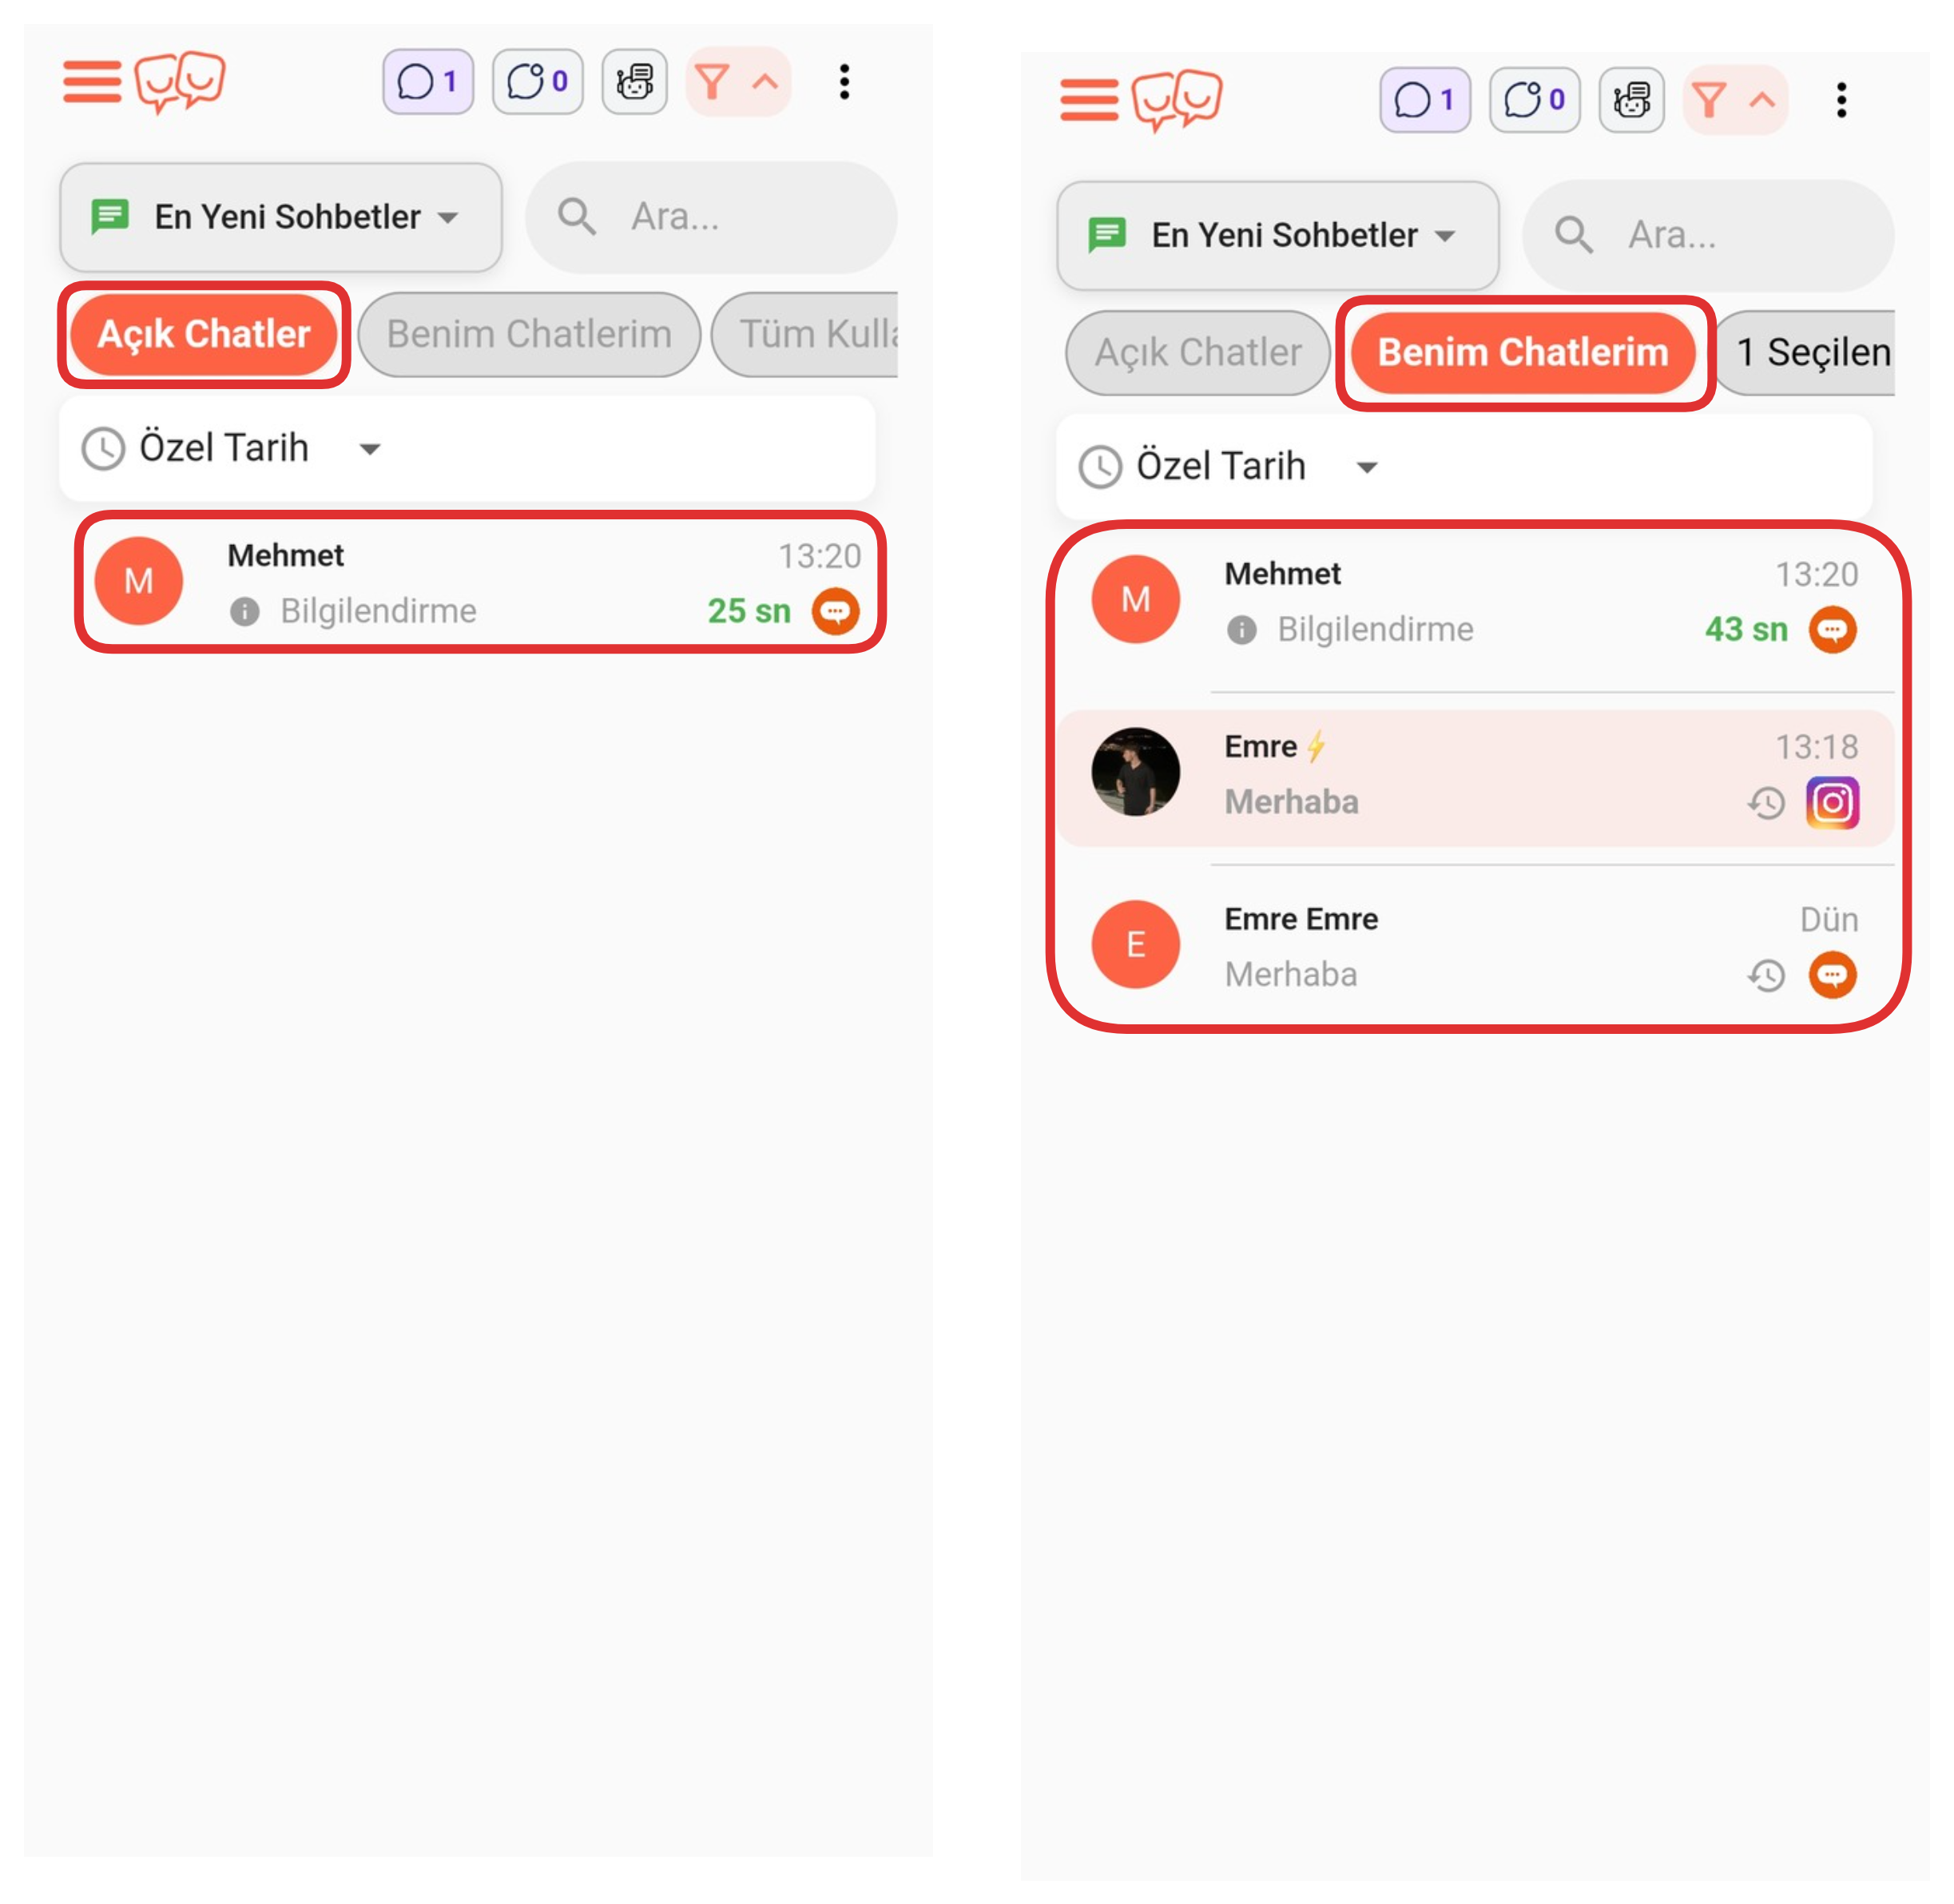
If you want only open and ongoing chats to be displayed, you can activate the "Open Chats" option. Additionally, if you want to see only chats assigned to your own user account, you can activate the "My Chats" option.
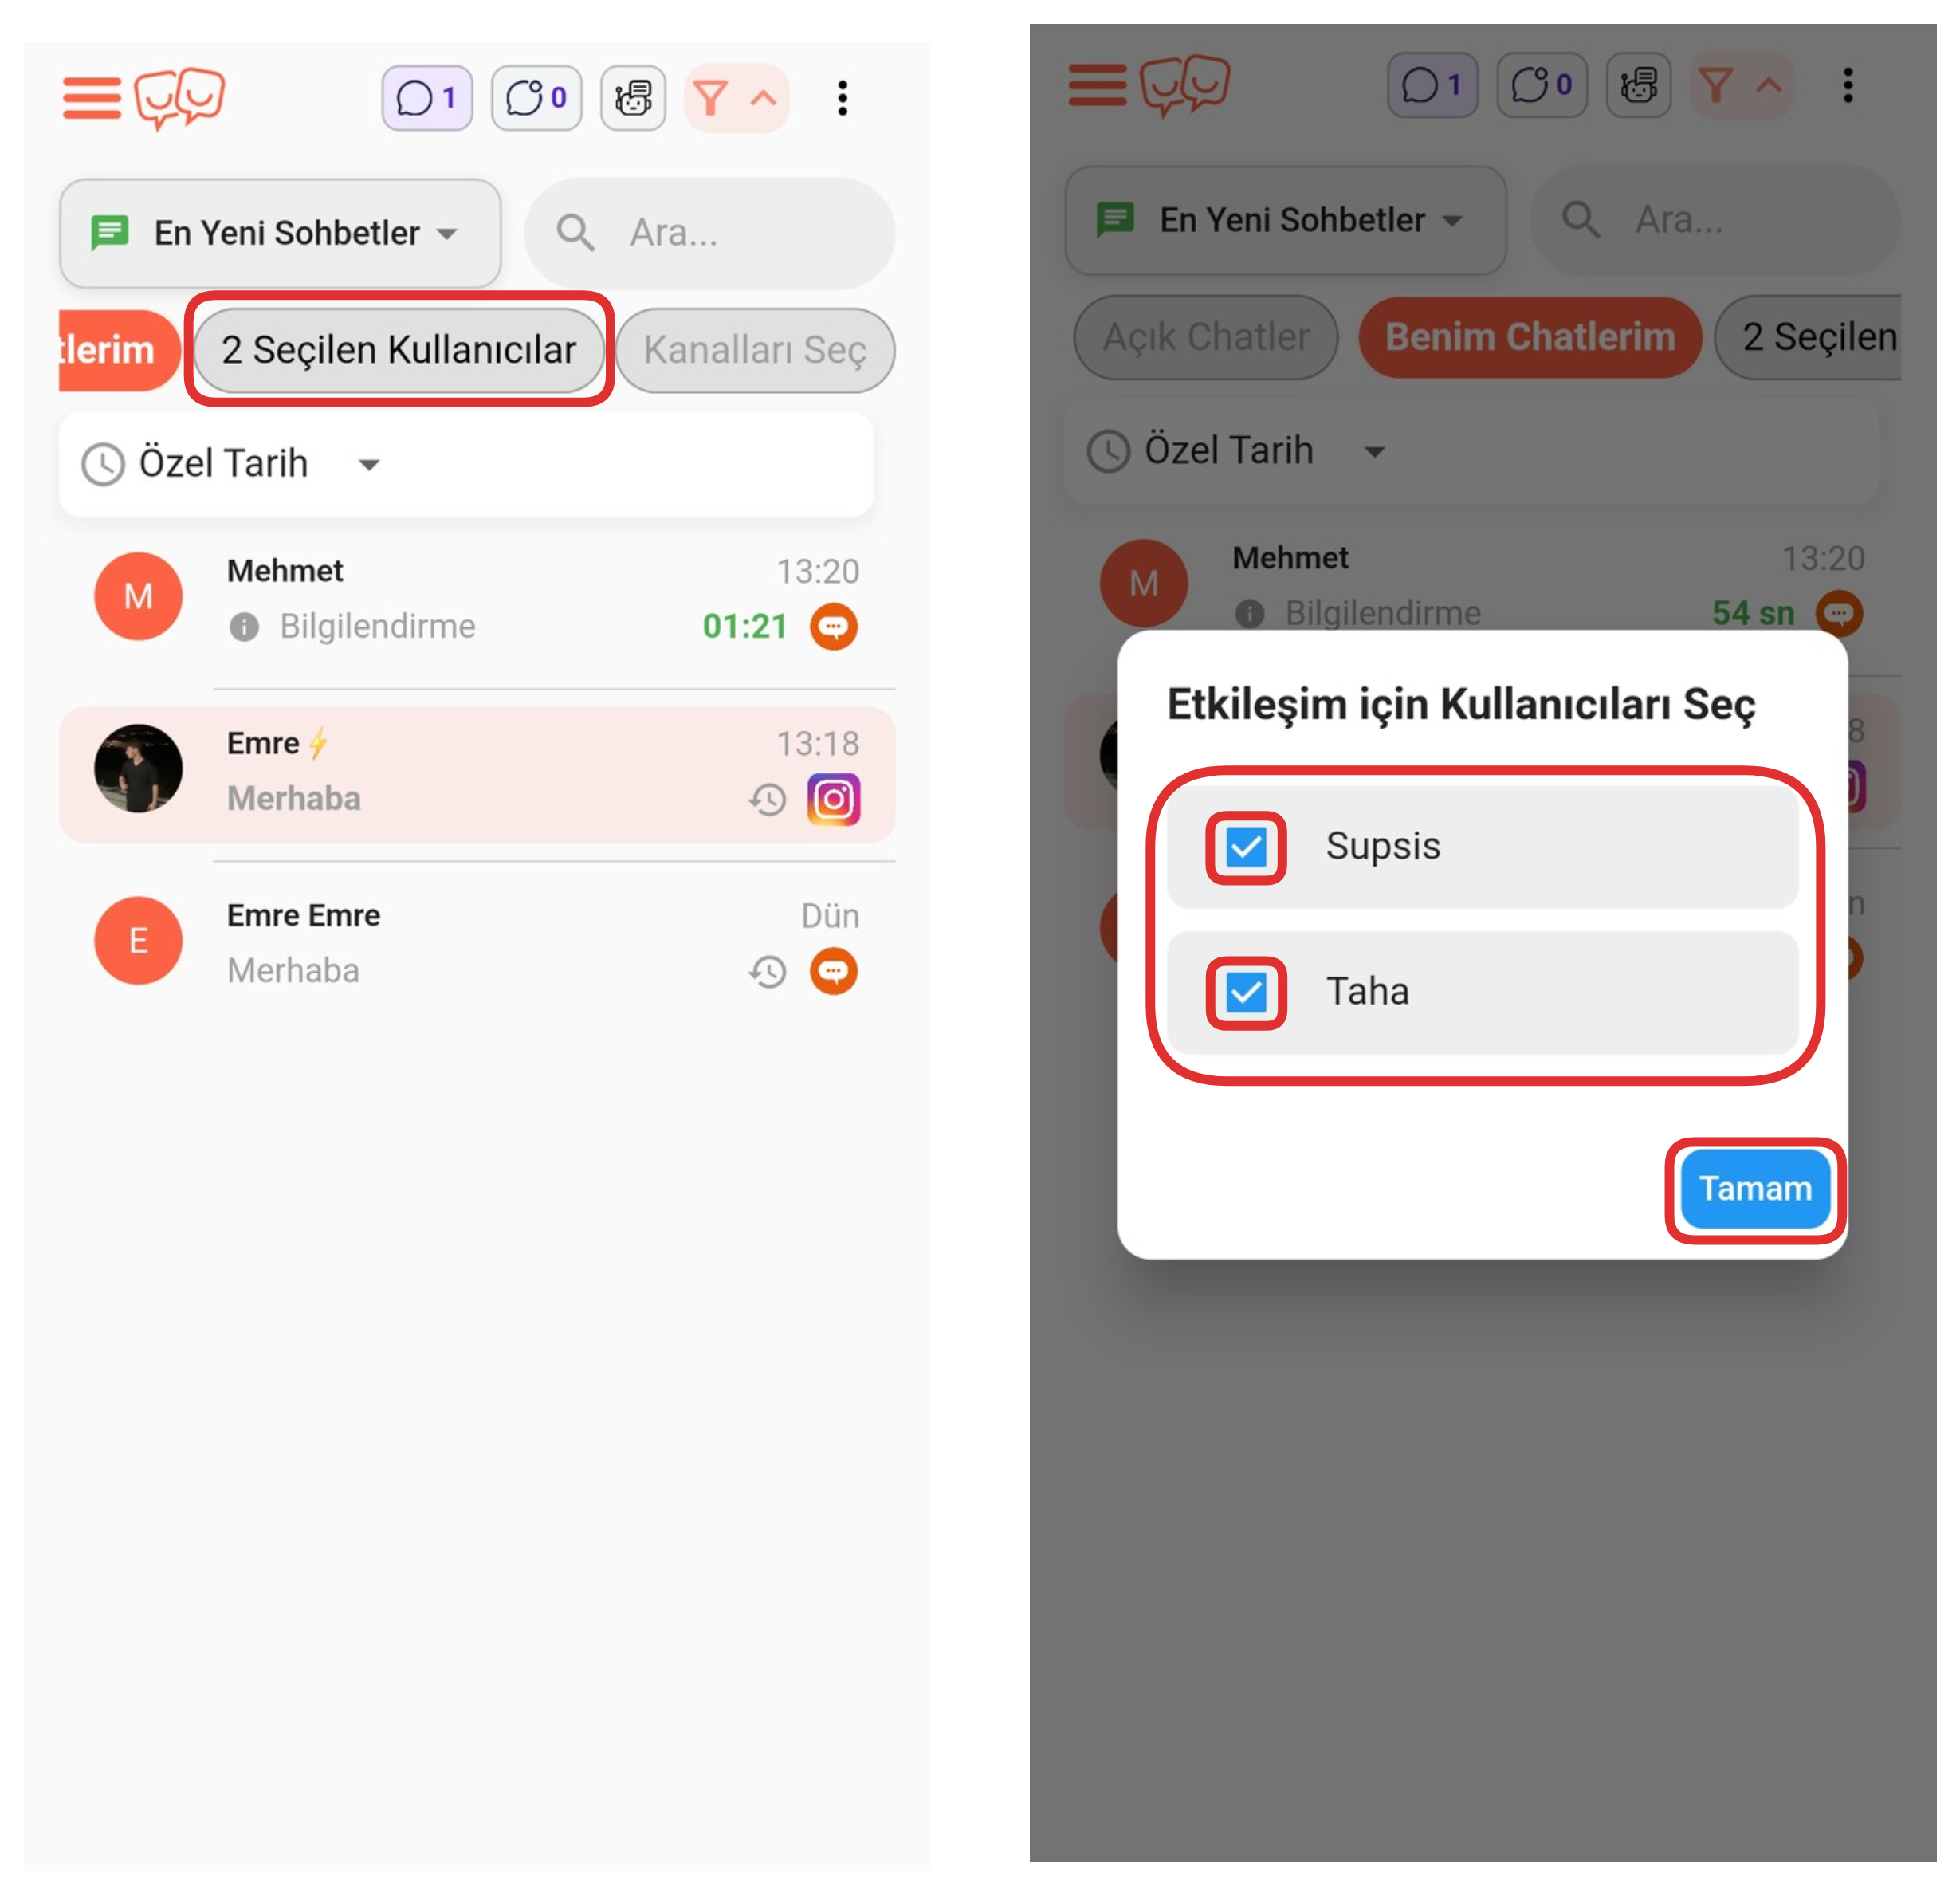
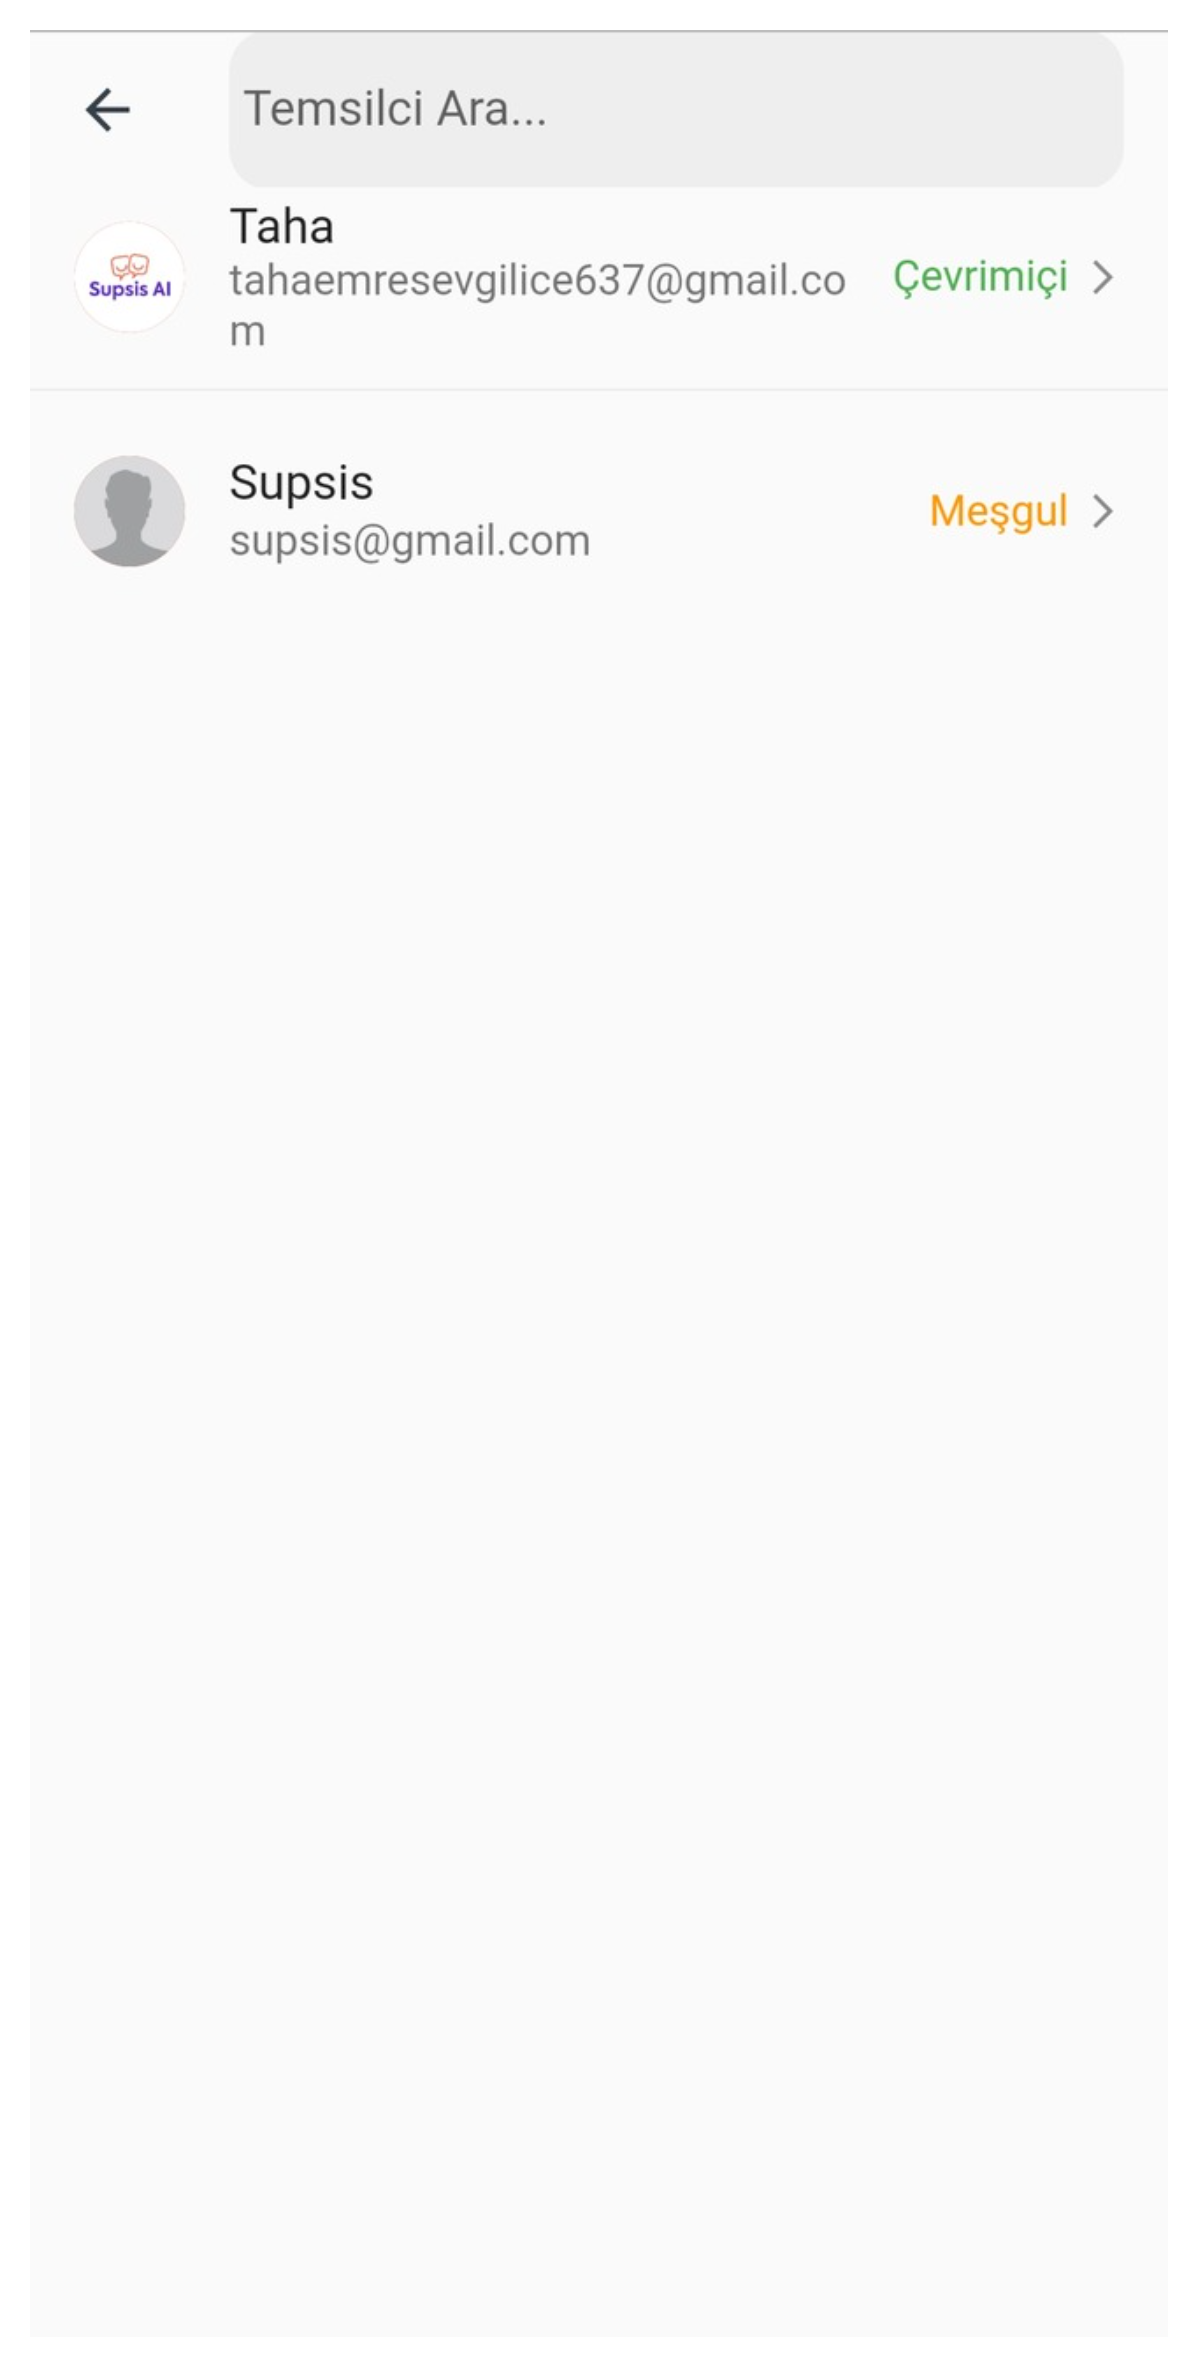
First, click the "All Users" button from the marked section. If you can't see this button, you can make it visible by swiping to the right. In the opened area, select the representatives whose chats you want to view, then click the "OK" button to complete the process. This way, you can filter to view only the chats of the representatives you selected.
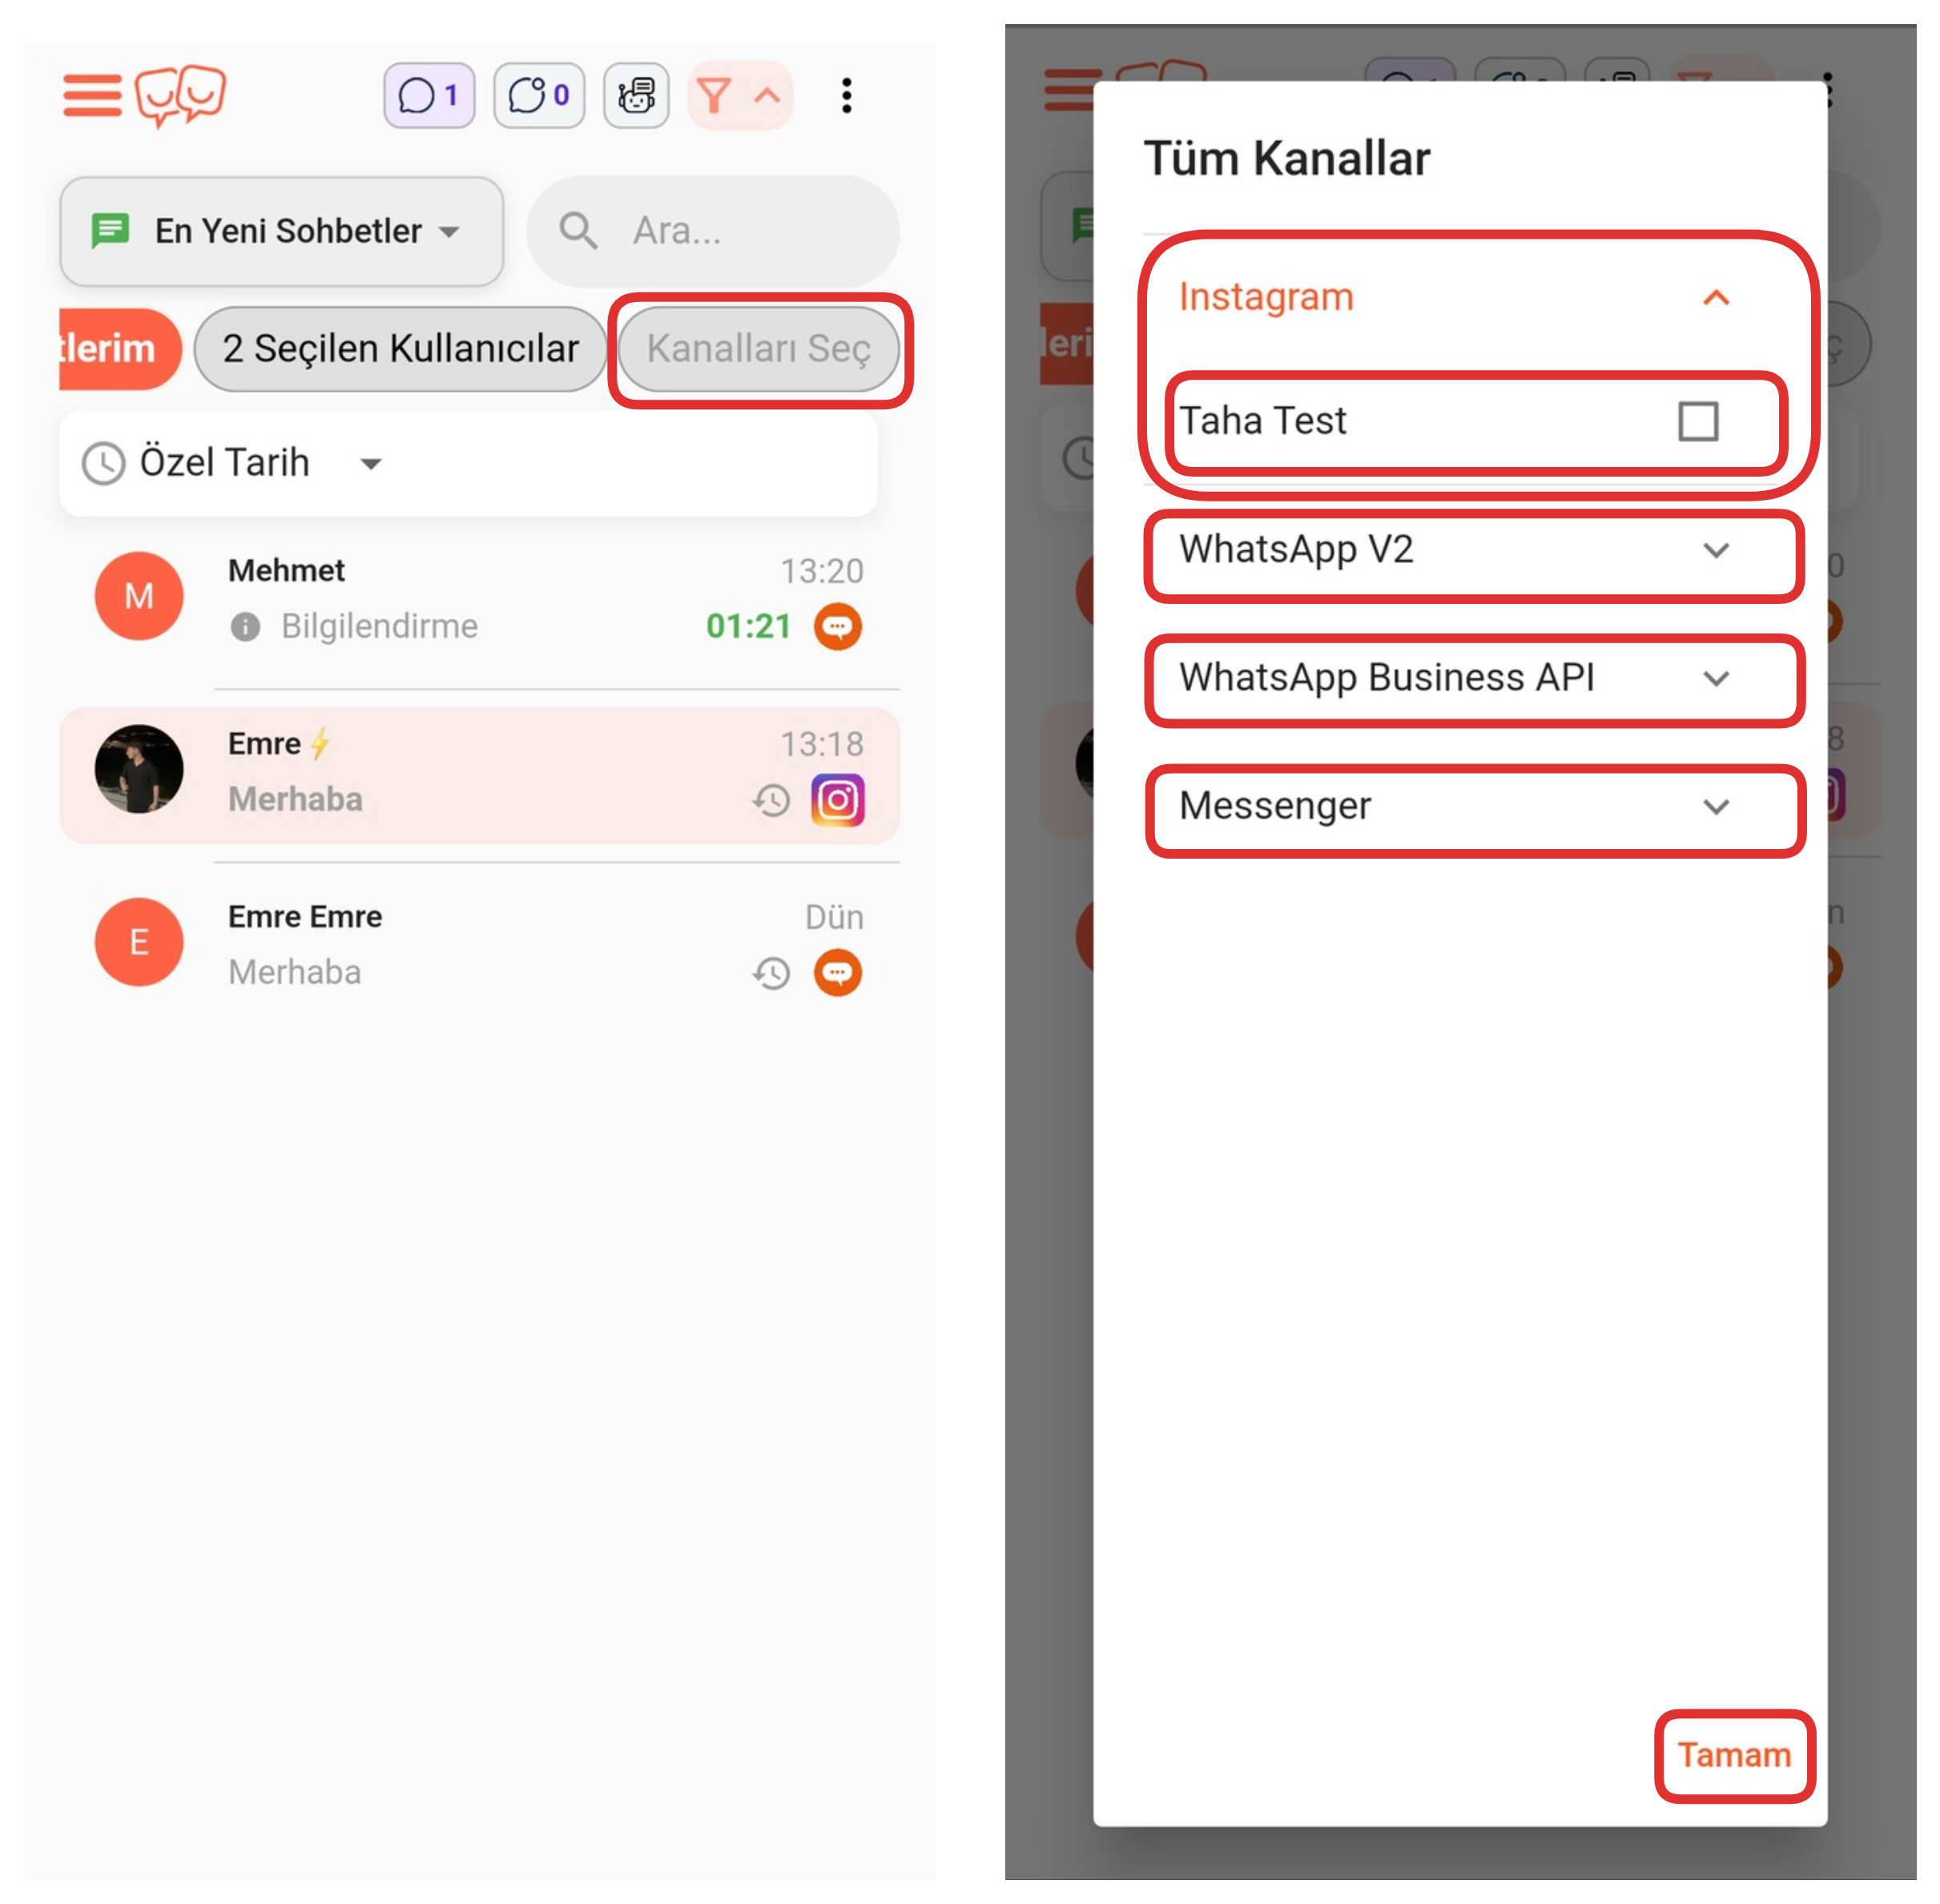
If you want to do channel-based filtering, this filter is perfect for you. You can do channel-based filtering by clicking the "Select Channels" button. If you can't see this button, try swiping the screen to the right. After clicking the button, you can view the channels in the dropdown list by clicking on the visible integrations in the opened area. You can filter to view only chats from the channels you selected by checking the boxes next to the channels in the list.
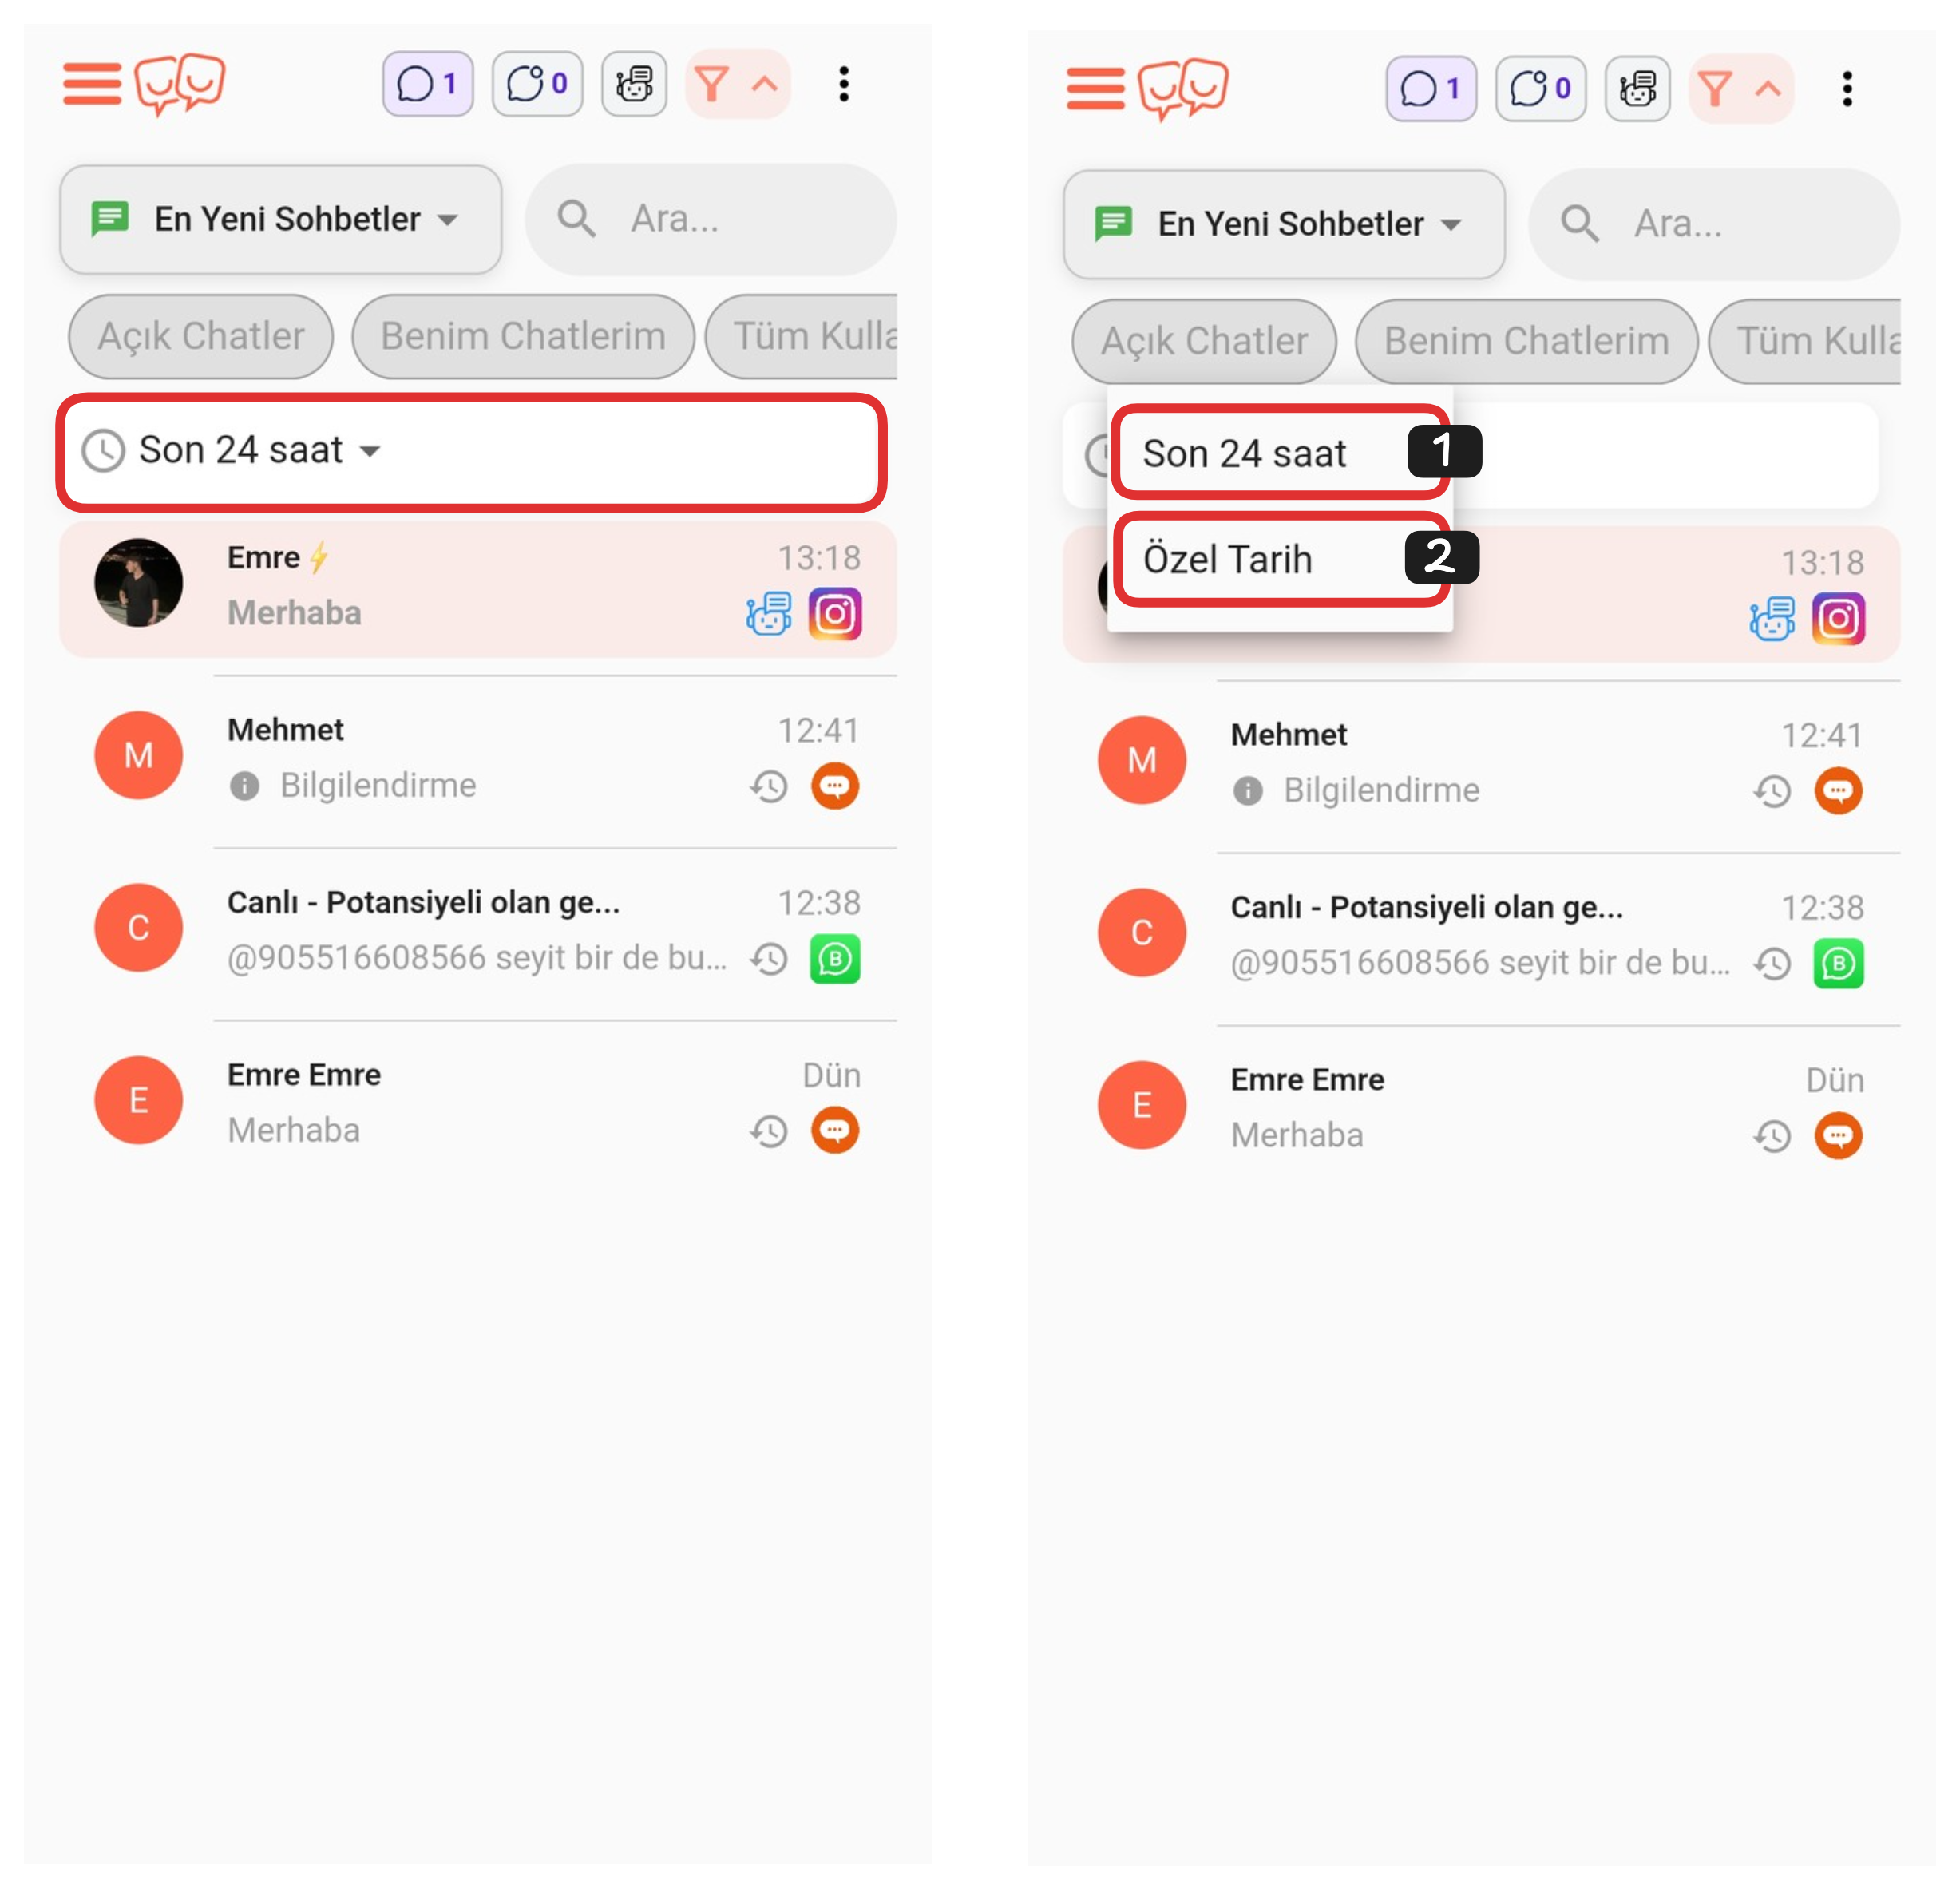
To do date filtering, you can select one of the Last 24 Hours or Custom Date options from the dropdown by clicking on the "Last 24 Hours" section. By using the "Custom Date" button, you can filter in your desired date range and view only chats in the time period you specified.
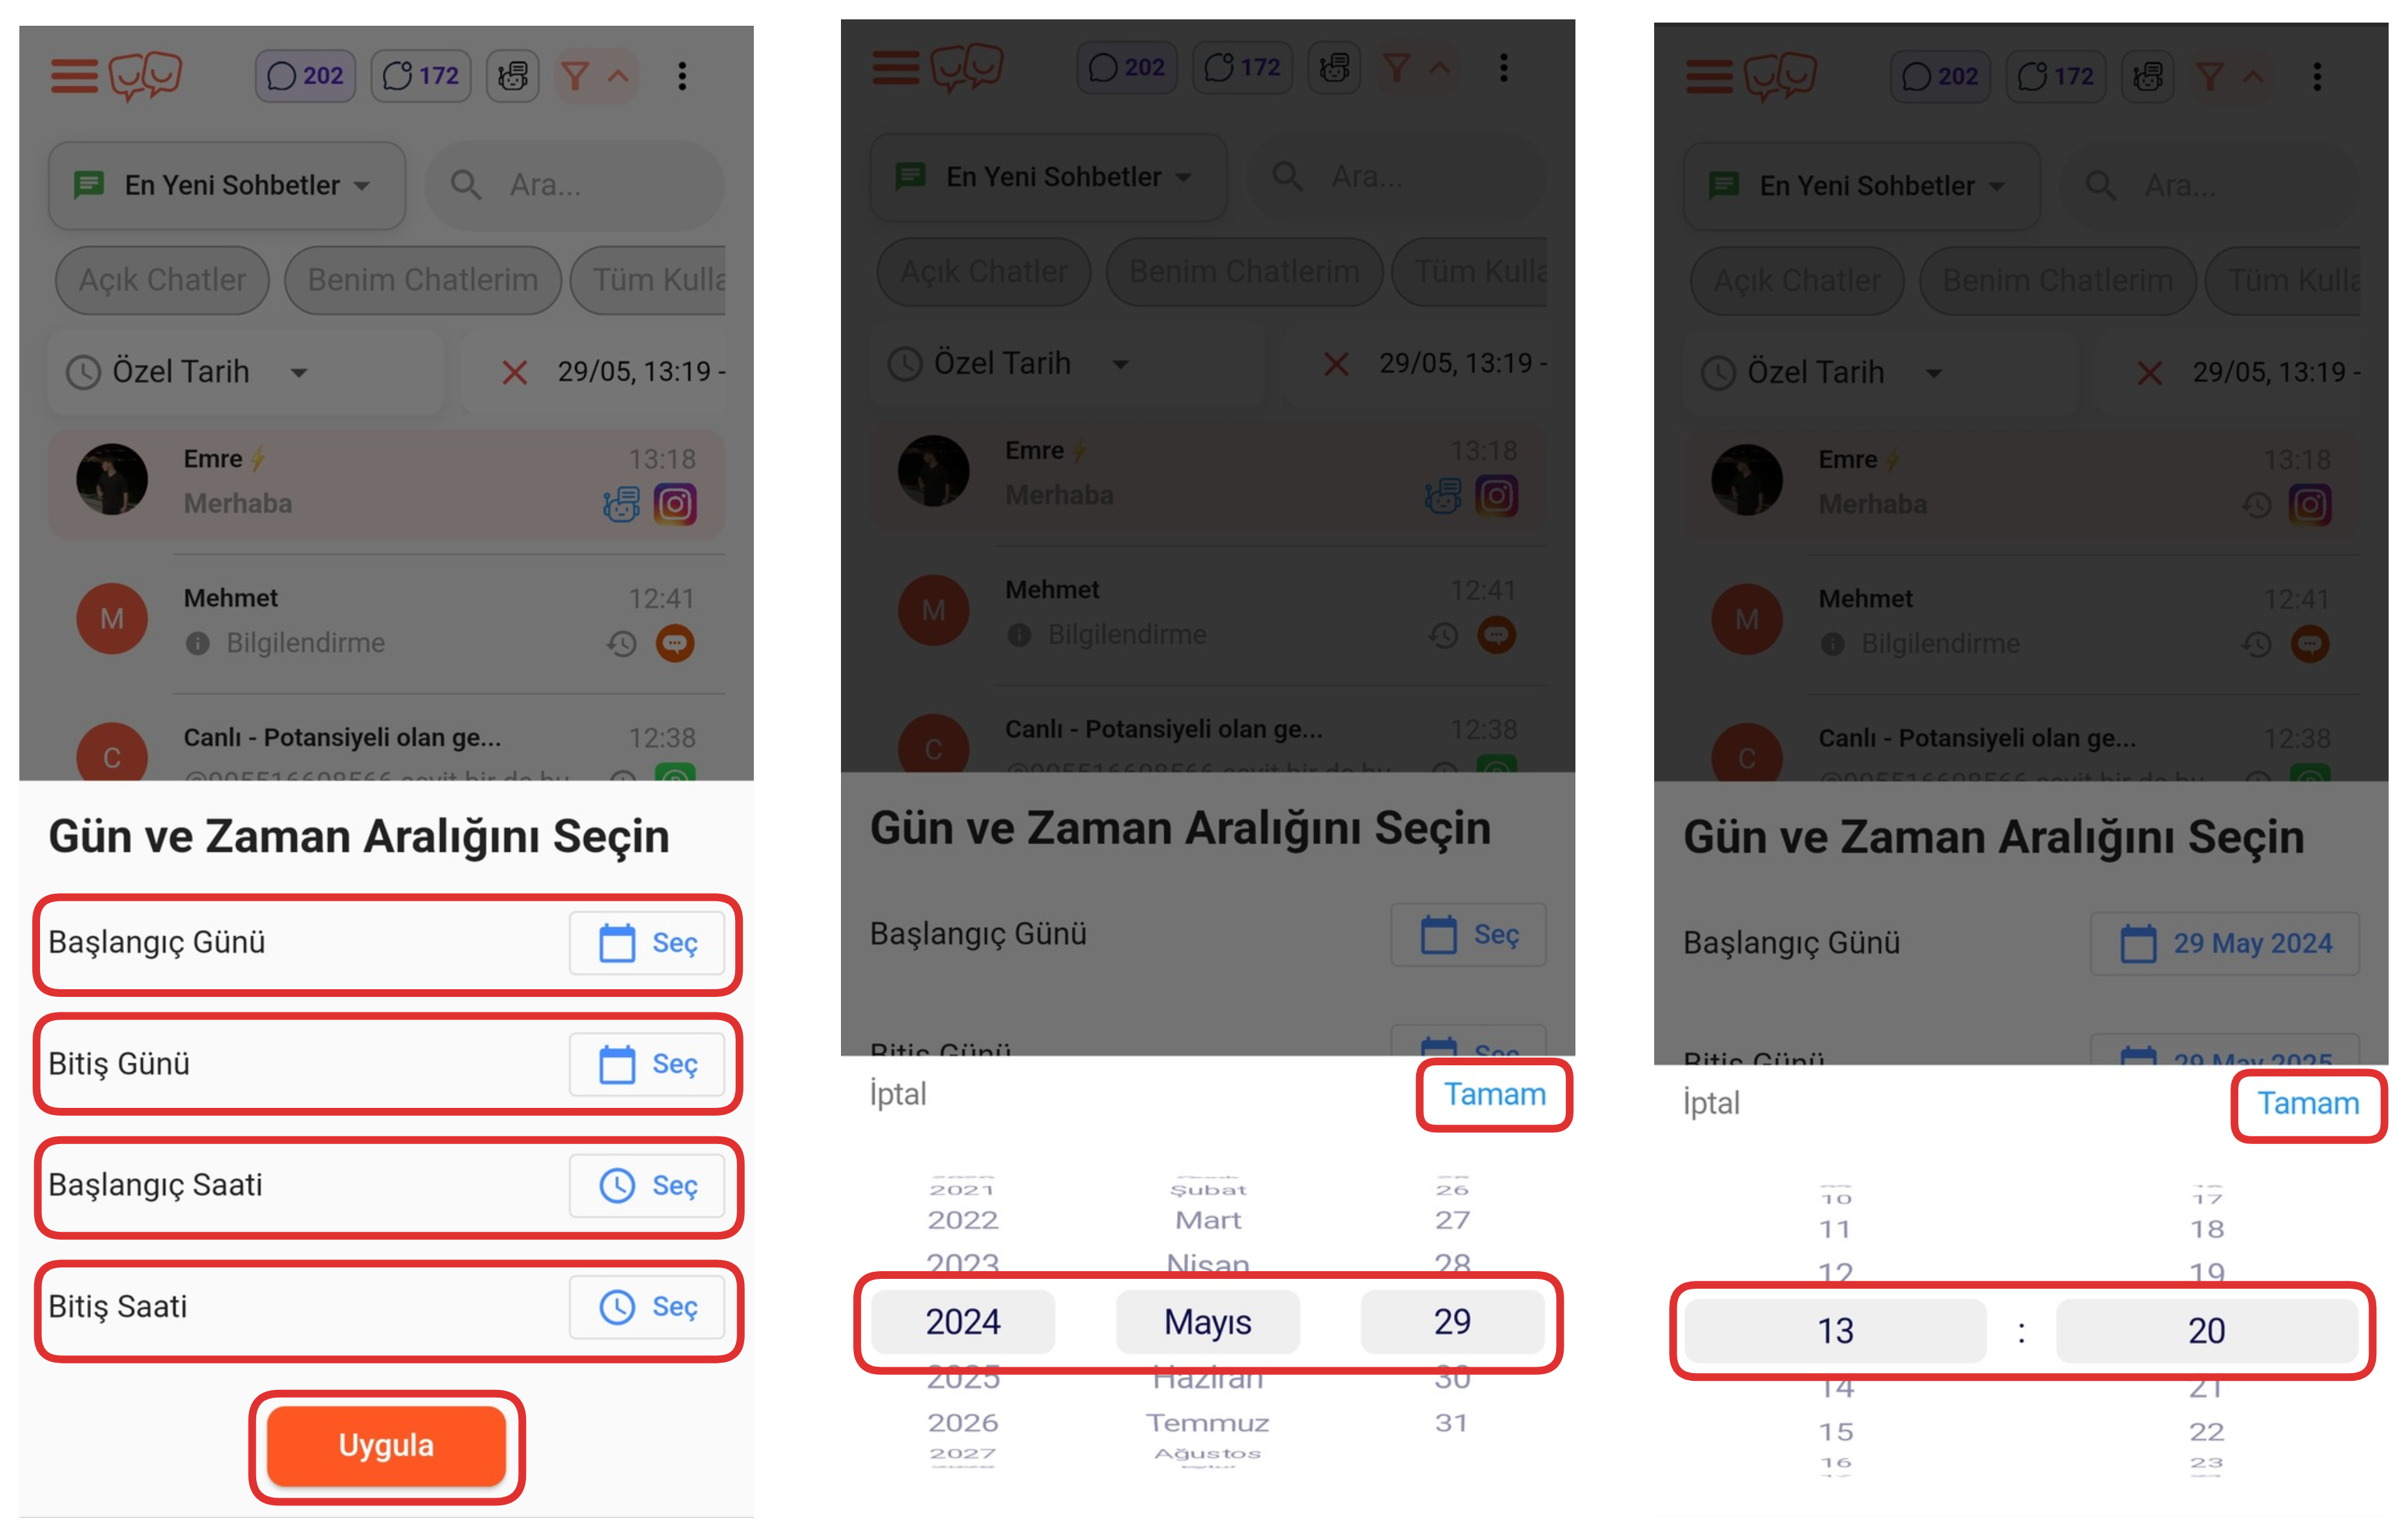
After selecting the "Custom Date" option, you first need to determine the Start Day and End Day. Then, you can apply a detailed date filter in your desired time range by selecting the start time and end time for both days.
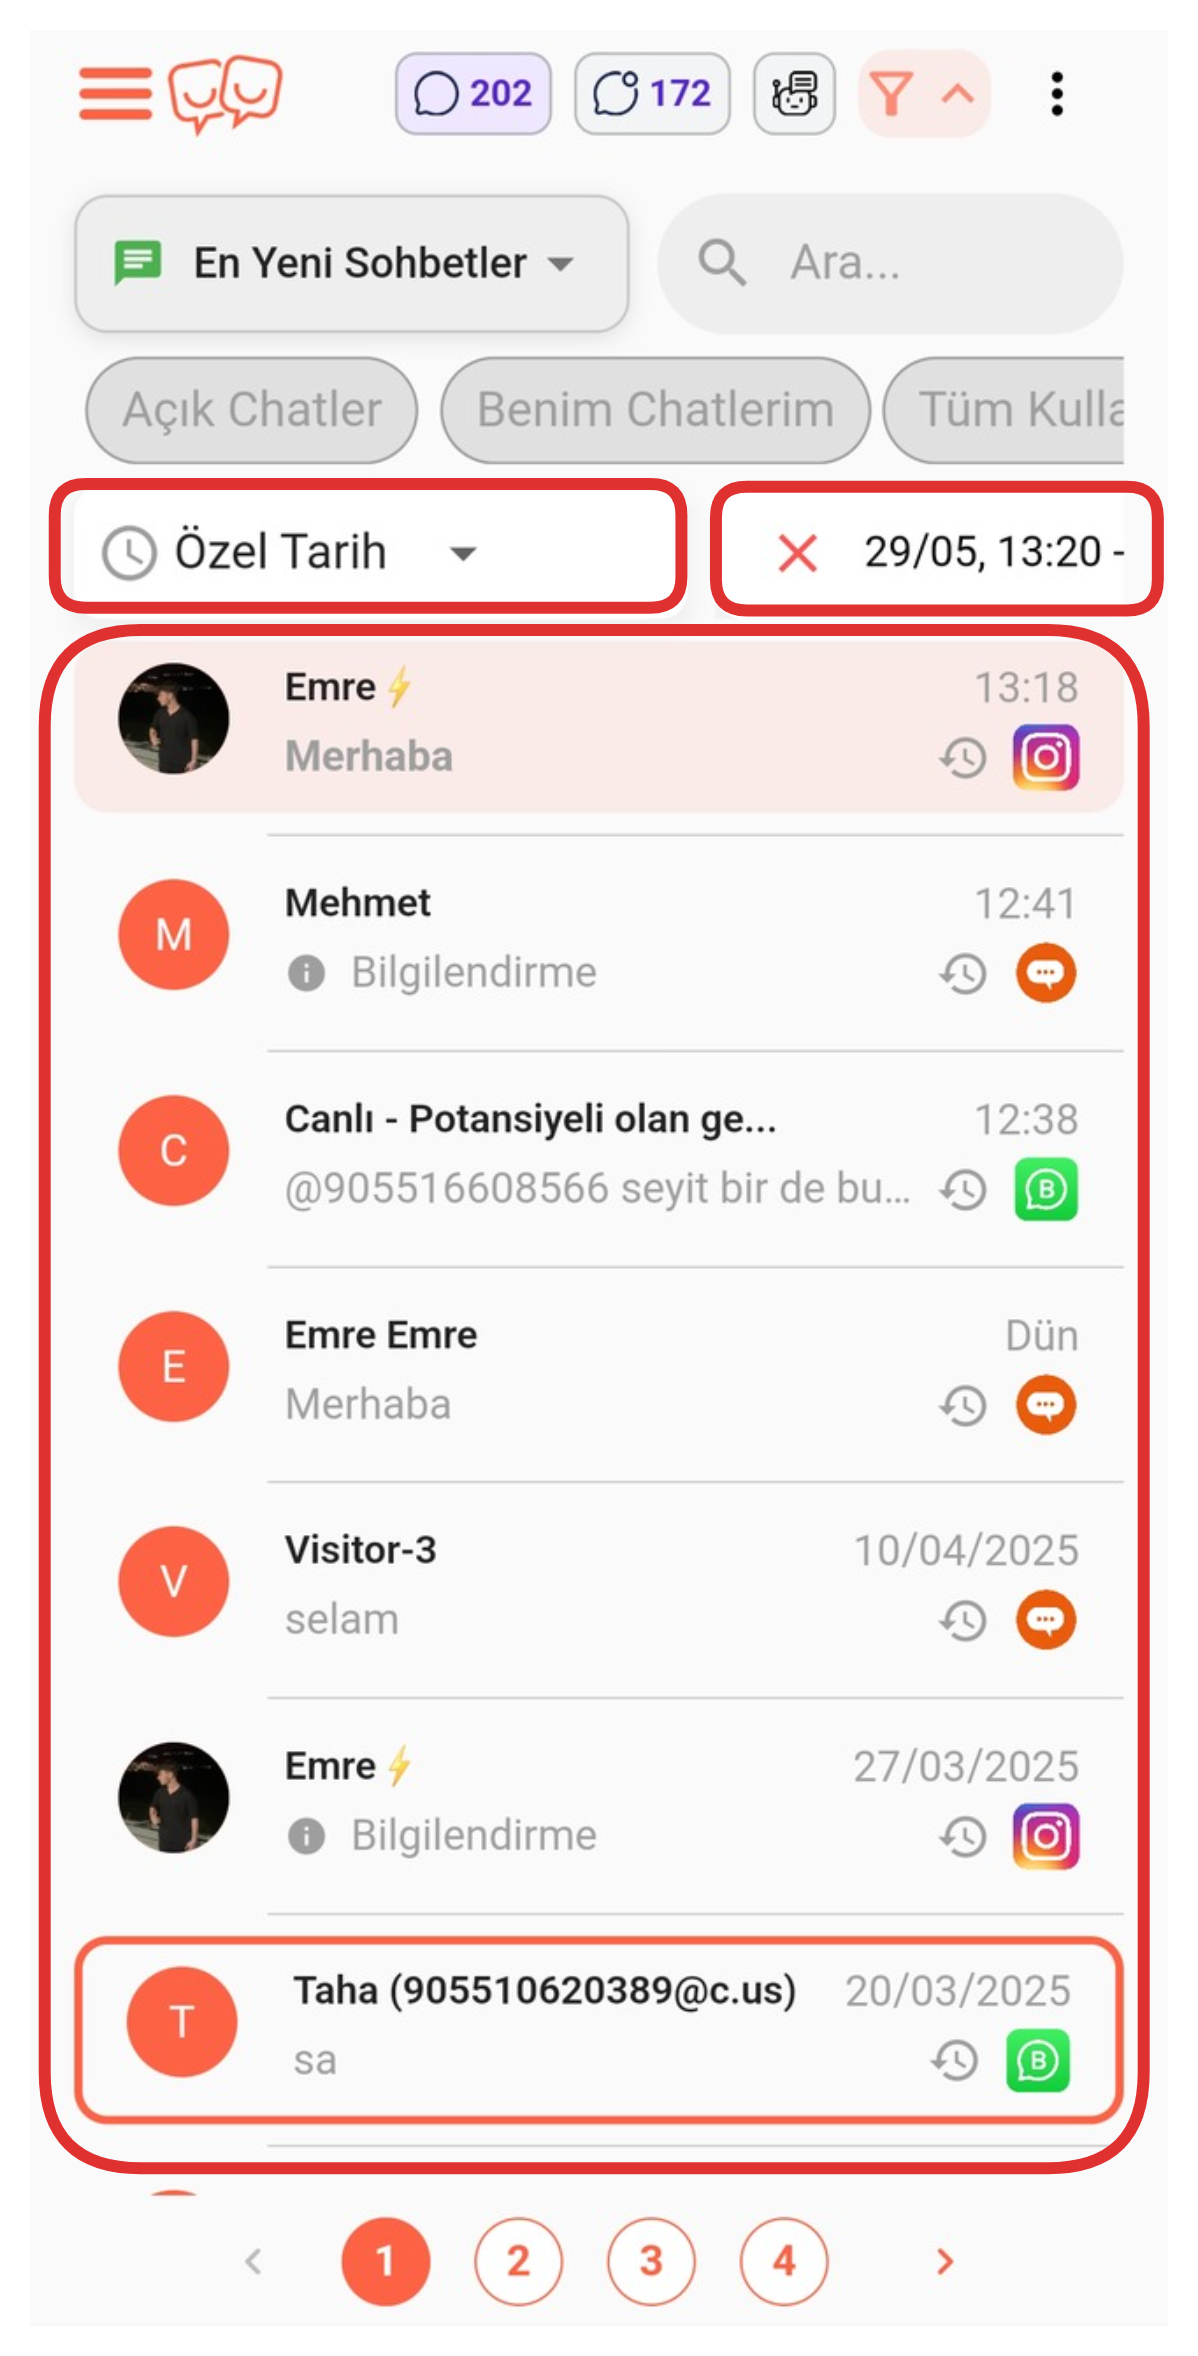
If you clicked the "Apply" button after entering the date range, you can view all chats between the two dates.
5-) Settings
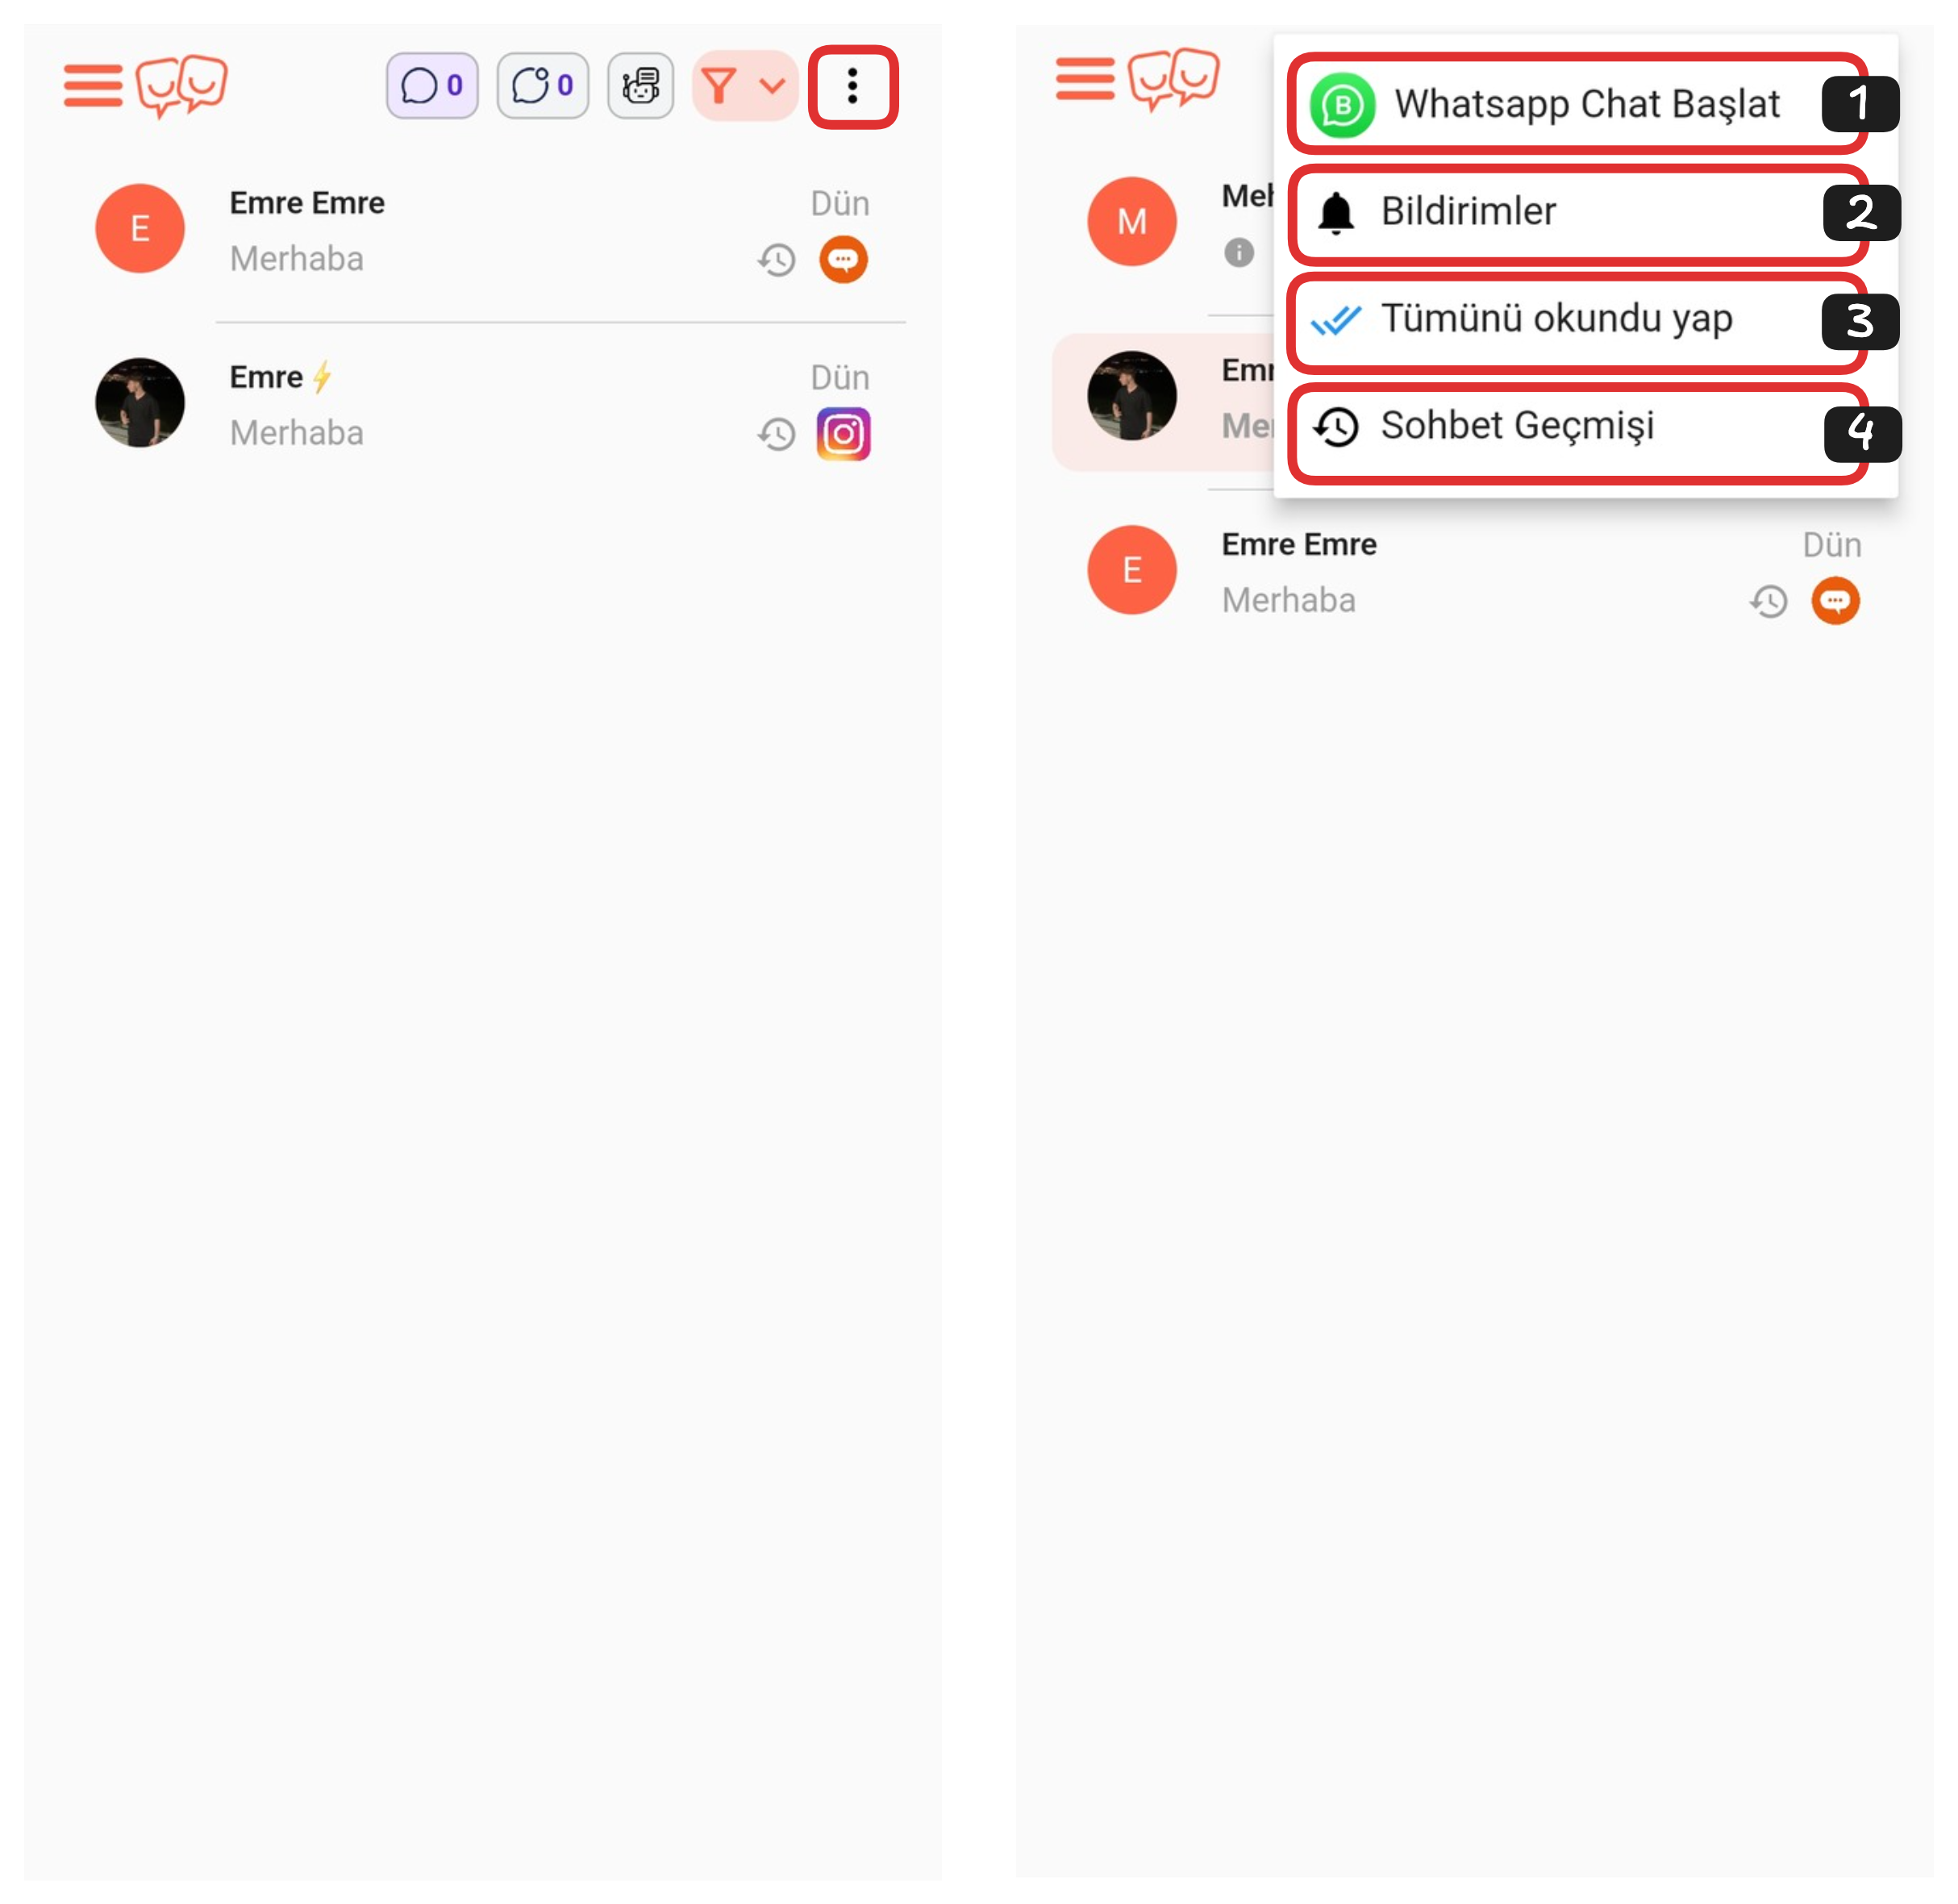
You can open the settings menu by clicking the "Three Dots" icon in the upper right corner. From this section, you can start chats on WhatsApp, view notifications, mark all chats as read, and view chat history.
Settings Menu:
- Start WhatsApp Chat
- Notifications
- Mark All as Read
- Chat History
1-) Start WhatsApp Chat
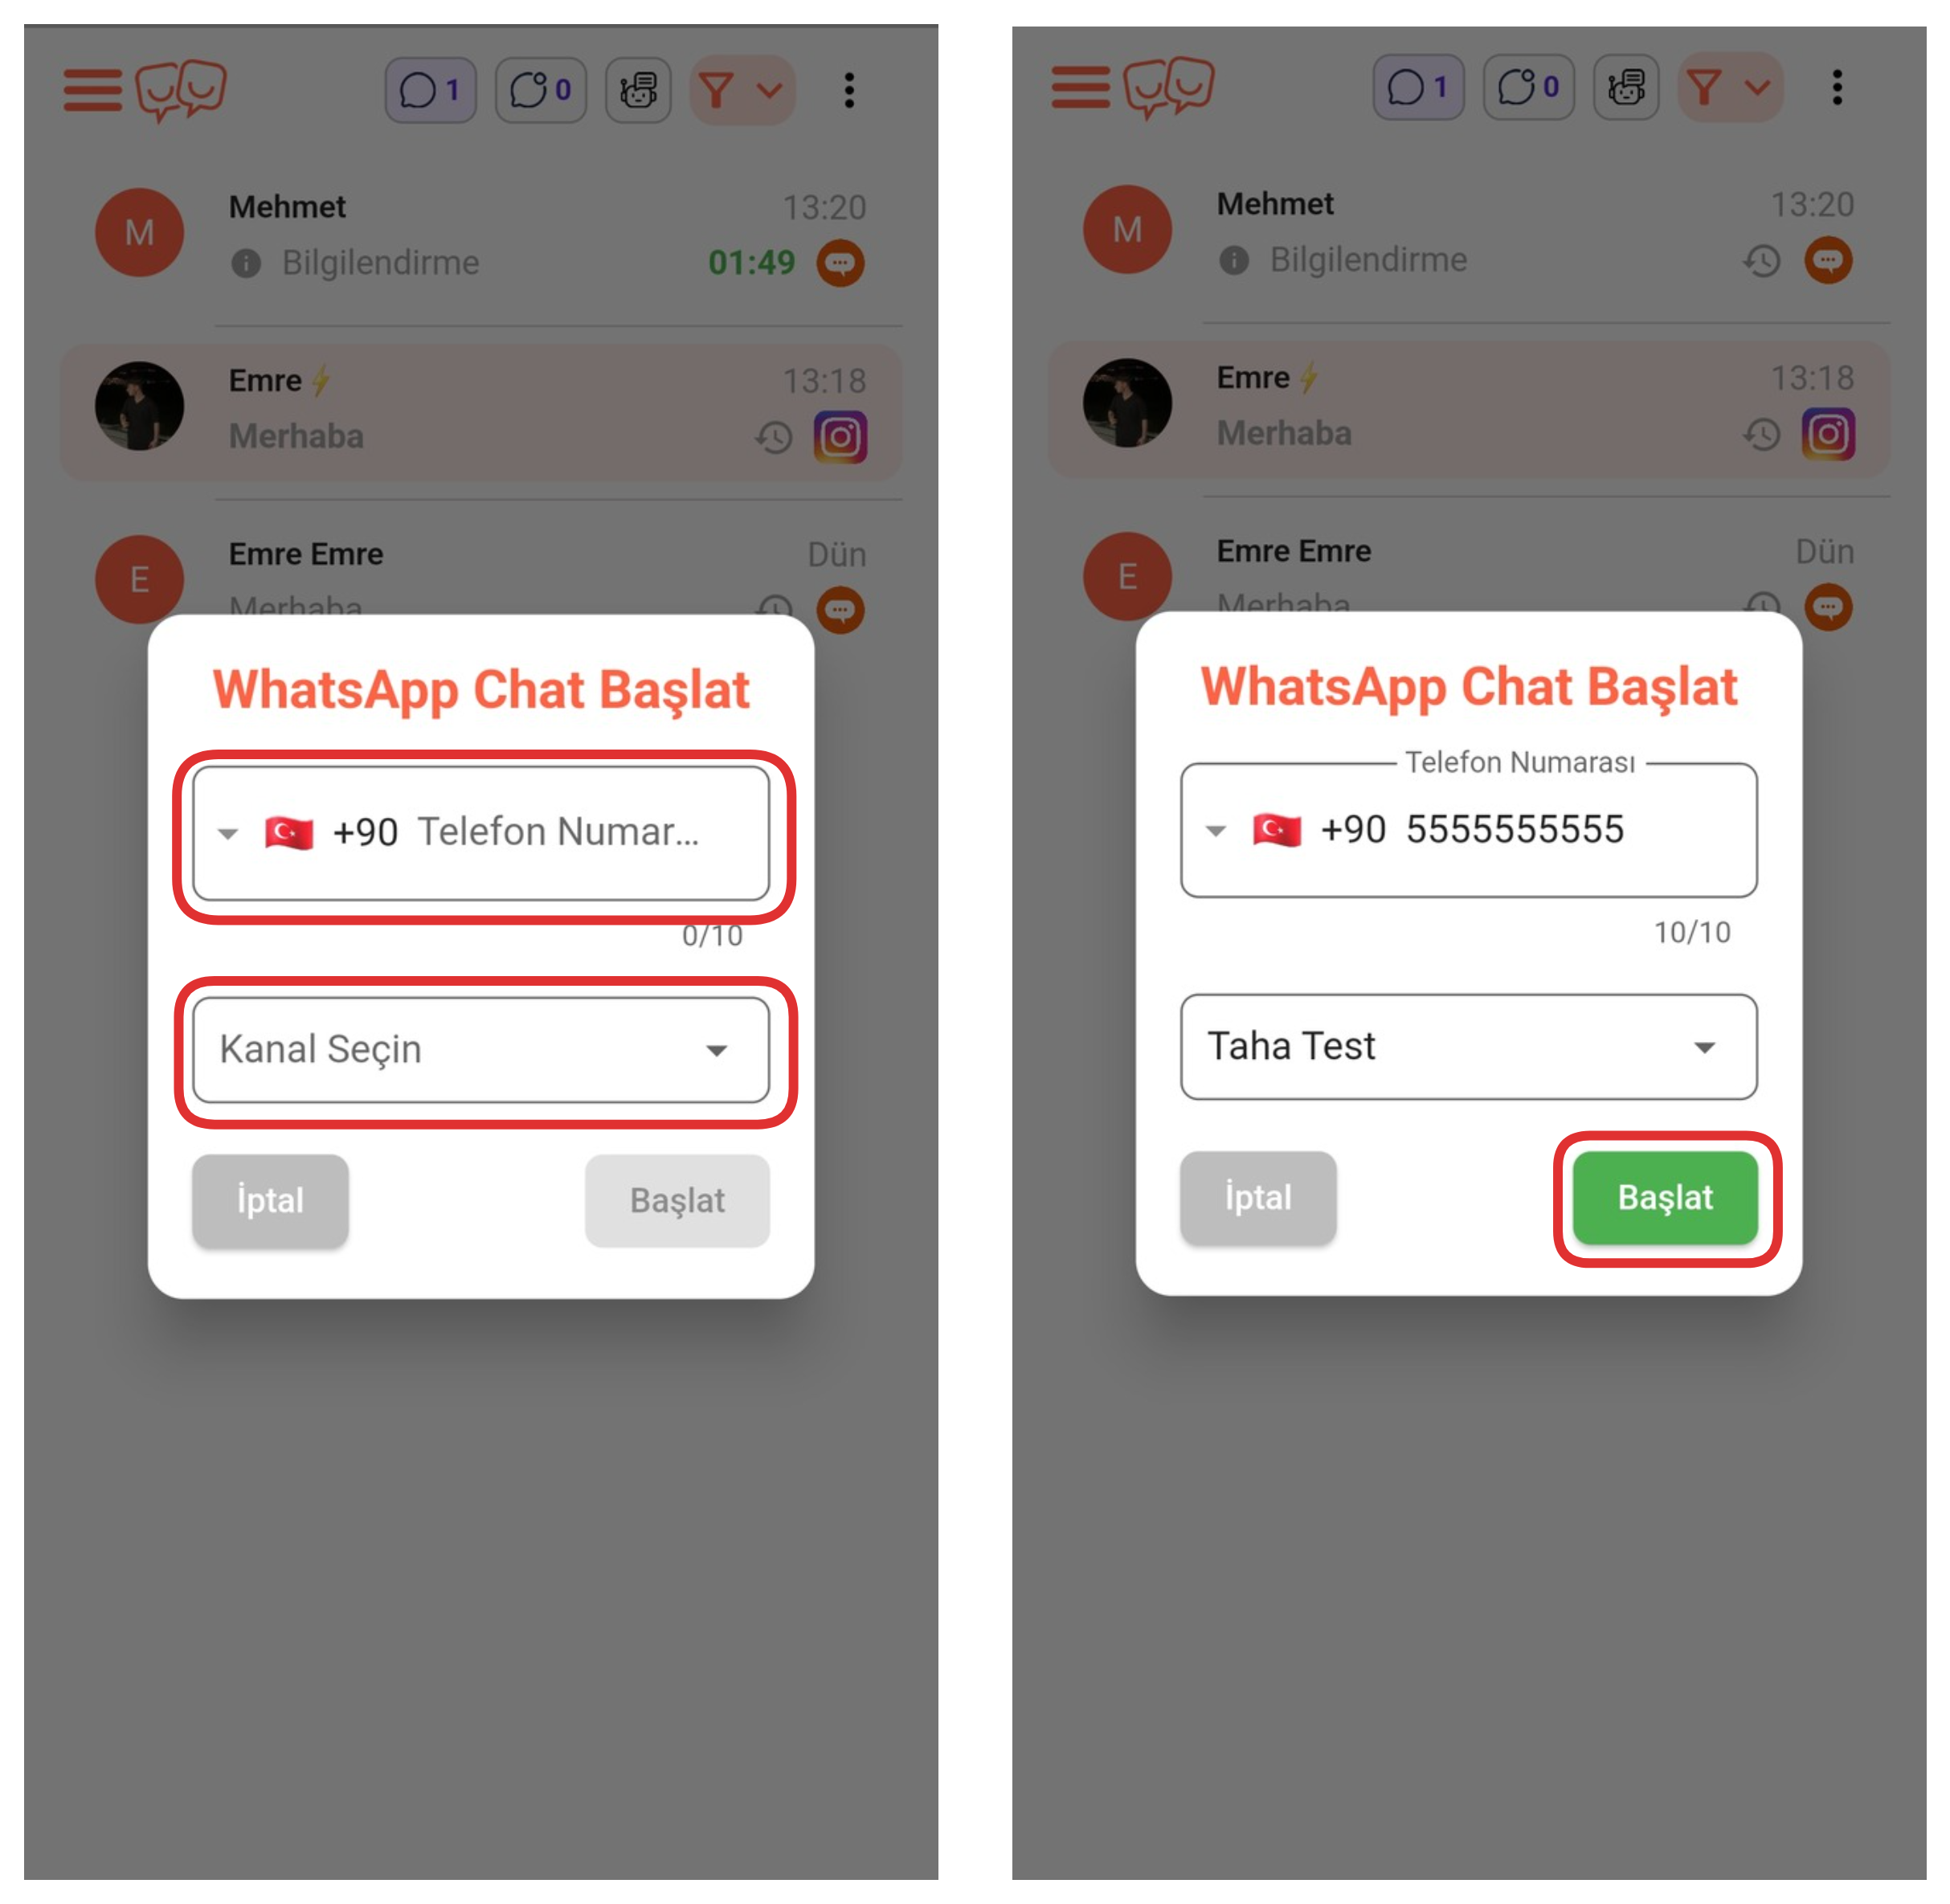
After clicking the "Start WhatsApp Chat" option from the settings menu, enter the phone number of the person you want to start a chat with in the field at the top. Then, select your WhatsApp channel from the "Select Channel" dropdown; the conversation will take place through the line connected to the channel you selected. After filling in all fields, you can start the chat by clicking the Start button.
2-) Notifications
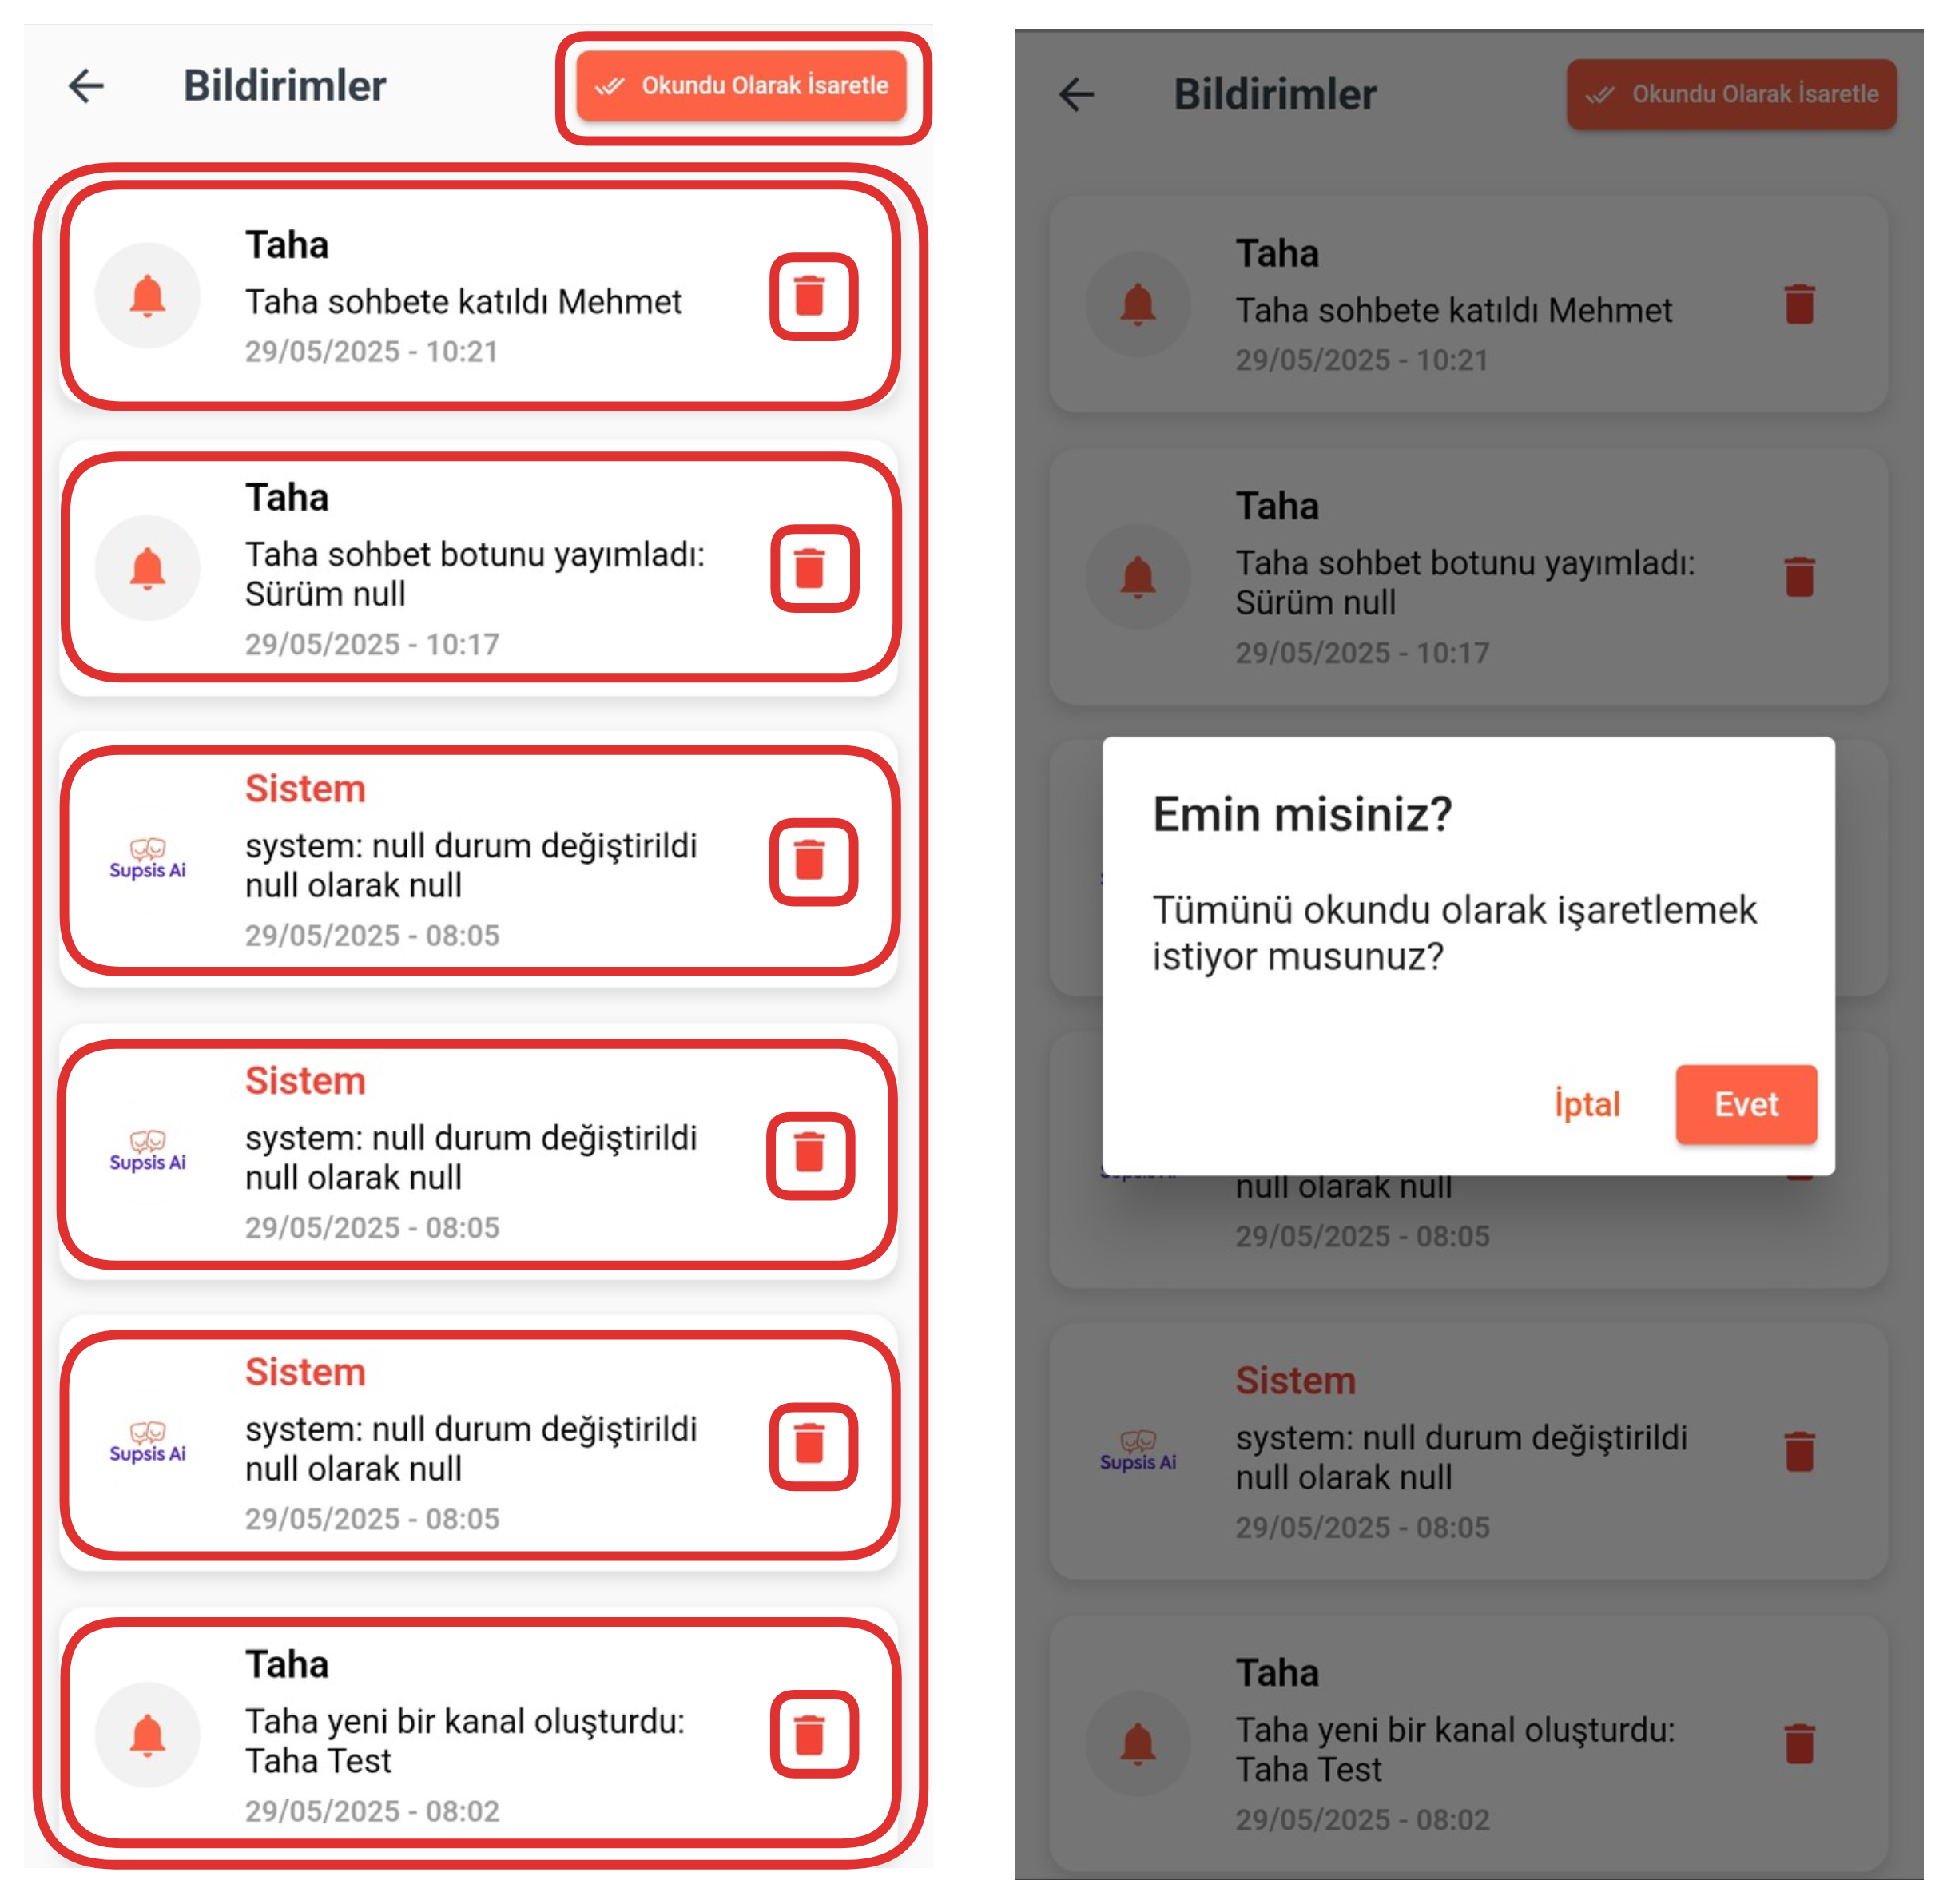
The notifications section lists all the notifications you have previously received on your phone here, providing you with a collective view. If you want to delete a notification, just click the Trash icon next to the relevant notification. Additionally, if you want to mark all notifications as read collectively, click the "Mark as Read" button in the upper right corner. You can mark all notifications as read by confirming Yes in the "Are you sure?" warning that appears.
3-) Mark All as Read
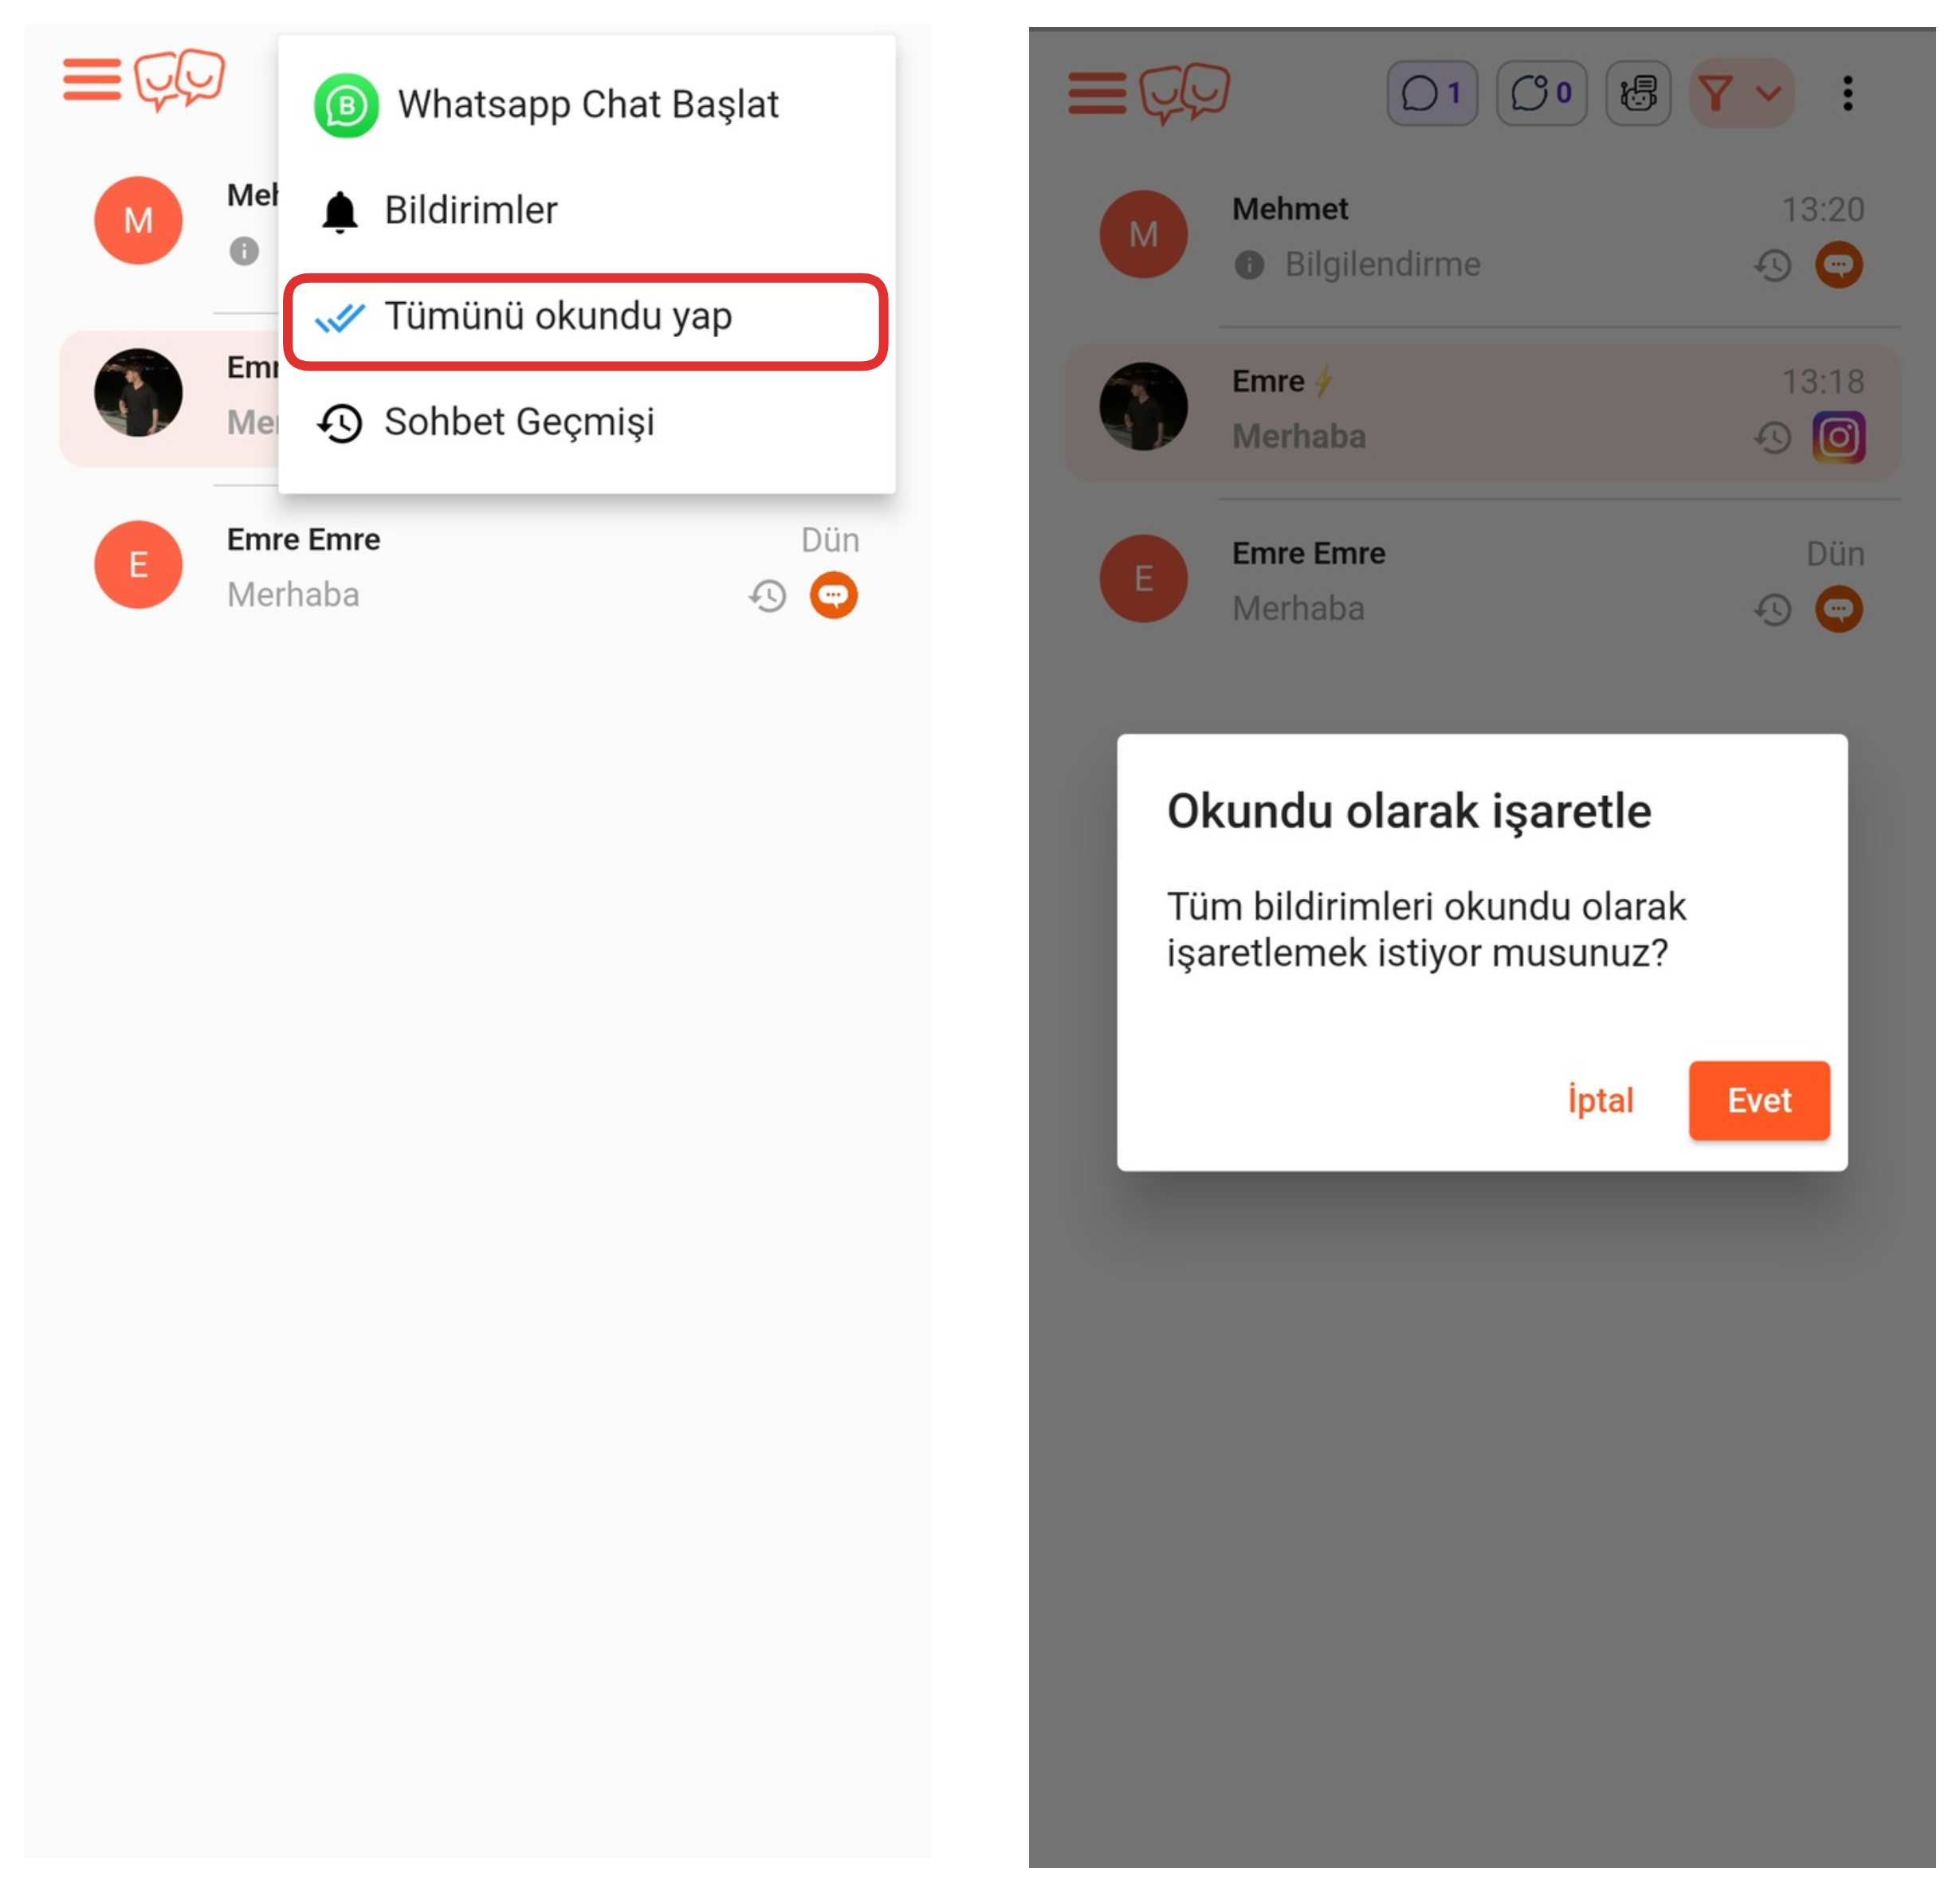
Click the "Mark All as Read" option from the settings menu and say Yes in the confirmation window in the opened modal to mark all chats as read.
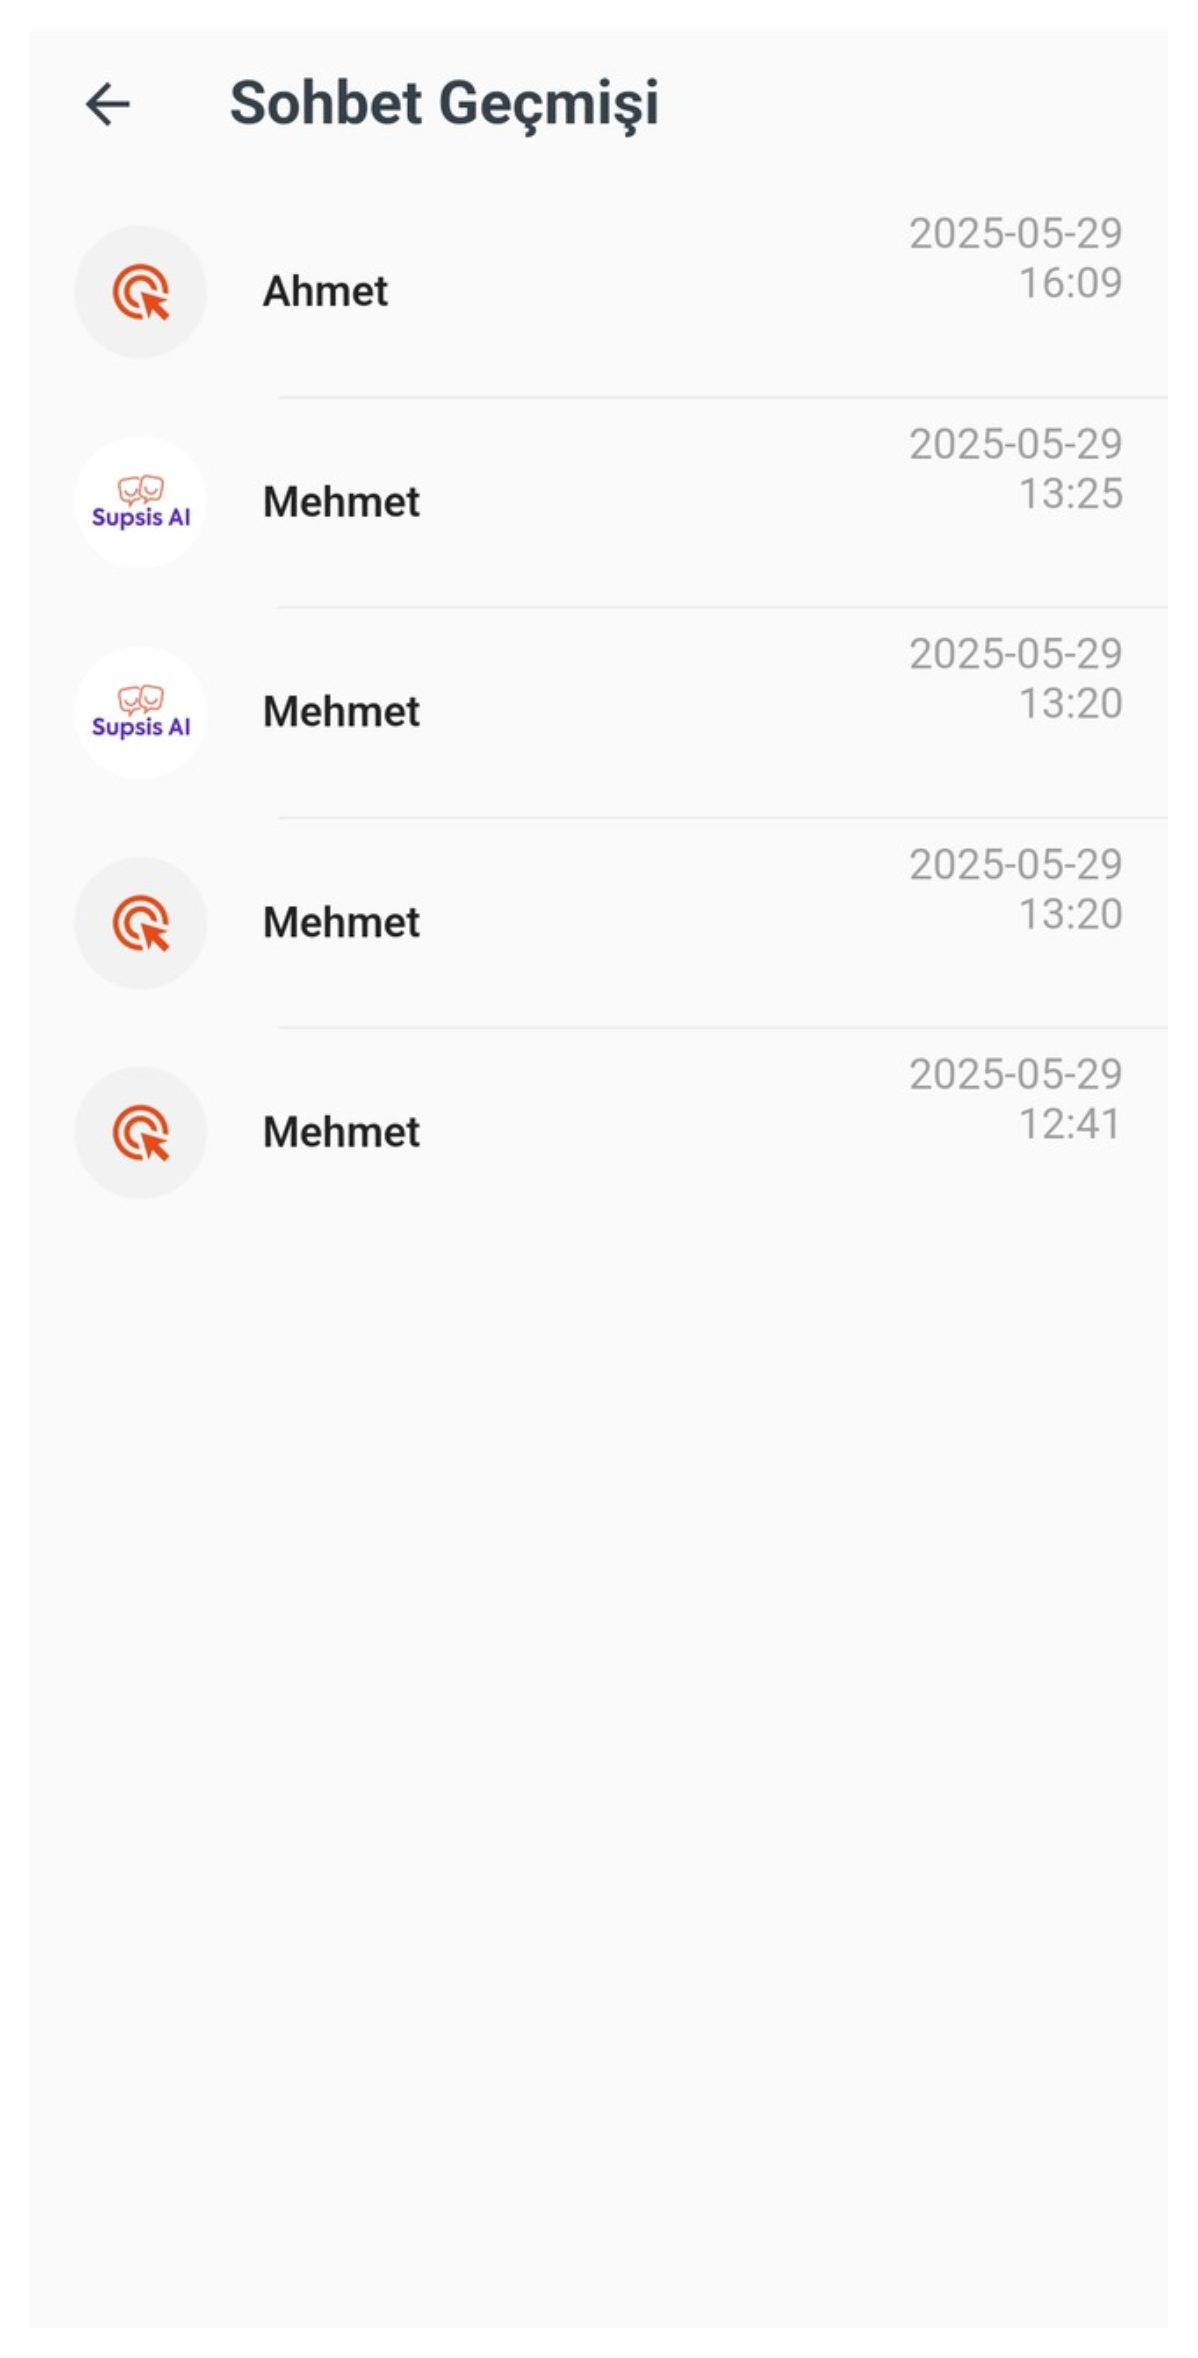
4-) Chat History
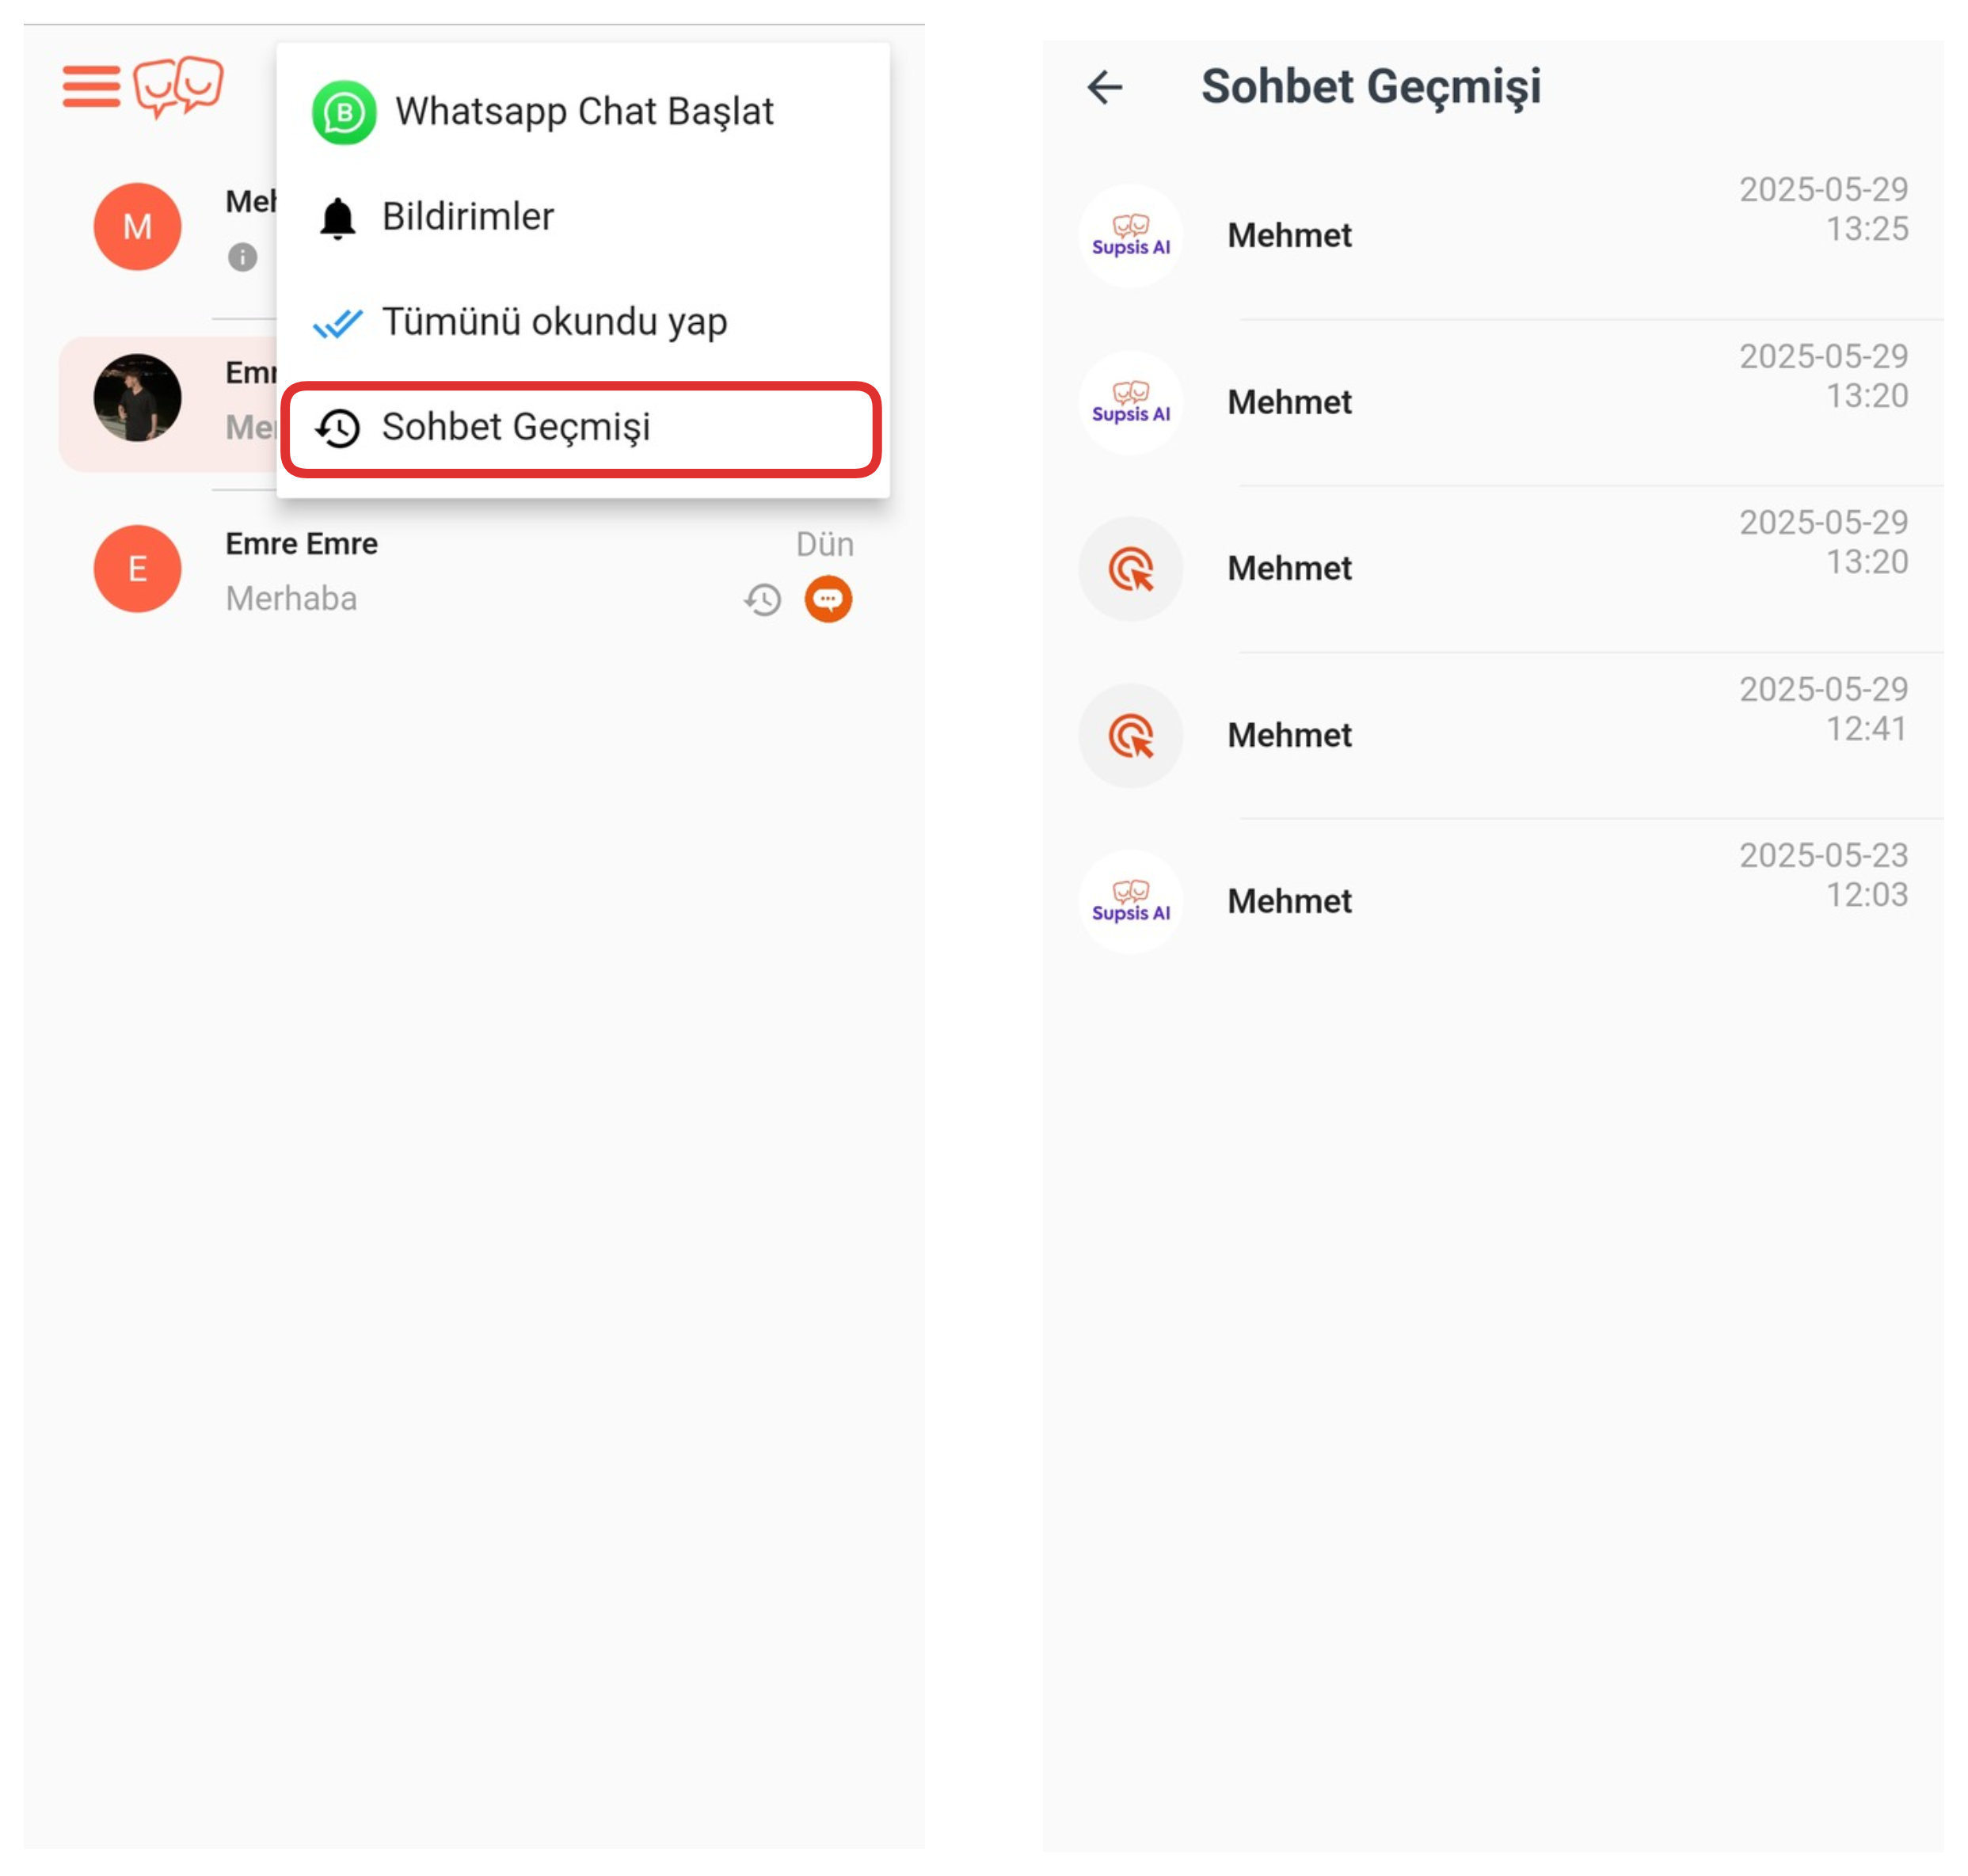
By clicking the "Chat History" option from the settings menu, you can view all your previous chat history. You can access the details and message history of the relevant chat by clicking on the chat whose details and content you want to examine.
6-) Chat
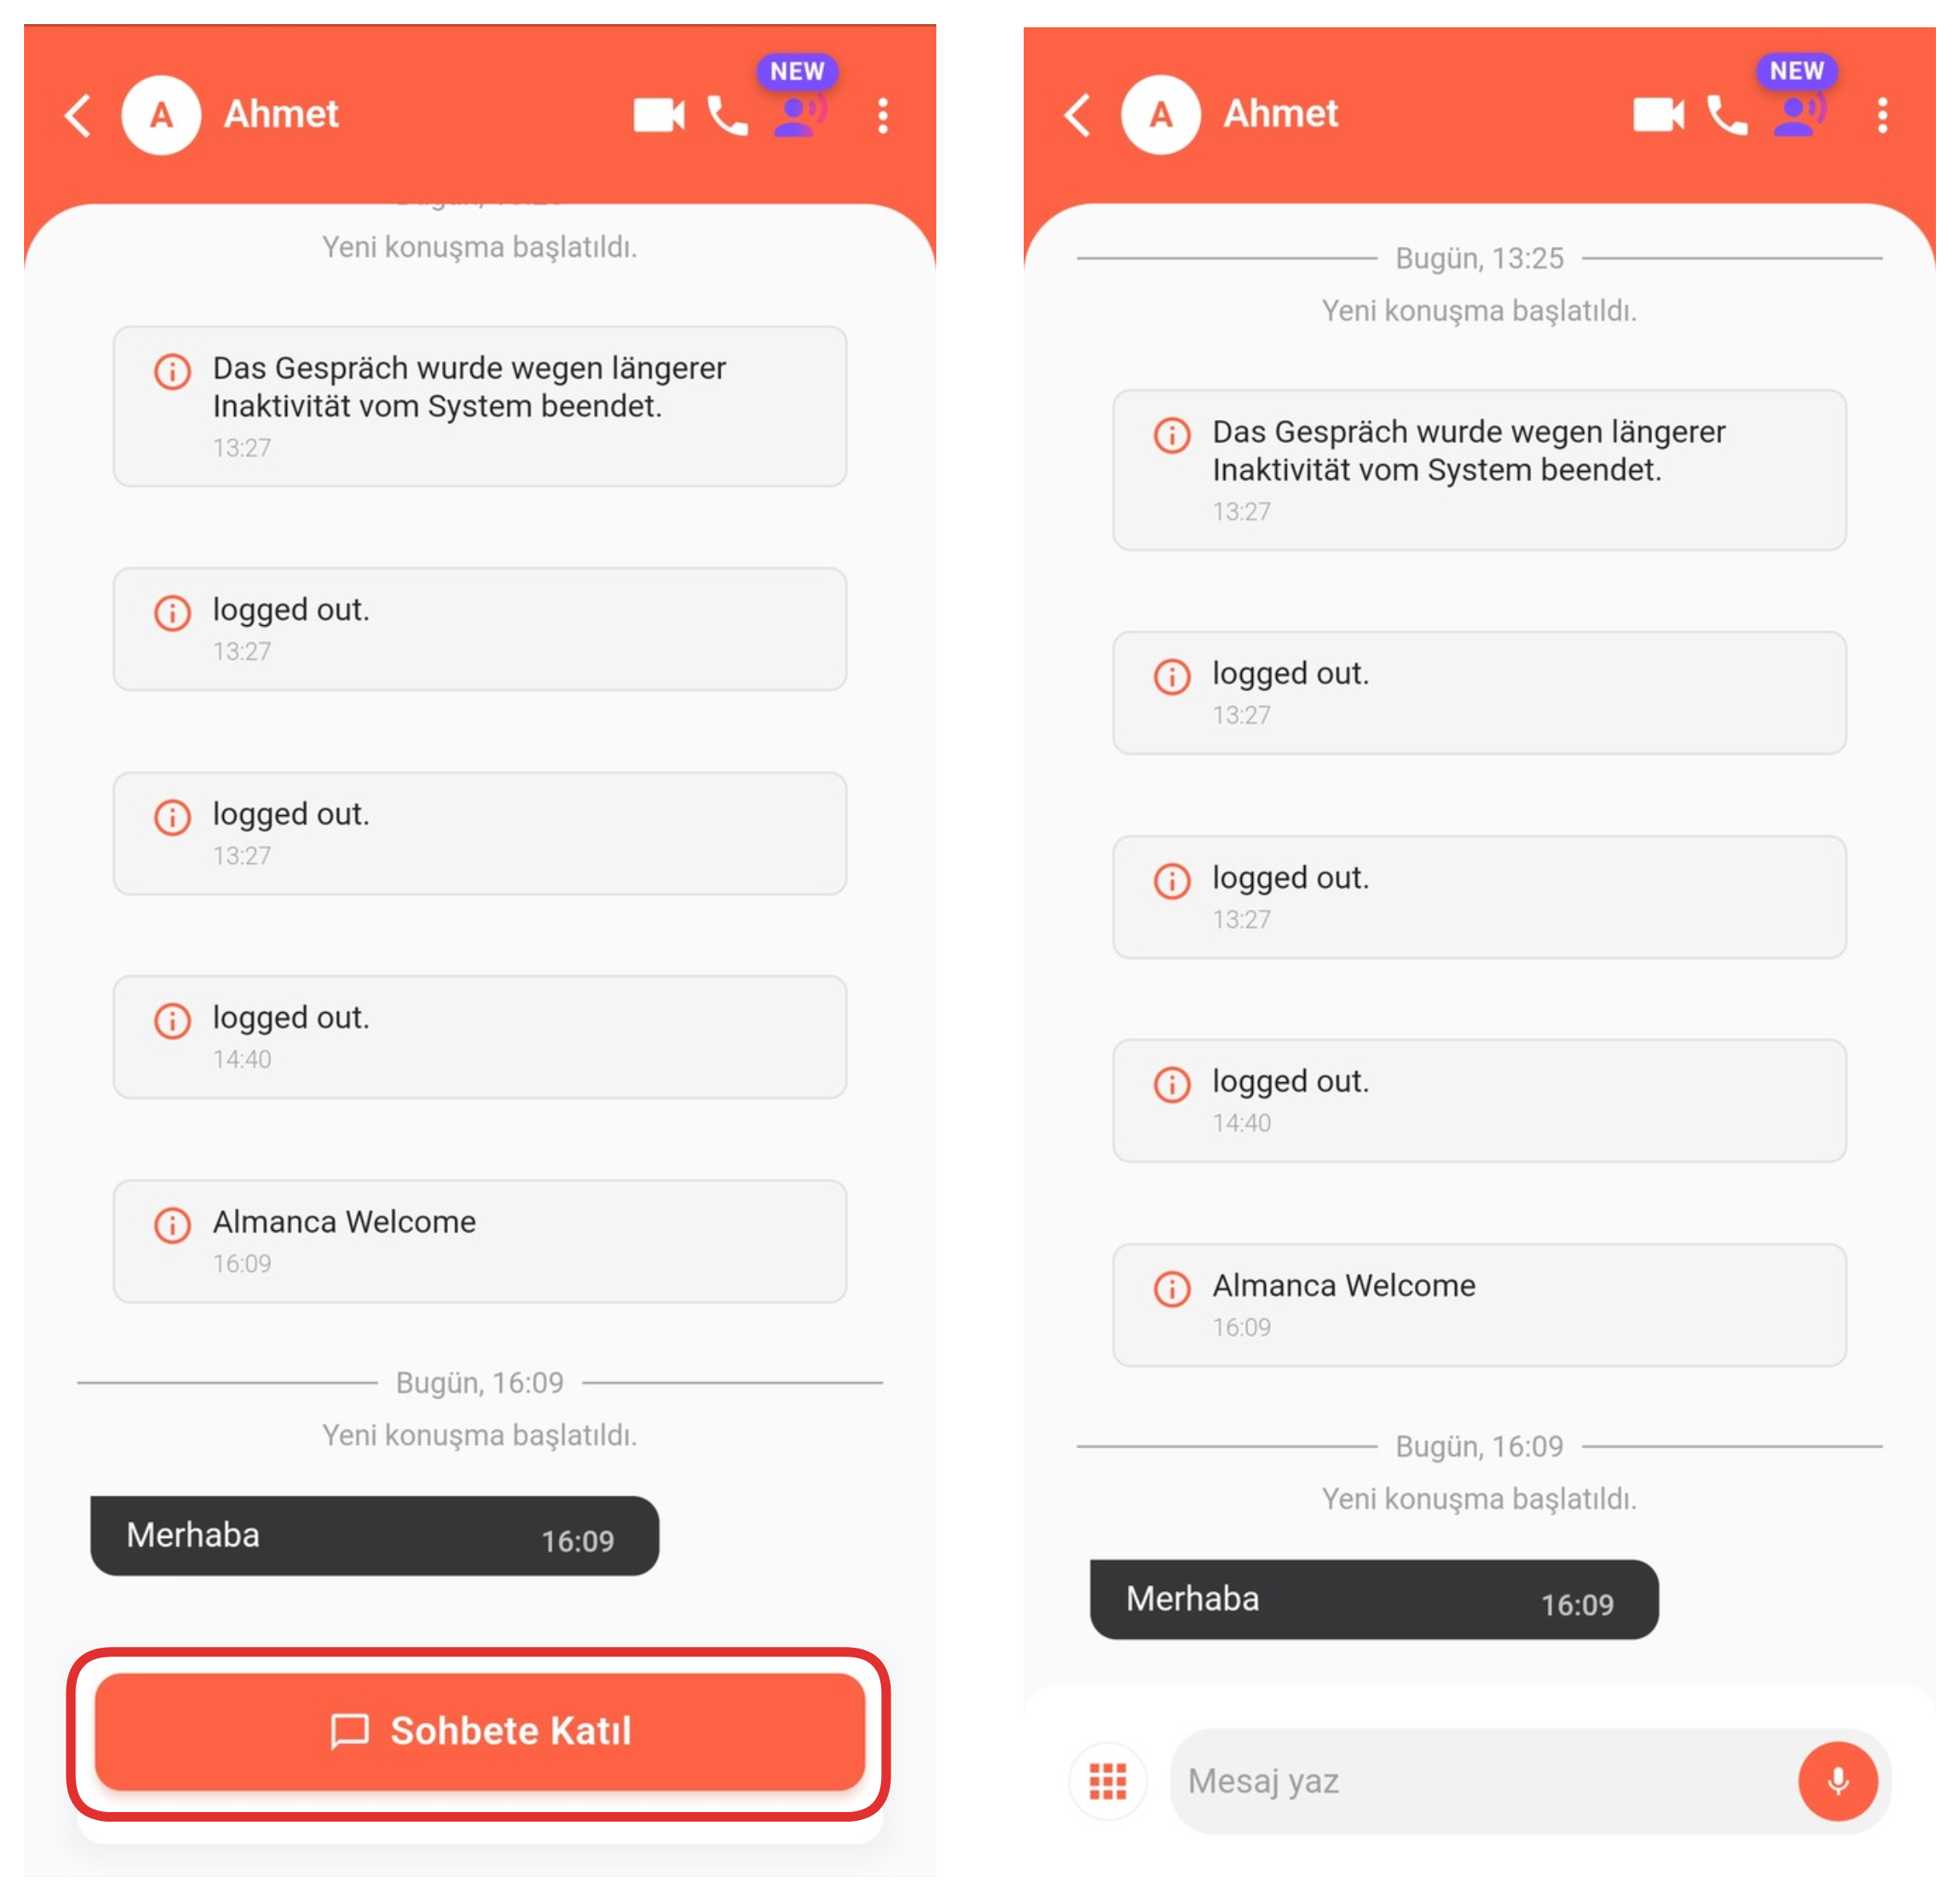
After clicking on the chat you want, if the chat is not on you, first join the chat by clicking the "Join Chat" button that appears at the bottom.

Chat Elements:
- Video Call
- Voice Call
- AI Voice Agent
- Chat Settings
- Voice Recording
- Translation
- AI Text Editor
- File Attachment
- Send Image
- Ready Contents
- Hold Chat
- Voice to Text
1-) Video Call
With this option, you can make video calls directly through the application. Thanks to the video call feature, you can communicate face-to-face with the other party instantly and provide support or information exchange more effectively and quickly. This feature is quite useful especially in situations that require one-on-one interaction.
2-) Voice Call
With this feature, you can make voice calls directly through the application. The voice call feature allows you to communicate with users more quickly and effectively in situations where written communication is not sufficient. You can perform support, information, or guidance operations instantly in voice format.
3-) AI Voice Agent
With this feature, you can call the person you're chatting with through an AI-powered voice agent using a realistic voice. This call is automatically made by artificial intelligence according to predefined scenarios. To use this feature, you need to create an AI Voice Agent beforehand. The AI voice agent provides a human-like conversation experience, making interactions more effective and professional.
4-) Chat Settings
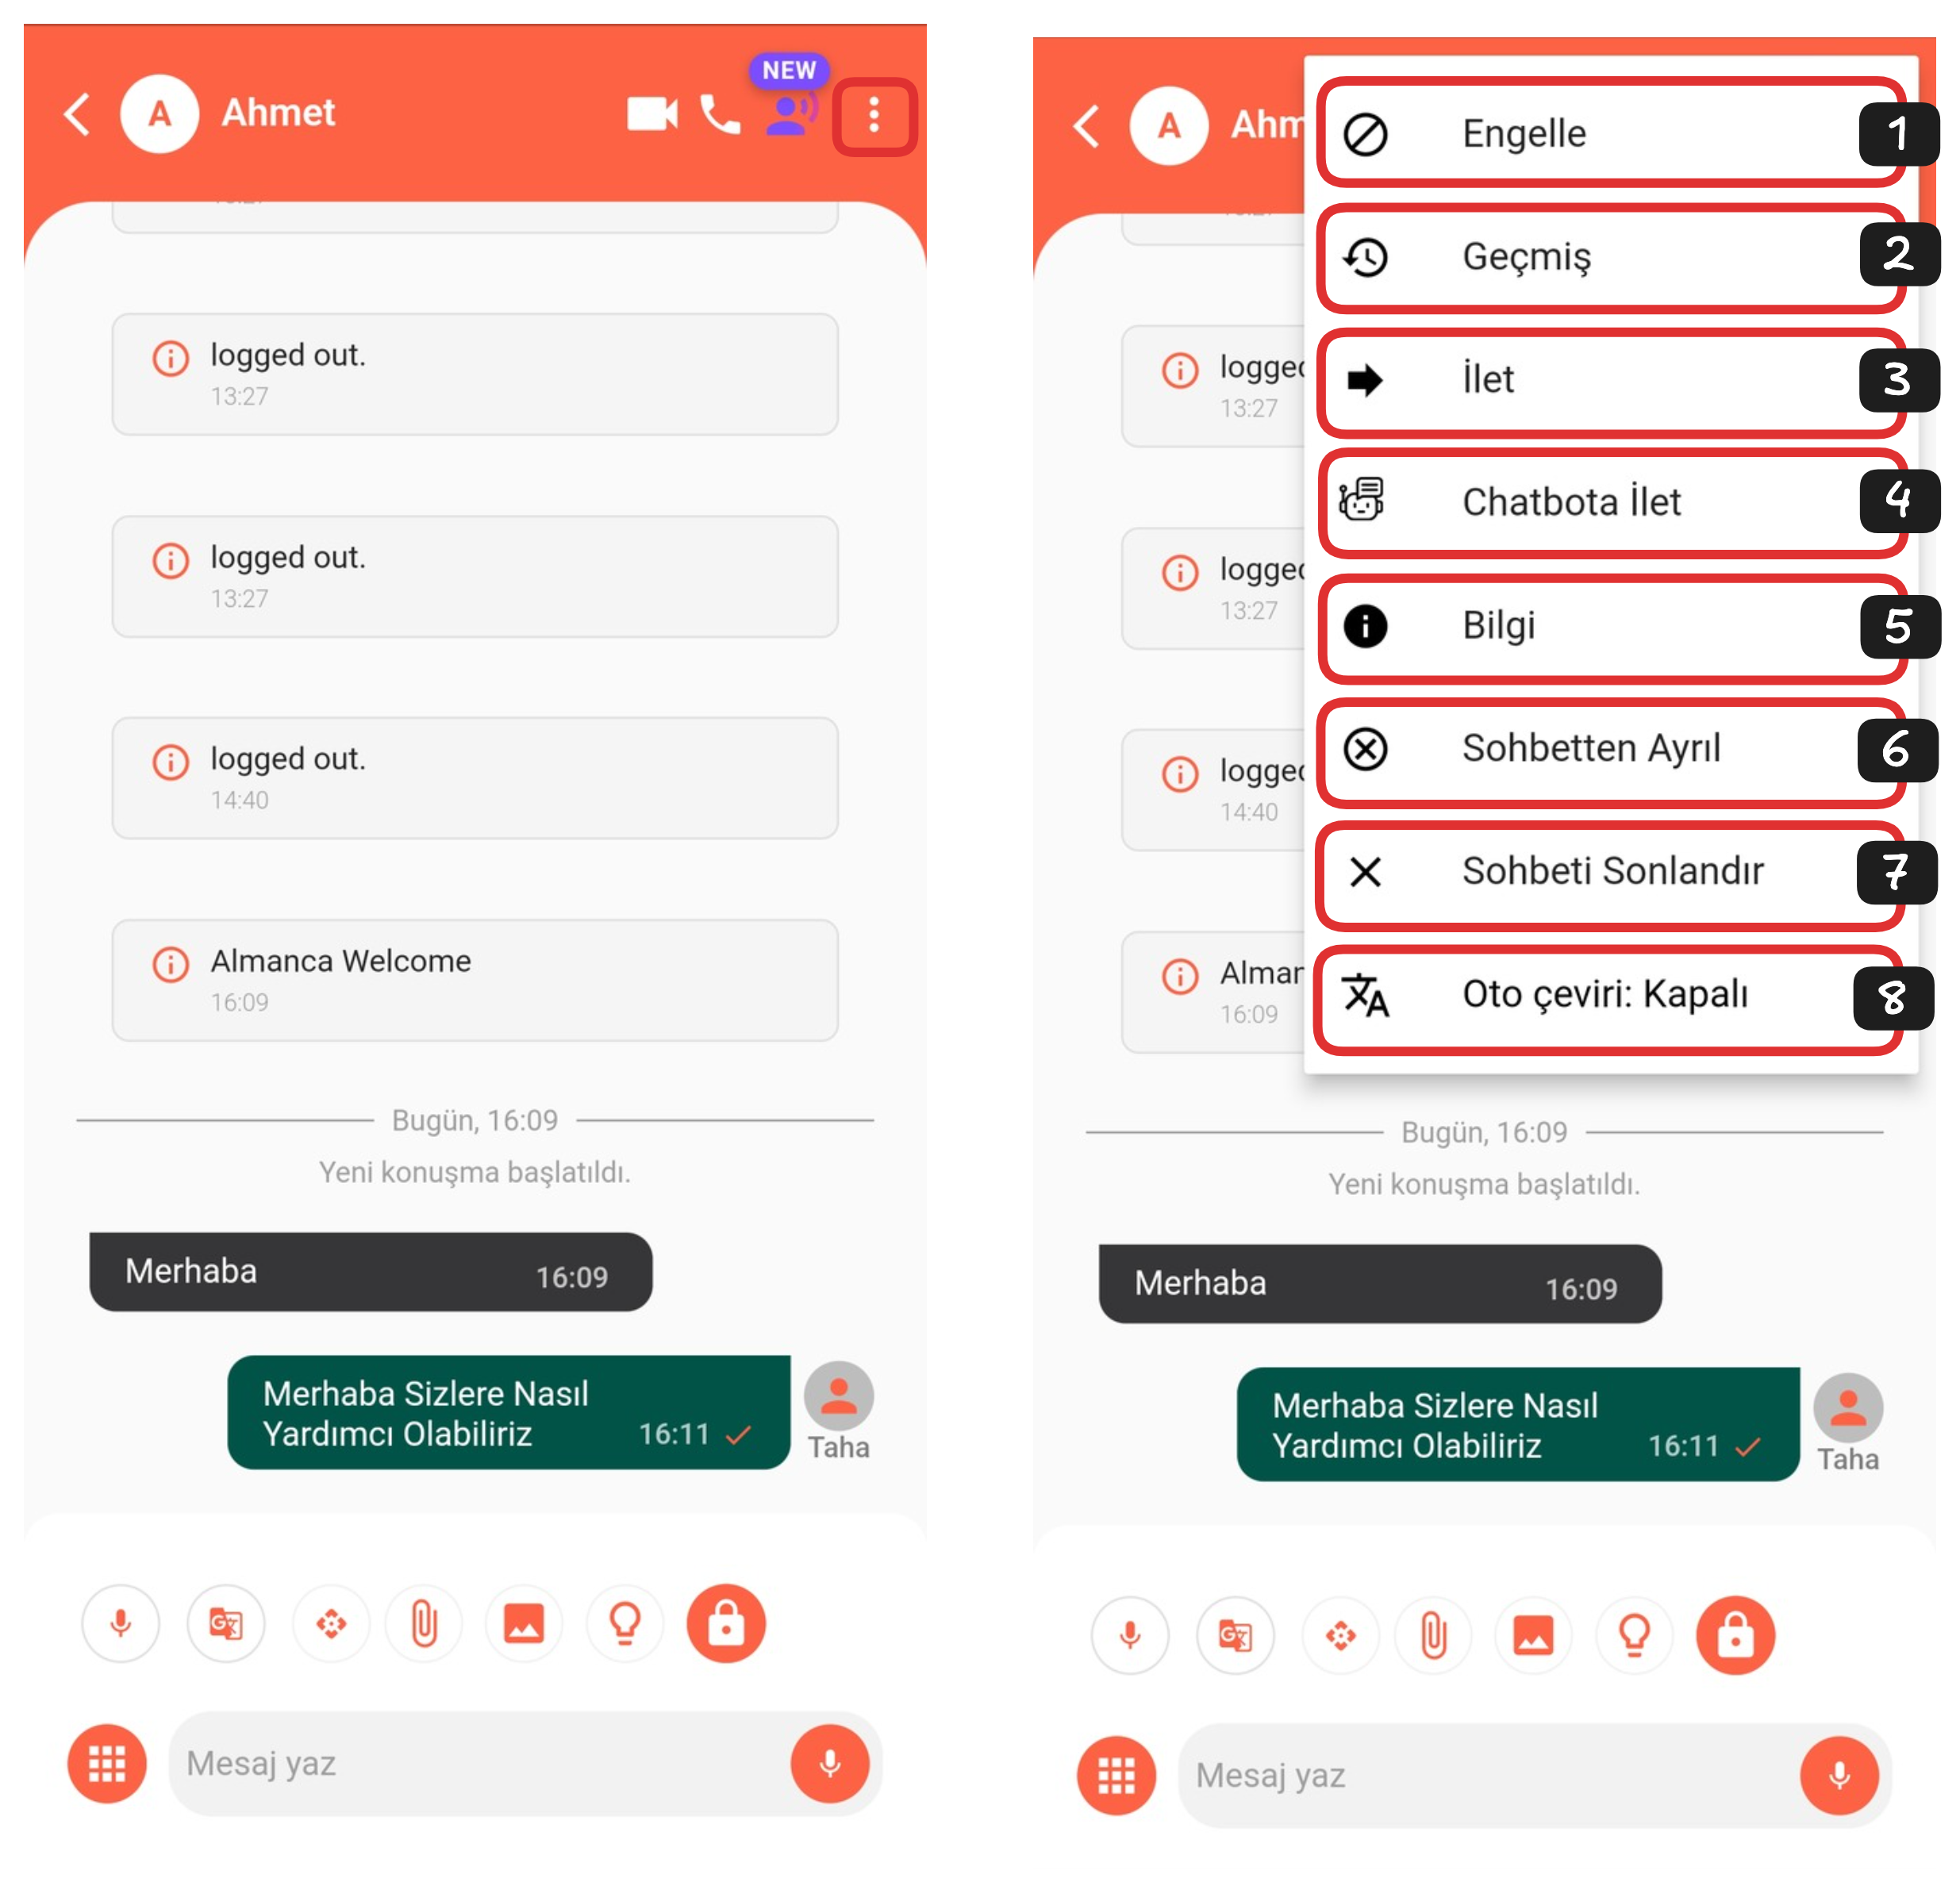
You can easily perform many operations through chat settings. Thanks to these settings, you can manage your interactions with users, direct the chat flow, and make your support processes more efficient.
-
Block Person
You can prevent unwanted communication by blocking the user from sending you messages. -
View Chat History
 You can examine all your previous correspondence with the person in detail.
 -
Forward to Another Representative
 You can delegate the communication by forwarding the chat to another representative you deem appropriate.
 -
Forward to Chatbot
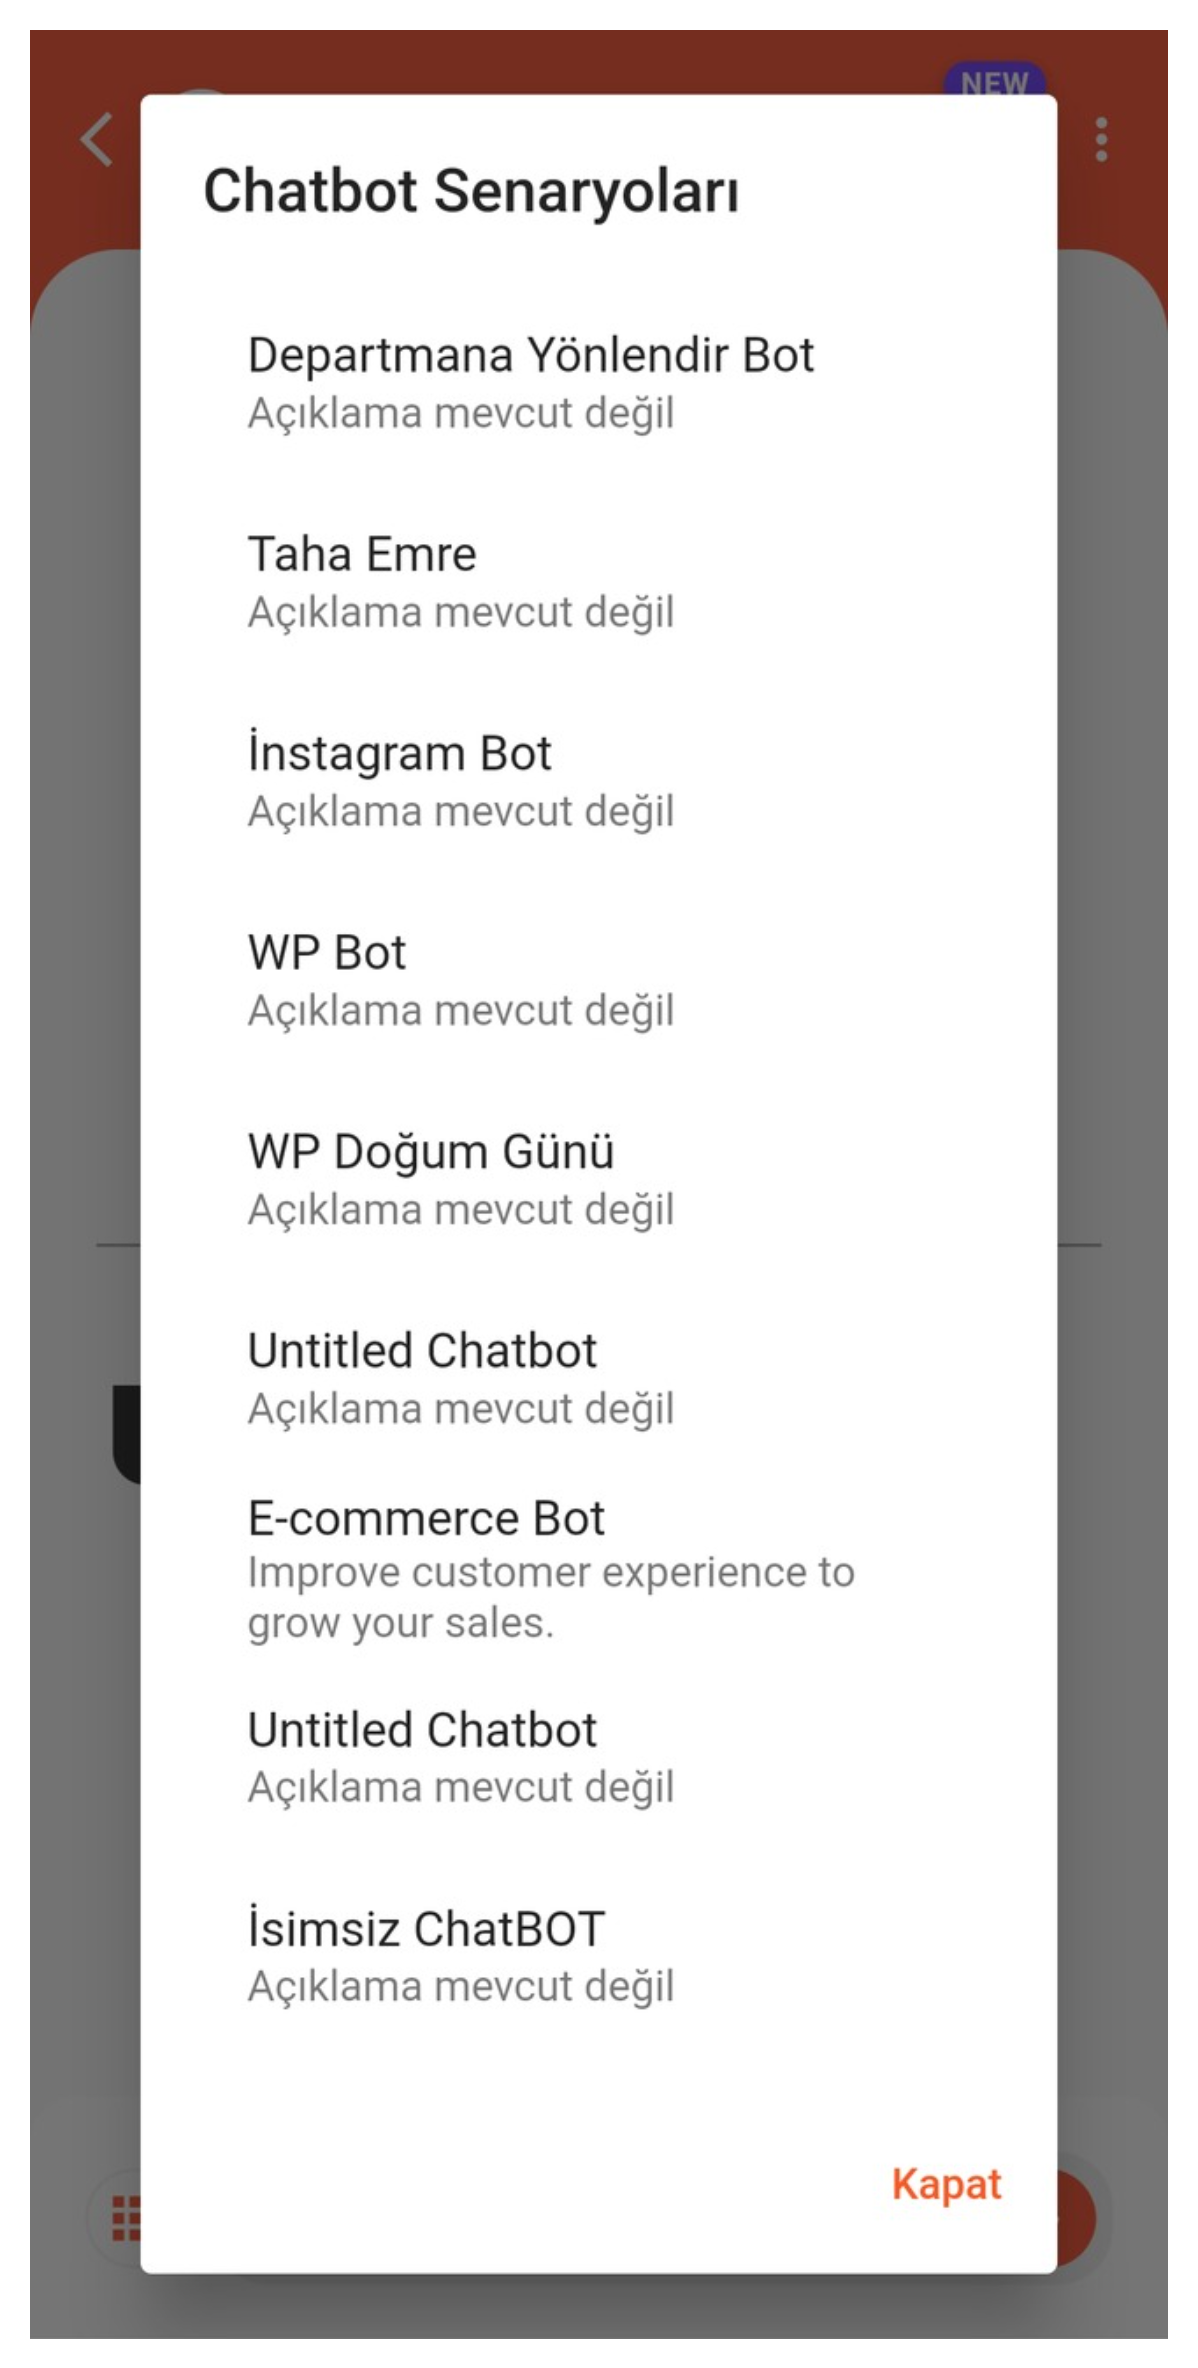 You can continue the process with automatic responses by forwarding the chat from manual support to chatbot.
 -
View Person Information
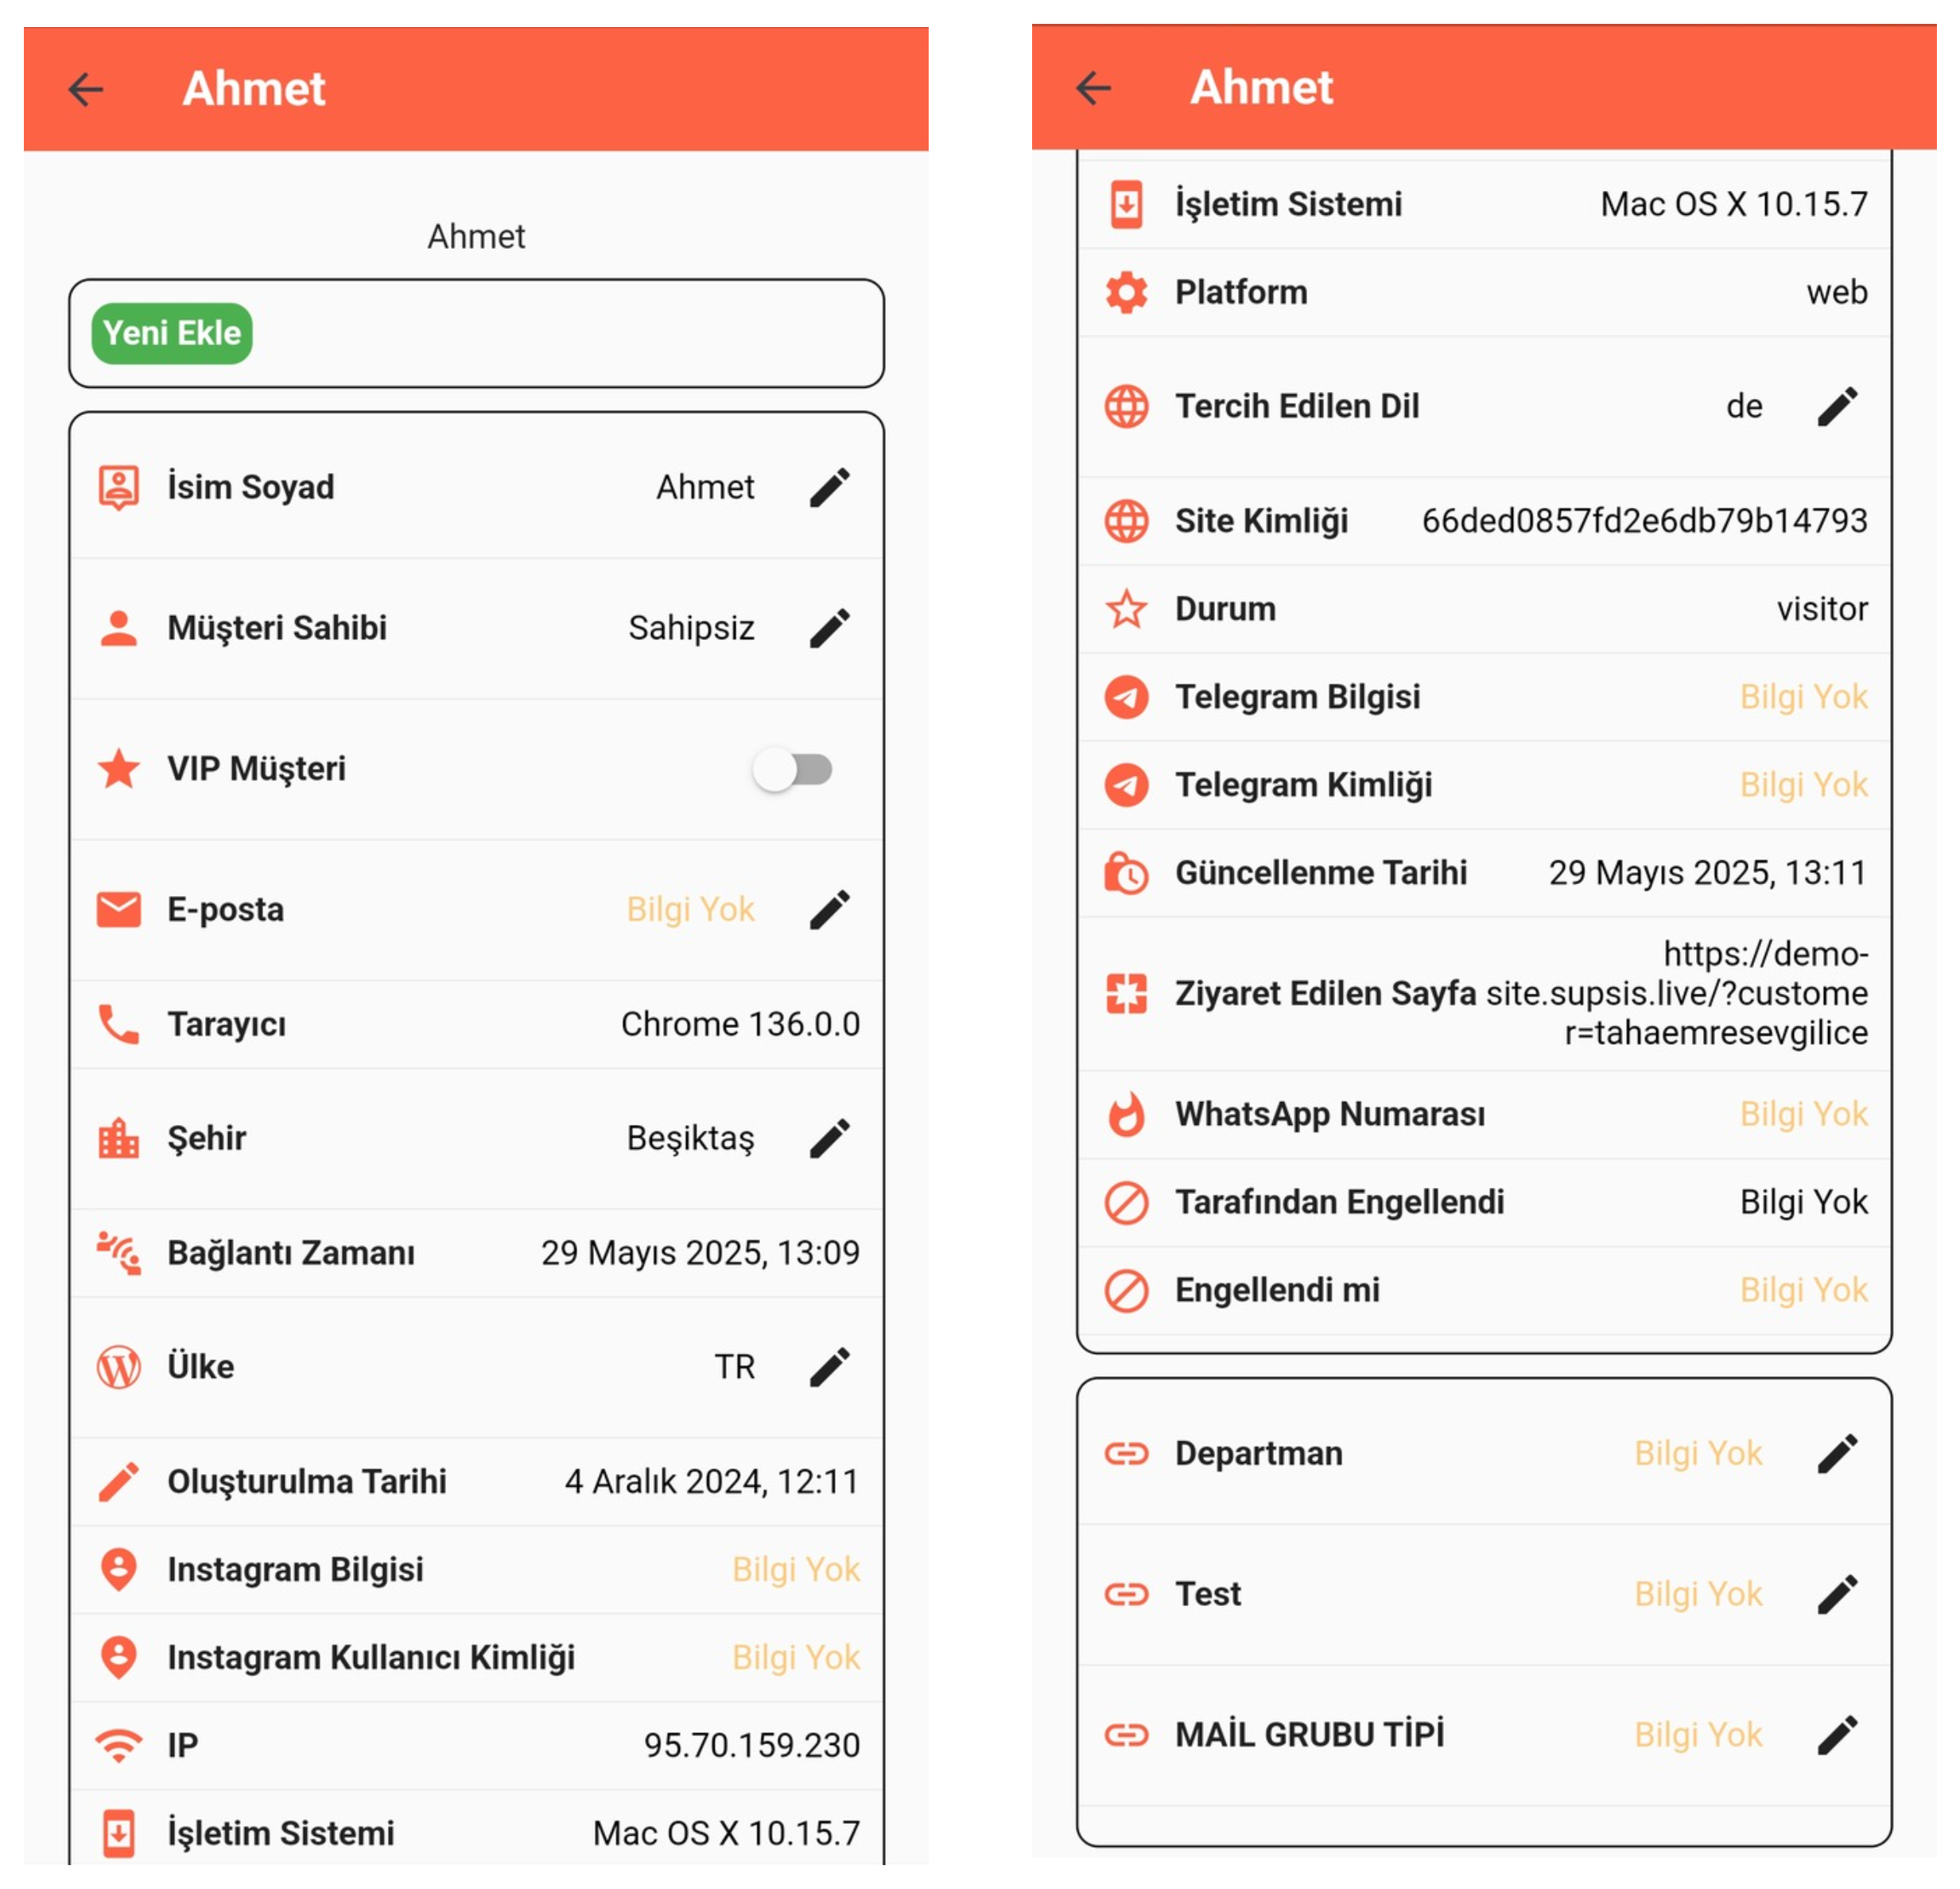 You can see the user's information such as profile, interaction history, tasks, and media.
 -
Leave Chat
You can remove yourself from the conversation without ending the chat. -
End Chat
You can mark the chat as completed by closing the active conversation. -
Turn Auto-Translate Feature On/Off
You can activate or deactivate the feature that automatically translates messages coming in different languages.
These options allow representatives to manage chats more effectively and help improve user experience.
5-) Voice Recording
With this feature, you can send voice recordings to the other party through the chat screen. Communicating directly by voice instead of writing saves time, especially in situations that require detailed explanations, and provides more effective communication.
6-) Translation
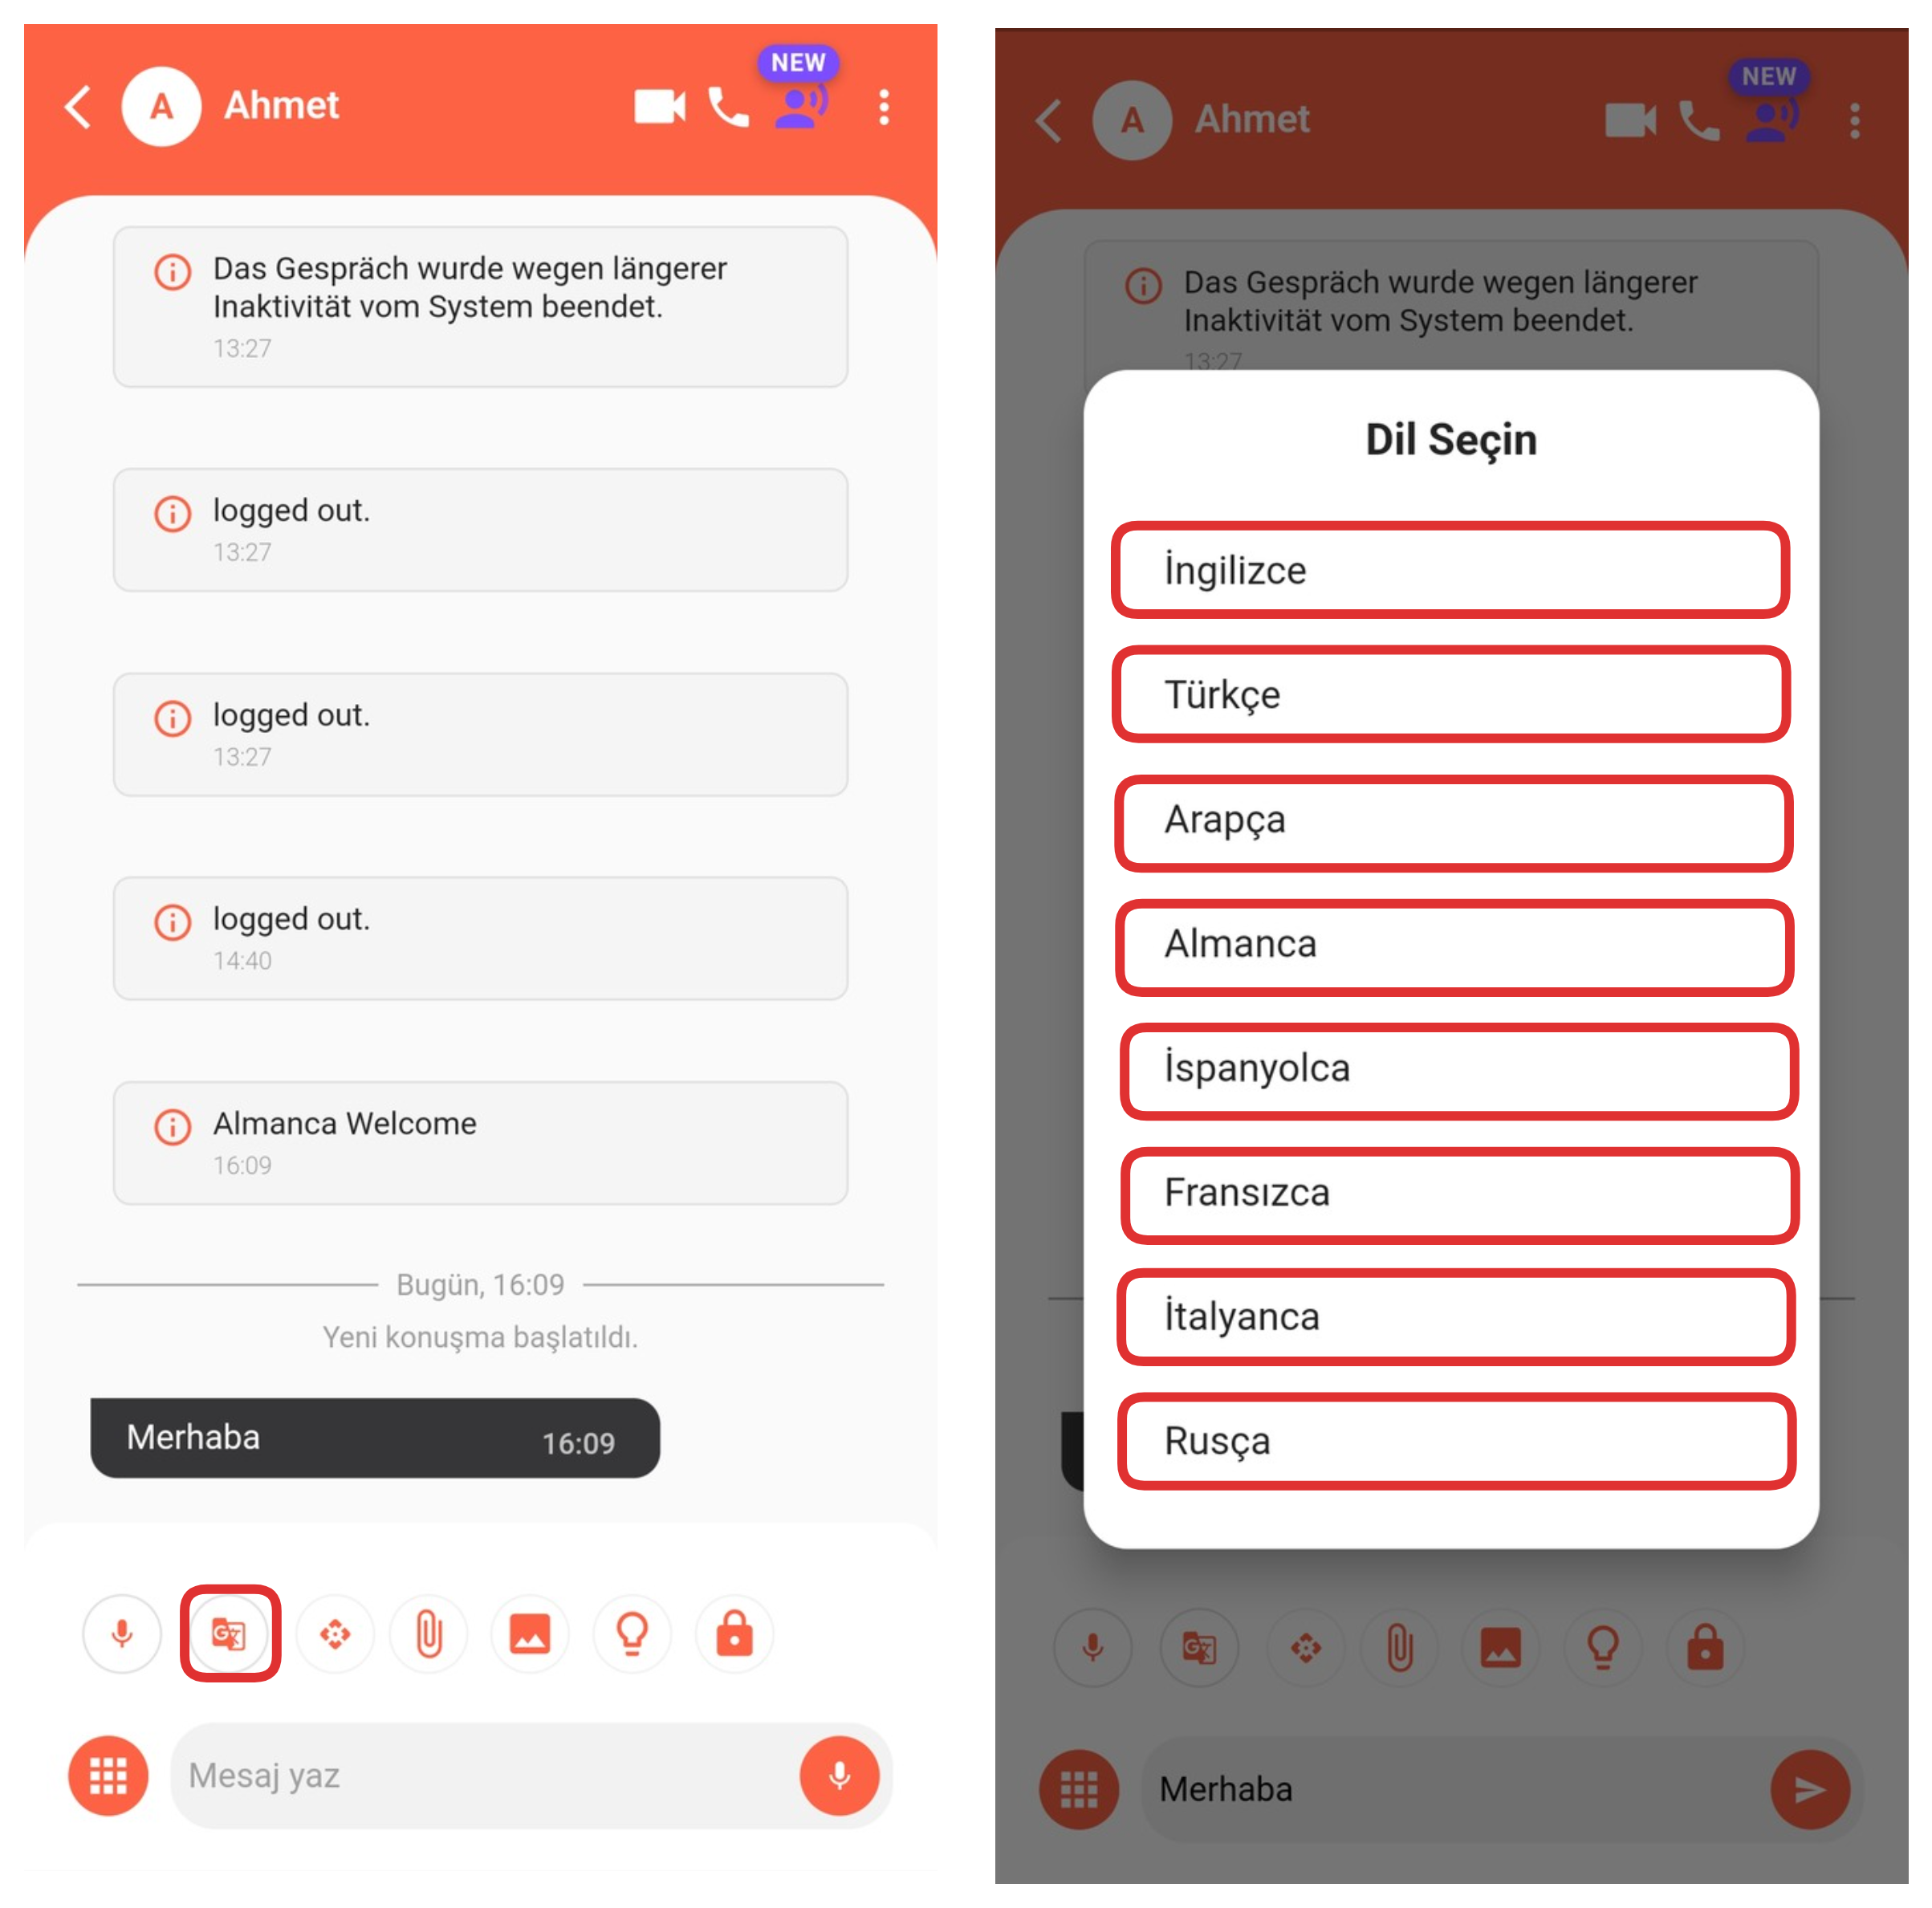
With this feature, you can automatically translate your conversations into 8 different languages simultaneously. The supported languages are: English, Turkish, Arabic, German, Spanish, French, Italian, and Russian. This translation feature facilitates communication with multilingual users and allows you to provide global customer support.
7-) AI Text Editor
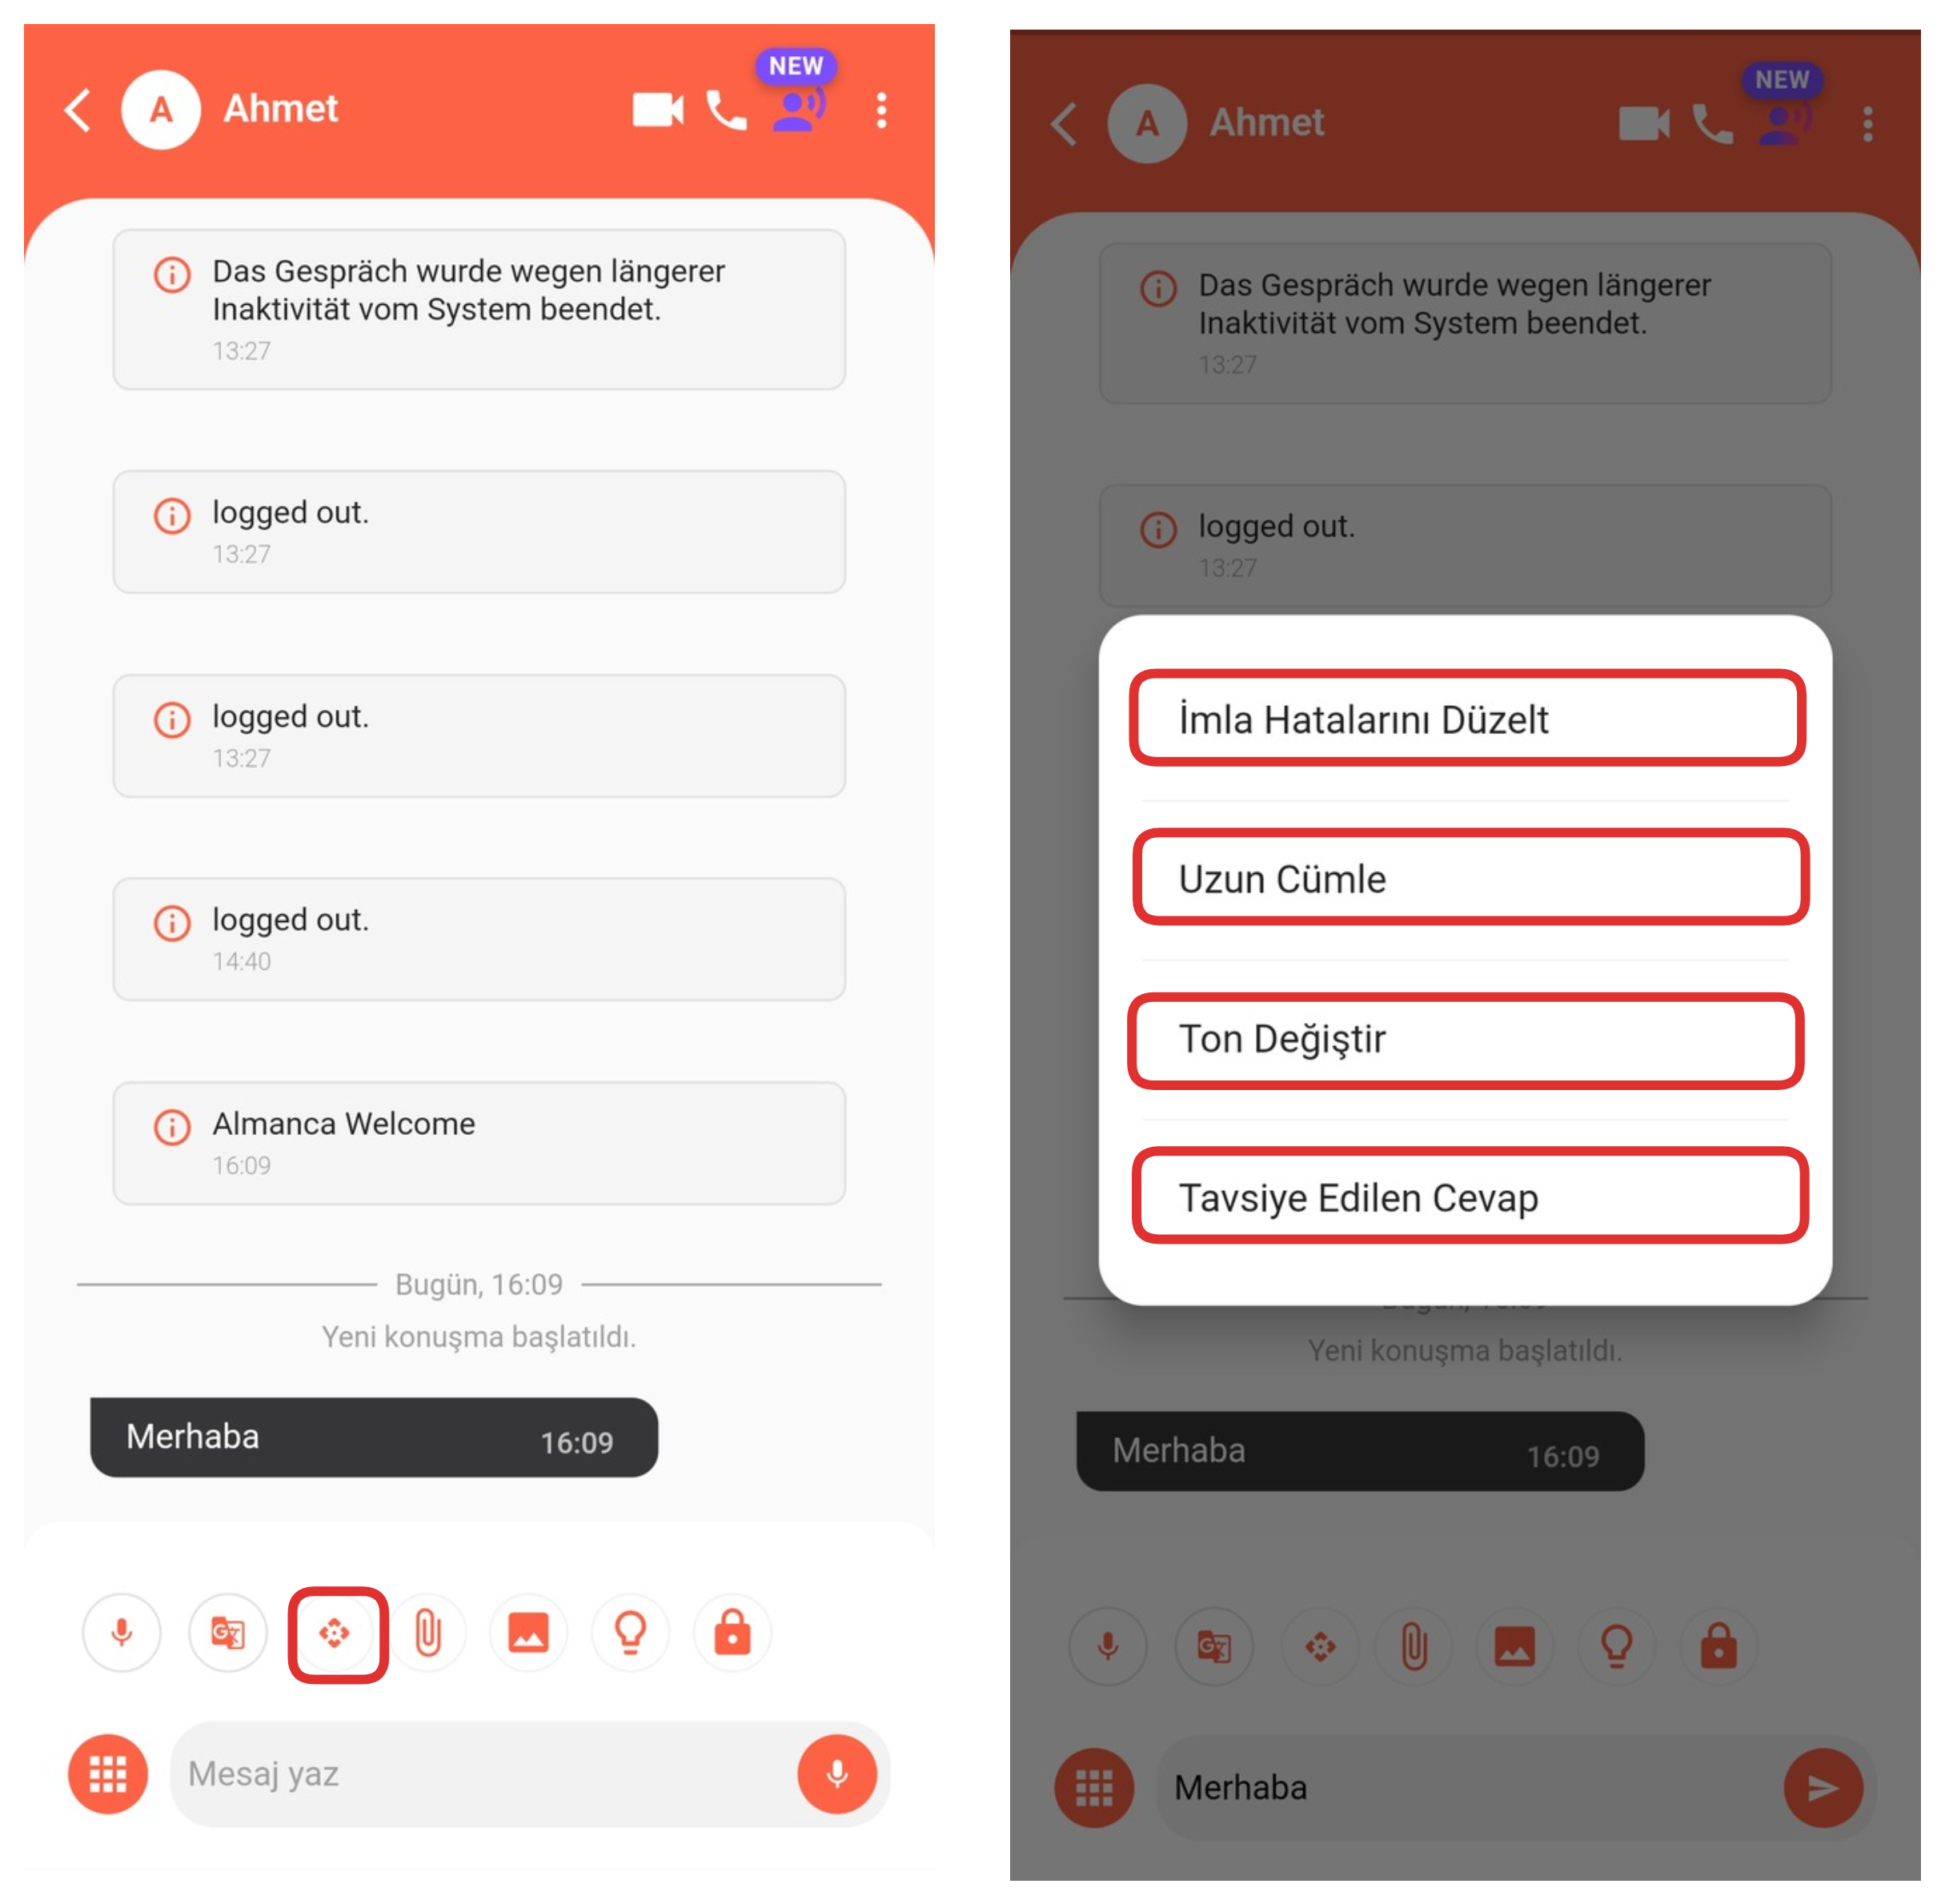
With the AI Text Editor feature, you can easily edit the texts you have written with AI support. With this feature:
-
Spelling and writing errors in your text are automatically corrected,
-
Your short sentences can be made more descriptive and longer,
-
The conversation tone of the message (formal, friendly, neutral, etc.) can be reshaped according to needs,
-
An AI-suggested response can be prepared for the message to be sent.
This way, you can create messages that are more accurate in terms of grammar and more effective in terms of content in your communication.
8-) File Attachment
With this feature, you can share files with the other party. You can quickly and practically transfer information by easily sending images, PDFs, documents, or other file types through the chat screen.
9-) Send Image
With this feature, you can send images to the other party. You can express what you want to tell more clearly by sharing visual content during the chat, and provide more effective communication by supporting support processes with visuals.
10-) Ready Contents
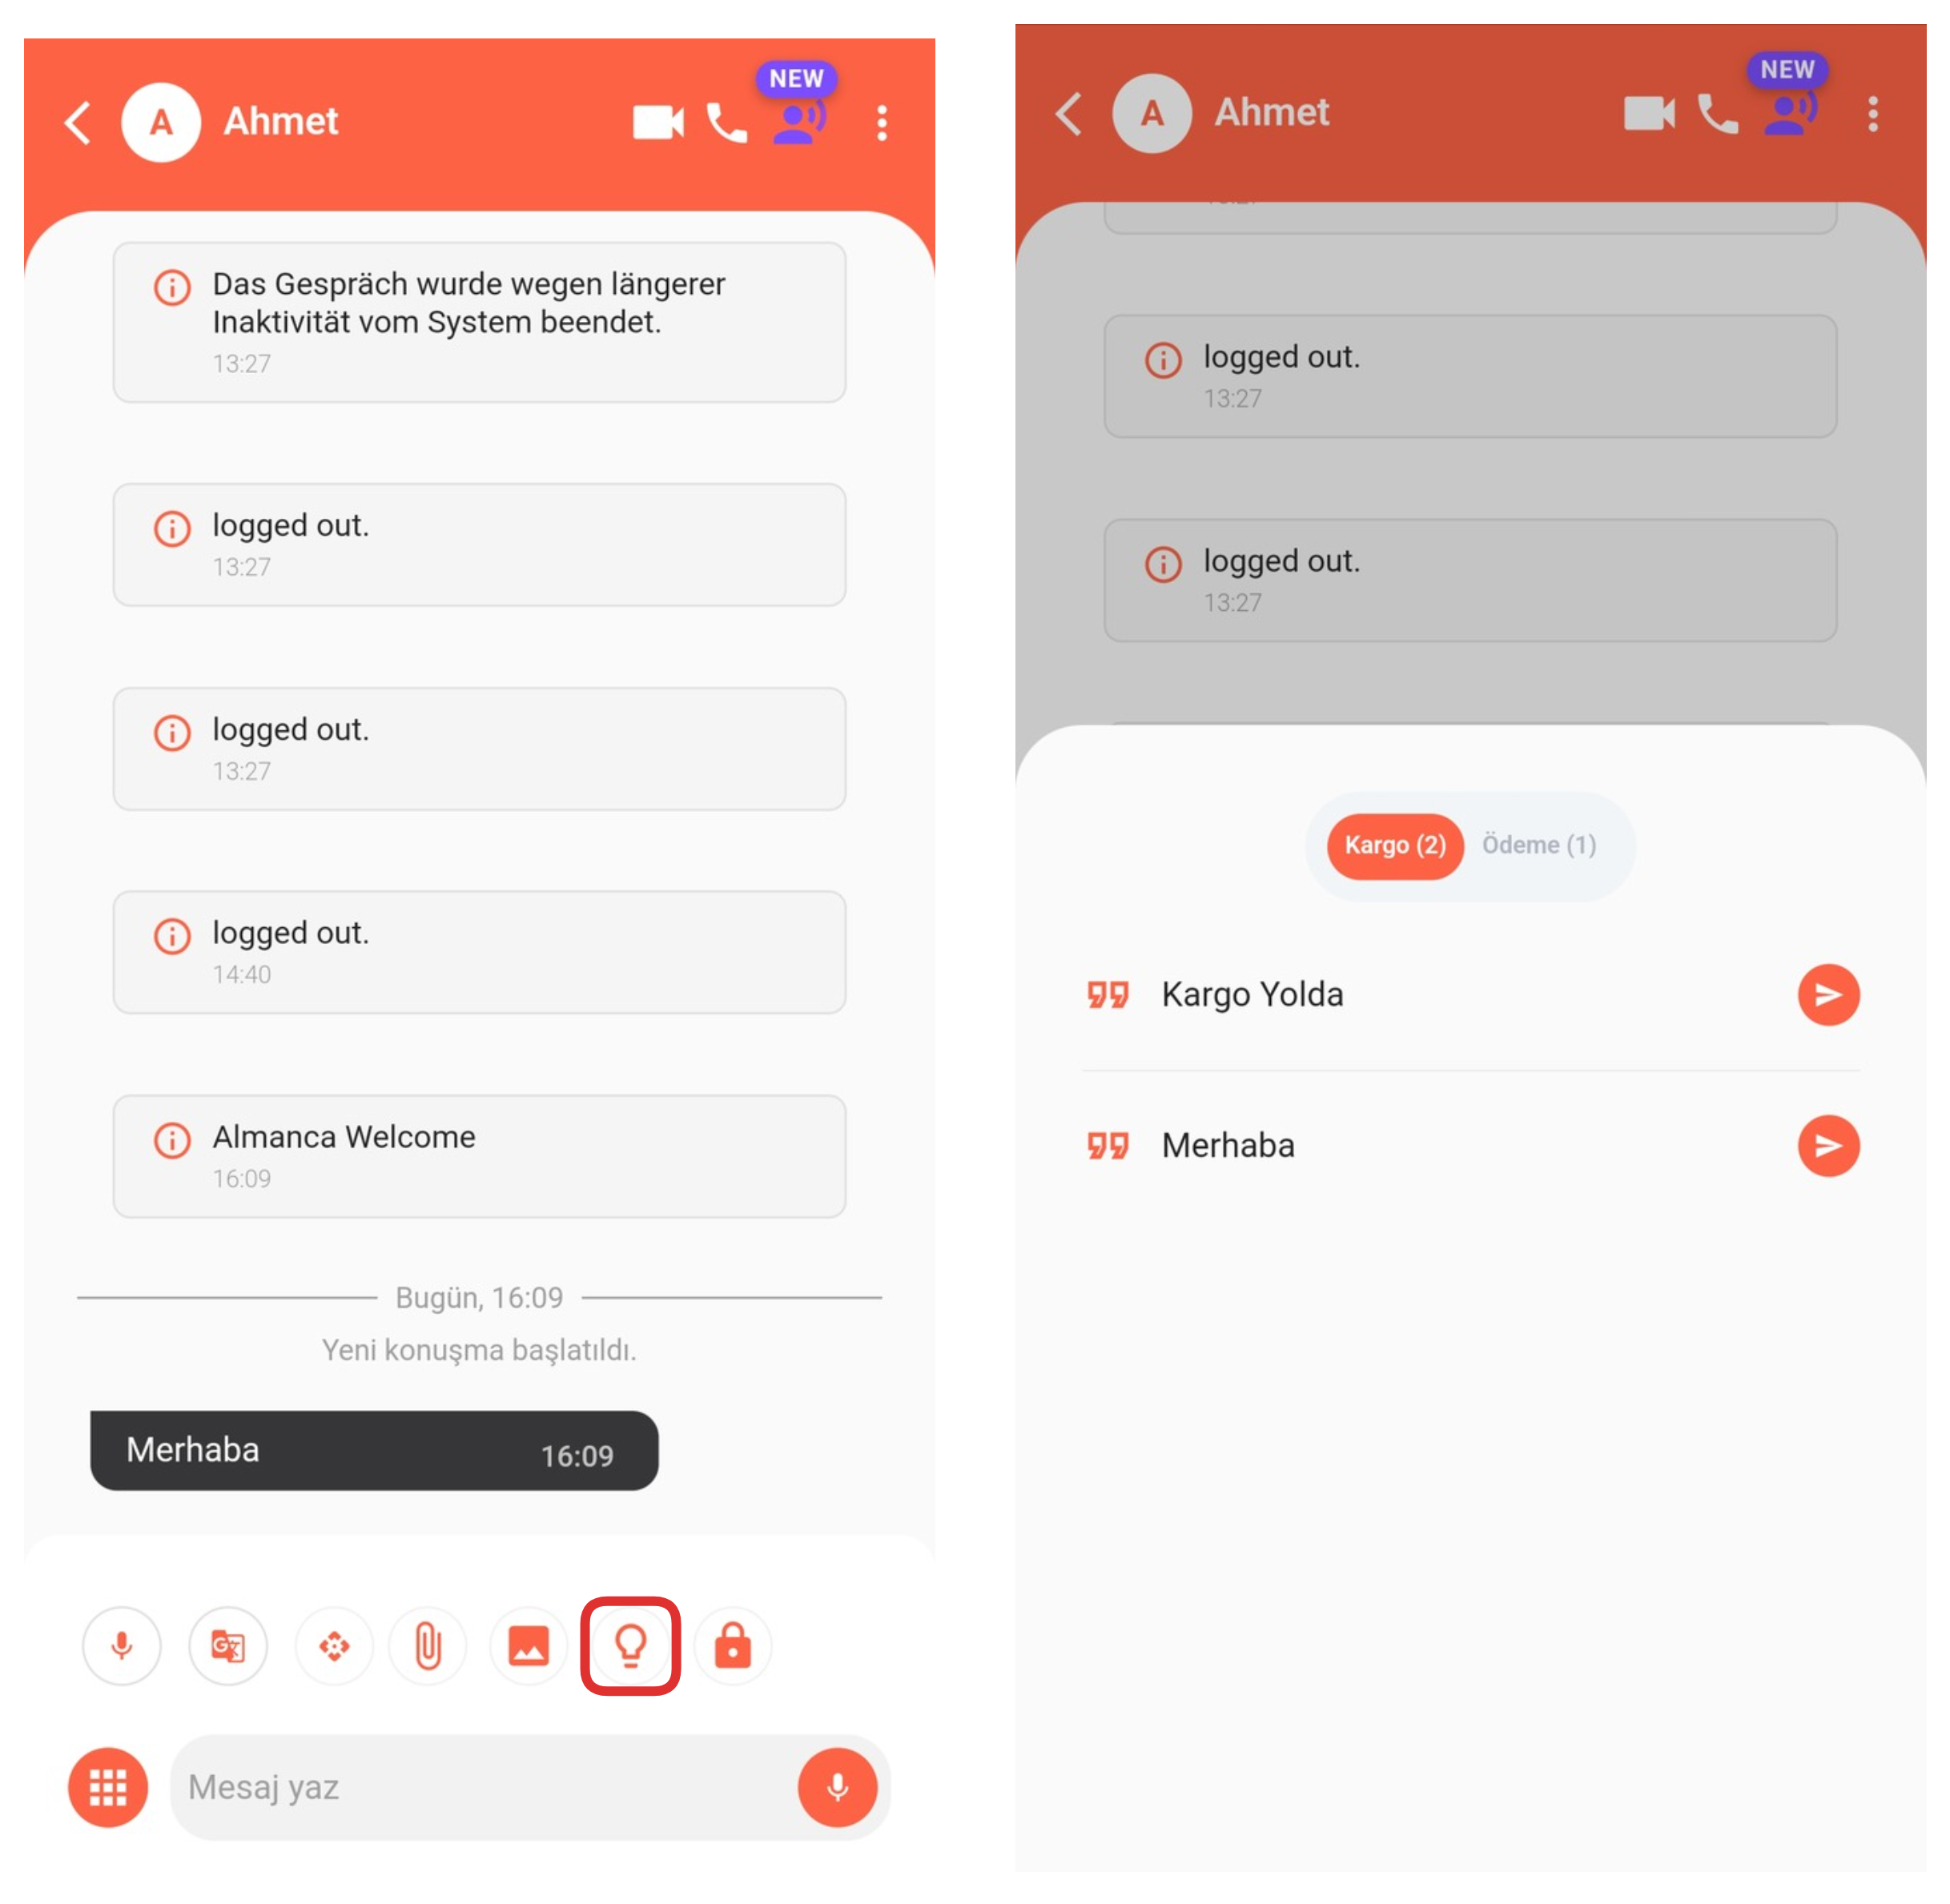
With this feature, you can easily find and quickly and practically send the ready contents you have previously created to the other party from this area. These contents save time for repetitive messages such as frequently asked questions, information texts, or automatic responses, and standardize the communication process.
11-) Hold Chat
This feature allows you to hold the chat; that is, it prevents the chat from being automatically closed by the system. Especially in long-term or ongoing conversations, it allows the chat to remain open, enabling uninterrupted communication.
12-) Voice to Text
Using this feature, you can instantly convert your voice to text and thus give faster responses. Thanks to voice input, you can quickly create text without using the keyboard, saving time and continuing communication more efficiently.