Application Elements
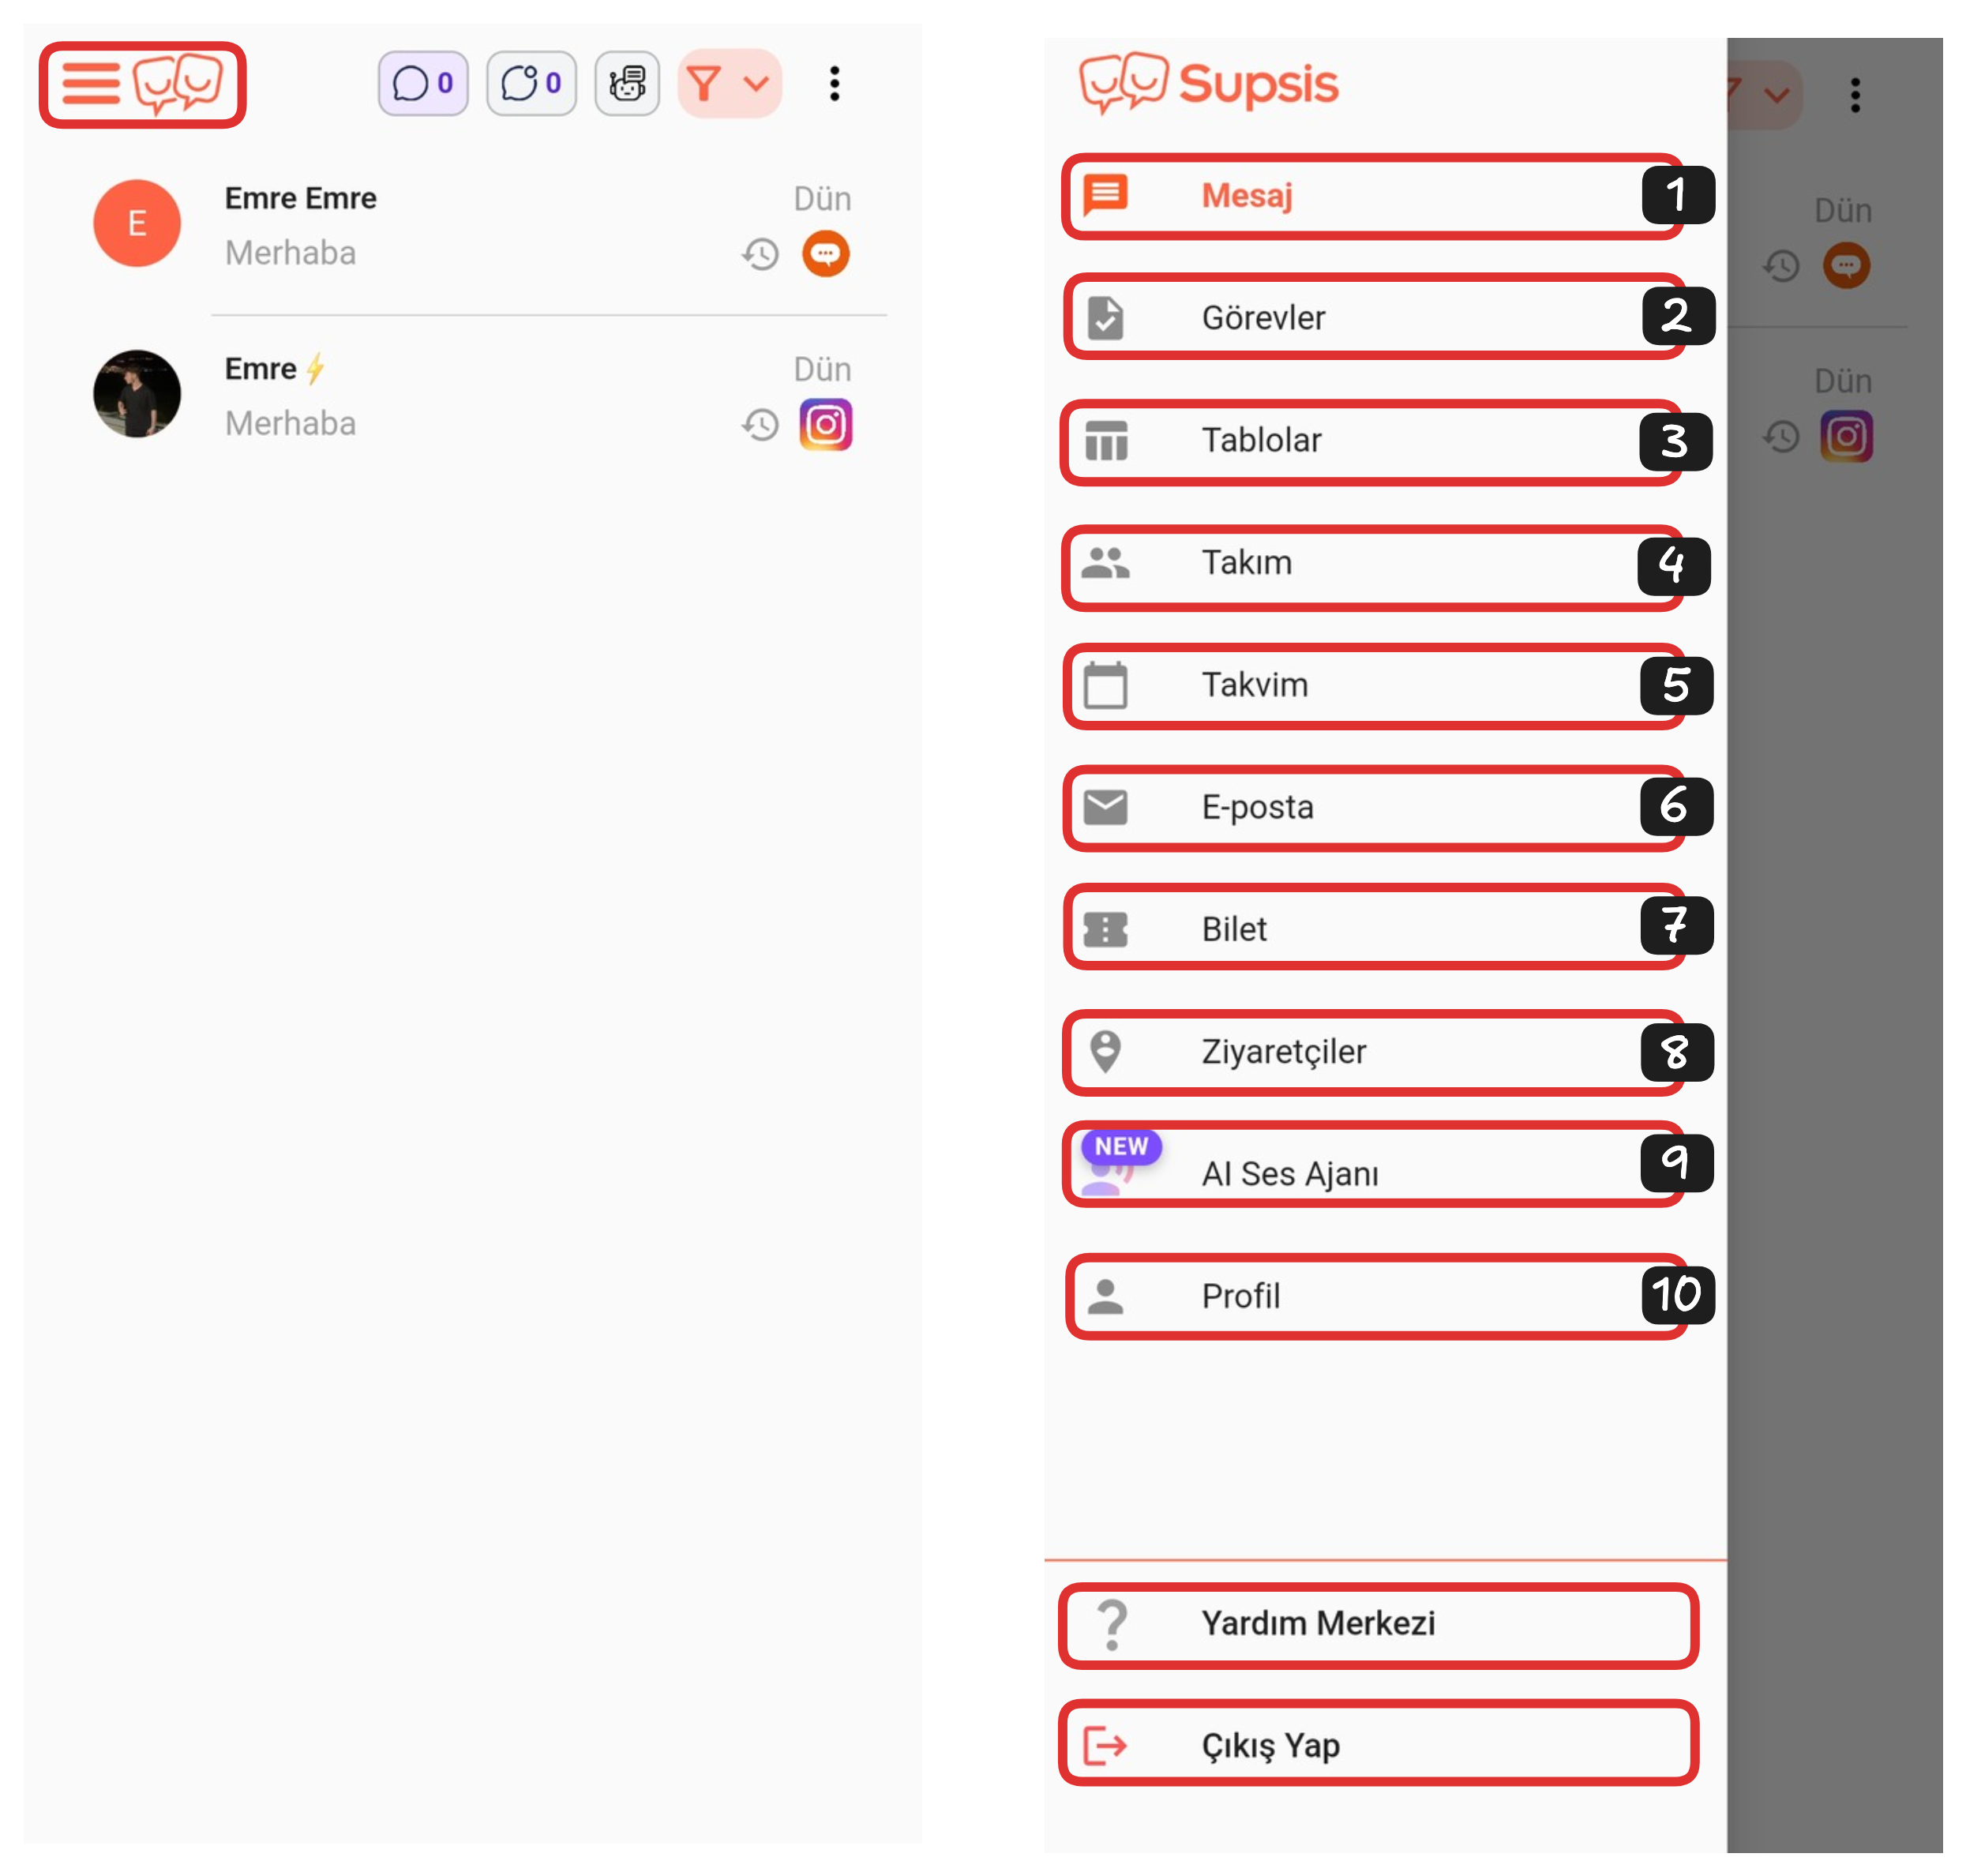
Application Elements:
- Message
- Tasks
- Tables
- Team
- Calendar
- Ticket
- Visitors
- AI Voice Agent
- Profile
5-) Calendar
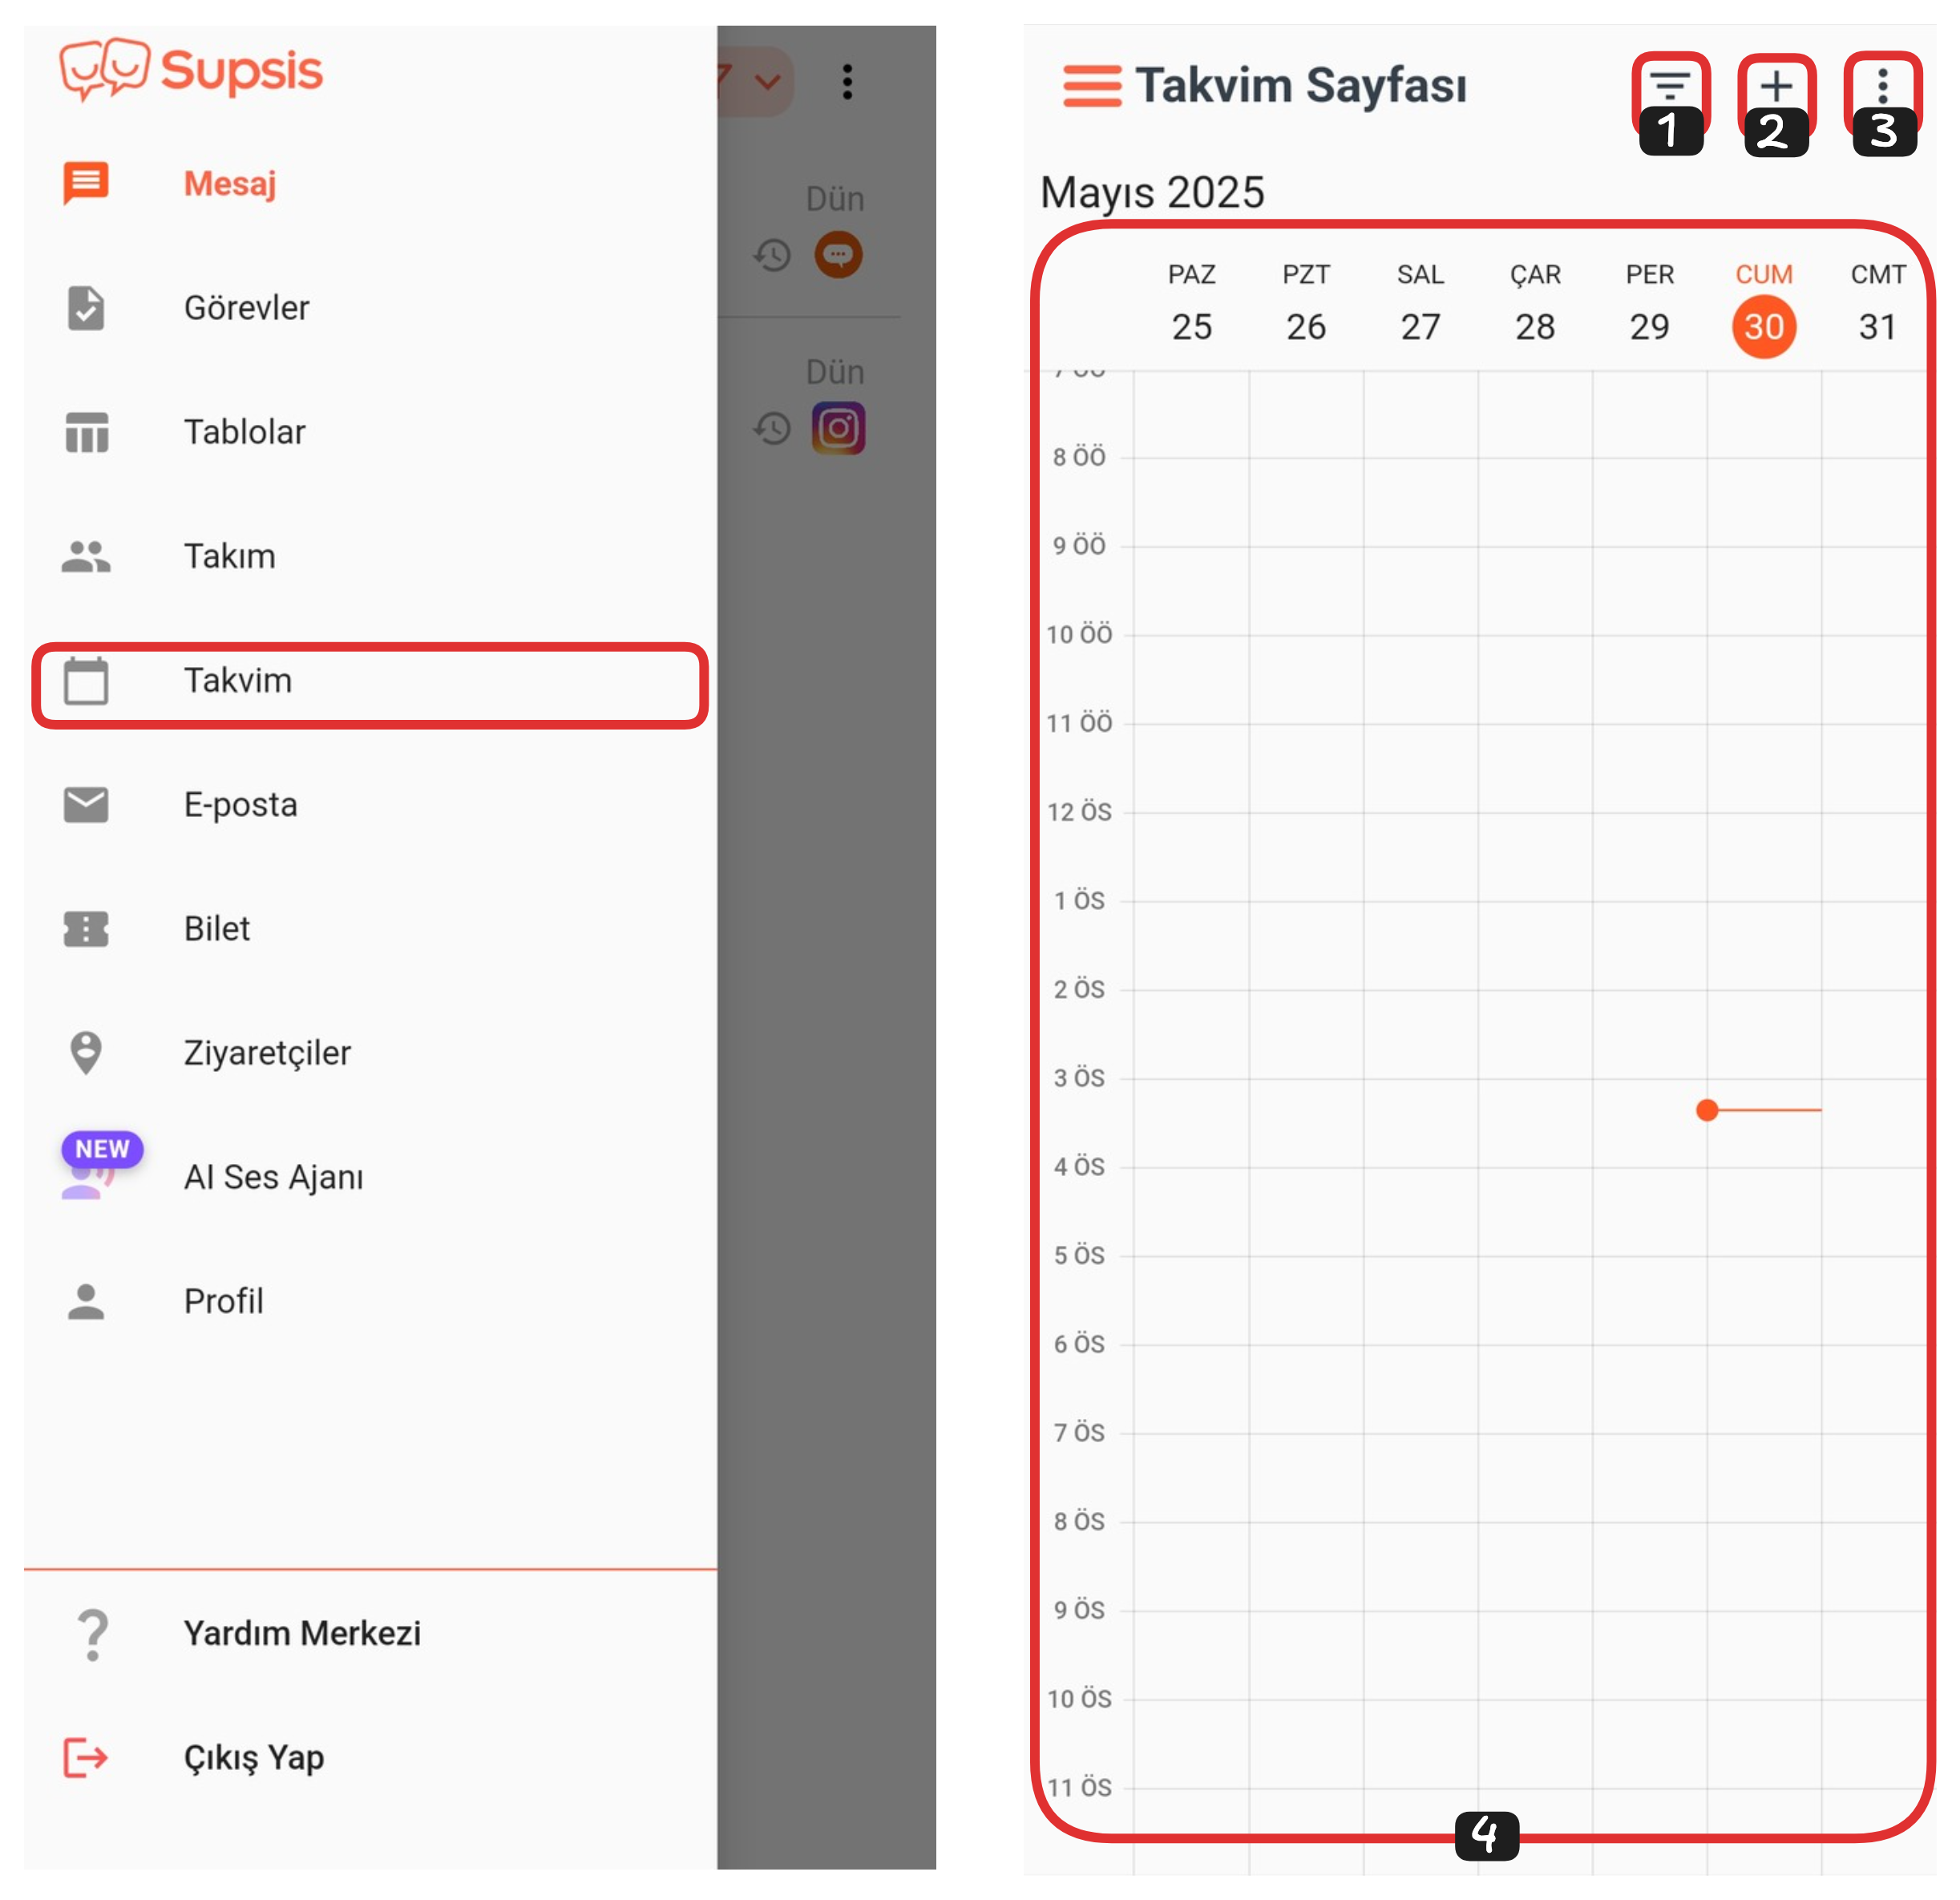
You can access the calendar page by clicking on the "Calendar" section through the Supsis menu. Through this page, you can plan your events, organize your meetings, and easily manage your time management with daily, weekly, or monthly views.
Calendar Page:
- Filter
- Create Event
- Settings
- Calendar
1-) Filter
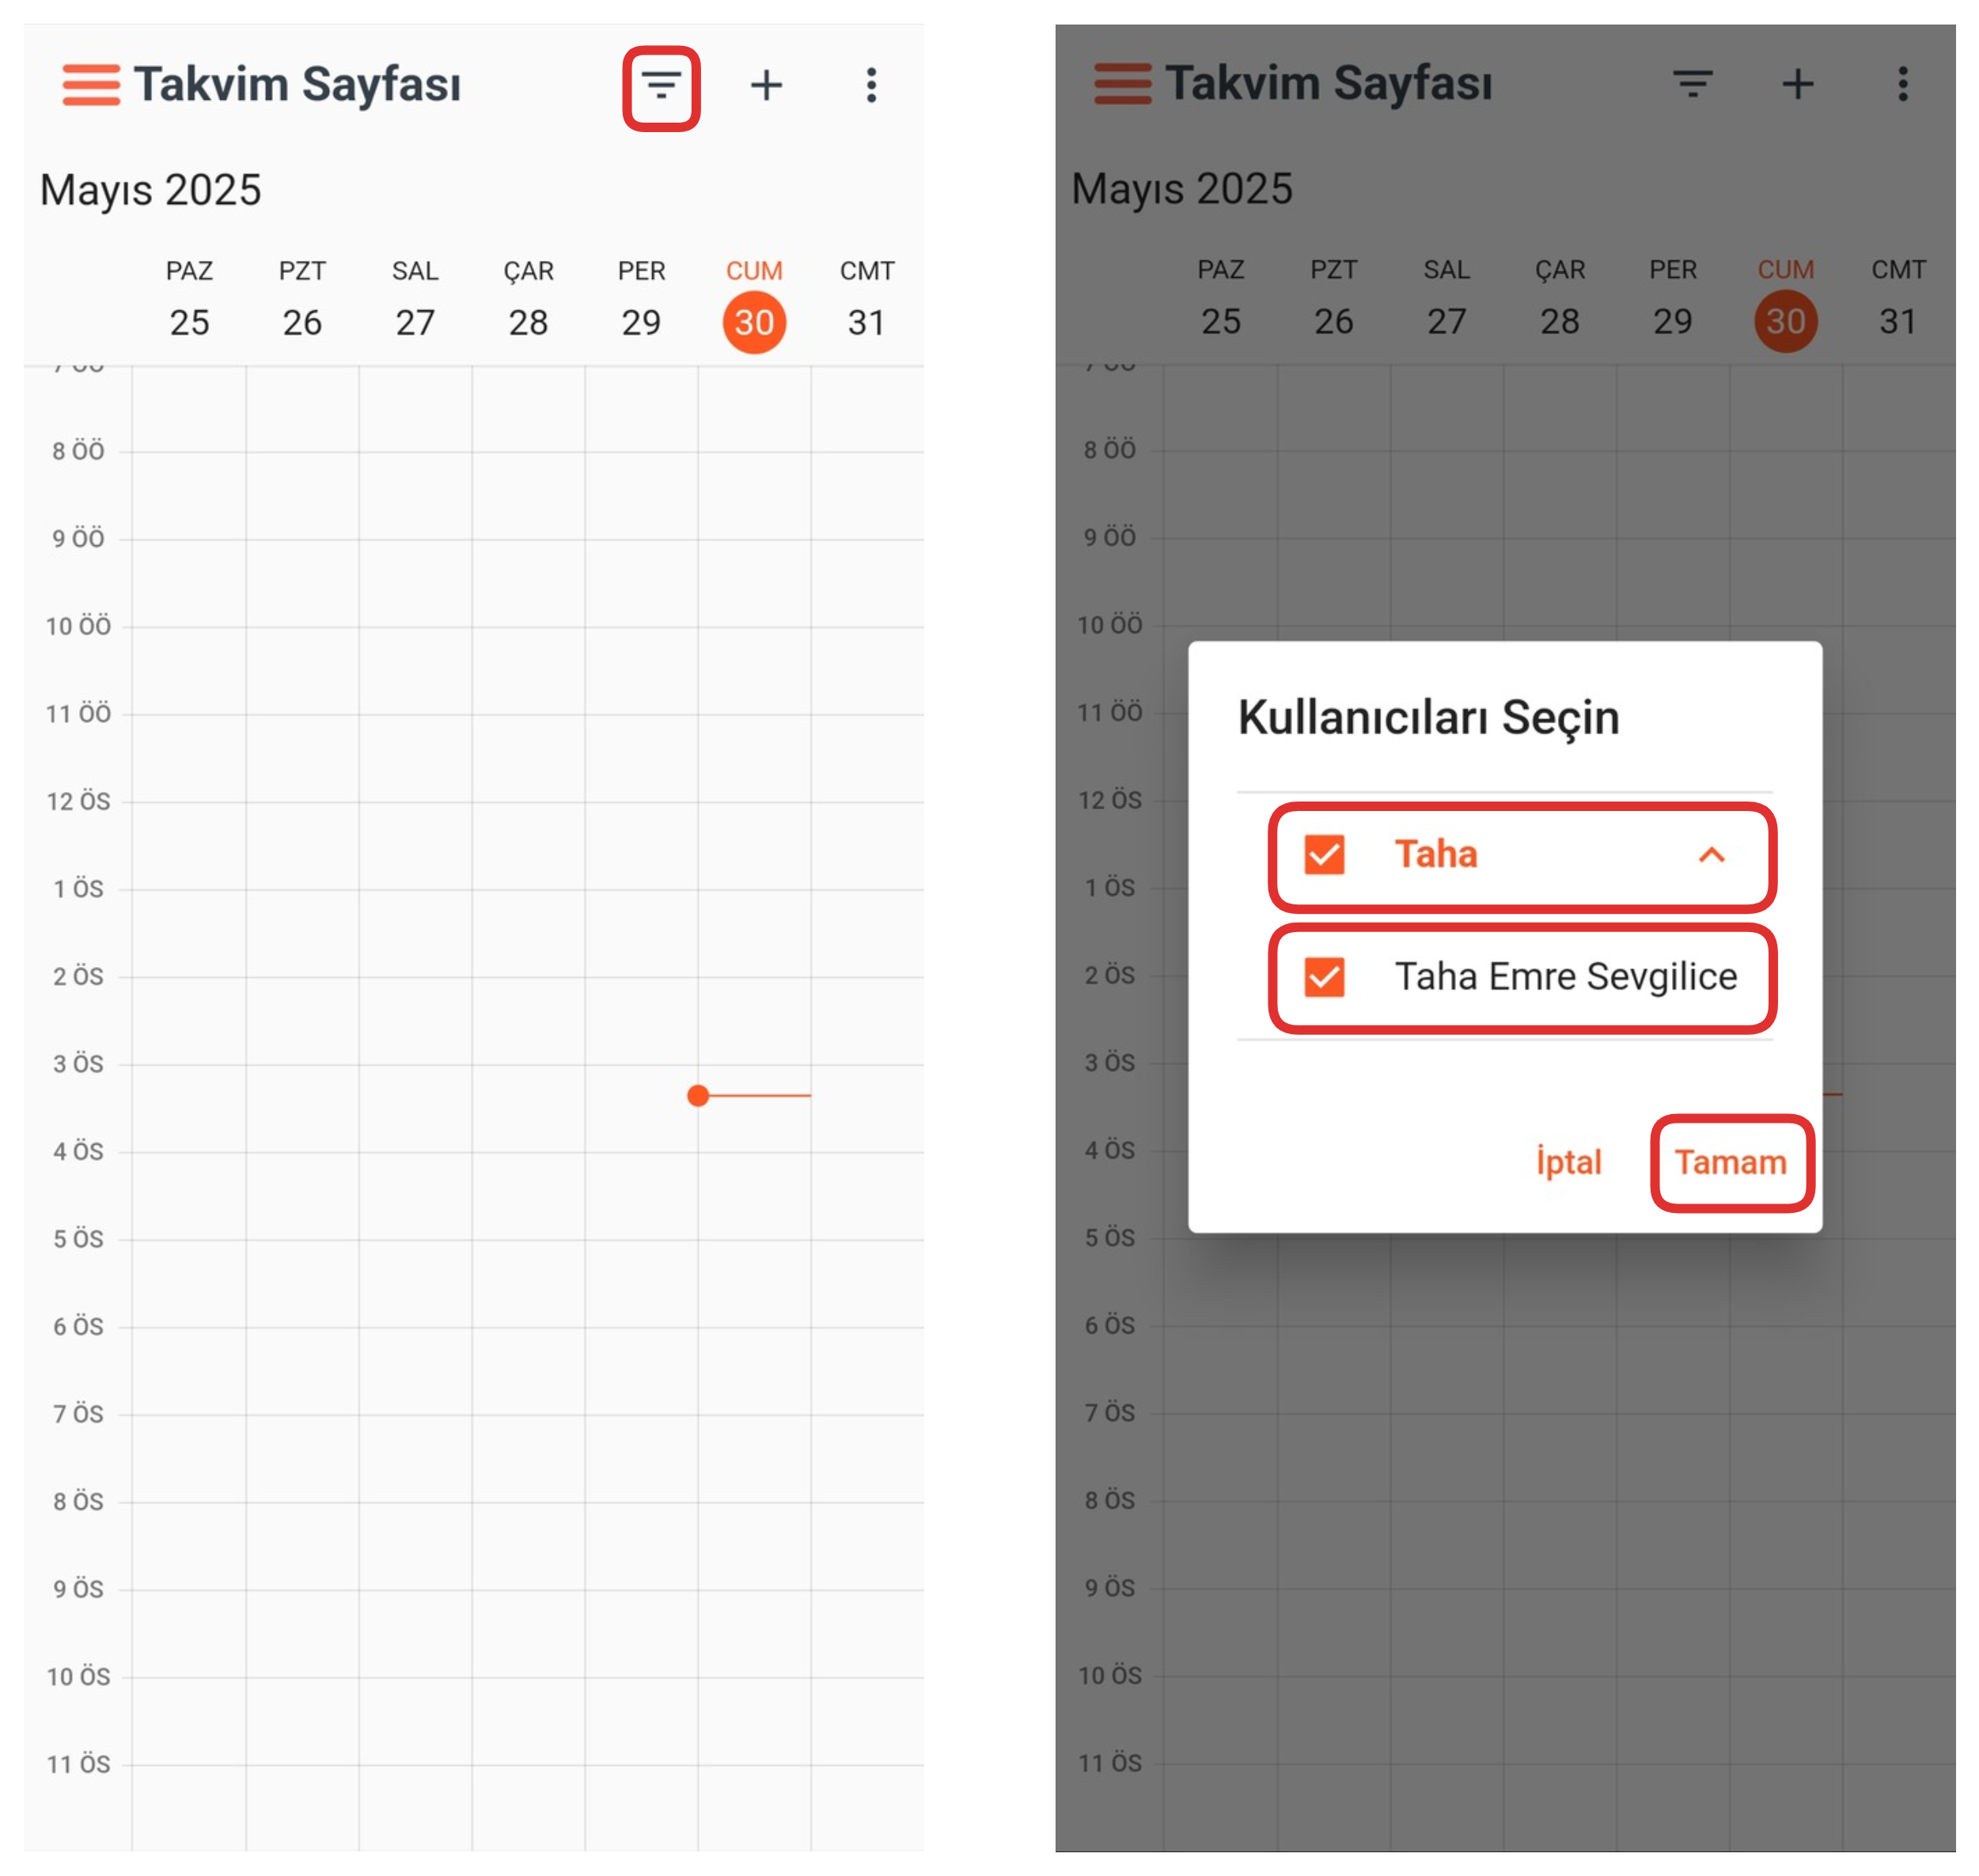
Using this filter feature, you can do user-based filtering. That is, if you want to view only the calendar events of certain users, you can use this feature. For this, click on the "Filter" option on the calendar page, check the box next to the user you want to see from the opened section, and then click the "OK" button to start the filtering process. This way, only the events of the users you selected are displayed on the calendar.
2-) Create Event
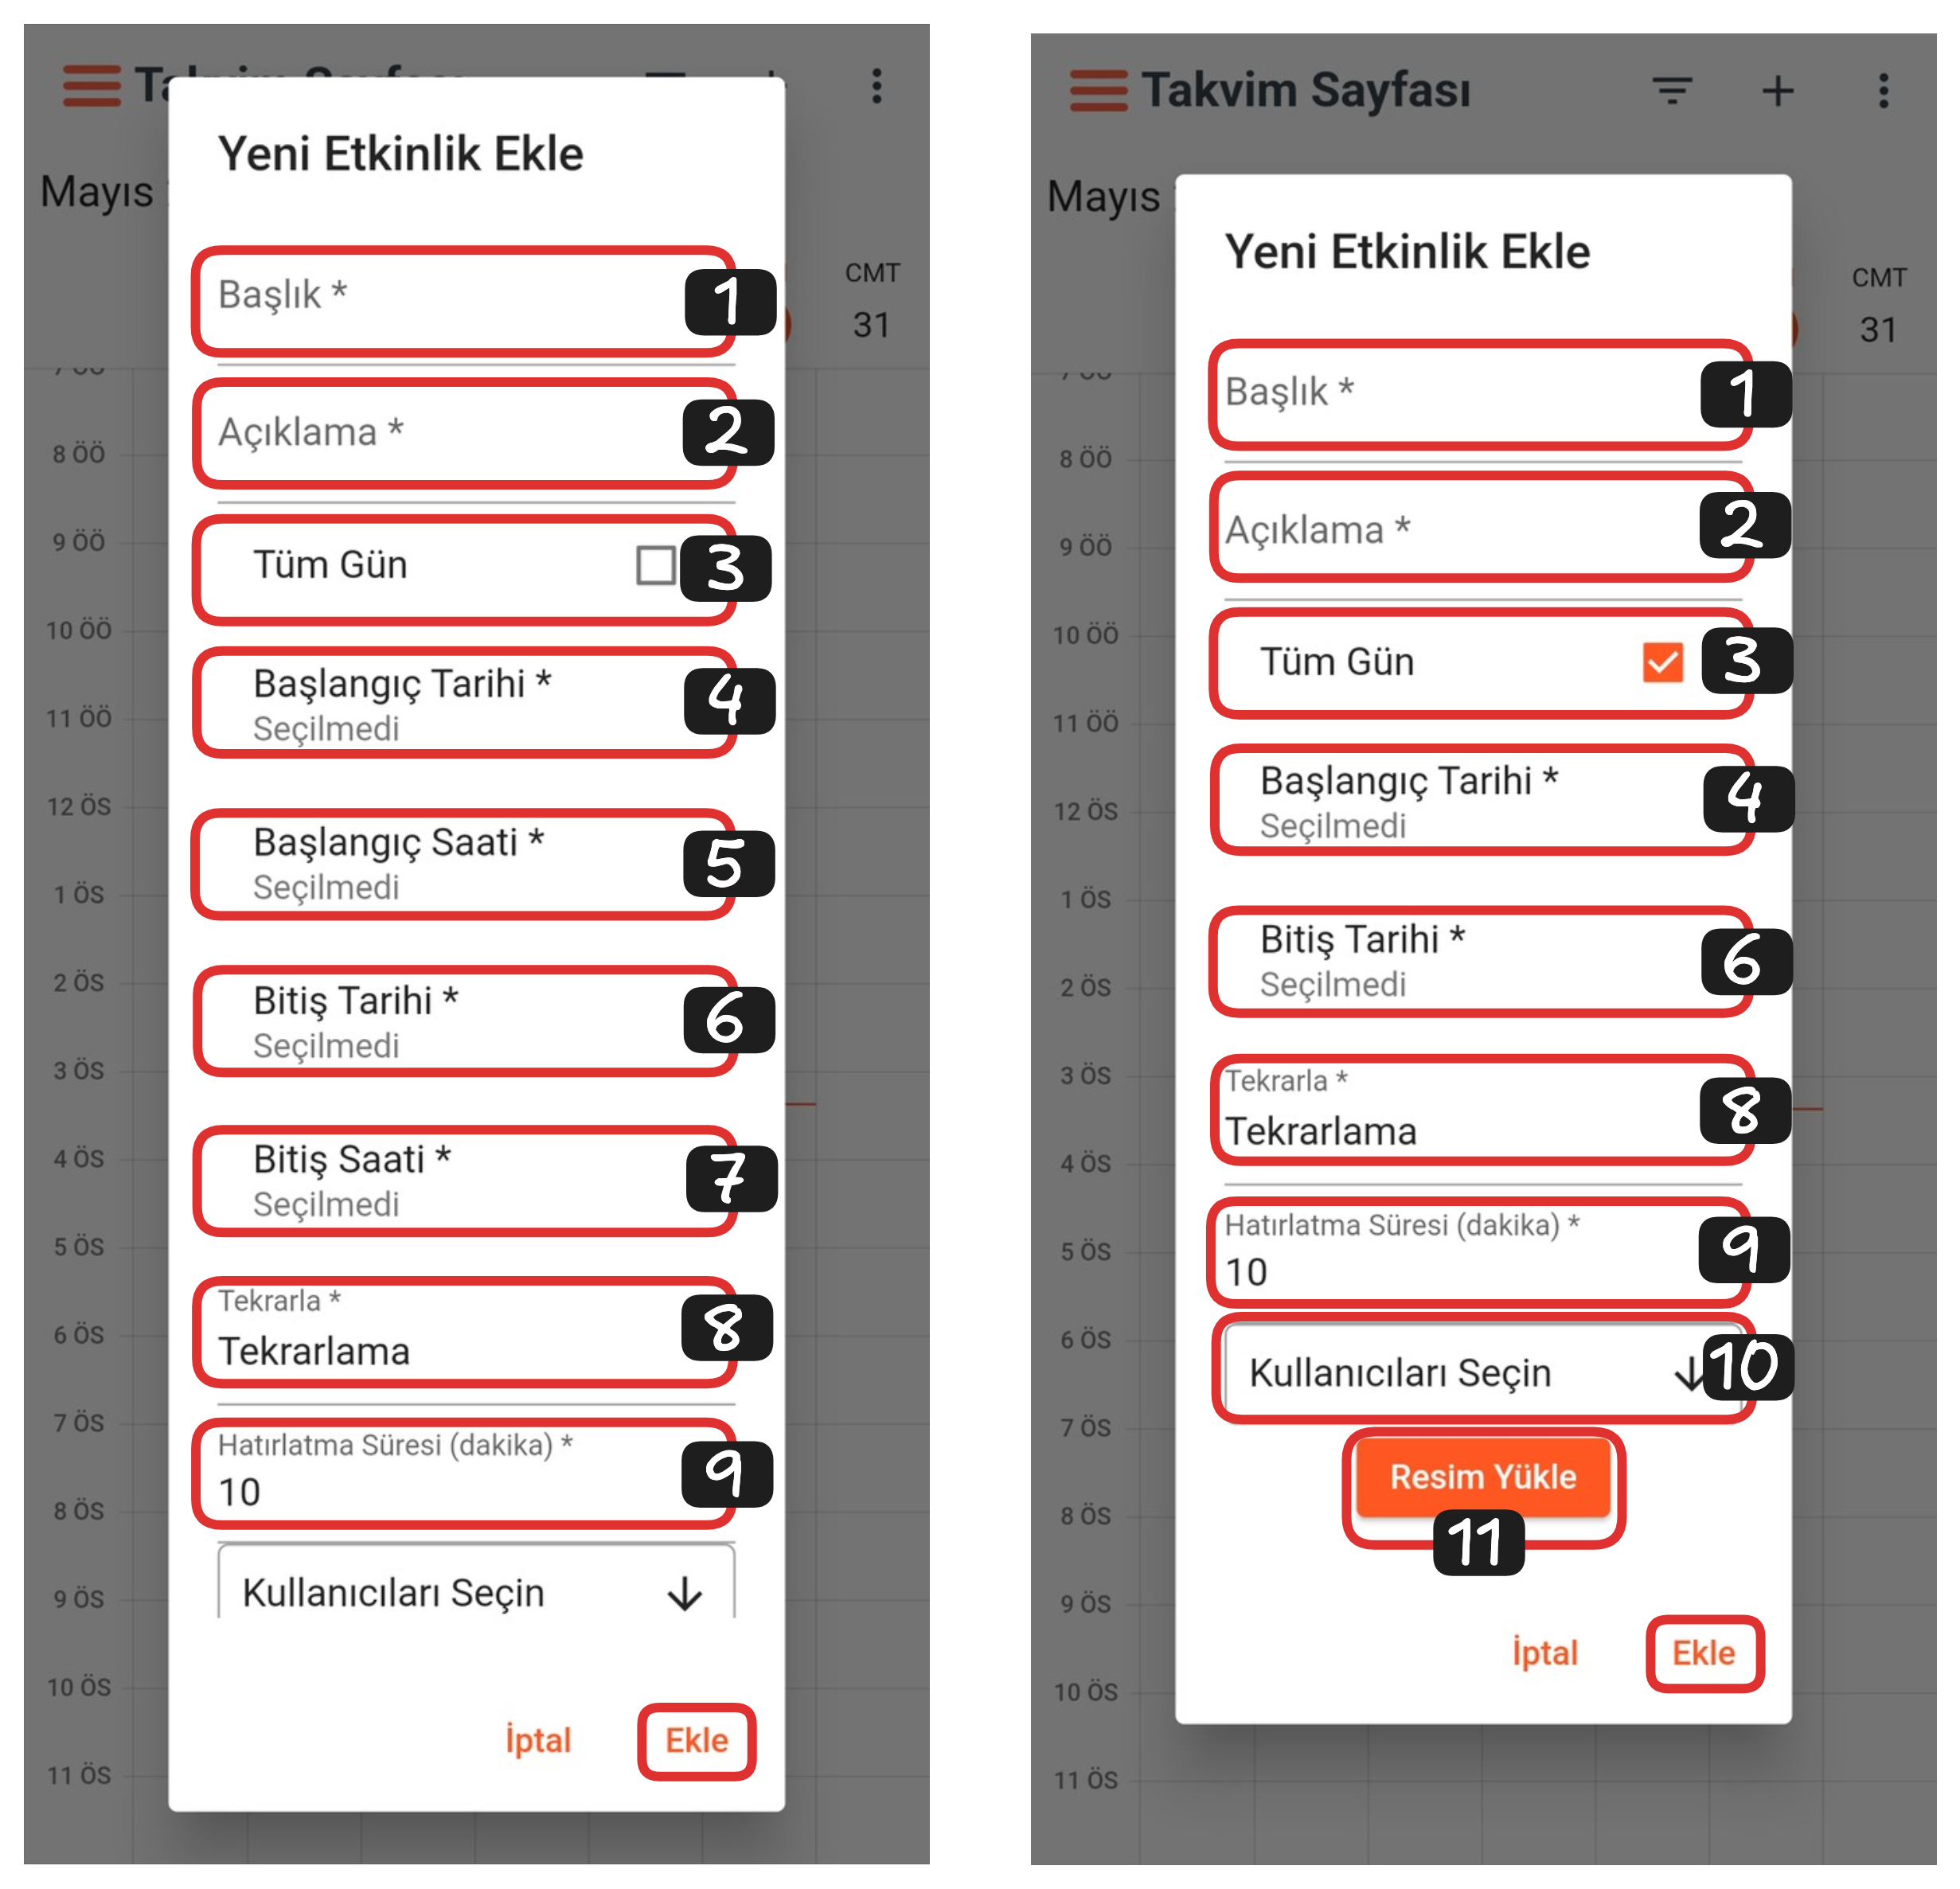
After coming to the calendar page, you can create a new event by clicking the "+" button in the upper right corner. Through this area, you can easily plan by entering the event name, date and time information.
Event Creation Elements:
- Title
- Description
- All Day
- Start Date
- Start Time
- End Date
- End Time
- Recurrence
- Reminder Duration
- Select User
- Upload Image
1-) Title
From this section, you can give a name to the event you want to create. The event name makes it easy to recognize and distinguish on the calendar.
2-) Description
From this section, you can determine the description of the event you want to create. The description field is used to provide information about the purpose, content, or details of the event.
3-) All Day
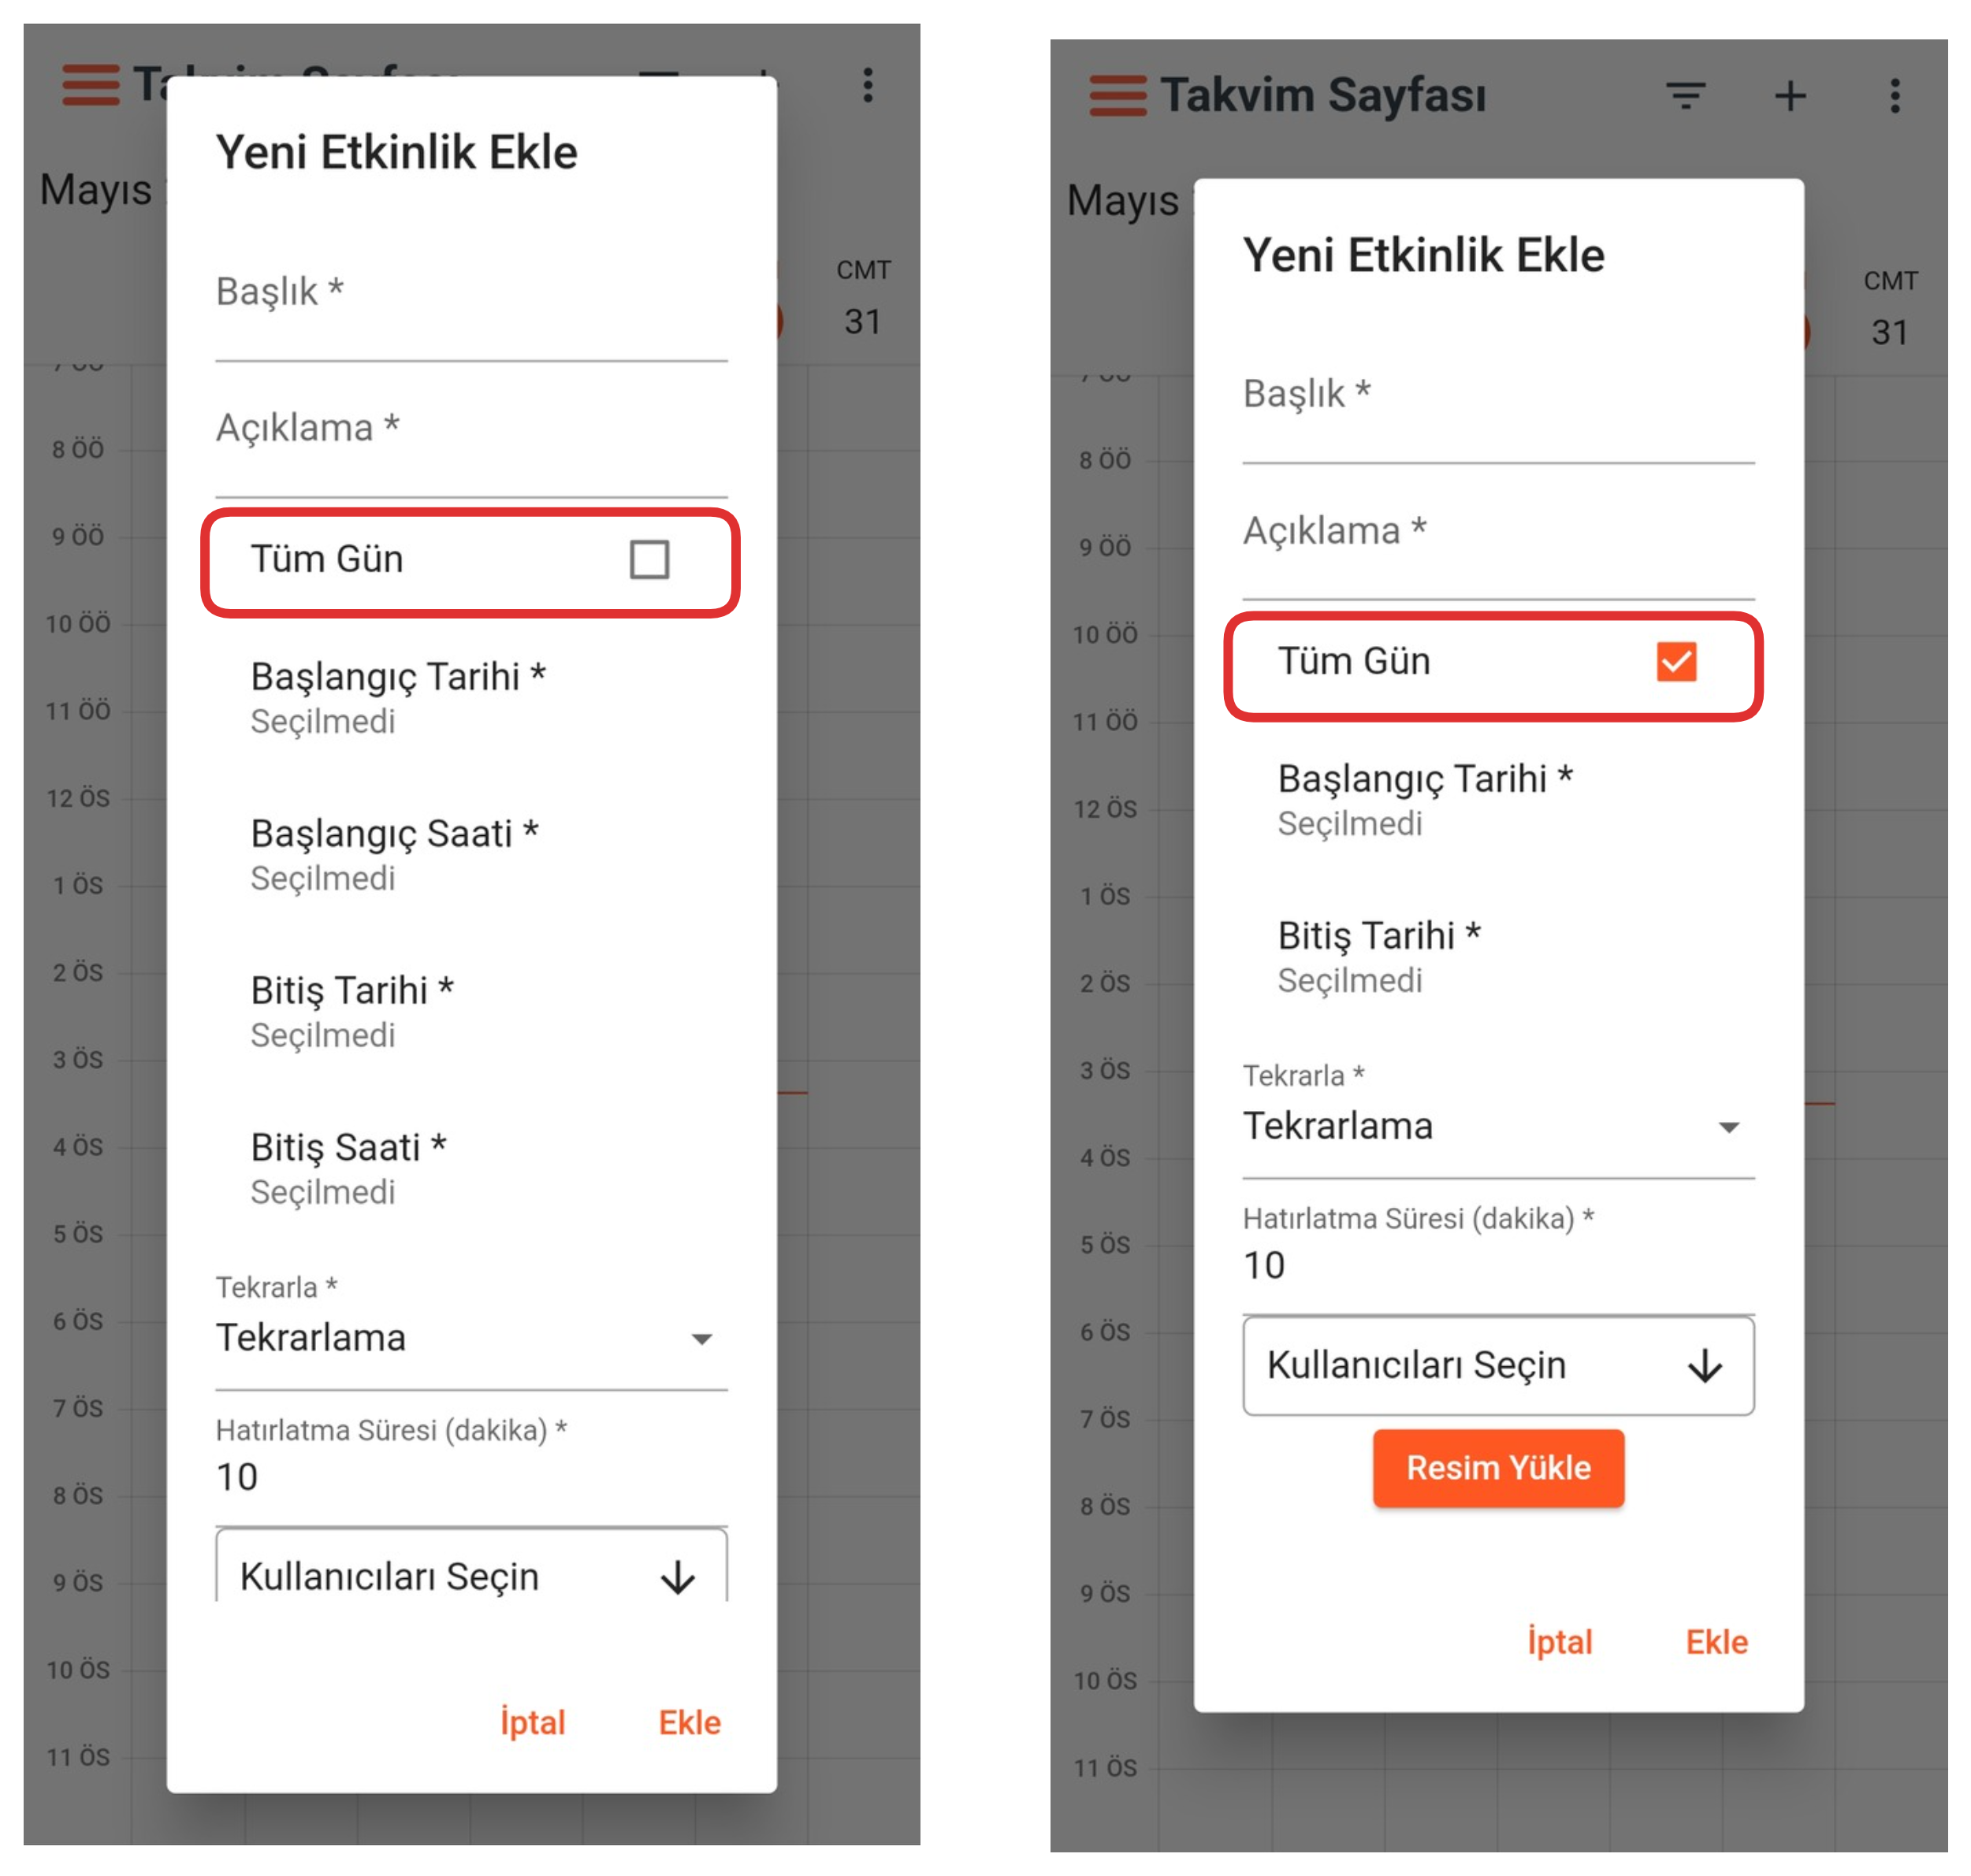
Using this option, you can mark that the event will last all day when determining the event range. If you activate the "All Day" option, the start and end times of the event are automatically removed, because there is no need to specify time for an event that will last all day. This feature is ideal for meetings, holidays, or important days that cover the entire day.
4-) Start Date
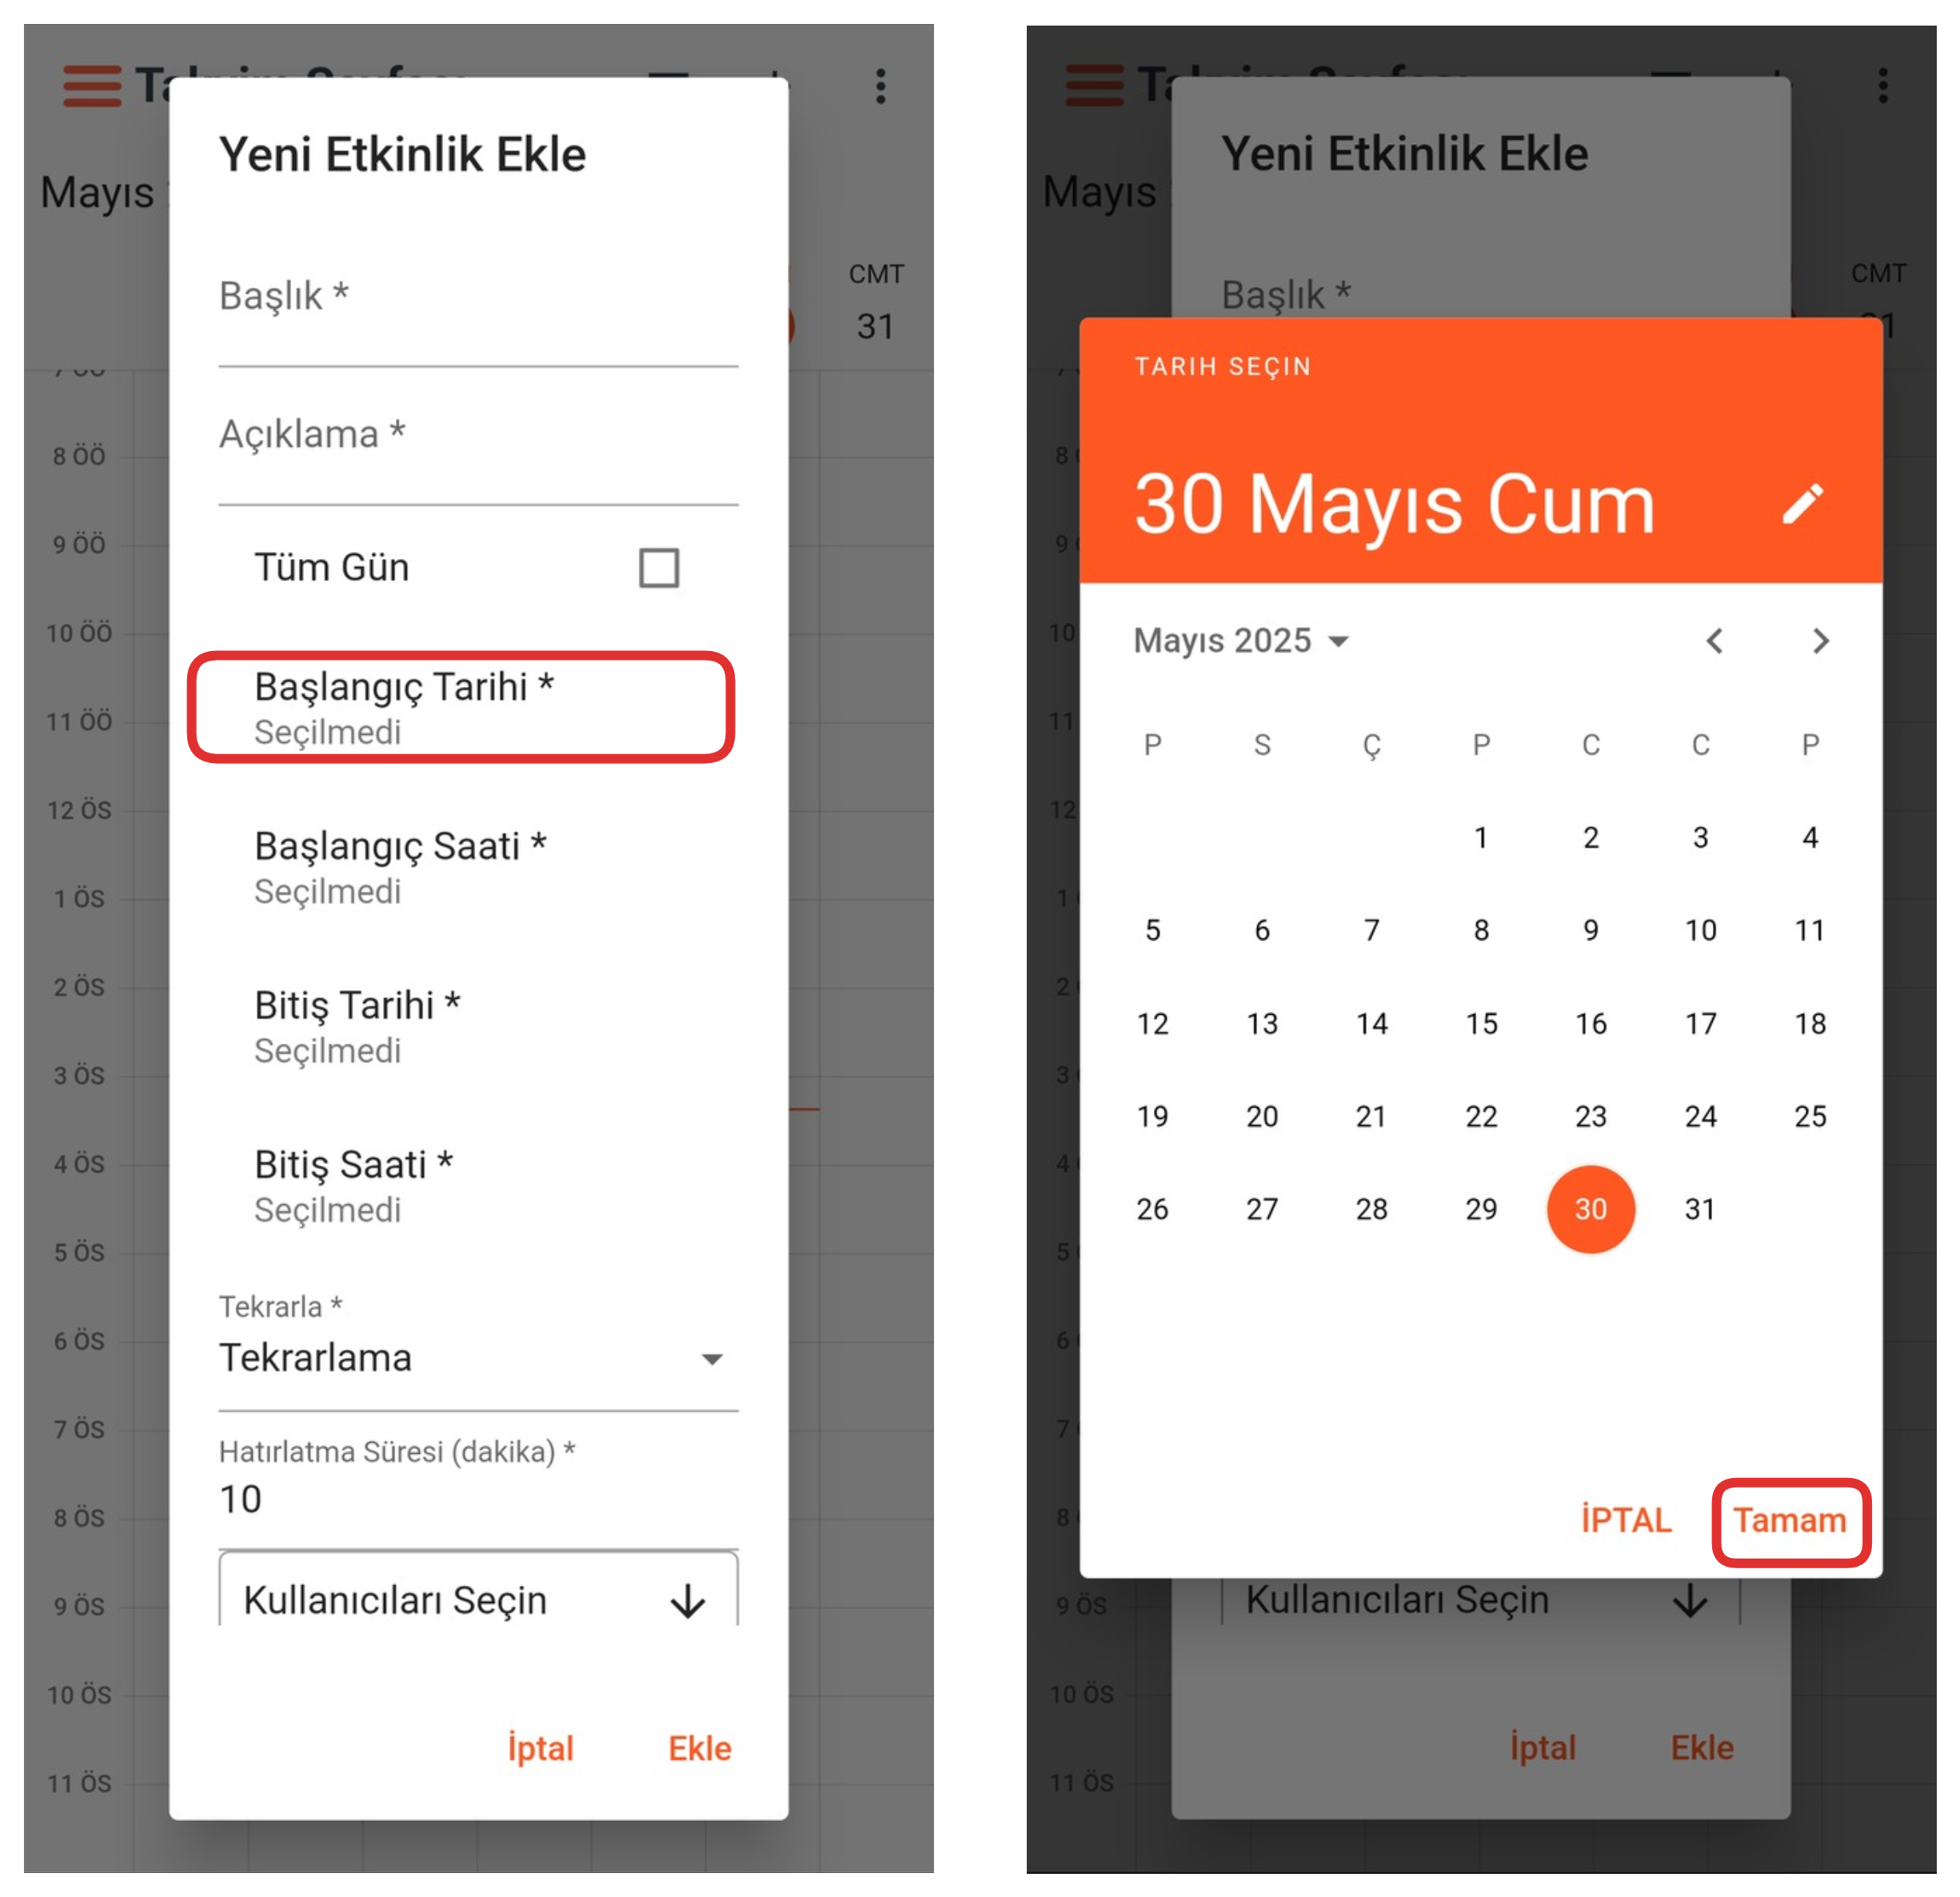
From this section, you can determine the date when your event will start. For this, click on the field that says "Start Date", select a date you want from the opened section, and then complete the process by clicking the "OK" button. This indicates when the event will start on the calendar.
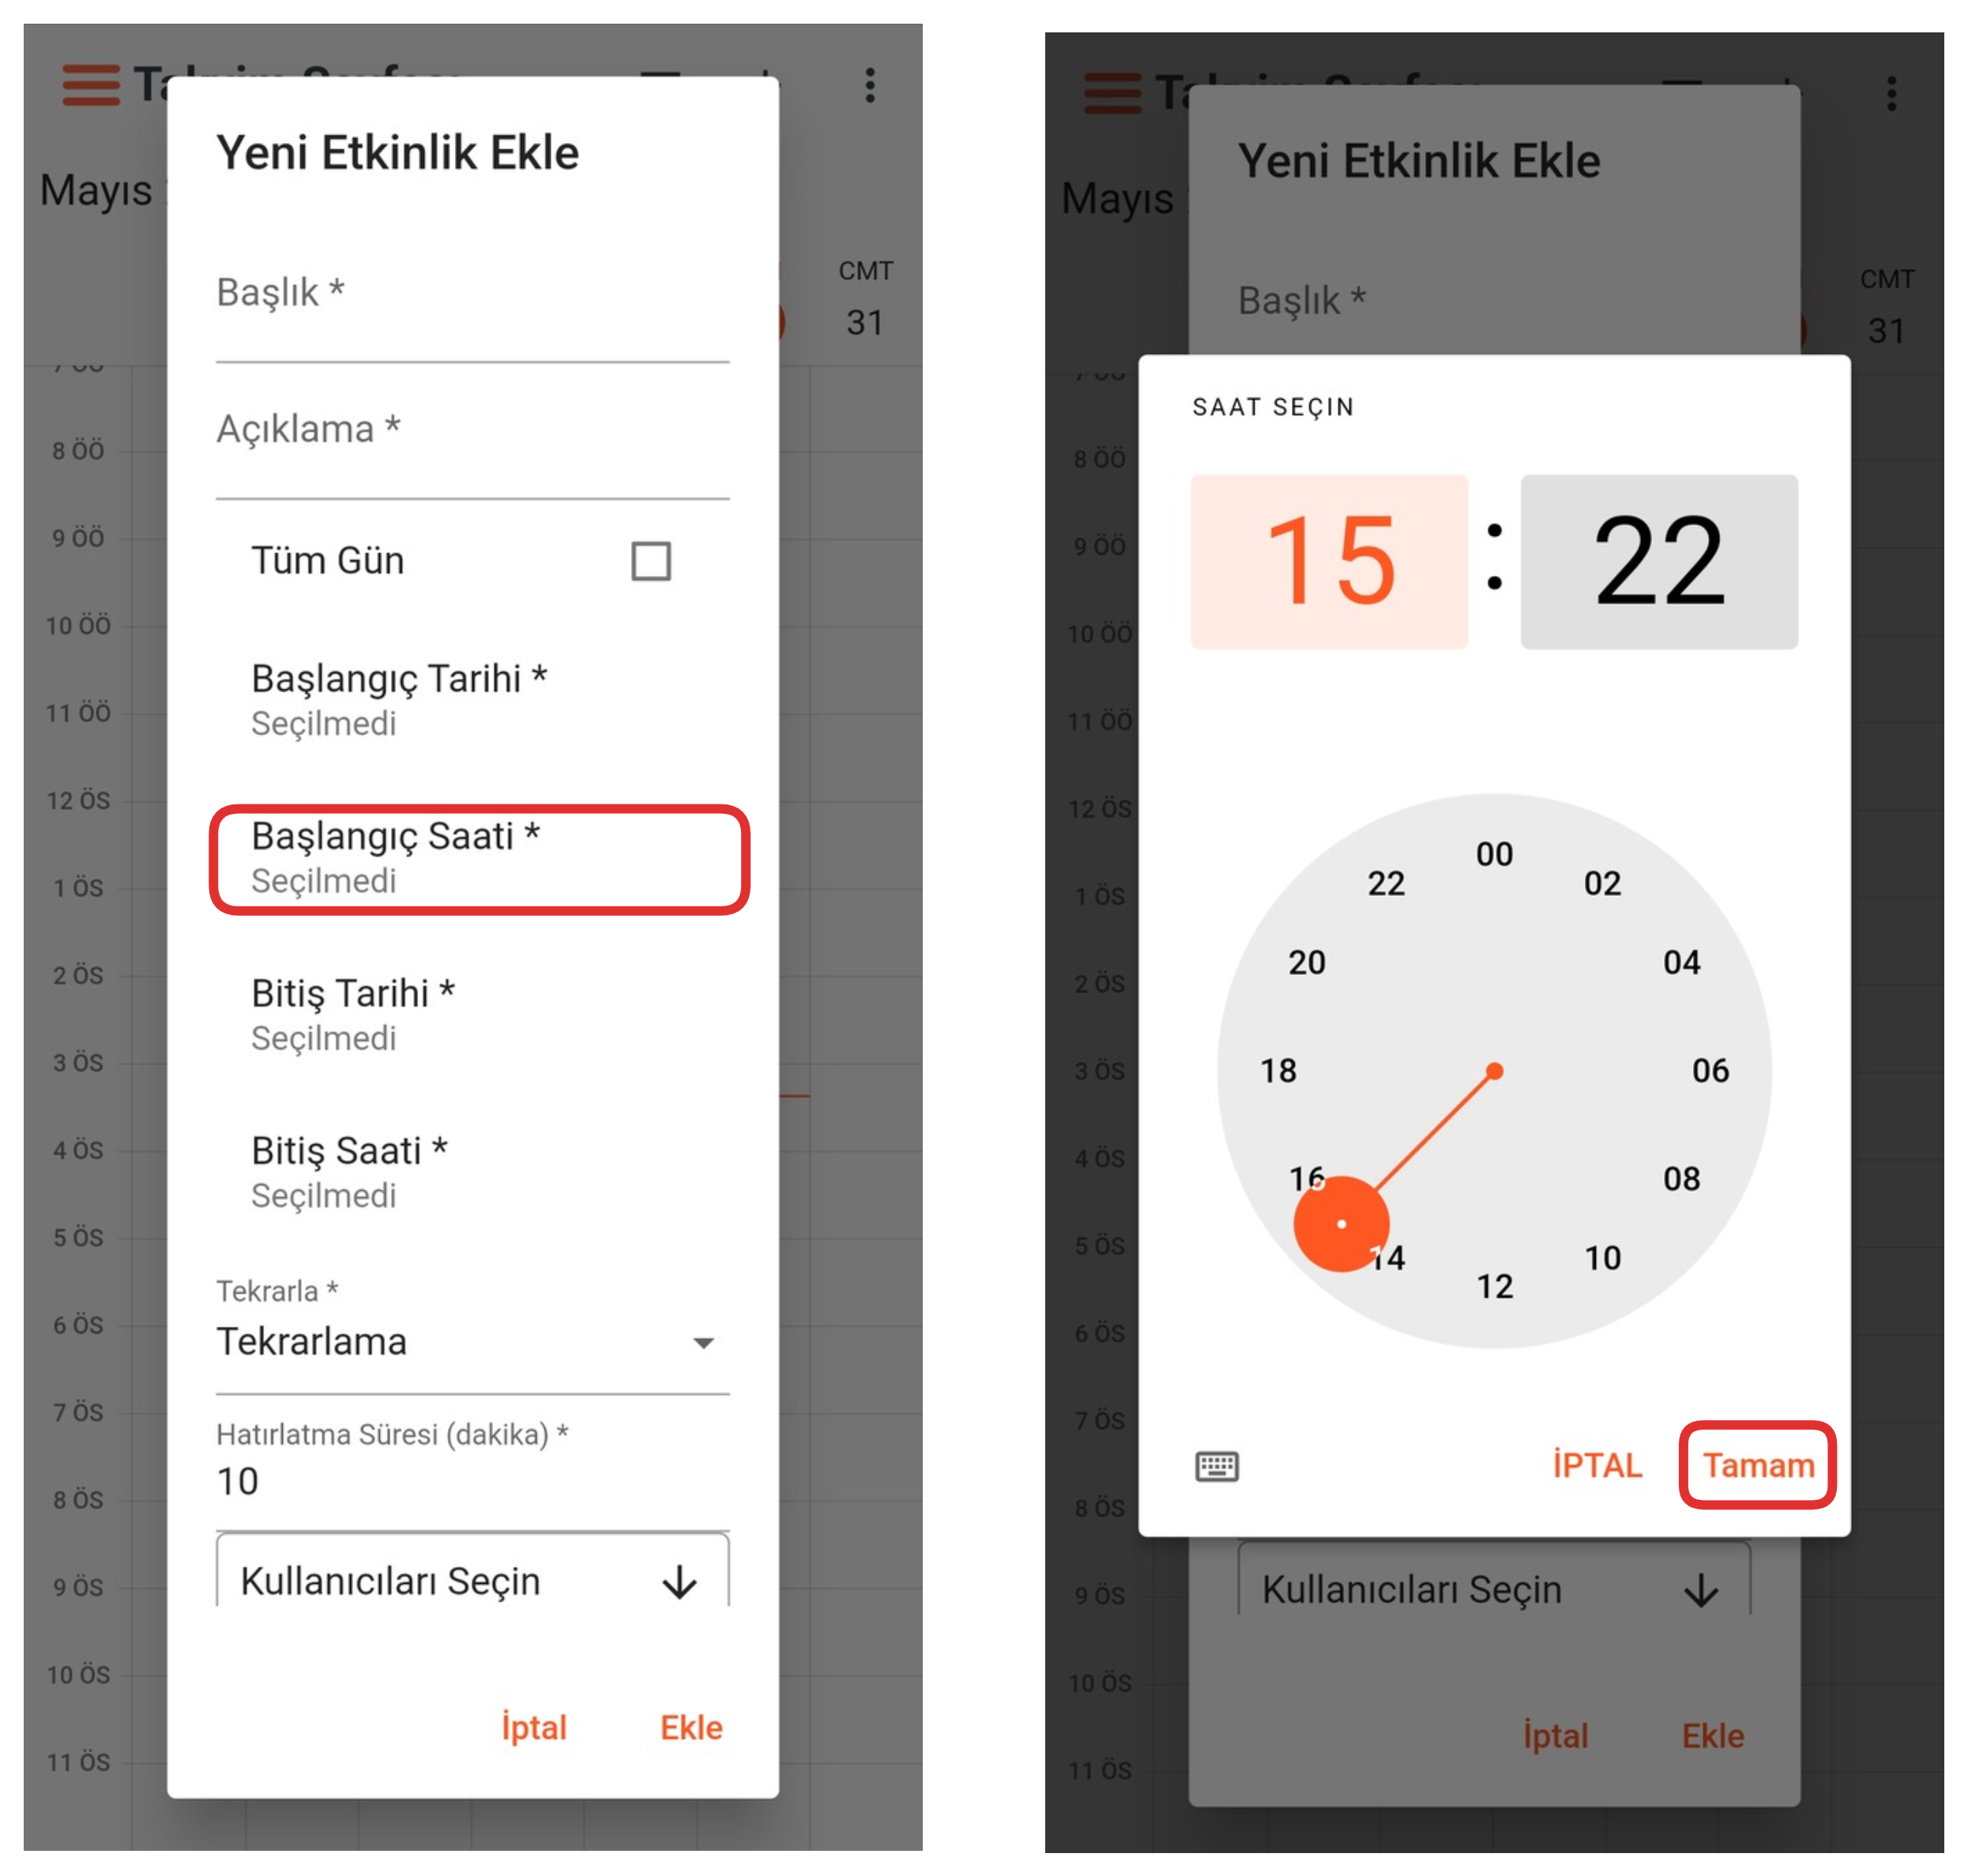
5-) Start Time

From this section, you can determine the time when your event will start. For this, click on the field that says "Start Time", select a time you want from the opened section, and then complete the process by clicking the "OK" button. This indicates when the event will start on the calendar.
6-) End Date
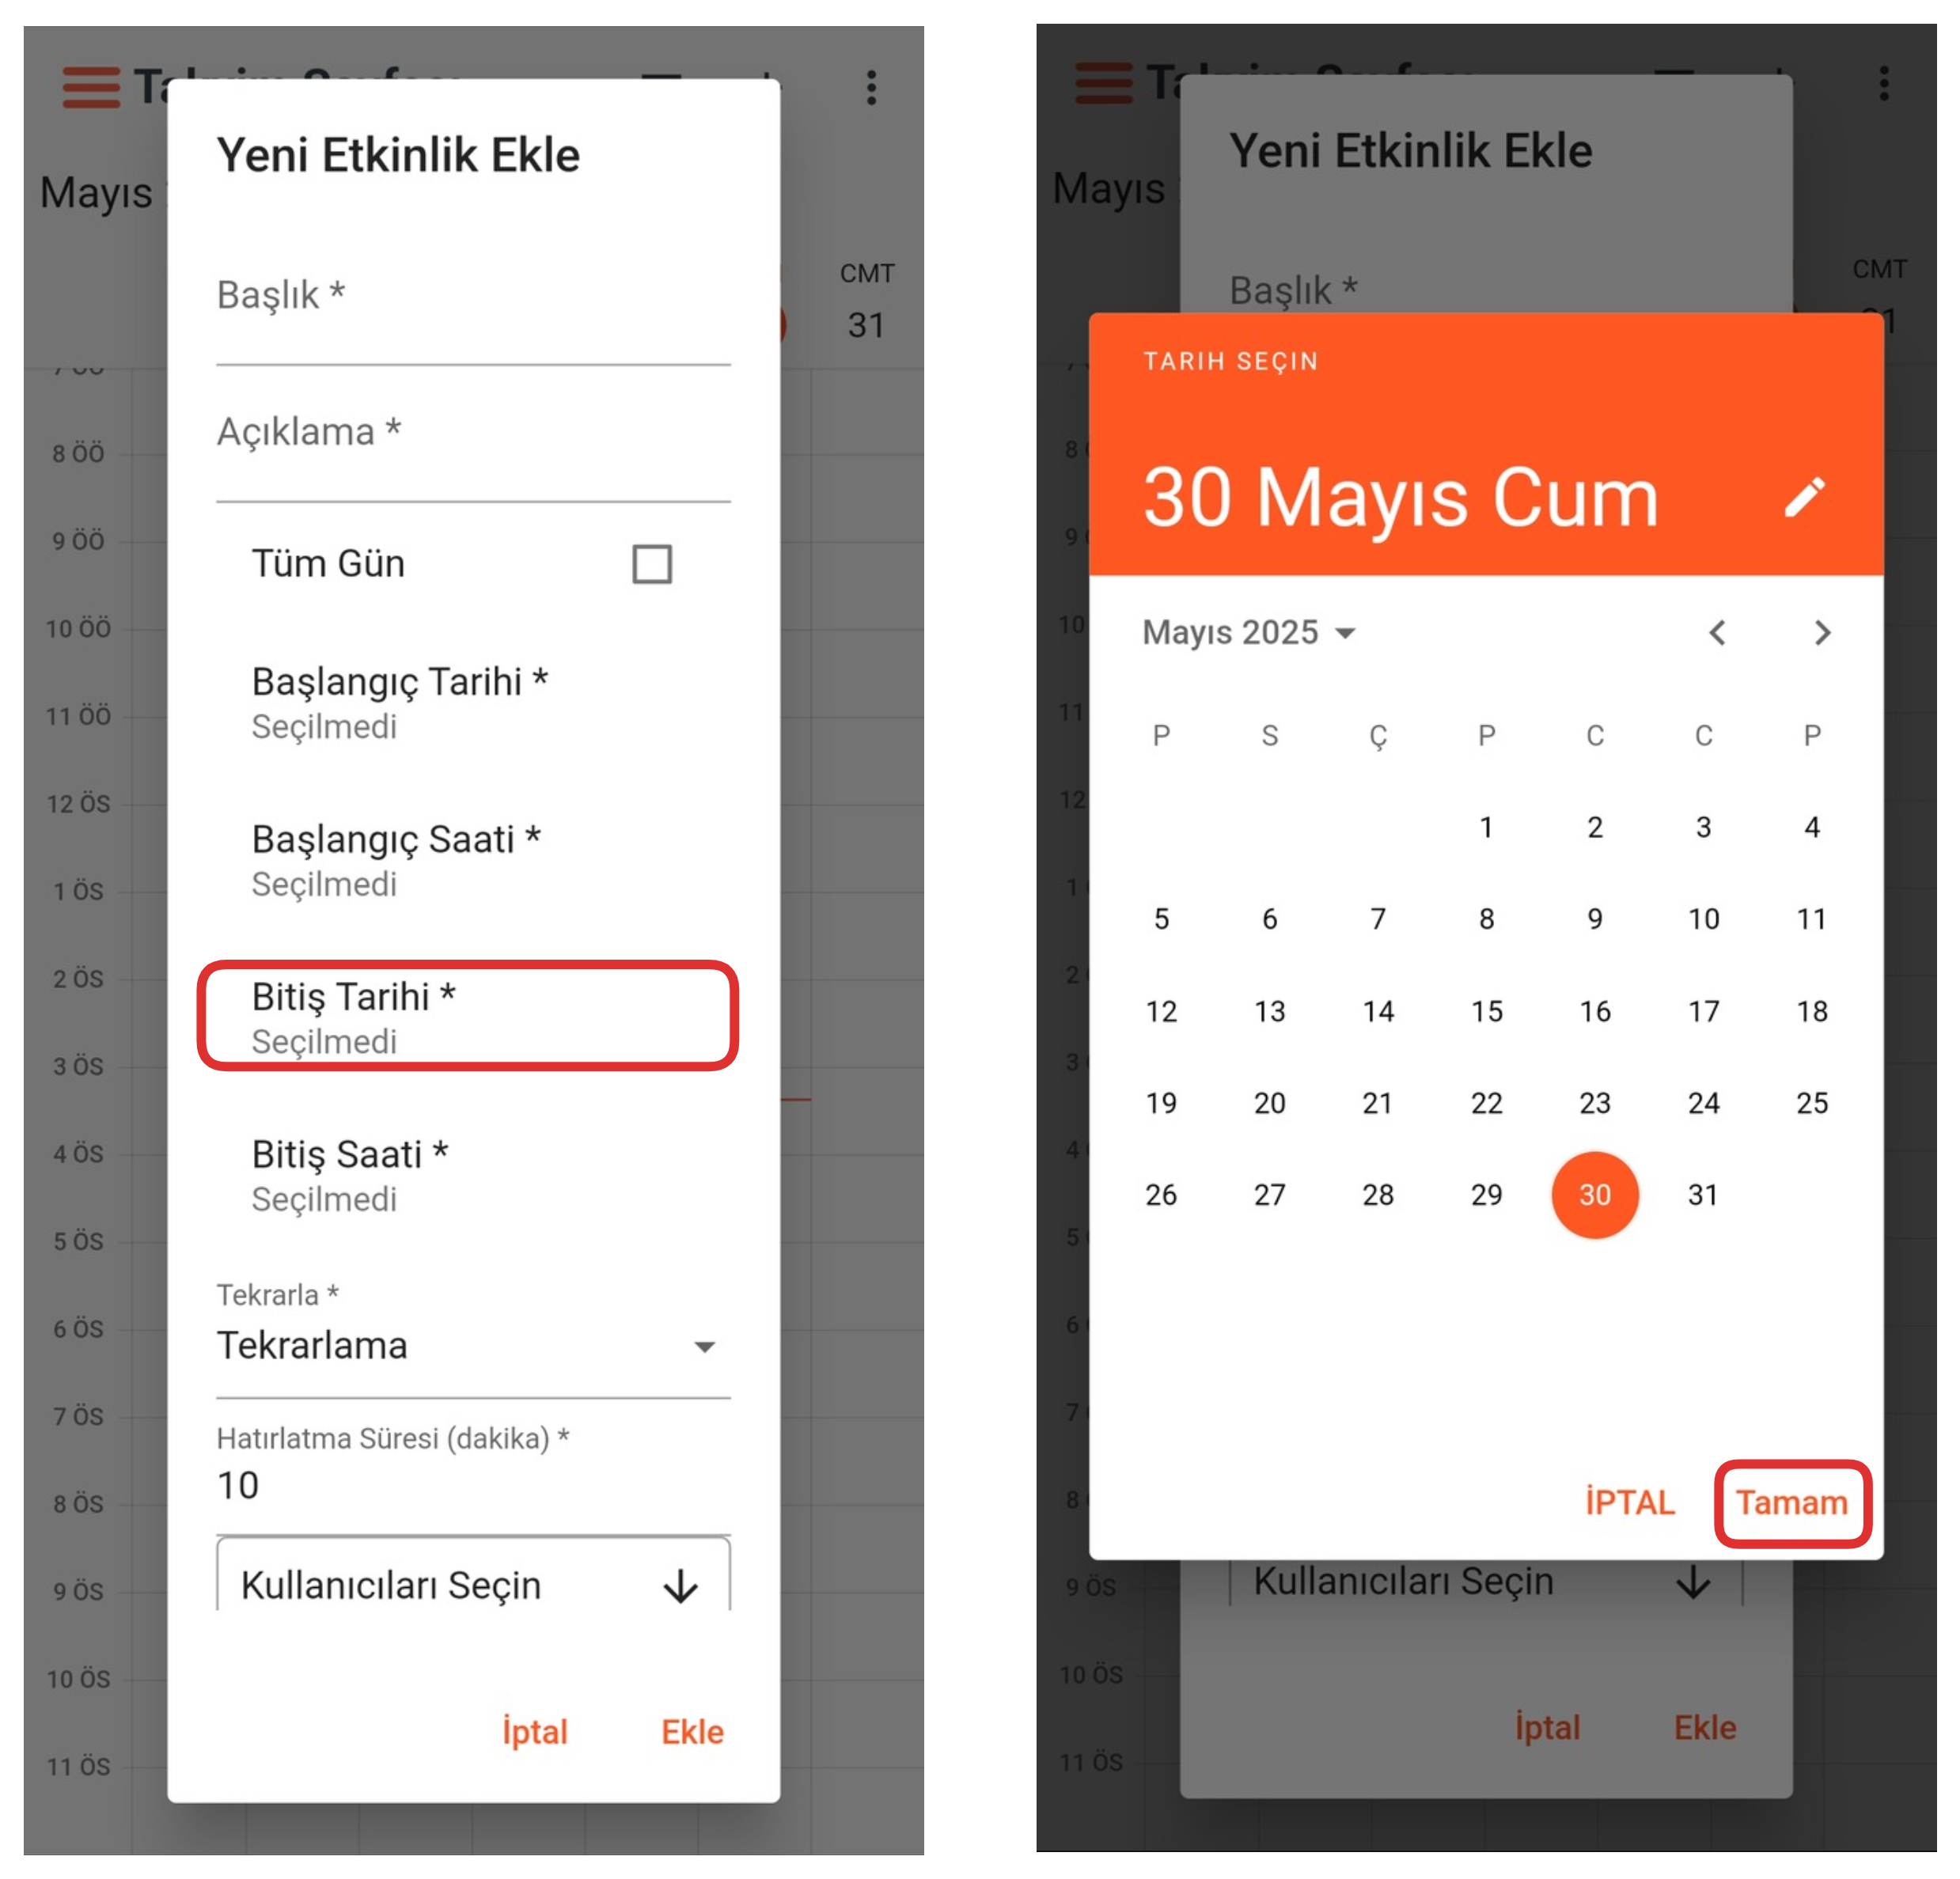
From this section, you can determine the date when your event will end. For this, click on the field that says "End Date", select a date you want from the opened section, and then complete the process by clicking the "OK" button. This indicates when the event will end on the calendar.
7-) End Time
From this section, you can determine the time when your event will end. For this, click on the field that says "End Time", select a time you want from the opened section, and then complete the process by clicking the "OK" button. This indicates when the event will end on the calendar.
8-) Recurrence
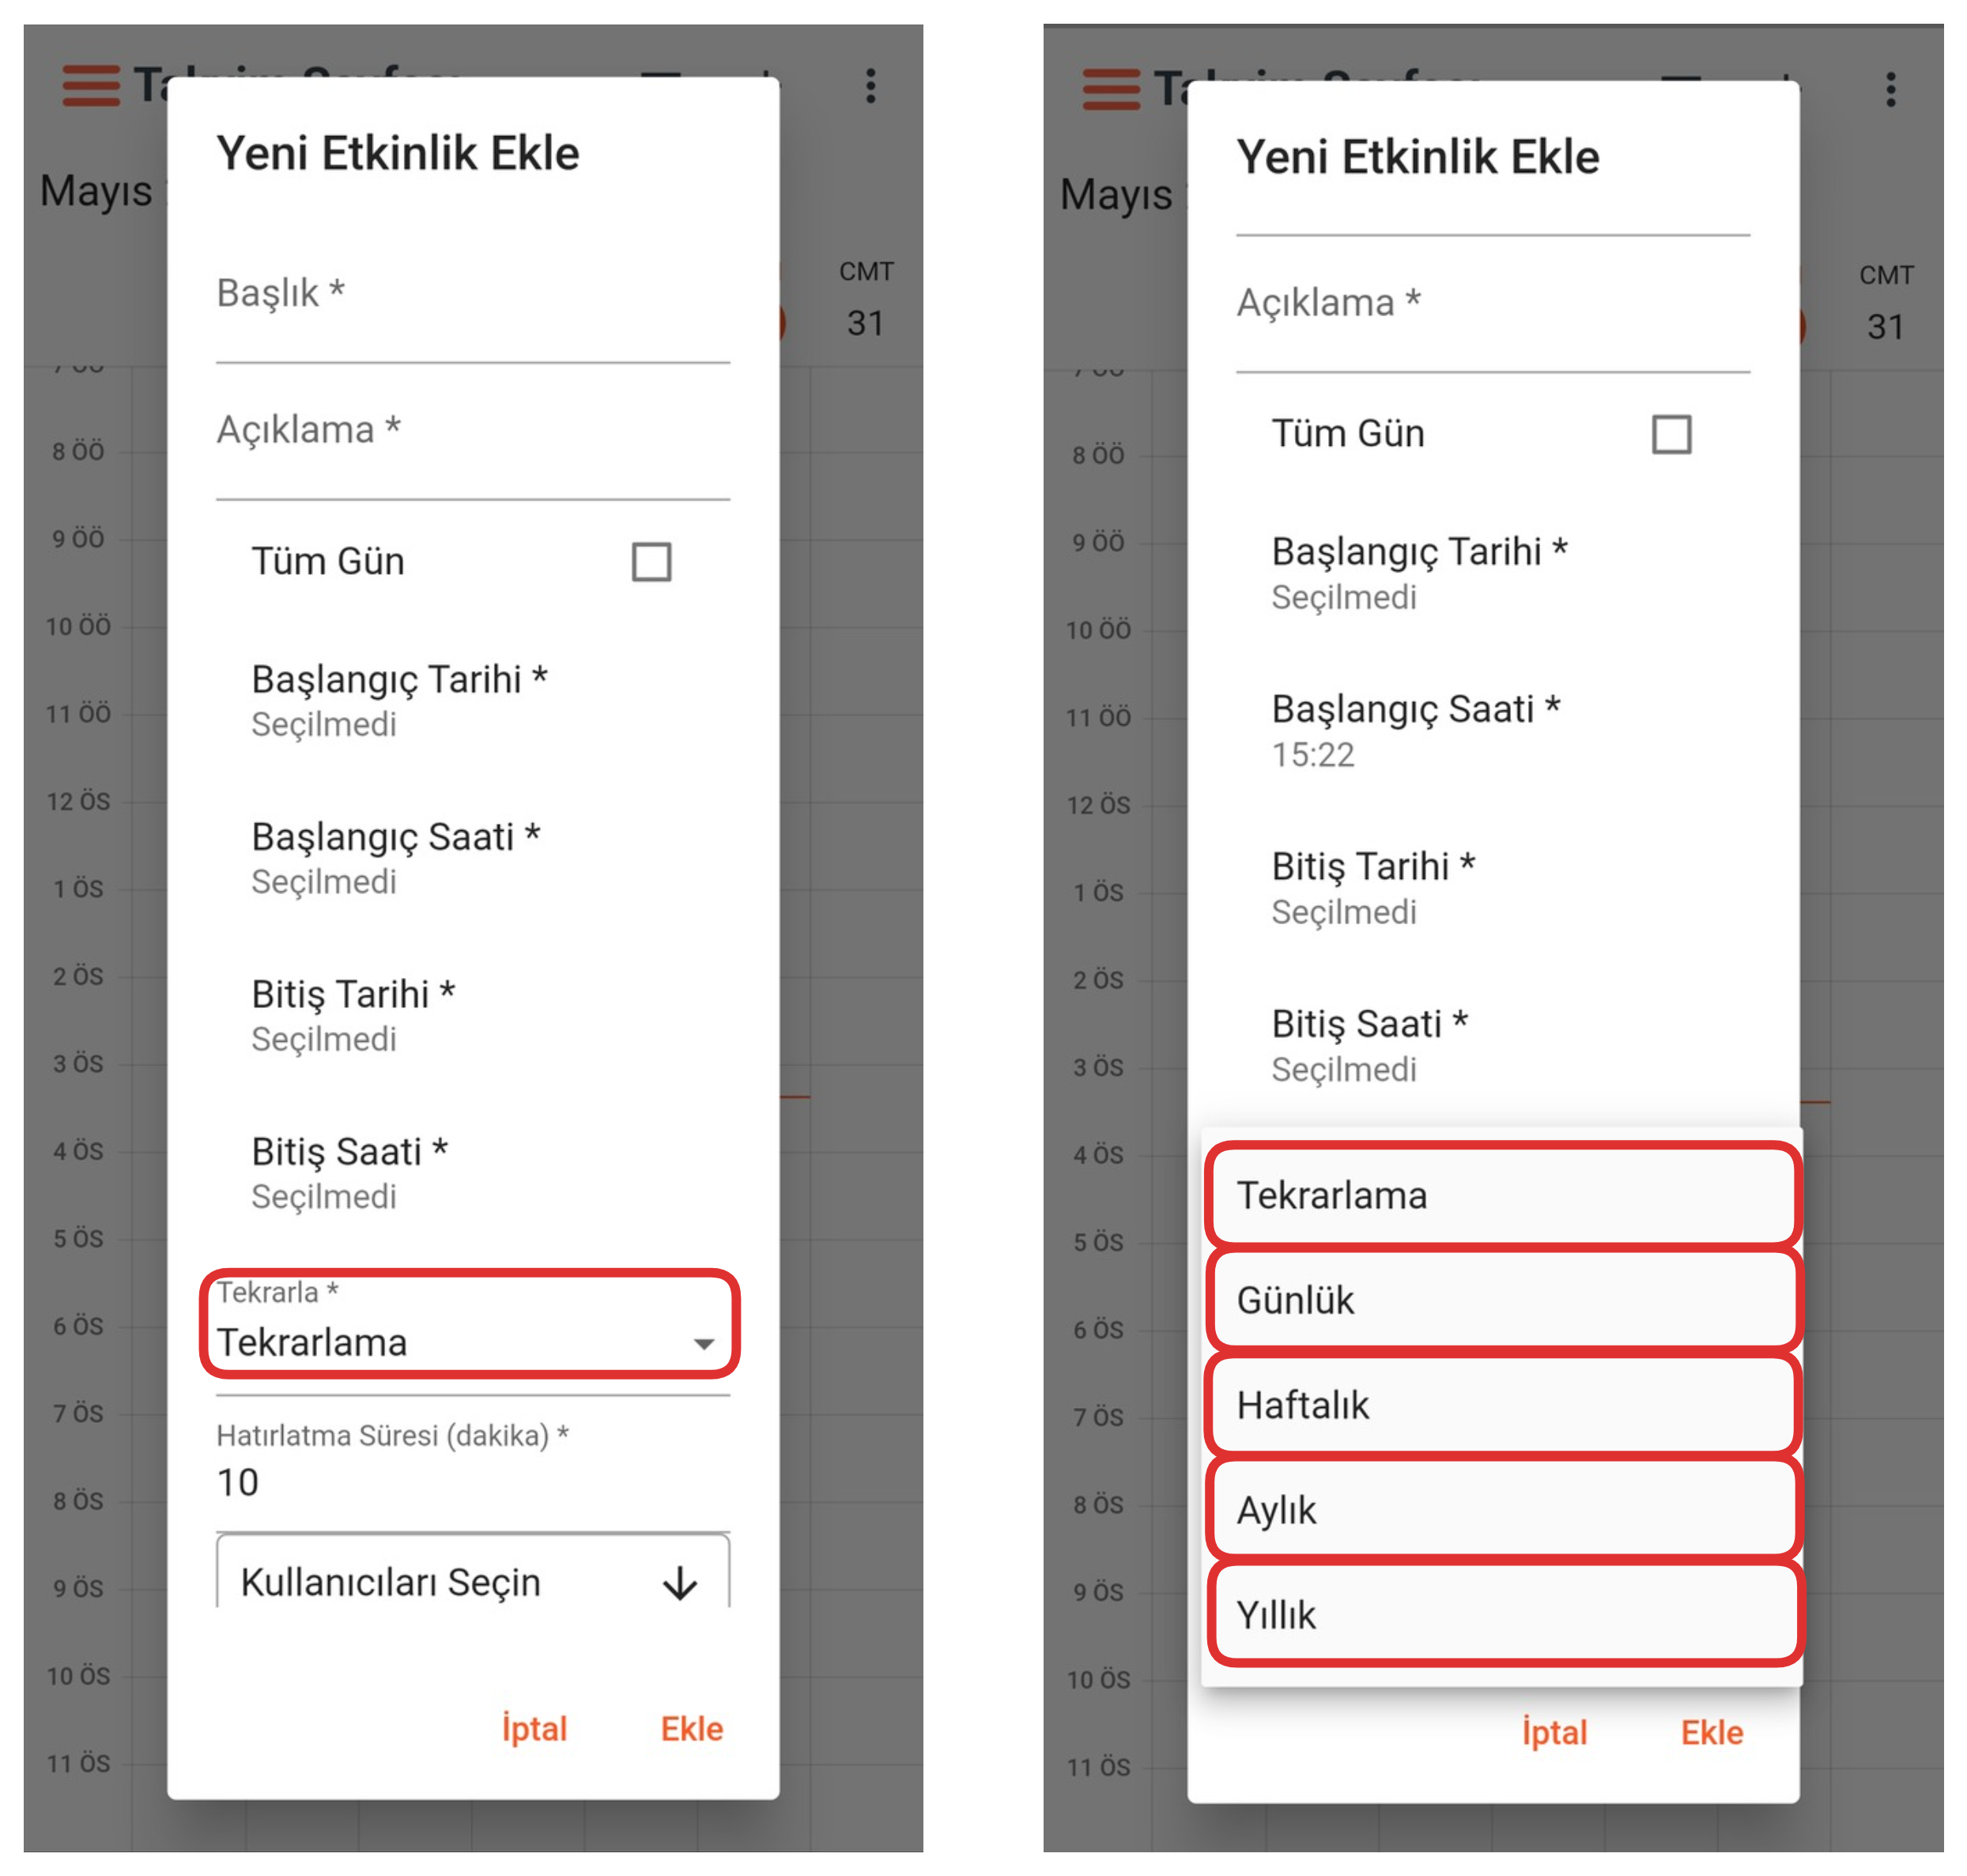
From this section, you can determine the recurrence frequency of your event. If you want the event to repeat as Daily, Weekly, Monthly, or Yearly, click on the "Recurrence" field and determine your desired frequency option from the dropdown list. This setting allows you to easily plan events that occur regularly.
9-) Reminder Duration
From this section, you can determine the reminder duration in minutes for your event. By entering how long before the event starts you want to receive a notification, you can set up an alert that will keep you informed on time.
10-) Select User
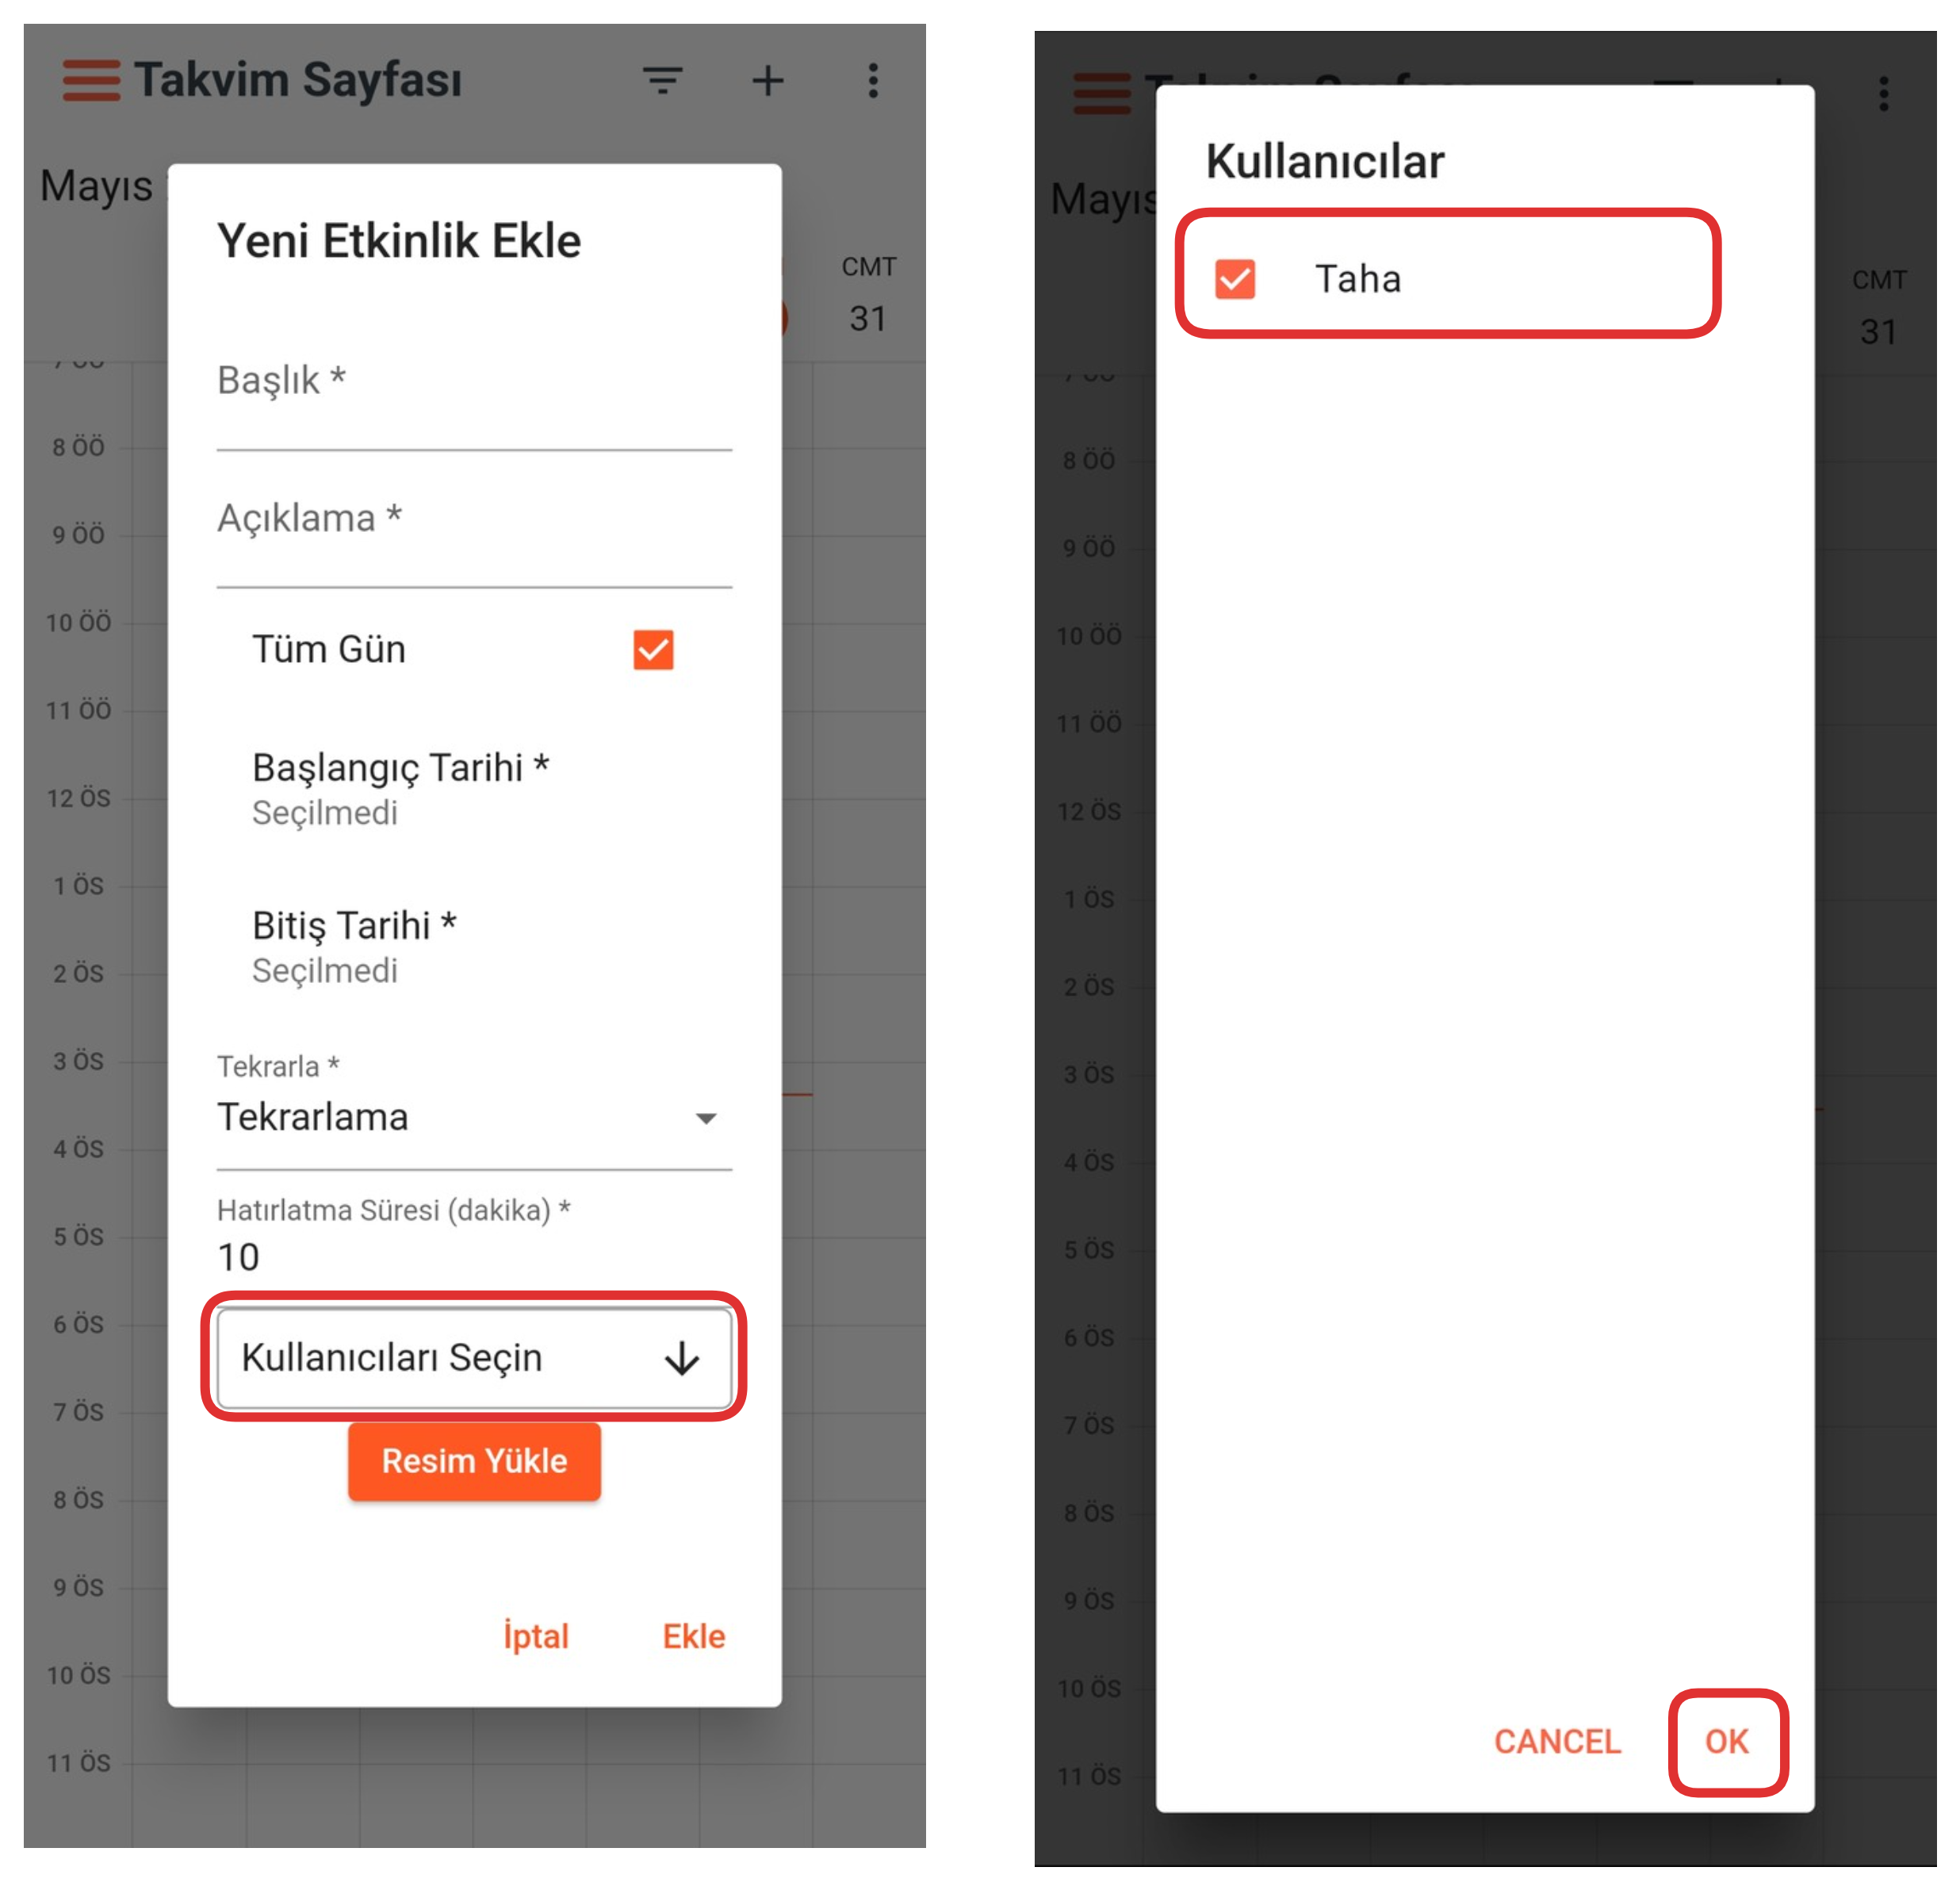
From this section, you can select the user to be included in the event. Users you add as participants will be notified about the event and this event will be displayed on their calendars.
11-) Upload Image
From this section, you can upload images for your event. The images you upload make the content of the event more descriptive and provide visual-supported information sharing.
After completing all these steps, you can complete the event addition process by clicking the "Add" button in the lower right section. With this operation, your event is saved to the calendar and shared with relevant users.
3-) Settings

Settings Elements:
- Day
- Week
- Month
1-) Day
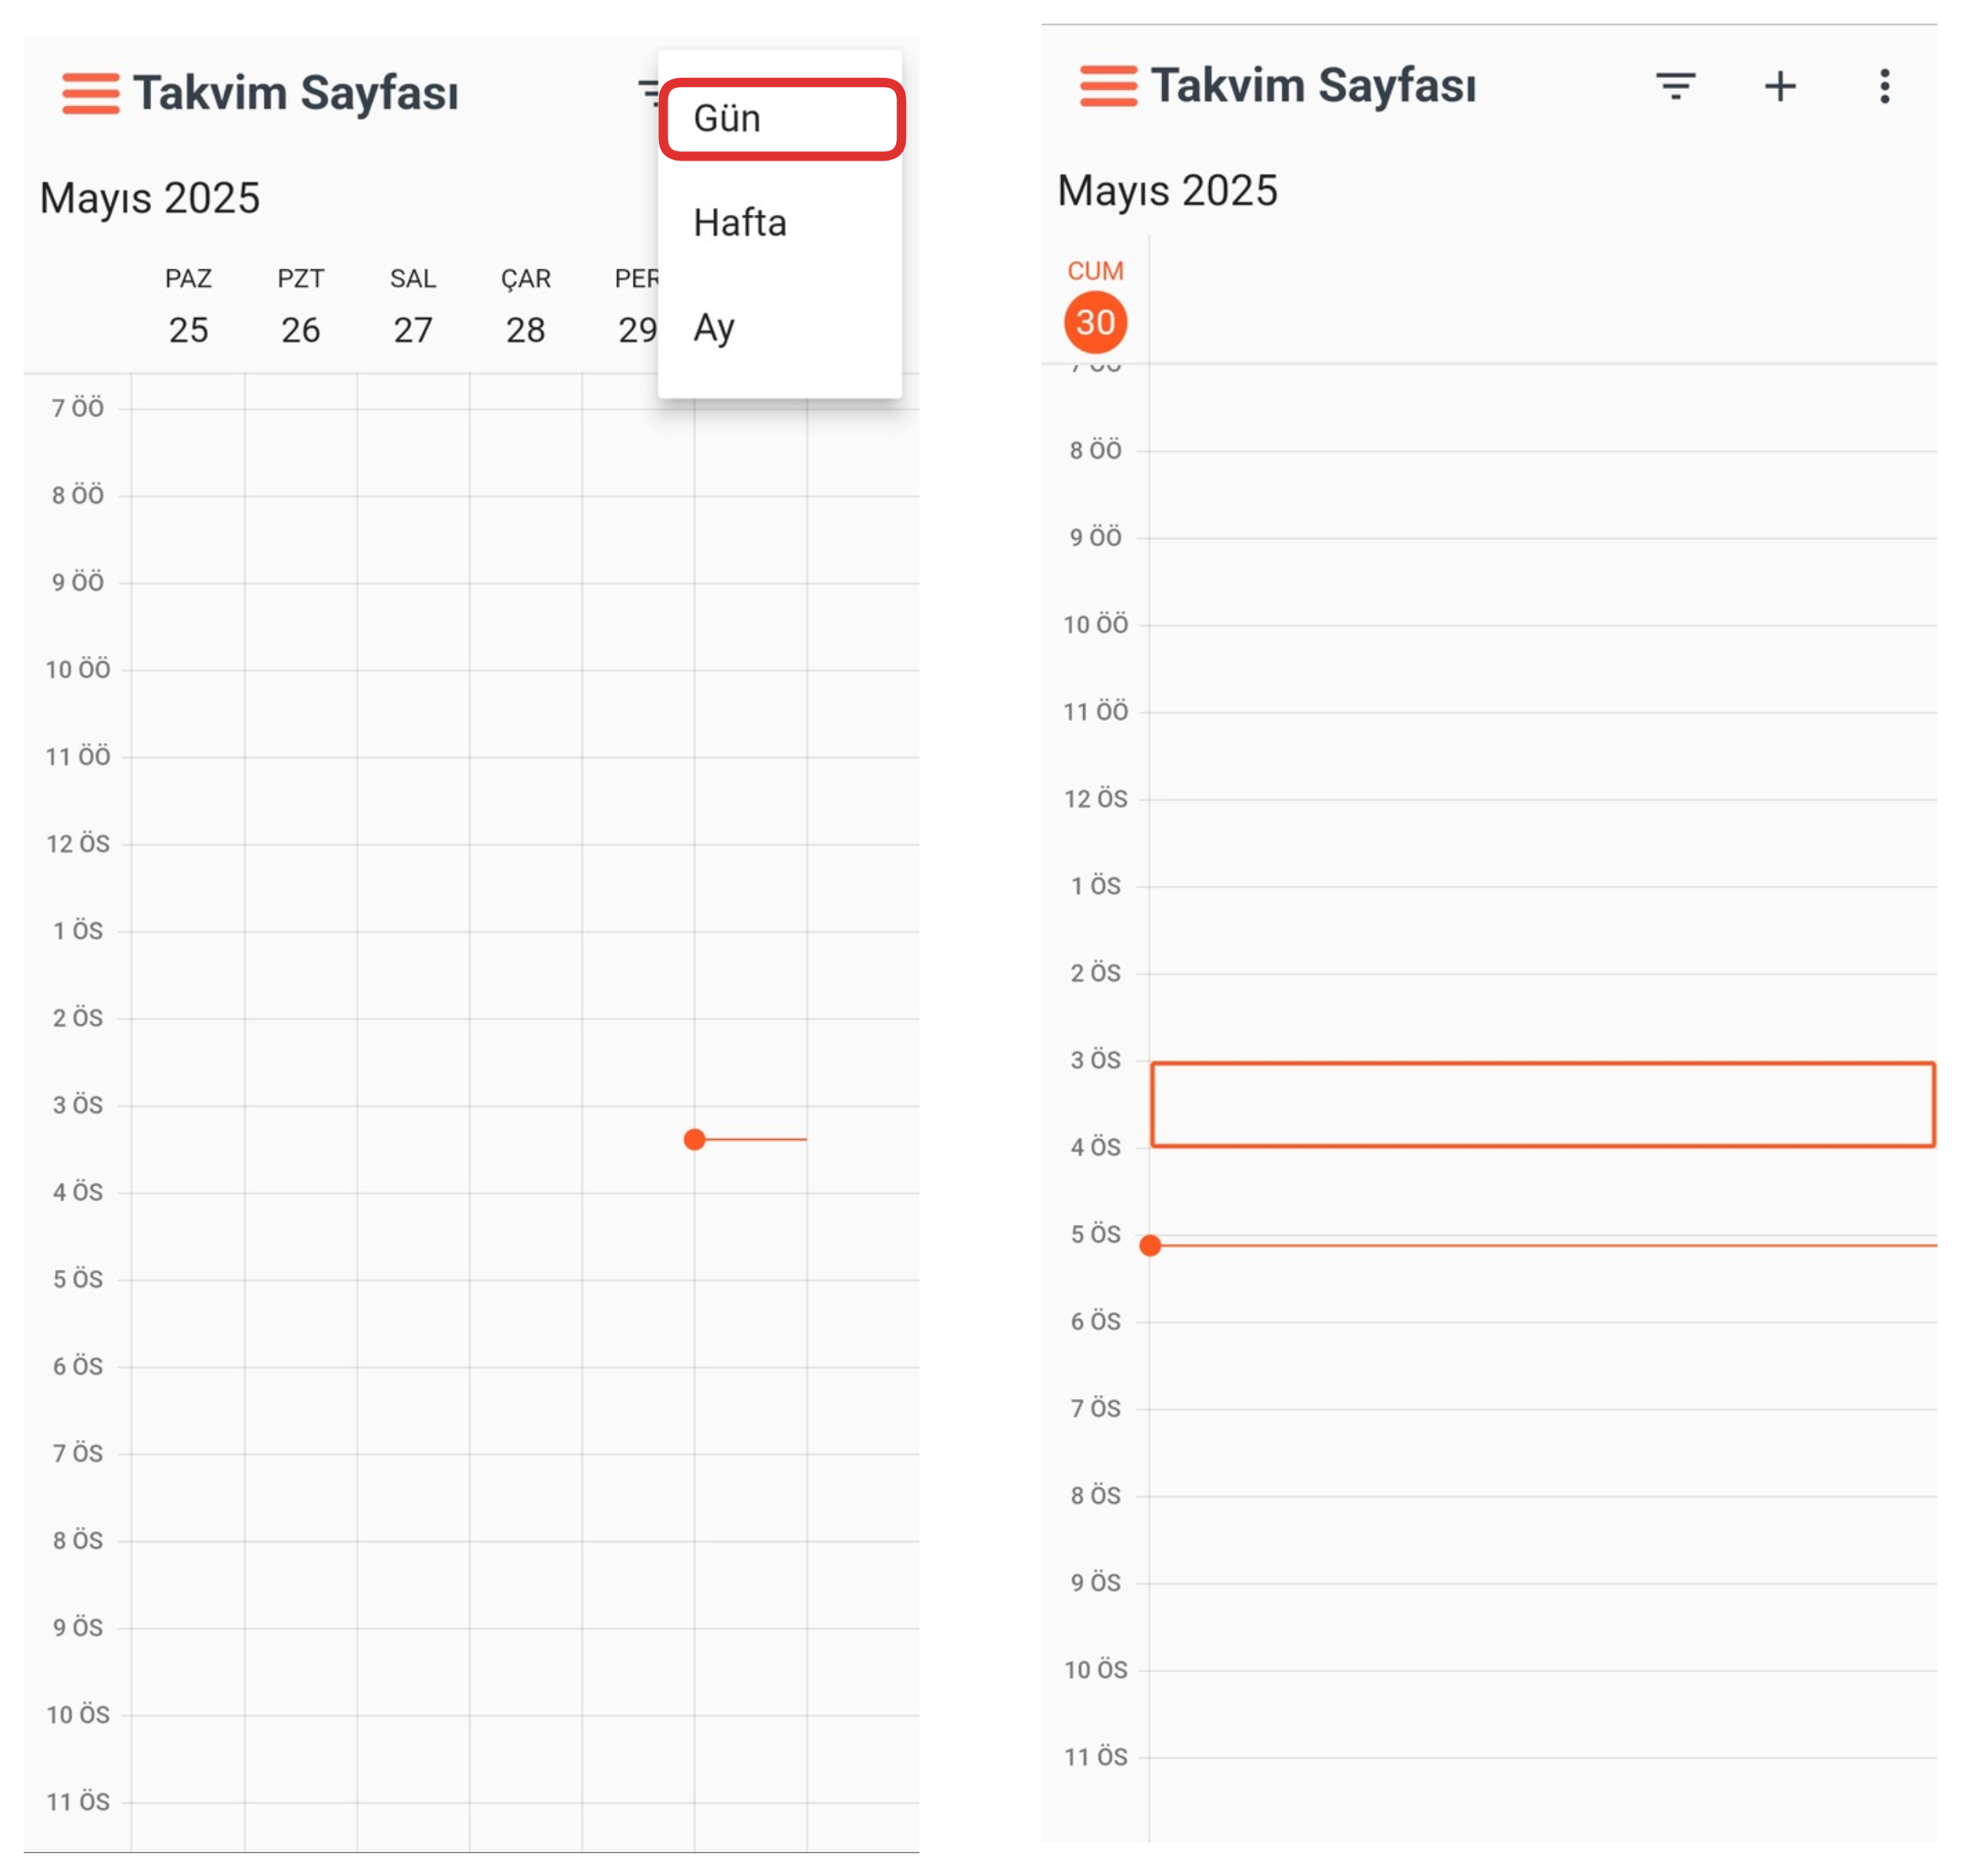
If you want to view your calendar in "Daily" view, click the "Three Dots" button in the upper right corner. From the opened menu, select the "Daily" option to view the calendar in Day format showing only events.
2-) Week
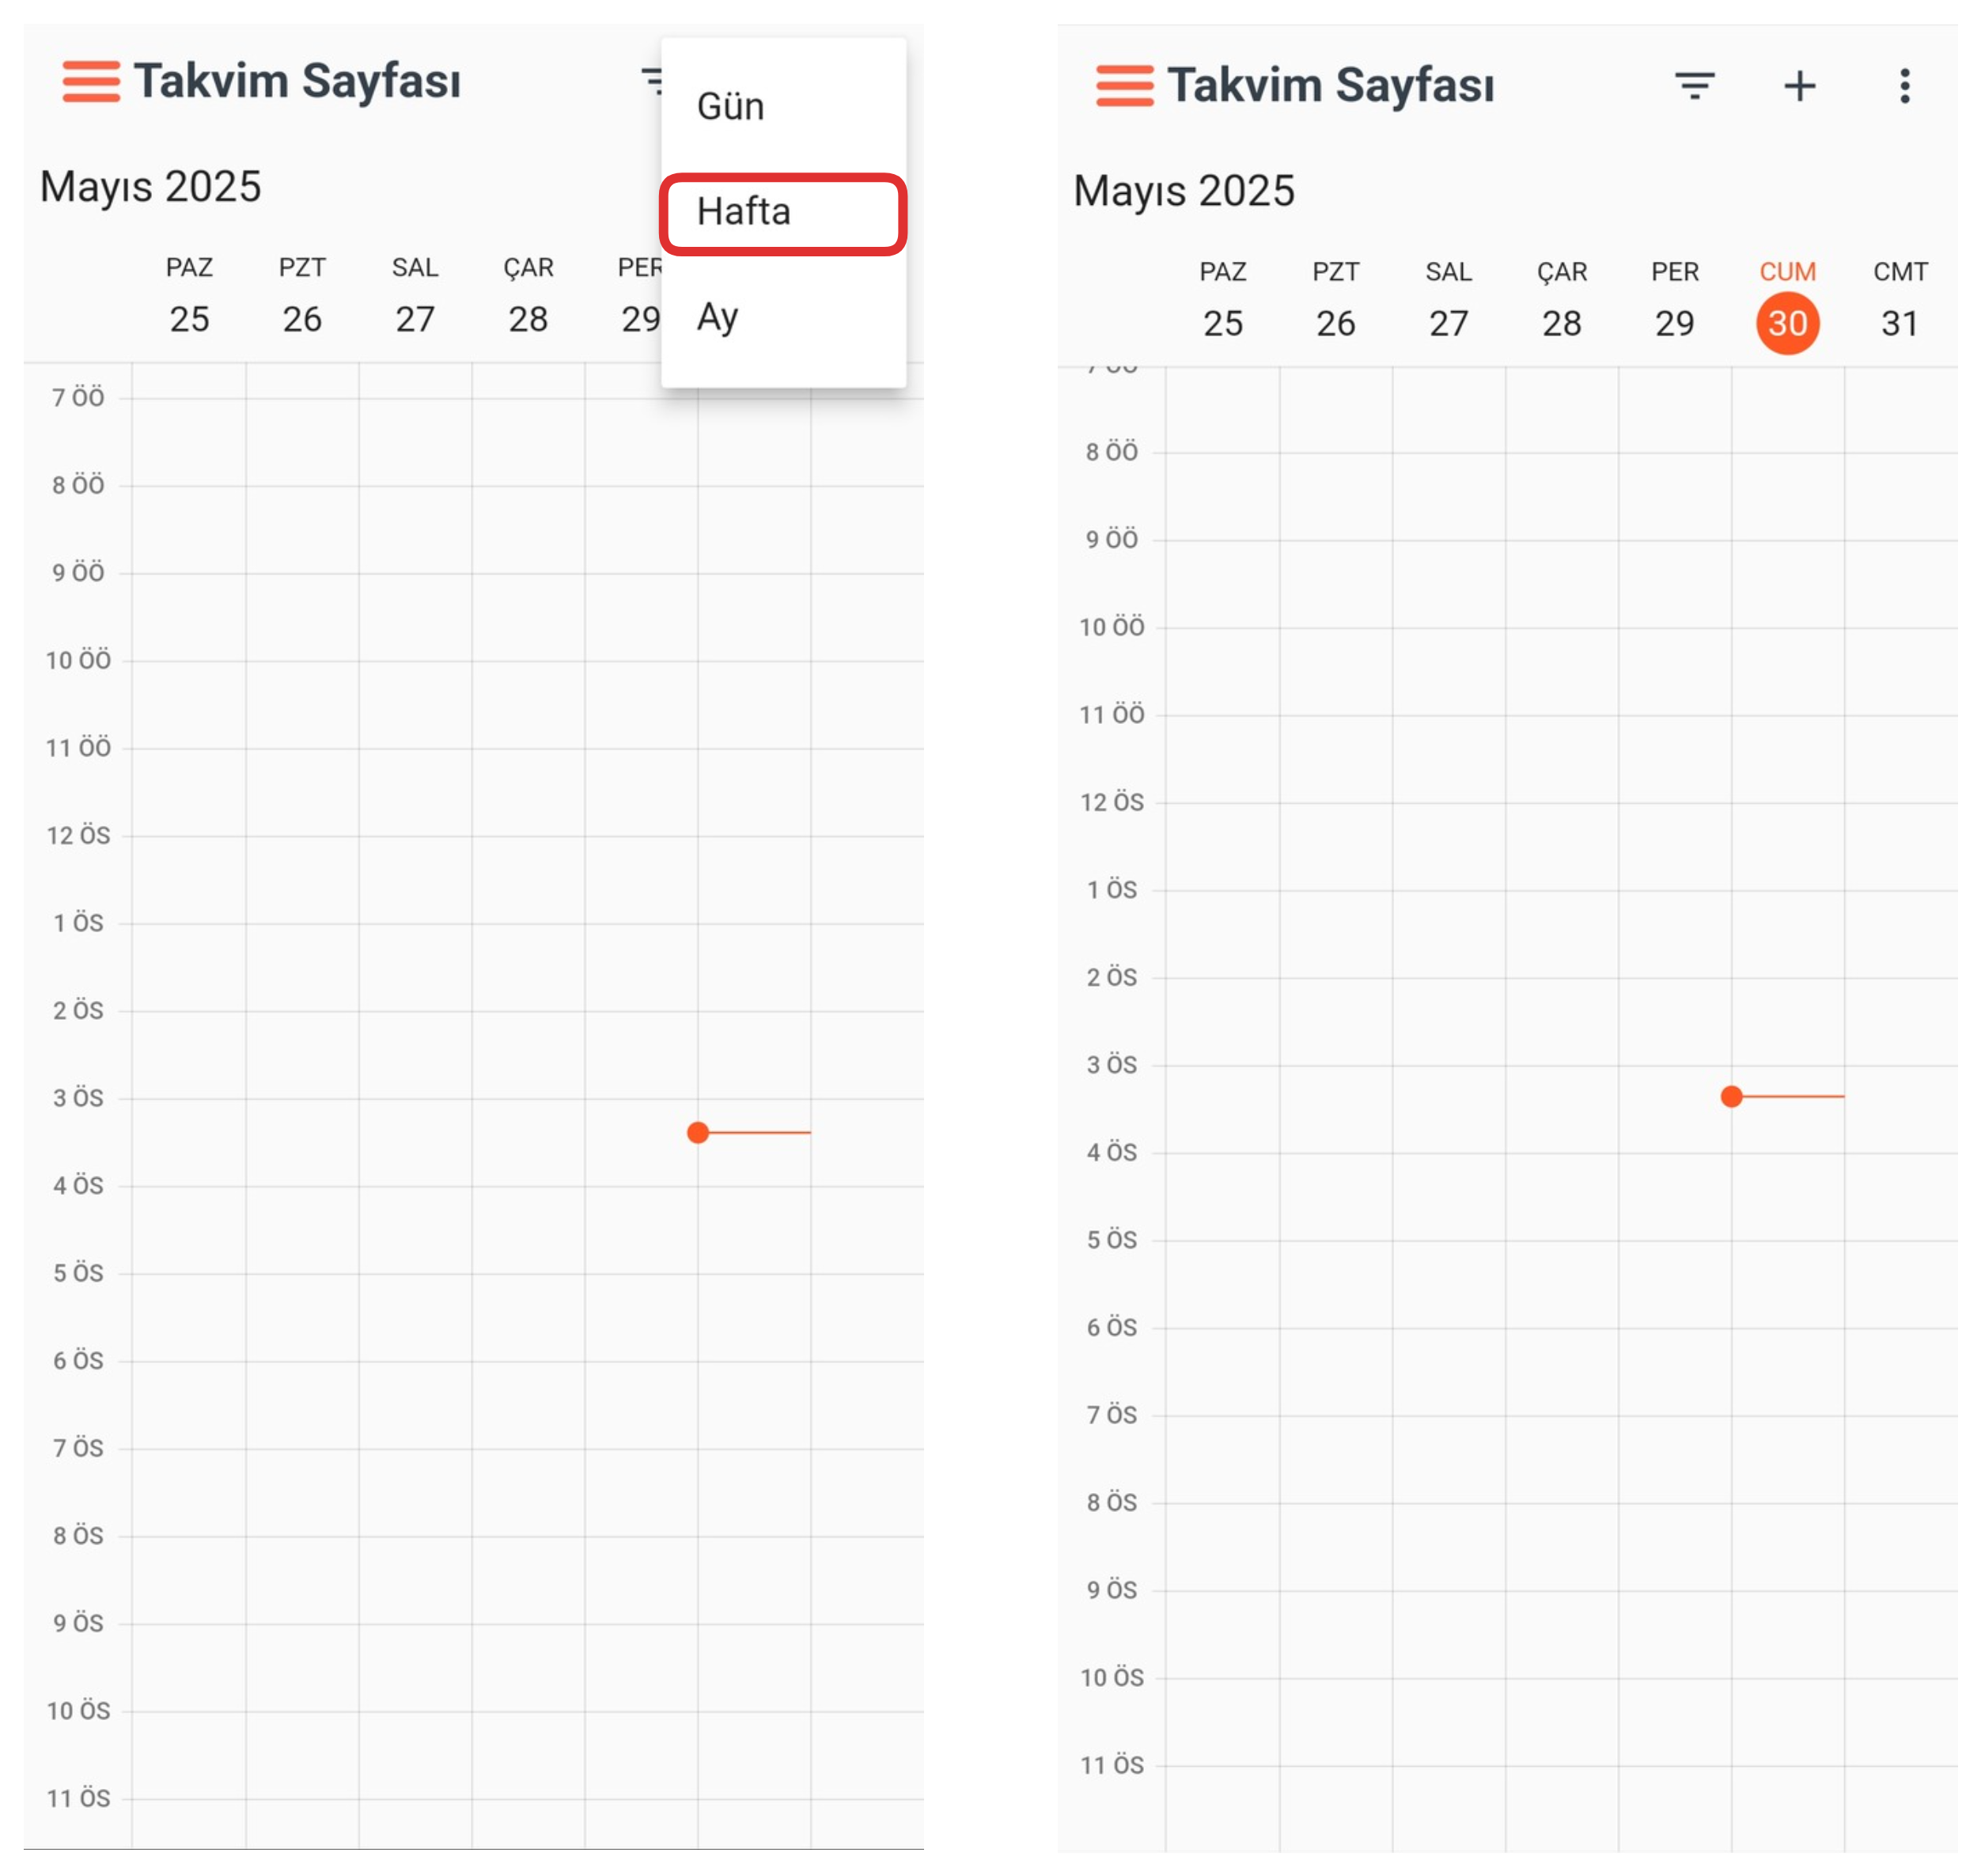
If you want to view your calendar in "Weekly" view, click the "Three Dots" button in the upper right corner. From the opened menu, select the "Weekly" option to view the calendar in Week format showing only events.
3-) Month
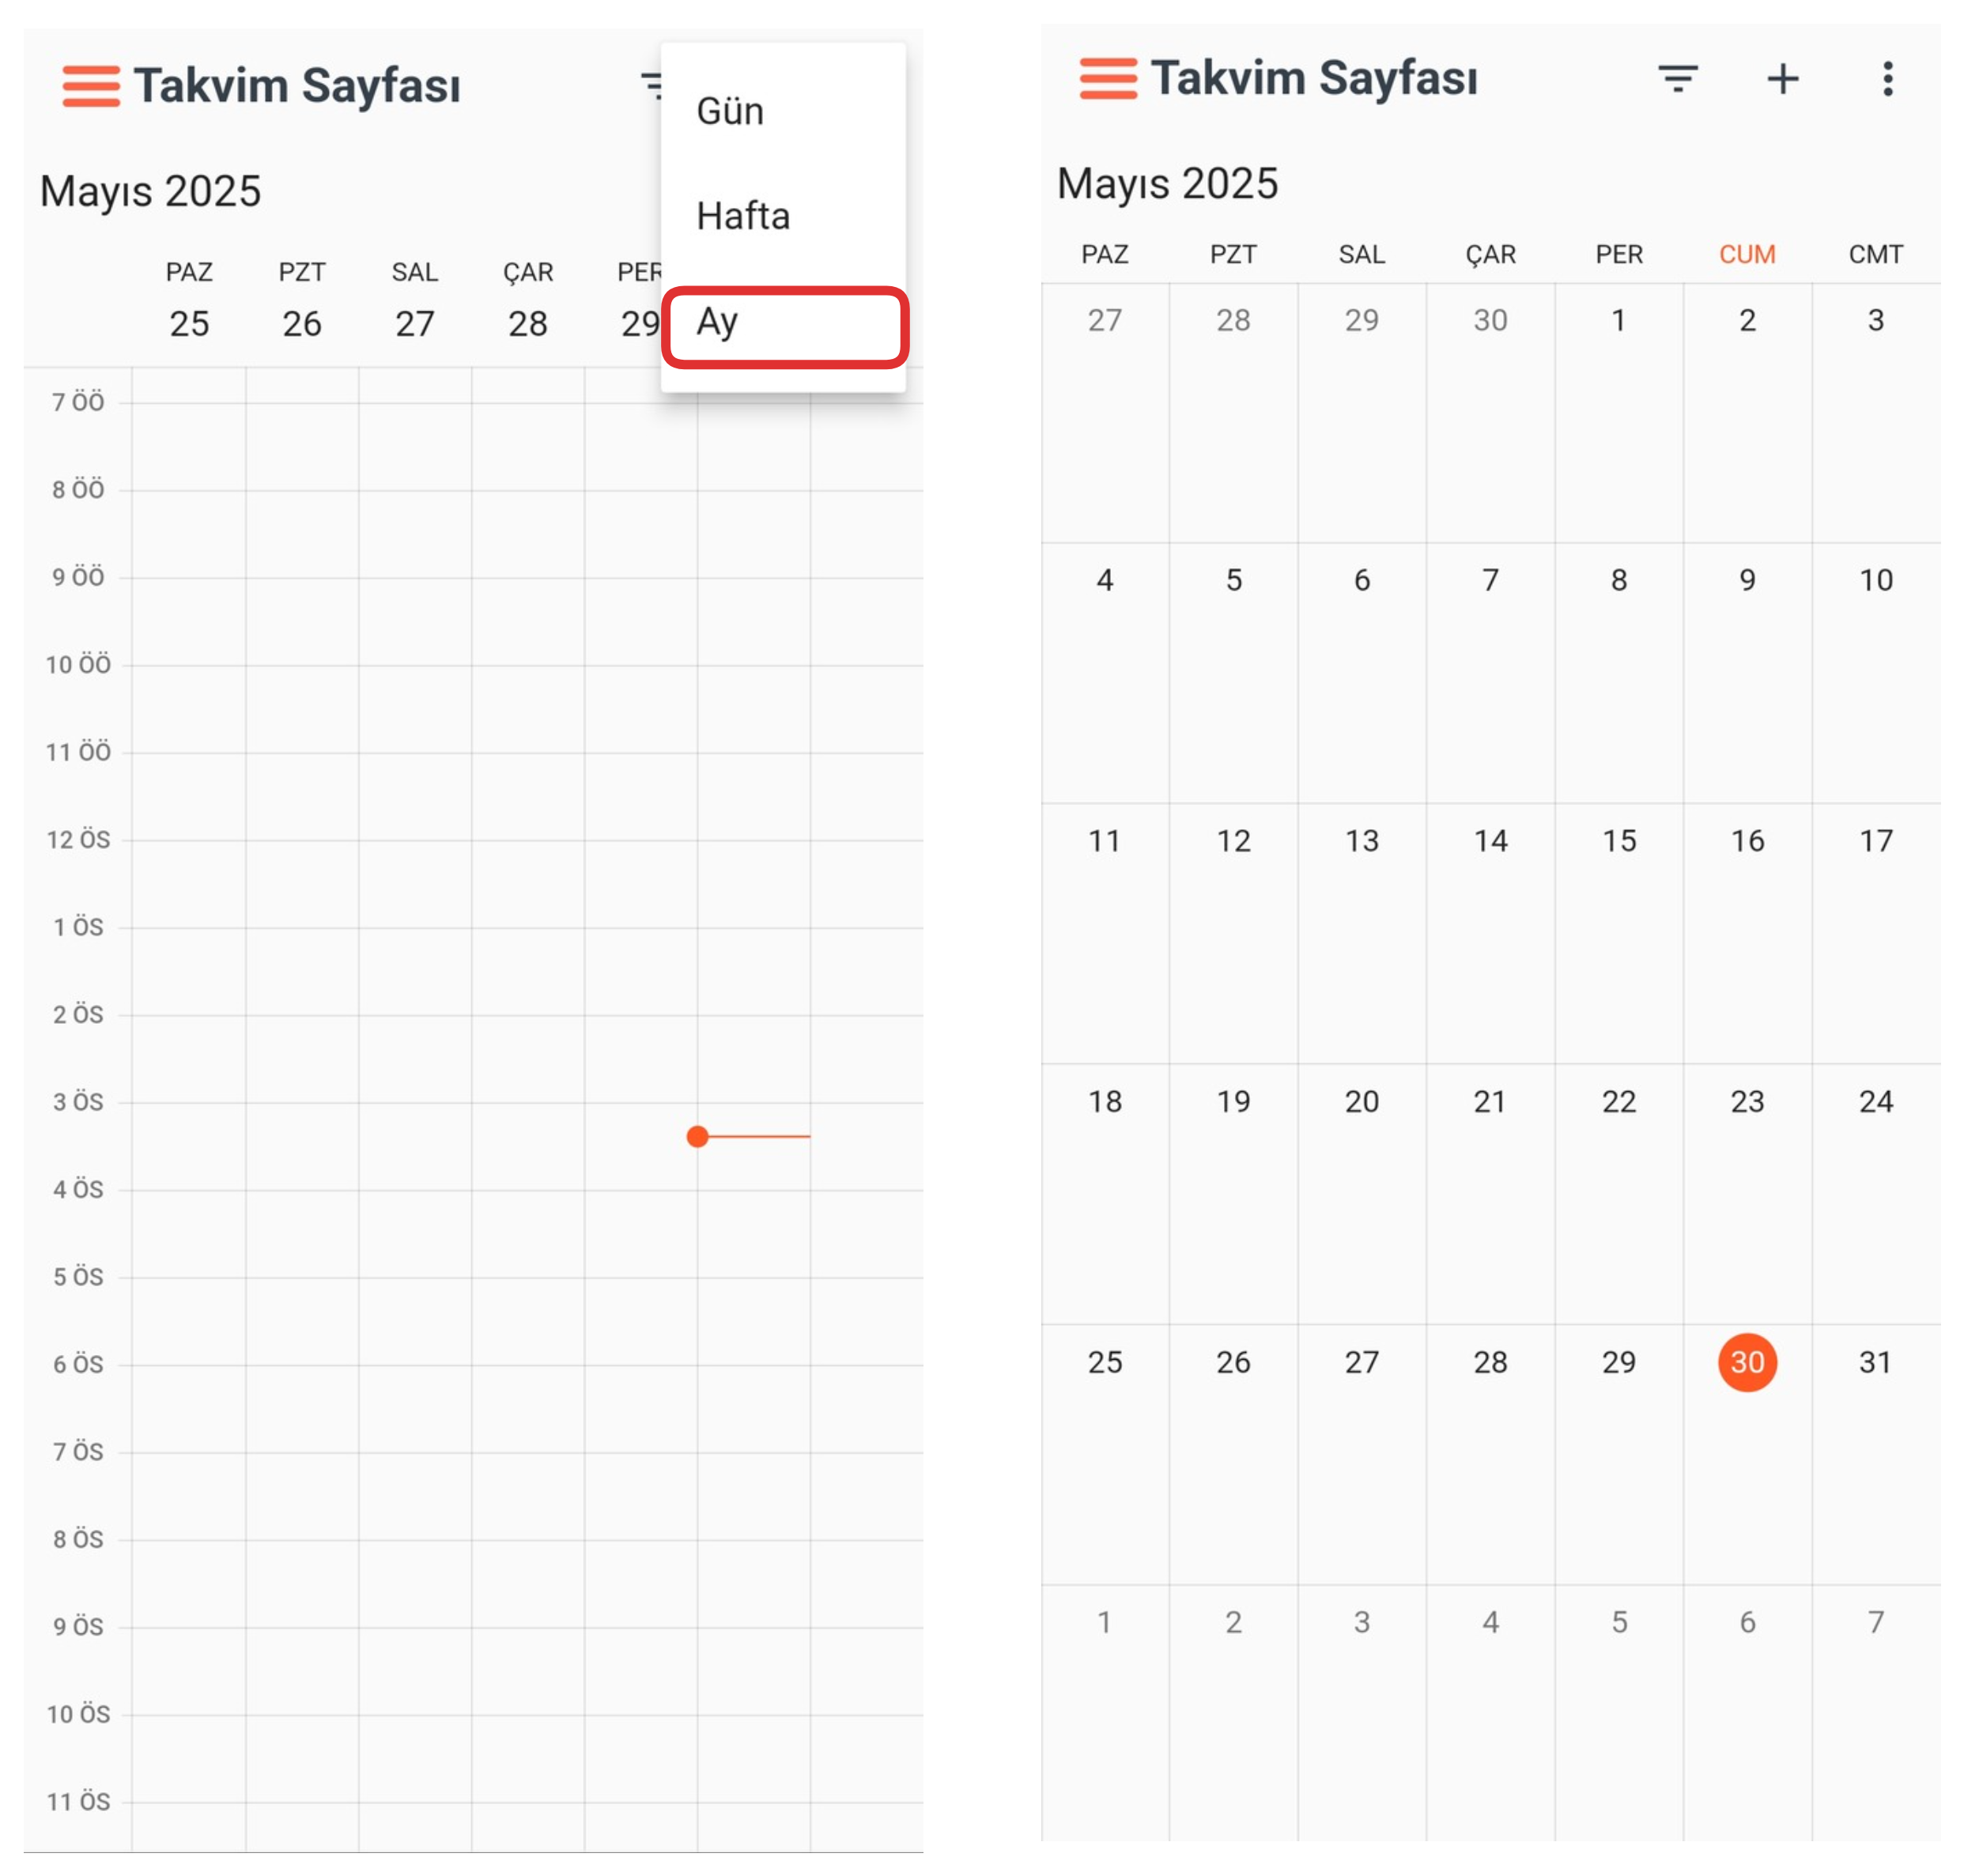
If you want to view your calendar in "Month" view, click the "Three Dots" button in the upper right corner. From the opened menu, select the "Month" option to view the calendar in Month format showing only events.
4-) Calendar
On the calendar screen, you can view the events you created in detail. You can easily see which day and between which hours the events are planned and manage your scheduling more efficiently.