How to Do Facebook/Messenger Integration?
Messenger Integration
Supsis AI allows you to centrally manage all your digital communication channels from a single panel. In this context, you can also easily integrate your Facebook/Messenger account through Supsis and control all messaging from one place. Thanks to the integration, you can respond instantly to messages coming through your Facebook channel and provide 7/24 uninterrupted support.
To establish a more effective and dynamic communication process by integrating your Facebook channel with Supsis, first a Facebook/Messenger channel must be created. Afterwards, log into the Supsis panel and proceed to the integration steps. The next stages to be followed are:
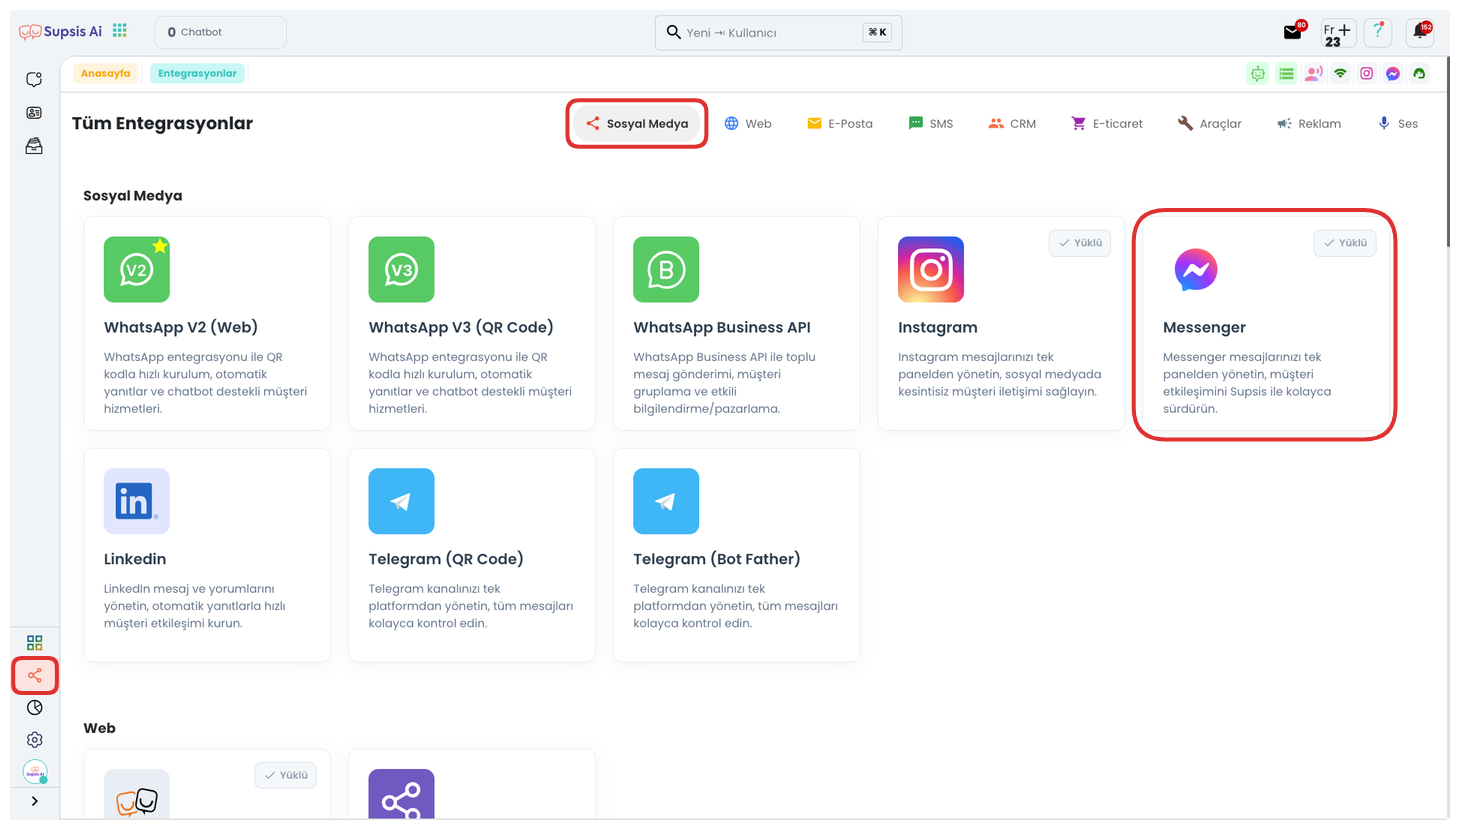
First, after logging into your Supsis panel, click on the "Integrations" section from the menu on the left. Find the "Messenger" option among the integration options listed on the opened screen. You can start the Facebook Messenger integration process by clicking on this option.
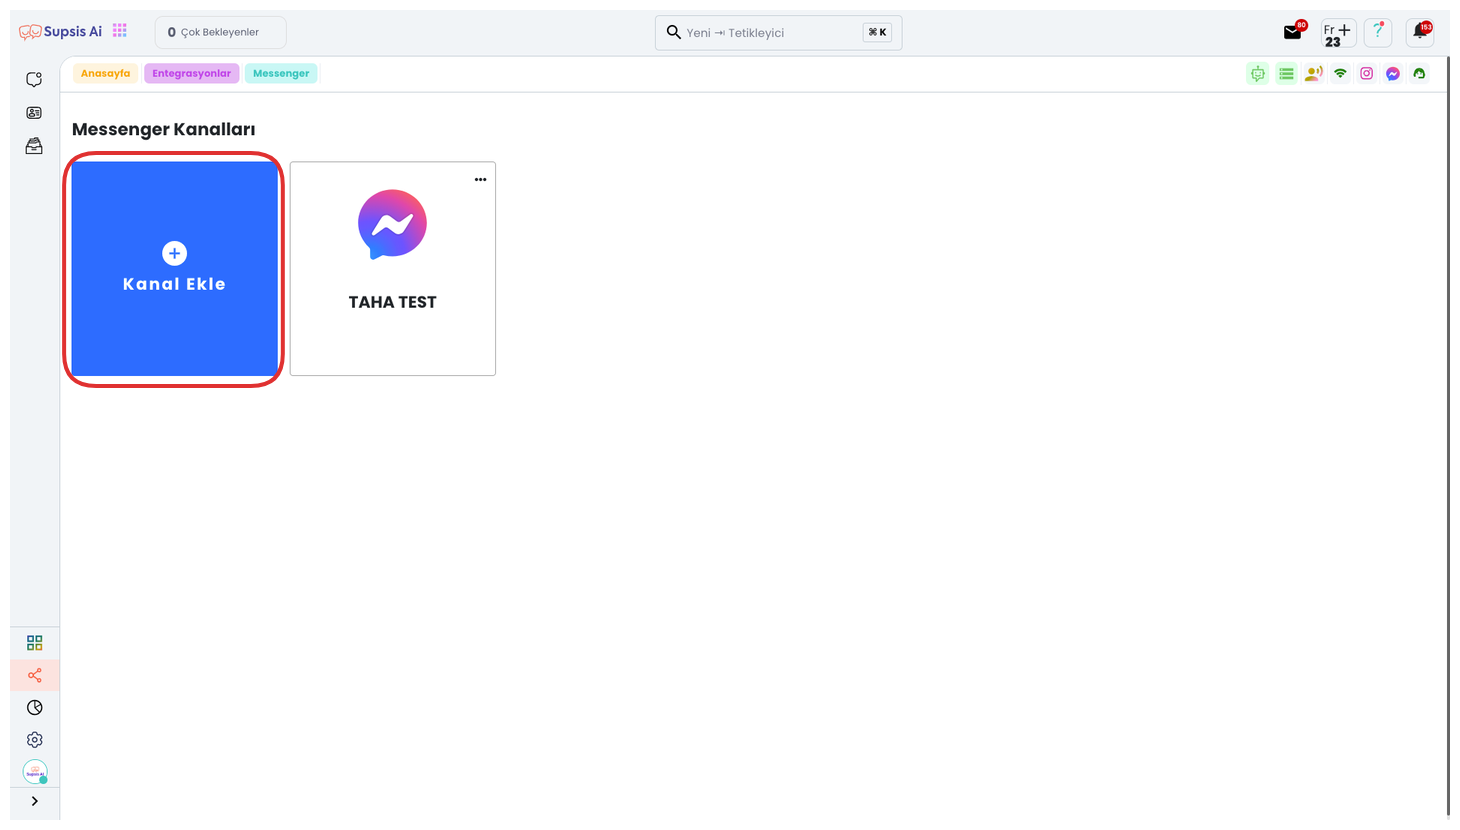
You can continue the integration process by clicking the "Add Channel" button on the opened page. This step is necessary to connect your Messenger account to the Supsis AI system.
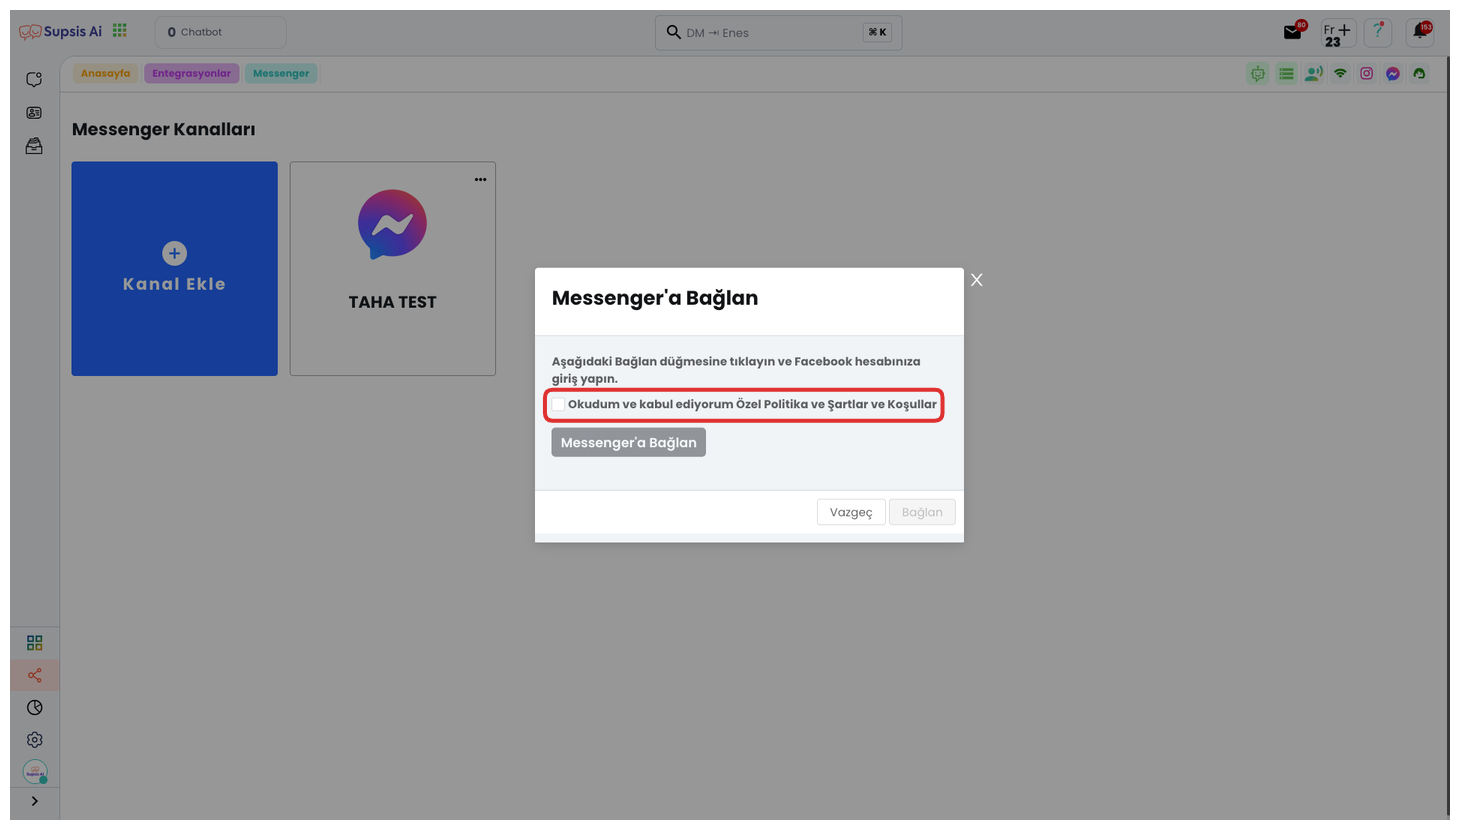
Continue by checking the Privacy Policy and Terms and Conditions box from the opened modal. This step indicates that you accept Supsis's terms of service and is mandatory for the integration process to proceed.
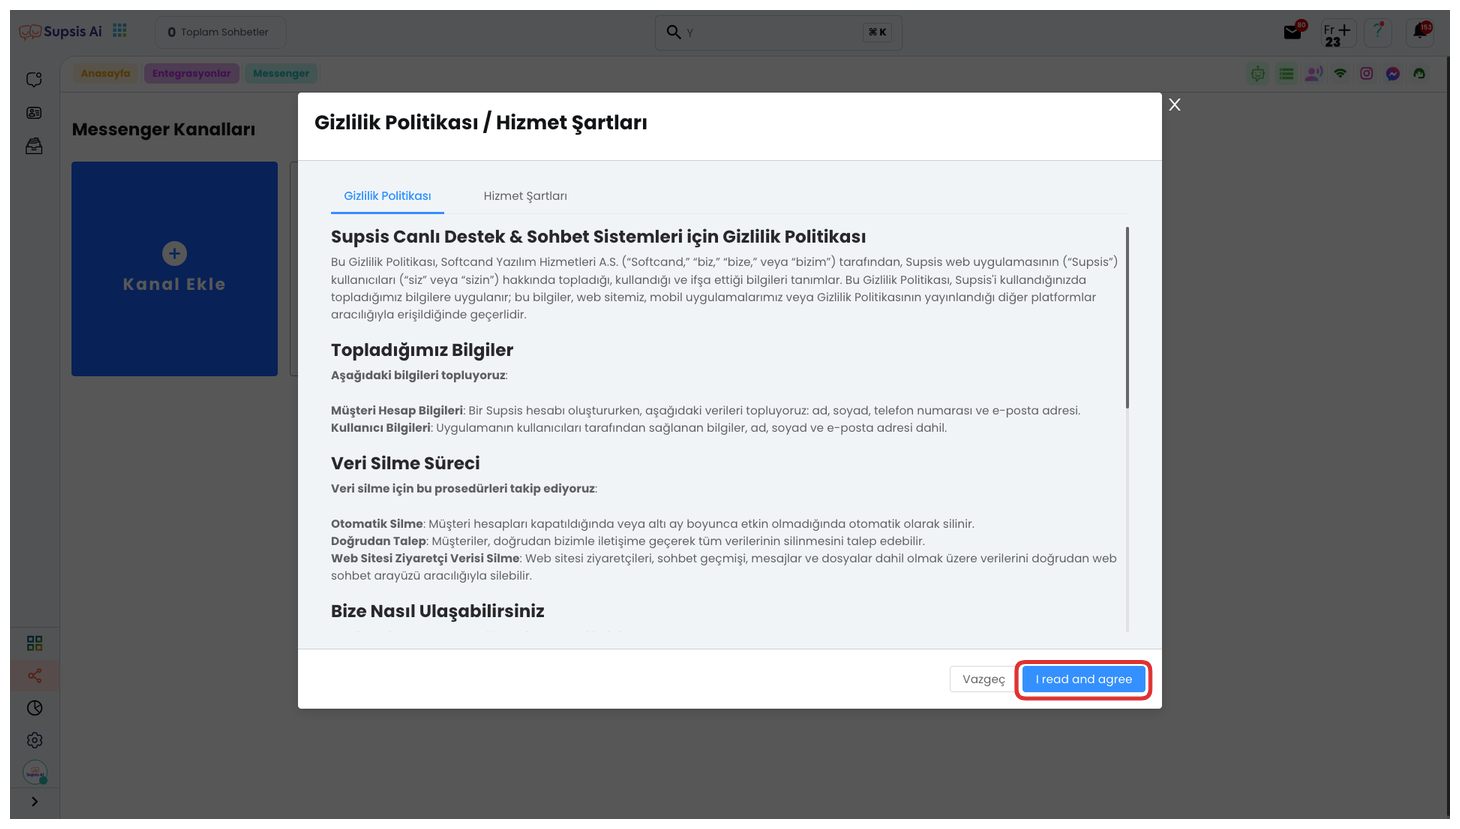
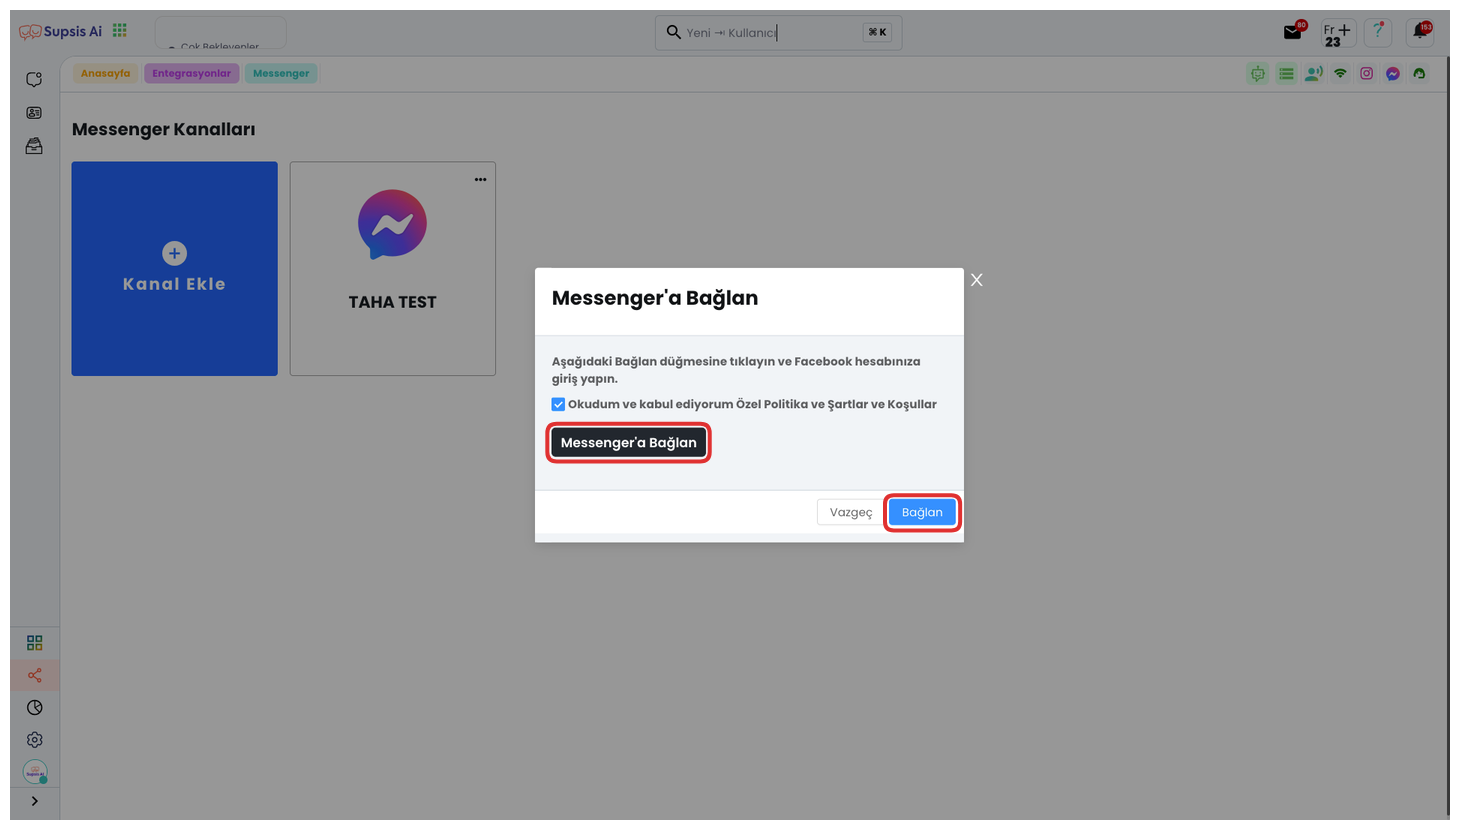
After carefully reviewing the Privacy Policy and Terms of Service in the opened area, give your approval by clicking the "I have read and accept" button at the bottom of the screen. Then, click the "Connect to Messenger" button to continue with the integration.
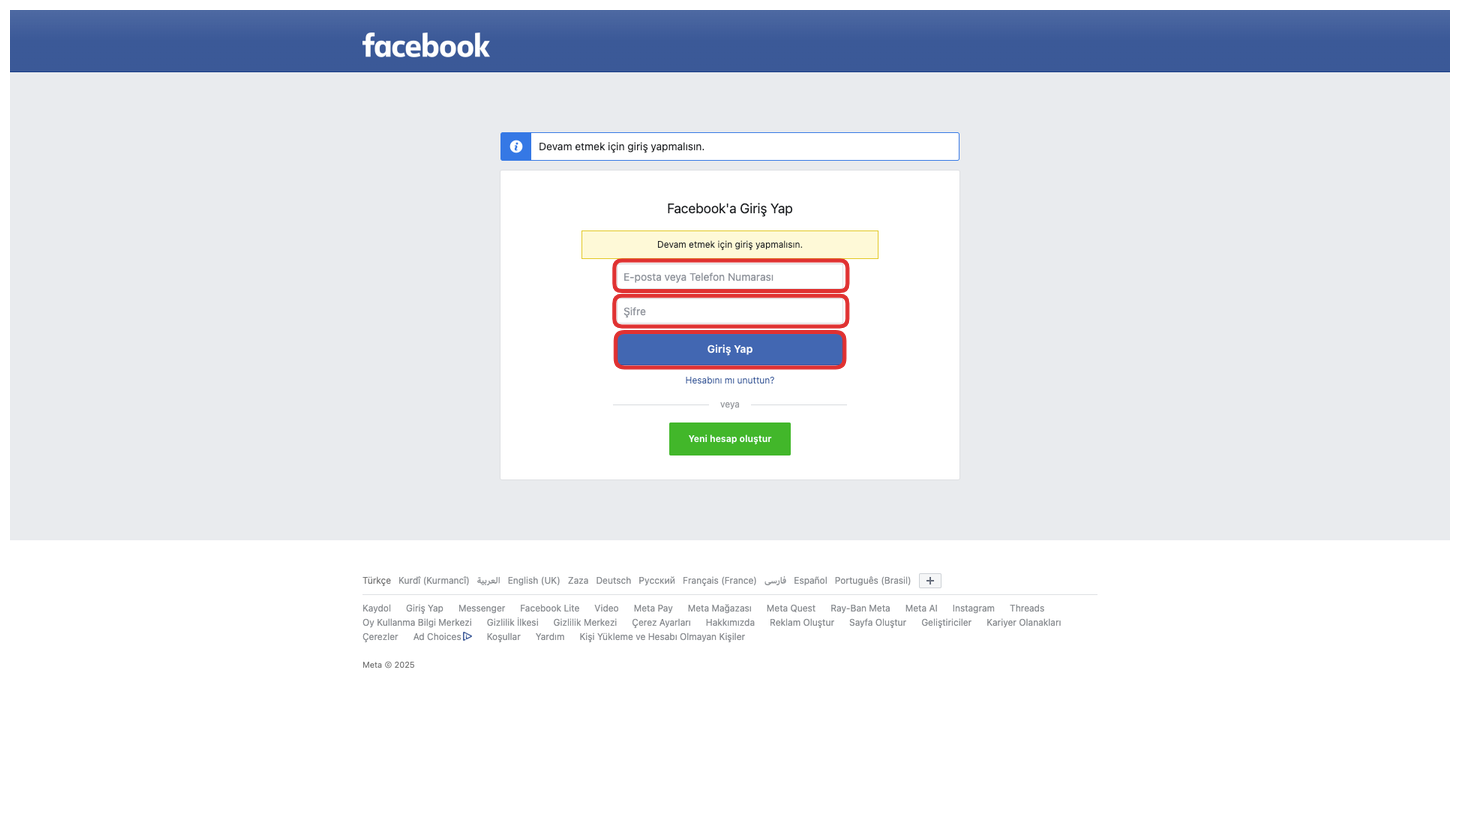
On the opened page, continue by logging in with your Facebook account that your Messenger account is connected to. This step is necessary for Supsis to obtain the necessary access permissions and complete the integration.
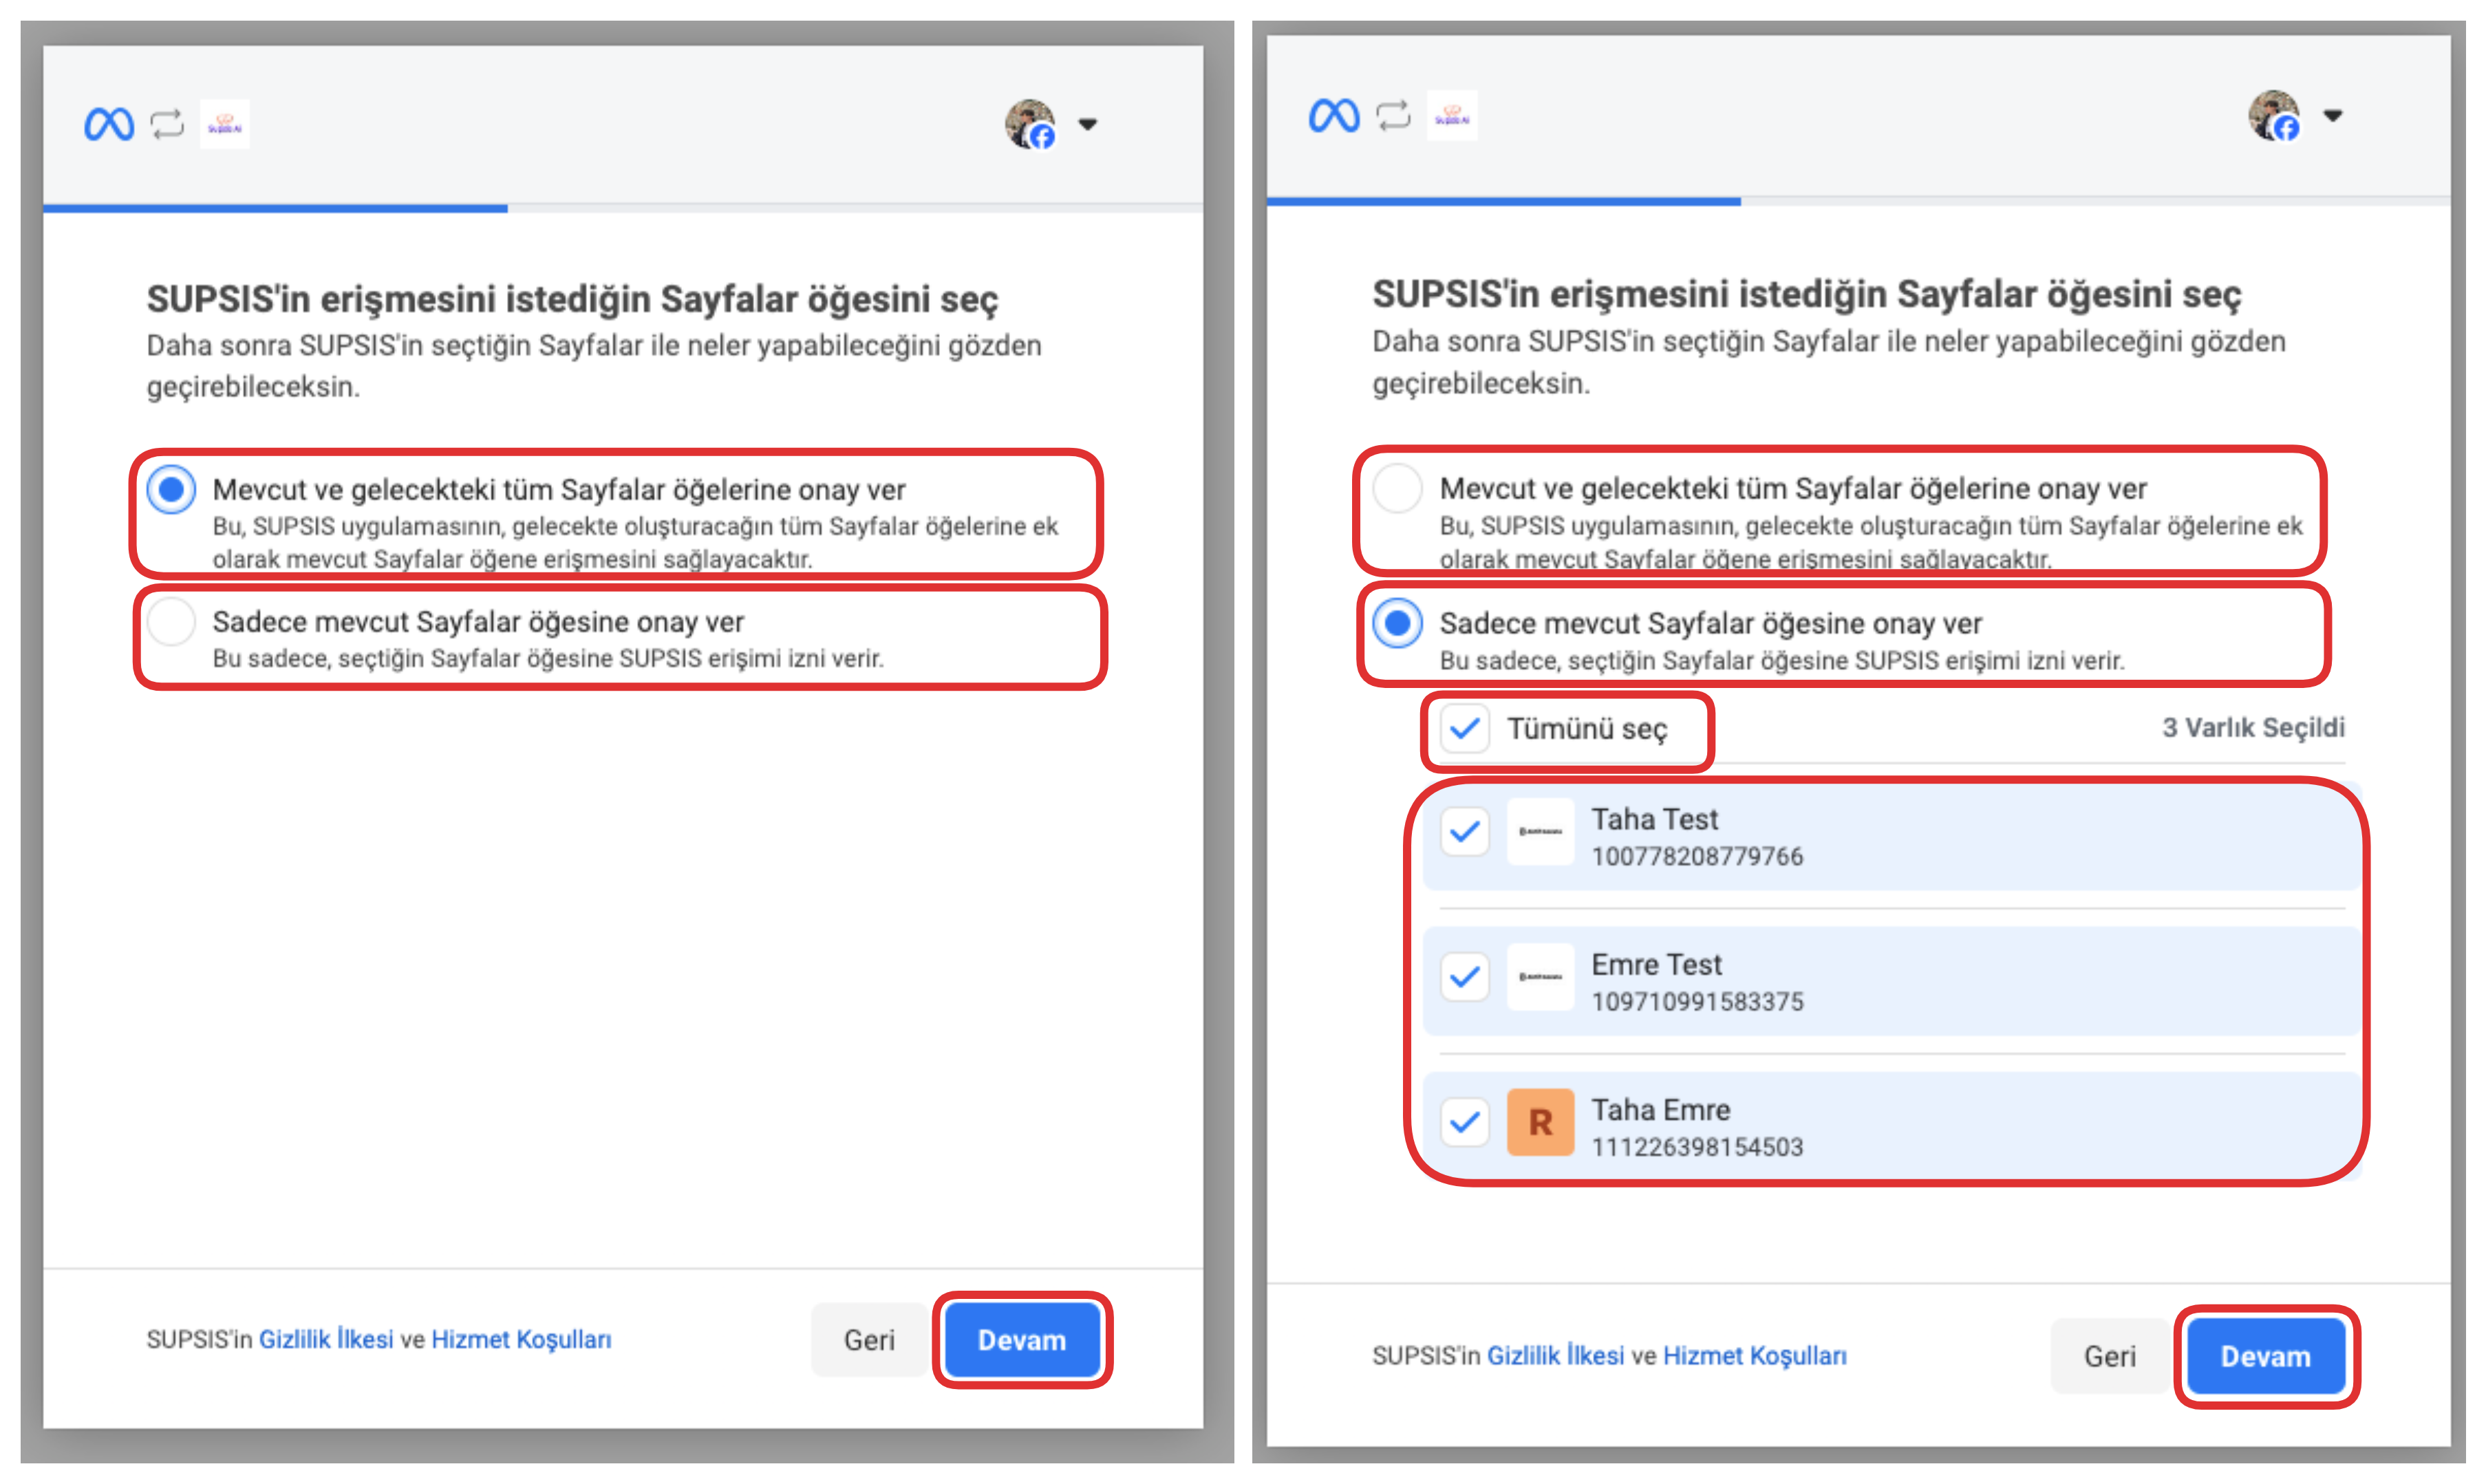
After logging into Facebook, you can select the pages you want Supsis to access from this screen. If you check the upper option, Supsis can access all your current and future Facebook pages. If you select the lower option, access permission is only given to the pages you manually specify.
After completing all these steps, you can proceed with the integration process by clicking the "Continue" button at the bottom of the screen. This step confirms your selected settings and directs you to complete the connection.
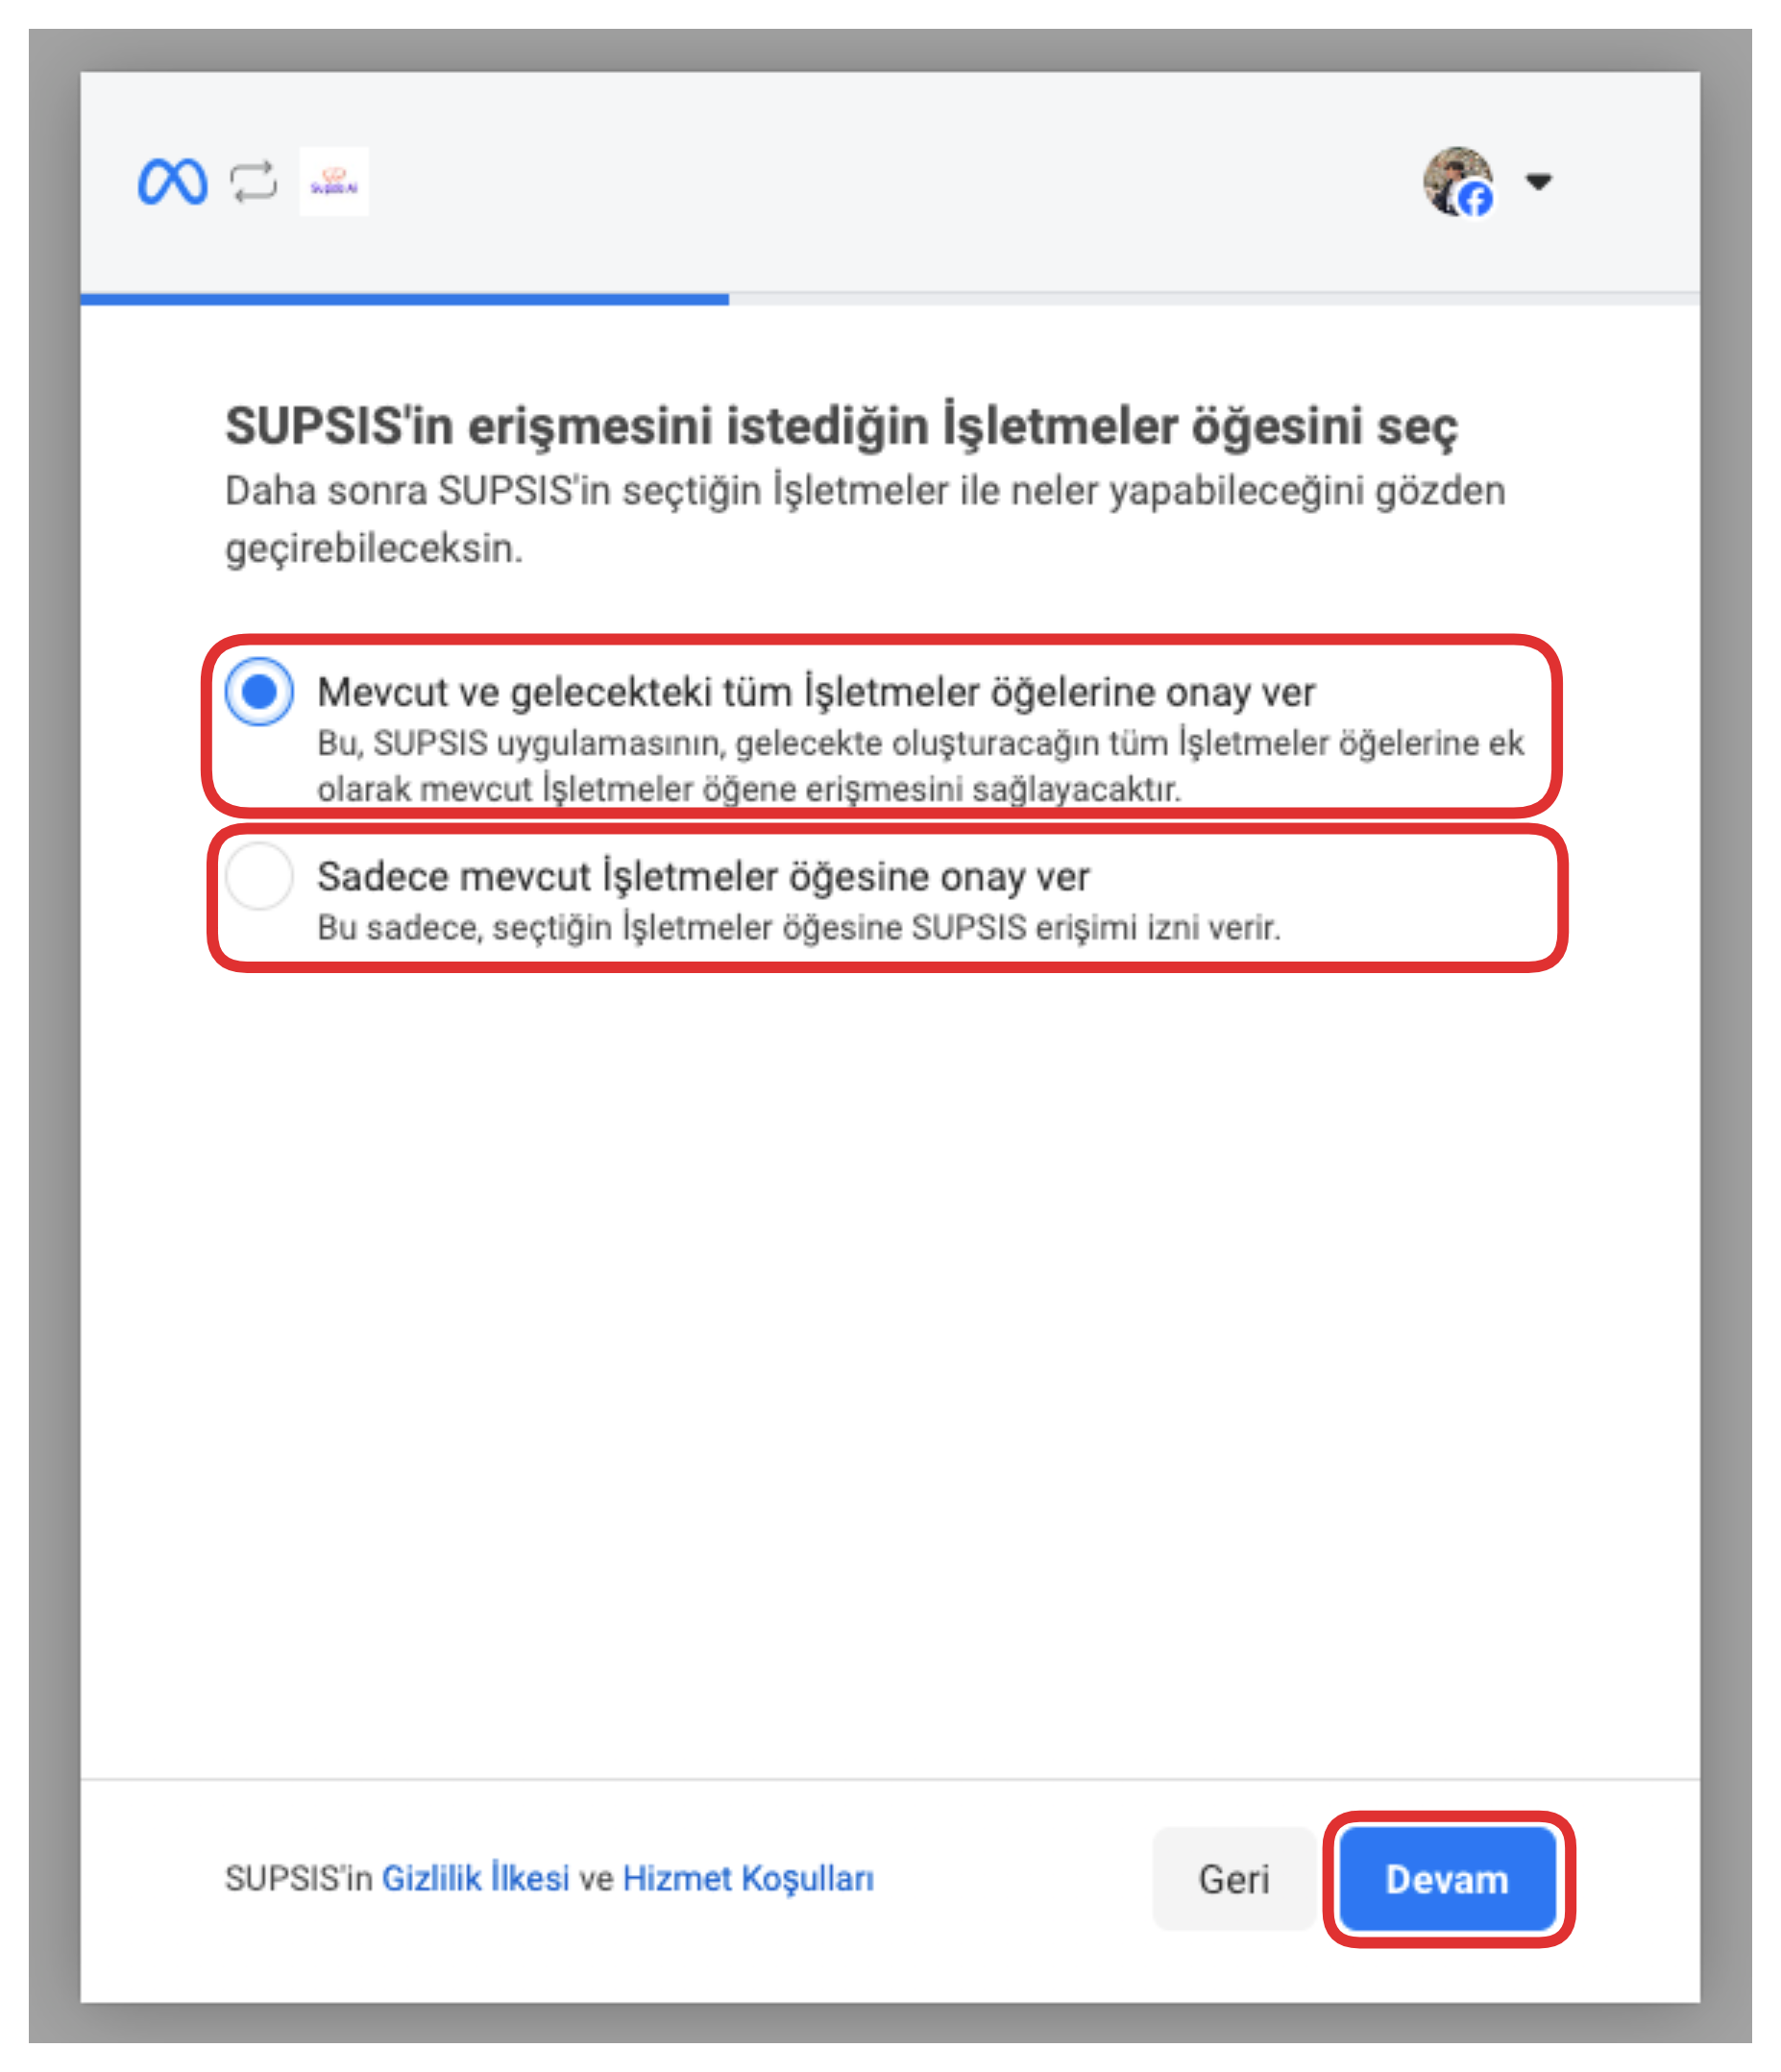
In the opened area, you can select the businesses you want Supsis to access. If you check the upper option, Supsis can access all your current and future businesses. If you select the lower option, access is only provided to the businesses you specify. This way, you can manage access control as you wish.
After completing all these steps, you can proceed with the integration process by clicking the "Continue" button at the bottom of the screen. This step confirms your selected settings and directs you to complete the connection.
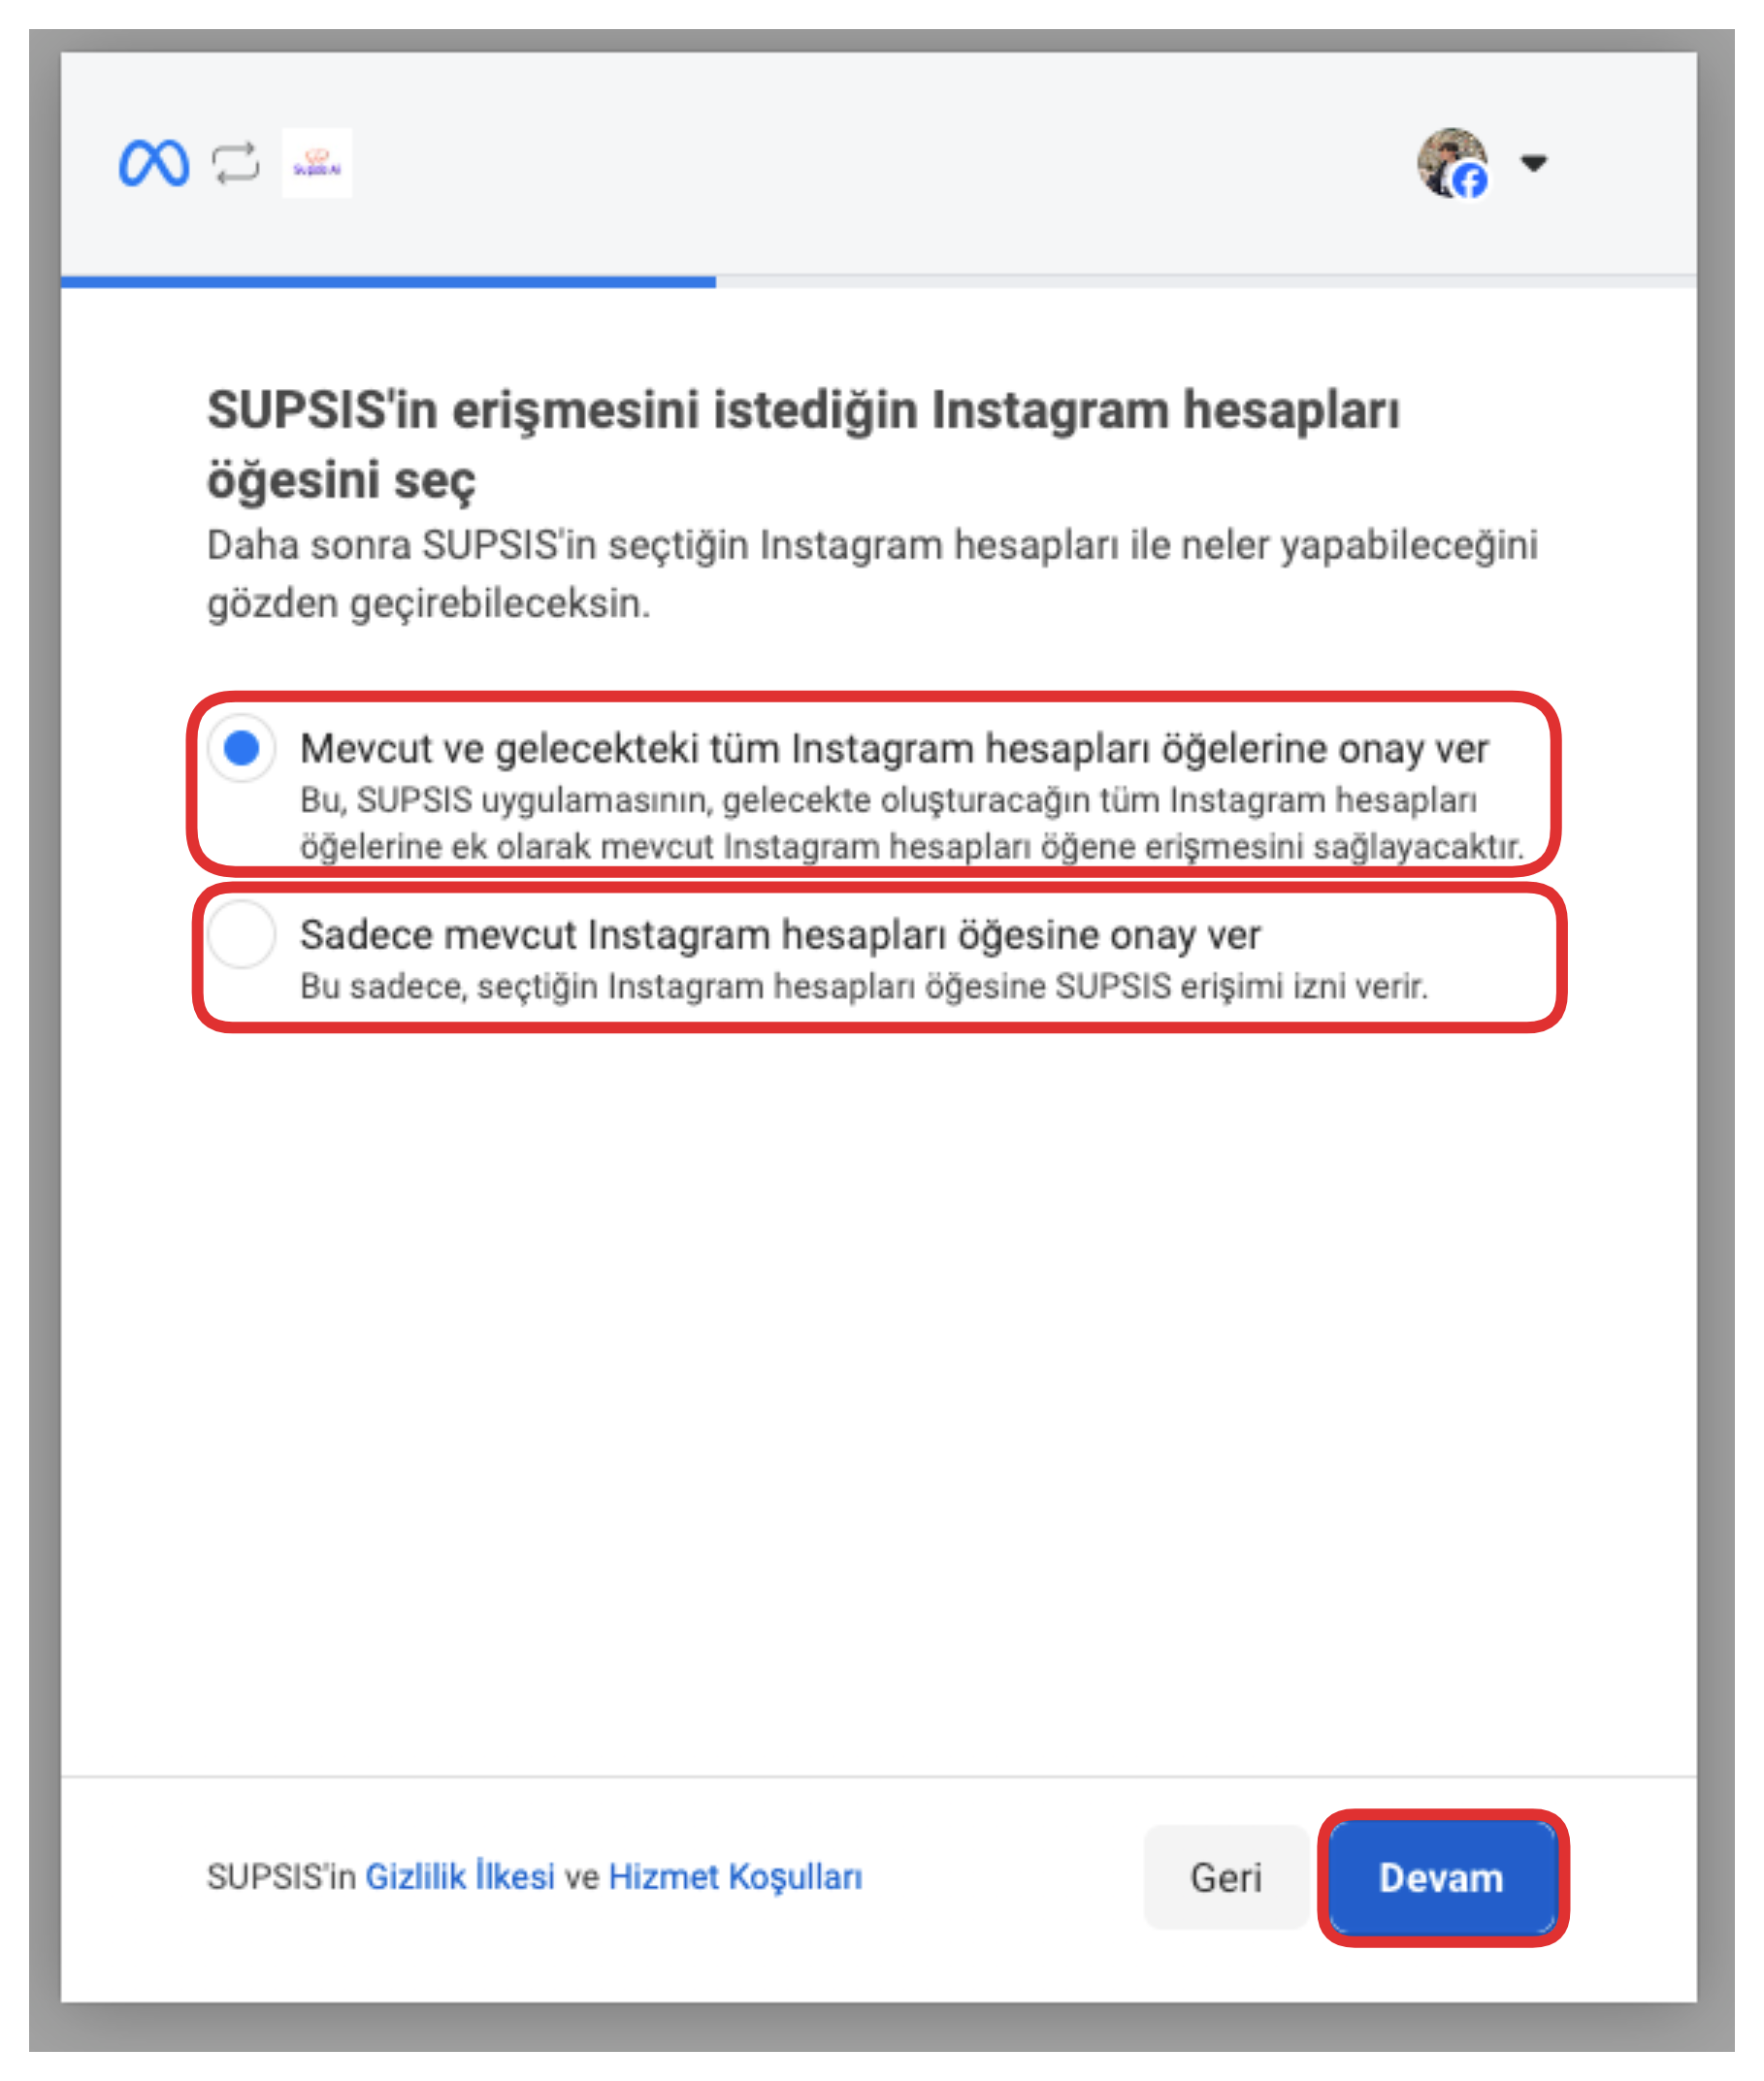
On the opened page, you can determine the Instagram accounts you want Supsis to access. If you select the upper option, Supsis can access all your current and future Instagram accounts. If you prefer the lower option, access is only provided to the accounts you manually specify.
After completing all these steps, you can proceed with the integration process by clicking the "Continue" button at the bottom of the screen. This step confirms your selected settings and directs you to complete the connection.
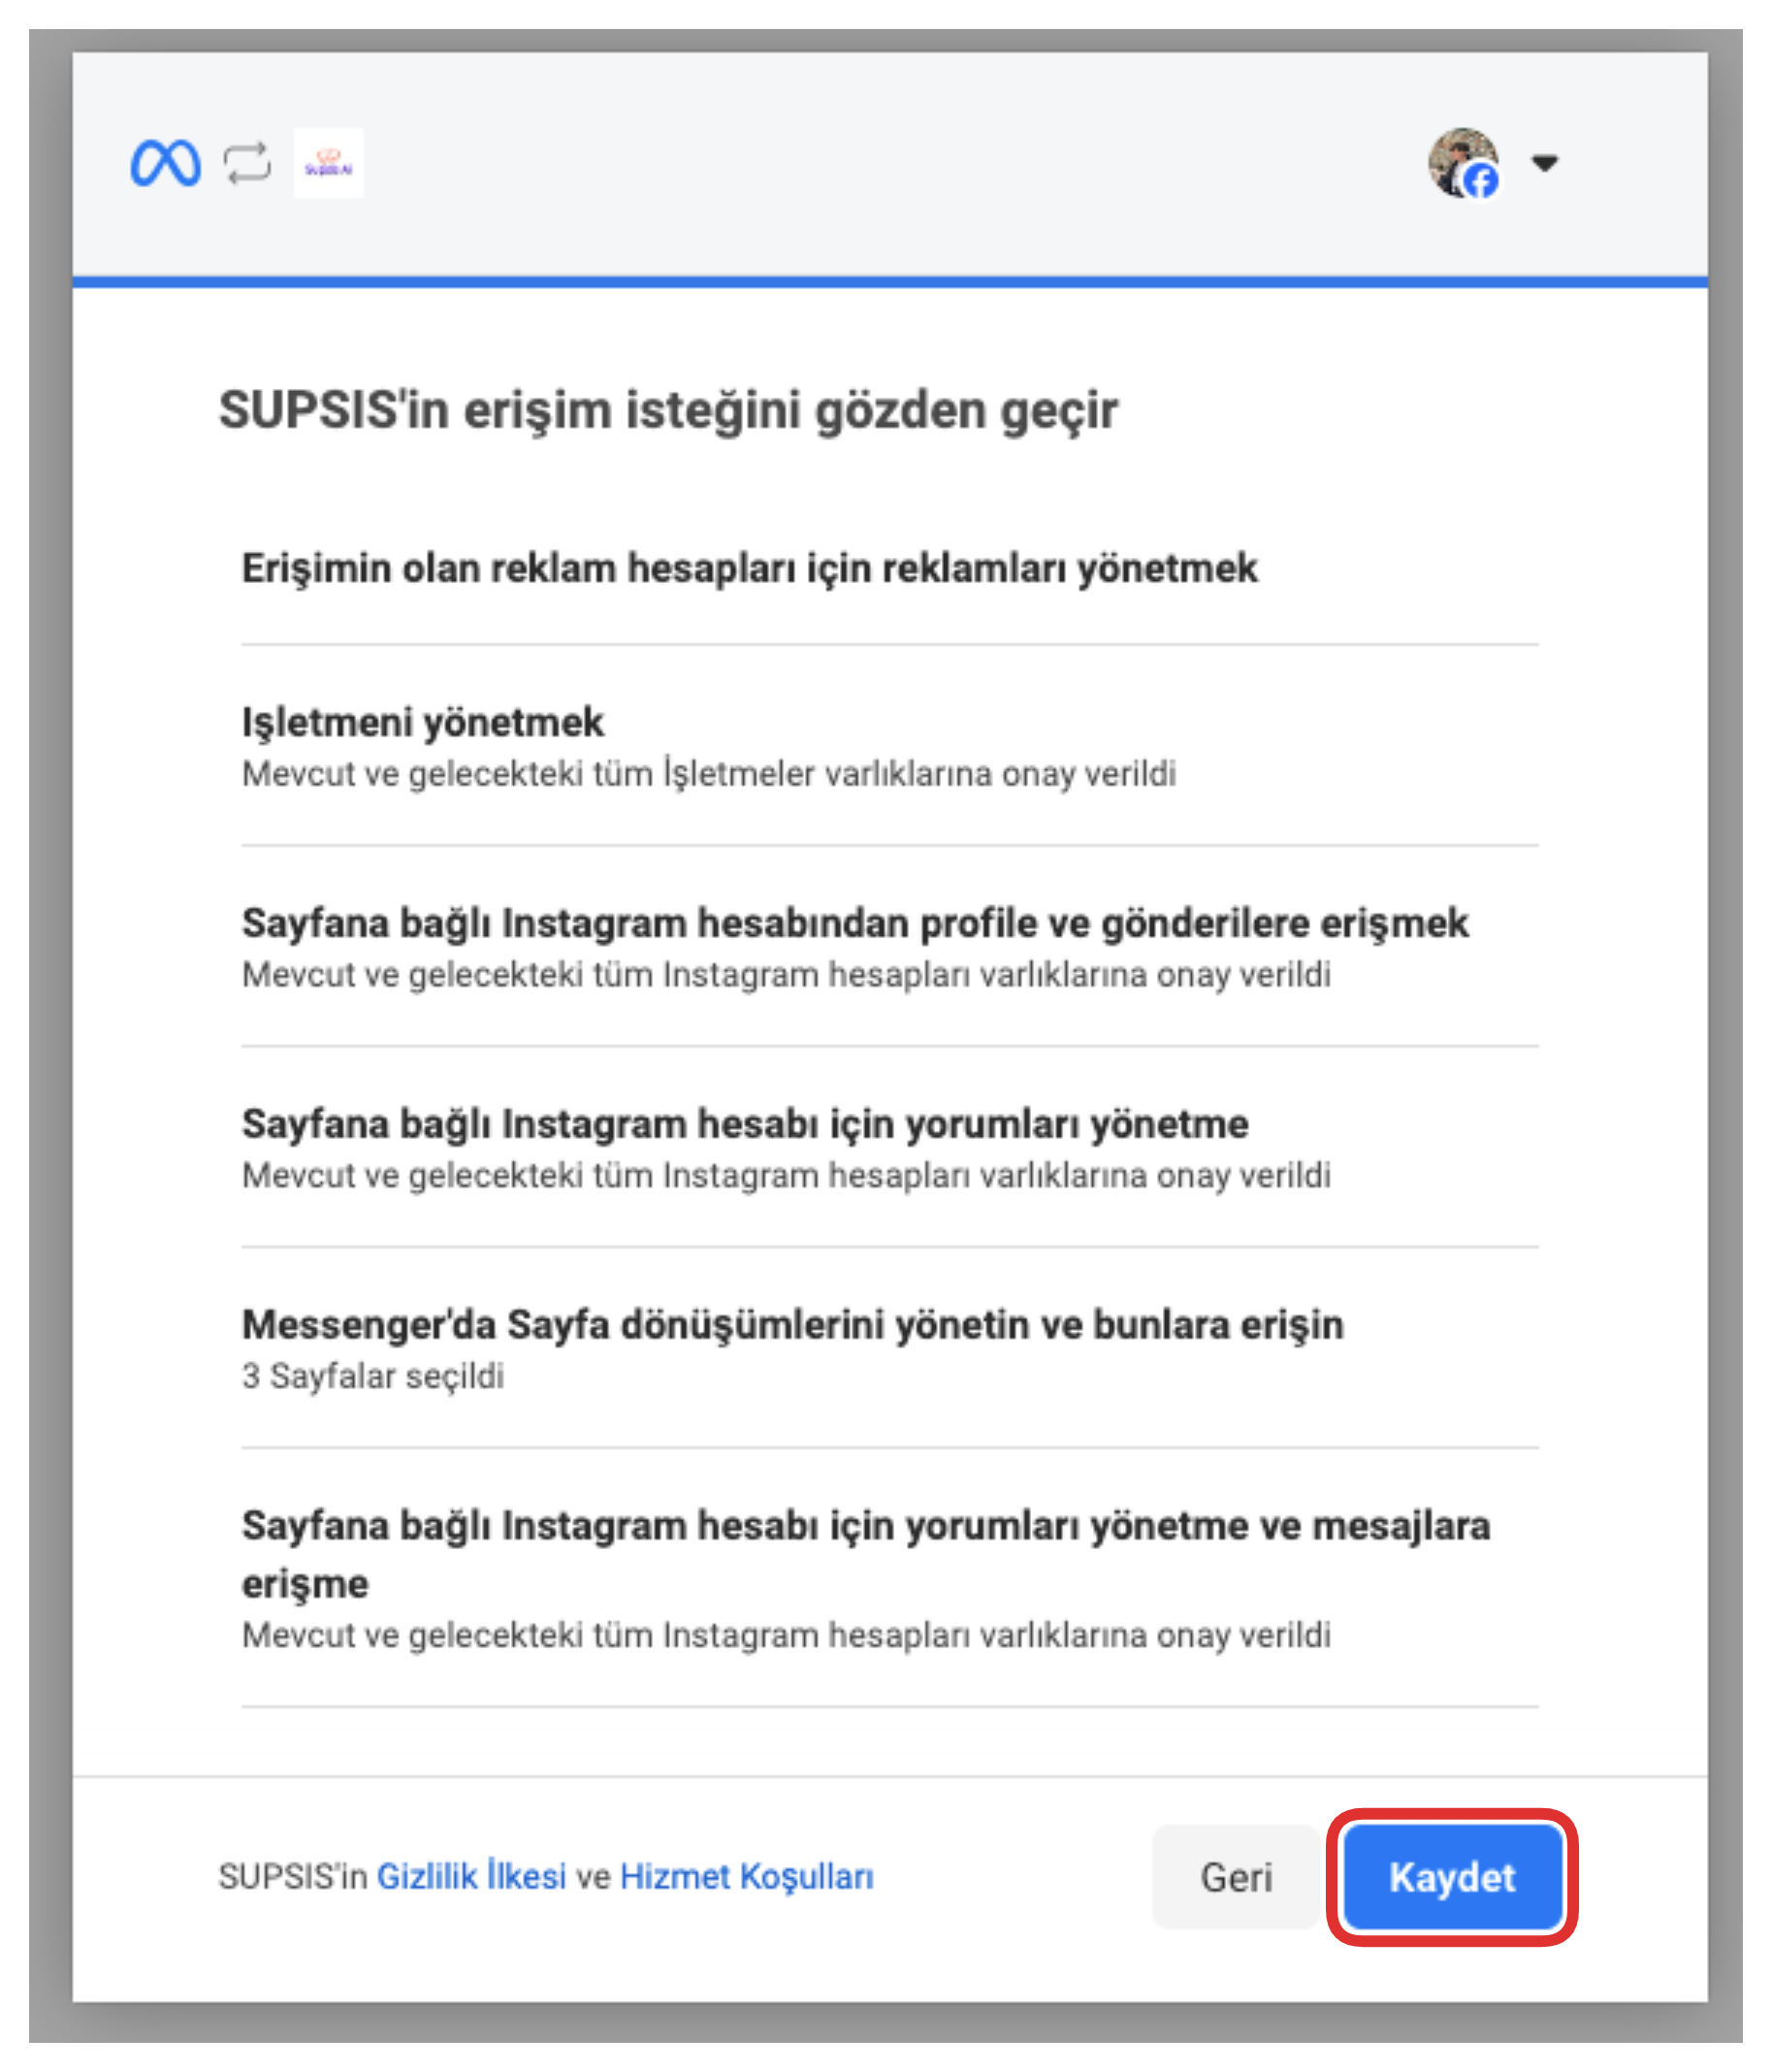
On the opened page, there is an area where you can review in detail the items that Supsis requests access to. After checking all access settings, you can confirm your selections and permanently save the settings by clicking the "Save" button at the bottom of the screen.
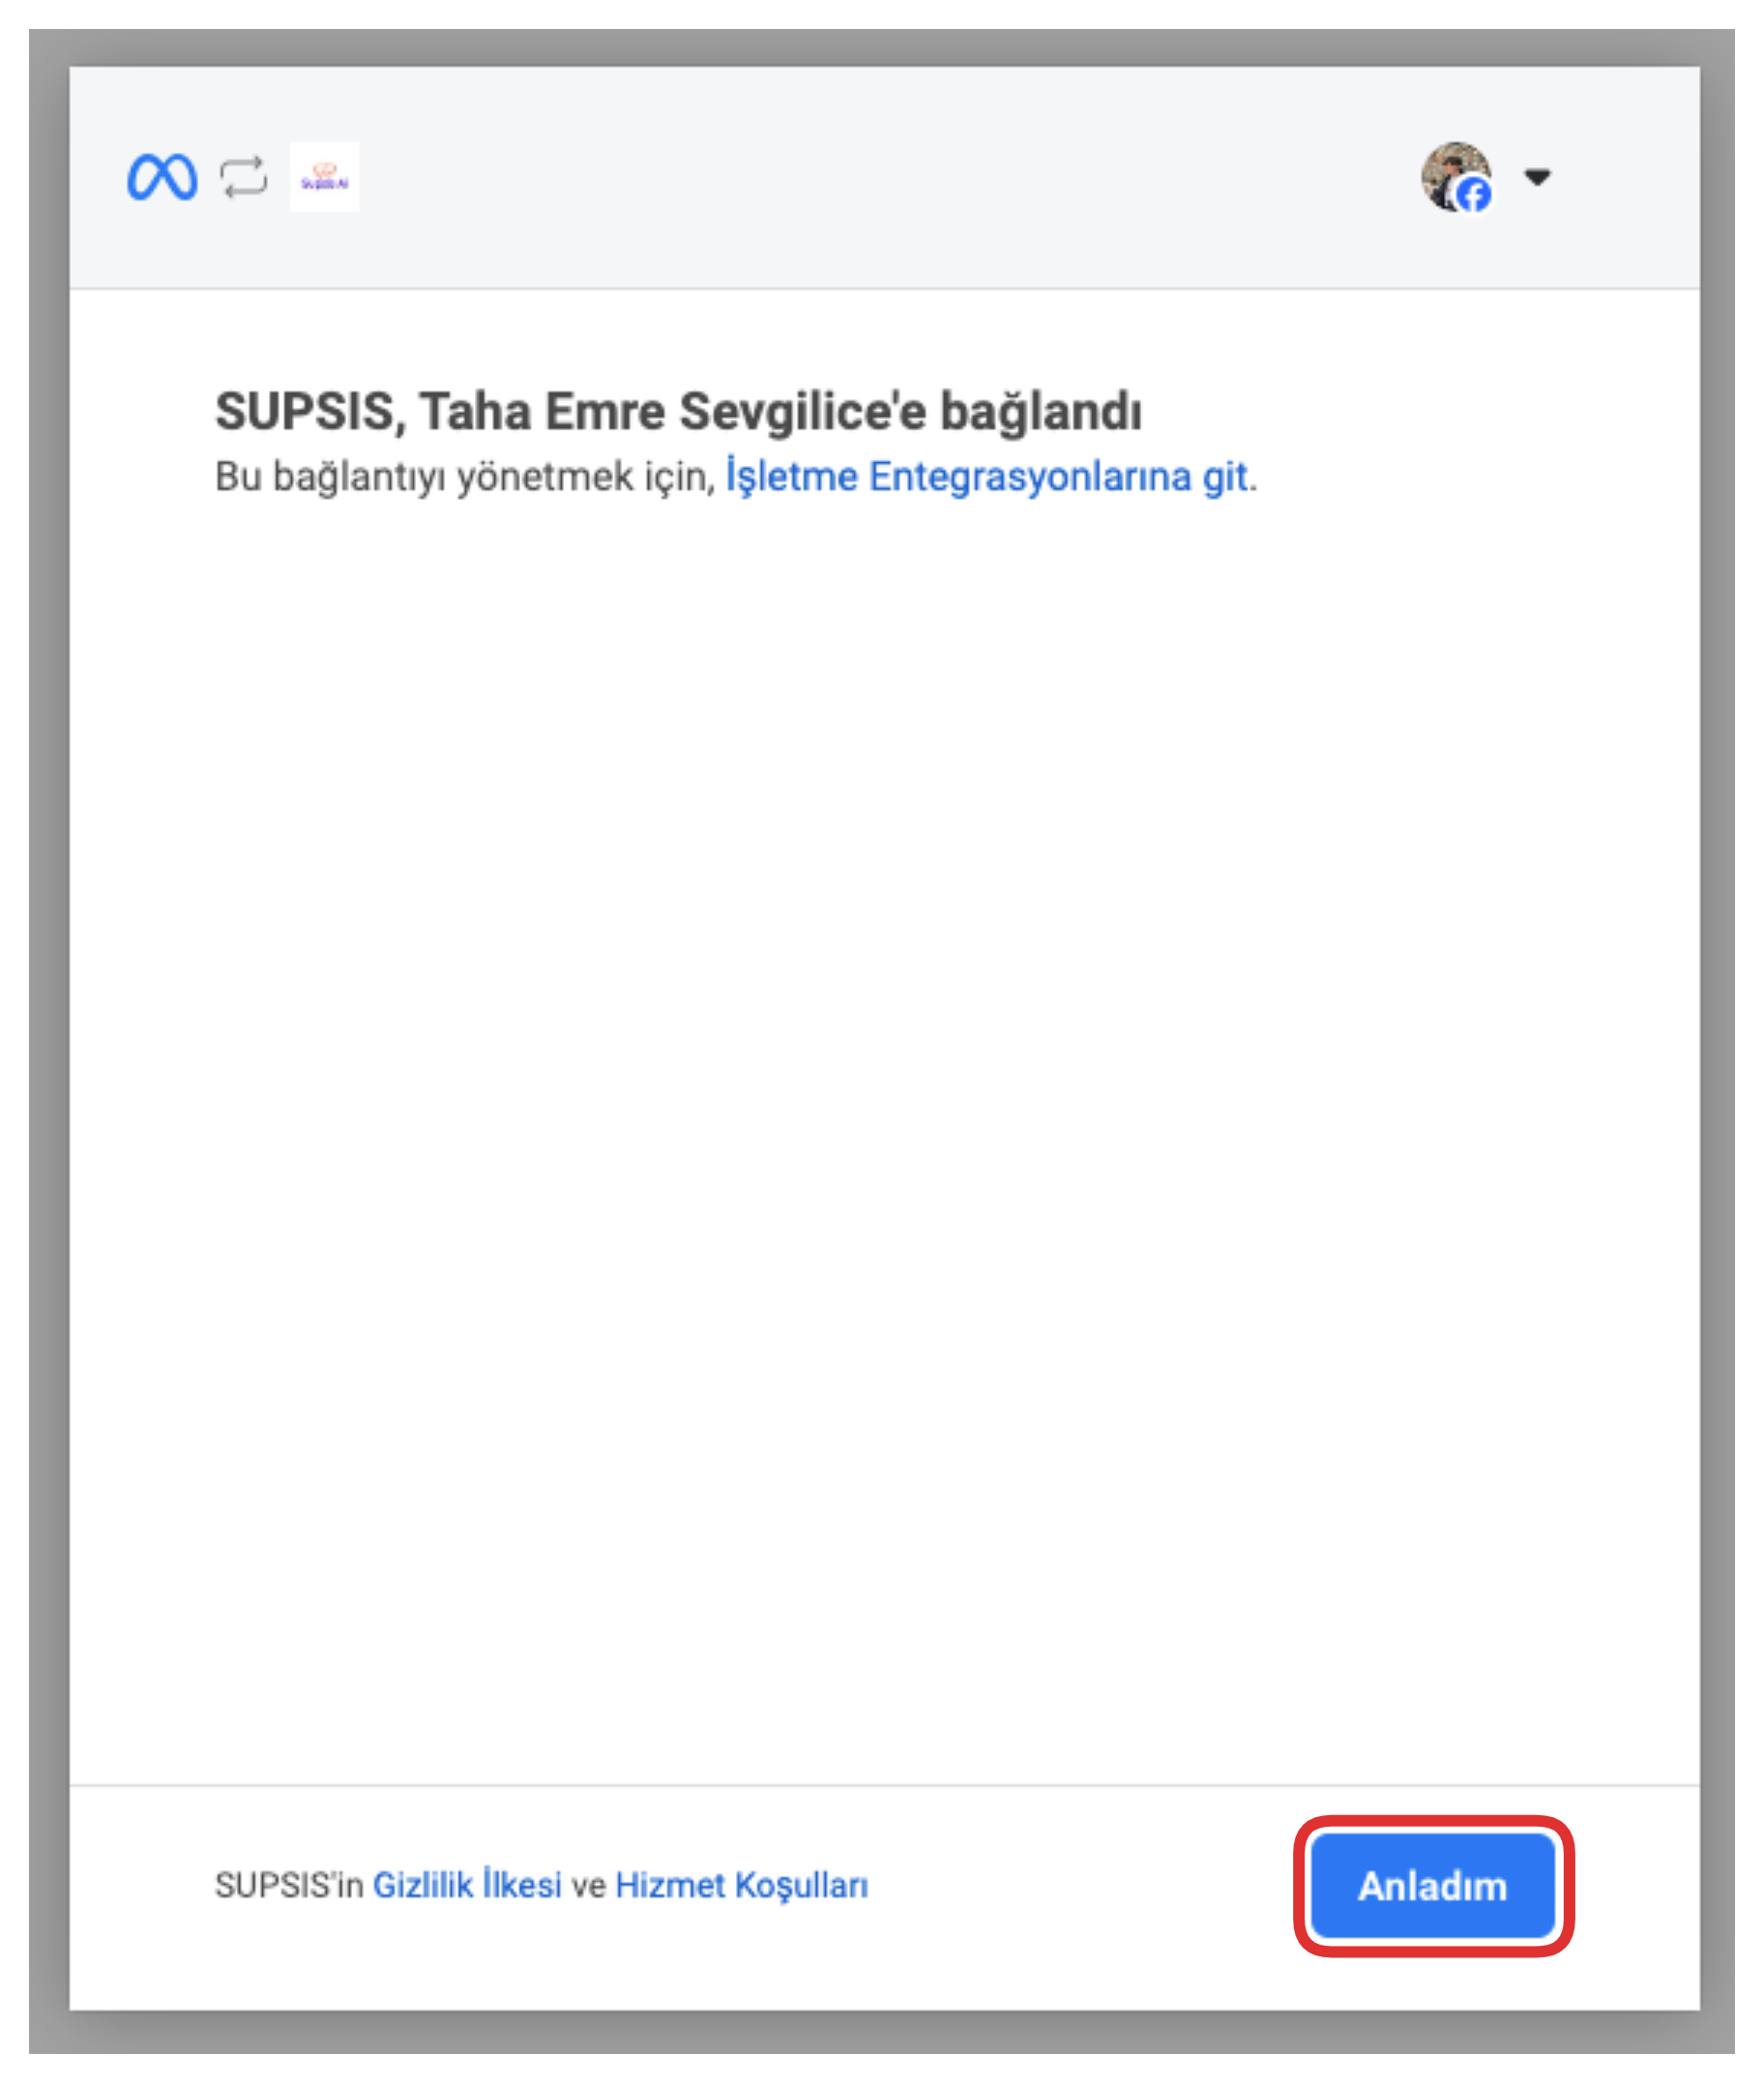
After completing all these steps, you can end the operations by clicking the "I understand" button at the bottom of the screen. This button completes the integration process and automatically redirects you back to your Supsis panel.

From the opened modal, you can determine the Messenger account you want to integrate with Supsis. You can start and continue the integration process by clicking the "Select" button next to the account you want to connect.

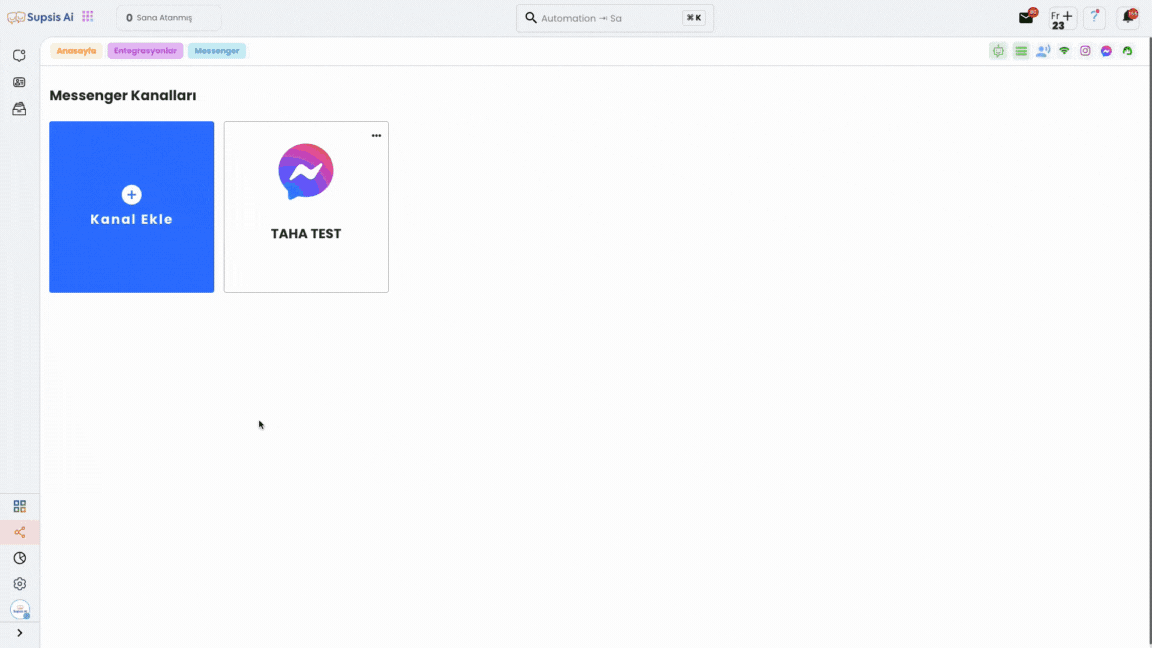
If you have completed all these steps completely, it means you have successfully completed the Messenger Integration process. Now, messages coming through Facebook Messenger will fall into your Supsis panel and can be managed from a single center.
Messenger Details
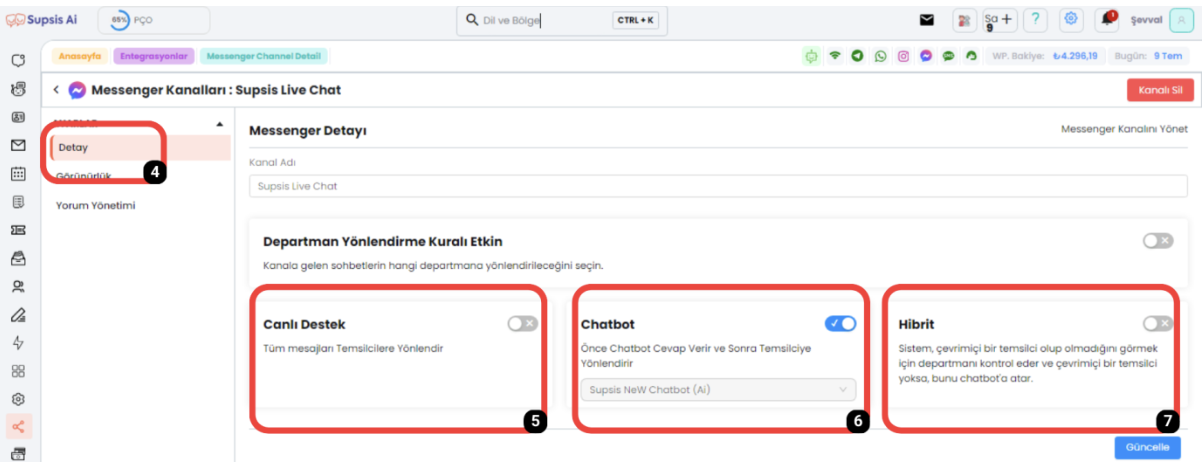
5. Live Support:
If you activate this button and click the "Update" option, messages sent by people who send messages to this account will fall directly to you and representatives will take care of your customers.
6. Chatbot:
If you activate this option, select the Chatbot scenario you have previously created from the section below and click the "Update" option, if your customers send messages to this account, the Chatbot scenario you selected will come into play and your customers will be welcomed by the Chatbot.
7. Hybrid:
If you activate the Hybrid button, the system checks whether there is an online representative for customers who send you messages. If there is no online representative, it sends the message to the Chatbot.
By following the same steps, you can connect multiple Facebook accounts and manage communication in all your Facebook/Messenger accounts from a single screen, greatly reducing your workload.
Supsis Ai, which has an easy-to-use interface, allows you to perform your integration processes simply. If you encounter any problems during this time, our Supsis support team is ready to help you. You can reach us through our website and request support.