Integration Operations
Email Integration Operations allows you to send bulk emails through this module by integrating your email account. After completing the integration operations, you can manage your email campaigns and make your customer communication more efficient.
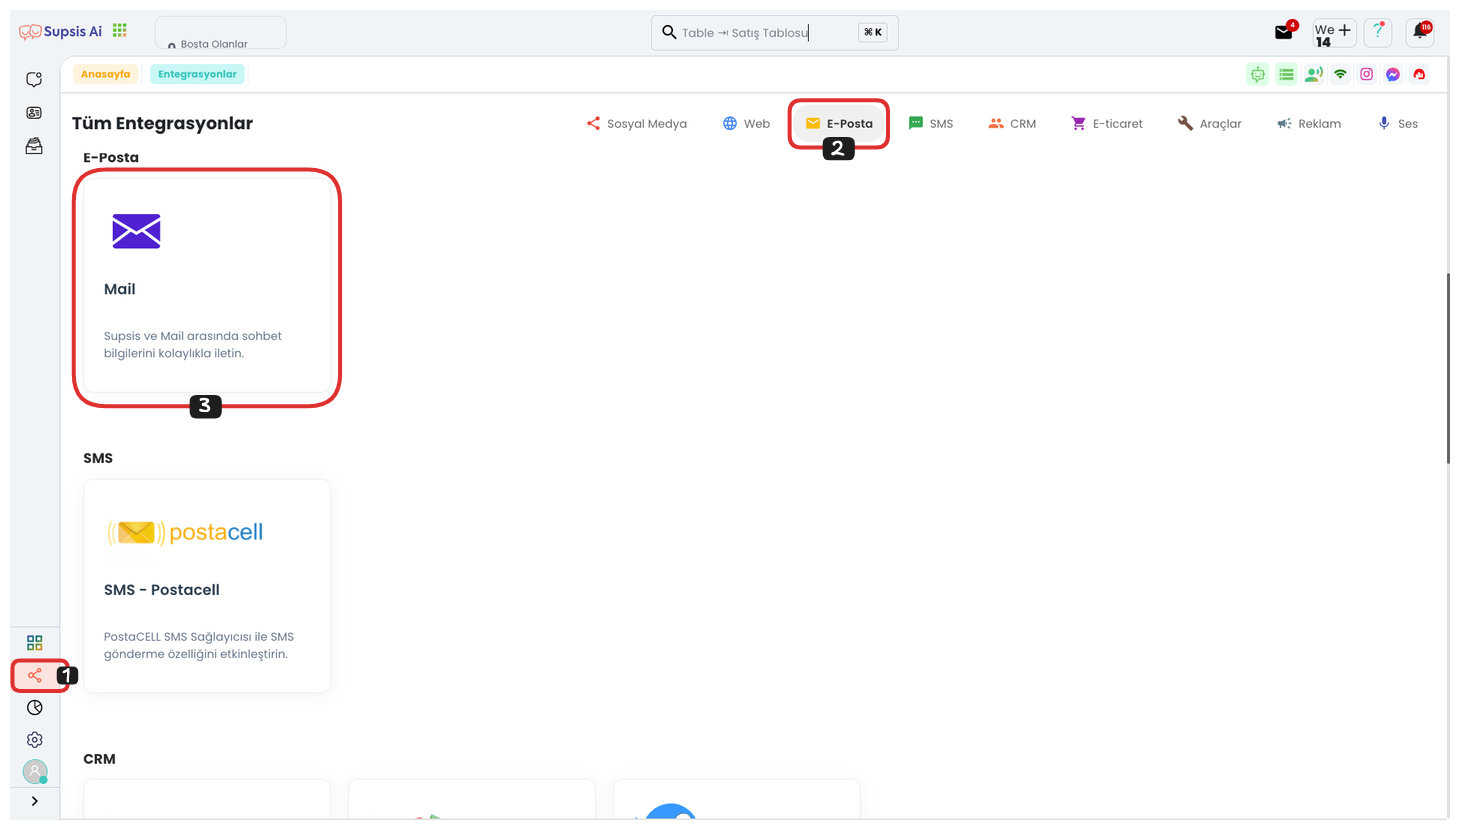
First, go to the Integrations page in the left menu. On the opened page, you can quickly reach the Mail Integration section by clicking the "Email" option from the menu in the upper right corner. After reaching this section, you can switch to the Email Integration page by clicking the "Mail" tab.
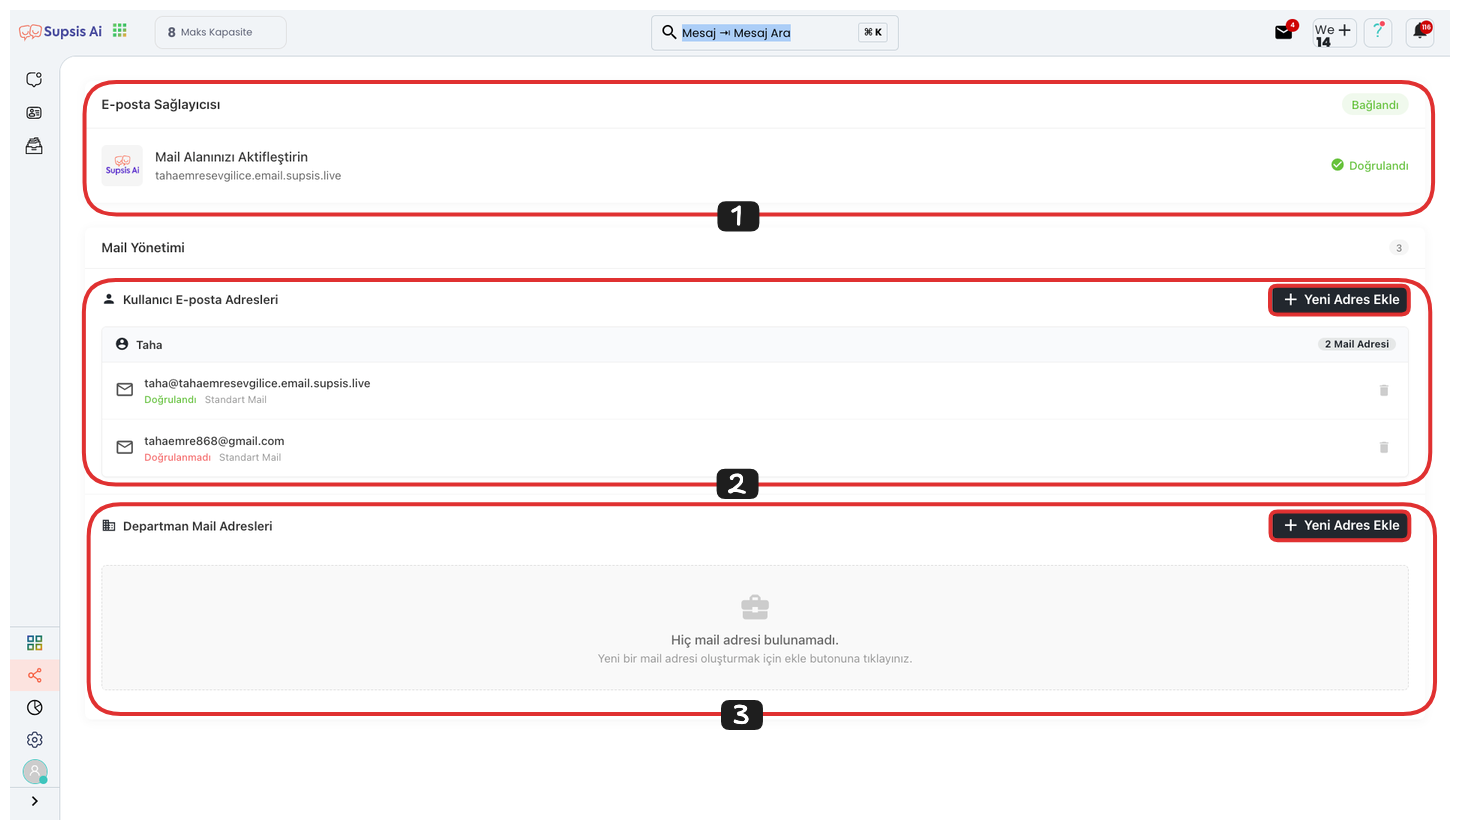
On the opened page, you can view your provider address at the top. This field indicates the part that appears on the right side of your provider mail address. It will usually be in the form of "yourpaneladdress.email.supsis.live". From the section below, you can first create a provider mail address, then add your own mail address here after forwarding this mail to your own mail address. You can create mail addresses on a user basis or on a department basis. You can click the "Add New Address" option for this.
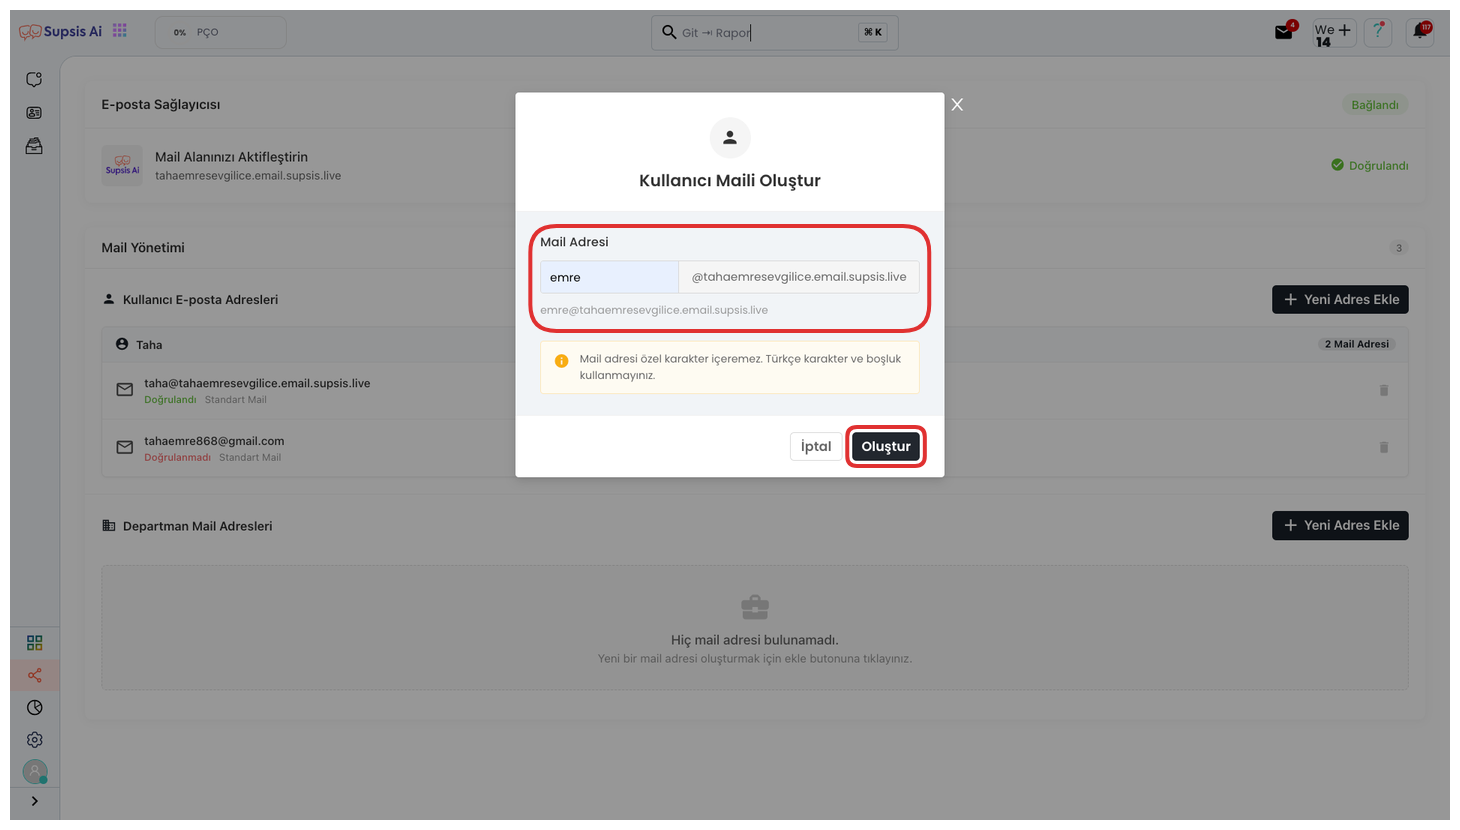
After clicking this button, in the opened modal, you can complete the provider mail address creation process by giving a name to your provider mail address and then clicking the "Create" button.
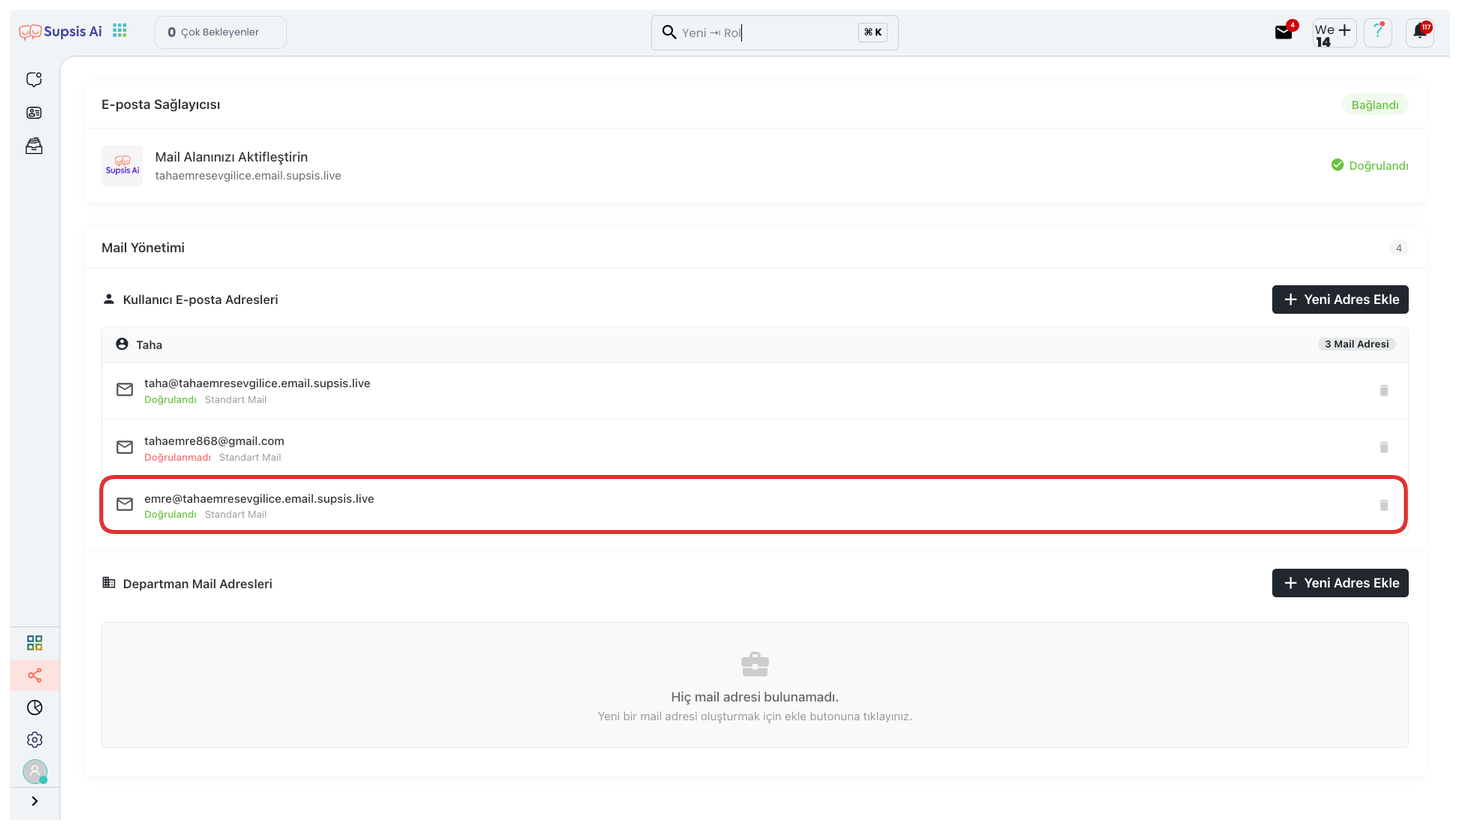
You can make forwarding settings and add your own mail address here by clicking on the provider mail address you created.
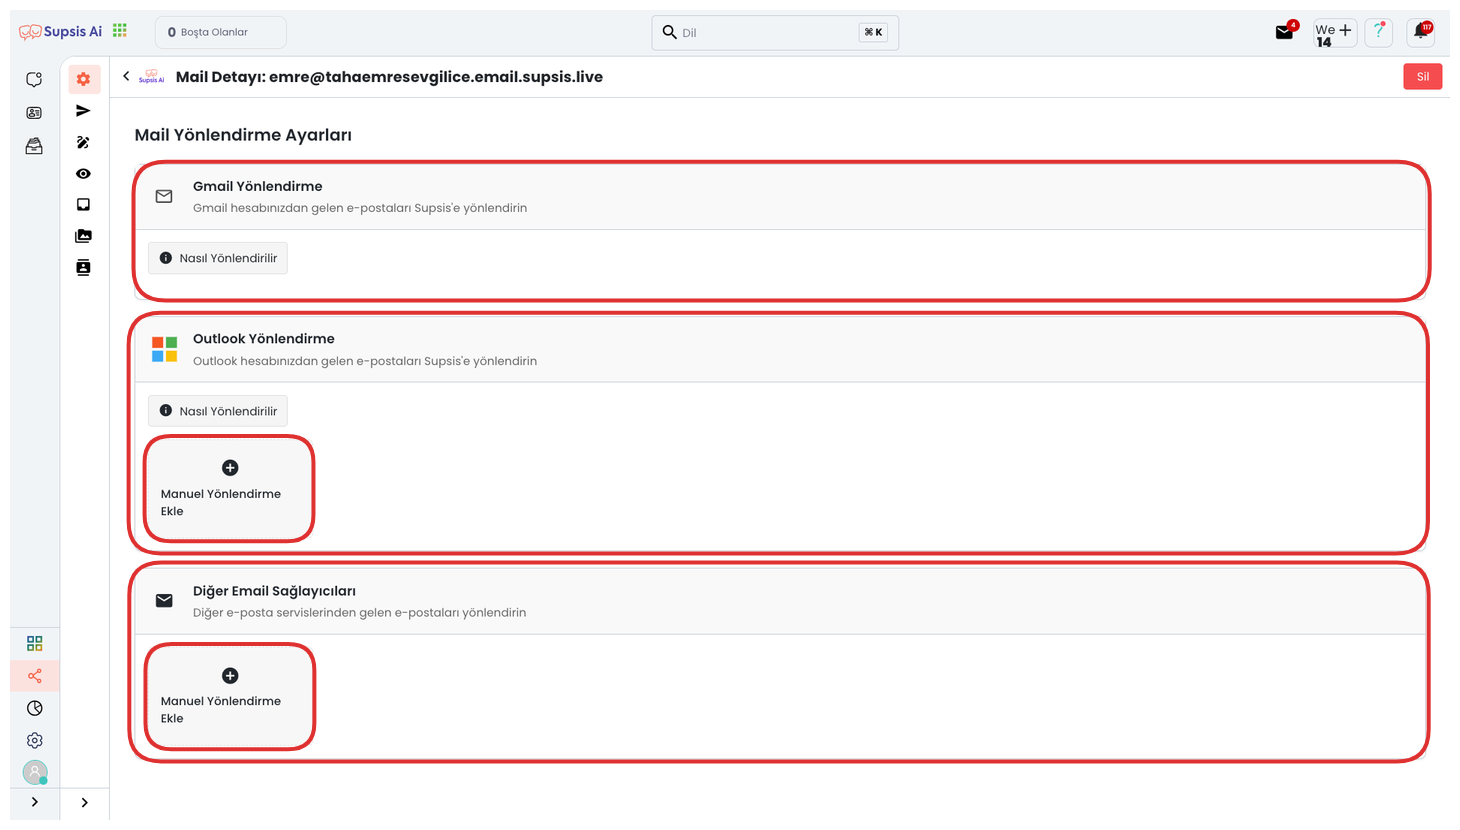
From the opened section, you can forward through Gmail, Outlook and other email providers. You can follow the steps below to complete this forwarding process.
Integration Elements:
- Gmail Integration
- Microsoft Outlook Integration
- Yandex Mail Integration
- Other Providers
1.) Gmail Integration
Gmail Integration allows you to integrate your Gmail accounts into the Supsis AI platform. Thanks to this integration, you can send bulk emails, manage your customer communication from a central point and make your email campaigns more efficient. During the integration process, you need to connect your Google account information and give the necessary permissions. After completing the integration, you can manage emails directly through your Gmail account.
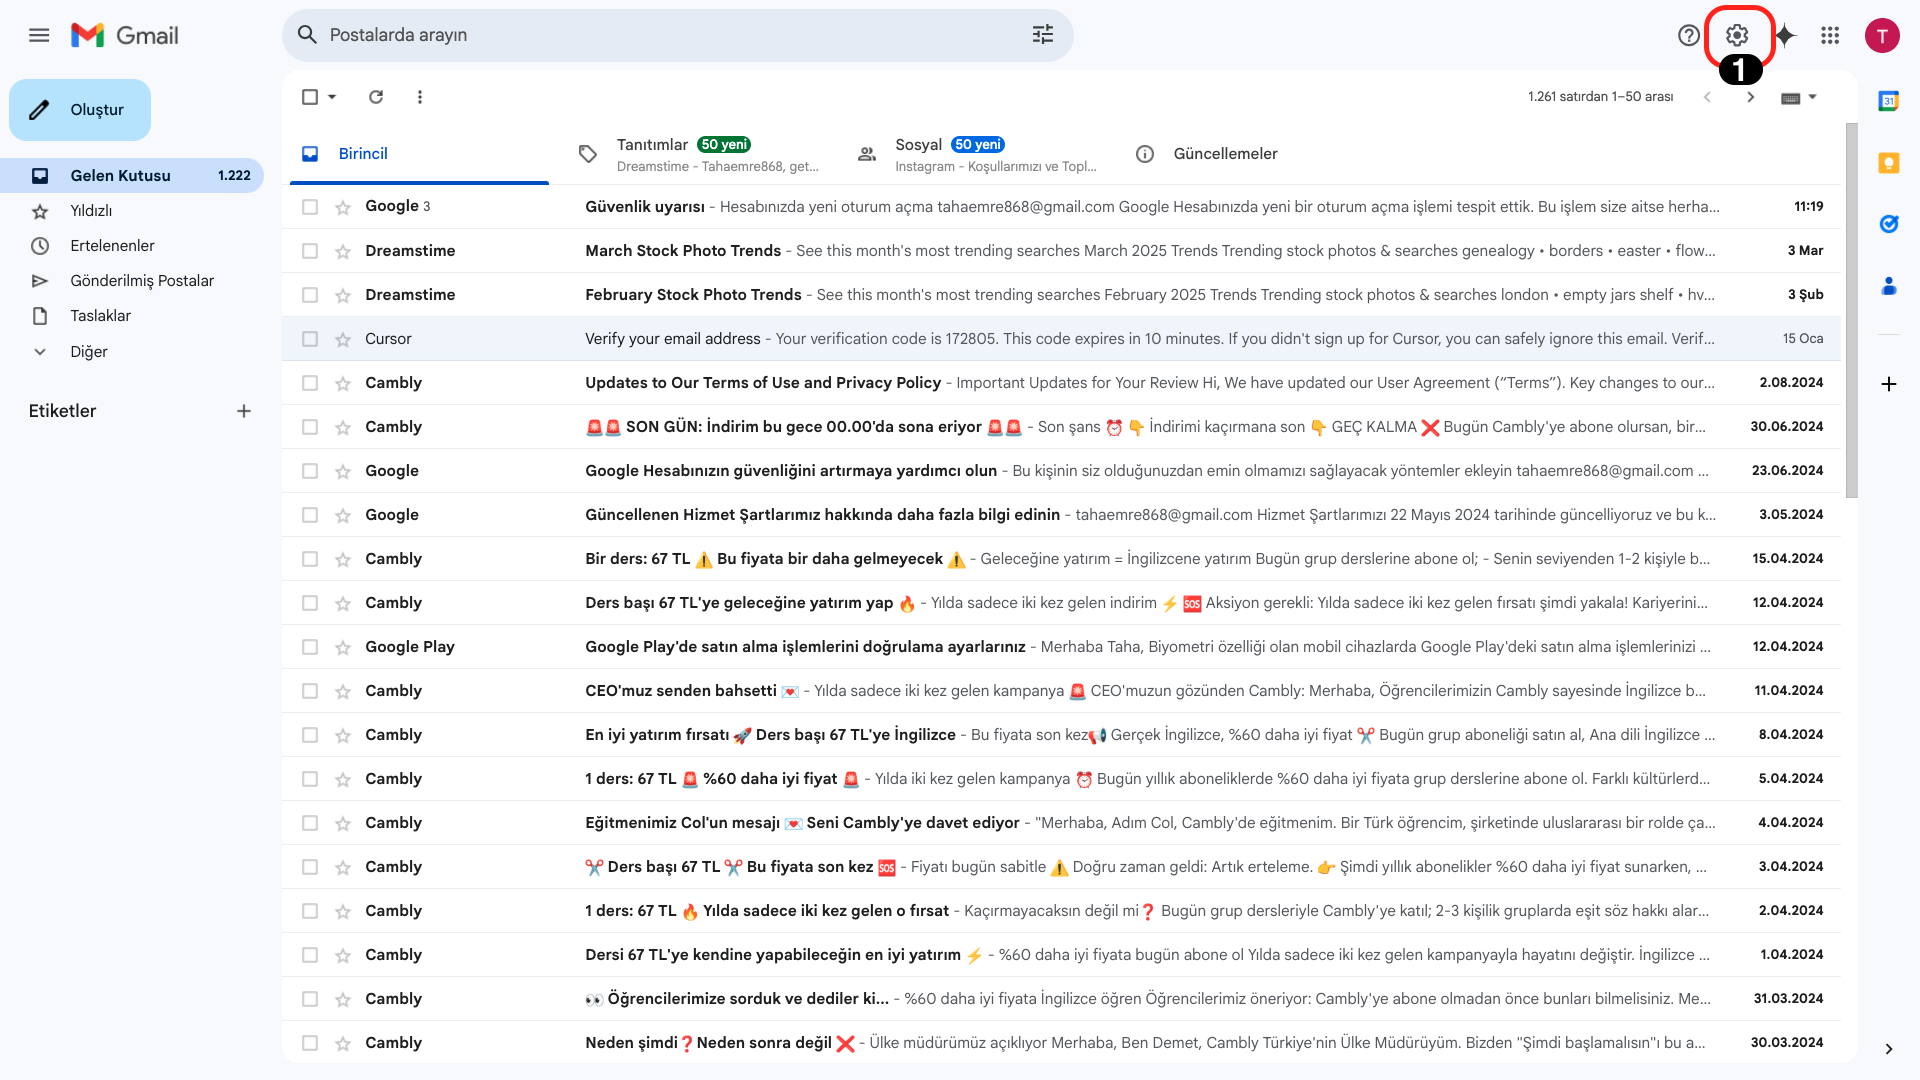
You can view the necessary settings by clicking the "Settings" icon in the upper right.
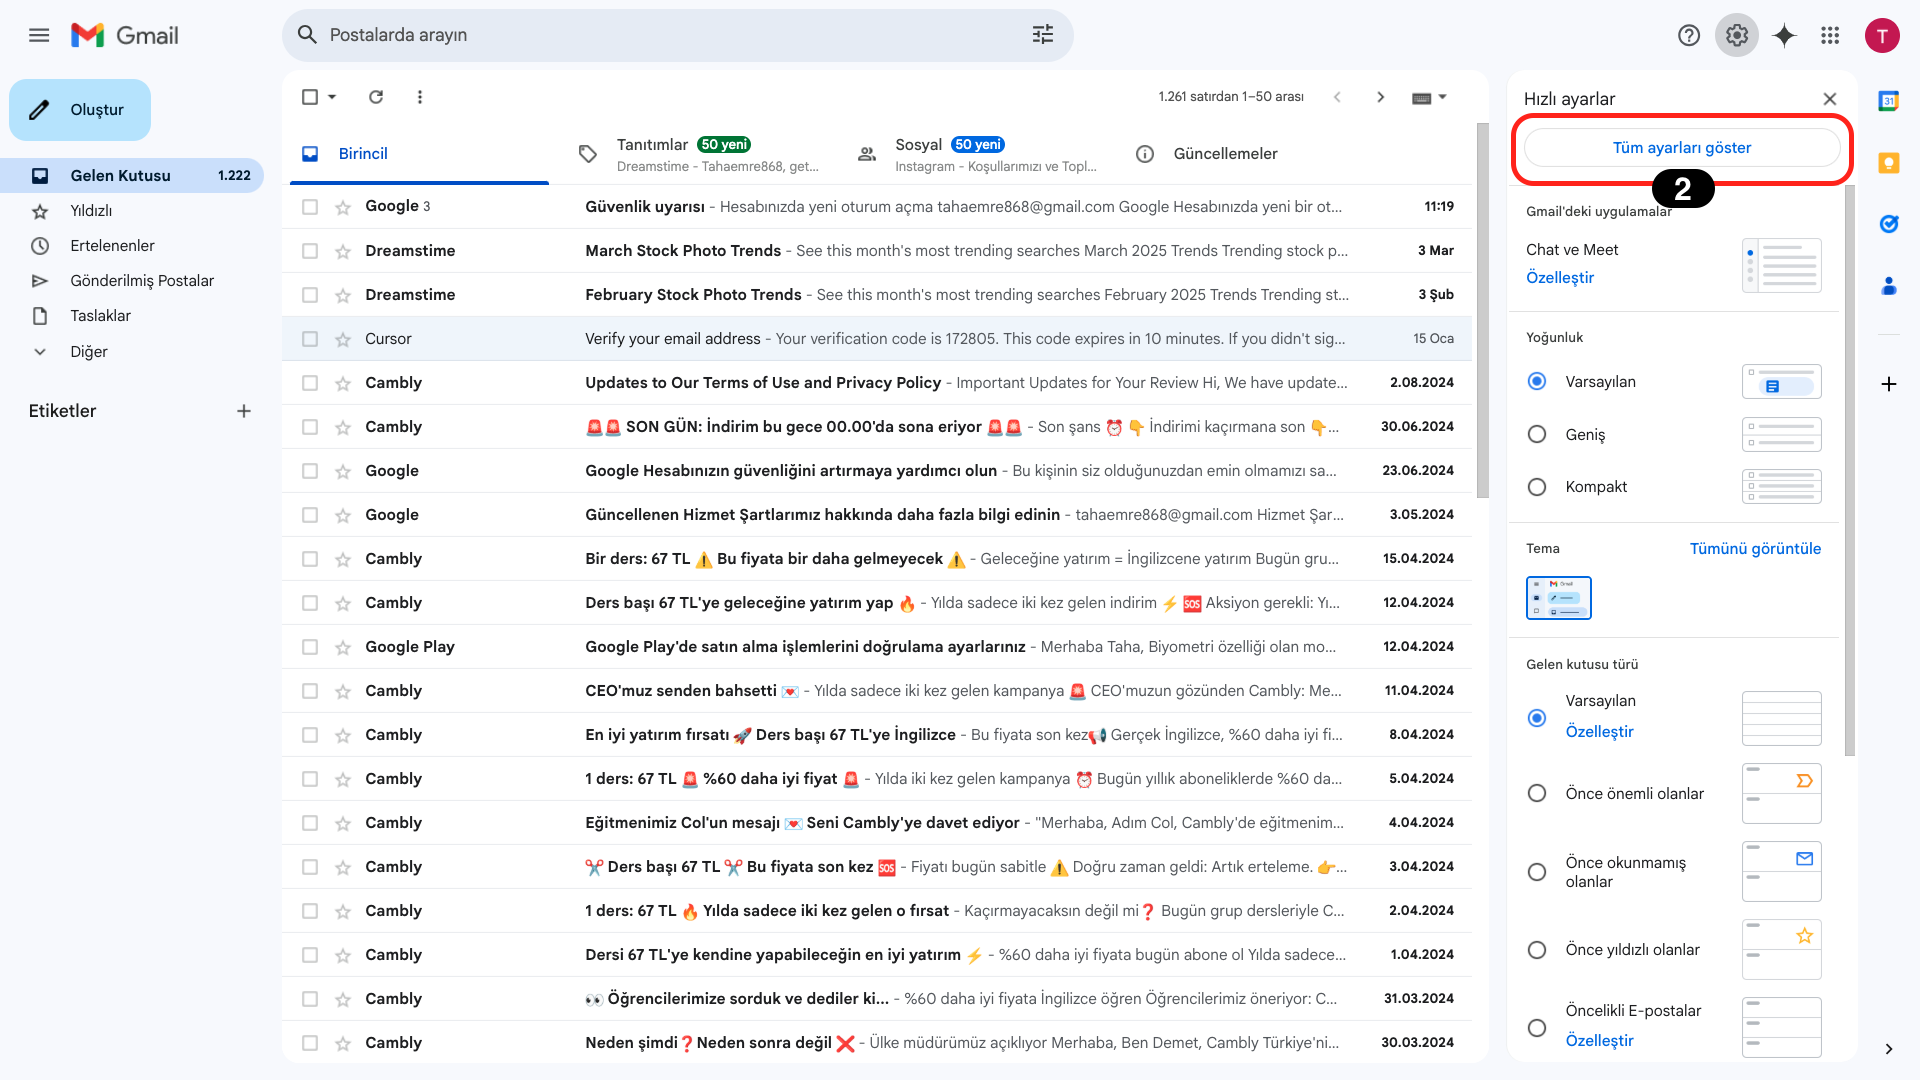
Continue the process by clicking the "Show All Settings" button from the opened tab.
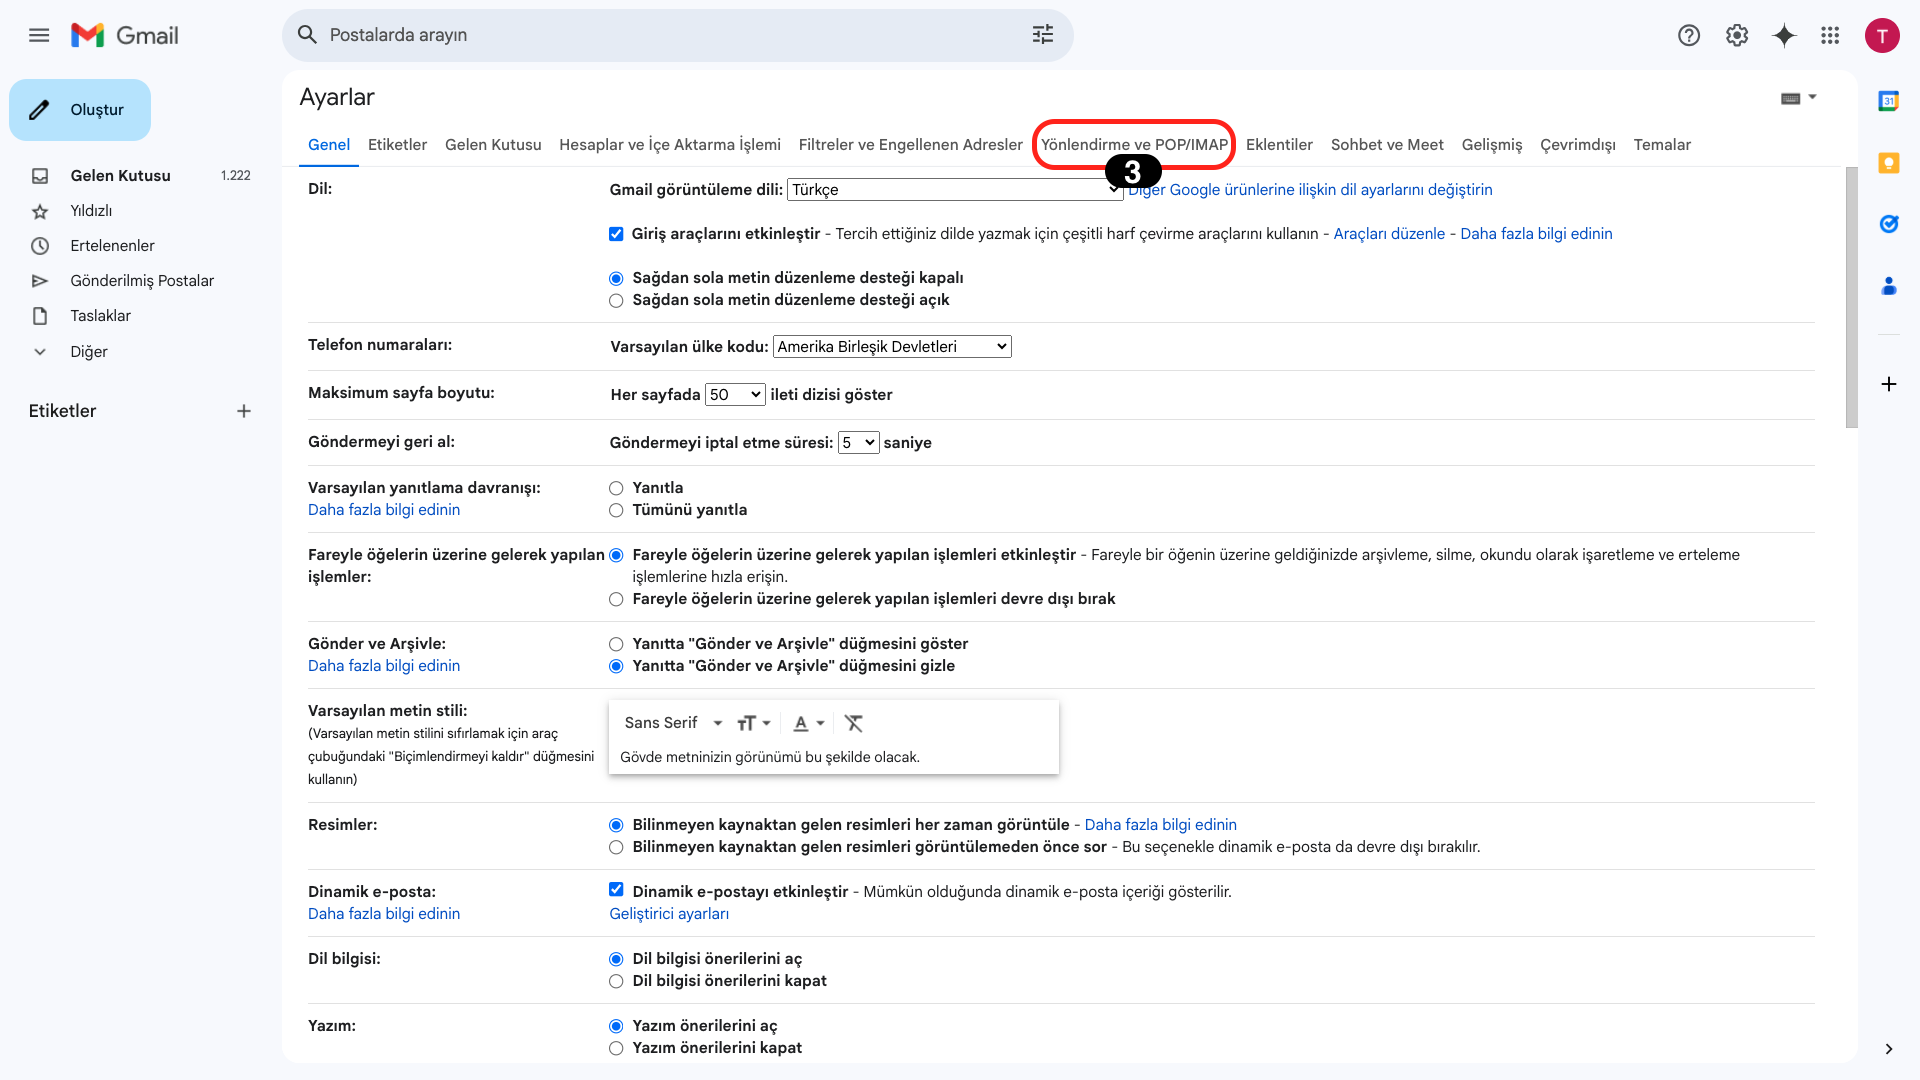
After coming to the "Settings" page, click on the "Forwarding and POP/IMAP" tab.
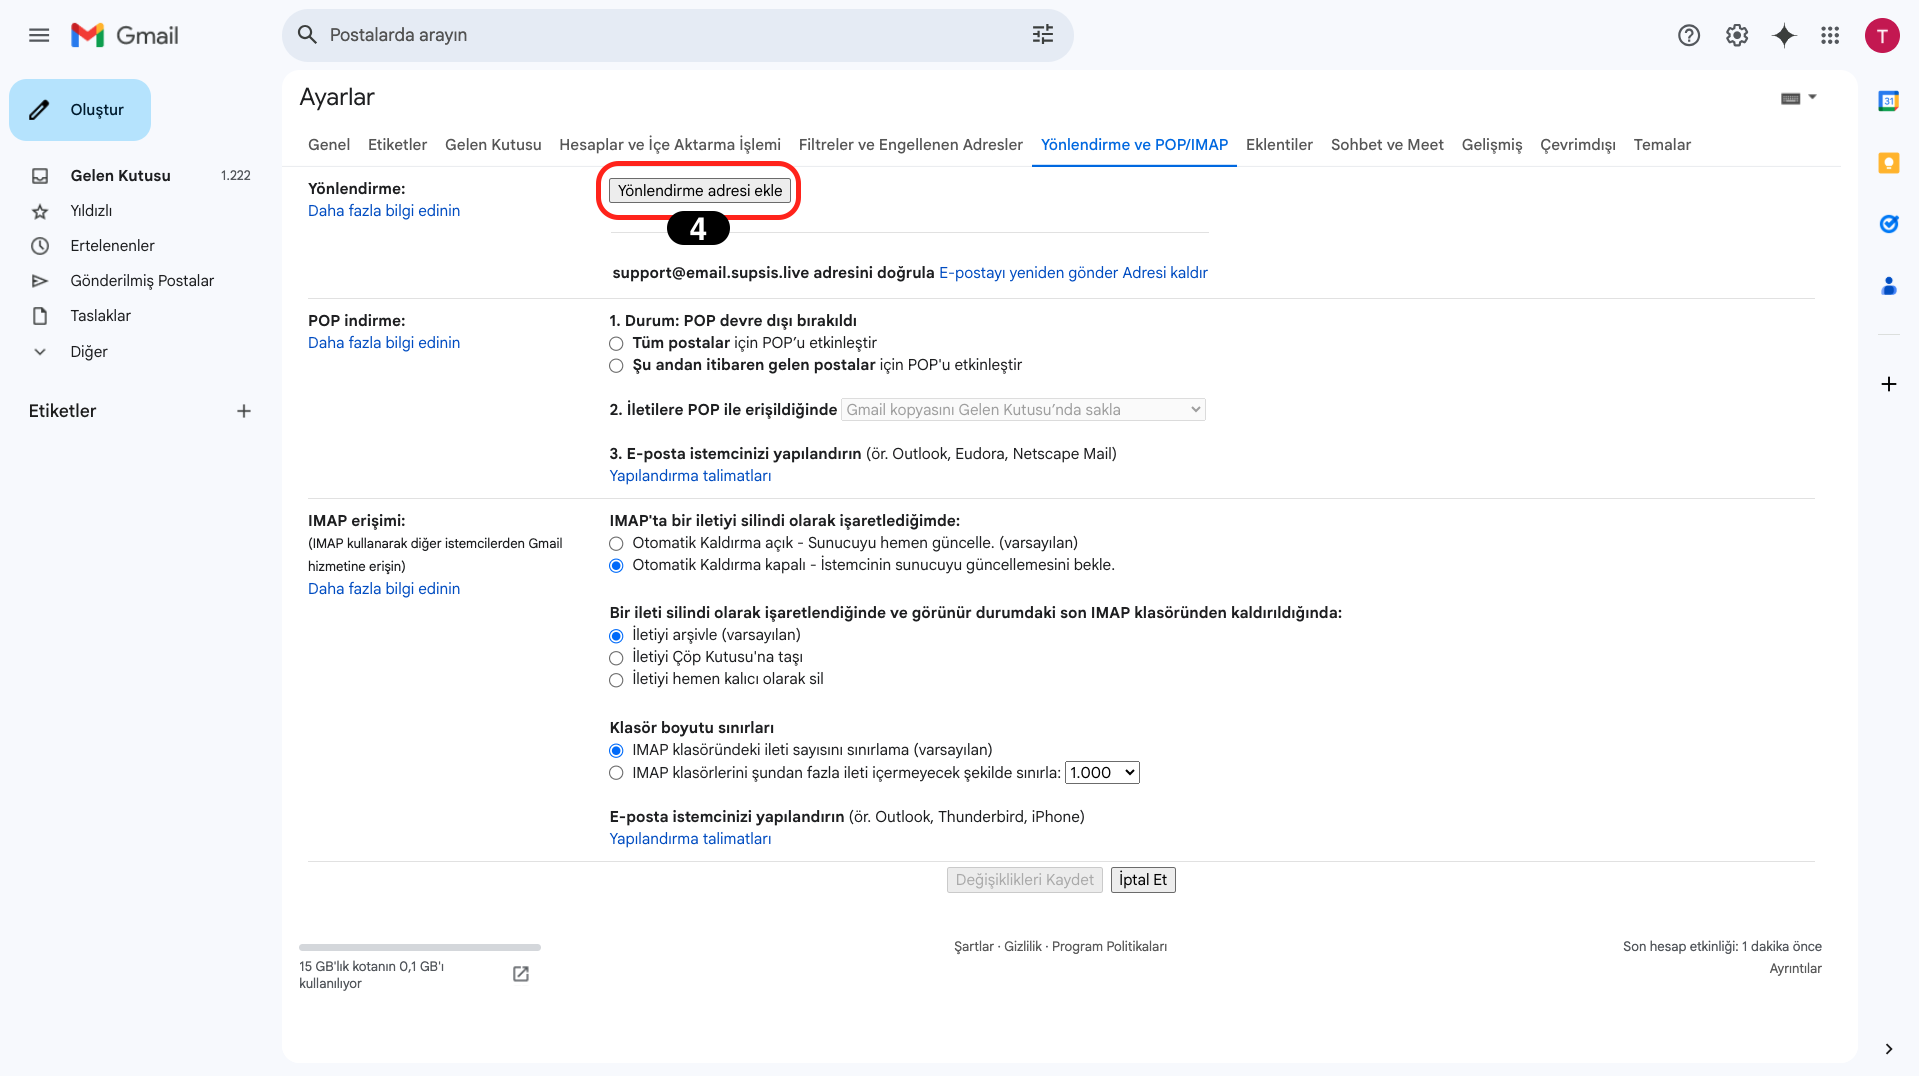
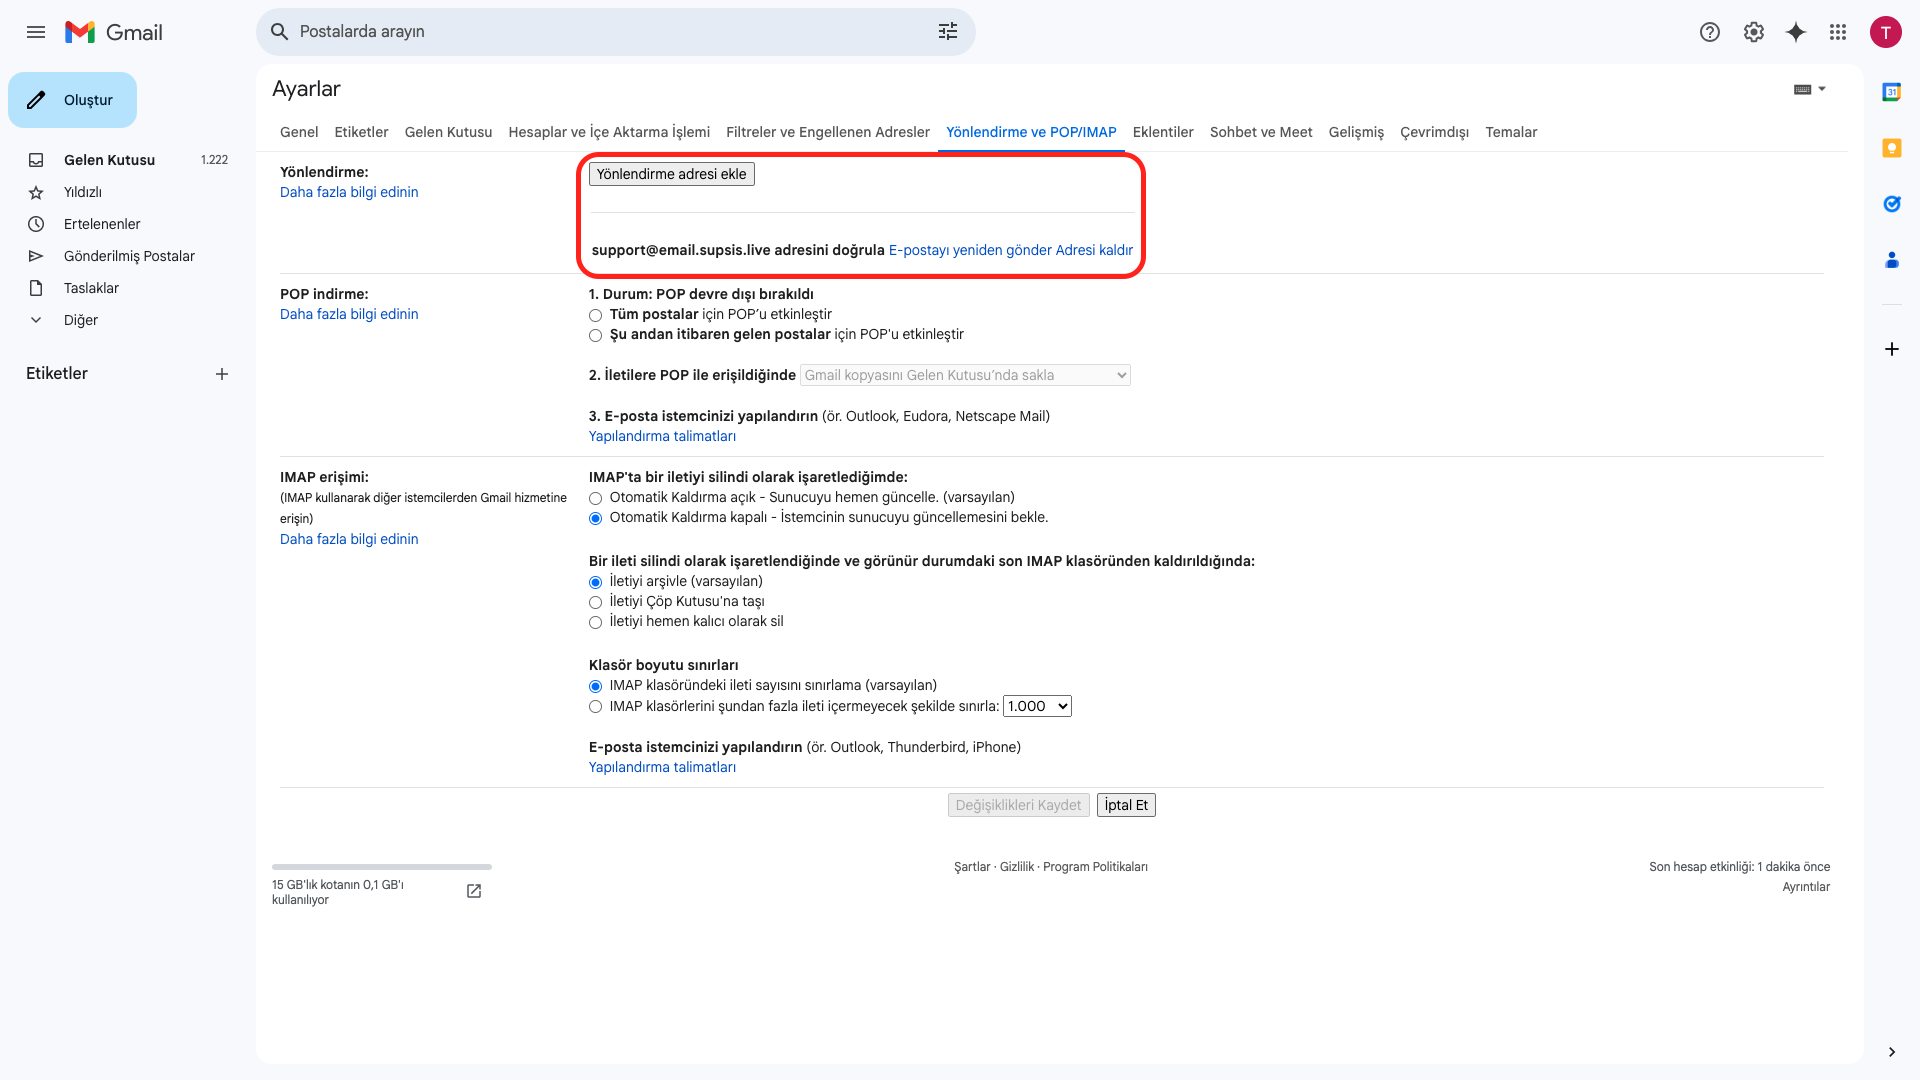
Continue the process by clicking the "Add Forwarding Address" option from the opened tab.
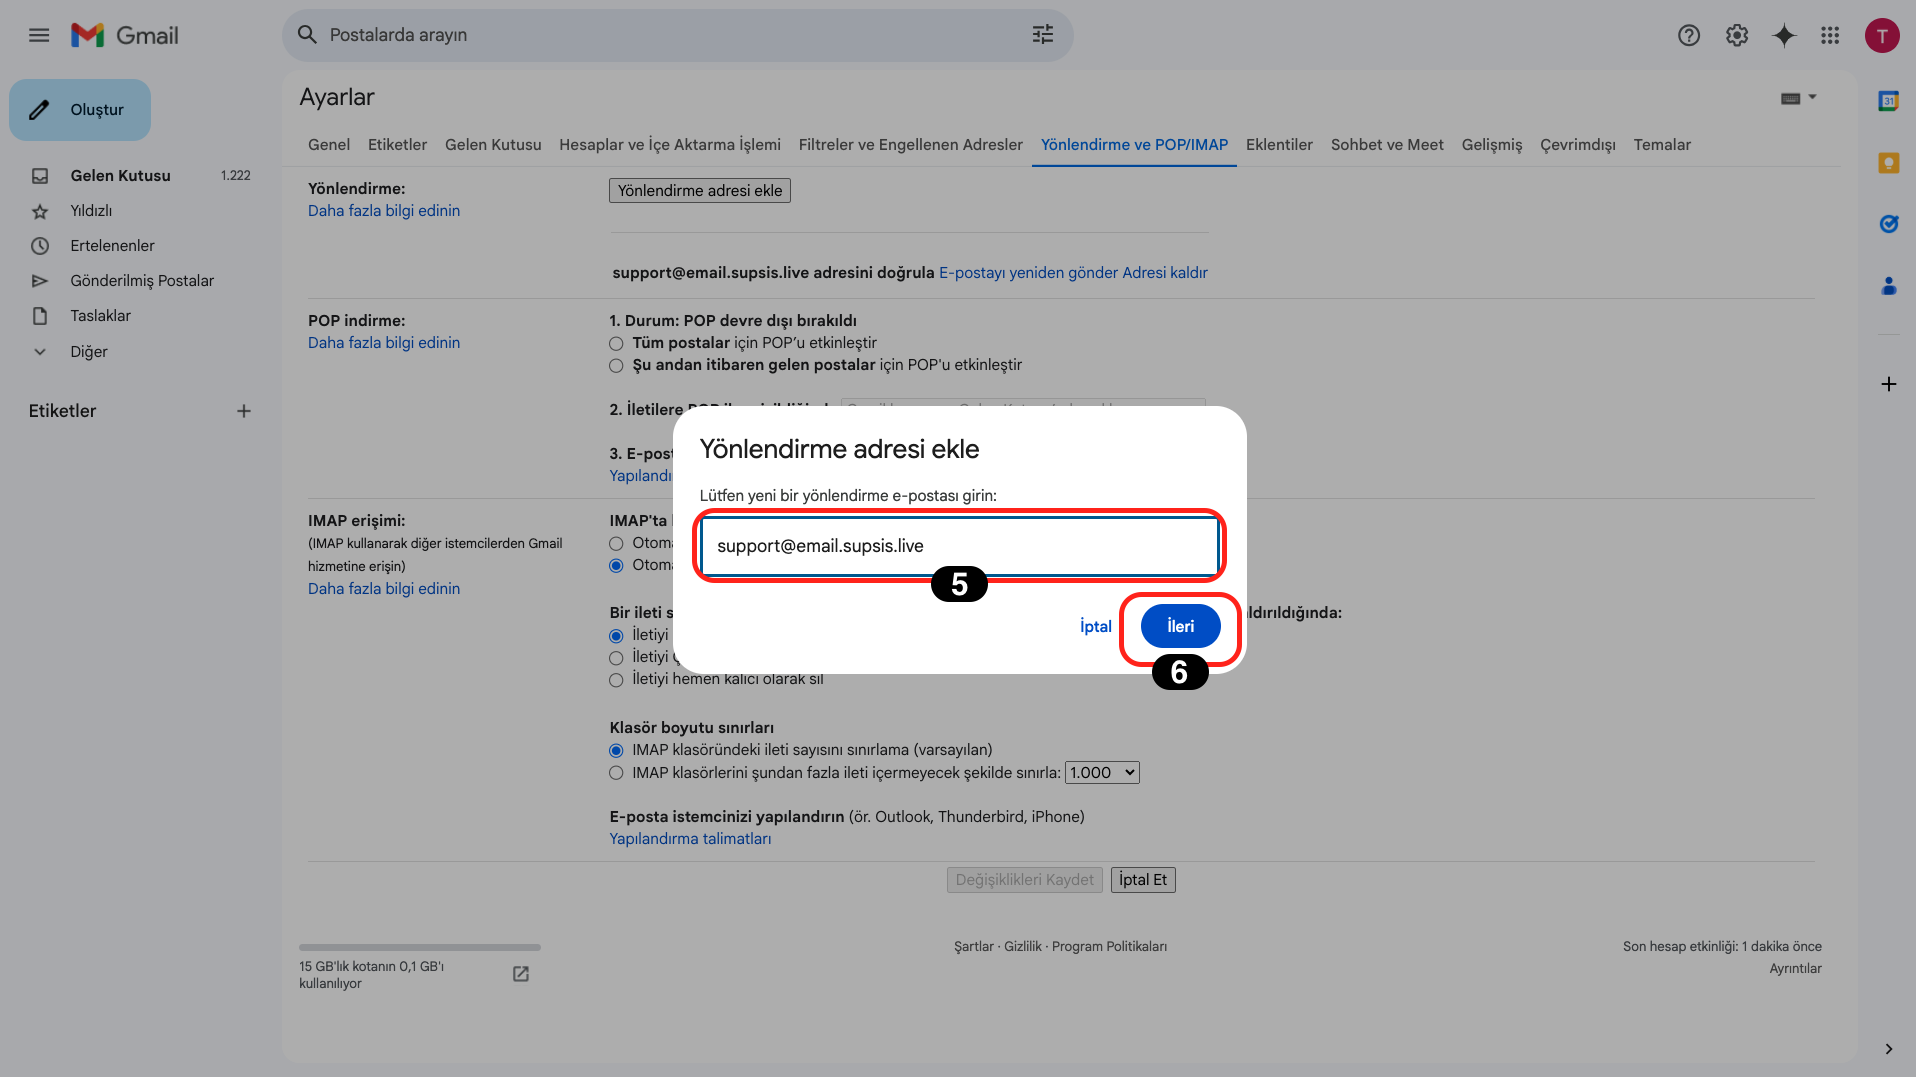
In the opened module, write your own created email provider address in the "Enter Forwarding Email" field, for example: "yourname@yourpanelname.email.supsis.live" and continue the process by clicking the "Next" button.
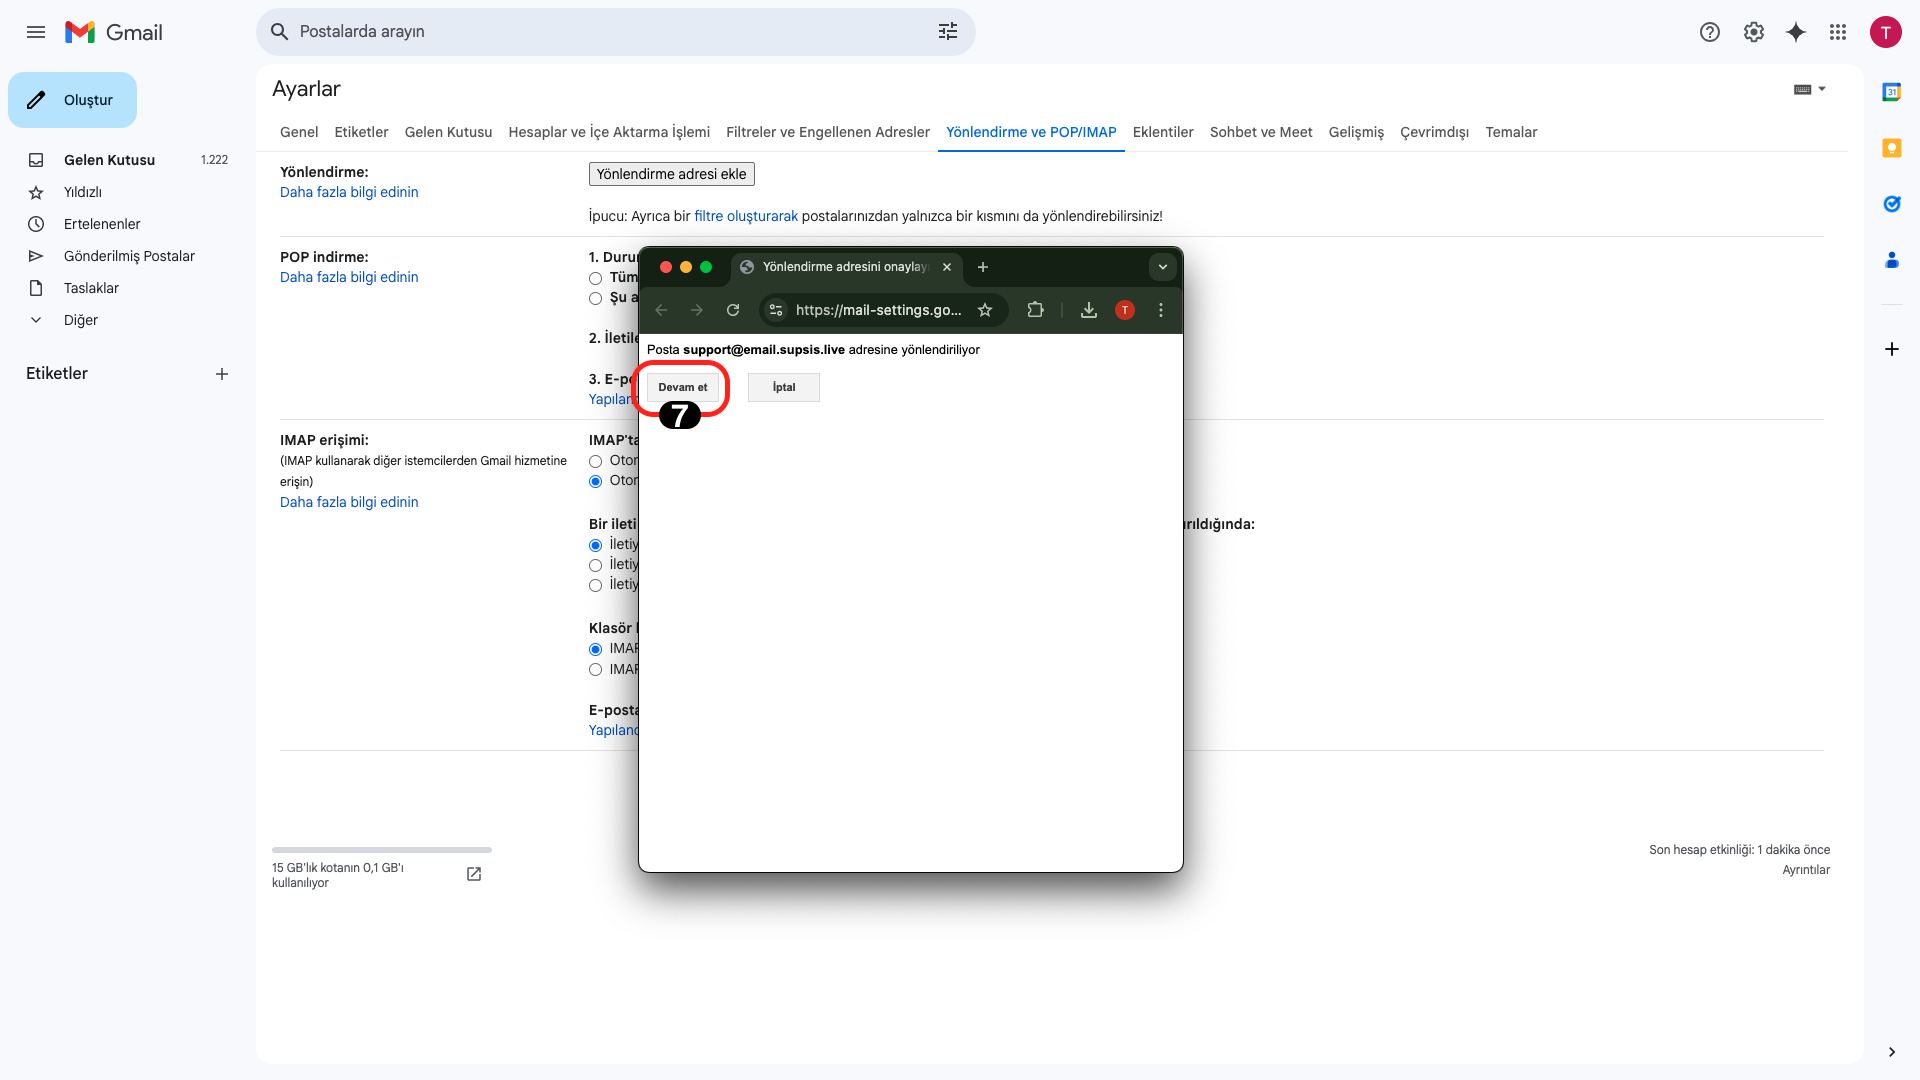
Approve the process by clicking the "Continue" button in the opened window.
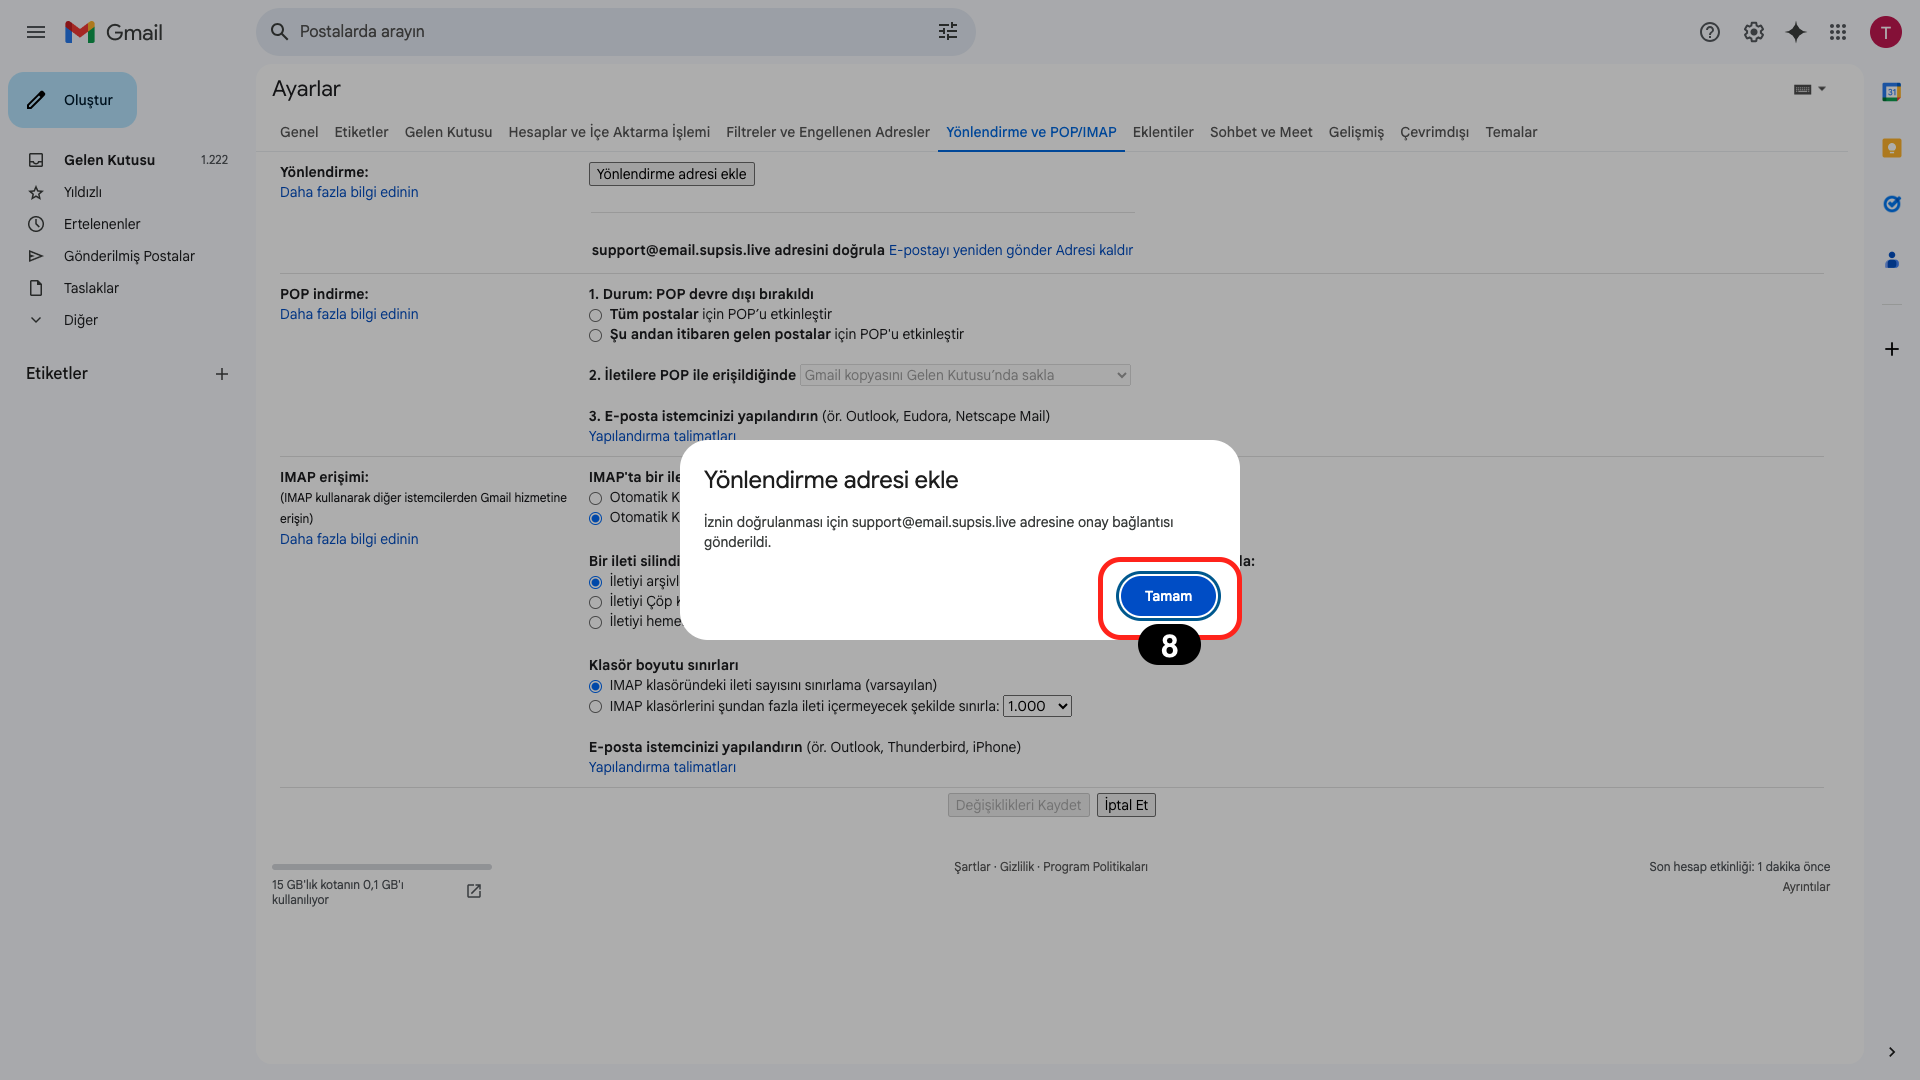
Finally, an approval link will be sent to our team and will be approved by our team in a short time. Click the "OK" button to complete the process.
If you have successfully completed these operations and your settings are configured correctly, it means you have successfully completed the integration process. Now you can perform your email management using Gmail integration through the system.
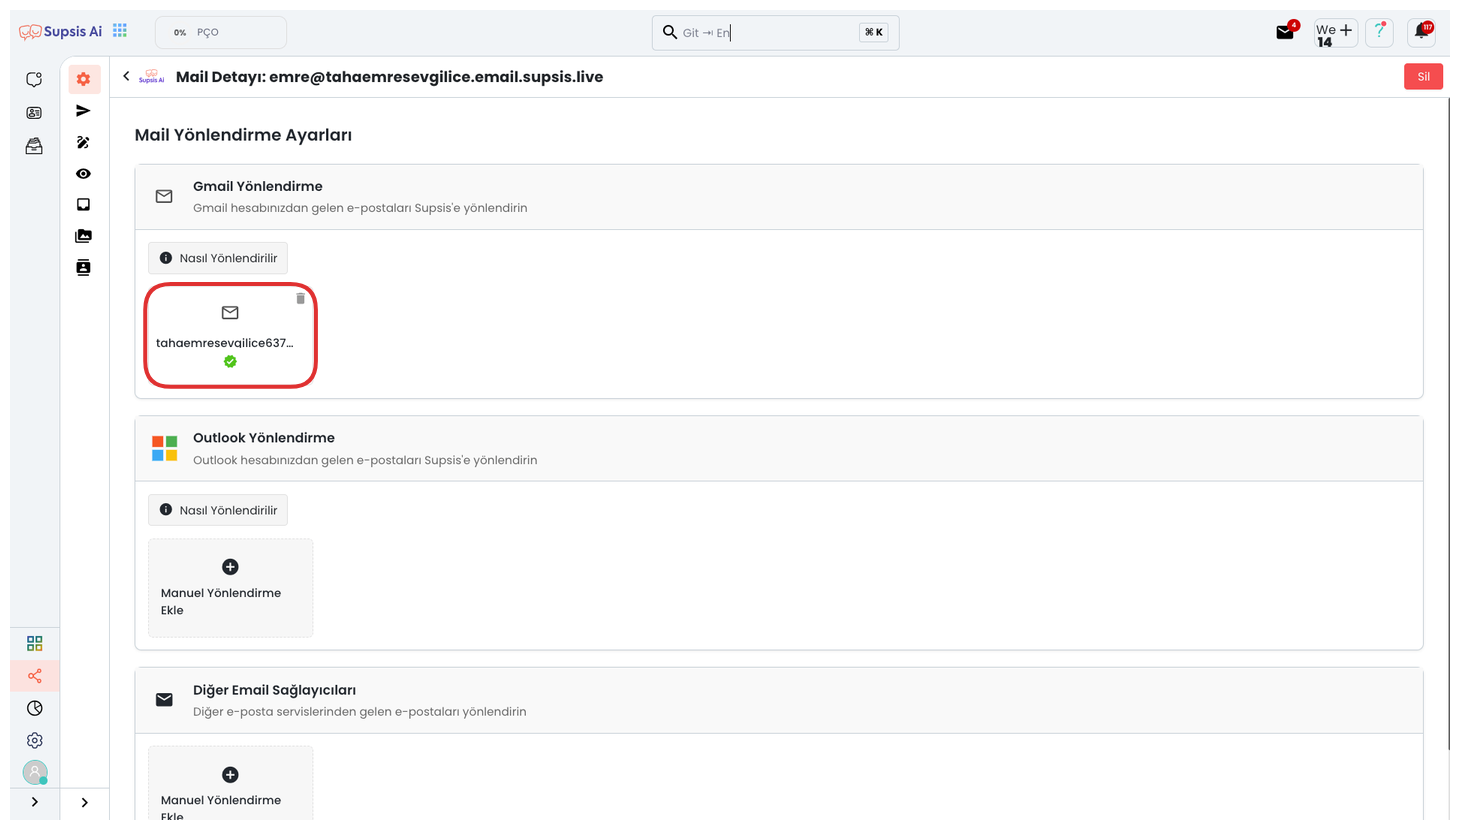 After completing all these steps, the verification process is completed automatically. The verification process may take a few minutes.
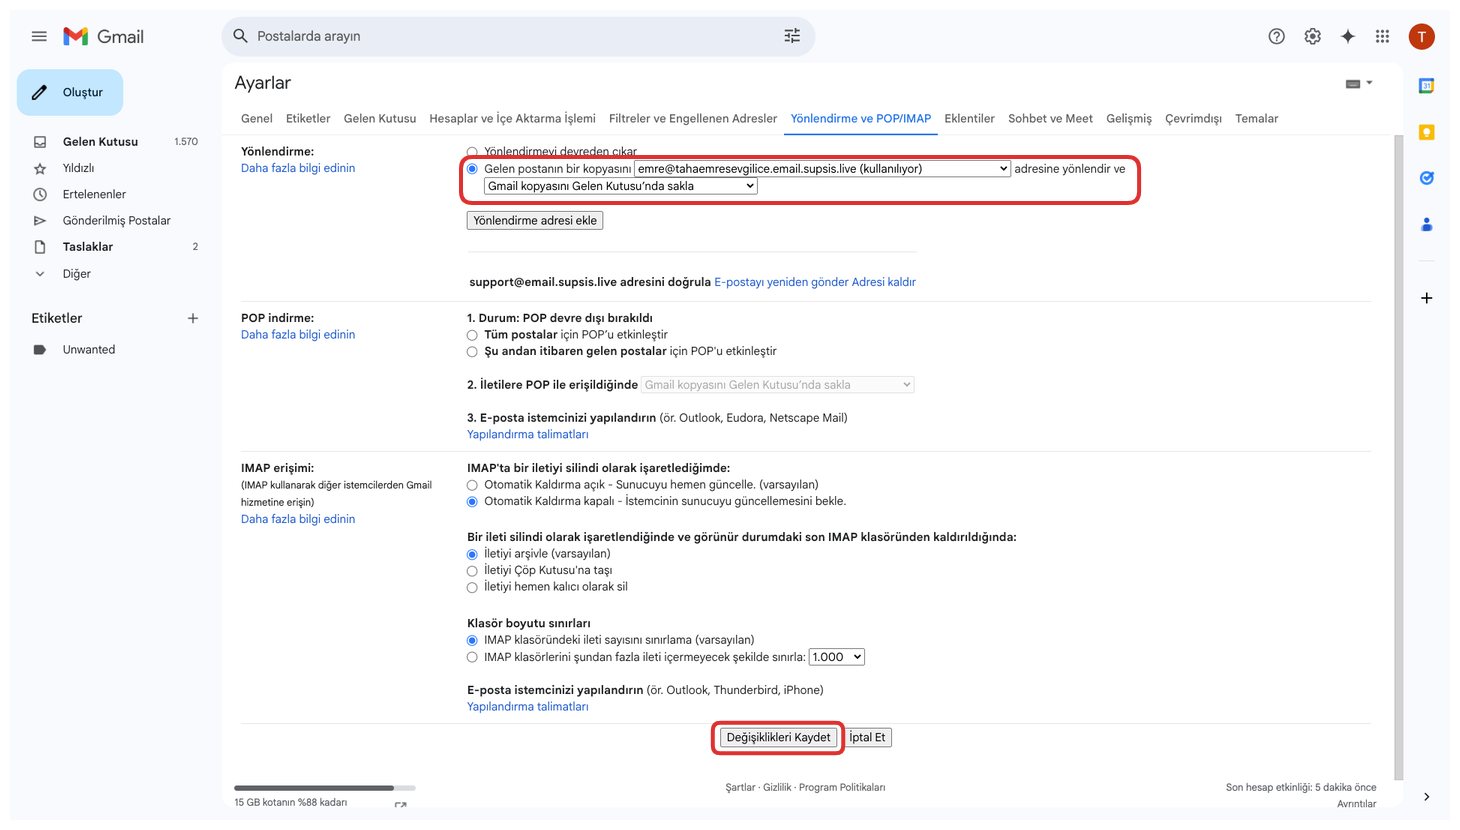
To be able to view emails from the inbox, check this box from the forwarding settings section and then click the "Save Changes" button. Otherwise, emails coming to your mail cannot be viewed on the panel.
2.) Microsoft Outlook Integration
Microsoft Outlook Integration allows you to integrate your Outlook accounts into the Supsis AI platform. Thanks to this integration, you can send bulk emails, manage your customer communication from a central point and make your email campaigns more efficient. During the integration process, you need to connect your Microsoft account information and give the necessary permissions. After completing the integration, you can manage emails directly through your Outlook account.

First, continue the process by clicking the "Settings" icon in the upper right.
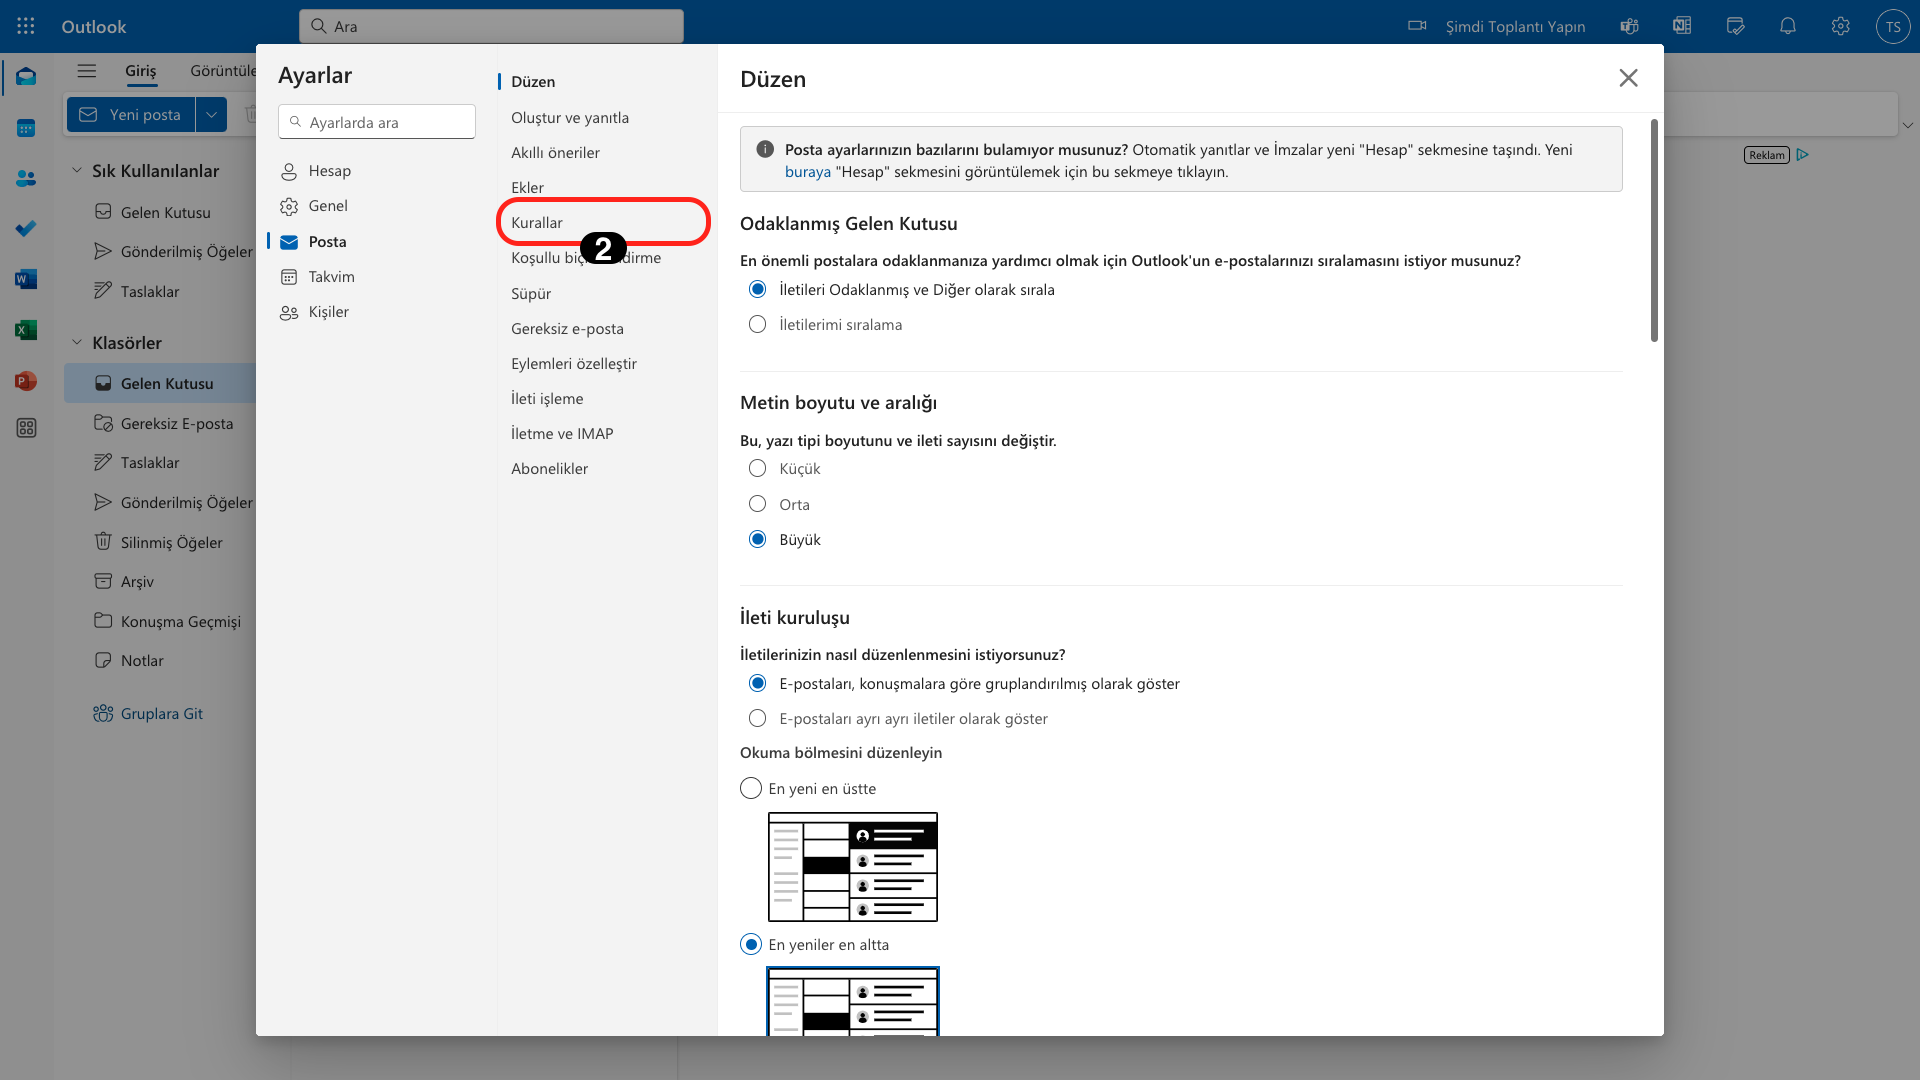
In the opened module, go to the "Mail" tab and then click the "Rules" section.
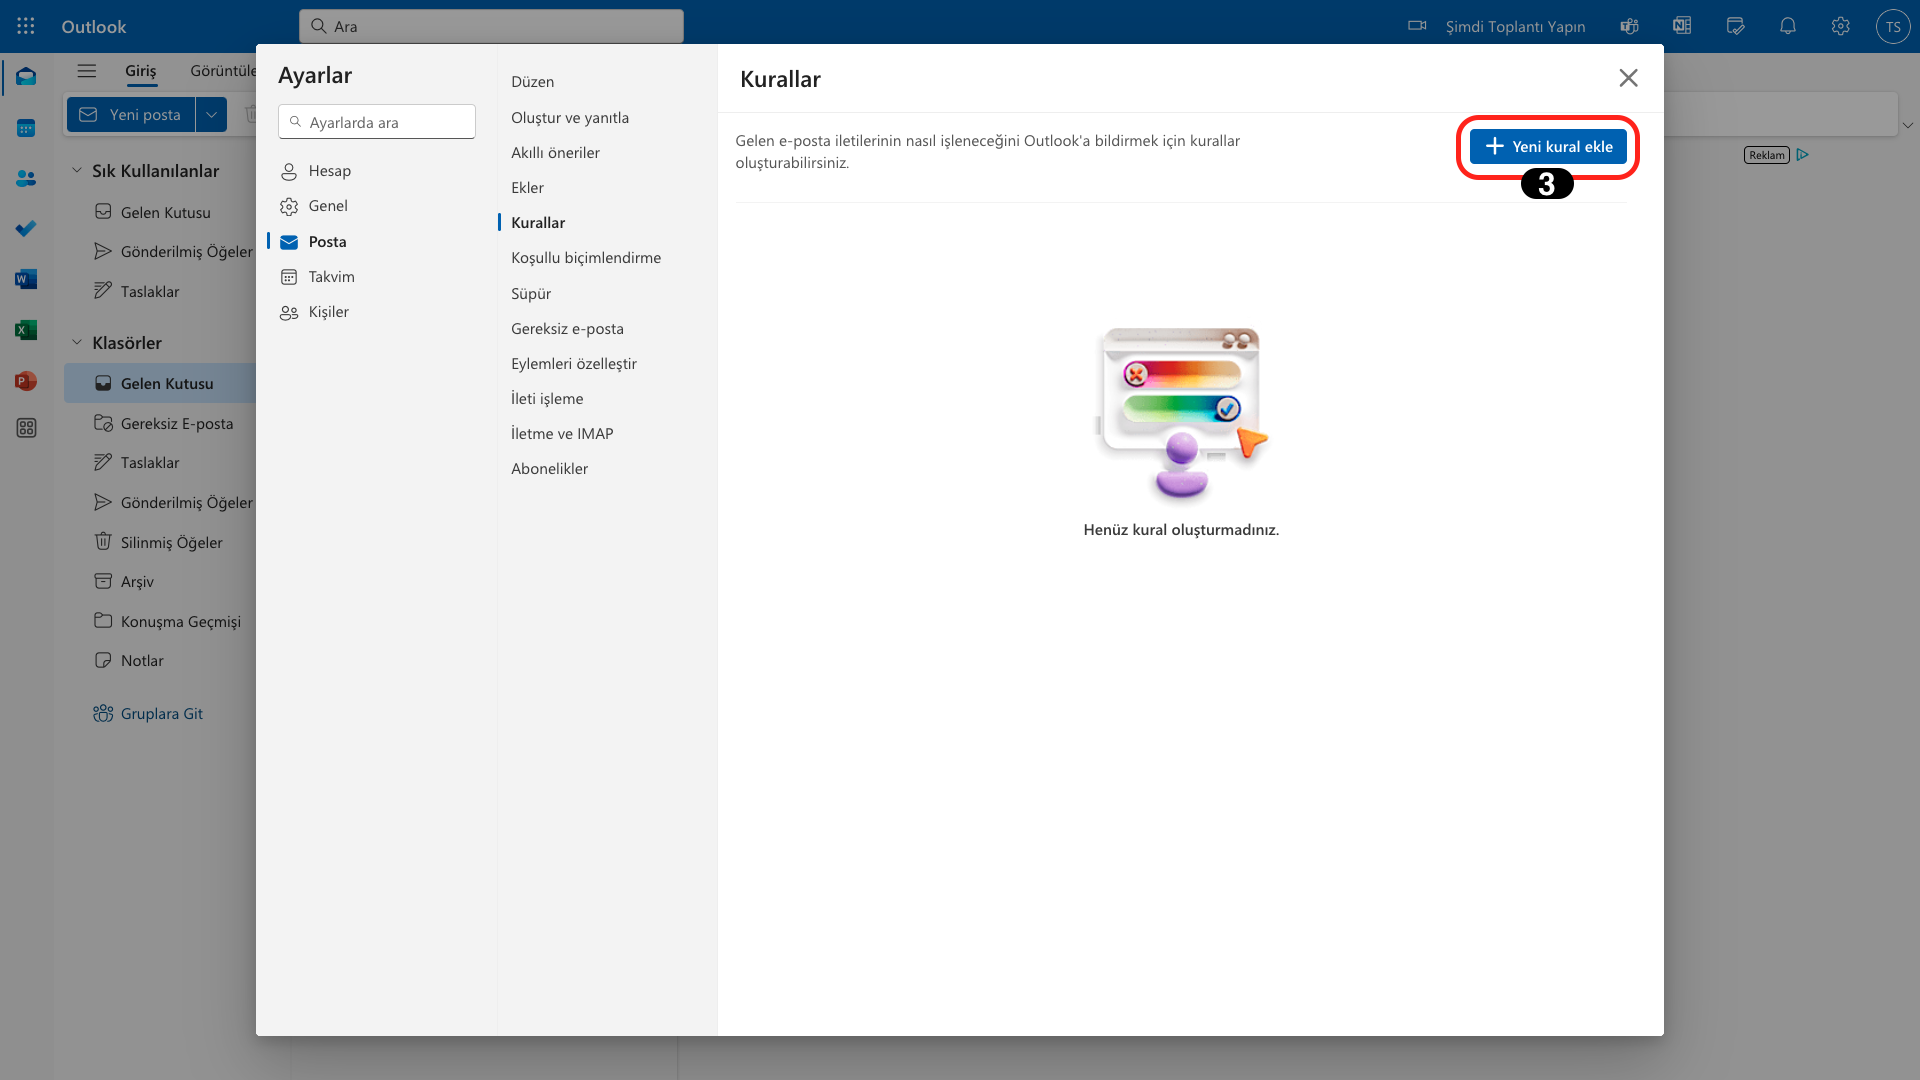
Continue the process by clicking the "Add New Rule" button in the opened area.
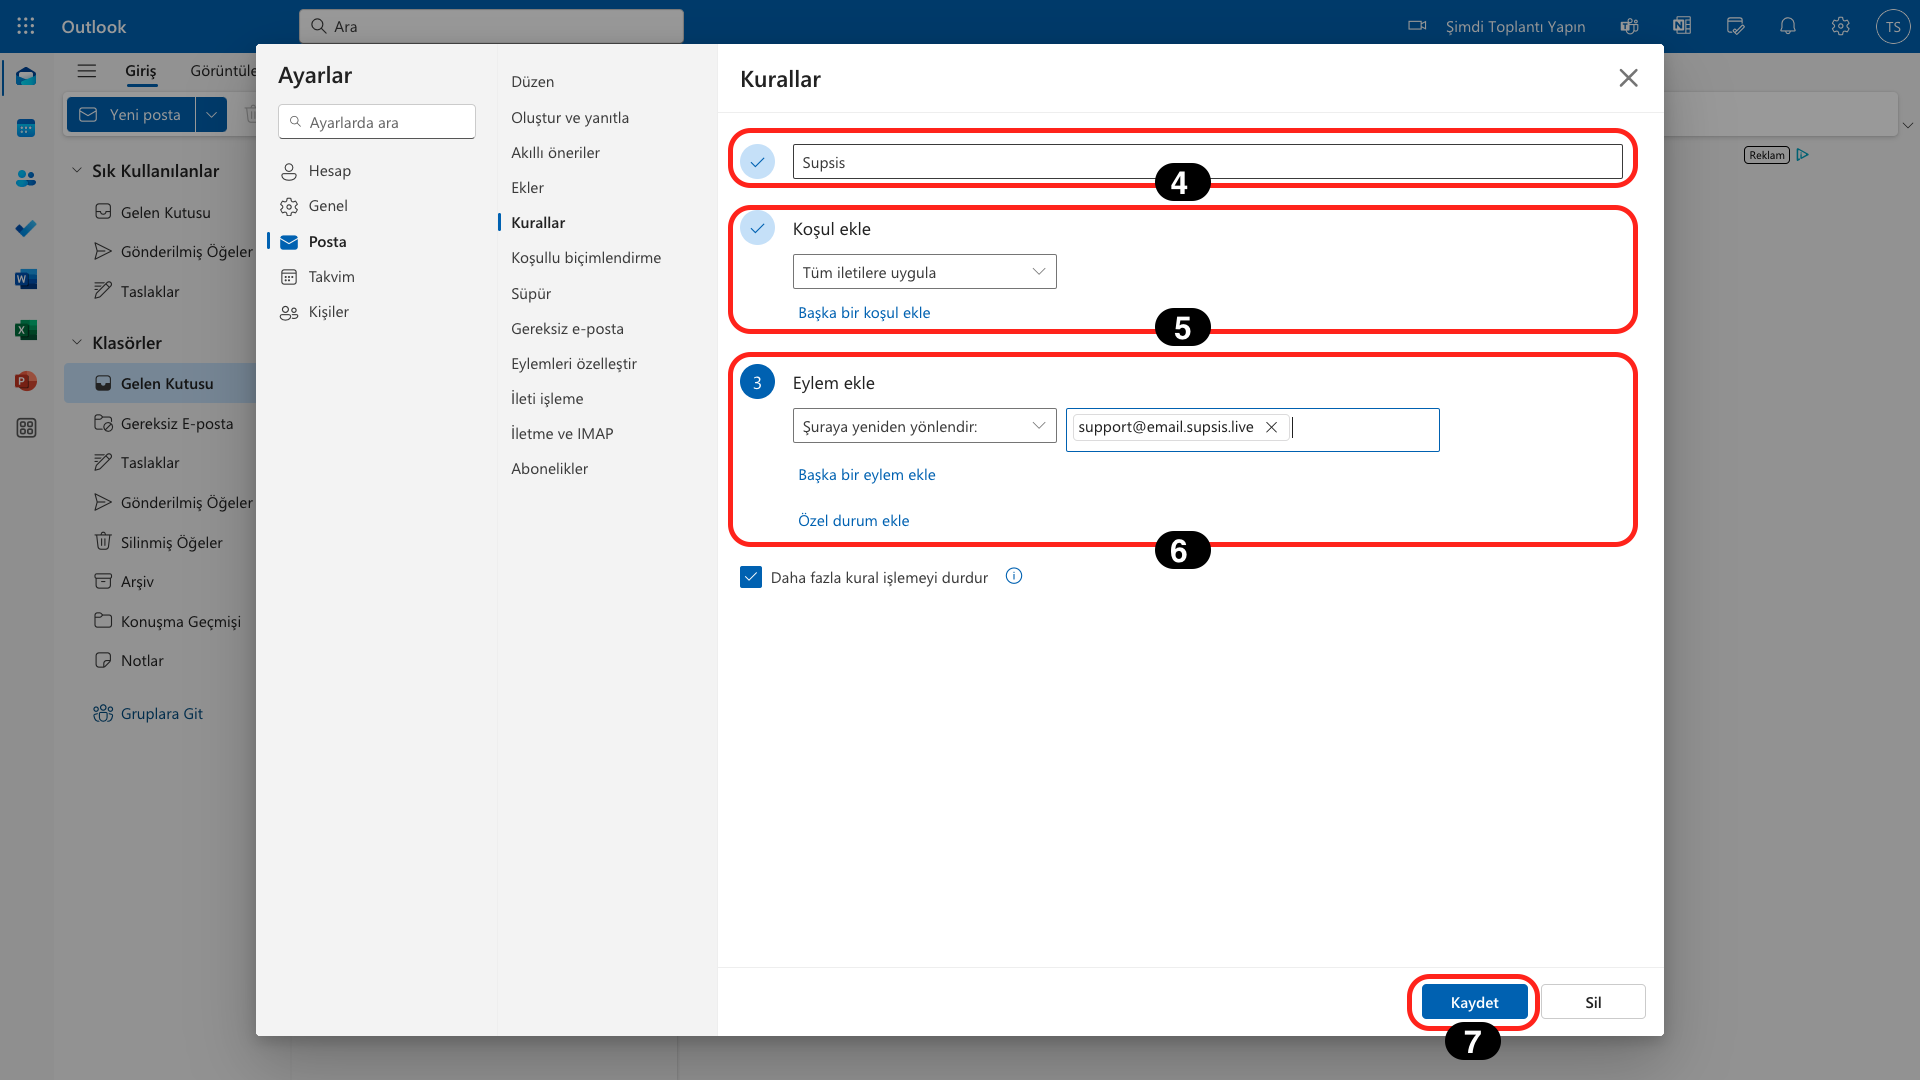
In the opened section, you can name your rule from the field at the top. Select the "Apply to all messages" option from the dropdown list from the "Add Condition" section.
In the "Add Action" field below, select the "Redirect to" option from the dropdown list and write your own created email provider address in the opened field, for example: "yourname@yourpanelname.email.supsis.live".
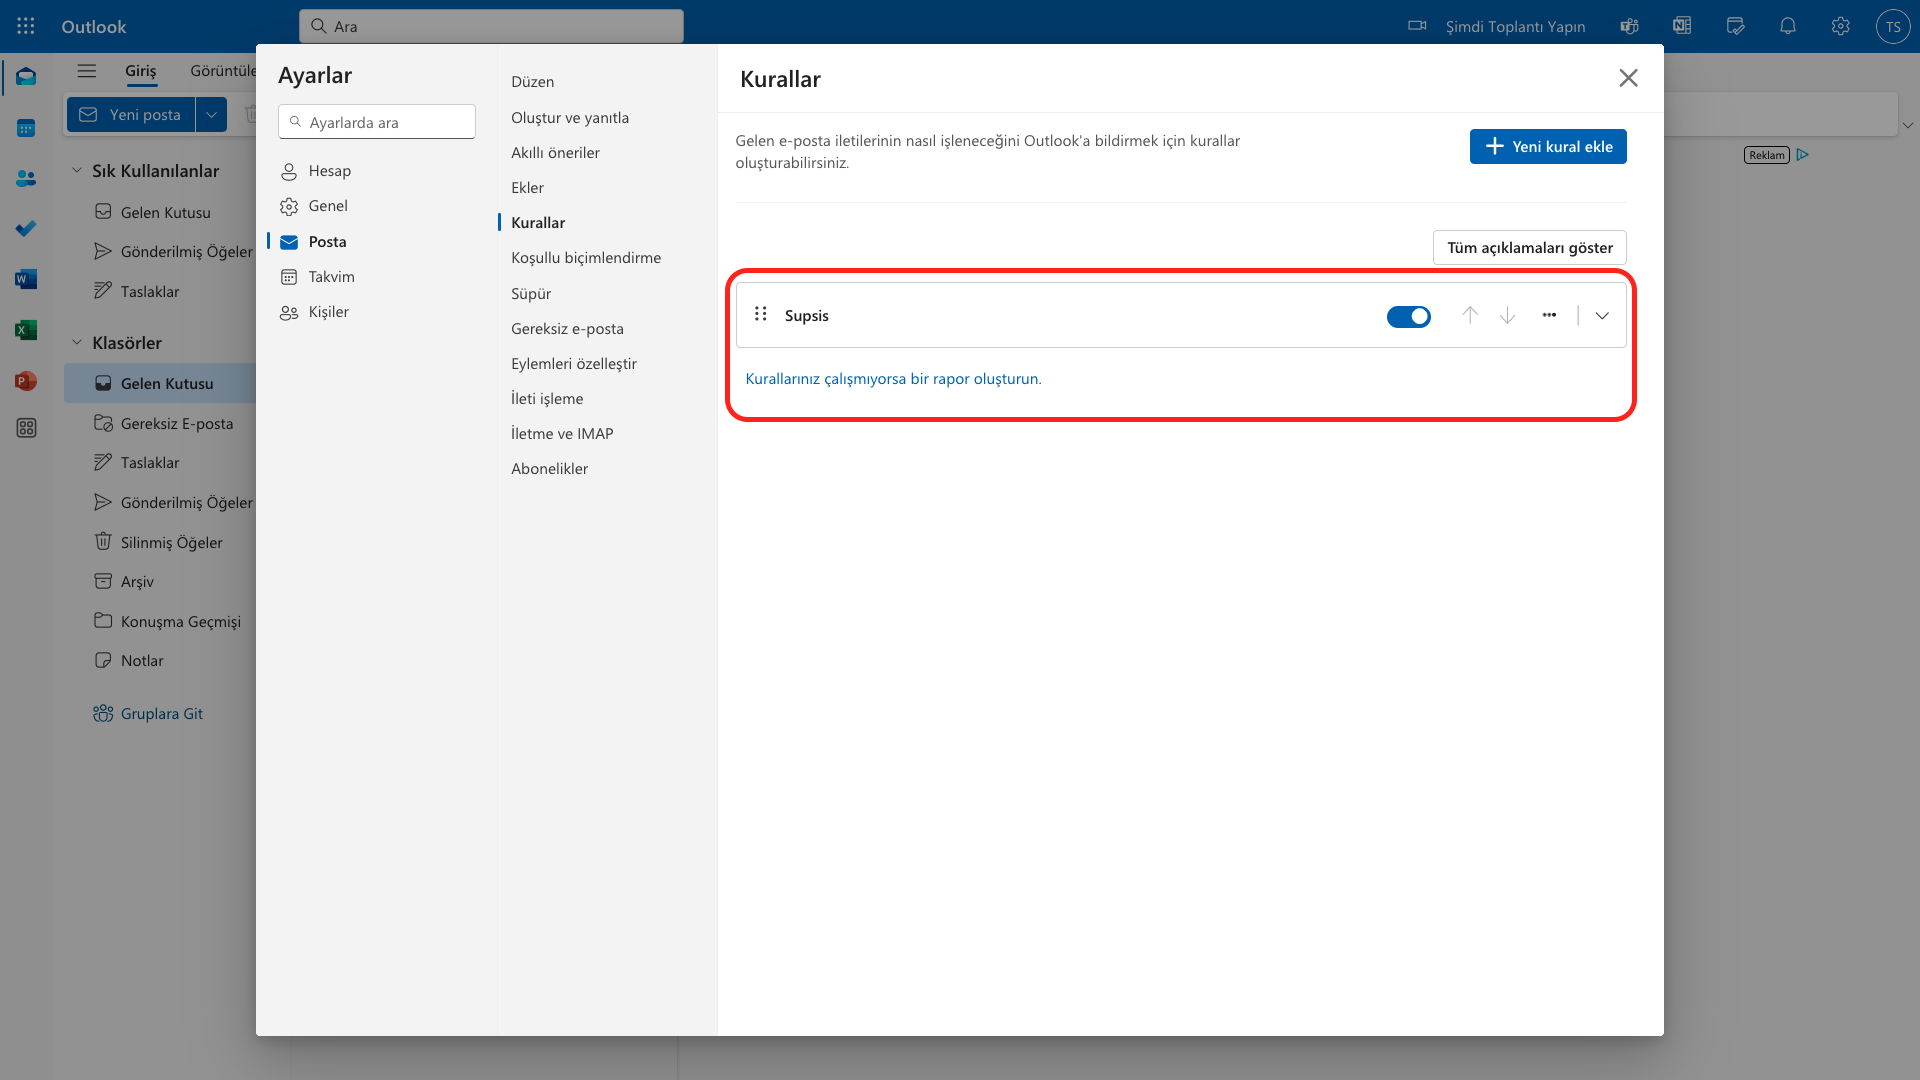
Finally, complete the process by clicking the "Save" button.
Manual Addition
First, go to the Integrations page in the left menu. On the opened page, you can quickly reach the Mail Integration section by clicking the "Email" option from the menu in the upper right corner. After reaching this section, you can switch to the Email Integration page by clicking the "Mail" tab.
From the opened section, you can continue with the operation steps by finding and clicking on your created provider mail address.
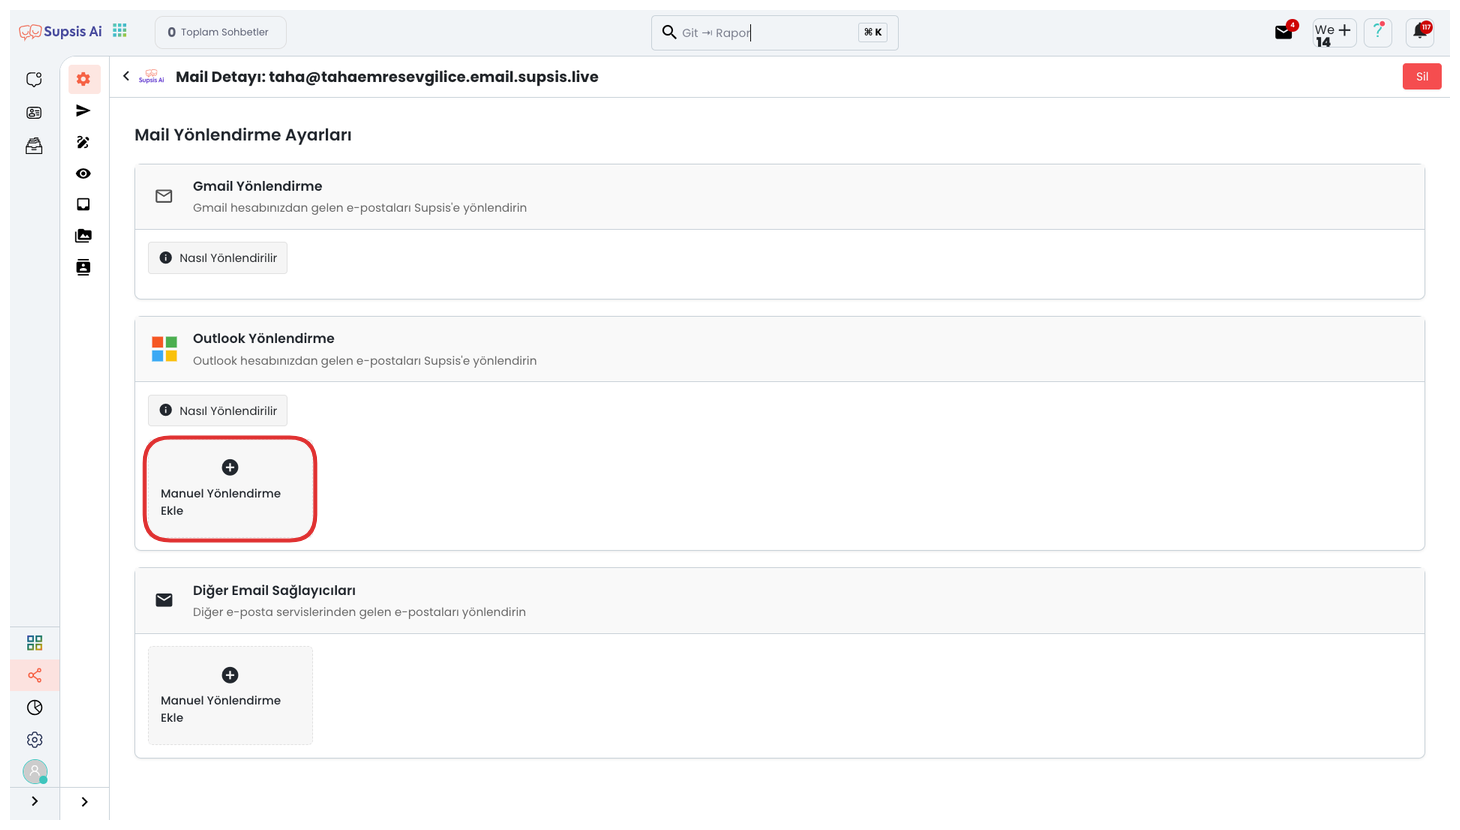
On the opened page, click the "Manual Addition" option under the section that says "Outlook Forwarding".
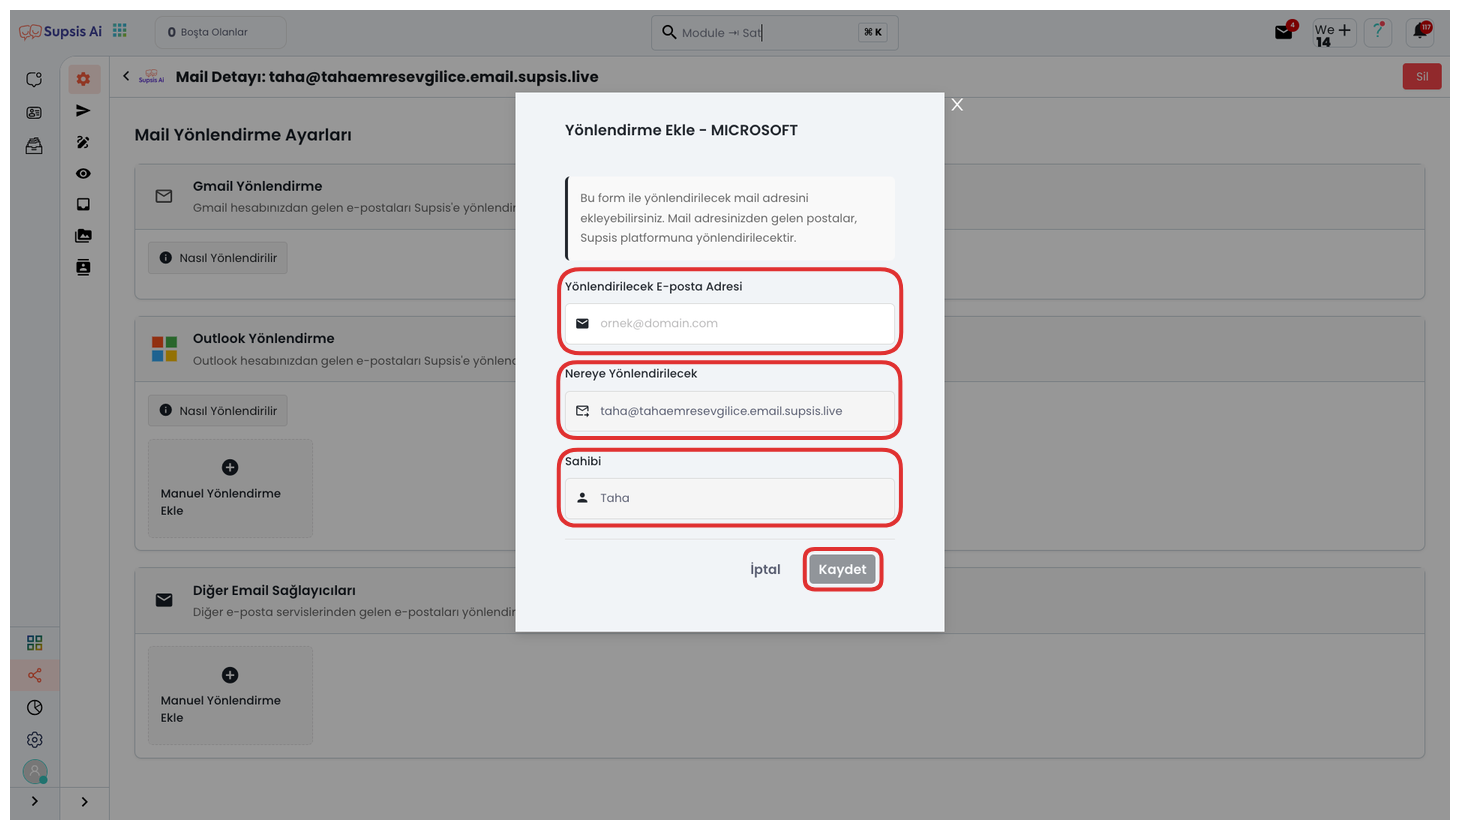
In the opened module, enter the Outlook account you want to forward in the field and complete the process by clicking the "Save" button.
3.) Yandex Mail Integration
Yandex Mail Integration allows you to integrate your Yandex accounts into the Supsis AI platform. Thanks to this integration, you can send bulk emails, manage your customer communication from a central point and make your email campaigns more efficient.
During the integration process, you need to connect your Yandex account information and give the necessary permissions. After completing the integration, you can manage emails directly through your Yandex Mail account.
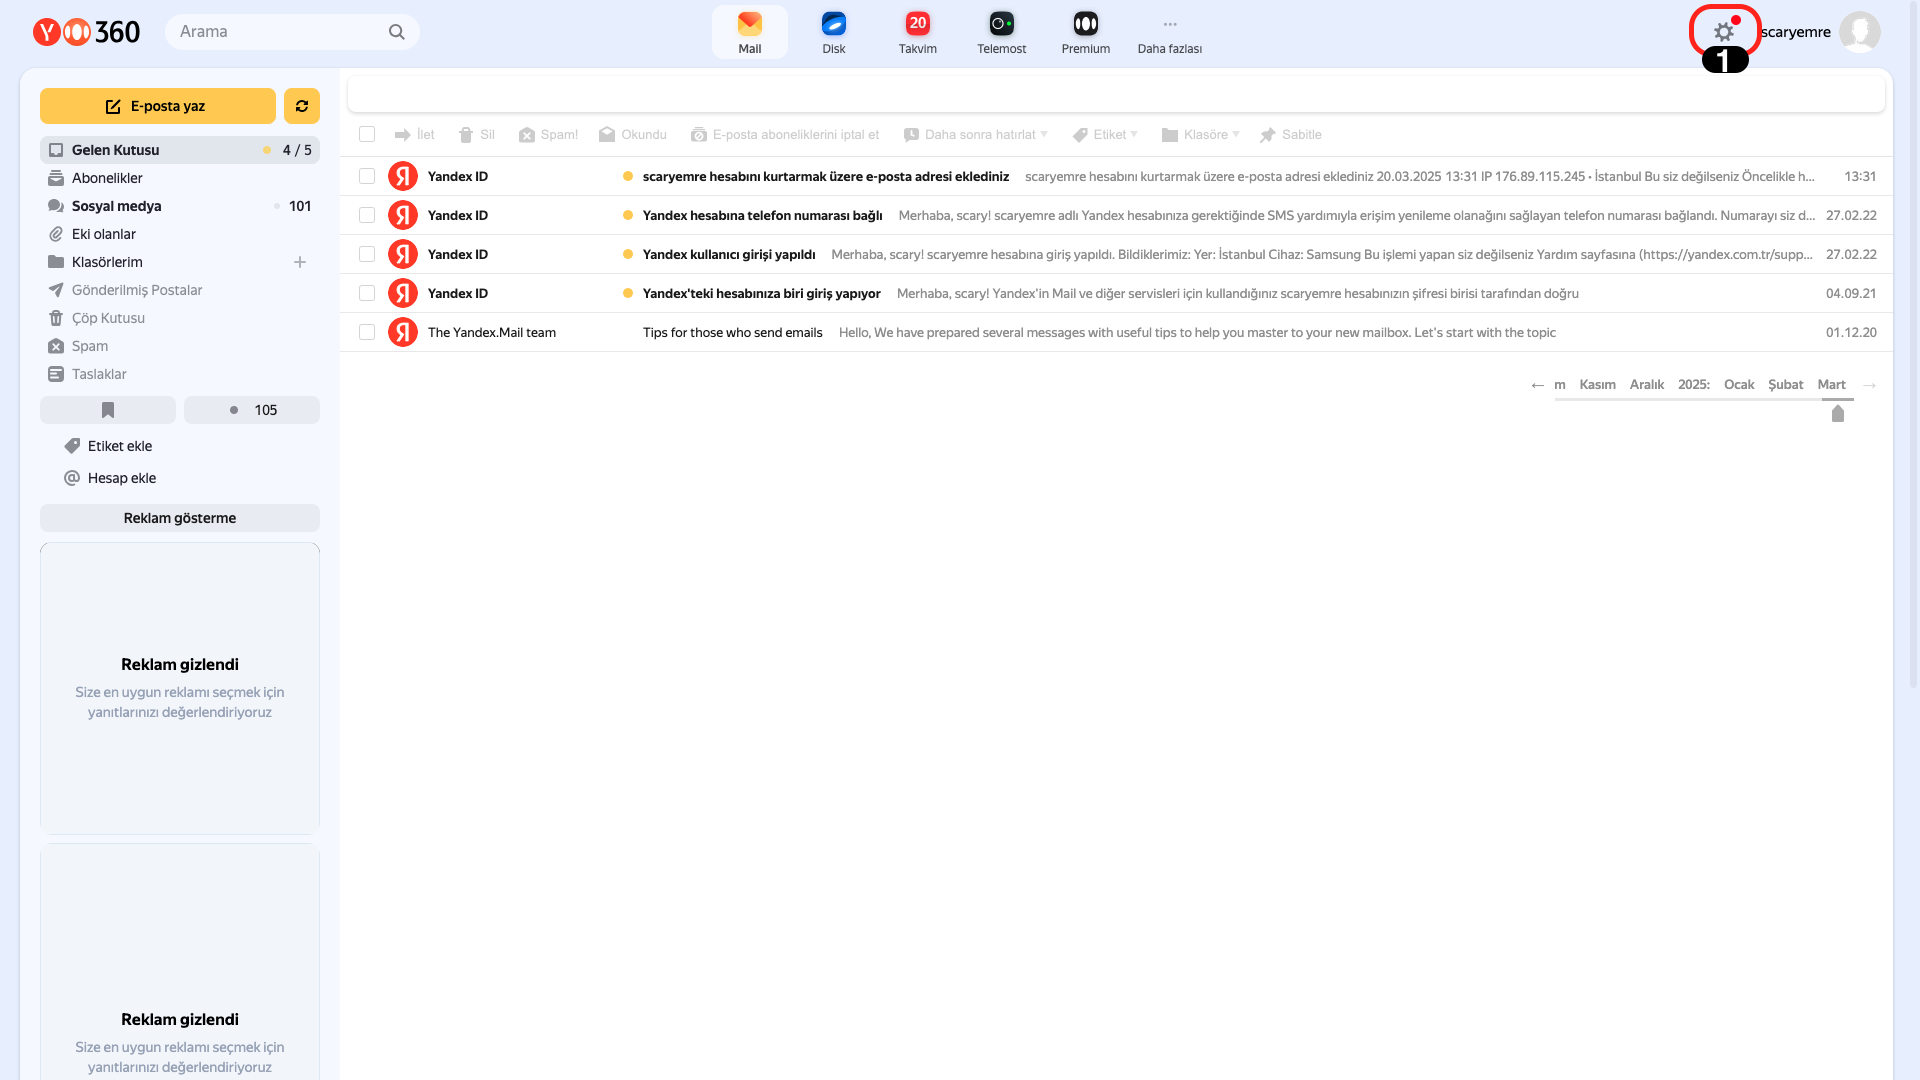
Click the "Settings" icon from the upper right.
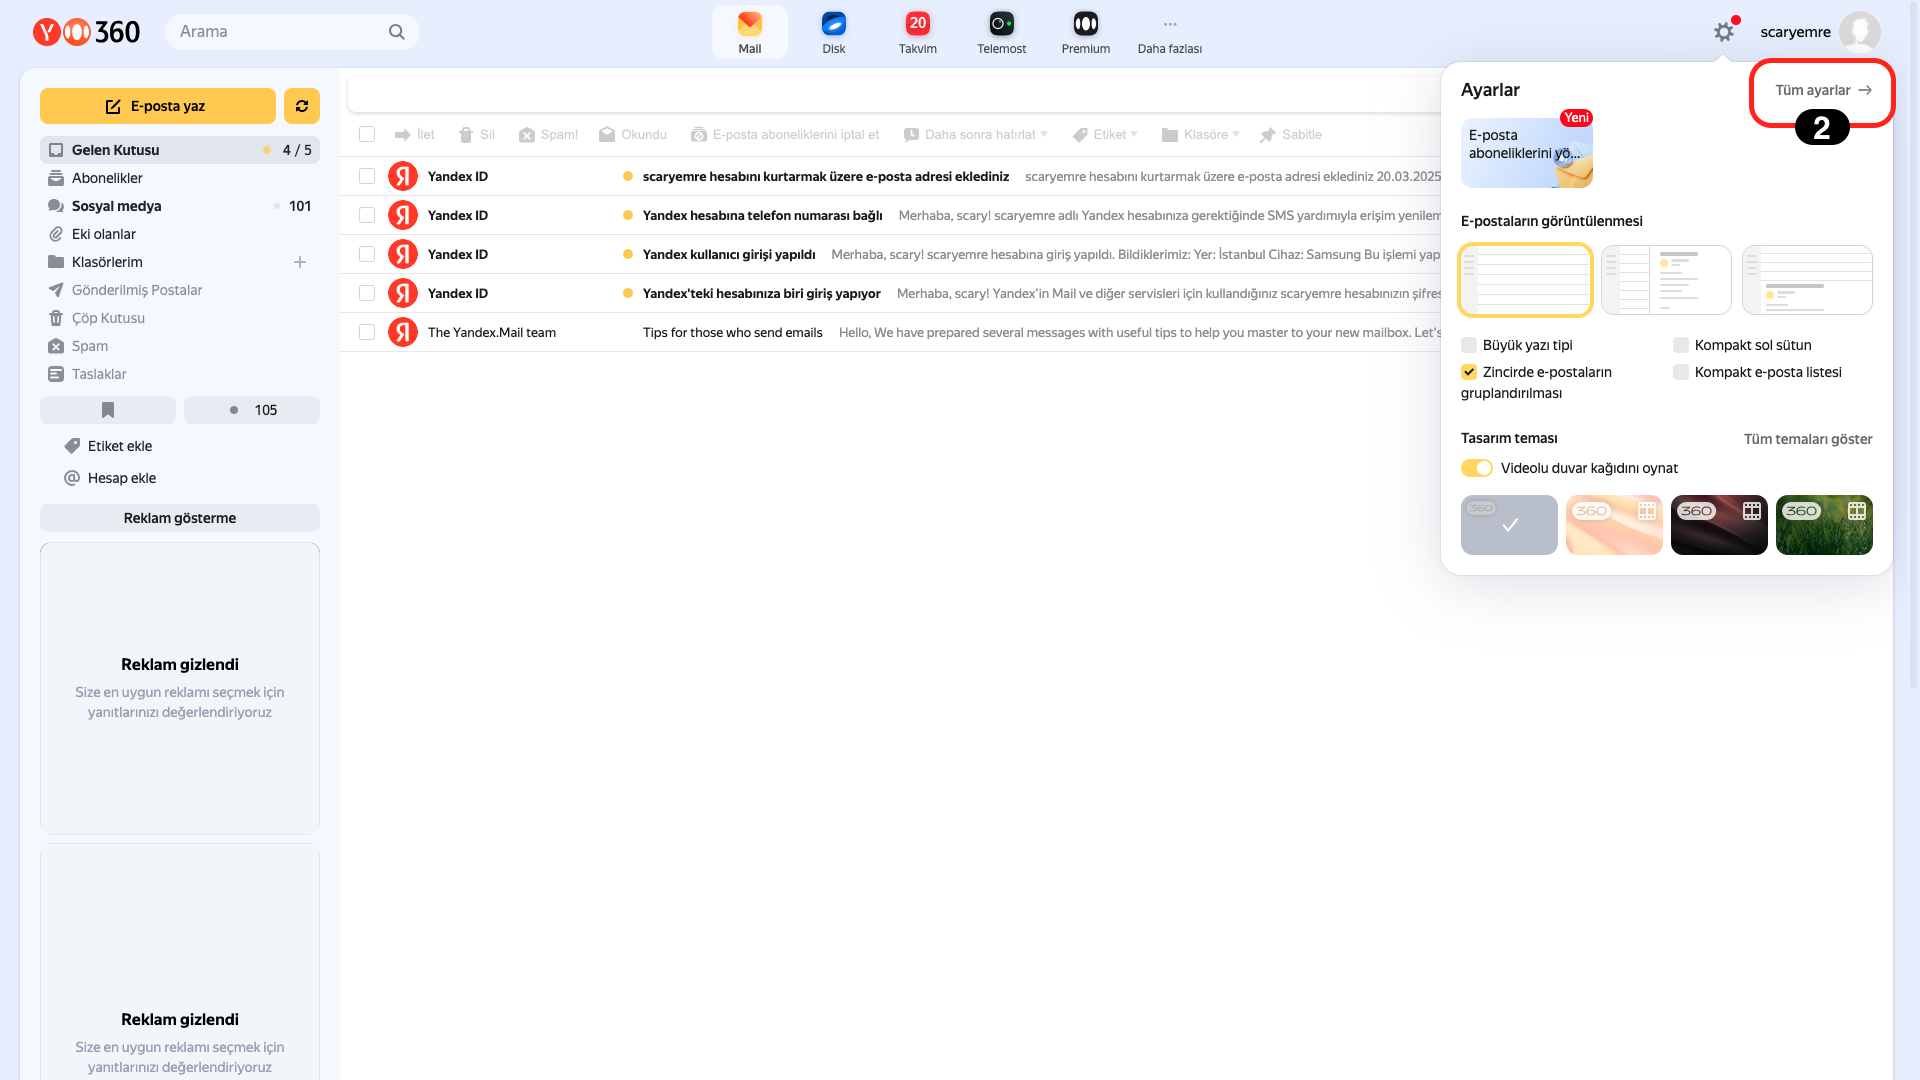
Continue by clicking the "All Settings" option from the opened page.
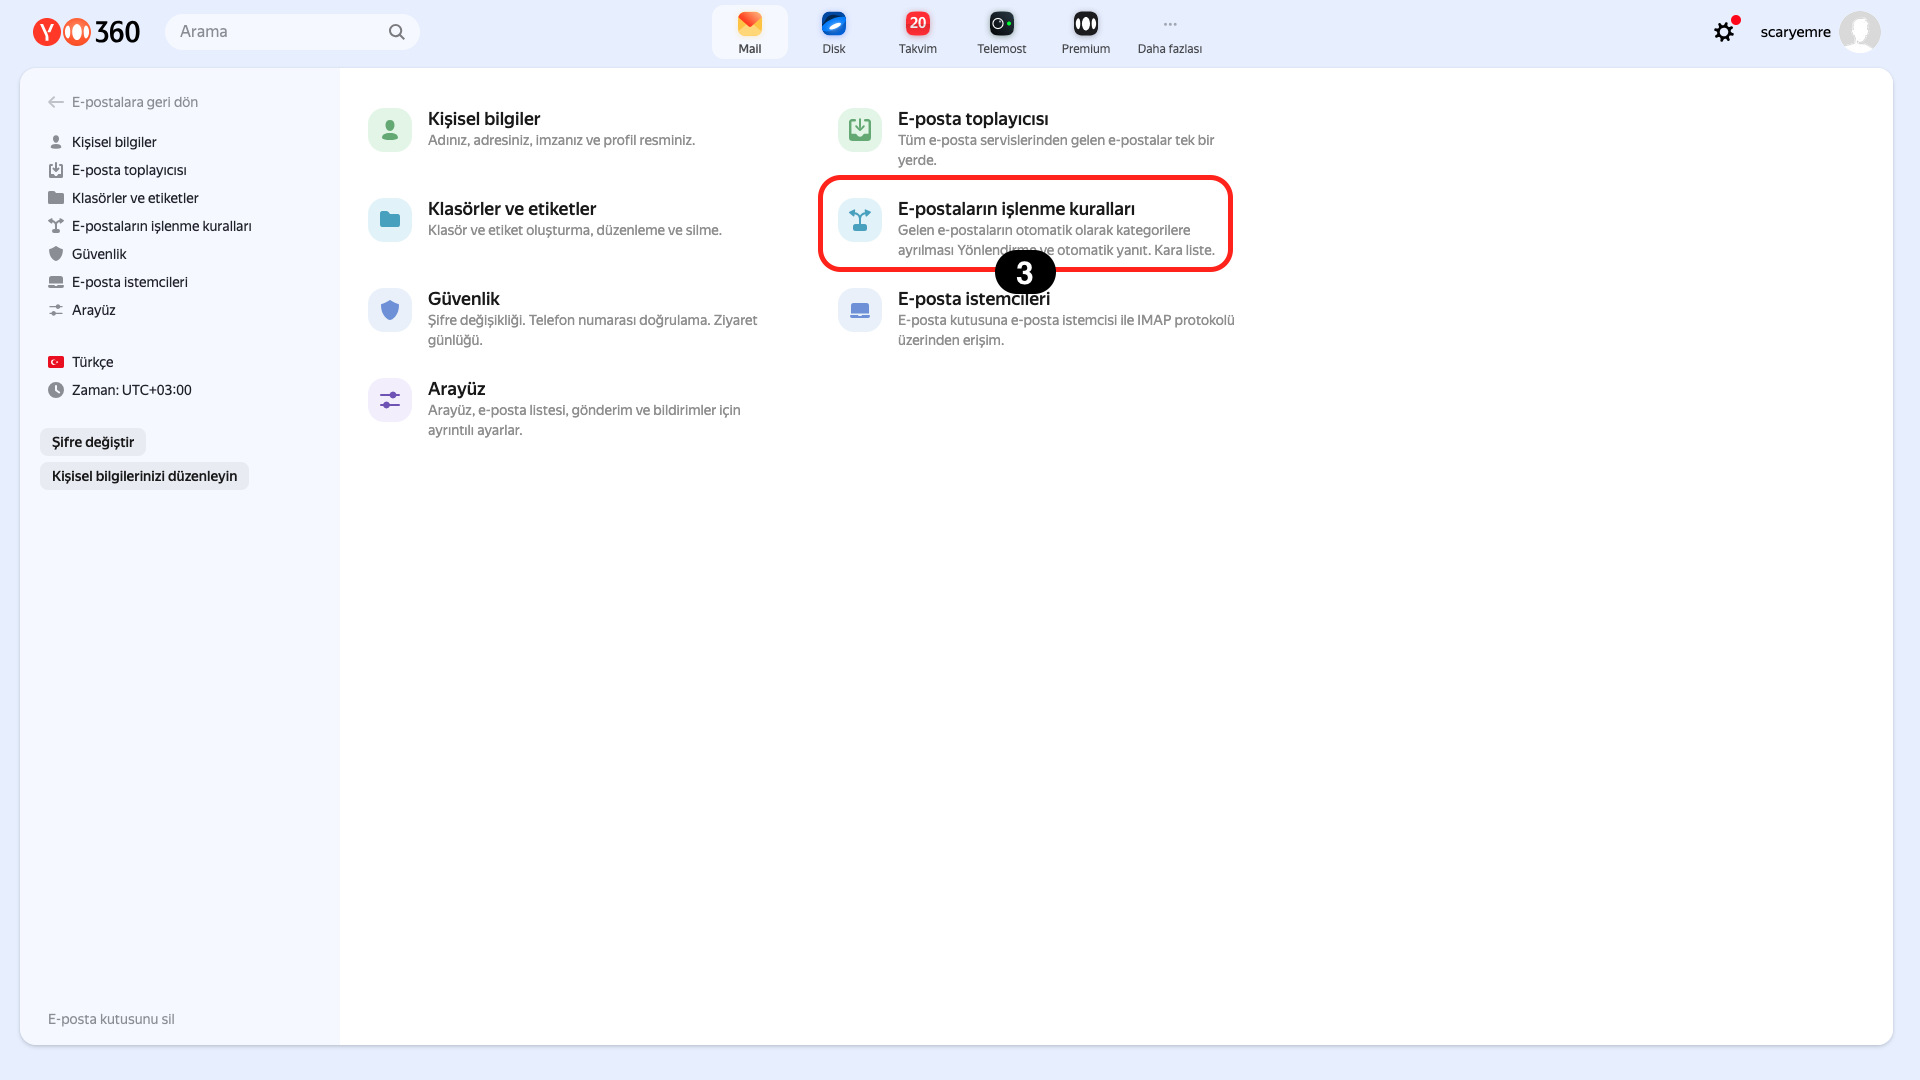
Click on the "Email Processing Rules" section from the opened page.

And then click the "Create Filter" button.

Check the "Forward to this address" box and write your own created email provider address in the box next to it, for example: "yourname@yourpanelname.email.supsis.live", Then complete the process by clicking the "Add Filter" button.
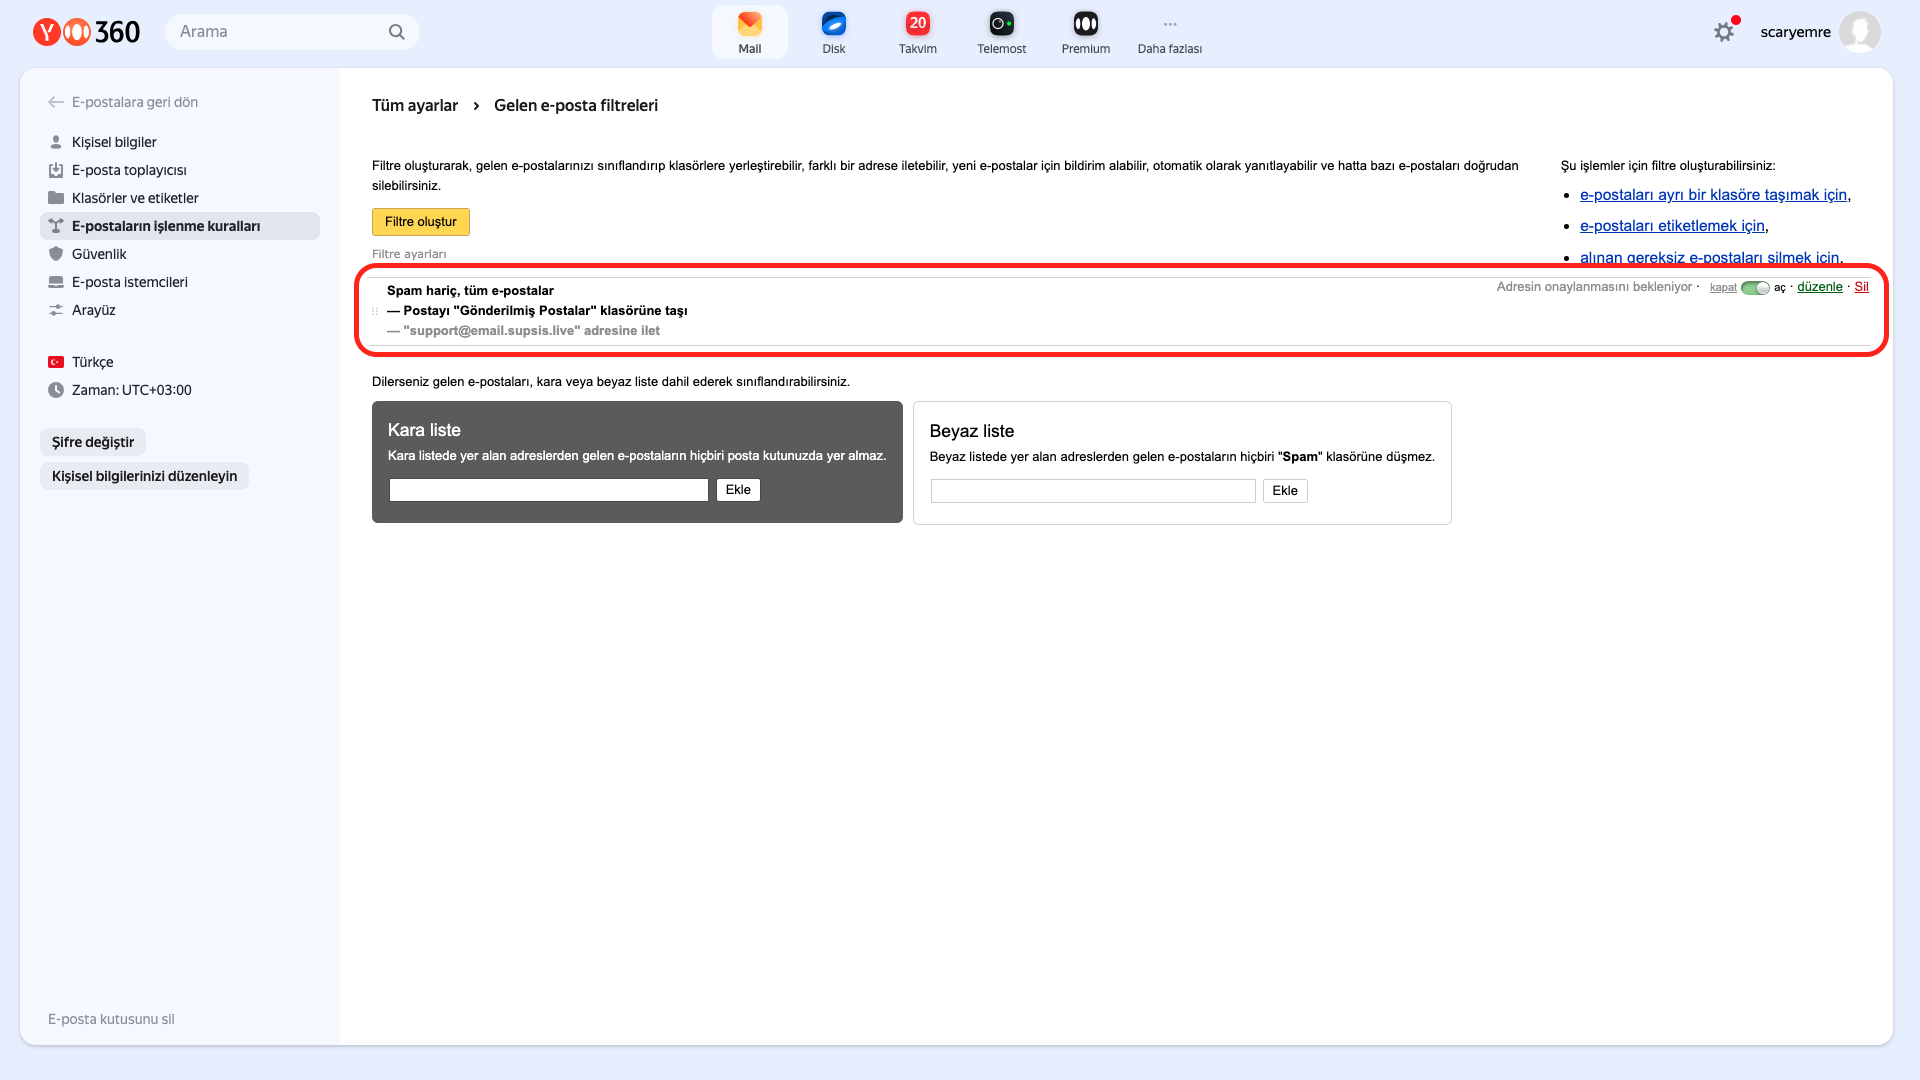
If you have completed all these steps and you see this screen, your integration process has been successfully completed. Now emails coming through Yandex Mail will be forwarded to the address you specified.
4.) Other Providers
To complete email integration in other providers, you can add forwarding by examining these documents and if you use a provider other than these documents, you can complete your forwarding process by examining your provider's official documents.
- Yahoo Mail:
-
iCloud Mail:
-
Yandex.Mail:
-
Zoho Mail:
-
ProtonMail:
-
 How to Forward Email in ProtonMail
Follow these steps after completing the forwarding operations.
First, go to the Integrations page in the left menu. On the opened page, you can quickly reach the Mail Integration section by clicking the "Email" option from the menu in the upper right corner. After reaching this section, you can switch to the Email Integration page by clicking the "Mail" tab.
From the opened section, you can continue with the operation steps by finding and clicking on your created provider mail address.
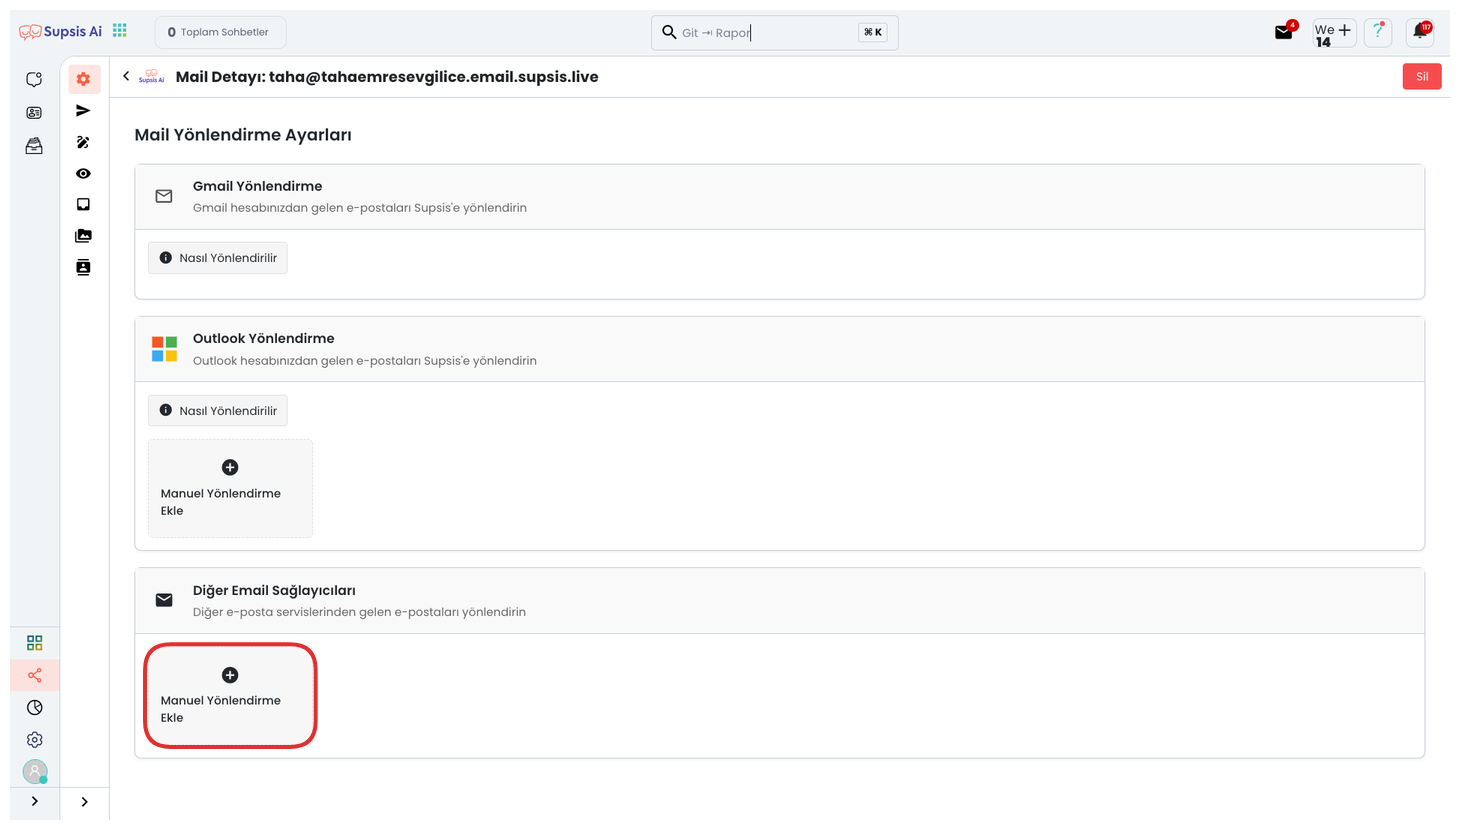
On the opened page, click the "Manual Addition" option under the section that says "Other Email Providers".
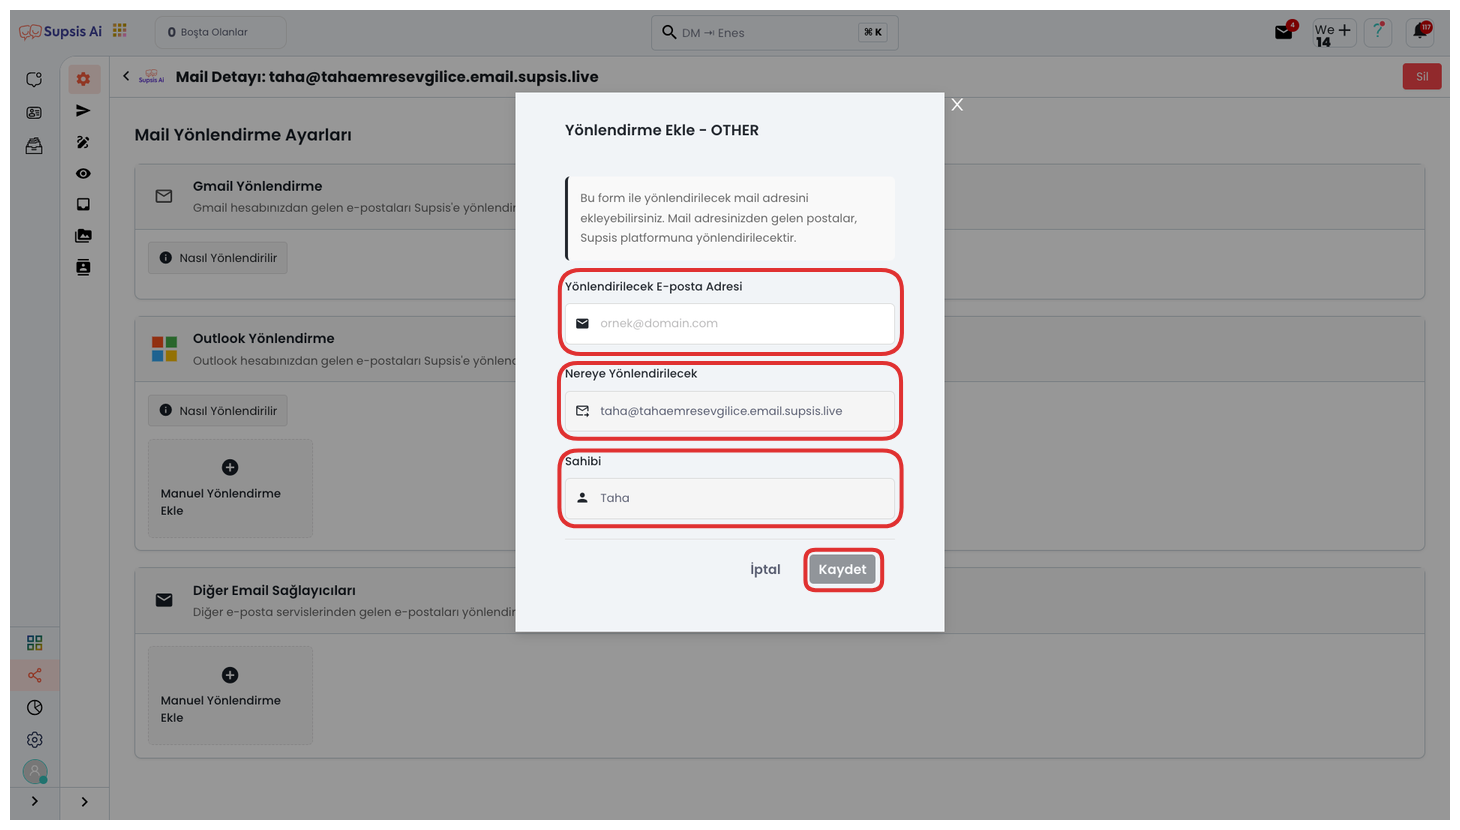
In the opened module, enter the mail address you want to forward in the field and complete the process by clicking the "Save" button.