Templates
Templates, Email Templates, is Supsis's communication management tool. This menu allows you to view and edit pre-prepared email templates for different scenarios. From this section, you can customize templates according to your needs, create messages suitable for specific customer groups, and manage automatic email sending processes. This tool is quite useful especially for increasing customer interaction, saving time, and creating a consistent communication strategy.
Template Creation
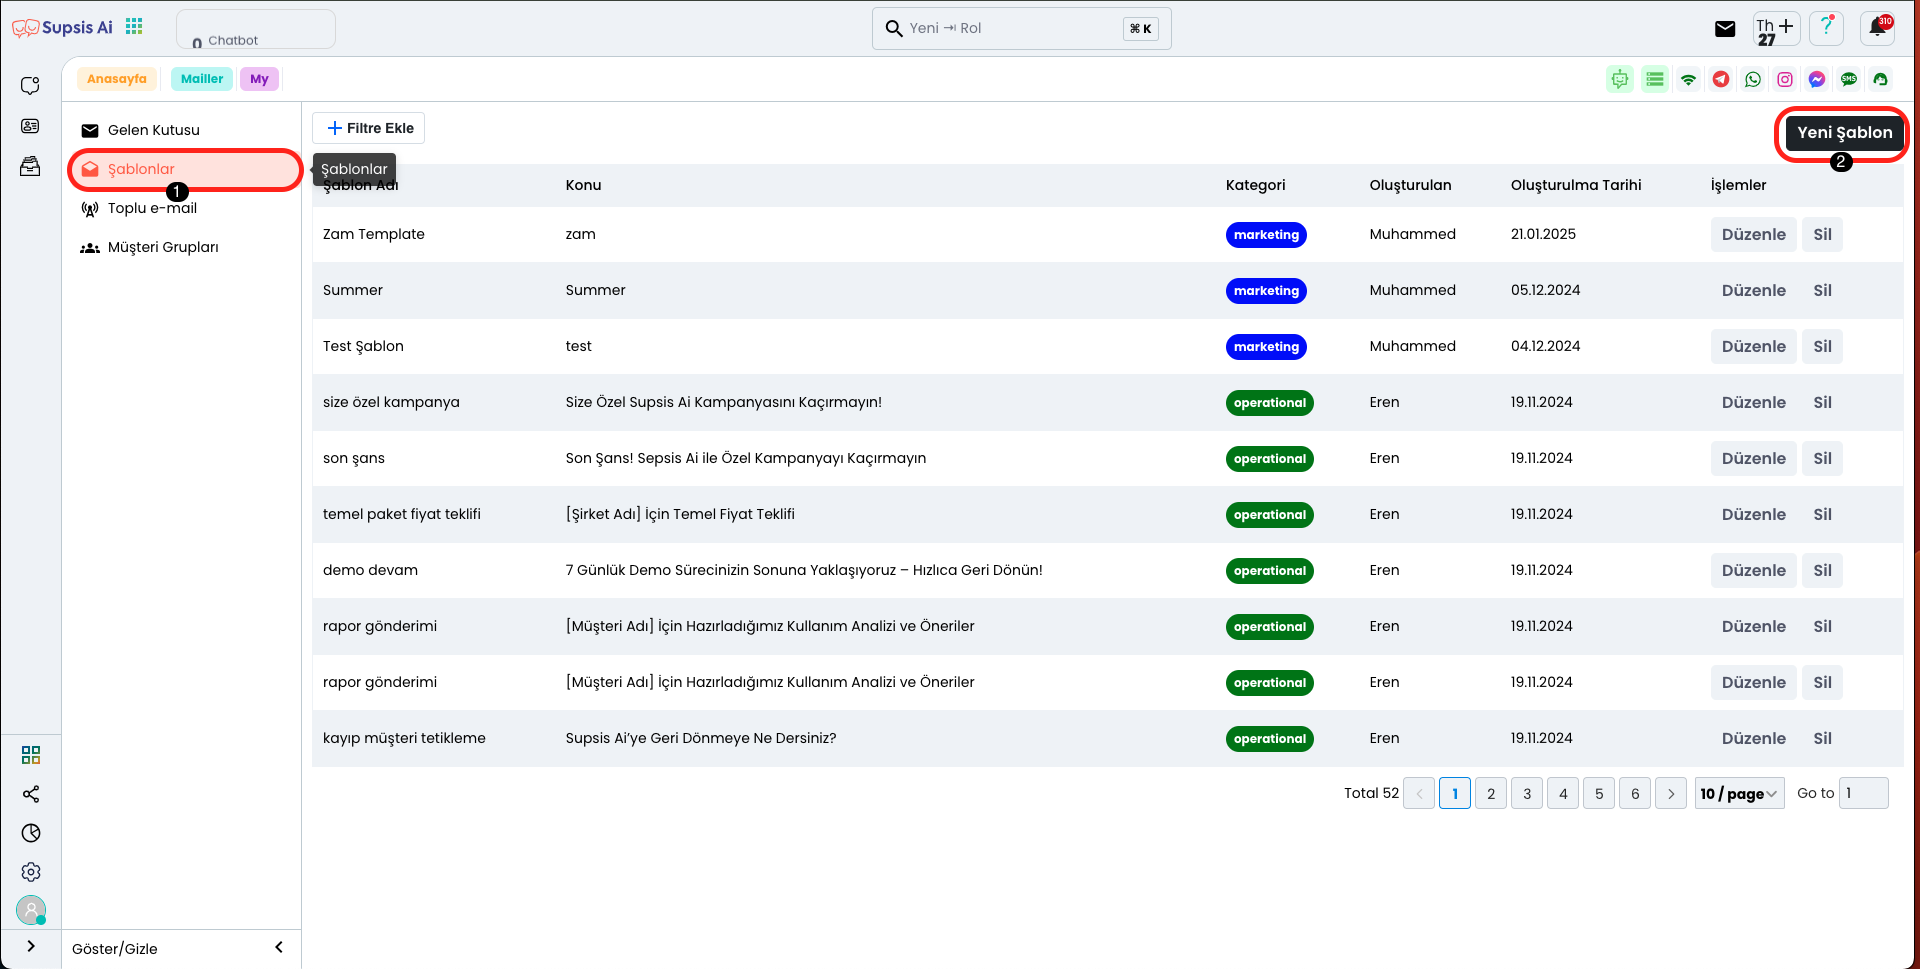
Click on the "Templates" tab from the menu on the left side of the mail page. Then, on the opened page, click the "New Template" button to create a new template.
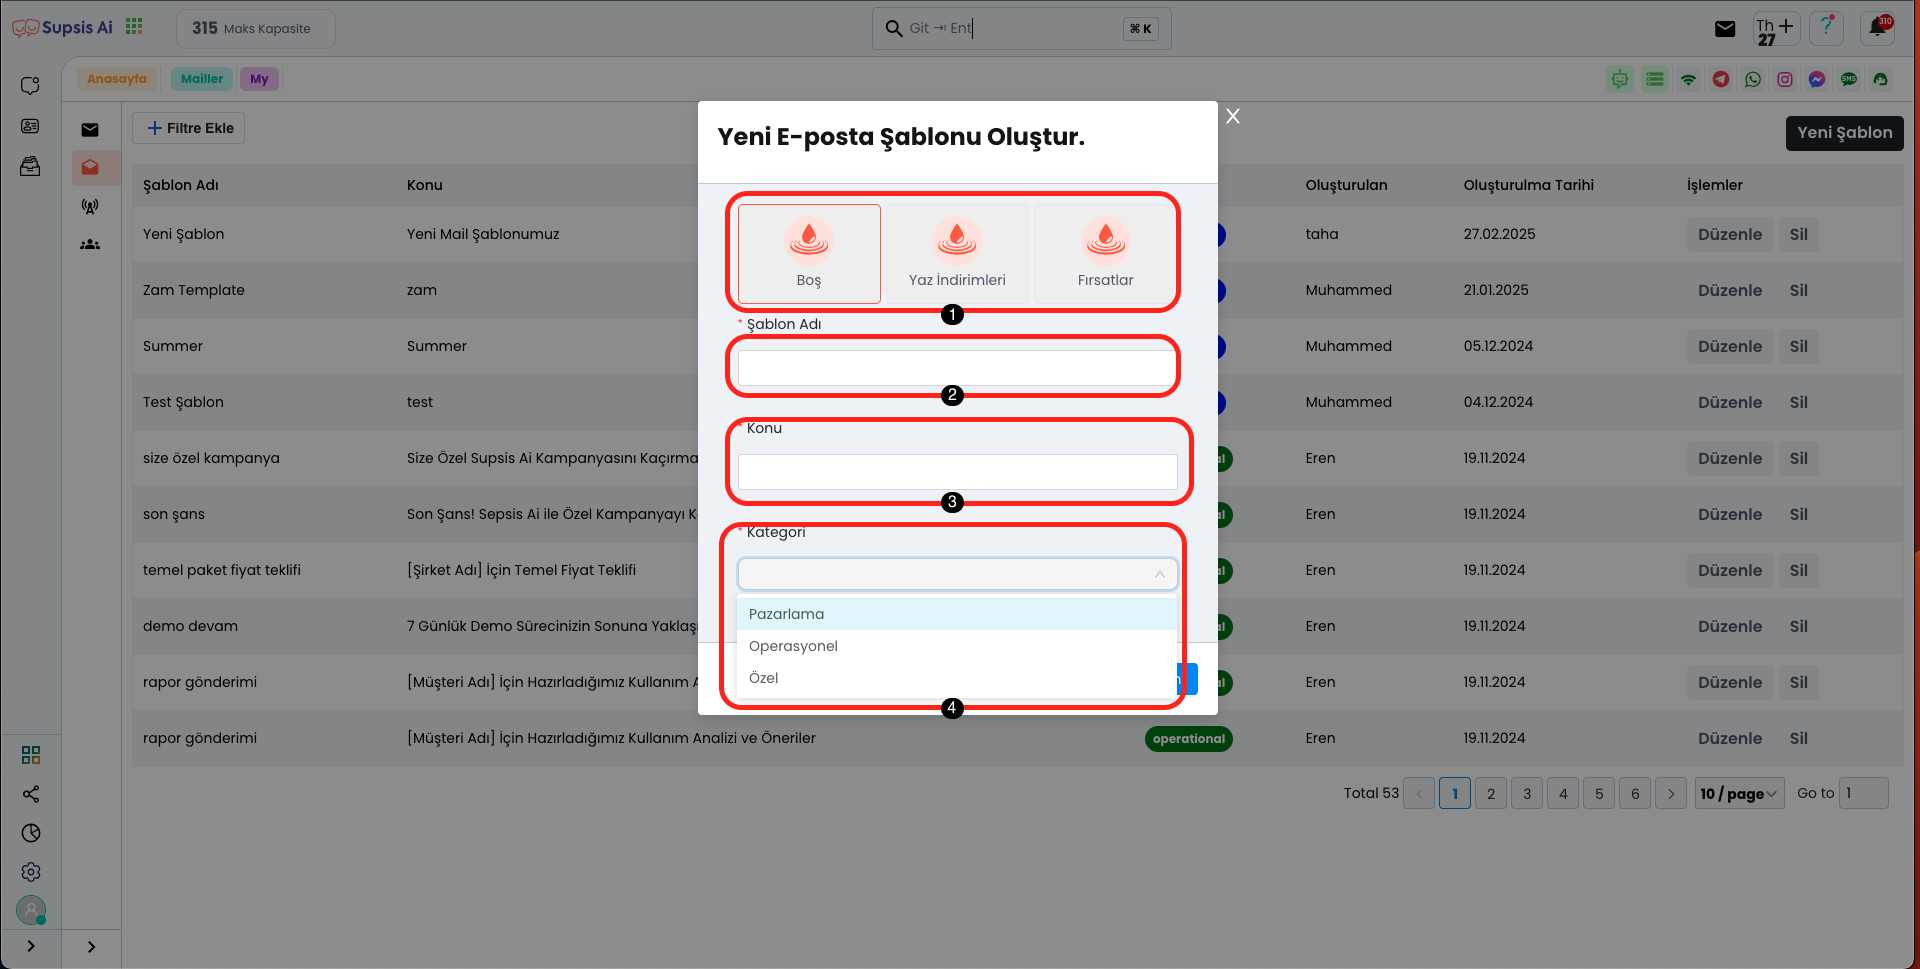
New Template Creation Elements:
- Select Template
- Template Name
- Subject
- Category
1.) Select Template
In the section at the top of the modal opened in this area, you can create a completely blank and clean template by clicking the "Blank" button on the left. In addition, you can easily use one of our ready templates suitable for your needs by selecting options such as "Summer Discounts" or "Opportunities".
2.) Template Name
In this area, you can continue your process by giving any name you want to your created template. By giving your template a meaningful and memorable name, you can quickly find it in the future and make edits.
3.) Subject
In this area, you can write a short description that explains the content of your template and provides more information about the title. The subject field will be useful to make your template more understandable and easily recognizable in the future.
4.) Category
In this area, you can select which category your template belongs to. For example, if you want to create a template in the "Marketing" category, you can choose this option. Additionally, you can create your operational templates with the "Operational" option or create your template under a completely original category by selecting the "Custom" category. Category selection will make your templates more organized and easily accessible.
Custom Template Creation
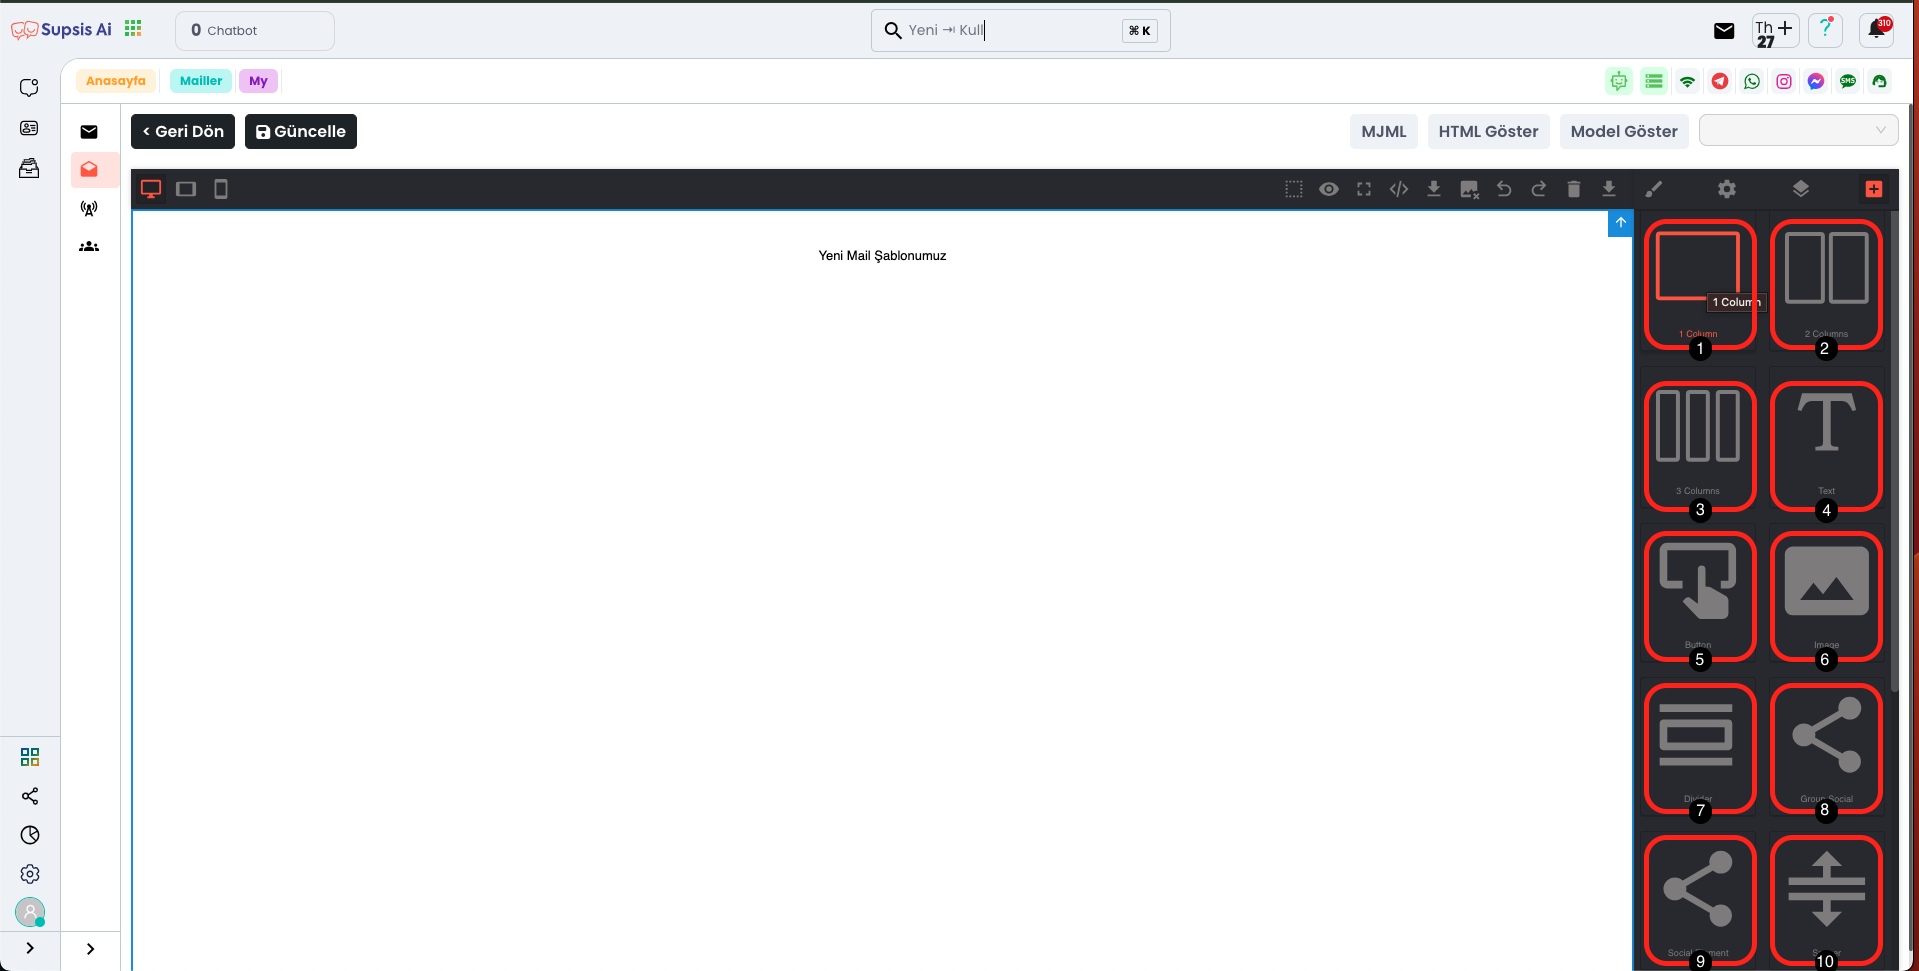
Custom Template Creation Elements:
- 1 Column
- 2 Column
- 3 Column
- Text
- Button
- Image
- Divider
- Group Social
- Social Elements
- Spacer
- Navbar
- Navbar Link
- Hero
- Wrapper
- Raw
1.) 1 Column
This feature allows you to organize all content and elements in a single piece by adding a single column. That is, you can create a simple and organized structure by placing text, images, or other elements within this column. This way, you can achieve a more neat and aesthetic appearance in your template.
2.) 2 Column
This feature divides the page into two and allows you to place text, images, or other elements in both columns. Thus, content is presented more balanced in your template and you can achieve a more organized visual appearance. Both columns can be used for different content, allowing you to organize your page more effectively.
3.) 3 Column
This feature divides the page into three and allows you to place text, images, or other elements within all three columns. Thus, you can organize content in three different areas in your template and use your page more efficiently. Three columns help you present information more balanced and visually more engaging.
4.) Text
The "Text" feature allows you to add text to your page. Thanks to this feature, you can easily edit text content and include it in your template. Adding text enriches your page content and improves the way you present information to your visitors.
5.) Button
This feature allows you to add a clickable button to your mail template. Thanks to this button, you can direct your recipients to any page you want or encourage them to perform a specific action. You can make your template more interactive and effective by easily customizing the button's text and target link.
6.) Image
This feature allows you to add an image to your mail template. By using the image area, you can make your template more attractive with visuals and visually support your message. You can design your template more professionally and eye-catching by easily adjusting the size and placement of the image.
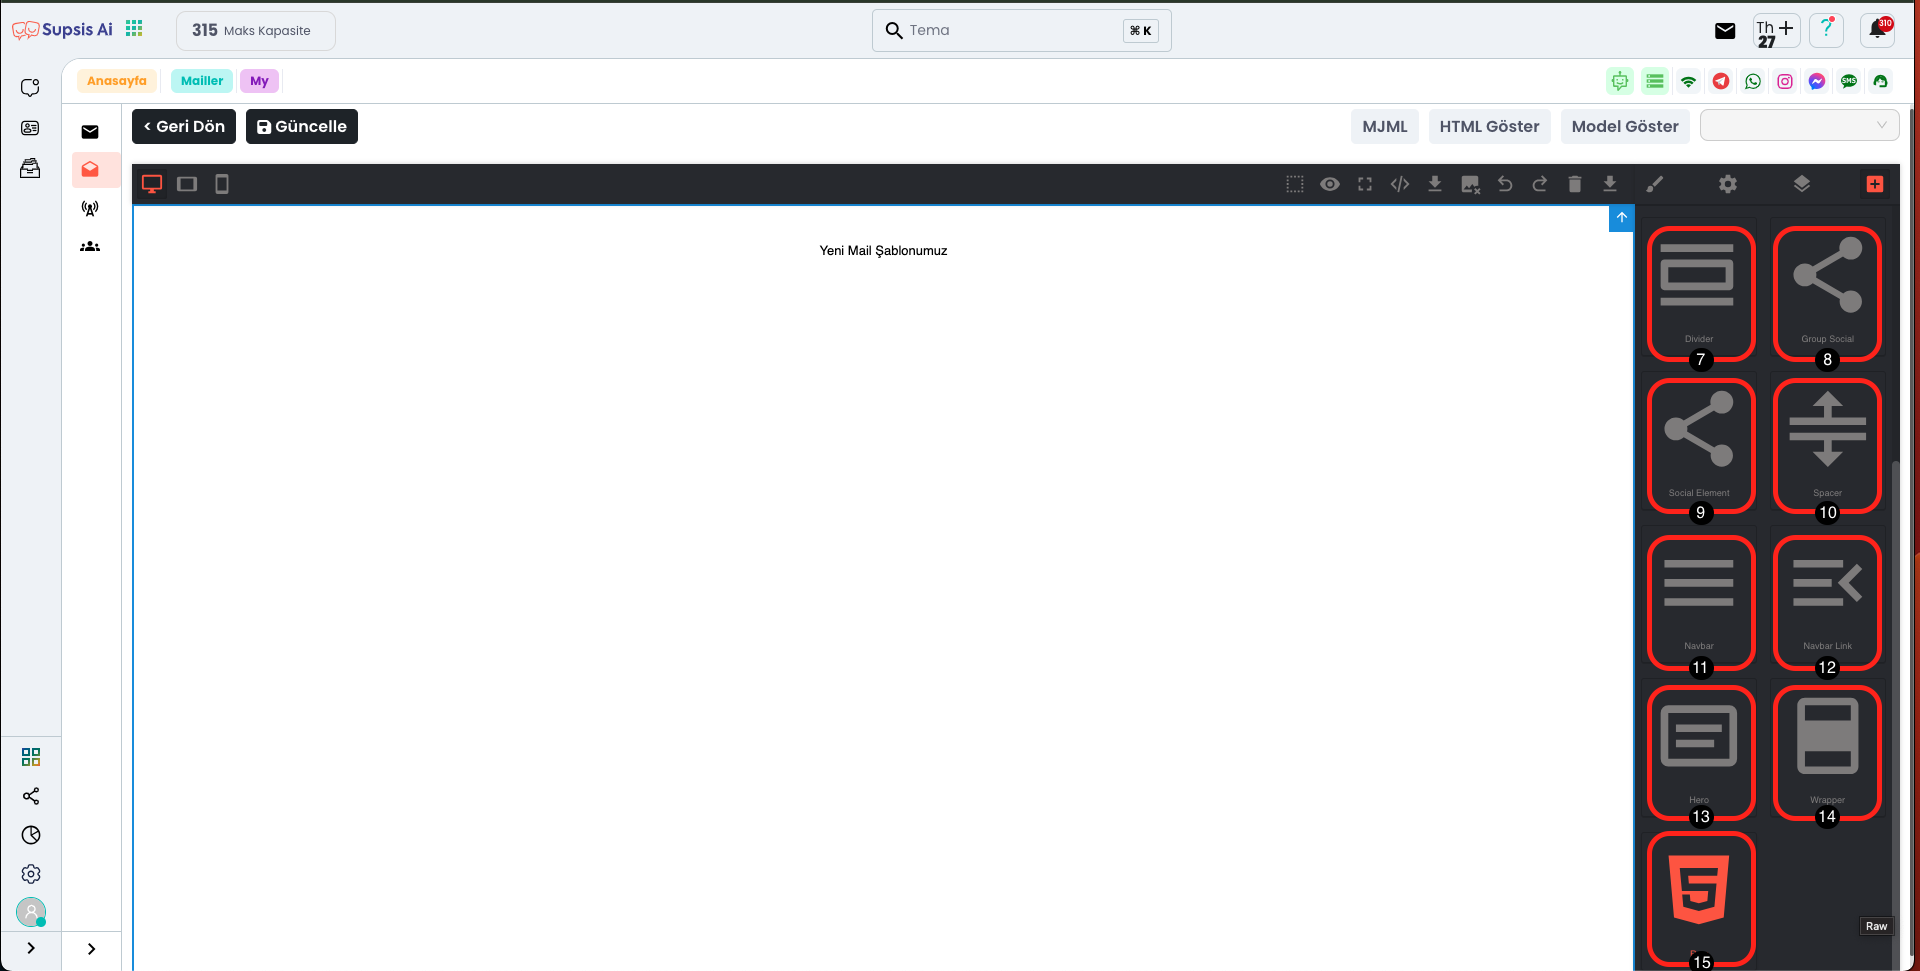
7.) Divider
This feature allows you to add a "Divider" (separator line) to your mail template. The divider makes your template more organized and readable by visually separating content sections. You can create visual balance in your template and organize content more effectively by using different colors and thicknesses.
8.) Group Social
This feature allows you to display your social media accounts as a group, as clickable icons. Thanks to the "Group Social" area, your users can easily access your social media accounts. By organizing the icons, you can integrate all your social media platforms into your template and allow your visitors to reach them quickly.
9.) Social Element
This feature allows you to add your social media accounts not as a group, but as a single icon. "Social Element" adds only a single clickable icon belonging to one social media platform. If you want to add more social media icons, you can add a separate icon each time and customize each one's link as you wish. This allows you to make your template more flexible and organized.
10.) Spacer
This feature, the "Spacer" area, allows you to leave space between two elements or areas. The spacer improves the arrangement between elements in your template and creates visual balance. This way, you can ensure that your template is more organized and readable by adjusting the desired distance between contents.
11.) Navbar
This feature, "Navbar" (navigation bar), allows you to add a menu that enables users to easily navigate on your page. The navbar provides quick access to different pages such as home, about, services in your template. By customizing this bar, you can determine your menu items and give your template an elegant navigation layout.
12.) Navbar Link
This feature, "Navbar Link", represents each link within the navbar. It appears as a single element in the navbar and provides users with a clickable link that directs them to different pages. By customizing the "Navbar Link" element, you can add links that direct to different pages or content and create an organized navigation experience in your navbar.
13.) Hero
This feature, "Hero", is a ready section template in your template. This area, usually designed with eye-catching titles, descriptions, and images, is used to attract visitors' attention. The hero section allows you to add visual impact to your template and helps you present your content effectively. By customizing this section according to your needs, you can create a strong entry point on your page.
14.) Wrapper
This feature, "Wrapper", provides a container area that holds the content in your template together. The wrapper is used to group all elements in an organized way and allows you to control the alignment, size, and layout of your content. This way, you can display each element of your template in a more organized and harmonious way. By using the wrapper, you can make the general structure of your page more professional and organized.
15.) Raw
This feature, "Raw", allows you to add raw HTML code to your template. The raw area allows you to create more customized content by using special codes within the template. This way, you can directly add HTML, CSS, or JavaScript codes suitable for your needs outside of default template elements and increase the functionality of your template.
In this area, you can easily add elements using the drag and drop method. You can place the components you need in your desired position by dragging them to your template and quickly customize them. This method speeds up the design process by offering a user-friendly experience.