Mail Details
Mail Details is the menu where various settings are located where you can customize your emails. Through this menu, you can manage many important settings such as Integration Settings, Sender Settings, Mail Visibility, Mailbox, Media, and Contacts. Each title allows you to conduct your email processes in a more controlled, personalized, and efficient way. Thanks to this area, you can configure your email management according to your needs.
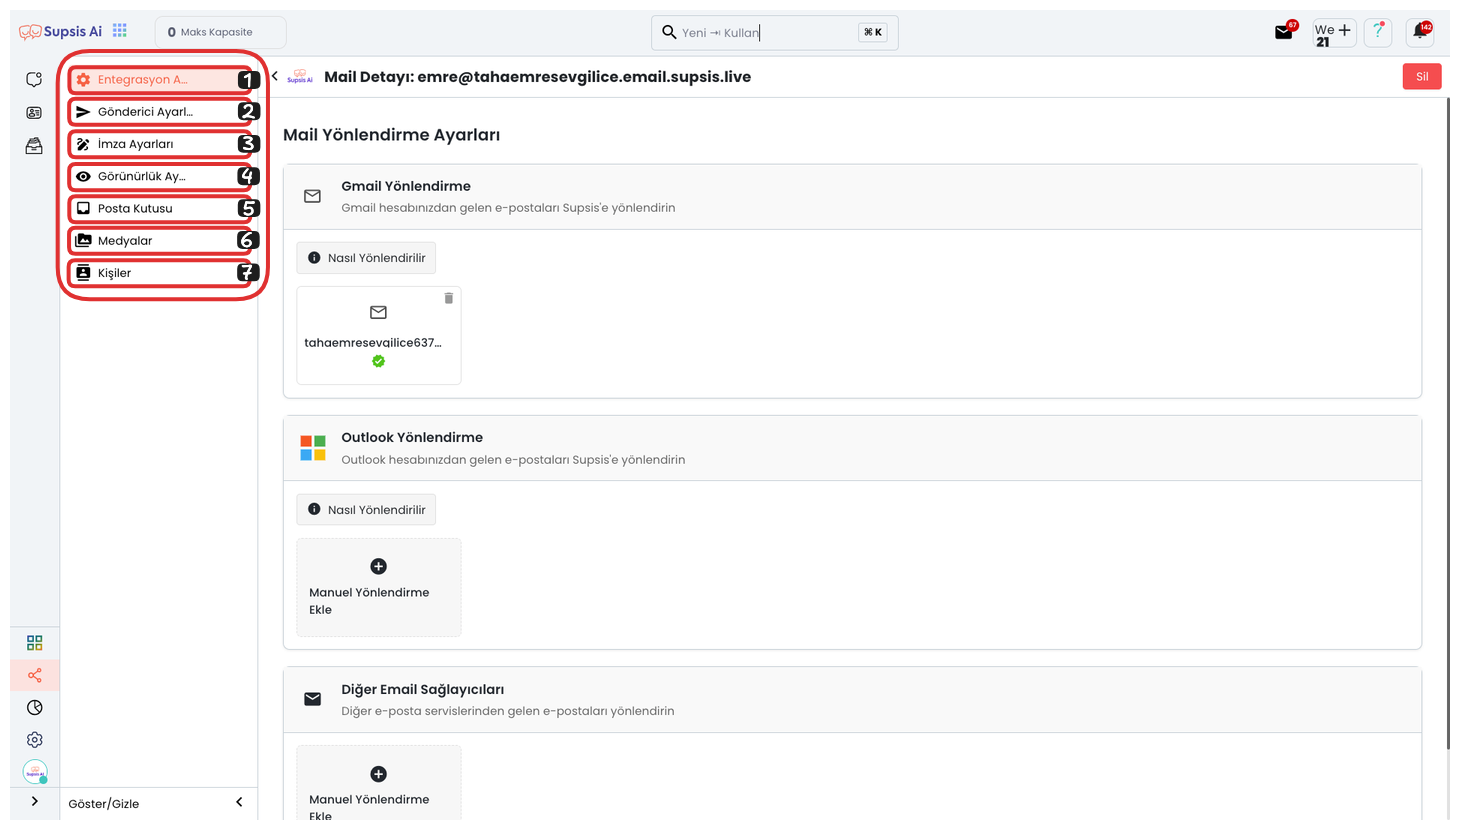
Mail Details:
- Integration Settings
- Sender Settings
- Signature Settings
- Visibility Settings
- Mailbox
- Media
- Contacts
1-) Integration Settings
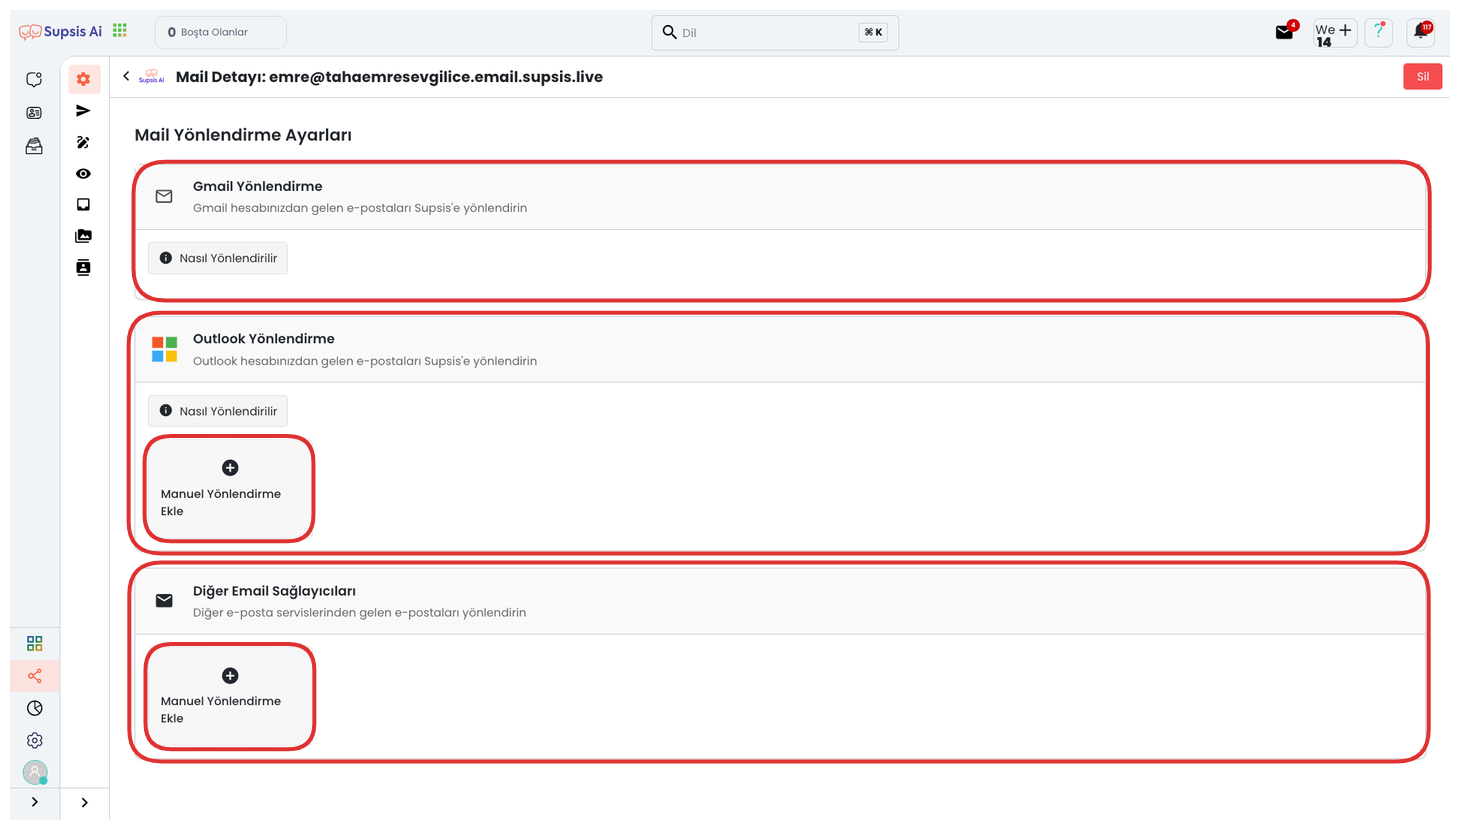
After creating your provider mail address, you can redirect to any email address you want from this area. Thanks to this redirection process, you can view your incoming emails through the system panel and perform both individual and bulk email sending through the same panel. This way, full access to your mail account is provided and a complete integration is established between the provider mail address you created and the system. You can access more information about integration operations from here.
2-) Sender Settings
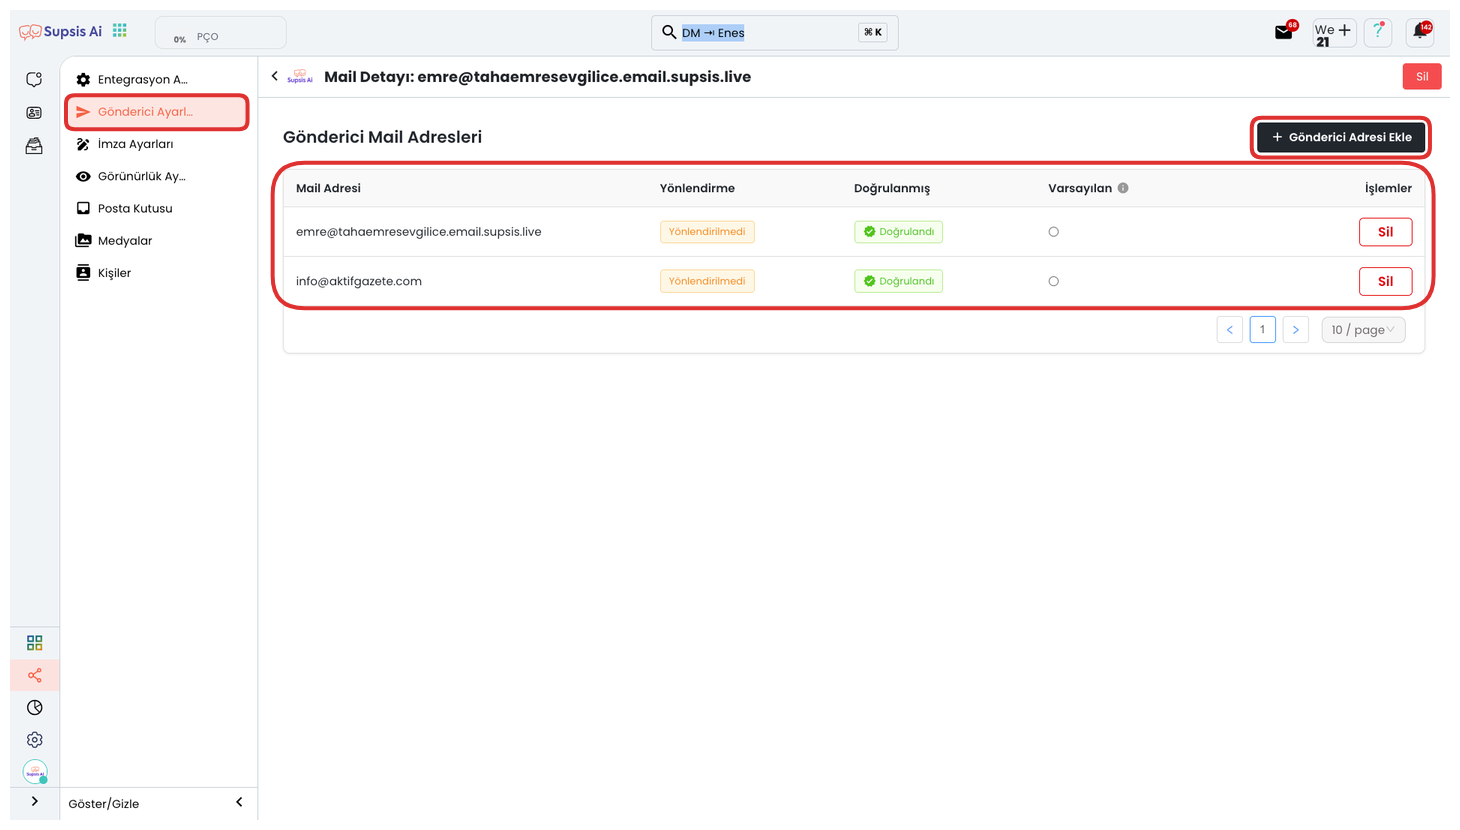
Through the Sender Settings section, you can add your personal or corporate sender email address to the system. This way, you can benefit from all email sending features of the system, especially bulk email sending, through your own private mail address. You can reflect your corporate identity in your sendings and manage your communication processes more professionally. You can access more information about Sender Settings from here.
3-) Signature Settings
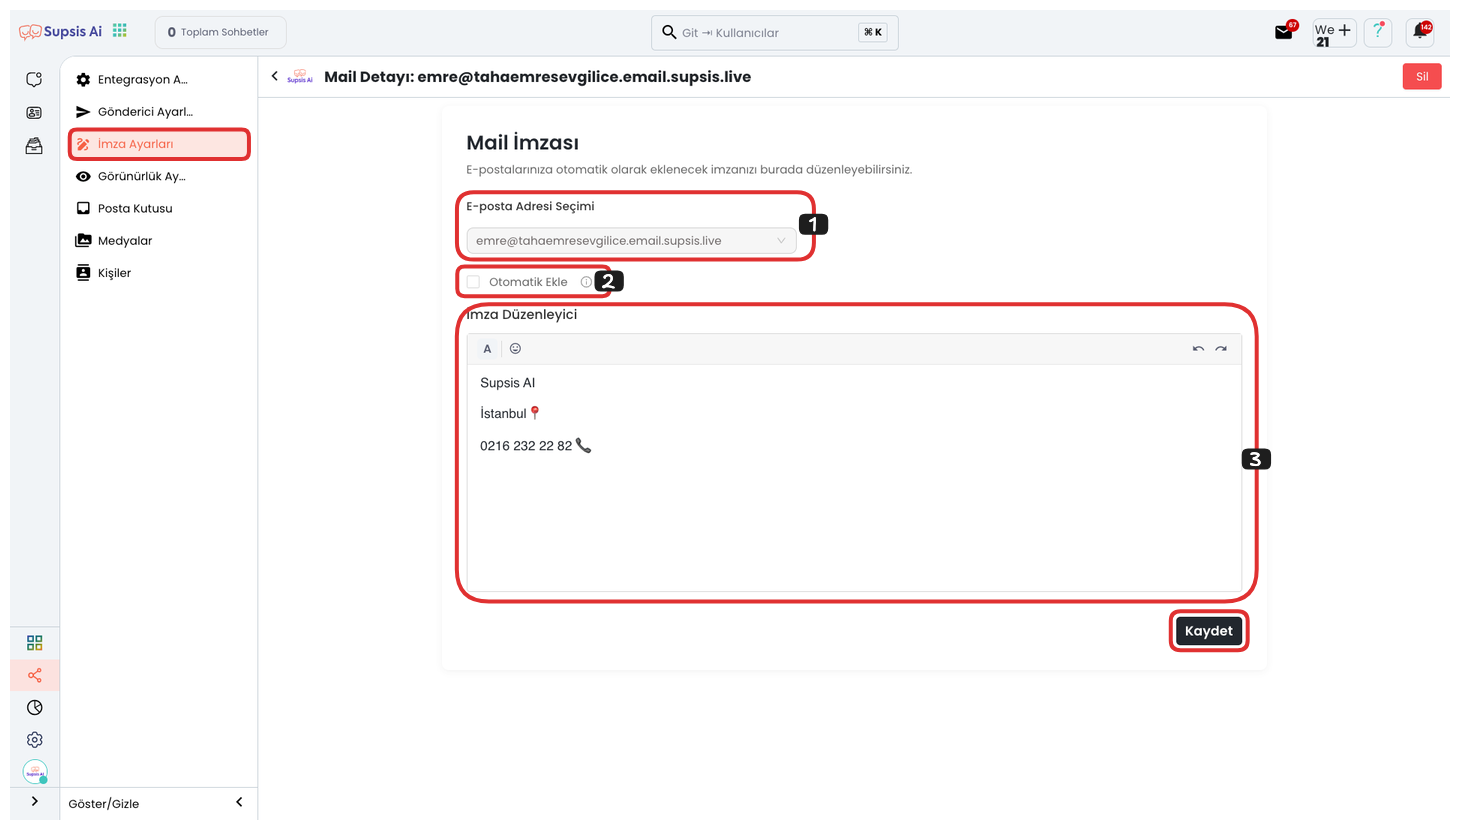
The Signature Settings section allows you to create your communication signature that will be located at the bottom of your email messages. First, you can determine which sender address this signature will be used on by selecting your email address from the upper section. Immediately after, you can ensure that the signature you created is automatically added to all new emails by checking the "Auto Add" option. In the lower section, you can customize your signature as you wish using text and emojis. After completing all arrangements, you can save your signature by clicking the "Save" button and start using it actively.
4-) Visibility Settings
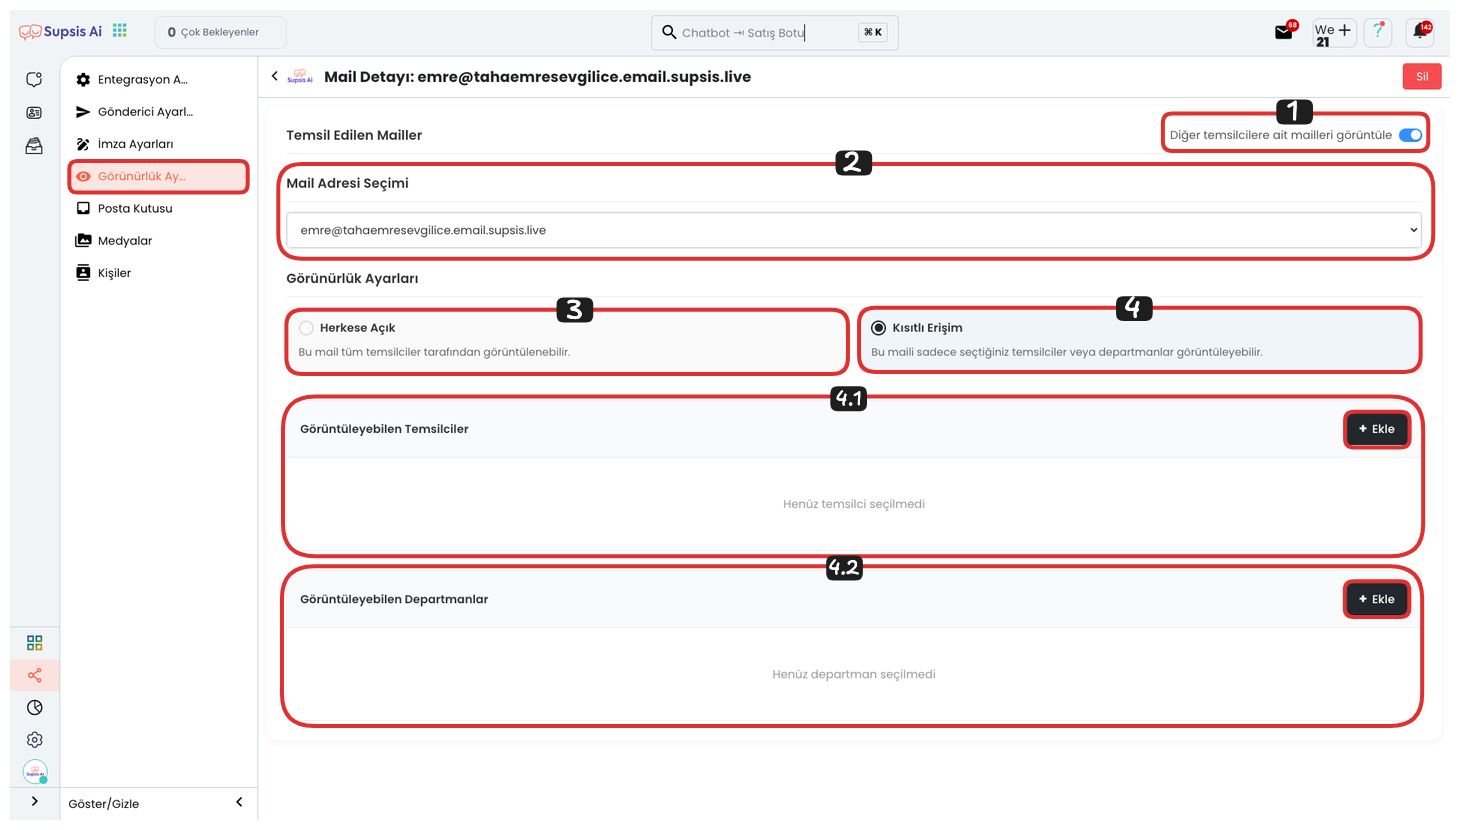
The Visibility Settings area allows you to determine which users your mail address will be accessible by within the system. From this section, you can provide access control by selecting which representatives or departments can use the email address. Thus, only the team members you have authorized can perform operations through this mail address, which makes usage security and workflow more efficient.
Visibility Settings:
- Show Other Representative Mails
- Select Mail Address
- Public
- Restricted Access
- Viewing Representatives
- Viewing Departments
1-) Show Other Representative Mails
By activating this option, you can also view other representatives' email boxes and manage the visibility settings of these addresses. This way, you can determine which representative can access which mail address and maintain internal team email management in a more controlled and organized way.
2-) Select Mail Address
From this area, you can select an email address and edit the visibility settings of the selected mail address within the system. This way, you can control which representatives or departments can view and use the relevant address.
3-) Public
If you activate this option, your mail address becomes viewable and usable by all representatives and departments in the system. This setting can be preferred to facilitate communication in situations requiring shared use and to open access to the entire team.
4-) Restricted Access
If you activate this option, you can manually determine which departments and representatives can view your mail address. For this, you can perform the authorization process by selecting the representatives and departments you want to give access to from the areas in the lower section and clicking the "Add" button. This way, only the users you have determined can access the relevant mail address.
4.1-) Viewing Representatives

From the modal that opens after clicking the "Add" button, determine the representatives you want to give viewing permission for the selected mail address. After making the representative selections, you can complete the process by clicking the "Save" button. After this step, the selected representatives gain access rights to the relevant mail address.
4.2-) Viewing Departments
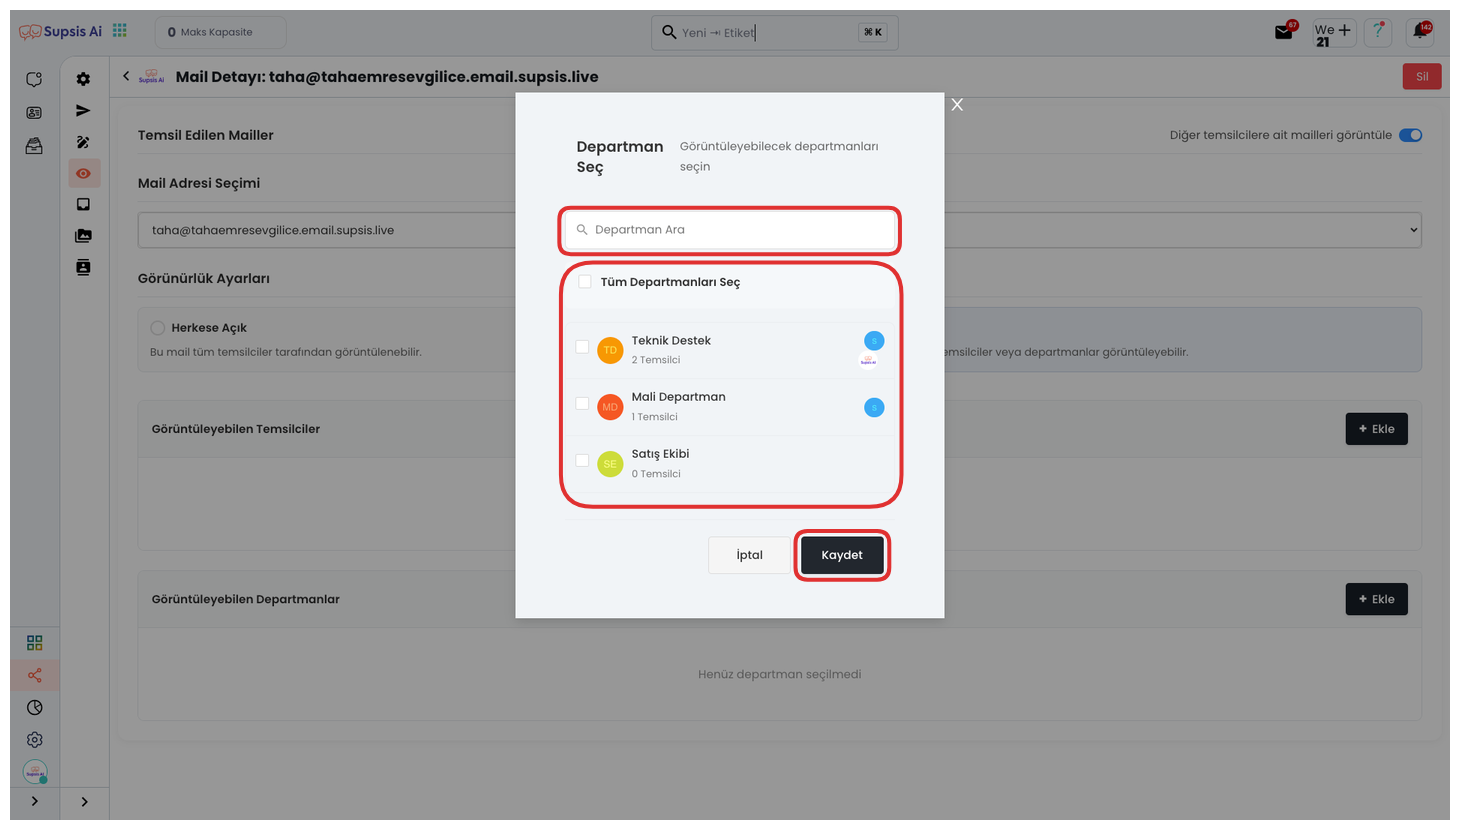
From the modal that opens after clicking the "Add" button, you can determine the department or multiple departments you want to view the selected mail address. After making the relevant selections, you can complete the process by clicking the "Save" button. This way, the departments you have determined can access the mentioned mail address.
5-) Mailbox
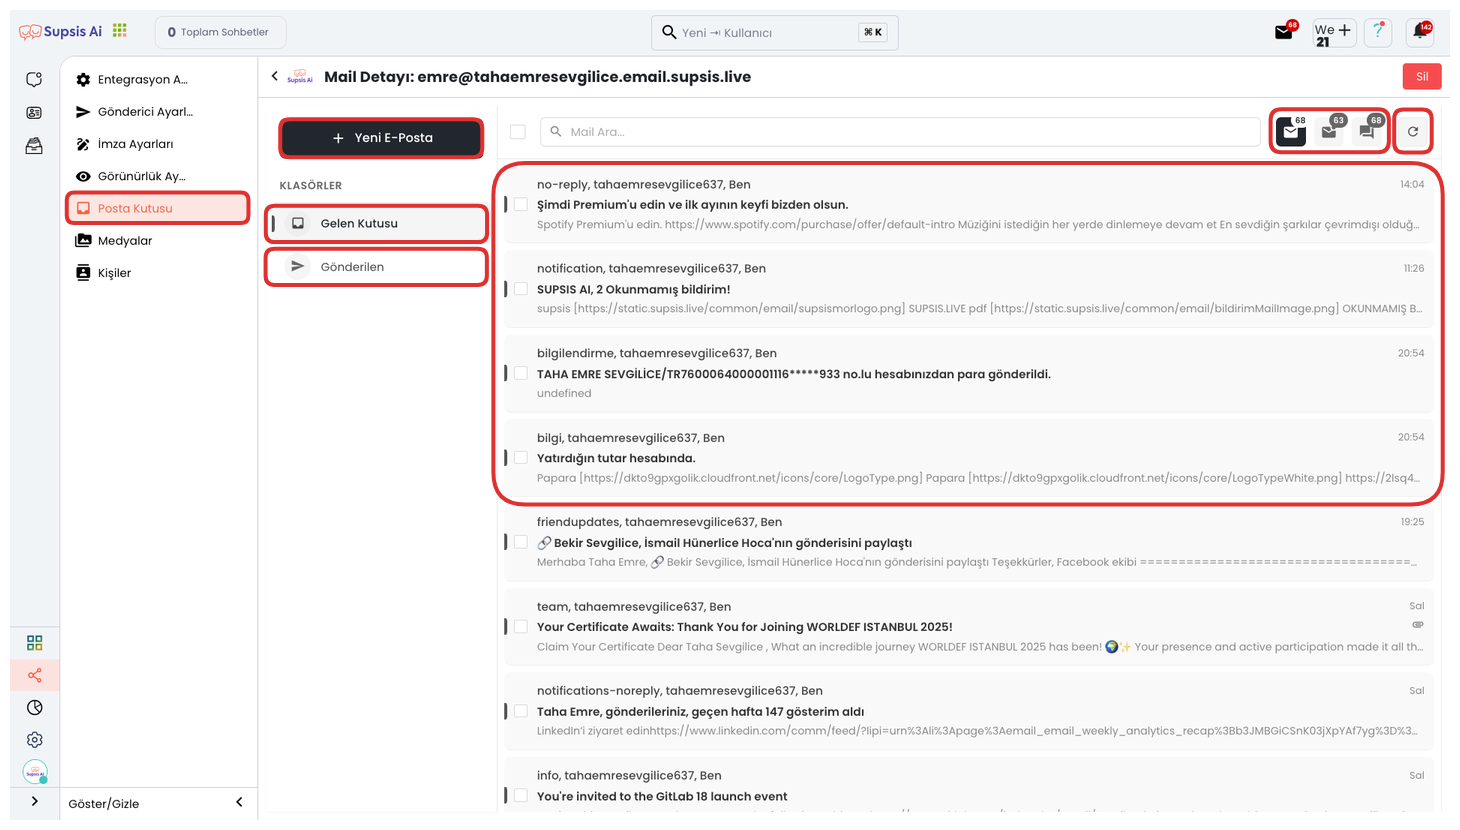
The mailbox area allows you to easily manage all your email communication processes through the panel. You can create a new mail and start the sending process by clicking the "New Email" button located in the upper left. You can view your incoming and sent emails through the "Inbox" and "Sent" tabs located right below. Thanks to the "All", "Unread", and "Unanswered" filtering options located in the upper right section, you can list your emails according to their status and take faster action. You can update your mailbox and track the latest incoming emails instantly by using the "Refresh" button located on the far right.
6-) Media
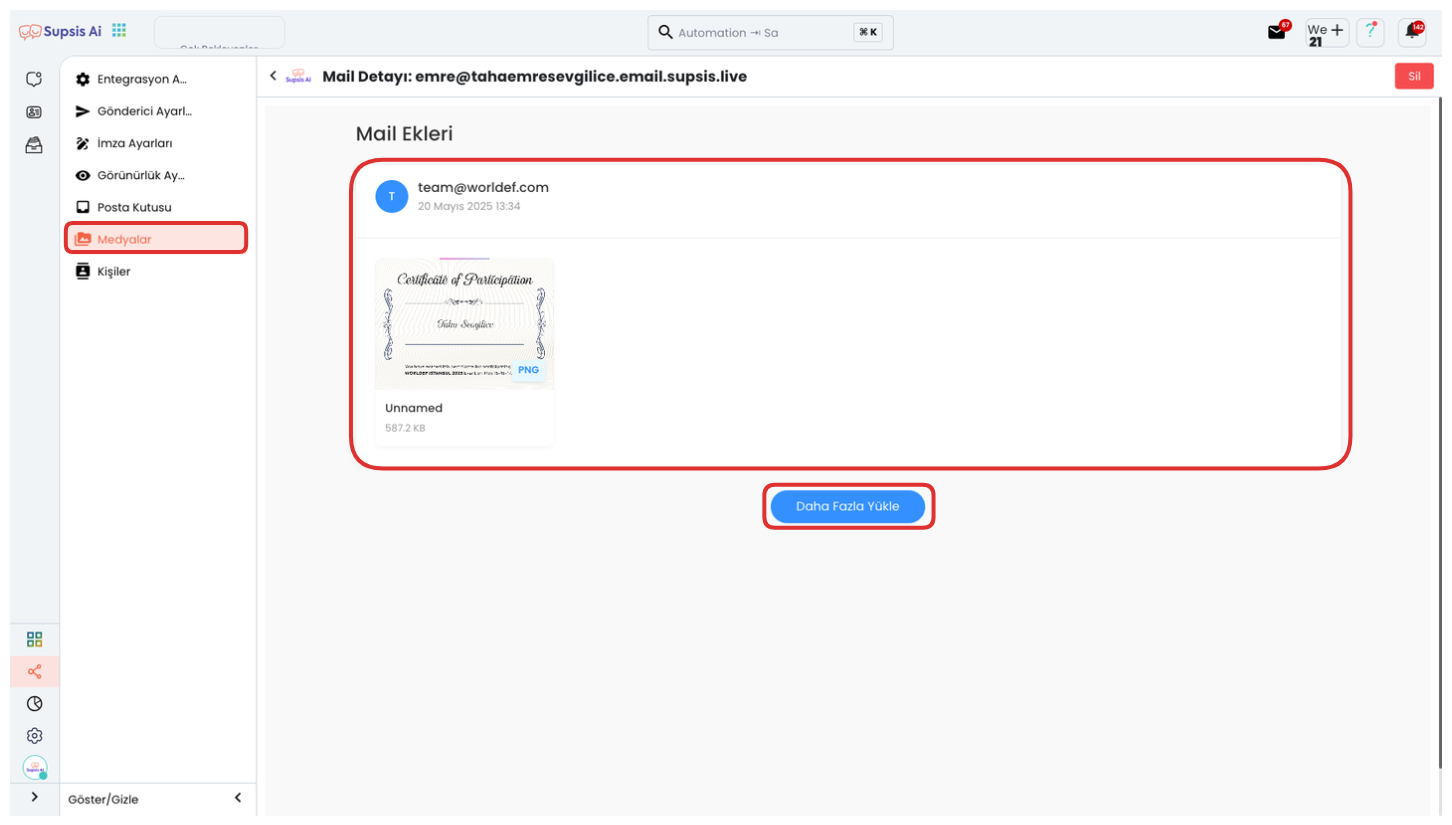
In this area, you can view all file attachments shared from the emails that come to you on a single screen. This way, you can quickly access all files without opening each email separately. You can view previous file attachments or check new incoming attachments by clicking the "Load More" button located in the lower section. When a new mail arrives, you can update the screen through this button and track the attachments in their most current state.
7-) Contacts
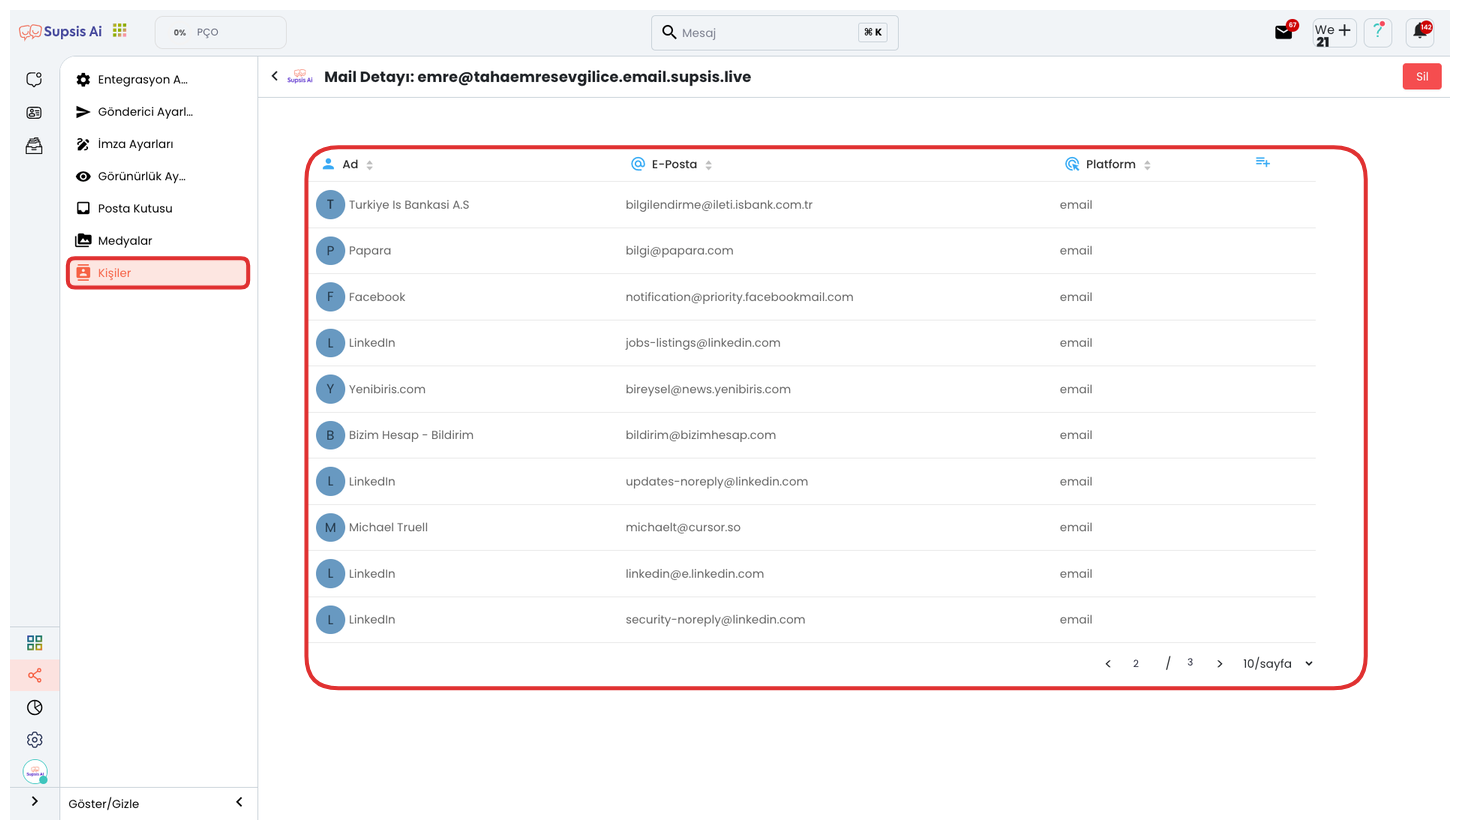
In this area, you can view the contact information of the people you interact with via email. This way, you can easily access the information of people you have sent emails to or received emails from before, and quickly track your communication history.