Bulk Mail Sendings
Past Bulk Mail Sendings serves as an important function as Supsis's email marketing and communication management tool. This feature allows you to view and manage bulk email campaigns you have sent in the past. Additionally, you can easily resend your previous campaigns for specific date ranges or specific customer groups and monitor their performance. The past bulk mail sending tool is quite useful for optimizing your email strategies, analyzing user feedback, and creating more effective campaigns.
Viewing Past Bulk Mails
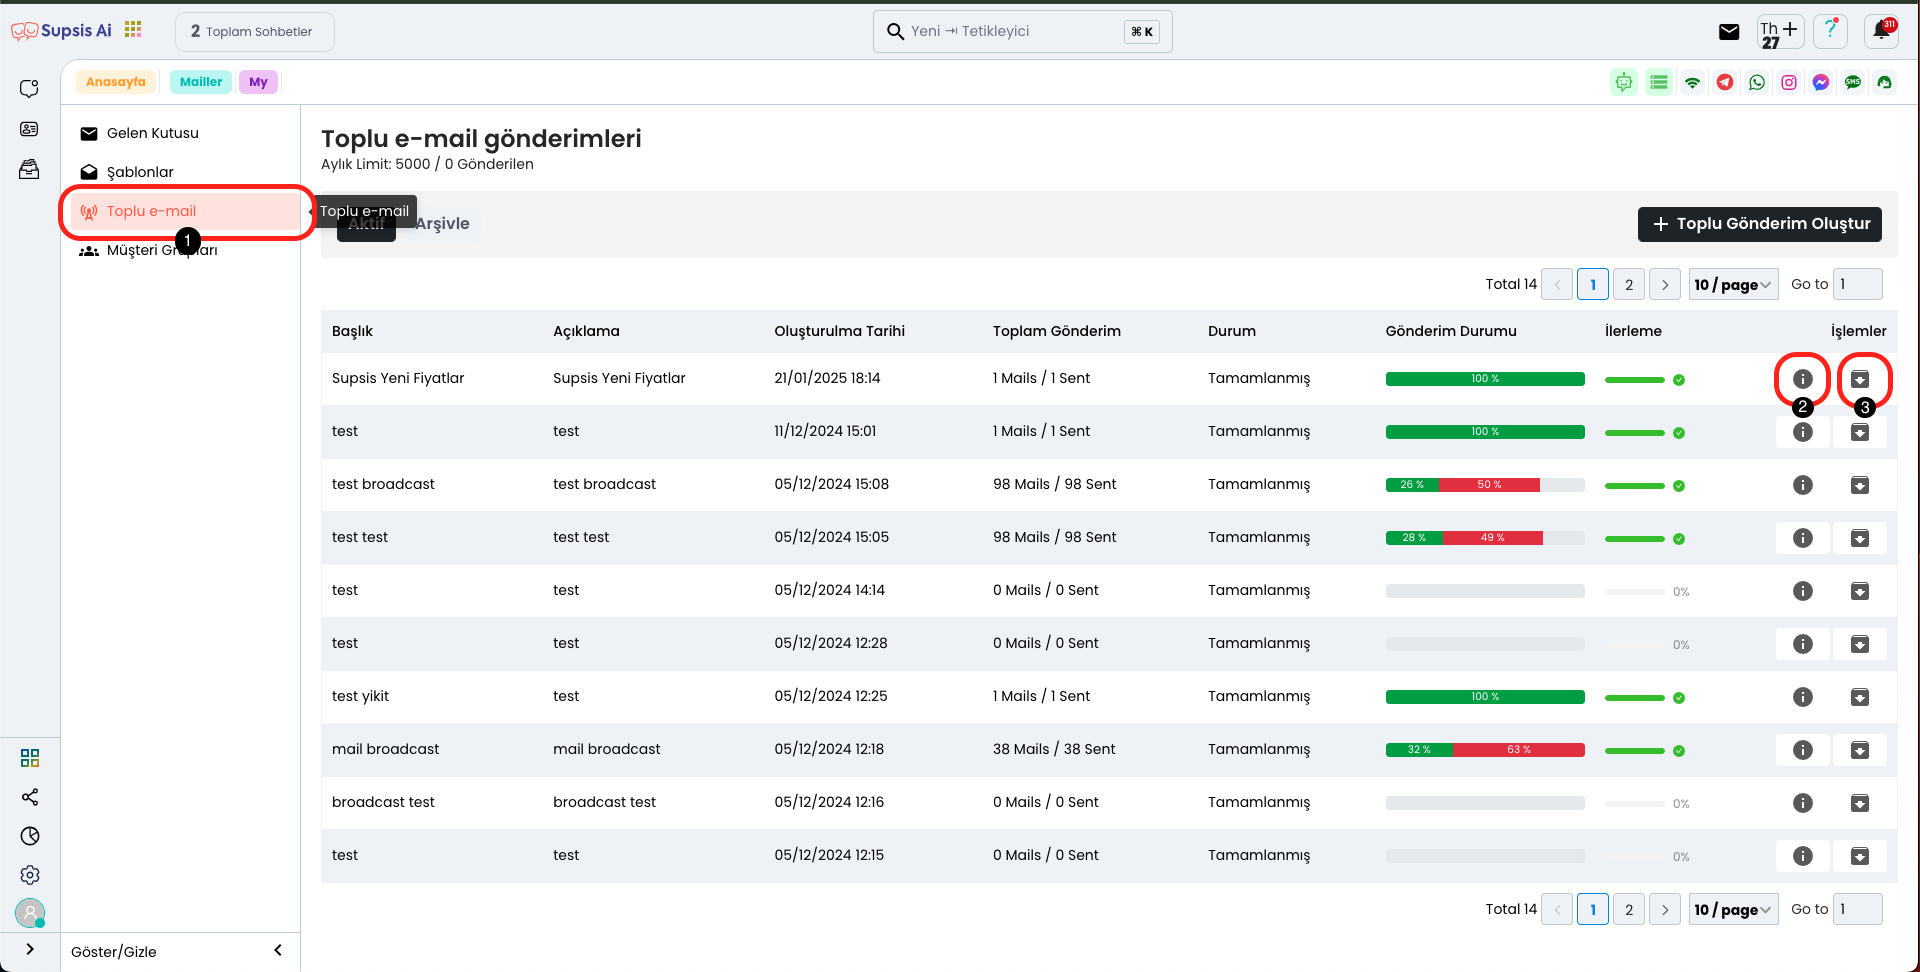
In the mail page, you can easily view the bulk emails you have sent in the past by clicking on the "Bulk E-mail" section from the menu on the left. This section allows you to access the details of your previous campaigns and examine them. In the second section, you can view the features of the bulk email sending where it says "Detail". In the third section, in the section that says "Archive", you can archive the email you sent and save it for future reference.
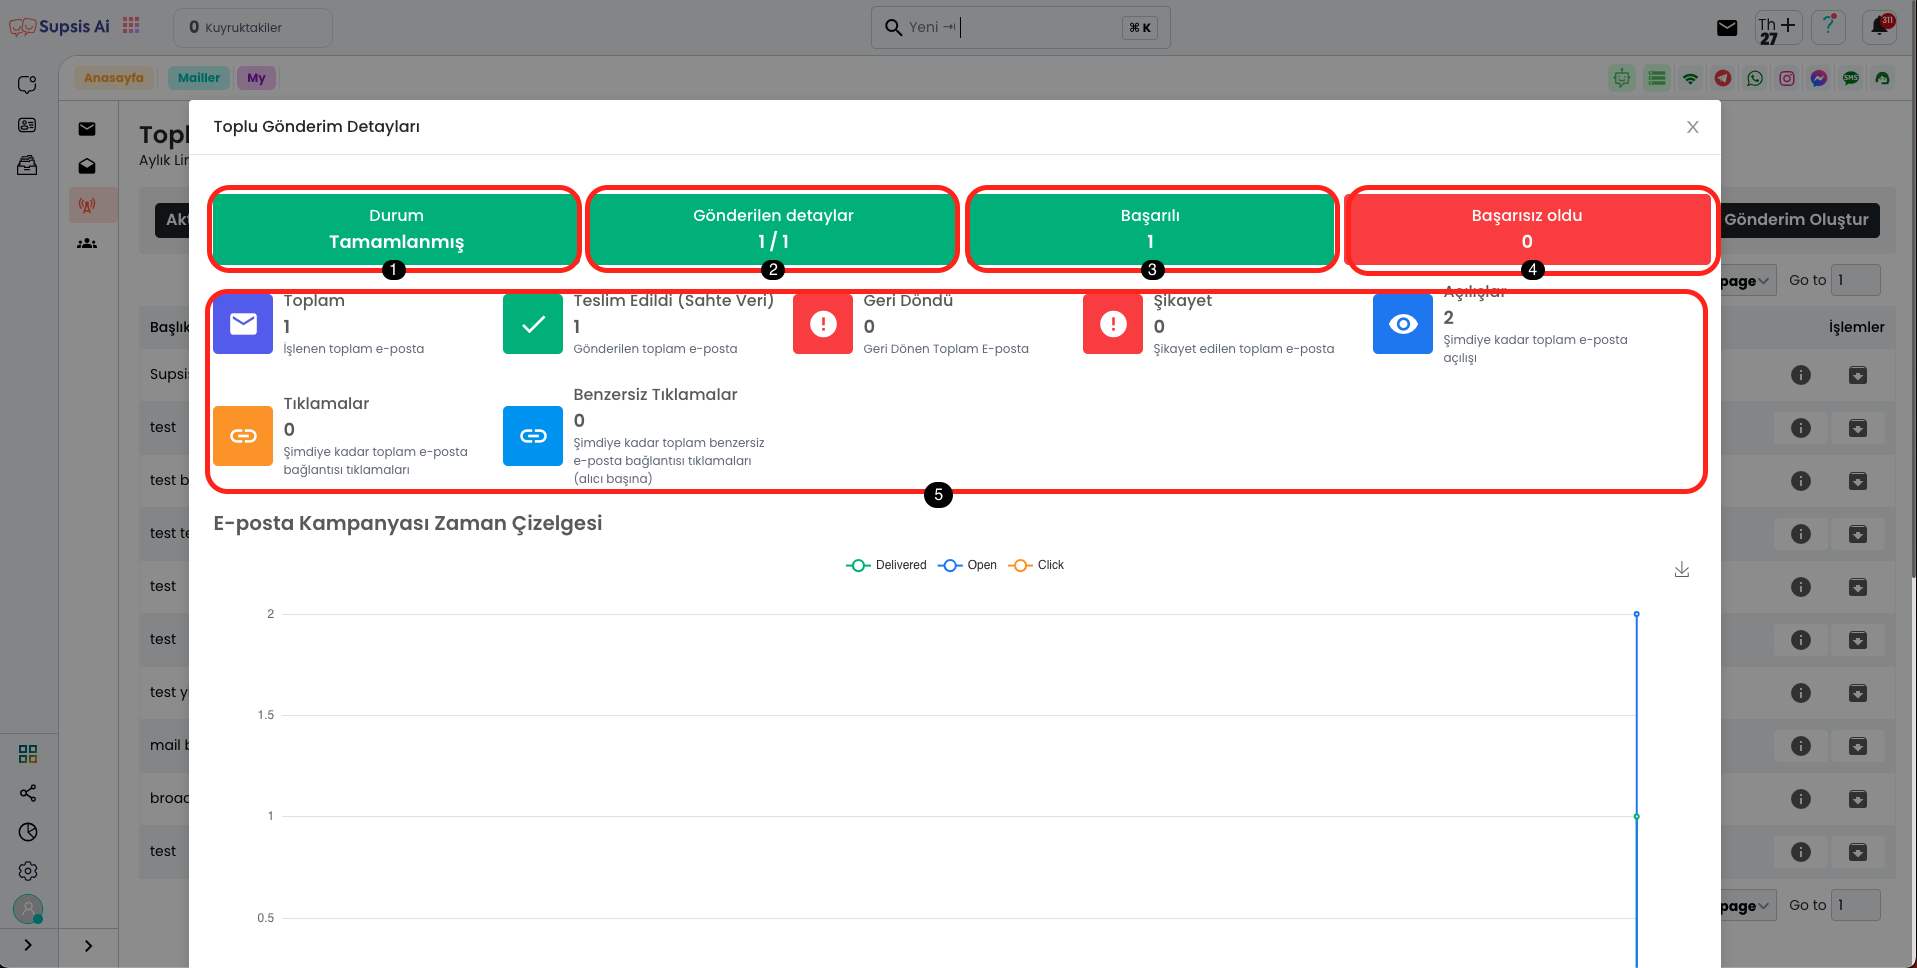
Bulk Sending Details Elements:
- Status
- Sending Details
- Successful
- Failed
- Other
1.) Status
In this area, you can see whether your bulk email sending has been completed. The status section allows you to track the progress of the sending process and whether the operation has ended successfully.
2.) Sending Details
In this area, in the "Sending Details" section, you can view the total number of emails sent and the number of emails successfully delivered. This information helps you track the effectiveness and success rate of your sending process.
3.) Successful
In this area, the "Successful" section shows the number of emails sent successfully. After the sending process is completed, you can view the number of emails that were successfully delivered here.
4.) Failed
In this area, the "Failed" section shows the number of emails that could not be sent or were not delivered due to errors. This section helps you track problems that occurred during sending and make necessary corrections.
5.) Other
5.1) Total
This area represents the total number of emails processed. You can see the total of all emails sent, delivered, or processed here. This information helps you track the scope and effectiveness of your email sending process.
5.2) Delivered
In this area, the "Delivered" section represents the number of emails successfully delivered. You can see how many of the emails you sent have reached the target recipients in this section.
5.3) Bounced
In this area, the "Bounced" section represents the total number of emails that were not delivered or returned due to errors. Some of the emails you sent may bounce back due to incorrect recipient addresses or temporary issues, and you can view the number of these emails in this section.
5.4) Complaint
In this area, the "Complaint" section represents the total number of emails complained about by users. Some of the emails you sent may be marked as spam or unwanted content by recipients, and you can view the number of complained emails in this section.
5.5) Opens
In this area, the "Opens" section shows how many times your email has been opened in total so far. This information helps you track how much interaction your sent emails received and allows you to evaluate the success of your campaign.
5.6) Clicks
In this area, the "Clicks" section shows the total number of clicks on the links in your emails. This information allows you to understand how much interaction your email content received and how interested recipients were in the email content.
5.7) Unique Clicks
In this area, the "Unique Clicks" section counts each recipient clicking on the links in your email only once. This, unlike the total click count, shows the number of unique clicks where each recipient is counted only once, allowing you to more accurately measure how effective your email content is.
Bulk Mail Sending
The Bulk Mail Sending feature allows you to send emails to large groups or specific customer segments at the same time. This feature saves time and helps you communicate effectively with your target audience. After customizing your email content, you can send to all recipients with a single operation. Bulk mail sending is particularly useful for marketing campaigns, announcements, and promotional emails.
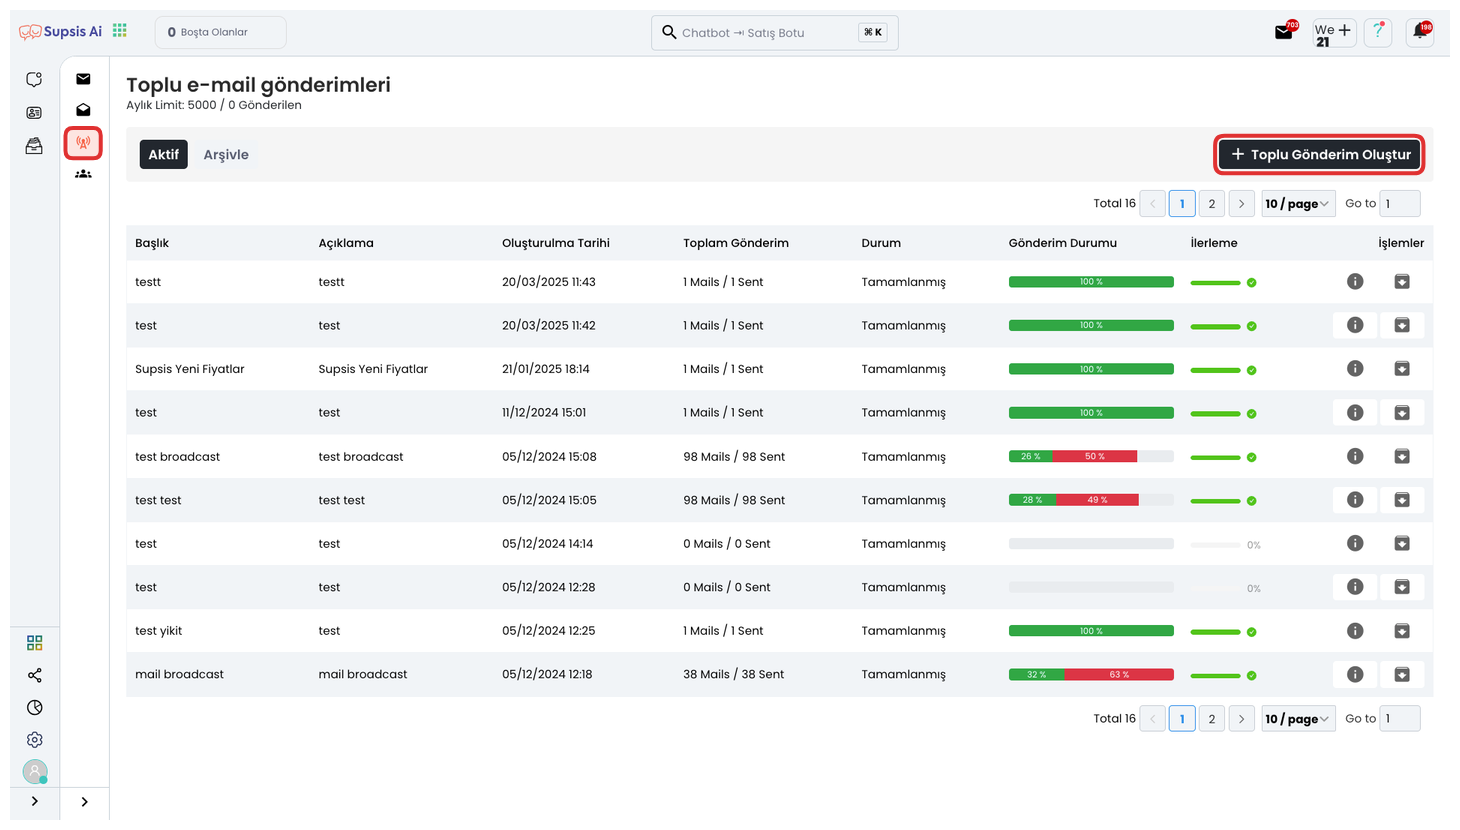
First, come to the "Bulk Mails" tab from the left menu and click the "Create Bulk Sending" button located in the upper right from the opened section.
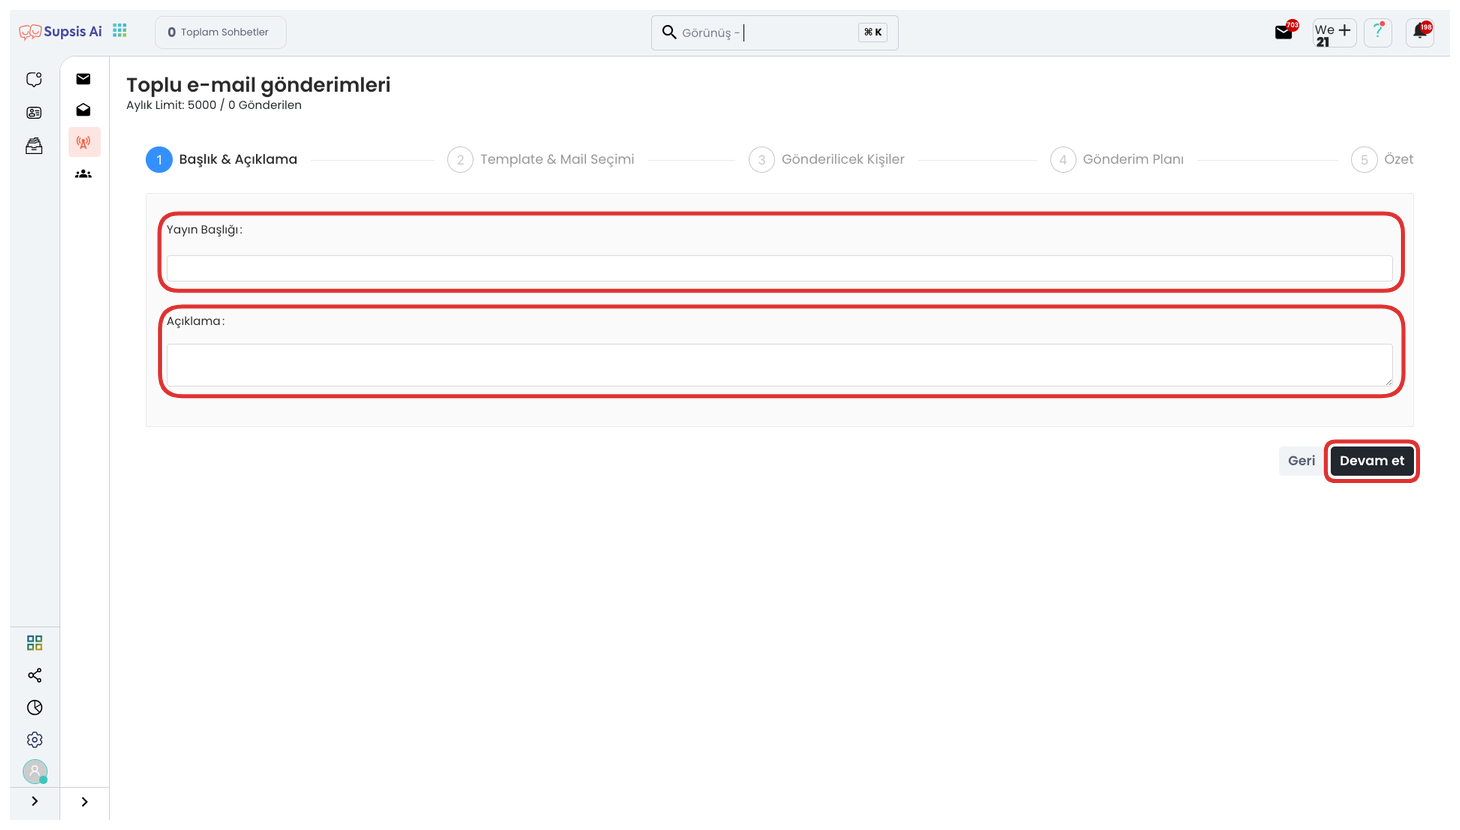
From the opened section, you can determine the general framework of your bulk mail sending by entering a Publication Title and Description. The Publication Title is the first title that recipients will see and is important for the attention-grabbing nature of the content. The description section provides a brief summary of the purpose, topic, or content of the mail to be sent. Filling these fields correctly and effectively will directly increase the read rate and interaction of your bulk email. Continue by clicking the Next button.
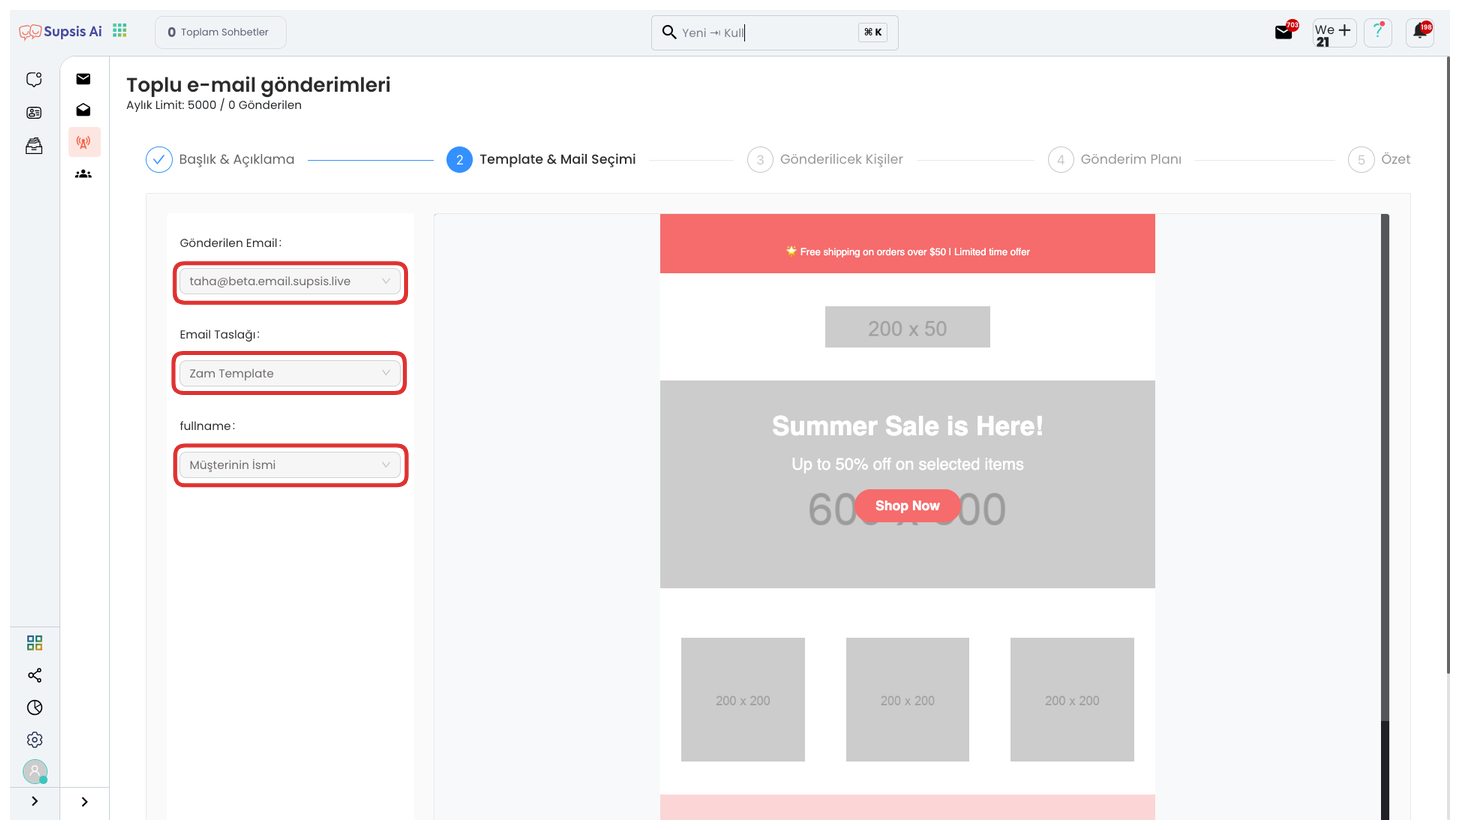
From this area, you can determine which mail address the bulk email will be sent from by selecting your sender email address. Then, select the email template to be used to set which template your message will be sent with. If the template supports it, you can also select which information will come as a parameter from the "fullname" field. This ensures that personal data such as the recipient's name-surname is automatically placed in the mail. After completing all these steps, continue by clicking the "Next" button.

From this area, you can determine which recipients your bulk email will be sent to by selecting a customer group. The recipient list belonging to the customer group you selected will be automatically displayed in the lower section. If you don't have a defined customer group yet, you can access information about customer group creation steps from  this document . Continue by saying "Next" after completing all these steps.
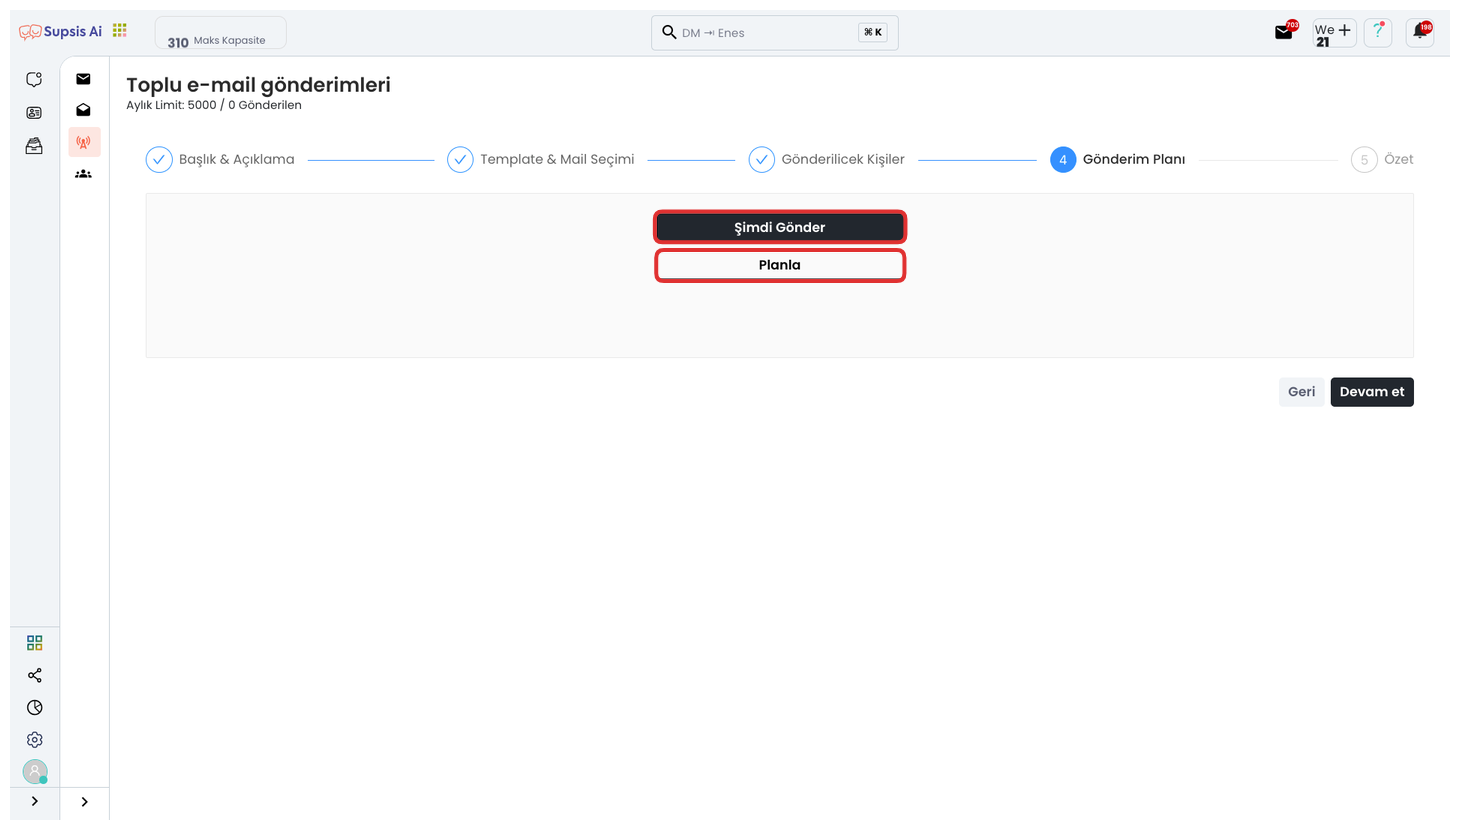
From this area, you can immediately start the bulk mail sending process by clicking the "Send Now" option. The sending process immediately delivers to the recipients you selected with the content and template you determined. If you want to send your emails later, you can make sending scheduling according to a specific date and time by using the "Schedule" option. This way, you can manage your email campaigns in a timely manner and achieve more efficient results. Click the "Continue" button after completing these steps.
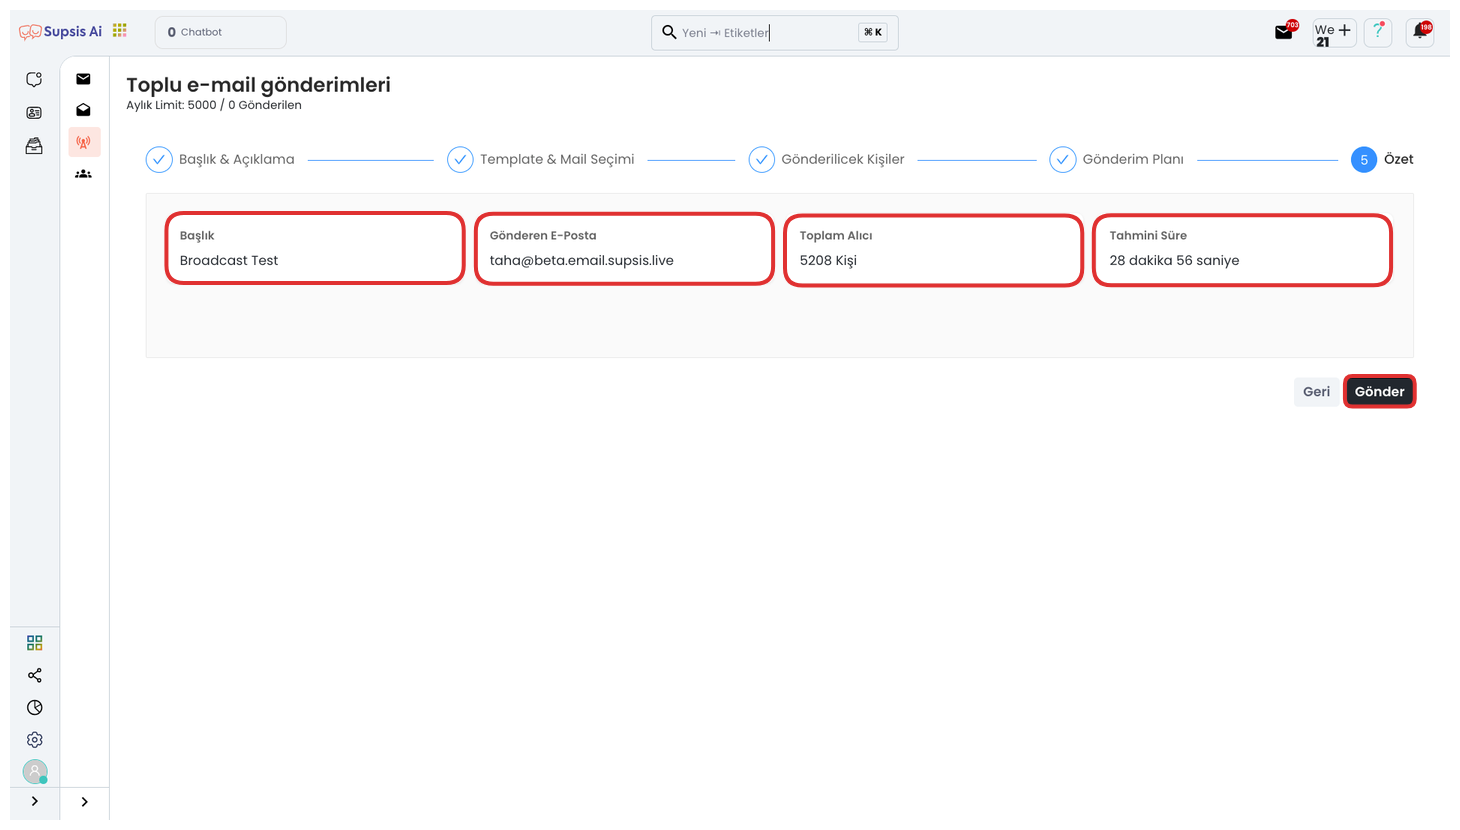
And finally, you can perform the control of all steps from this screen. You can review information such as Publication Title, Sender Email Address, Total Recipient Count, and Estimated Sending Time in this area. After carefully examining all details and making sure there are no missing or errors, you can complete the bulk email sending process by clicking the "Send" button.