Tags
Tags
With this feature, users with a specific tag can be filtered and special strategies can be applied on this segment. In searches made through the archive, searches can be made with specific parameters and users suitable for the selected tag can be easily filtered. This allows customer relationships and service processes to be managed more strategically.
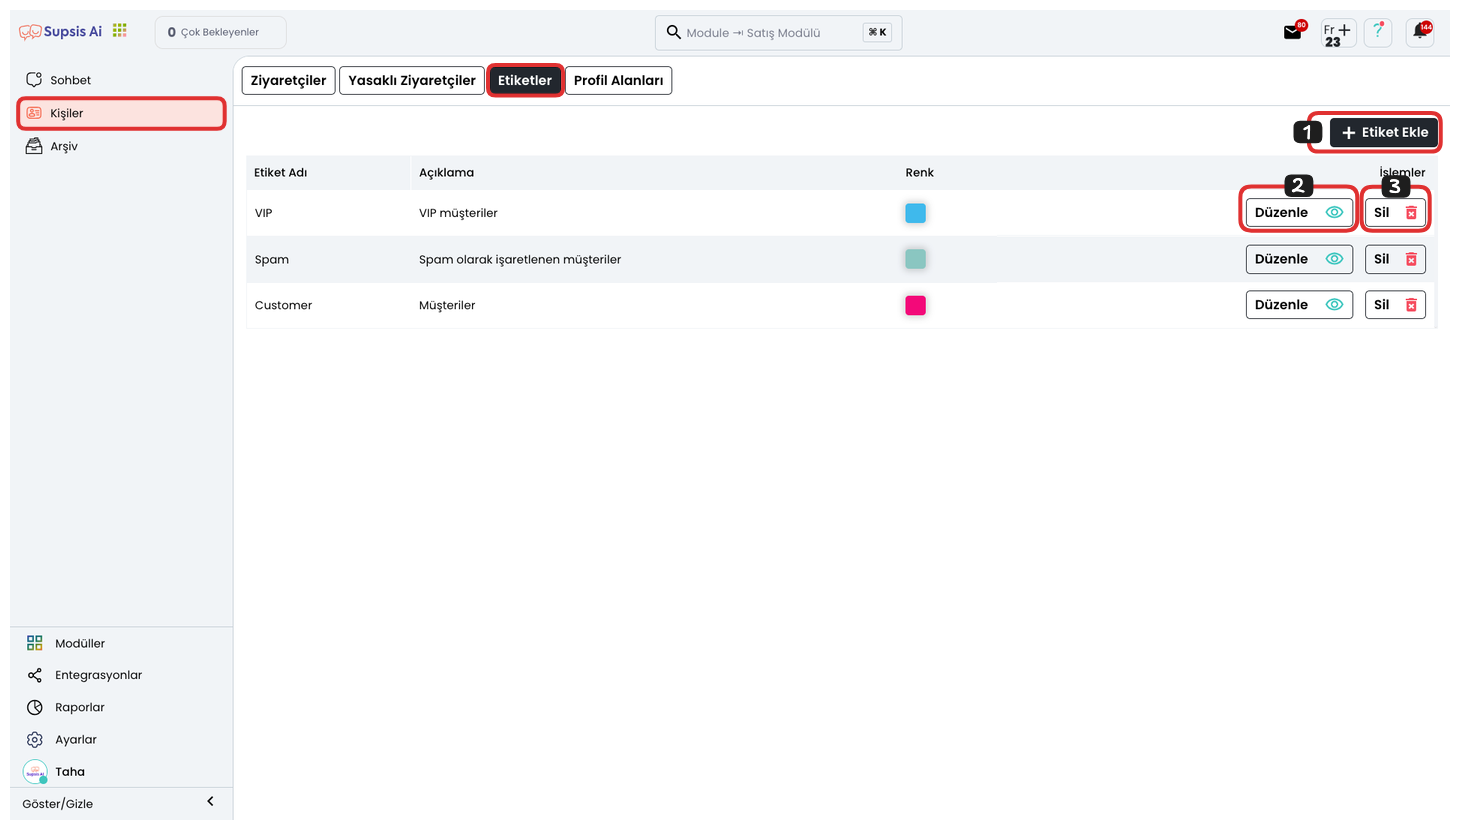
Menu Items:
- Add Tag
- Edit
- Delete
1-) Add Tag
This option allows you to add a new tag to the system. Tags help you classify customers or visitors according to specific categories or criteria. To add a new tag, you can click the "Add Tag" button to switch to the tag creation screen.
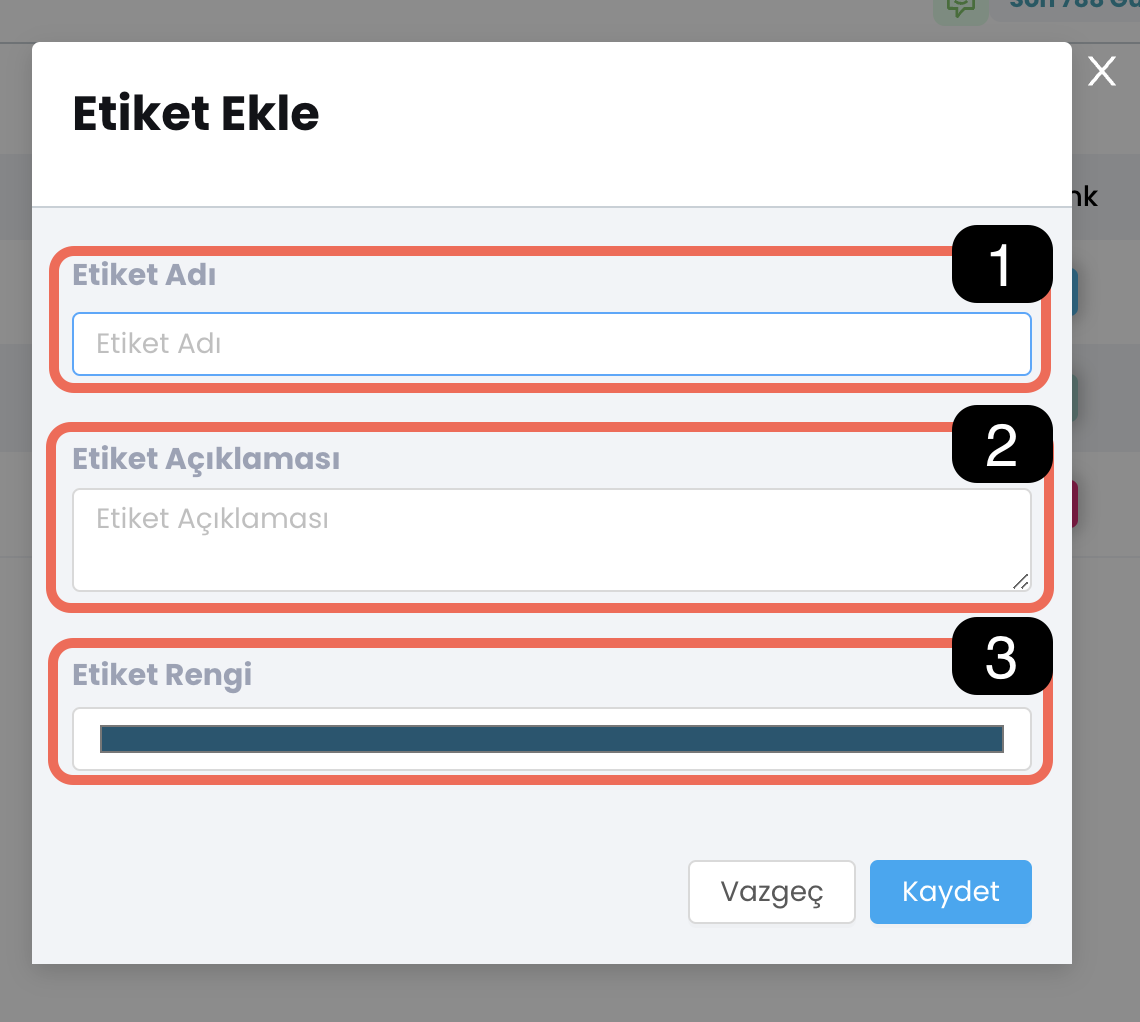
1.1. Tag Name: Write the name of the tag you want to add here. This name is the tag name that will appear in users' profiles or on the chat screen so you can distinguish visitors. For example, a descriptive name such as "Opportunity Customer", "Customer to be Contacted" or "New User" can be given.
1.2. Tag Description: Enter a descriptive text to define what purpose and for which situations the tag will be used. This field makes it easier for you to determine the function of the tag and which customers it will be assigned to. For example, you can add a description such as "Customers who shop frequently".
1.3. Tag Color: You can assign a different color to each tag so that tags can be distinguished more easily. This color ensures that tags are visually easily recognized in user profiles and other lists.
2-) Edit
From this section, you can update the tag you previously added by clicking the 'Edit' option.
3-) Delete
From this section, you can remove the tag you previously added by clicking the 'Delete' icon.