What Are Tags Used For, How Are They Customized and How Are They Used?
Supsis AI operates on a line based on easy communication and effective customer services. It serves automatically to quickly convey the right information to its customers. The tag feature also enables Supsis to recognize, segment, and help its customers more functionally in this process.
Tags enable the classification of customers. This way, more effective and customer-focused service is provided based on the "tagged" feature. Through classifications such as customers from advertisements, customers to be contacted, you can work more efficiently by directing to a specific tag.
Tags that enable the customization of the service you offer to your customers provide a service focused on users gathered under a specific title. Thus, a step is taken towards a more dynamic process where customer satisfaction is achieved.
It is also possible to obtain the list of customer groups you have segmented with tags and easily reach customers again.
The steps you need to follow to make tagging on the Supsis AI panel are as follows;
Tag Adding Steps
- First, go to the "Tags" menu from the "Contents" menu on your Supsis panel.
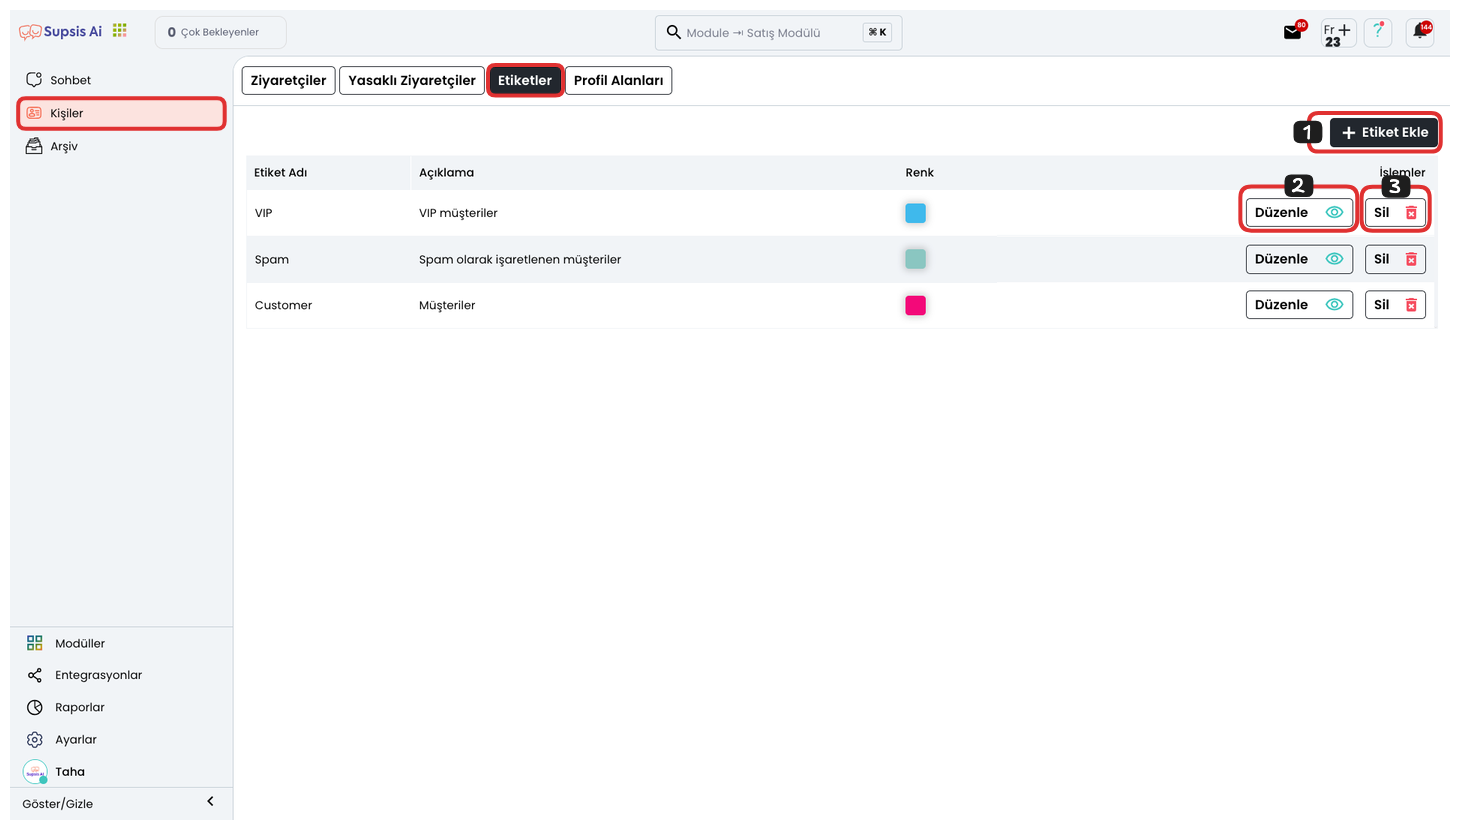
- Button 1: You can add a new tag.
- Button 2: You can edit the existing tag (description, color, tag name).
- Button 3: You can delete the existing tag.
How Are the Tags I Created Given to Users?
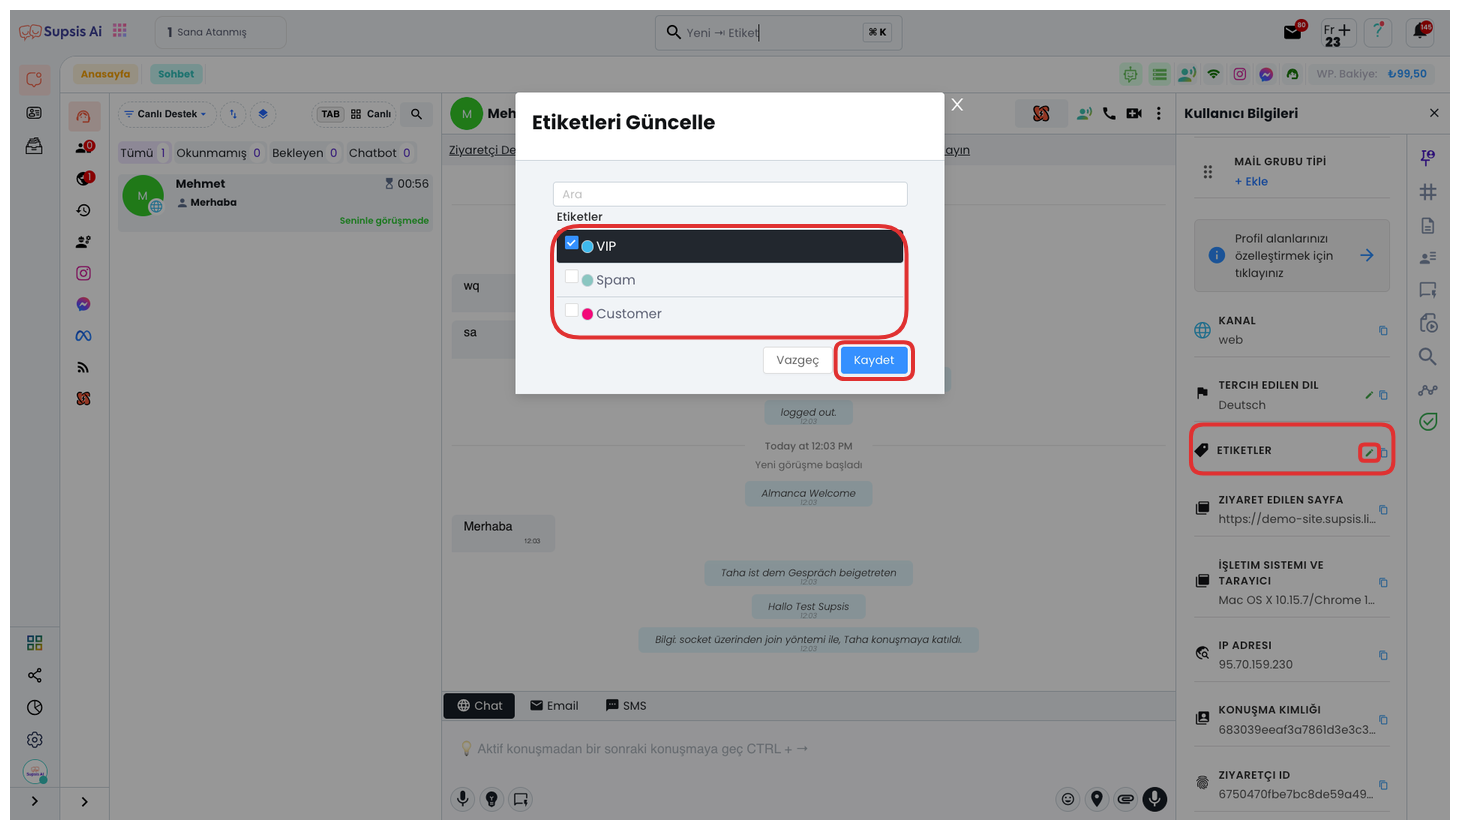
Tags that enable customer classification are given automatically through Chatbot. It is also possible to manually give tags to customers you communicate with.
In the manual tagging process, you can give a tag to the customer by clicking the "+" sign in the image. This way, the customer is placed in a specific class and encounters a more customized service.
Supsis AI signs a service where customer satisfaction will be achieved and a more efficient workflow will be provided with the tag giving service. Don't miss the opportunity to offer this customized, practical service to your customers with tags.