Supsis AI Chatbot WhatsApp Interaction
Introduction
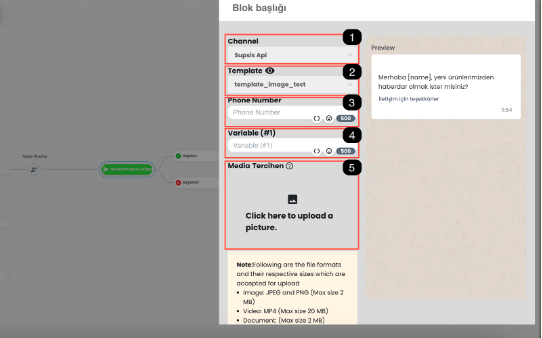
Supsis AI Chatbot has the ability to automatically send WhatsApp messages when users reach certain steps. This feature allows you to communicate effectively and instantly with users. Below, how the WhatsApp message sending process works is explained in detail.
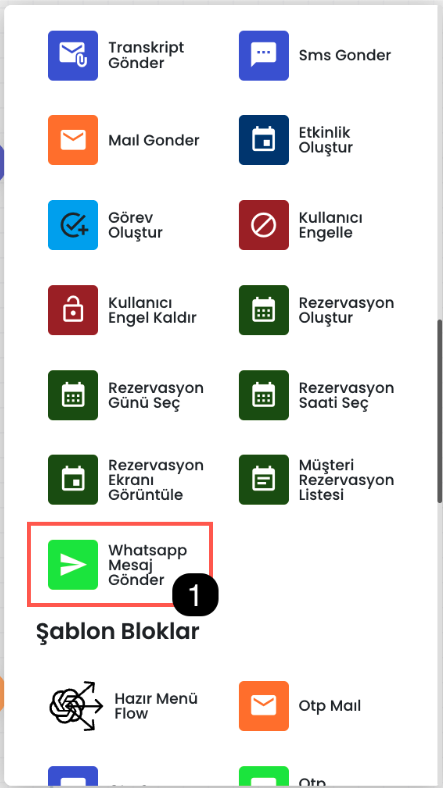
1-) WhatsApp Message Sending Block
WhatsApp Message Sending Process
- WhatsApp Channel Selection
- Template Selection and Customization
- Phone Number Selection
- Filling Variable Value
- Media Preference
1. WhatsApp Channel Selection
The WhatsApp channel where the message will be sent is selected. This step allows you to determine the WhatsApp Business API channel integrated in the Supsis AI platform. (Shown with area number 1 in the image)
2. Template Selection and Customization
The message template created through your WhatsApp Business API channel is selected. This template contains a predefined message structure. If there are variables in the template, these variables can be customized with data received from the user.
- Variable Customization: For example, the chatbot can ask the user for their name and fill the name variable in the template.
- Media Editing: If there are images or videos in the template, these media elements can also be replaced with new images or videos you choose. (Shown with area number 2 in the image)
3. Phone Number Selection
The phone number where the message will be sent is determined.
- Dynamic Phone Number: To select the phone number of the user talking with the chatbot, you can automatically select this number by clicking the curly bracket symbol.
- Specific Phone Number: If a message will be sent to a specific person or people in specific situations, a phone number can be entered manually in this field. (Shown with area number 3 in the image)
4. Filling Variable Value
It is determined with which values the contents of the variables in the template will be filled. These variables can be information received from the user or special values you determine. Special values can be added by clicking the curly bracket symbol. (Shown with area number 4 in the image)
5. Media Preference
If there are images or videos in your template, these media elements can be edited here. If the media element is not edited, the image or video in the current template is used.
- Image and Video Editing: To change the media preference, you can upload a new image or video by clicking on the specified area. (Shown with area number 5 in the image)
Usage Examples
- Campaign Notification: Automatic message sending to inform users about new products or campaigns.
- Appointment Reminders: Automatic message sending to remind users of their upcoming appointments.
- Support Request Confirmation: Automatic message sending to inform users that their support requests have been received.