API Request Block
The API Request Block allows you to retrieve data from external APIs by integrating it into your chatbot flow. With this block, you can use the retrieved data as parameters in chatbot messages, provide dynamic content to users, or perform conditional routing and operations with this data.
For example, based on information received from a user, you can retrieve data from an external service and generate different responses or make routing decisions based on that data. This block helps make your chatbots smarter and more interactive.
Supsis API
To use the API Request Block, you first need an API. For this, you can use Supsis's own API or integrate your own custom API. By retrieving data through the API, you can create dynamic responses in your chatbot, perform automatic operations, and make user interactions smarter.
Supsis API Elements:
- Settings
- Developer
- Generate Token
- Copy Token
- API Documentation
- API Documentation Usage
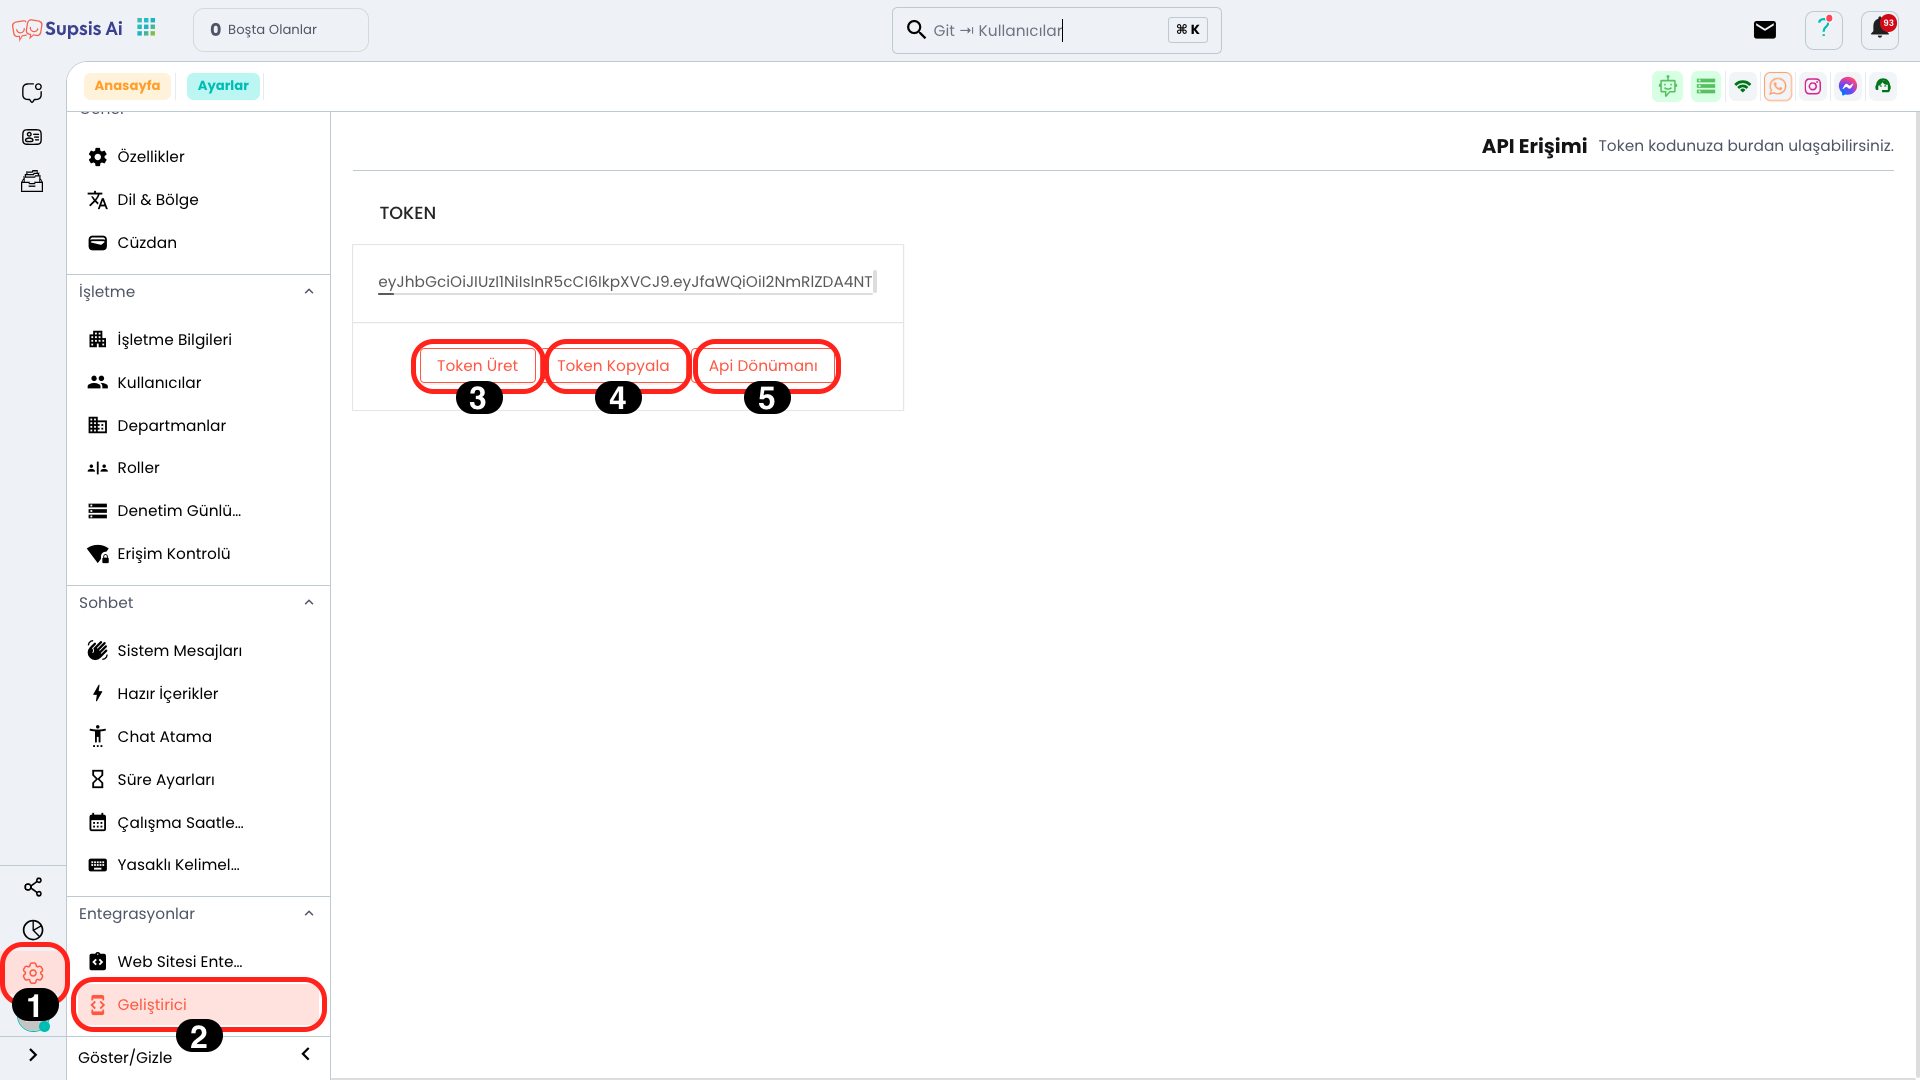
1.) Settings
You can access the Settings page by clicking the "Settings" icon from the left menu. In this section, you can edit various configurations related to the system.
2.) Developer
You can access the Developer page by clicking the "Developer" option from the opened menu. In this section, you can manage API keys and configure integration settings.
3.) Generate Token
If the Token is not visible, you can create a new API token by clicking the "Create New Token" button. This token will be used to authorize your API requests.
4.) Copy Token
You can use the "Copy Token" button to copy the entire token. This operation allows you to easily copy the authorization key you need to use in API integrations.
5.) API Documentation
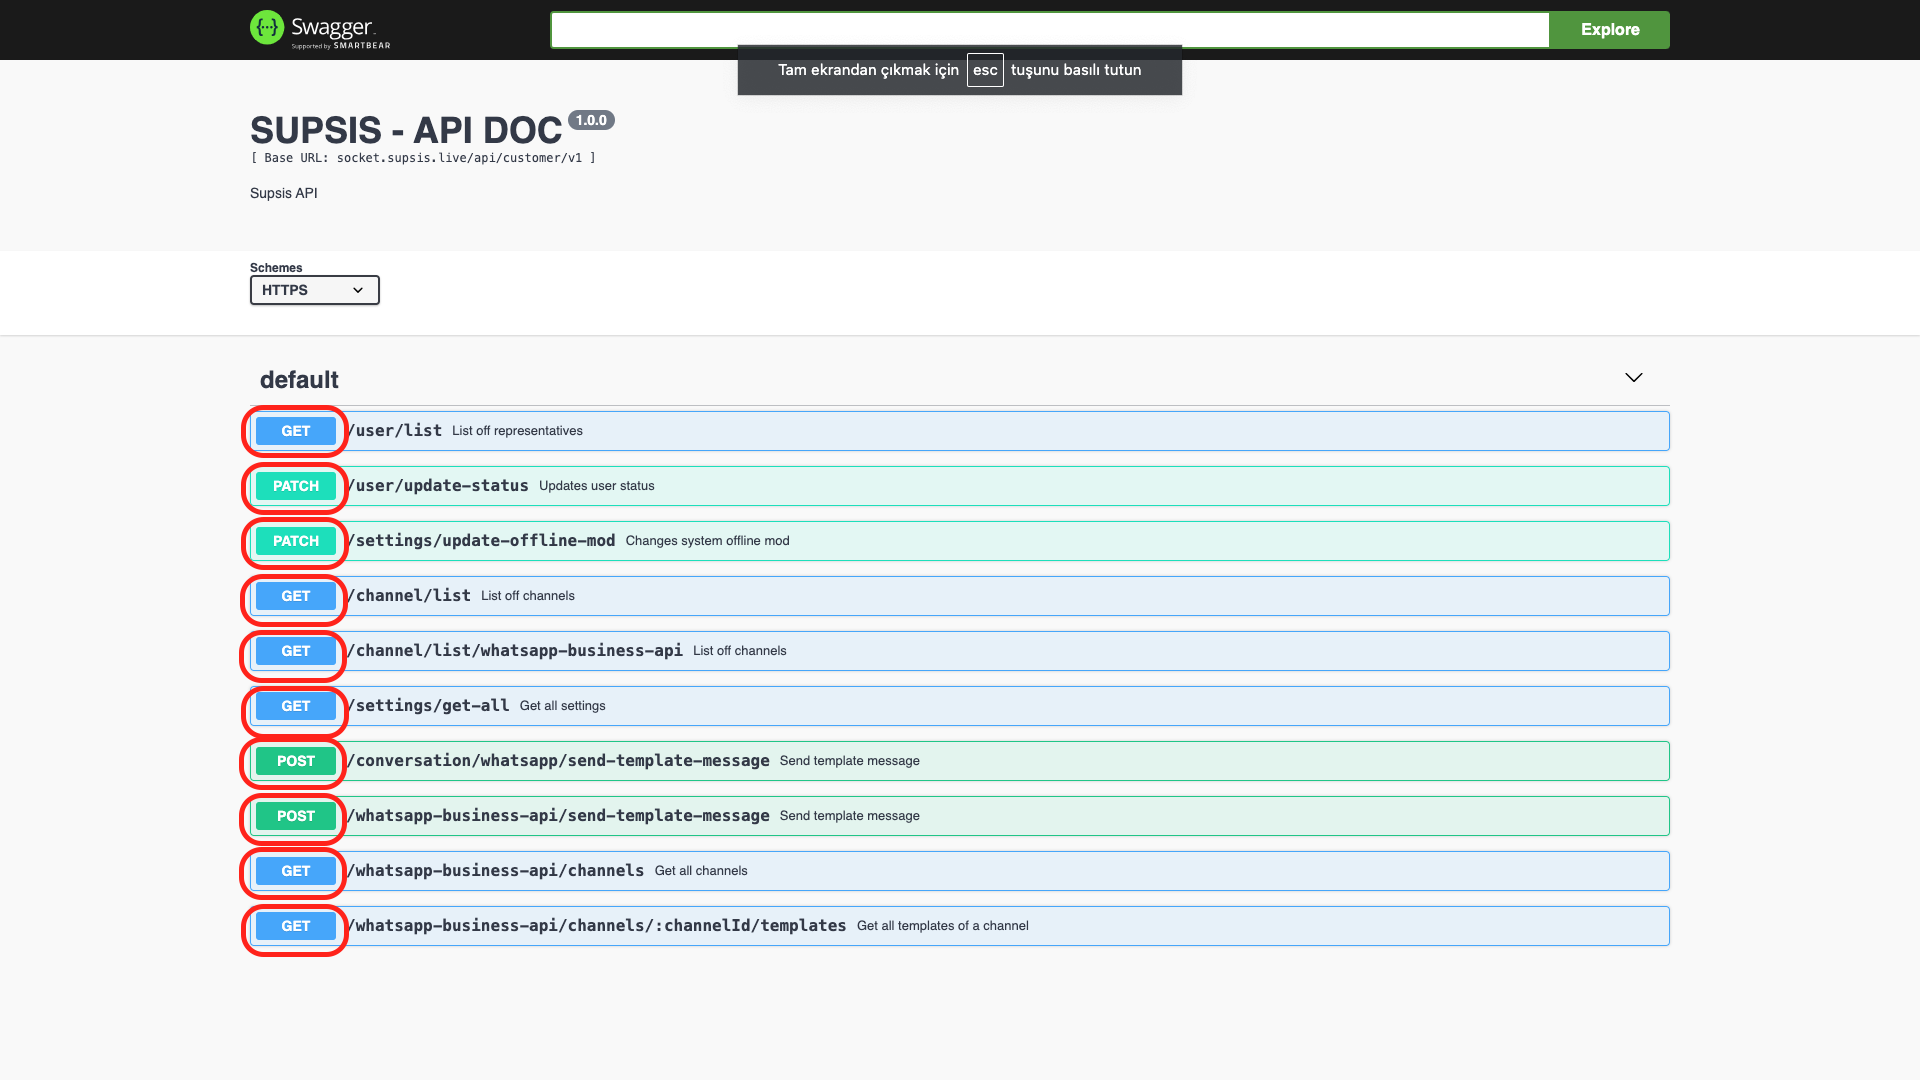
If you want to get more information about the API, you can click the "API Documentation" button. This button redirects you to the API Documentation, allowing you to get information about API endpoints, authorization, and usage details.
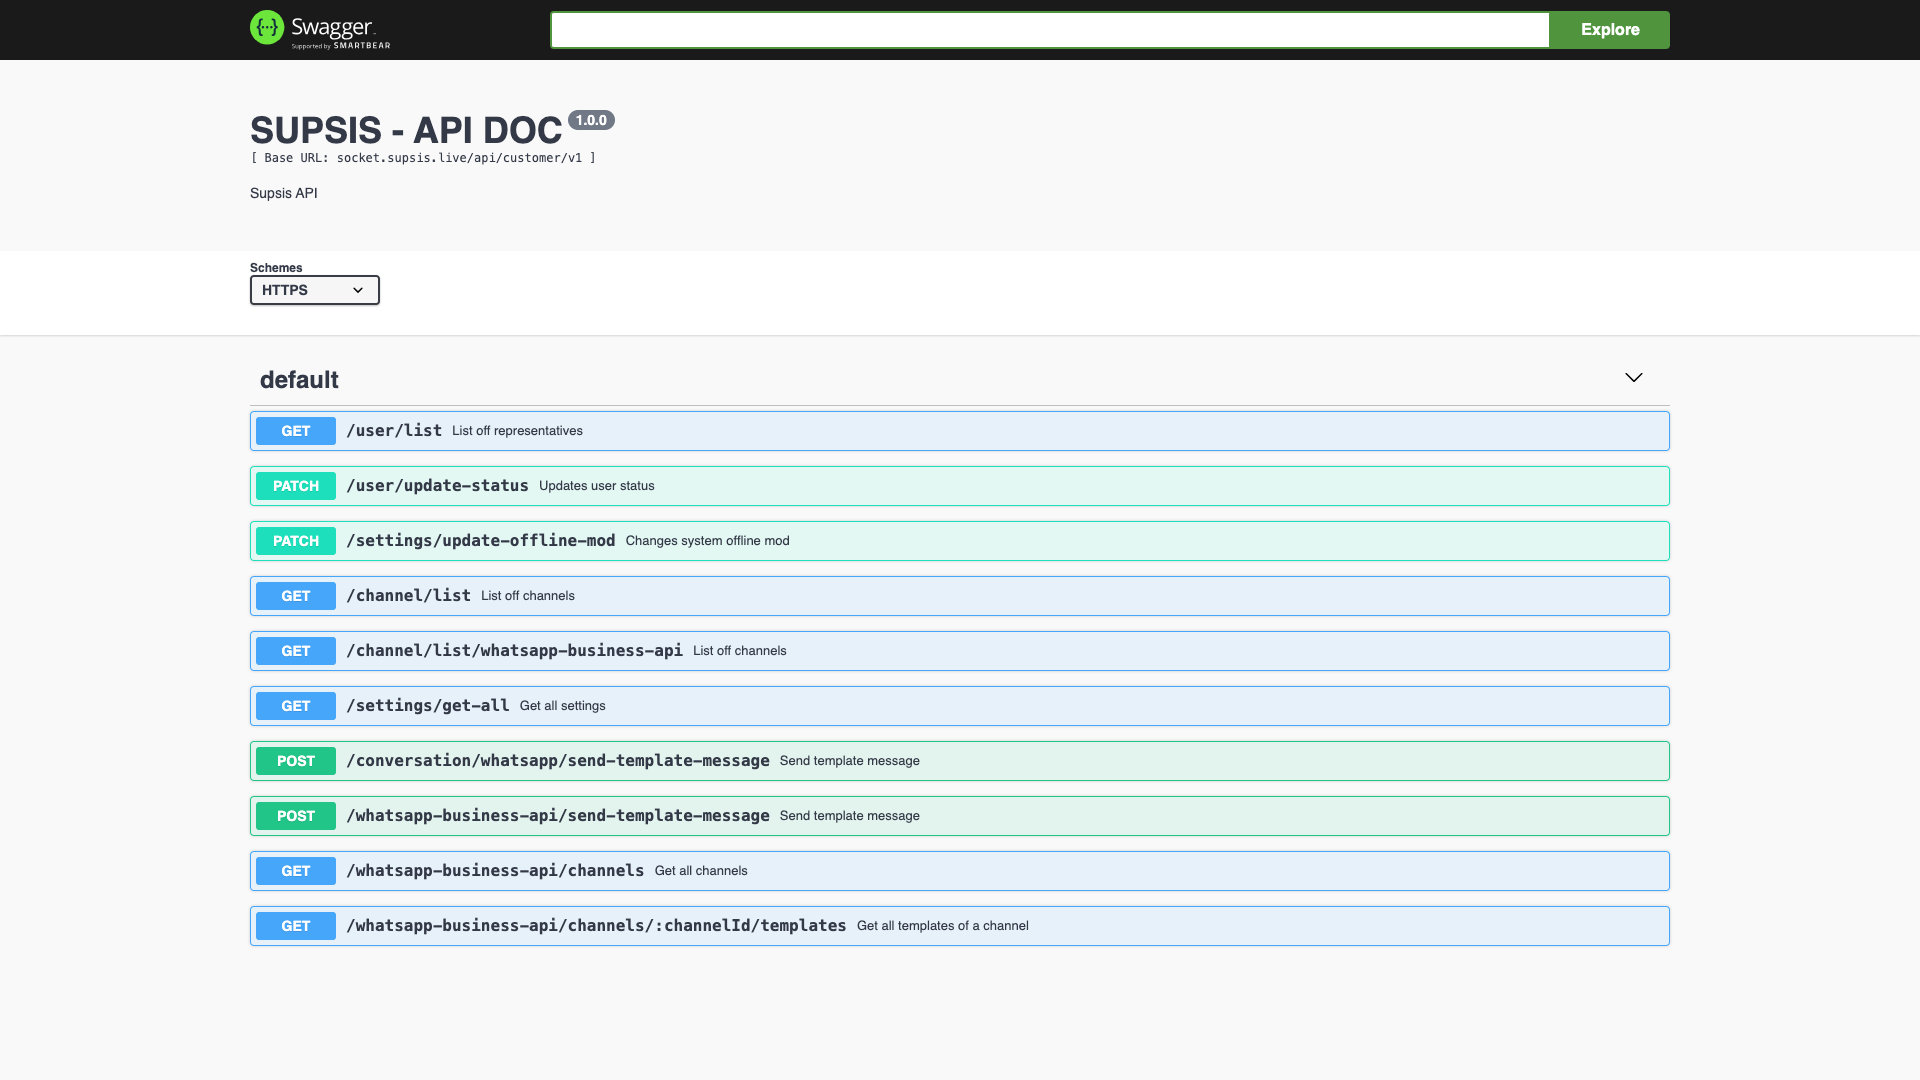
6.) API Documentation Usage
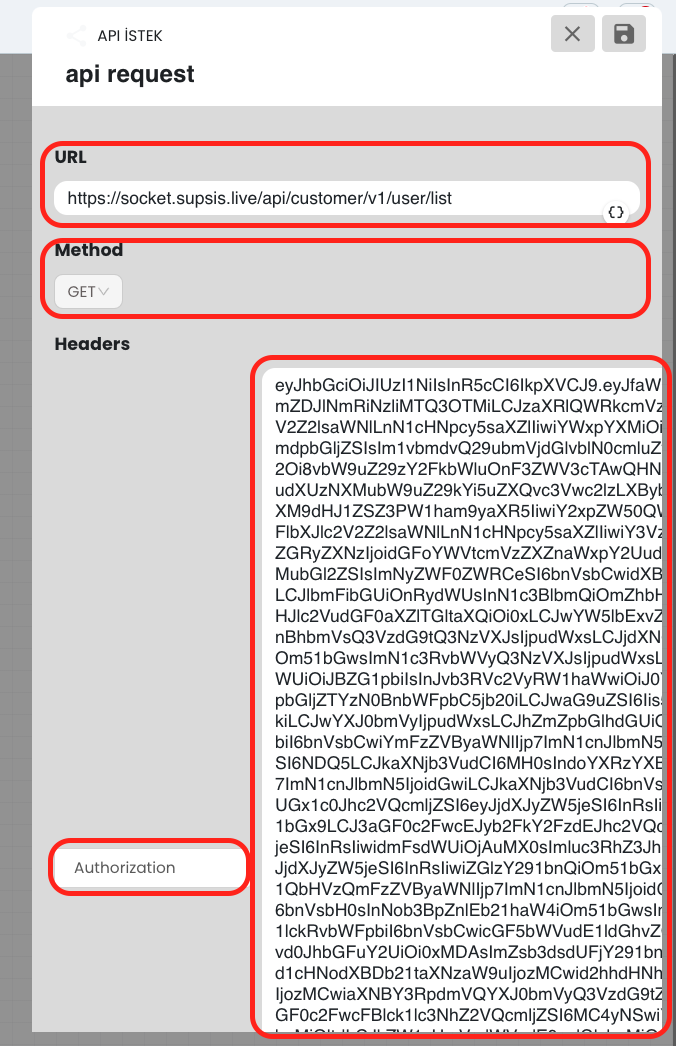
First, select which API you will use. In the opened field, paste the token you copied into the "Authorization" box and then click the "Execute" button to get API information. This operation allows you to validate your API and retrieve usable data.
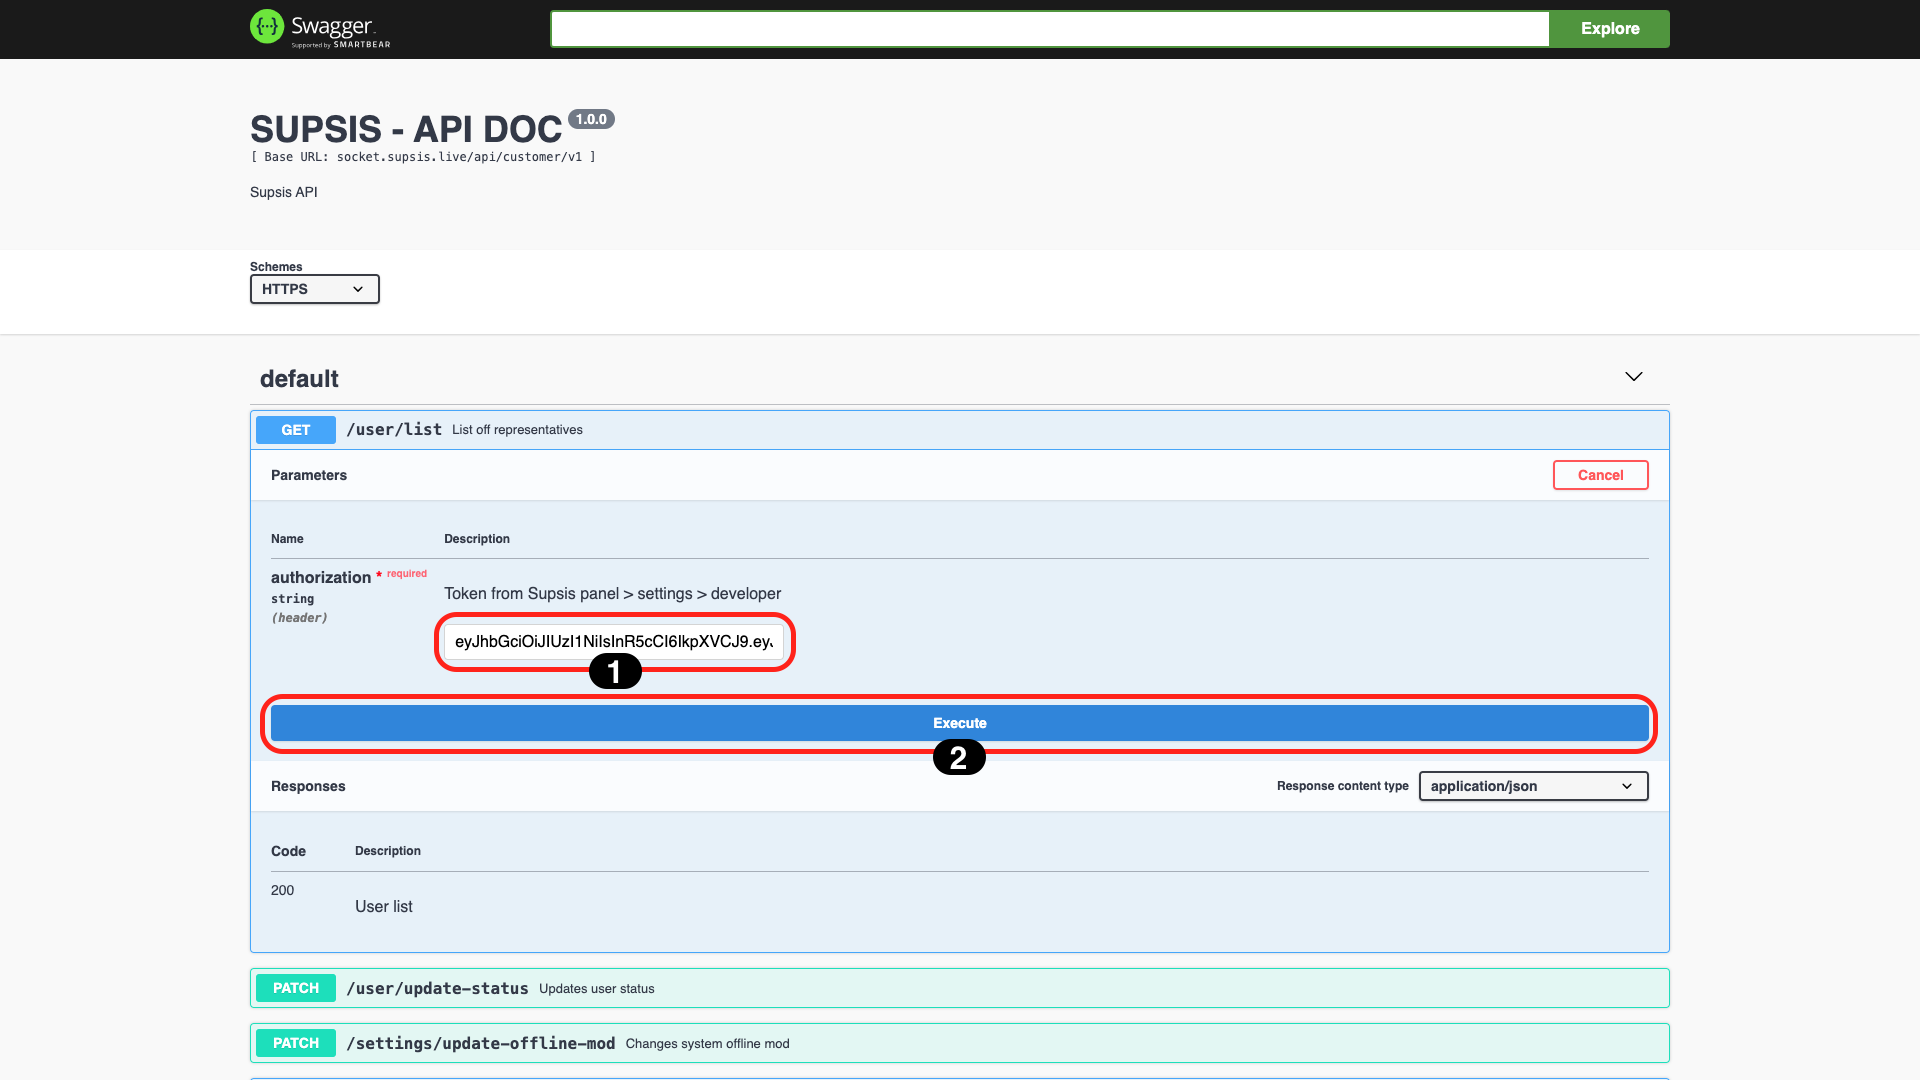
In the opened section, you can see your API URL under the "Request URL" section. Also, in the "Response Body" section at the bottom, you can examine the response data from the API in detail. This information will help you verify how the API works and manage your integration process.
API Request Block Usage
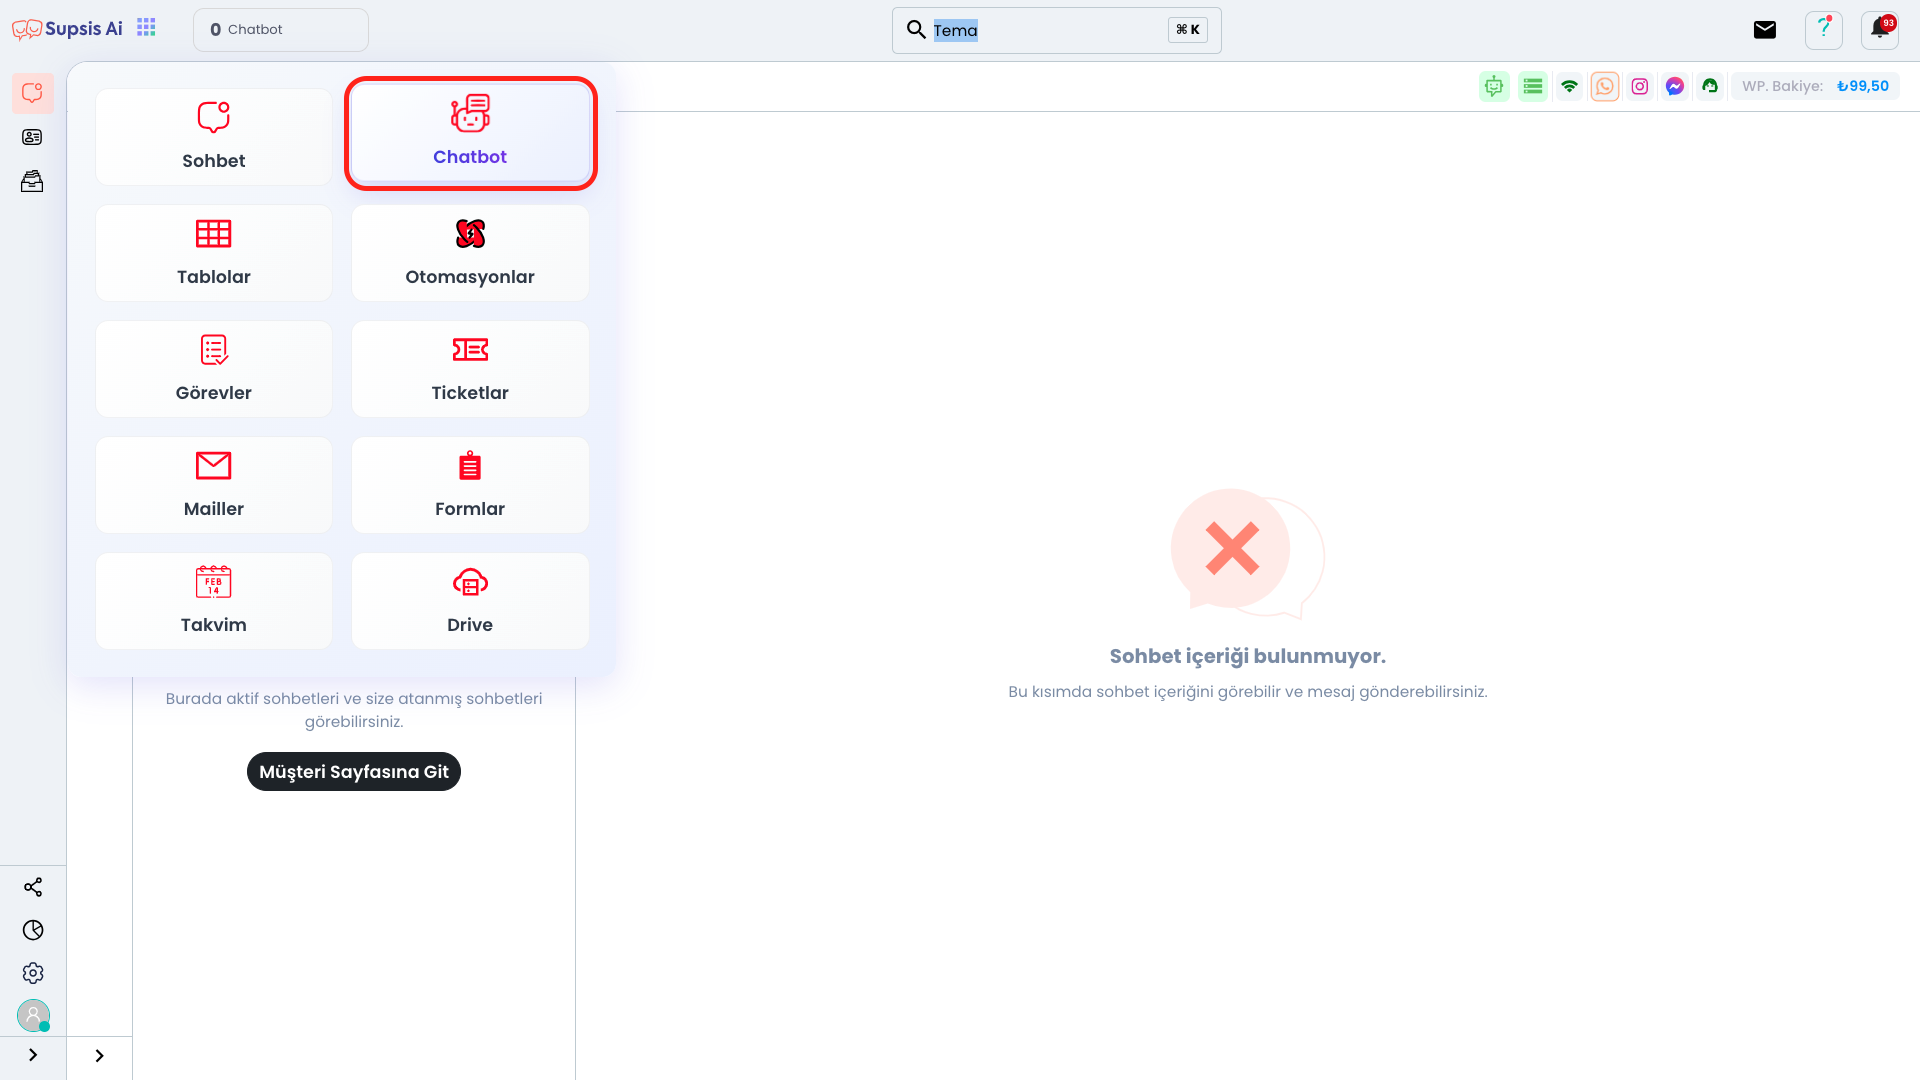
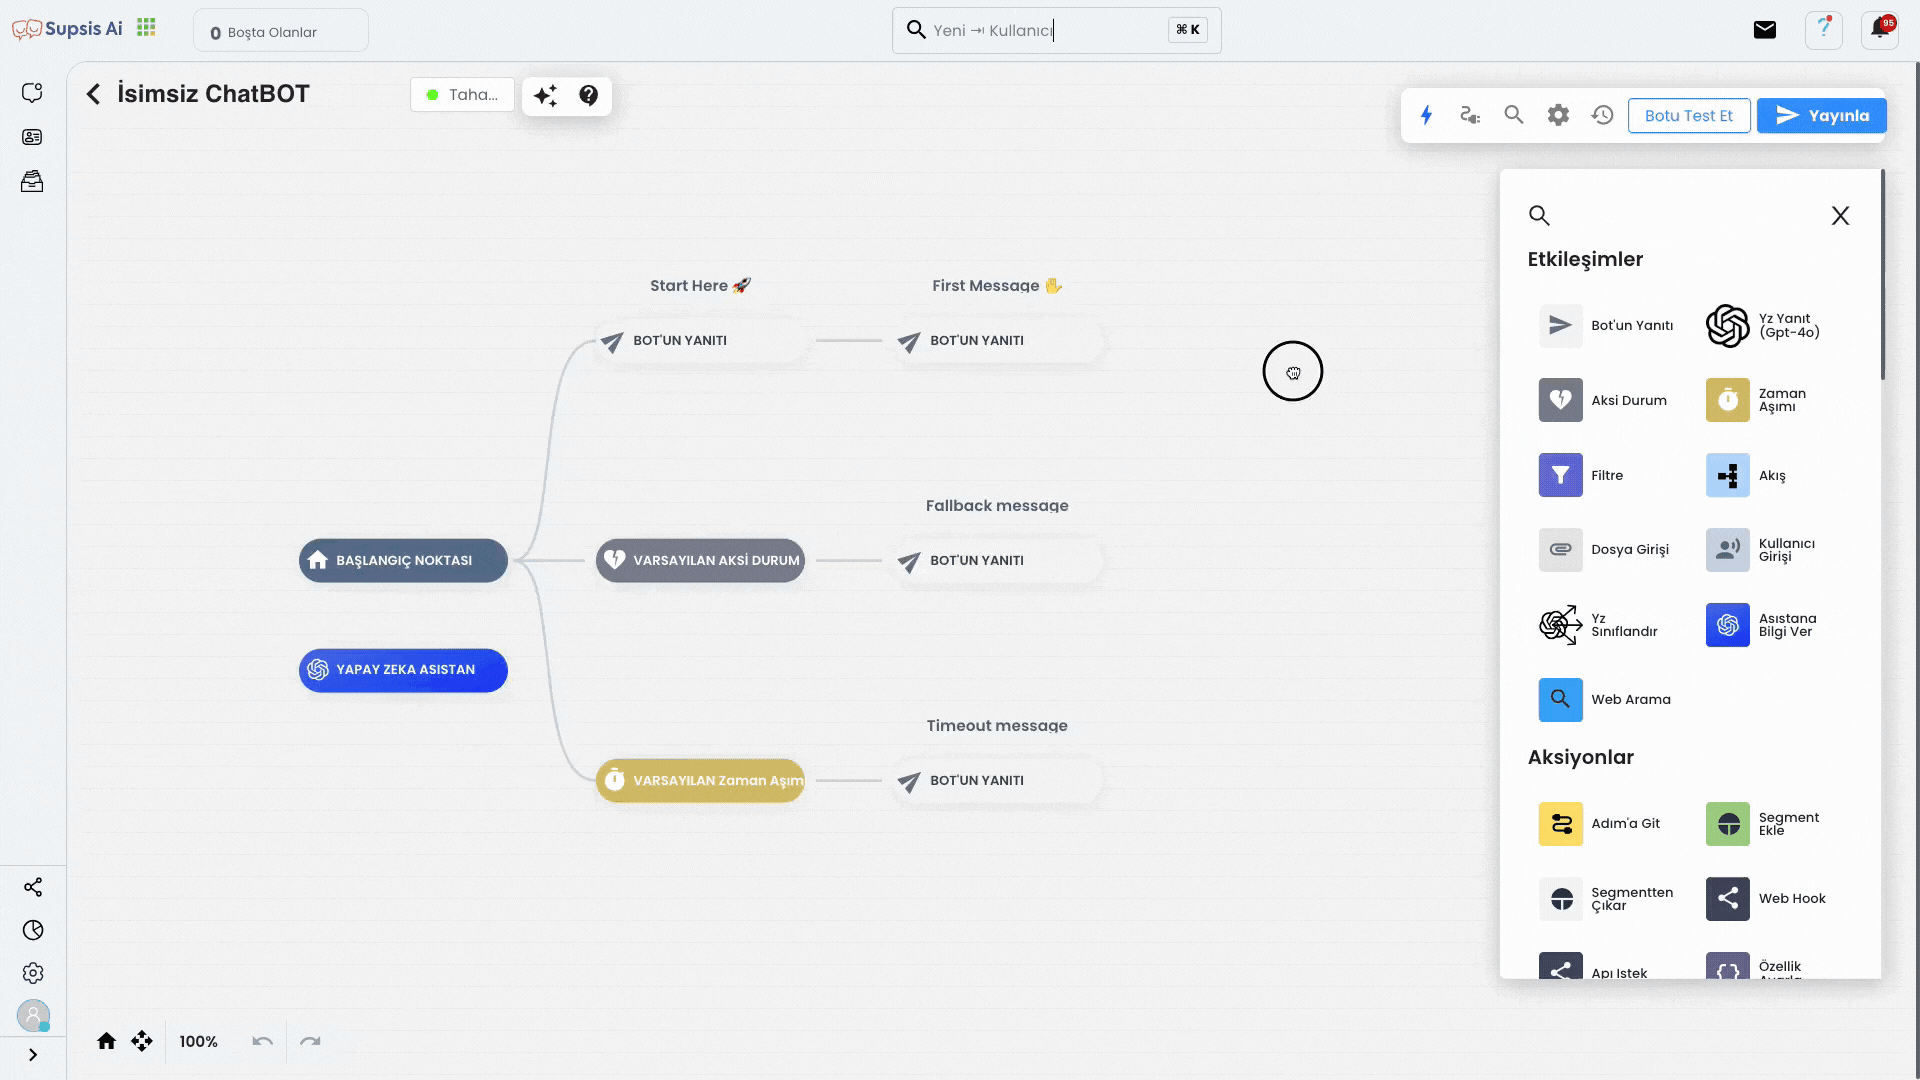
First, click the "Applications" icon in the upper left and select "Chatbot" from the opened menu. This way, you can access the chatbot management page.
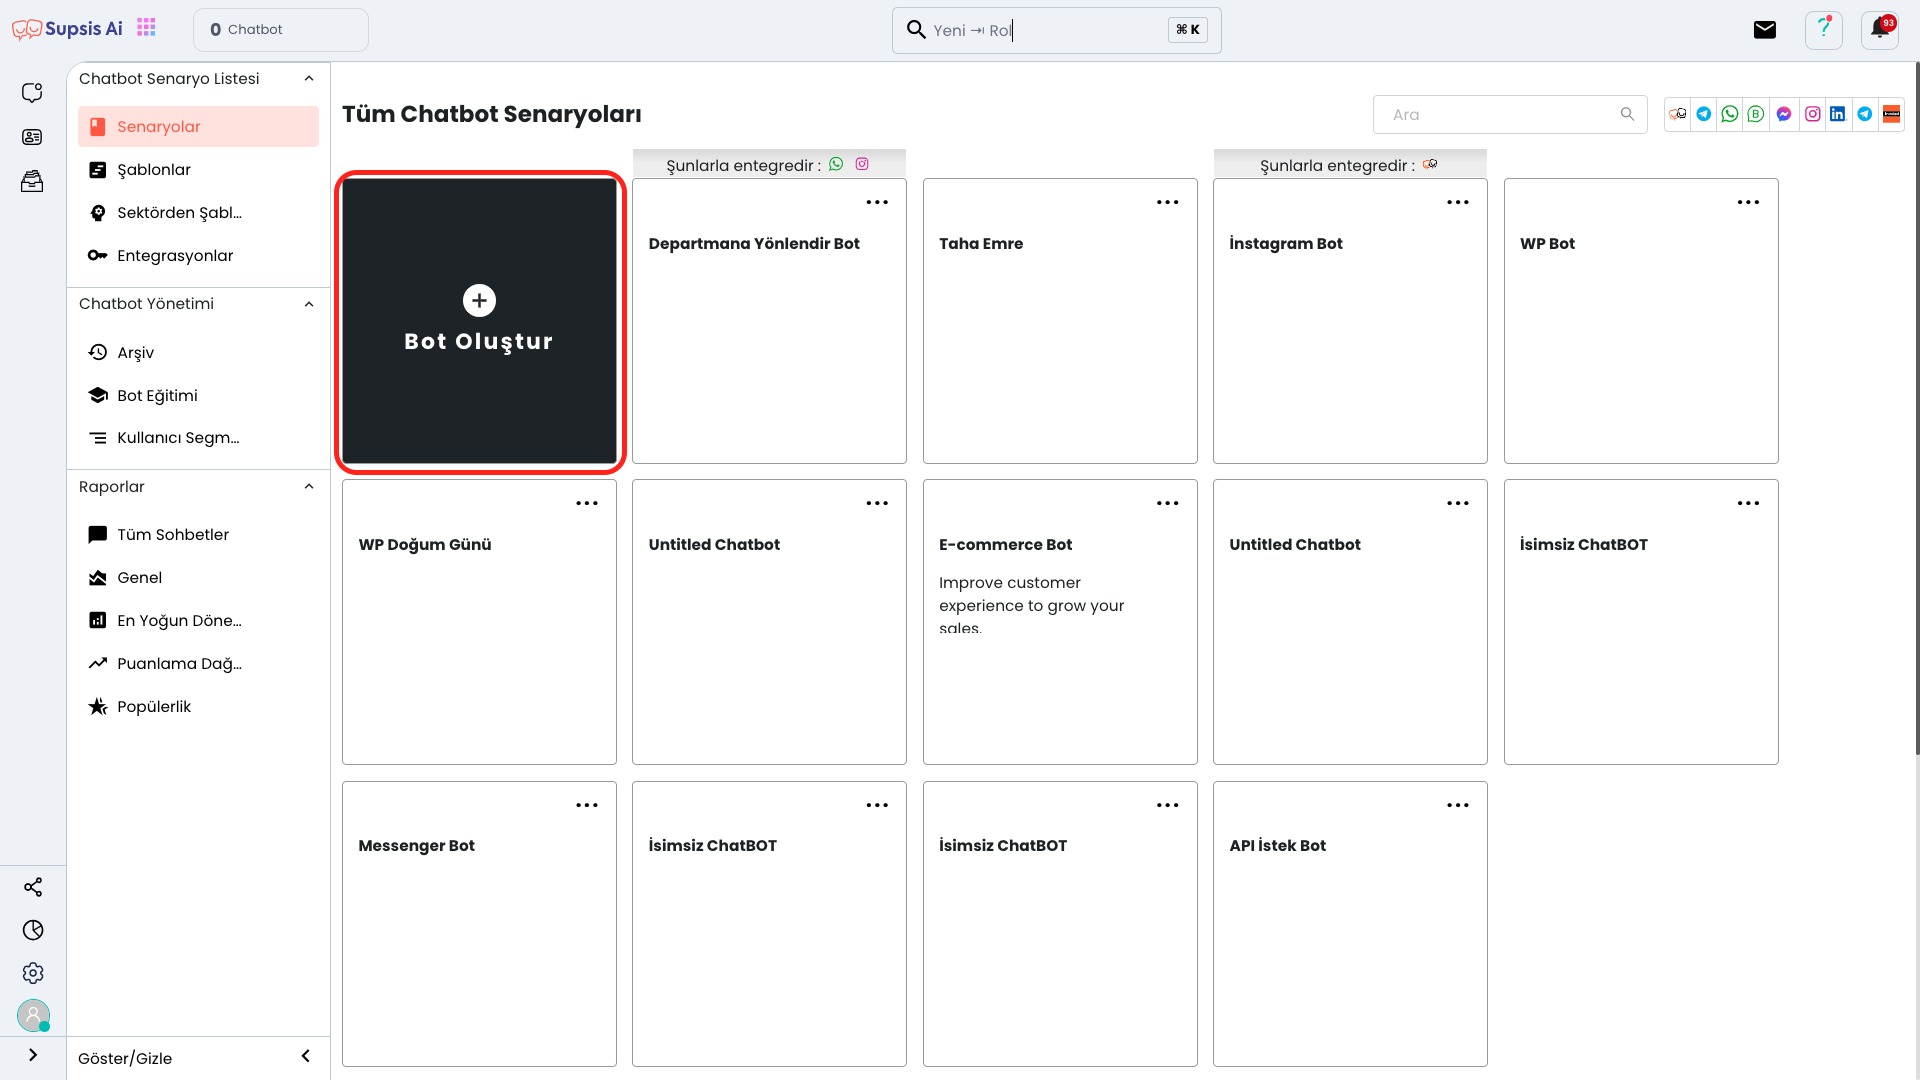
On the opened page, you can start creating a new chatbot by clicking the "Create Bot" button.
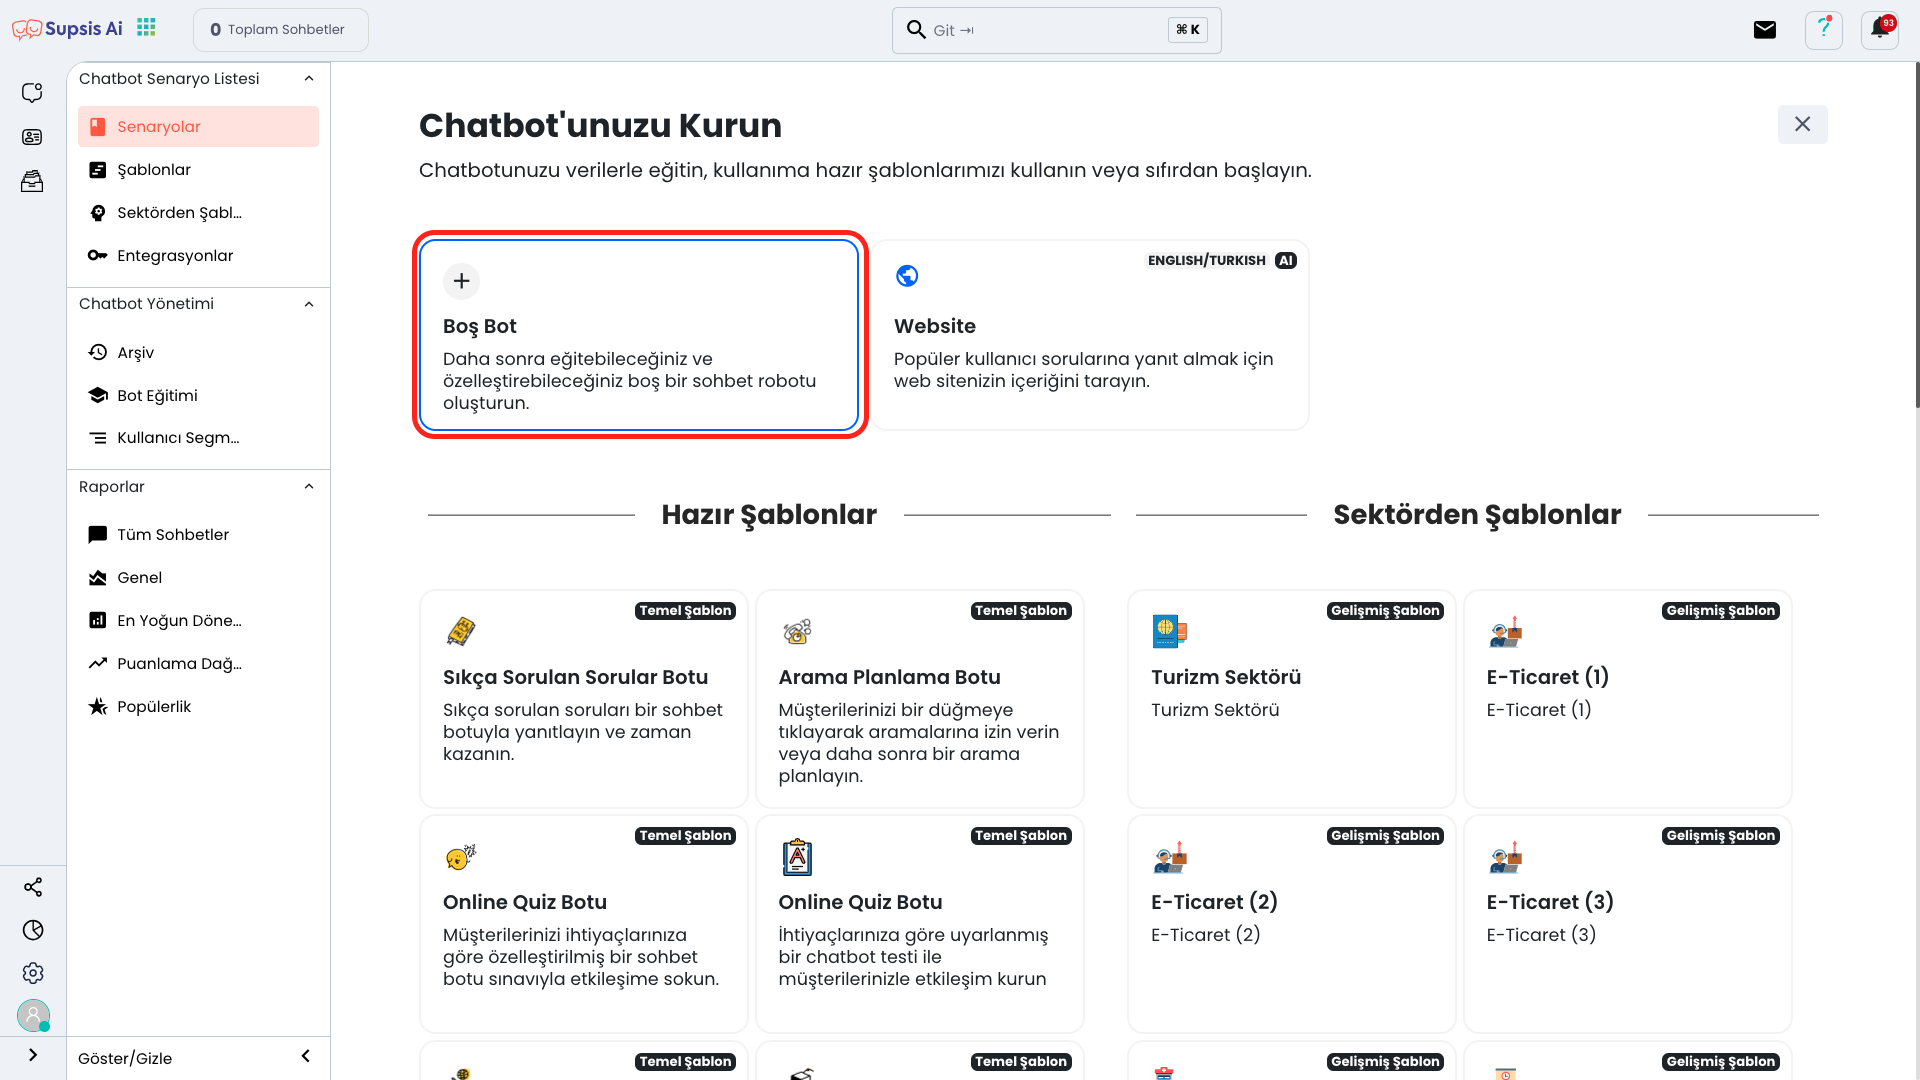
Continue by clicking the "Empty Bot" option from the opened section. This provides a clean start for you to create your own setup from scratch.
After creating the bot, first find the "API Request" block from the blocks menu on the right and add it to your chatbot by dragging and dropping it into the flow. With this block, you can retrieve data from external APIs and use this data in the bot flow.

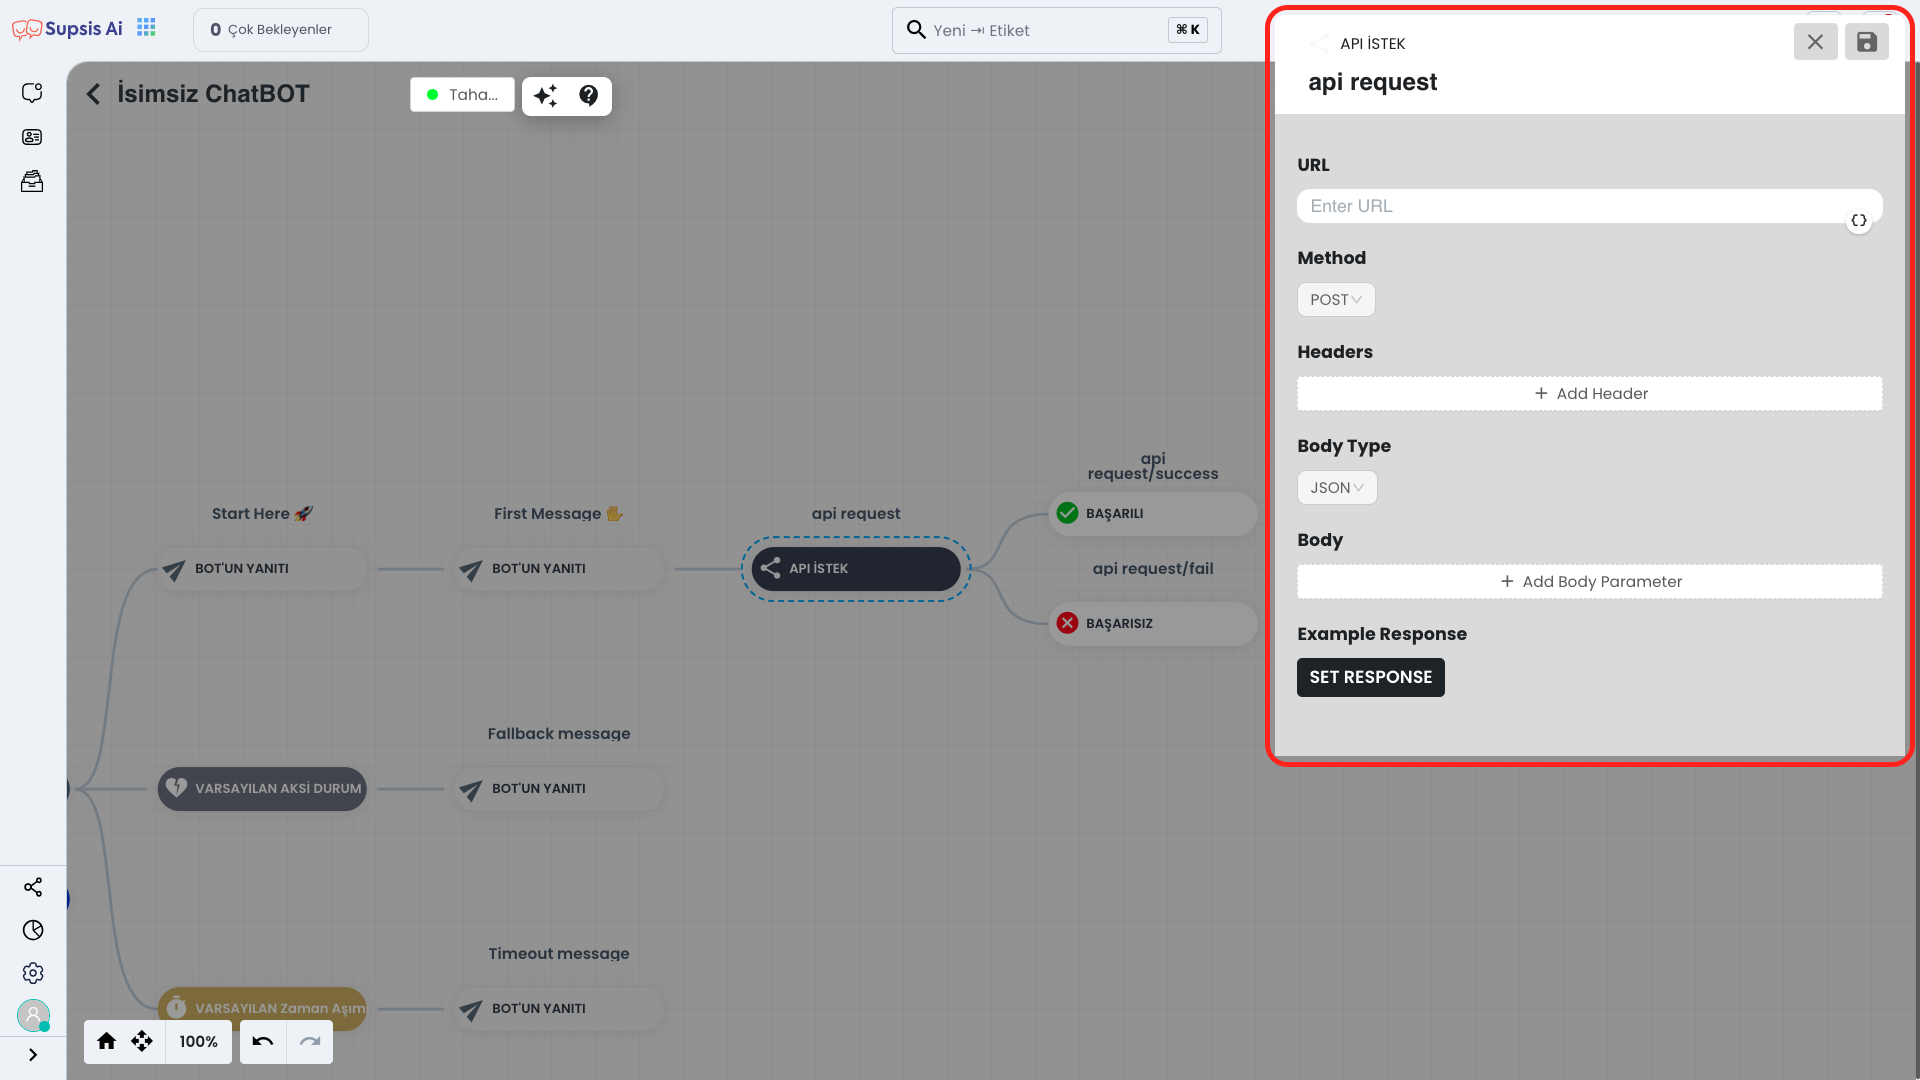
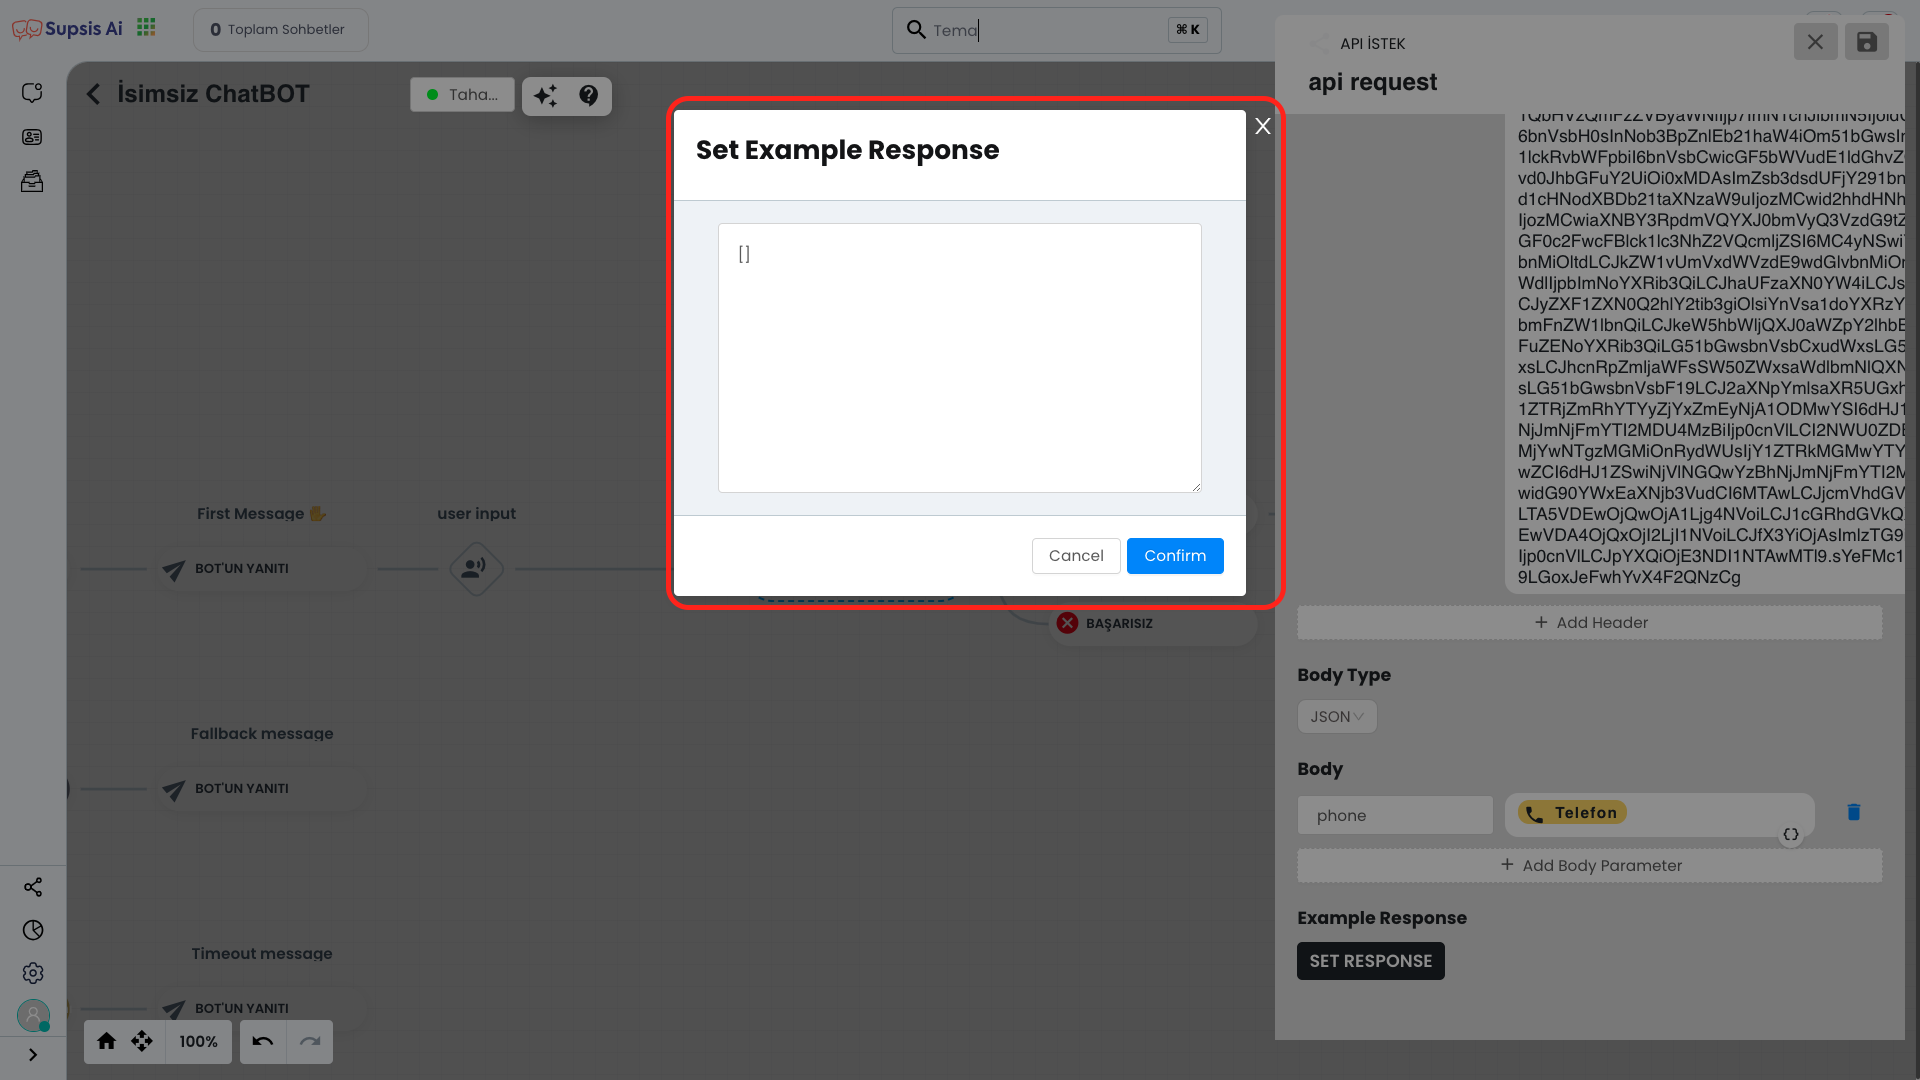
Click on the API Request block you added and fill in the necessary fields (URL, method, header, body, etc.) completely in the opened module. This step is the configuration process for the API to work correctly.
API Request Elements:
- API URL
- Methods
- Headers
- Body
- Set Response
1.) API URL

Paste your API URL into the URL field at the top. If you don't have an API URL, you can learn how to create one and how to use example URLs from the Supsis API Documentation Usage section. This step is necessary to establish the correct connection to the external data source.

2.) Methods
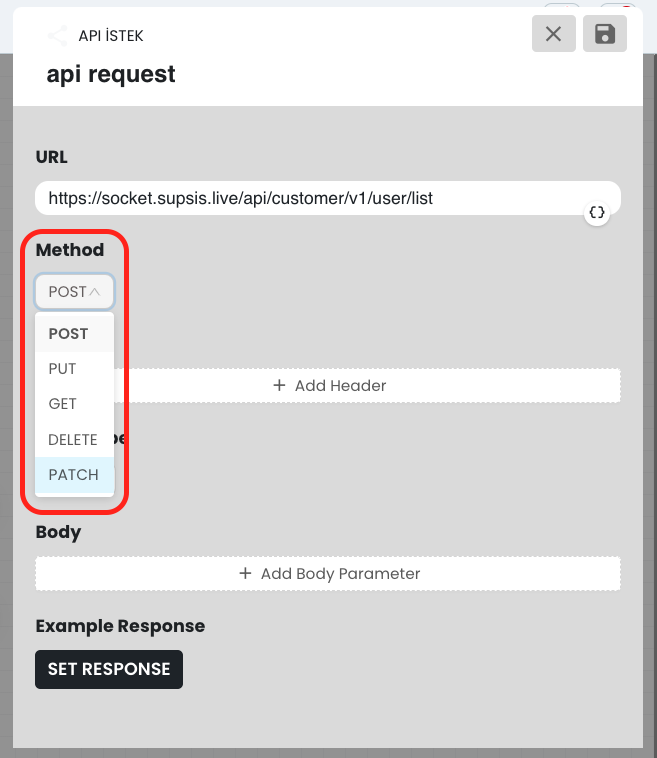
In the Methods section, select the HTTP method (POST, PUT, GET, DELETE, PATCH) appropriate for the API request you want to use. These methods determine what type of request you will send to the API and the desired information format may vary according to this method.
📌 Briefly:
✅ GET → RETRIEVES Data
✅ POST → SENDS Data (saves)
✅ PUT/PATCH → UPDATES existing data
✅ DELETE → DELETES data
If you are using the Supsis API, the method you select must be compatible with the method specified in the API documentation. Otherwise, the request may not work or you may encounter an error. Therefore, when making method selection, proceed considering the method supported by the API.
Also, Body section is usually required for POST, PUT and PATCH methods. This section contains the data to be sent to the API and it is important to configure it correctly.
On the other hand, Body is generally not used in GET and DELETE methods. In such requests, necessary data is usually transmitted through URL parameters.
Therefore, you should pay attention to whether you need to add the Body section or not according to your method selection.
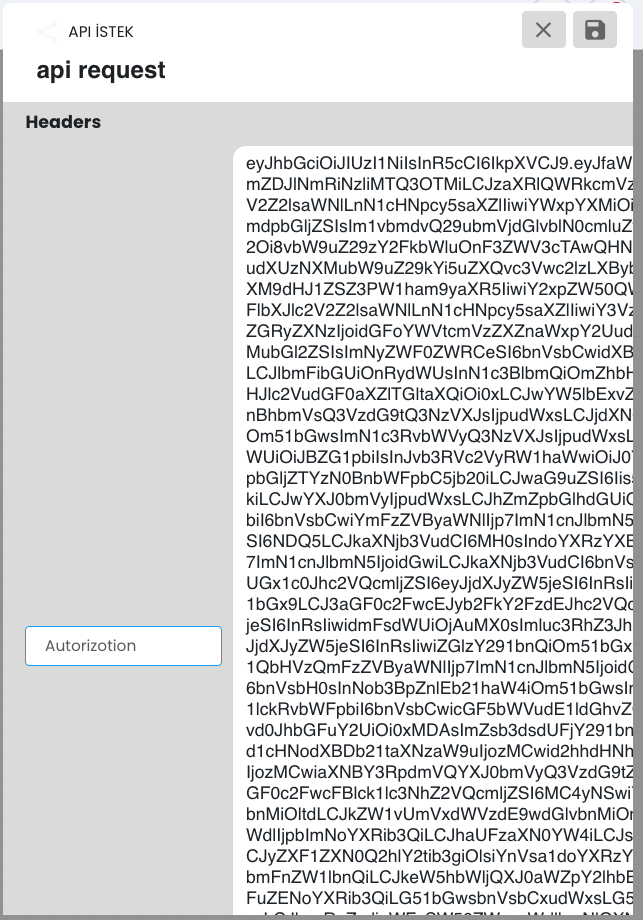
3.) Headers

Click the "Add Header" button. In the opened field:
- Write
"Authorization"in the Header Key section. - Paste the token you copied in the Header Value section.
This step is necessary for you to authenticate with the API. Make sure the token is correct and up-to-date.
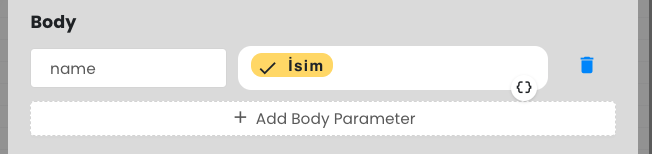
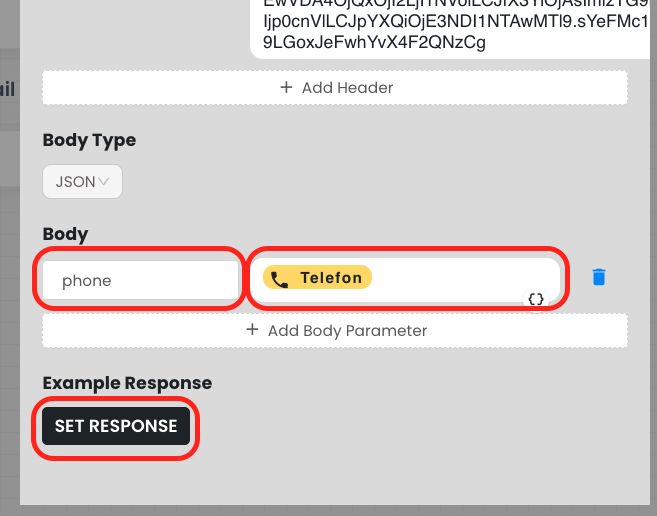
4.) Body
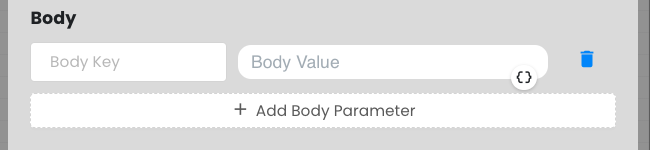
This field is not required for GET and DELETE methods. If you are using POST, PUT or PATCH methods, you need to define a key and value in the data (Body) to use this feature.
In the Key field, you should write the data key expected by the API (for example "name", "email").
In the Value field, you should enter a dynamic variable or a constant value corresponding to this key.
If you want to send data received from the user to the API, you can send dynamic data by adding the variable you defined in the chatbot (for example {{name}}) to the Body Value section.
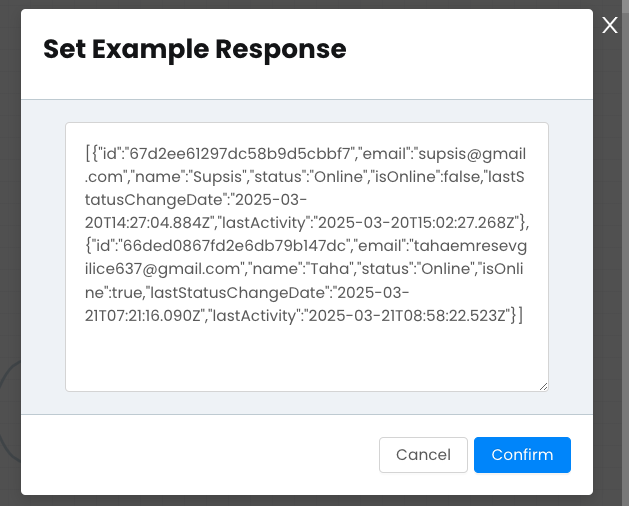
5.) Set Response
Set Response is the field where you need to share an example part of the data that will return from the API.
This field allows you to add an example data set in advance so that you can use the data structure returned by the API correctly. This way, you can determine which fields will be used in the chatbot and retrieve variables correctly.
If the API returns a response like this:
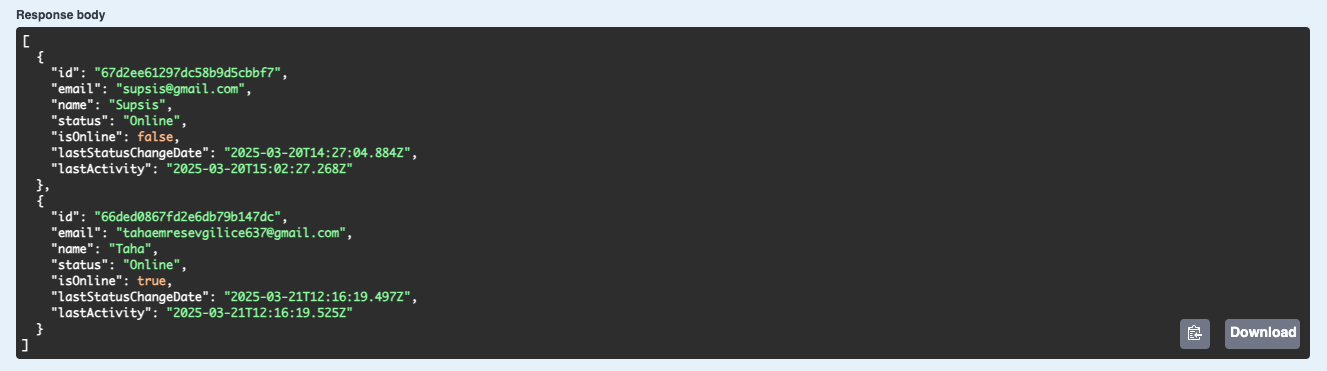
📌 By adding this to the Set Response field, you can dynamically use values like "name" or "email" in the chatbot.
After filling this field, you can use the data coming from the API with expressions like {{response.name}} in the chatbot. 🚀
 To add the Response Body to the Set Response field, you can copy the JSON data returned by the API and paste it here.
Example Usage
GET Method
The GET Method allows you to retrieve data from your API and use this data through the panel.
First, create an empty chatbot and add the "API Request" block to the chatbot flow using the drag-and-drop method. This block allows you to retrieve data from an external API and create dynamic responses within the chatbot. 🚀

You should fill these fields according to your API requirements.
1️⃣ API URL: Enter your API's endpoint here.
2️⃣ Method: Select GET. (GET method is used to retrieve data from the API.)
3️⃣ Headers: If the API requires authorization, fill as follows:
-
Key:
Authorization -
Value:
Bearer API_TOKEN(Add your token here.)
Body: Body section is generally not used for GET method, you can leave this field empty.
4️⃣ Set Response: To see the data returned from the API and be able to use it in the chatbot, paste an example API response here.
After completing these steps, you can verify that your API request works correctly by testing it. 🚀
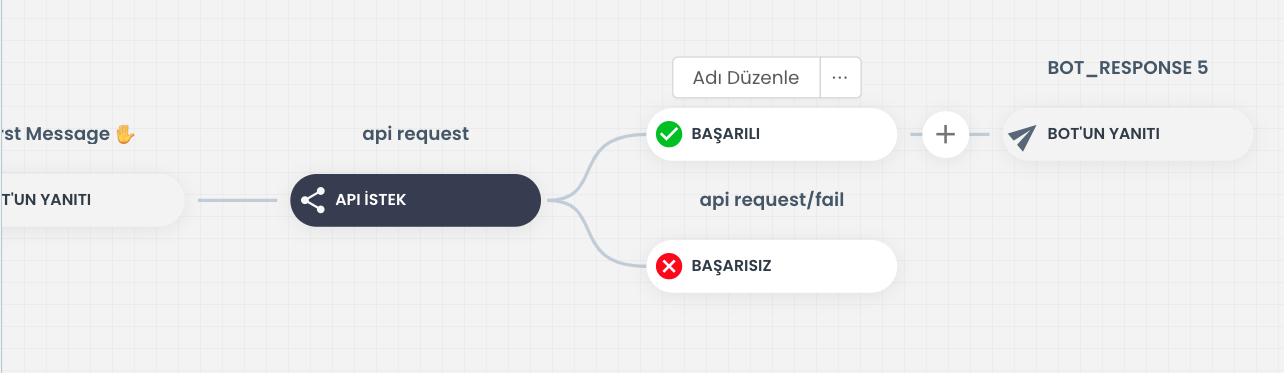
If the API request was successful, you can add the "Bot Response" block to make the chatbot send the data it received from the API as a response to the user.
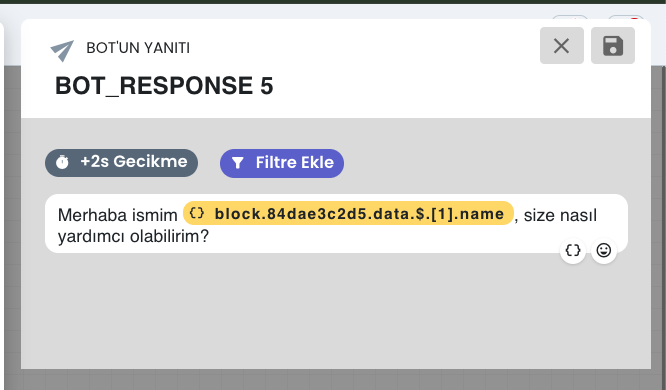
If you want to get the name information from your API and show it as "Hello I am [name]", you can use [1] (where 1 is an example index number) between the "$" sign and "name" points to access the data.
This way, you can show the name of a specific record coming from the API.
Important Note: Index numbers start from 0, so you need to use [0] for the first user, [1] for the second user.
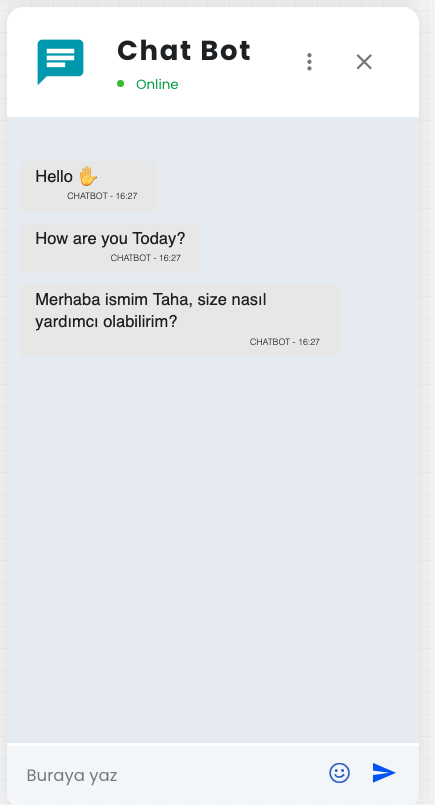
And as a result, you can send automatic messages through the chatbot with the data it received from the API. Using this structure, you can develop many applications specific to different scenarios and needs.
You can contact our team for more information and support.
POST Method
The POST Method allows you to add new data to your API.
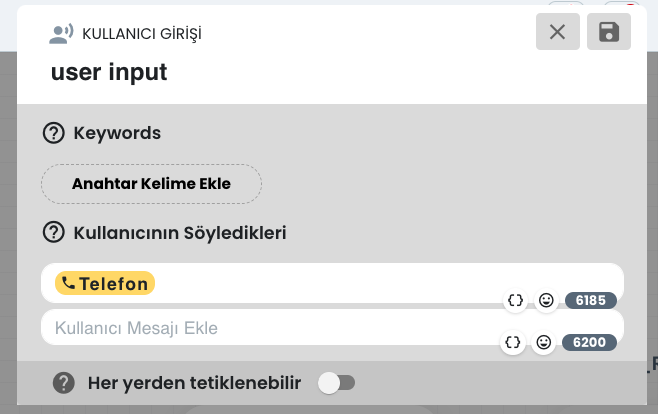
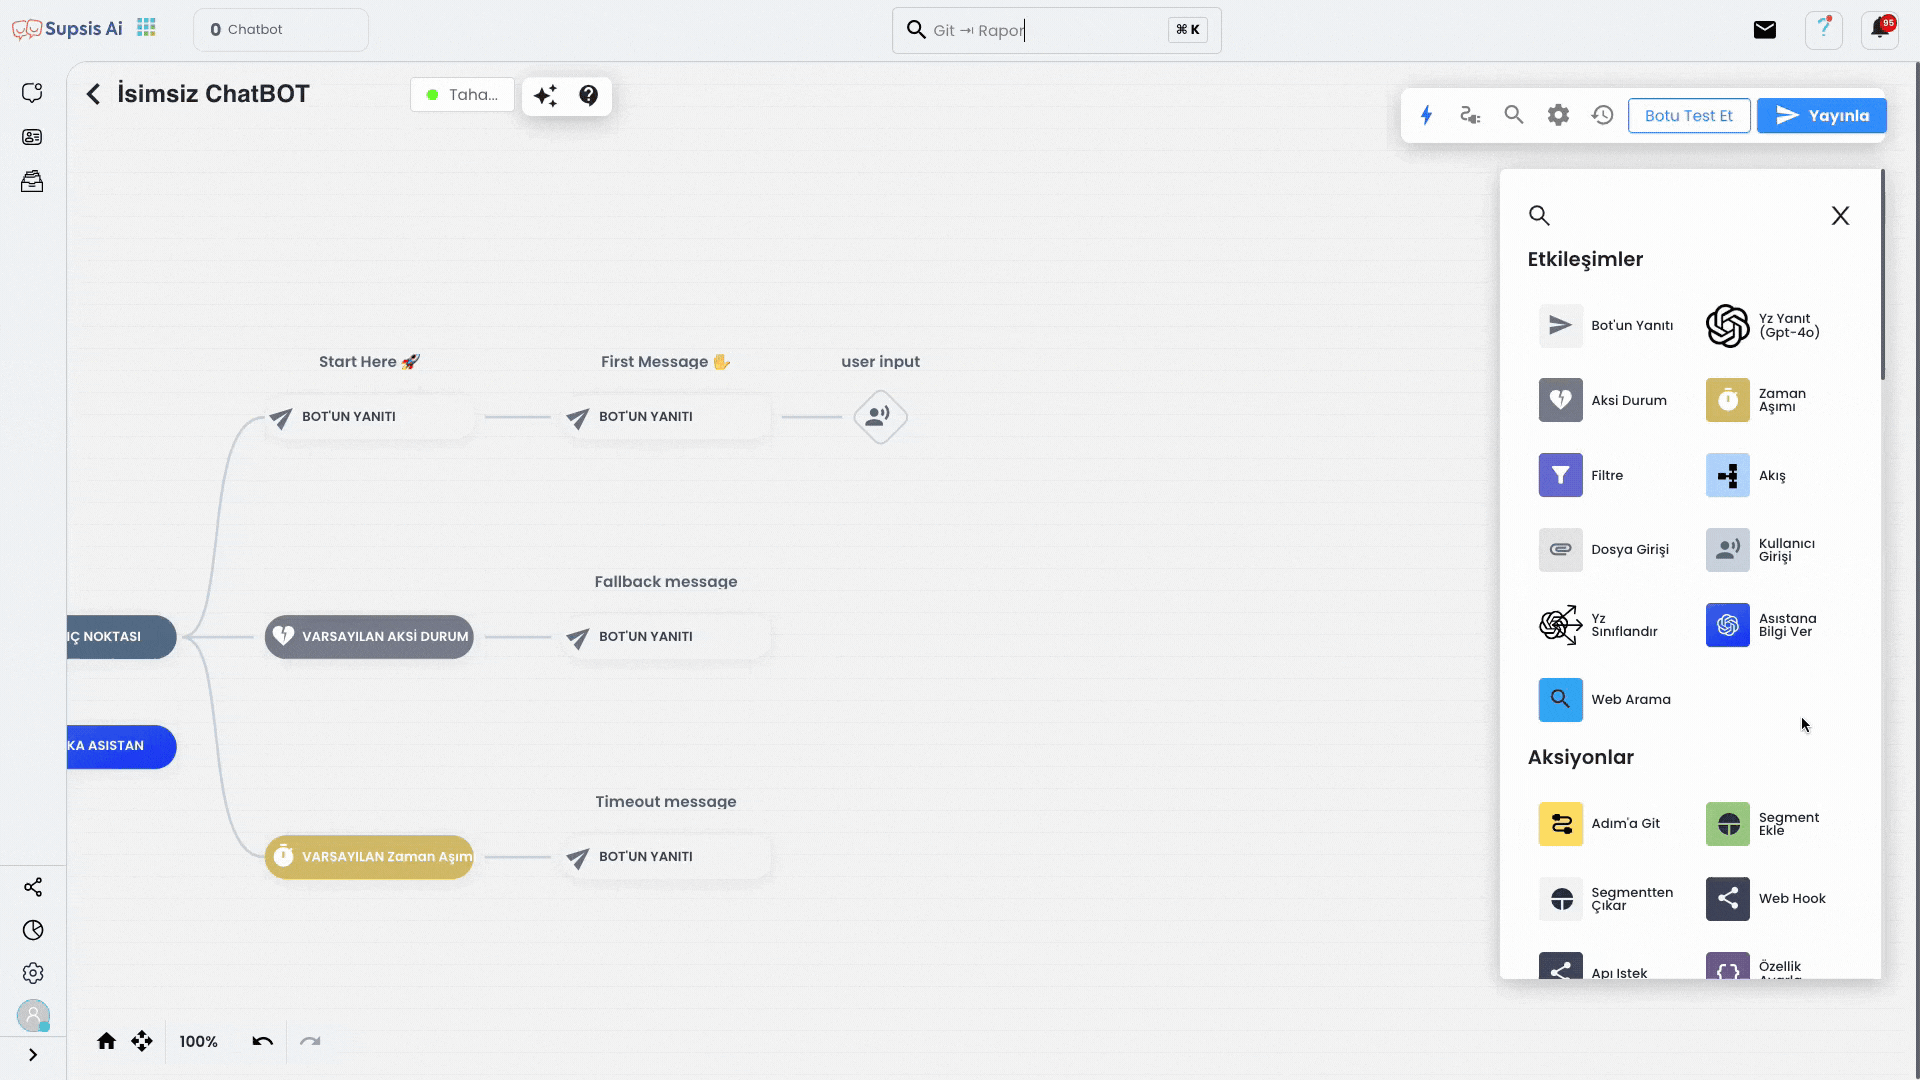
First, create an empty chatbot and add the "User Input" block to the flow using the drag-and-drop method from the left. This block allows you to receive data from the user and then send this data to the API.
Click the "{ }" icon in the User Input block you added to open the variable definition field. In this field, enter a parameter name such as phone and then click the save button to complete the process. This way, the phone number entered by the user will be stored as a variable in the system.
Similarly, add the "API Request" block to the flow using the drag-and-drop method. This block allows you to send the data received from the user to your API and save it. In the chatbot flow, the data received from the user is first saved, then sent to the server with an API request.
Click on the "API Request" block and fill in the necessary fields appropriately according to your API structure from the opened section.
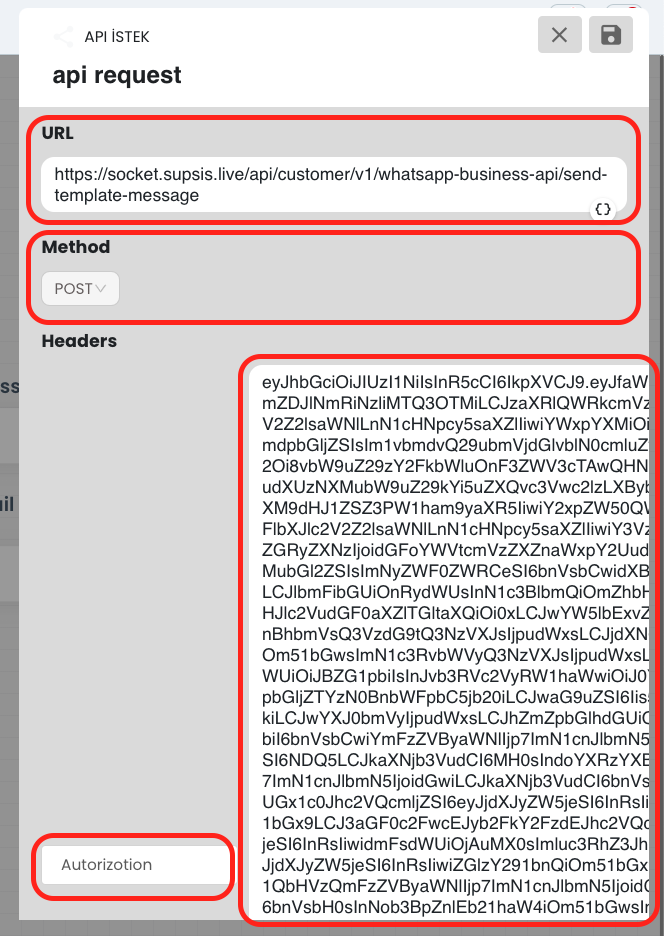
- URL: Write your API's data addition (POST) endpoint.
- Method: Select as POST.
- Header: Add token with
Authorizationheader if necessary. - Body Key/Value: Add the data you received from the user (for example
phone) in appropriate key-value format:- Key:
phone - Value:
{{phone}}
- Key:
After filling all the information completely, the data received from the user will be successfully transmitted to the API with this block.
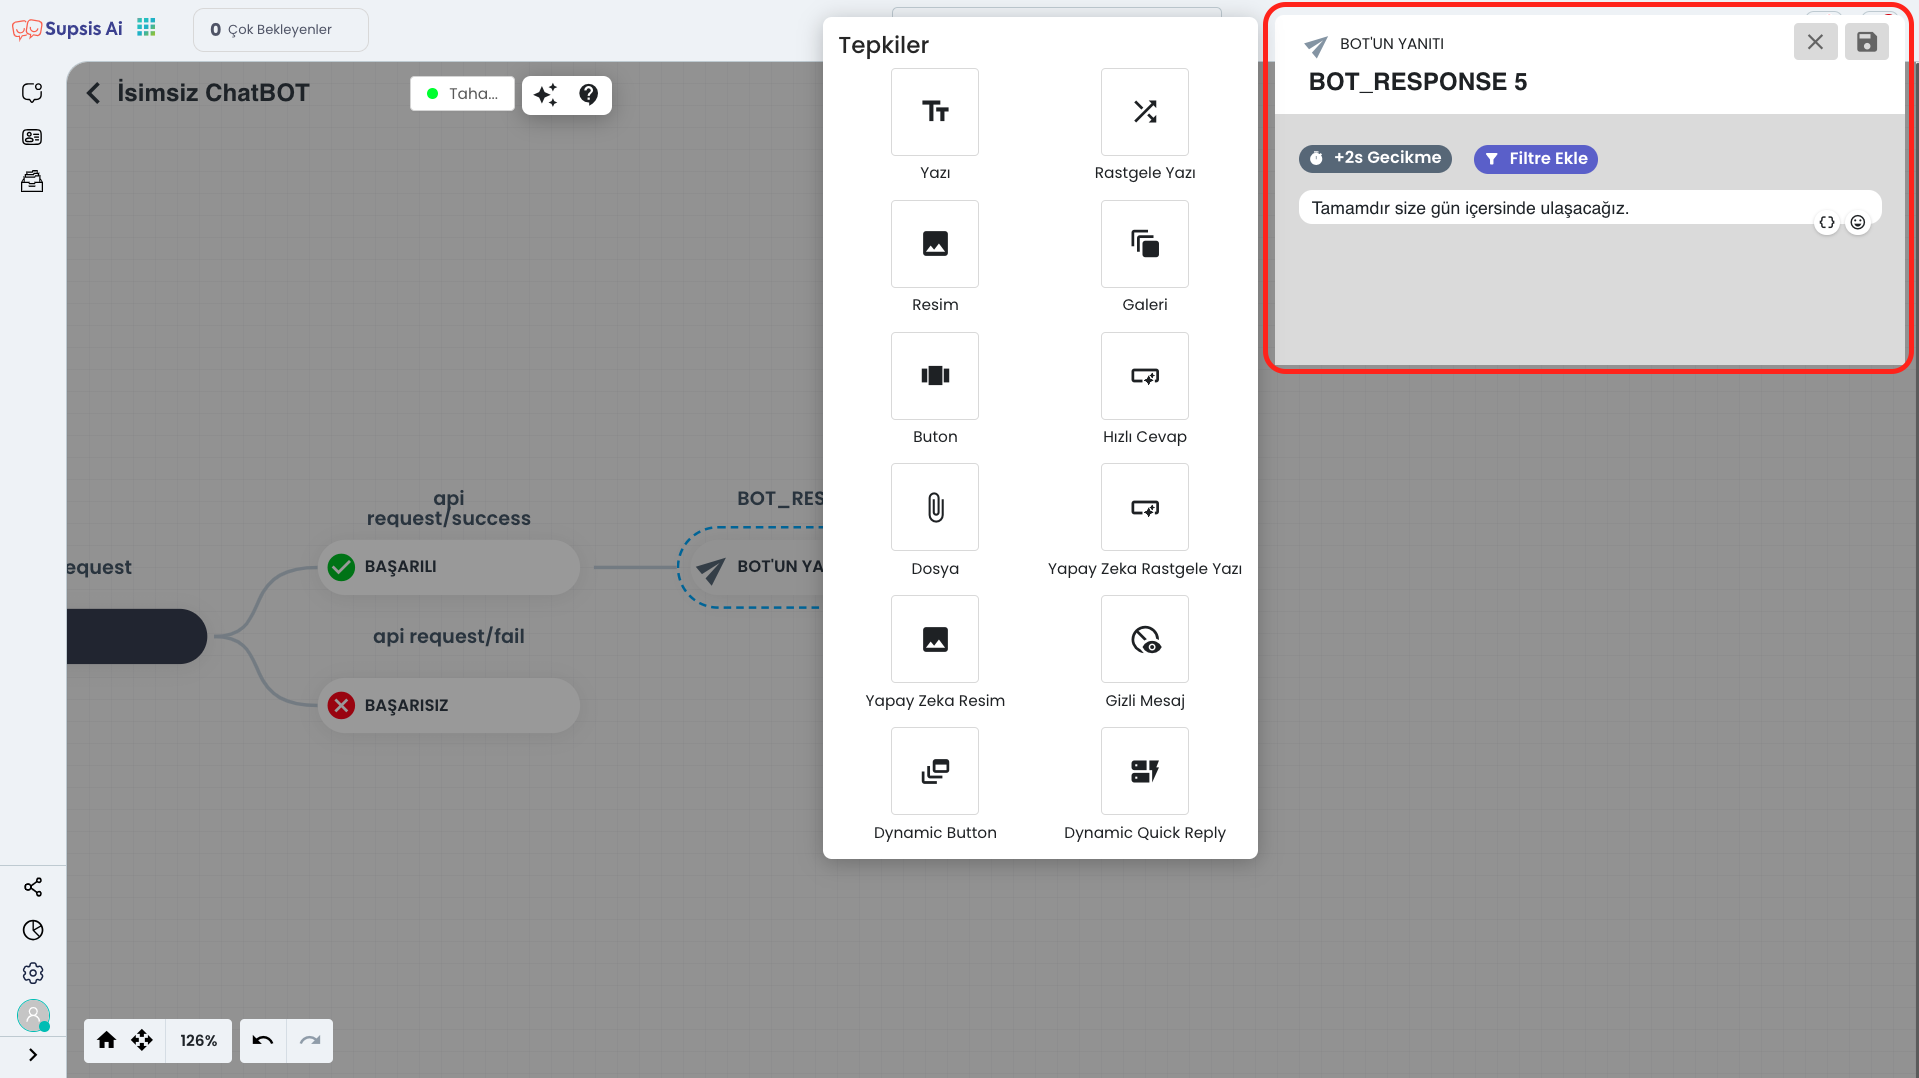
Finally, add the "Bot Response" block to your flow using the drag-and-drop method. In this block, you can write the message you want to show to the user after the data sending process to the API is completed.
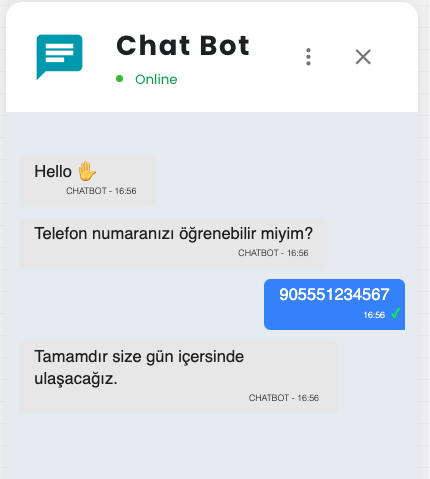
And as a result, the data received from the user information is successfully saved to the API. Through this process, the data received from the user is sent to the API endpoint you specified and saved to your database. This way, you can store and manage your customer data in the system in an organized manner.