Chat Forwarding
Chat Forwarding allows you to make customer support more efficient by forwarding the current chat to a different agent or department. This feature is quite useful, especially when customer requests need to be directed to a specific expertise area or department. For example, when a customer expresses a technical support issue, you can forward the chat directly to the technical support department, or you can transfer a user dealing with a sales agent to the sales department.
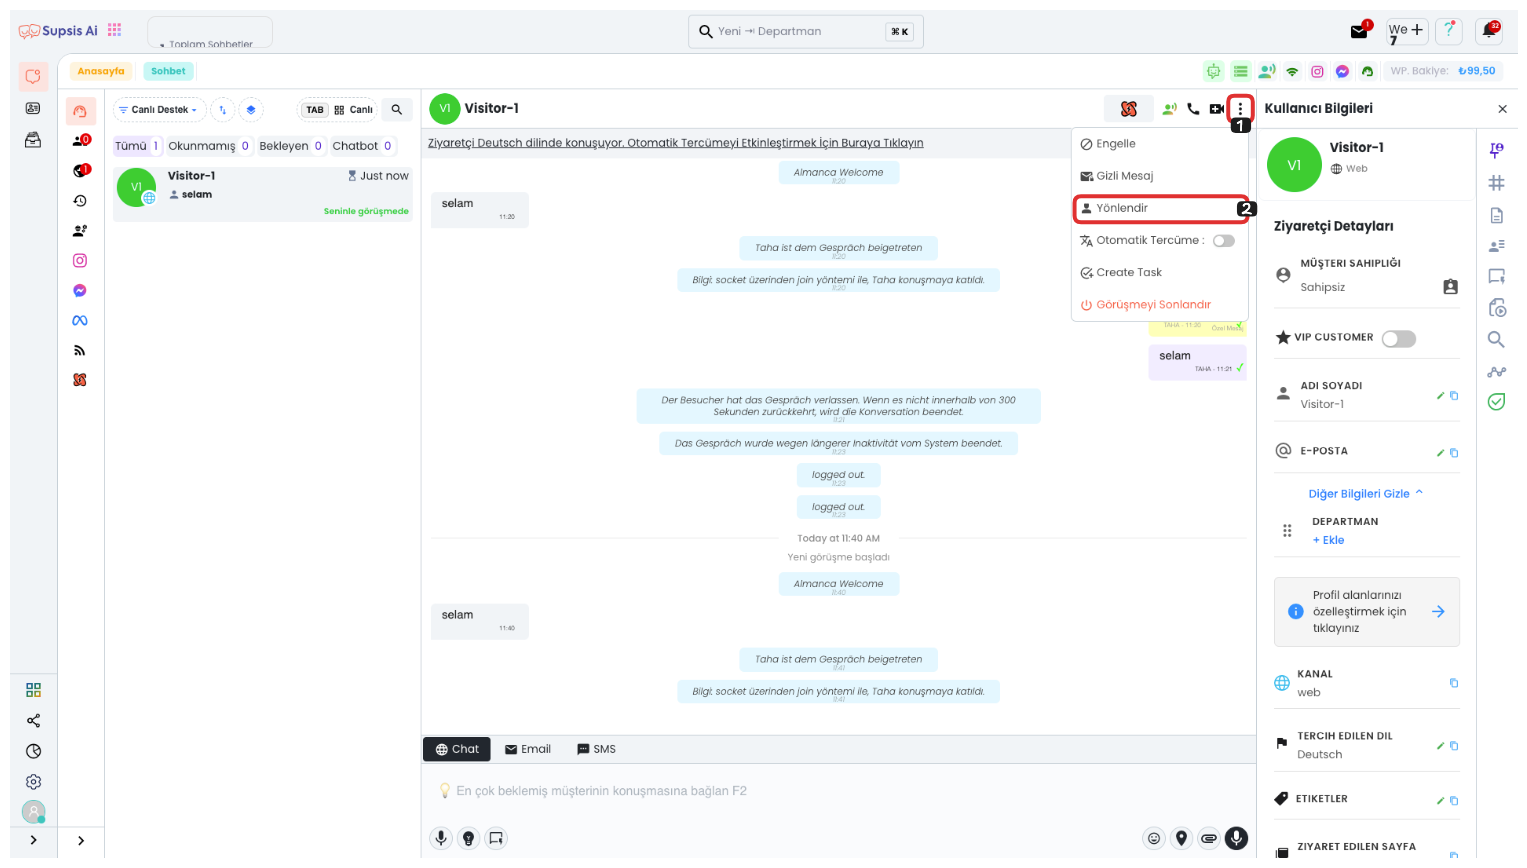
First, click on the three dots icon in the top right corner to open the options menu and select the "Forward" option from the opened menu.
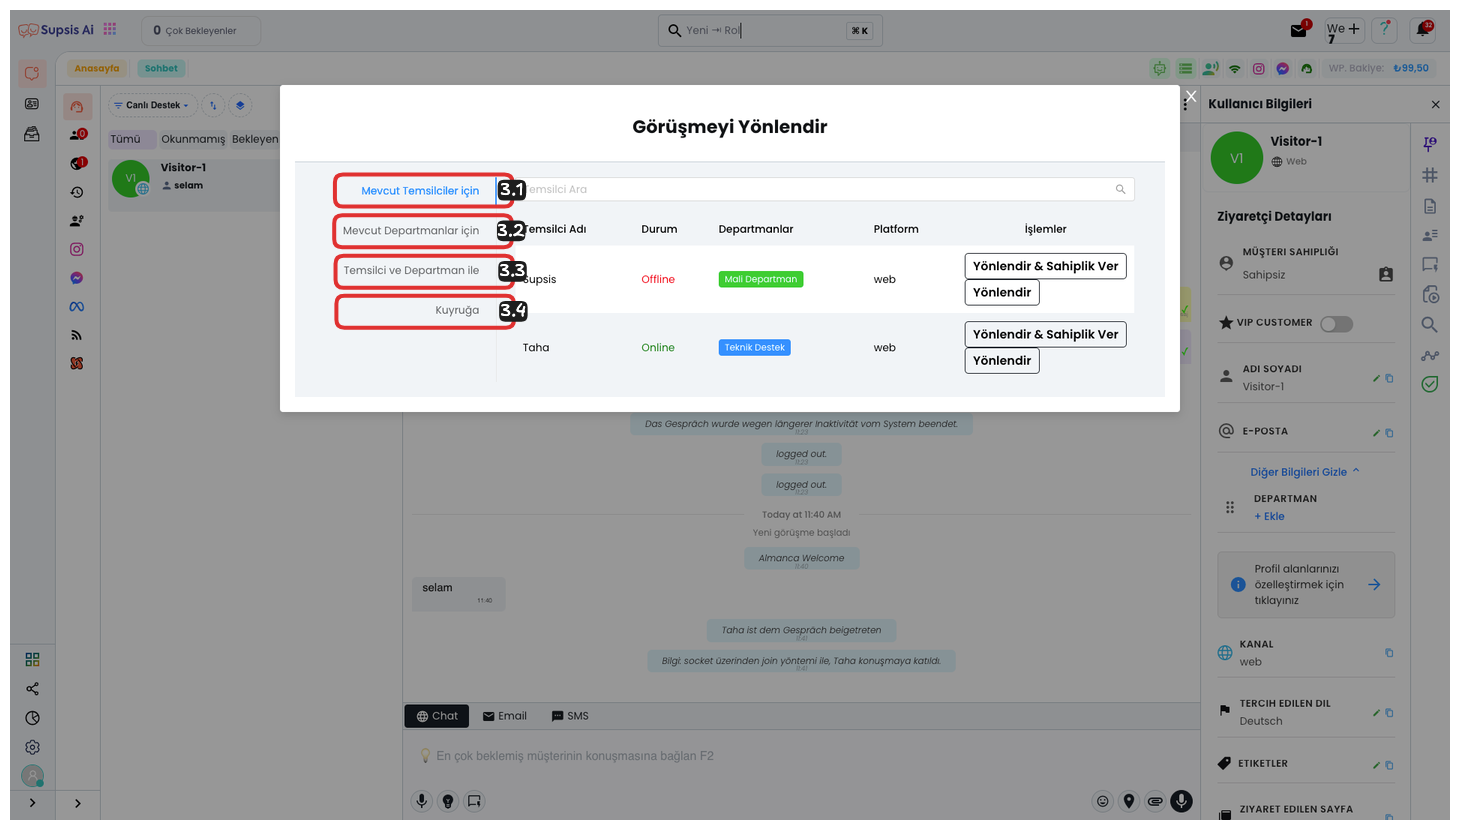
Forward Conversation:
- For Current Agents
- For Current Departments
- With Agent and Department
- To Queue
1-) For Current Agents
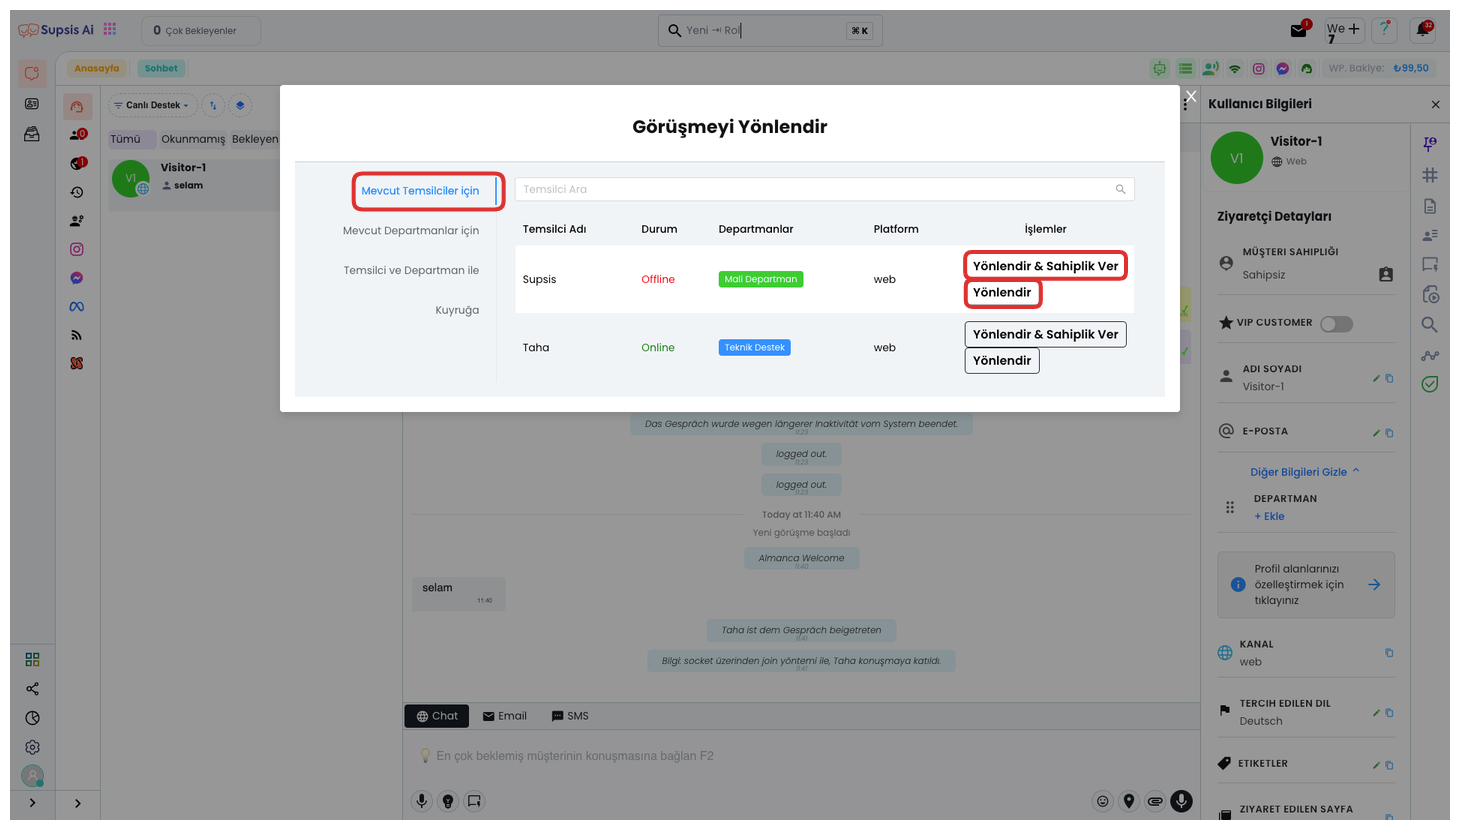
You can forward to current agents from this tab. Click the "Forward & Give Ownership" button from the operations section on the right to give ownership of the conversation to that agent while forwarding. Or you can complete only the forwarding process by clicking the "Forward" button below it. This way, you can create a more efficient support process by ensuring the chat is forwarded to the right agent.
2-) For Current Departments

You can forward to current departments from this tab. If all your departments are not visible in this area, you can edit your channel's privacy settings by clicking the "Go to Channel Settings" button from the field at the top. You can forward to the relevant department by clicking the "Forward to Department" button on the right side of the selected department. This way, you can ensure that customer requests are processed by the right people by quickly forwarding to the right department.
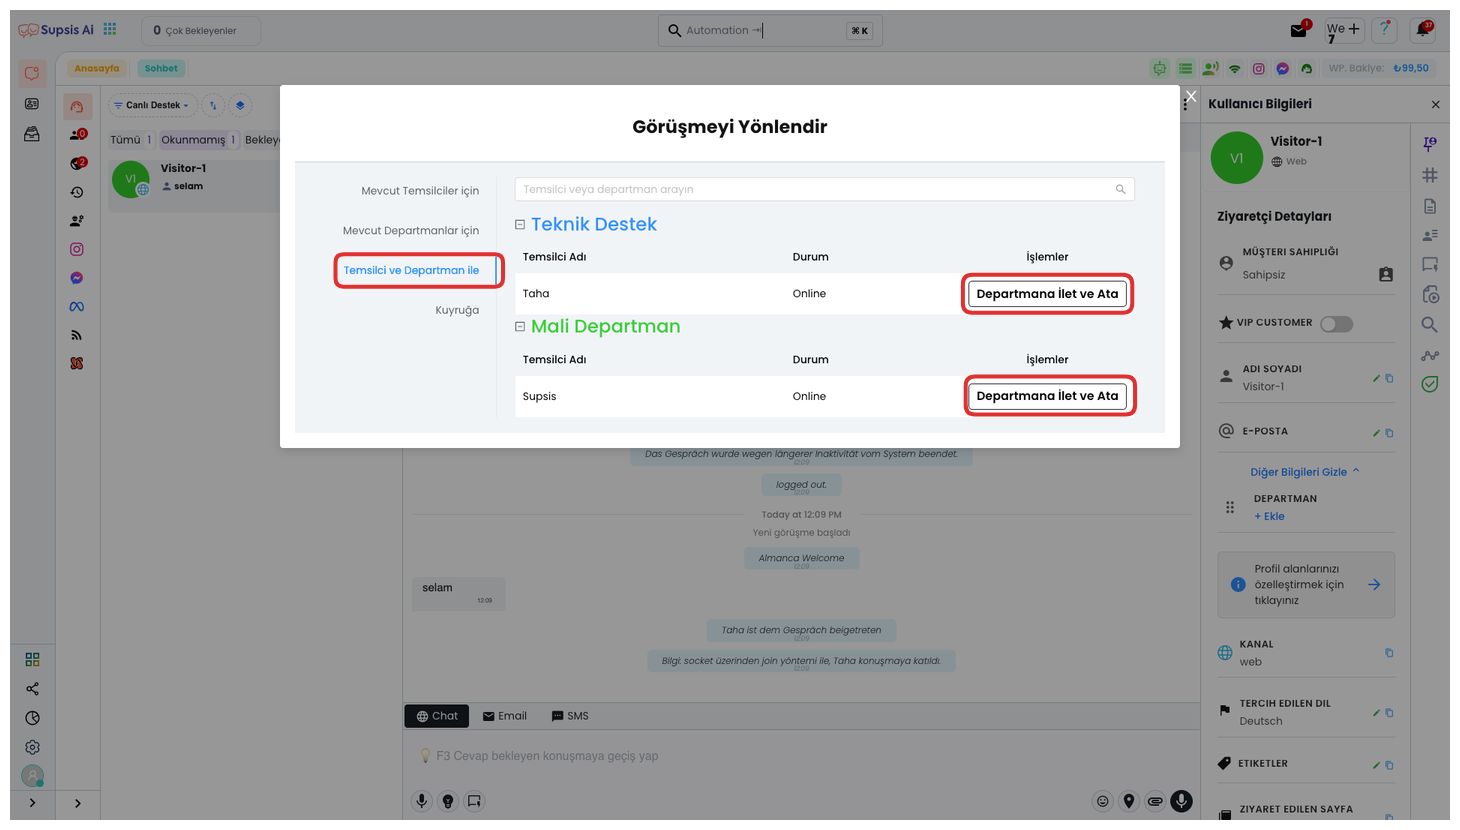
3-) With Agent and Department
From this tab, you can select any agent in the department you have determined and forward to that agent. For this, you can perform the operation by clicking the "Forward to Department and Assign" button from the button on the right side of the selected agent. This way, you can ensure that the chat is resolved in the fastest way by forwarding to the right agent.
4-) To Queue
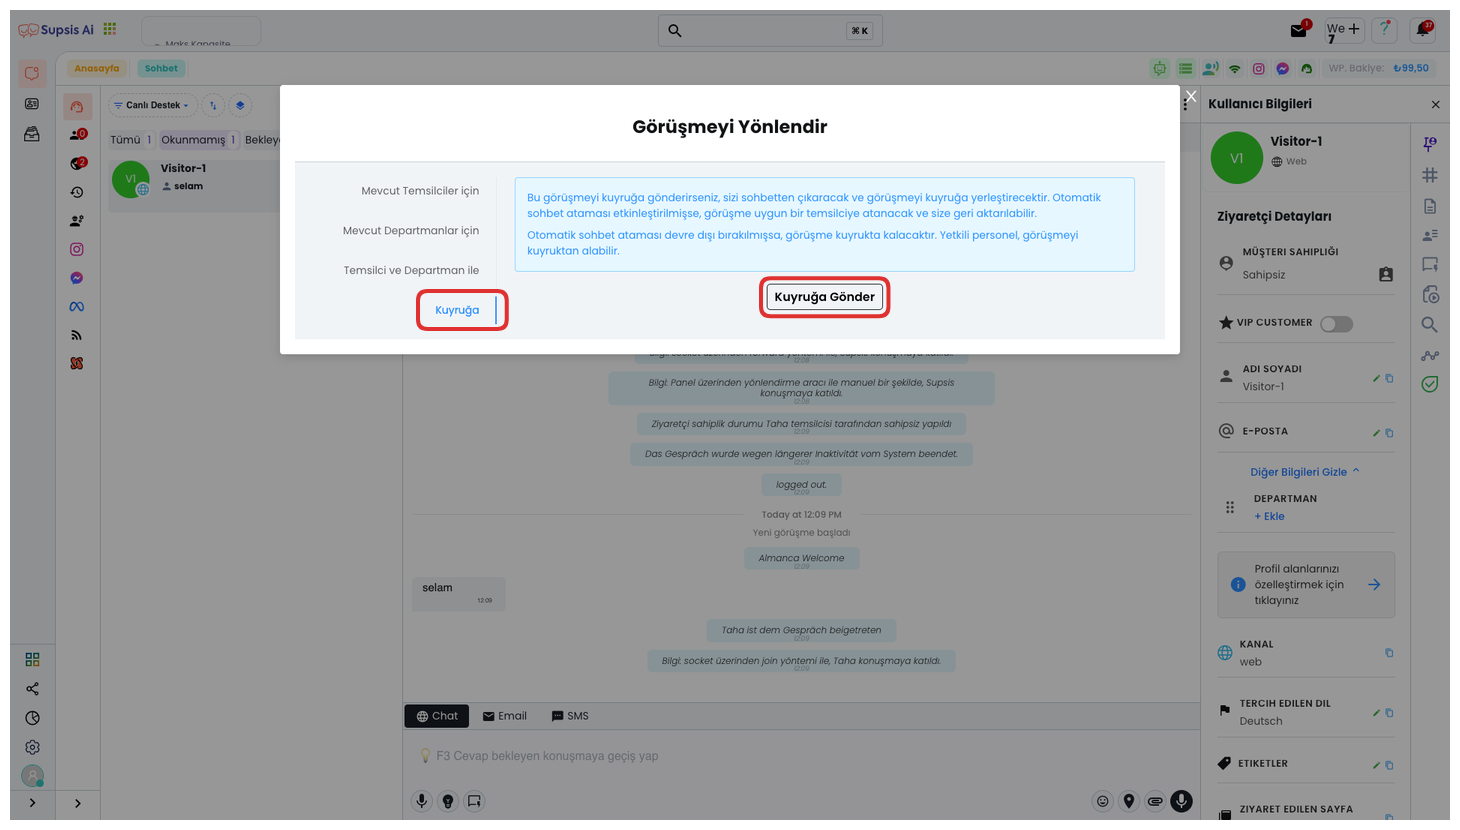
You can send to queue from this tab. This operation will remove you from the chat and add the chat to the queue, then provide automatic assignment to a suitable agent. For this, you can perform the operation by clicking the "Send to Queue" button. This feature makes customer support faster and more efficient by automating agent assignment according to chat density.
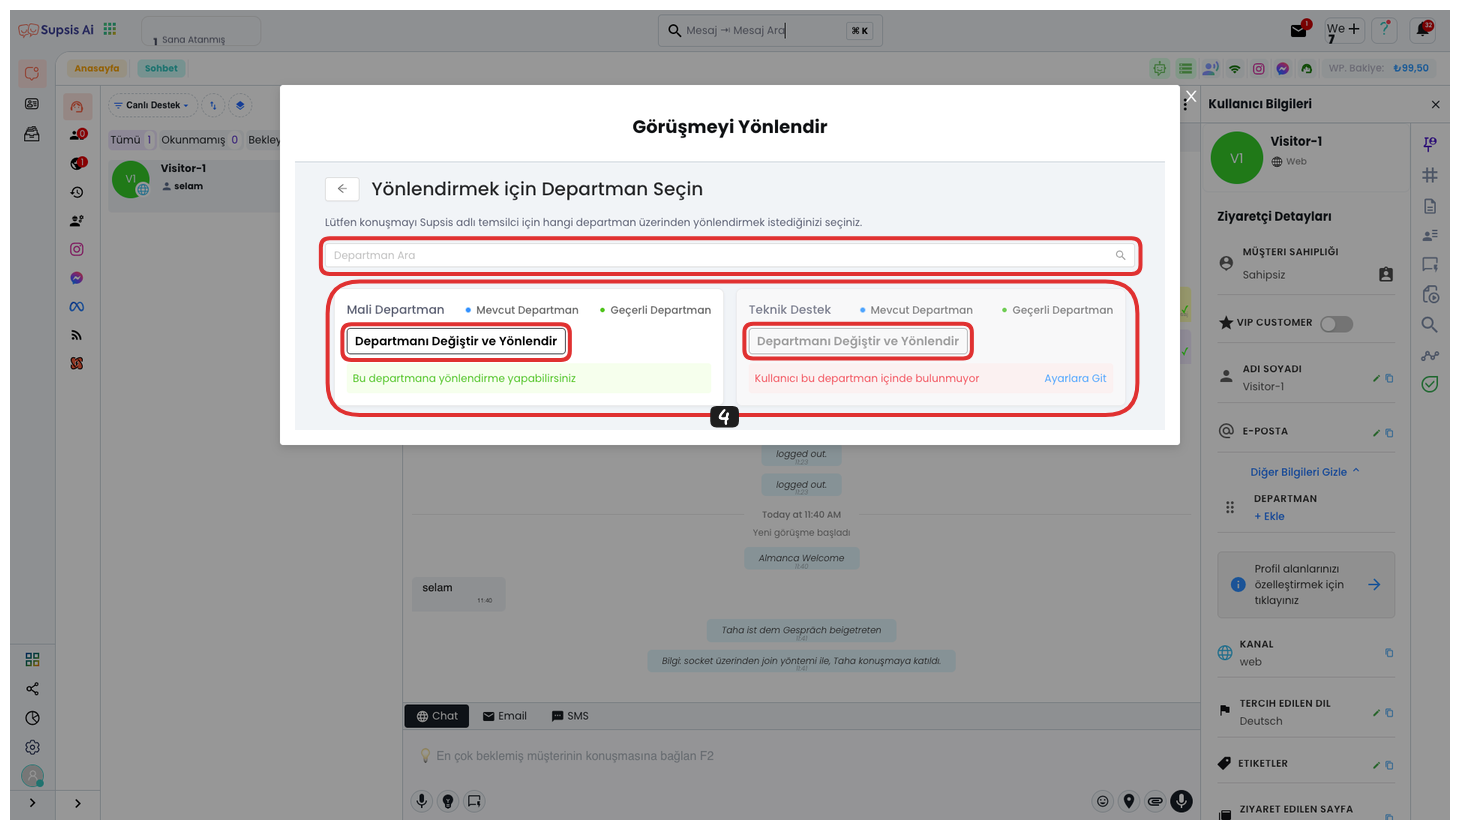
After clicking one of the forwarding buttons, you can select the department you want from the opened section, and you can perform the forwarding operation by selecting an agent from that department by clicking the "Change Department and Forward" button of the selected department. Also, if you have too many departments, you can easily find the department you are looking for by searching from the "Search Department" section at the top. This feature makes the forwarding process fast and efficient even in a large organization.
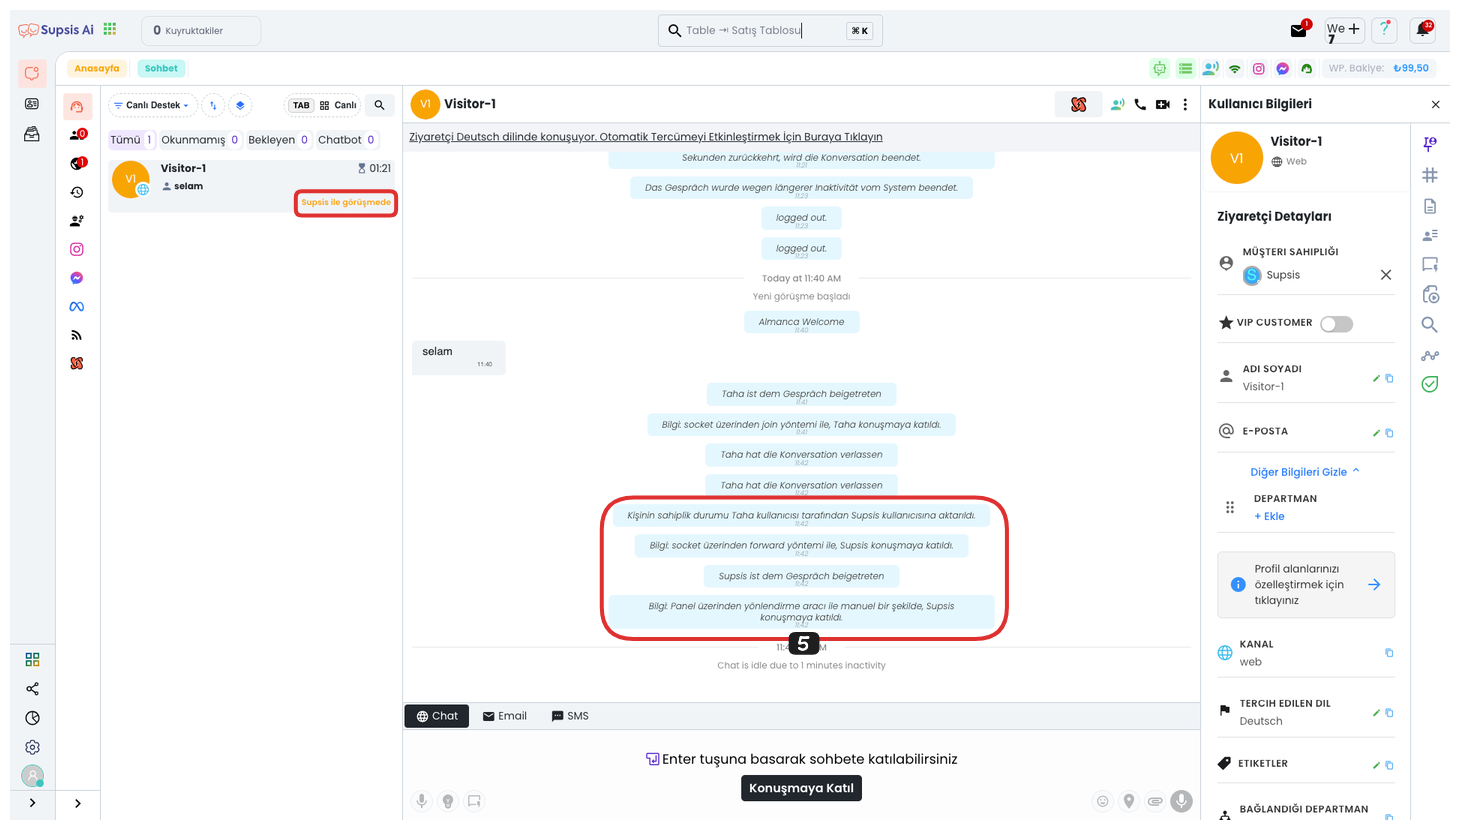
You can successfully complete your forwarding operation by following these steps.