Simulation (Test) Page
Customer Test Page is a simulation area that allows you to experience the entire system from the customer's perspective before integrating the Supsis chat balloon into your website. This way, you can test the experience your users will encounter and better understand customer interactions. The test page gives you an idea about how the chat balloon you integrate will look, how it will work, and how users will interact with the system.
1-) Go to Customer Page
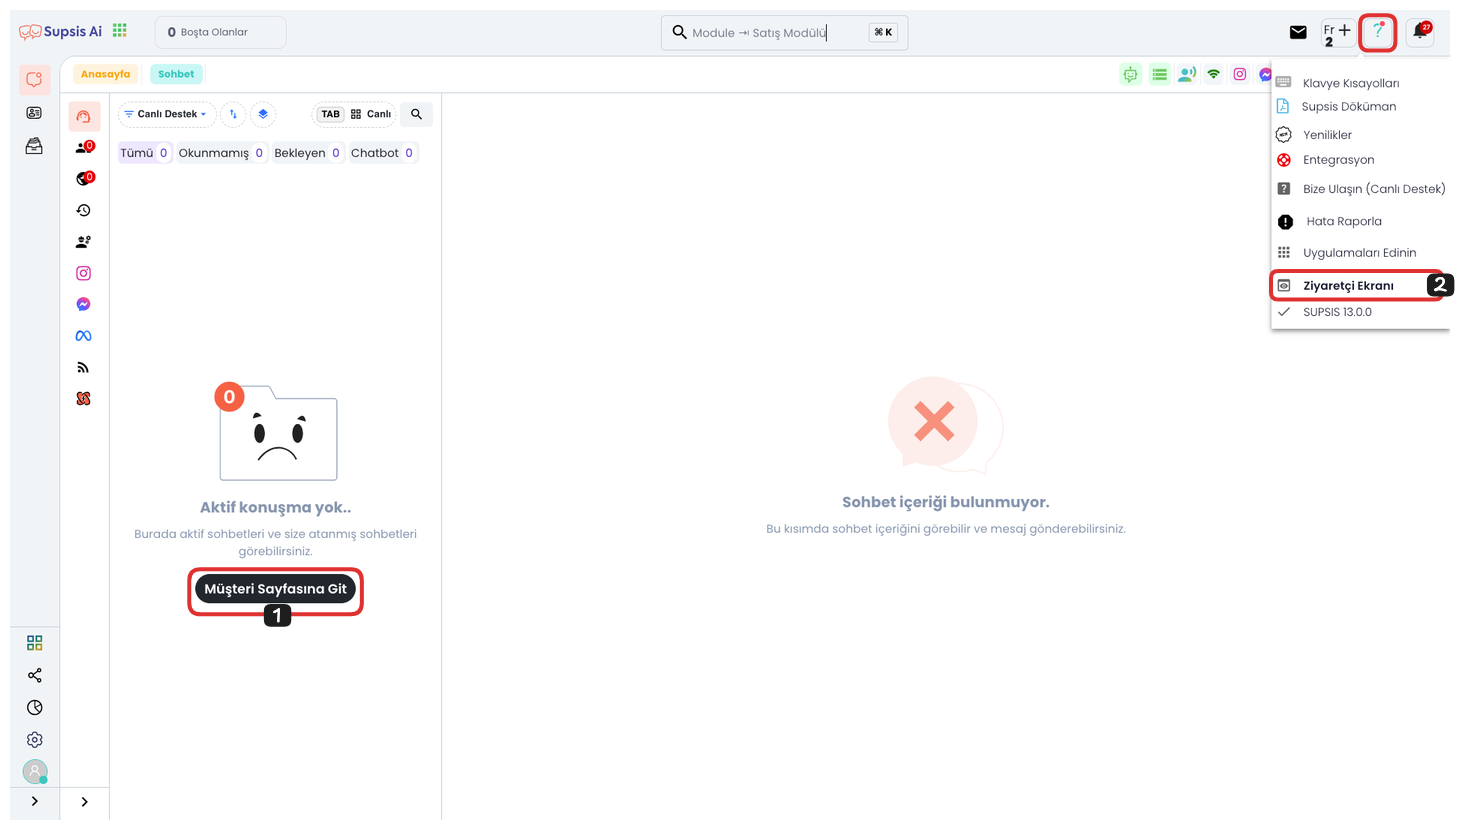
If you don't currently have an active chat session, don't worry. By clicking the Go to Customer Page button, you can easily access the Customer Test Page. This page is designed to provide you with the support you need and ensure that all your operations are completed smoothly.
2-) Visitor Screen
Another way to access the Customer Test Page is to click on the "Question Mark" icon in the top right corner and select the "Visitor Screen" option from the opened menu to go to the customer test page.
Customer Test Page
1-) Website Integration
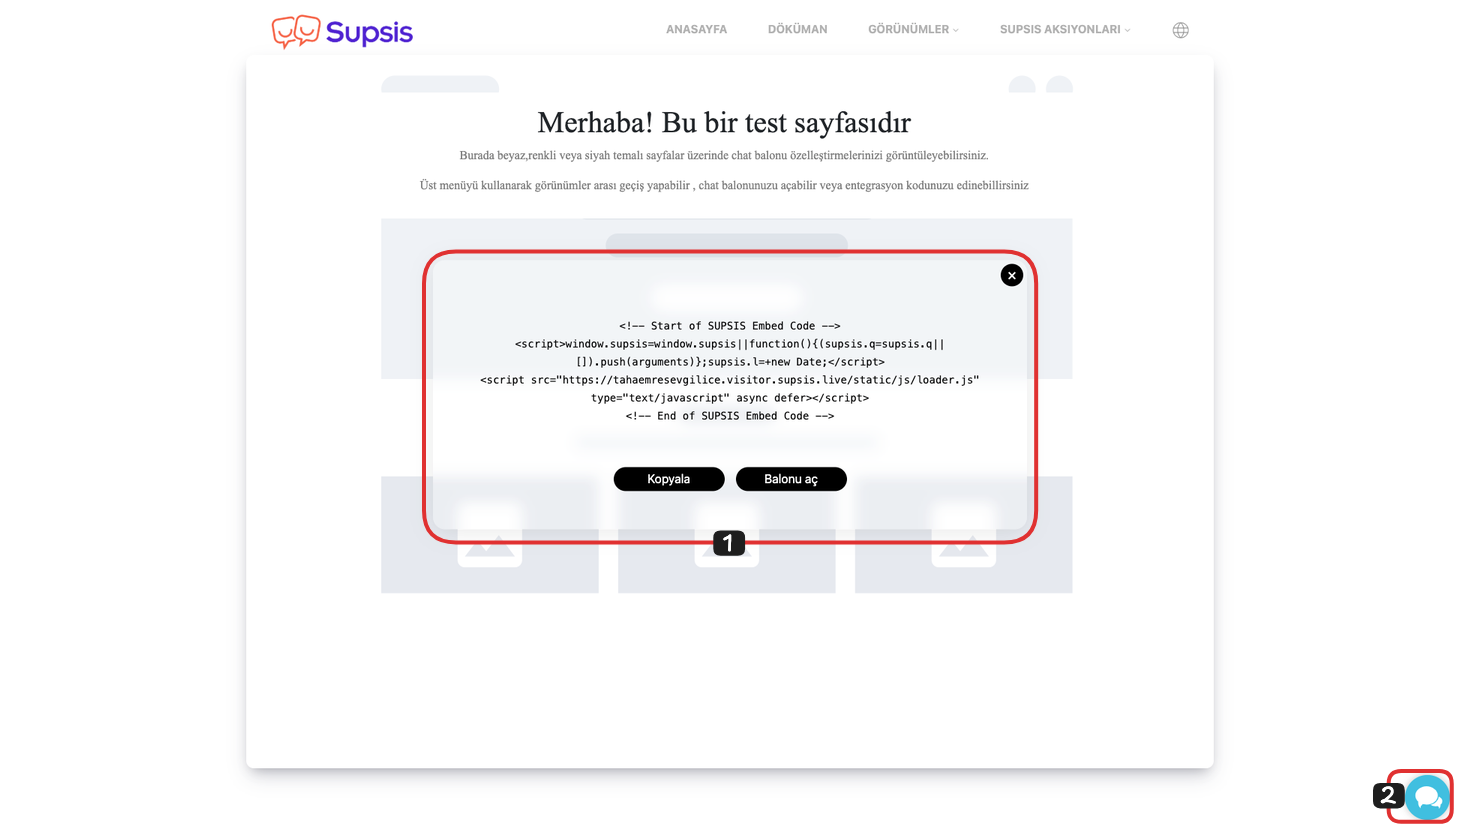
On the opened page, you can copy your integration code by clicking the "Copy" button above the modal. After copying this code, you can add it to your website and install the Chat Balloon on your website just like here.
2-) Chat Balloon
You can open the chat balloon by clicking the "Open Balloon" button from the modal or by clicking the balloon in the bottom right.
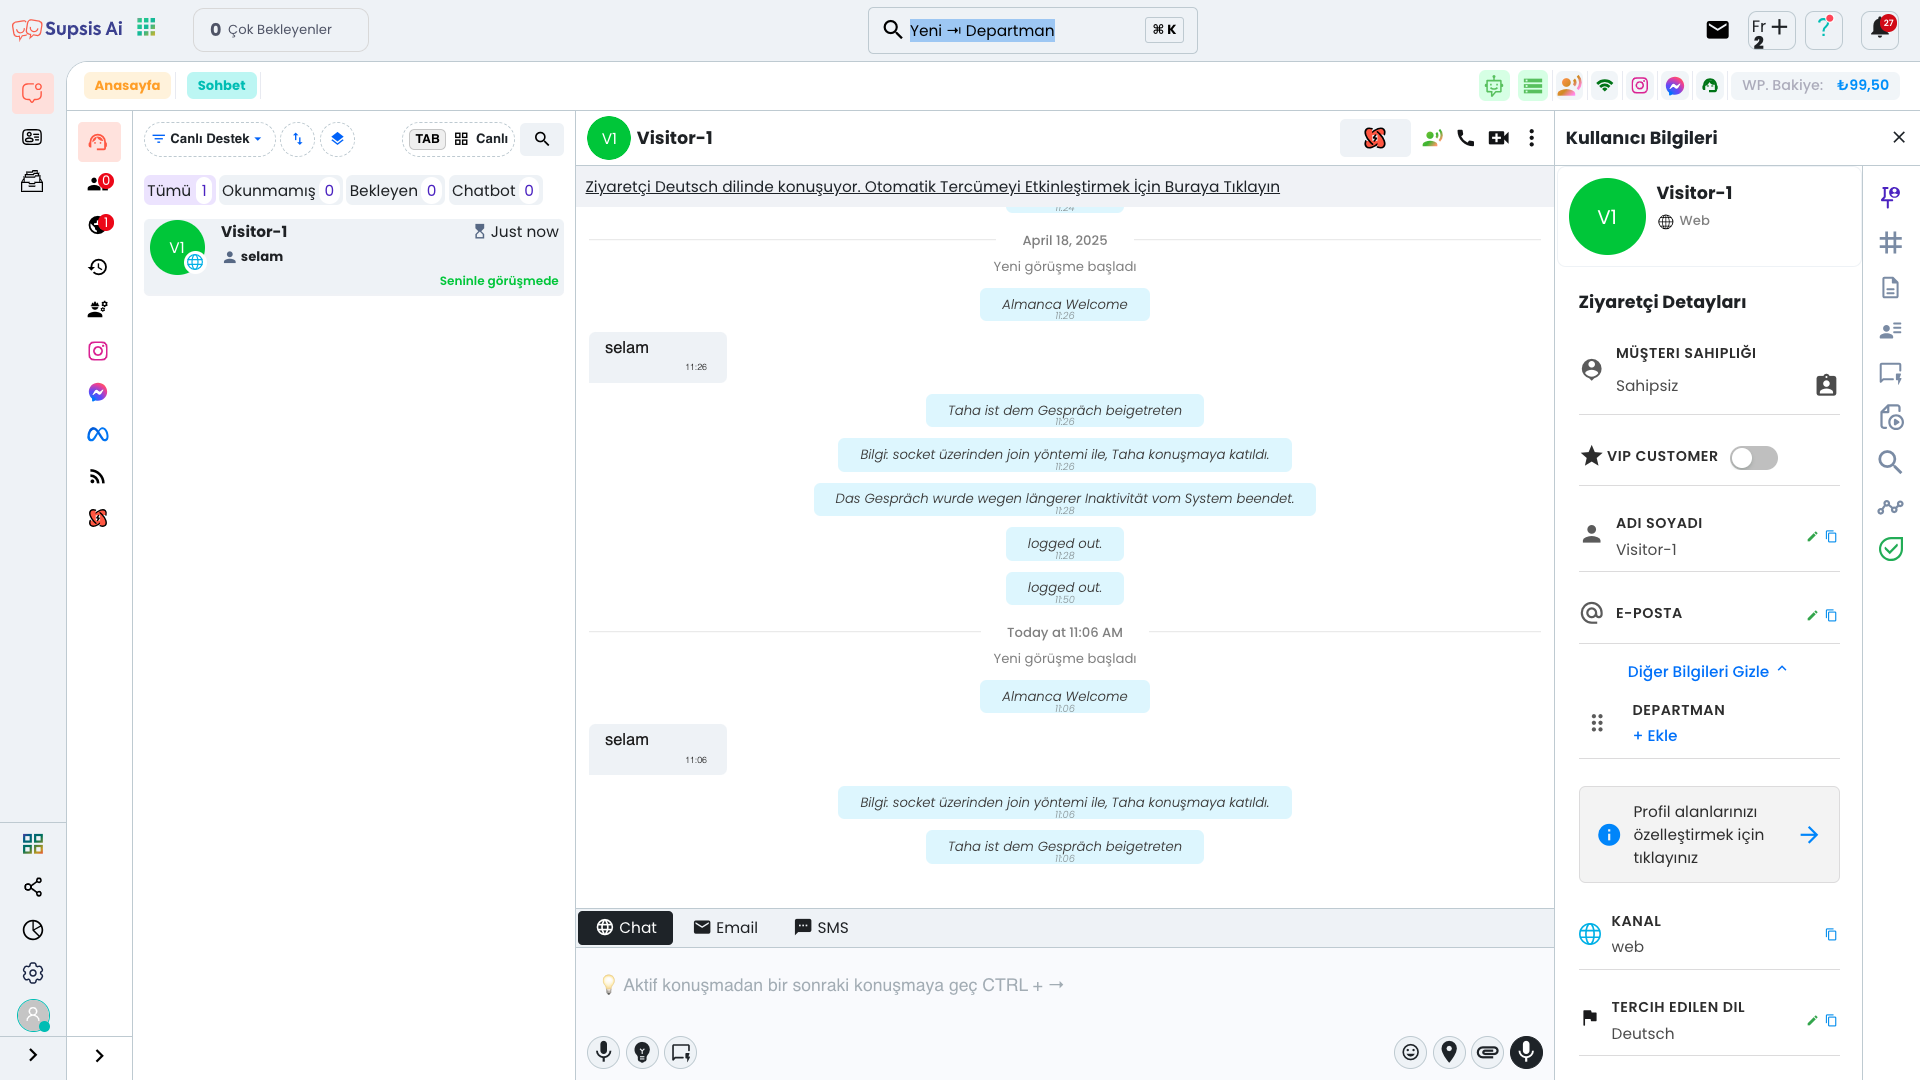
The message you send will come to the chat page like this:
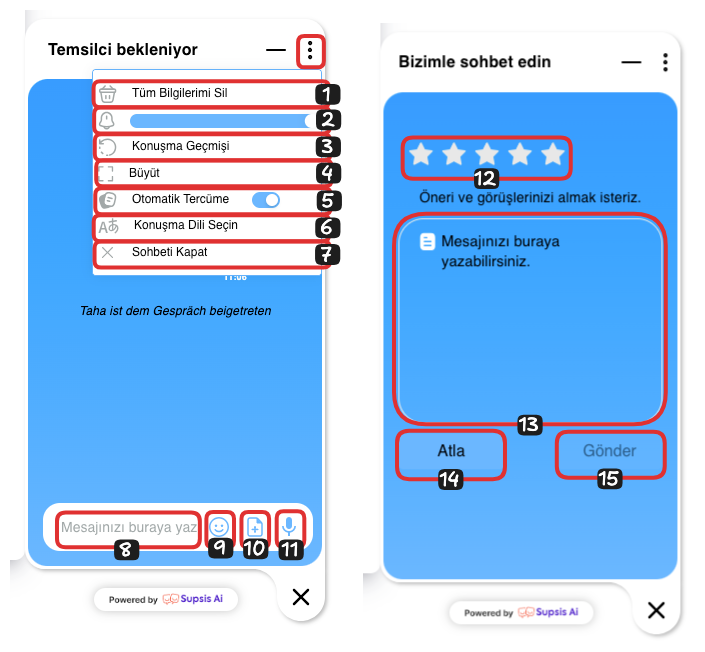
Chat Balloon Elements:
- Delete All My Information
- Notifications
- Conversation History
- Enlarge
- Automatic Translation
- Select Conversation Language
- Close Chat
- Message
- Emoji
- Attach File
- Voice
- Rating
- Write Message
- Skip
- Send
1-) Delete All My Information: If the user wants all their information to be deleted, they can completely delete the information by clicking this button.
2-) Notifications: If the user wants to receive a sound notification when a response is given, they can activate this option.
3-) Conversation History: If the user wants to view previous chats, they can view previous chats by clicking this button.
4-) Enlarge: If the user wants to make the chat full screen, they can switch to full screen view by clicking this button.
5-) Automatic Translation: If the user wants the chat to be automatically translated, they can activate this option.
6-) Select Conversation Language: The user can determine the conversation language by clicking this button here.
7-) Close Chat: If the user wants to end the conversation, they can end the conversation by clicking this button and then clicking the "Yes" button.
8-) Message: The user can send a message by writing the message they will send in this field.
9-) Emoji: If the user wants to use emoji in the message they will send, they can select and use any emoji they want from this field.
10-) Attach File: If the user wants to send you a file such as an image or document, they can send it from this field.
11-) Voice: If the user wants to send you a voice message, they can send it from this field.
12-) Rating: After the chat is closed, the user can give a star rating out of 5 to your agent from here; this way, you can measure the efficiency of your agents from here.
13-) Write Message: In this field, the user can express their comments about the conversation.
14-) Skip: If the user does not want to fill out this survey, they can skip this part by clicking this button.
15-) Send: The user can complete the process by clicking the send button and informing you about their opinions about the conversation.