Calendar Module - Appointment Creation Steps
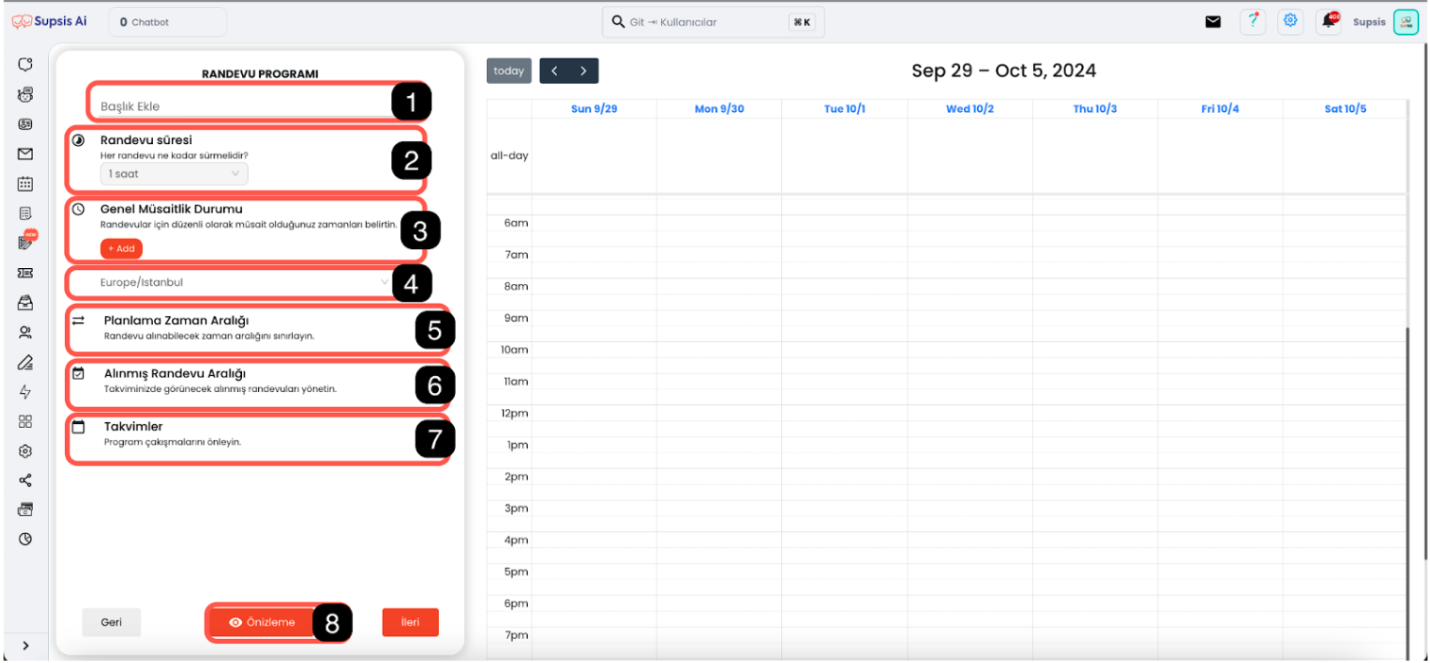
- Appointment Title
- Appointment Duration Setting
- General Availability Status
- Regional Time Zone
- Planning Time Interval
- Taken Appointment Interval
- Calendars
- Preview
1-) Appointment Title
- This is the field where you determine the name of your appointments.
2-) Appointment Duration Setting
- This is the field where you determine and customize the duration of appointments.
3-) General Availability Status
- This is the section where you can set the availability of agents and departments. By clicking the "Add Availability" button, you can specify which hours of the day the agent is available.
4-) Regional Time Zone
- Used to set the time zone where appointments will be planned. From this field, you can select the time zone suitable for your region to ensure events are planned at the correct time.
5-) Planning Time Interval
Set the maximum and minimum time intervals for which appointments can be planned. Example: Reservations can be accepted at most 30 days in advance and at least 1 hour in advance for appointments.
6-) Taken Appointment Interval
This is the section where you can set the gaps that need to be added between two appointments and the daily maximum number of appointments. Example: There should be a minimum 10-minute gap between two meetings.
7-) Calendars
This is the field where the calendars to which the appointment program will be associated are selected. You can set which users or departments will see this appointment through calendars.
8-) Preview
You can view all the settings made and added appointments with the "Preview" button.
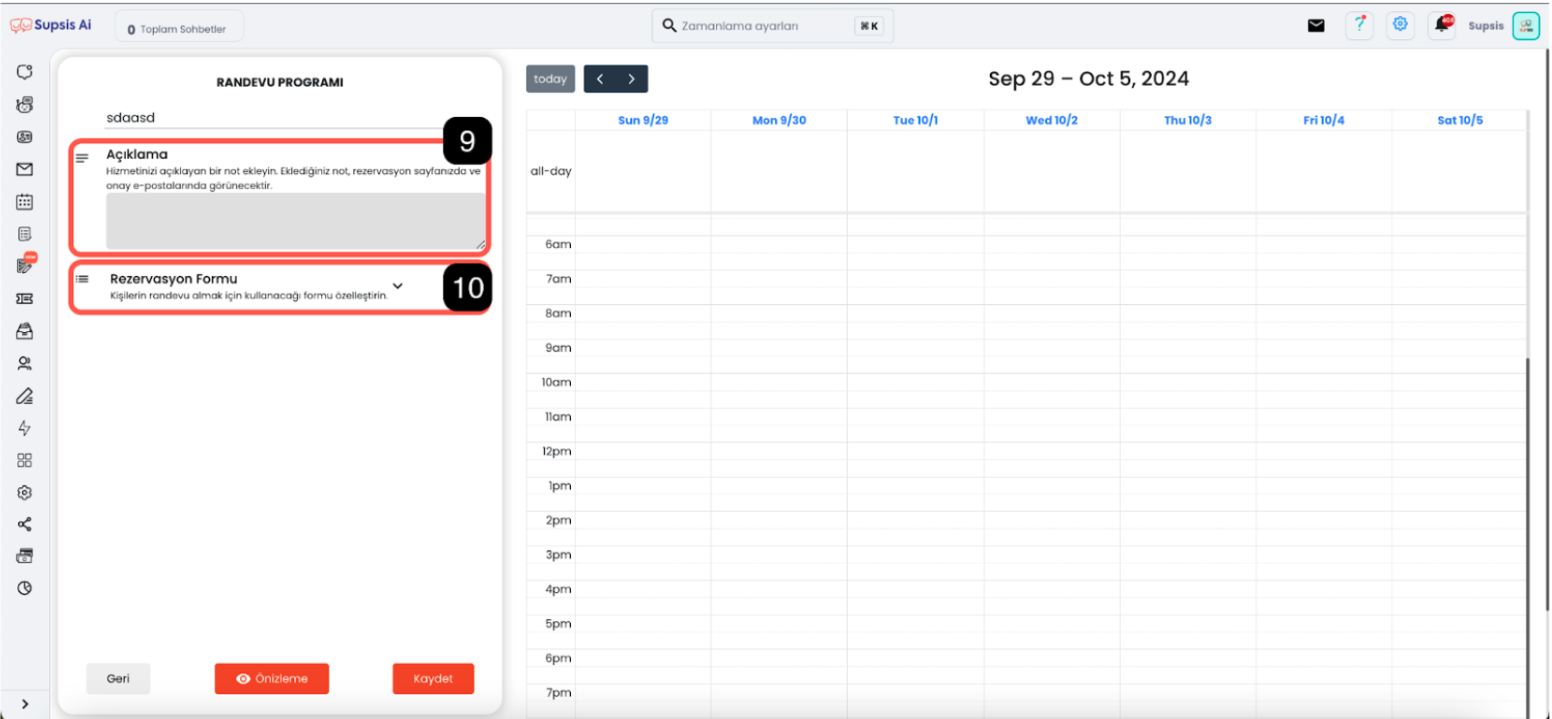
9. Description
10. Reservation Form
9-) Description
This is the field where you can add information about the appointment or service. This field will also appear in appointment confirmation emails.
10-) Reservation Form
Used to customize the form that people will fill out to make appointments.