Calendar Module Appointment Settings
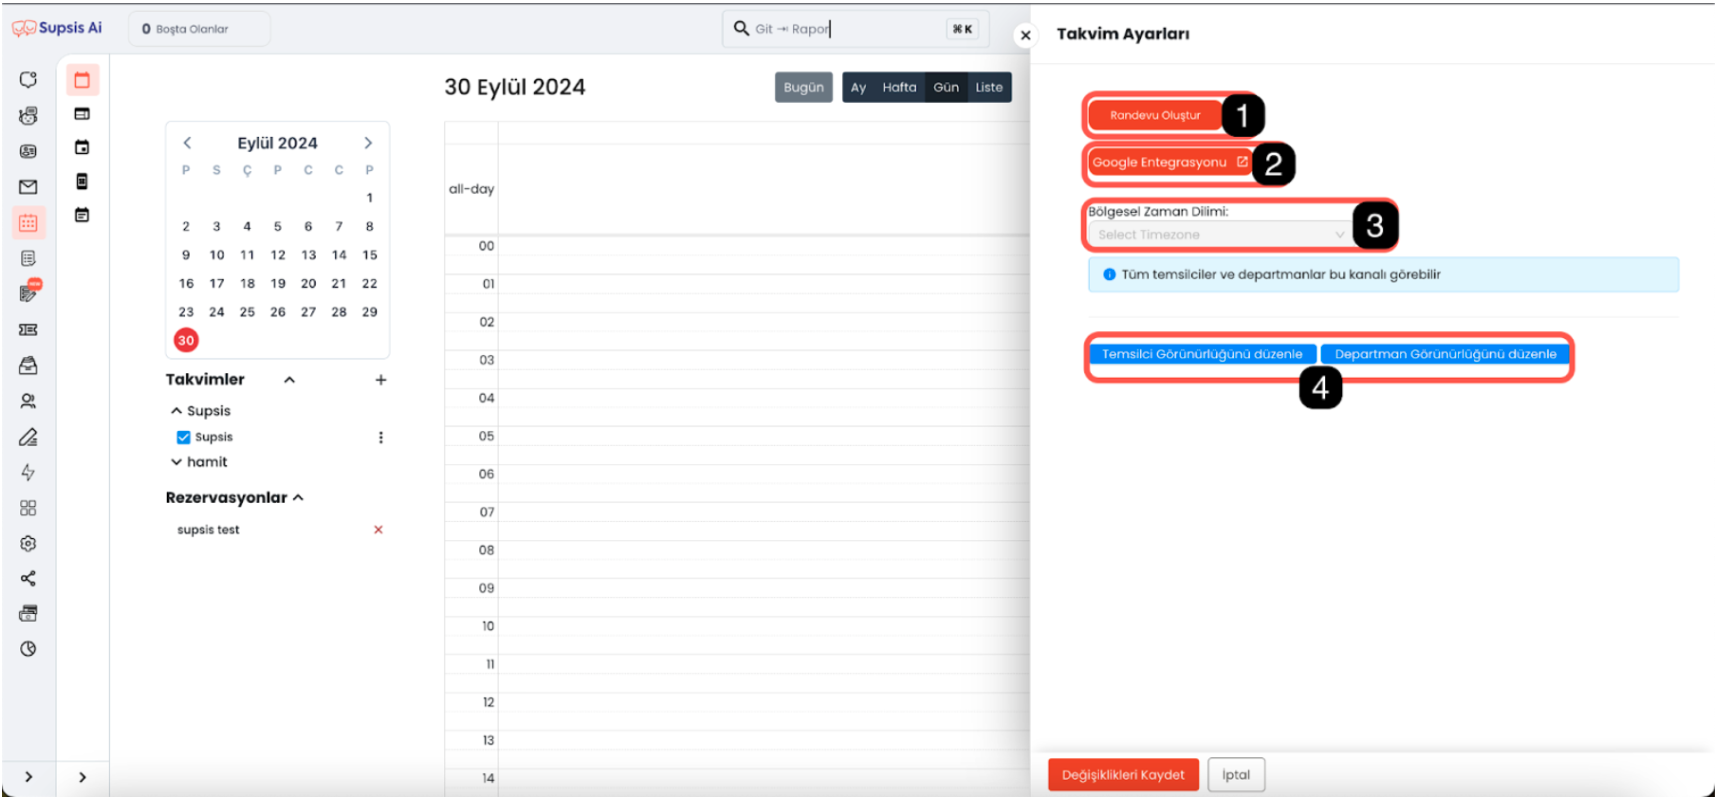
- Create Appointment
- Google Integration
- Regional Time Zone
- Agent and Department Visibility Editing
1-) Create Appointment
By clicking this button, you can create a new appointment calendar. For more information about appointment creation, Click here.
2-) Google Integration
This integration can be used to synchronize your calendars with Google. By logging into your Google account, you can synchronize your calendars and track all your events on the same platform. Thanks to this integration, you can manage your Google Calendar events through the Supsis Calendar Module.
3-) Regional Time Zone
You can set your calendar's time zone from here so that appointments can be planned in the correct time zone. By selecting the appropriate time zone for users in different regions worldwide, events are ensured to appear at the correct timing for all agents and customers.
4-) Agent and Department Visibility Editing
-
Edit Agent Visibility: This setting allows you to control which agents can see the calendar. Specific agents can access appointments or view the calendar.
-
Edit Department Visibility: This is the section where you can determine whether specific departments can see the calendar. Visibility can be restricted to specific departments.
-
If no editing is made, all agents and departments will be able to see the calendar by default.