Webhook Based Automations
Webhook Based Automations are a type of automation that makes automation processes more efficient by exchanging data with external systems and facilitates data transfer. Using webhooks, data from different platforms can trigger specific actions, thus enabling system integration. These automations can be easily triggered by user interactions, form responses, external API calls, and more, thus allowing access to the right data at each step and speeding up operations.
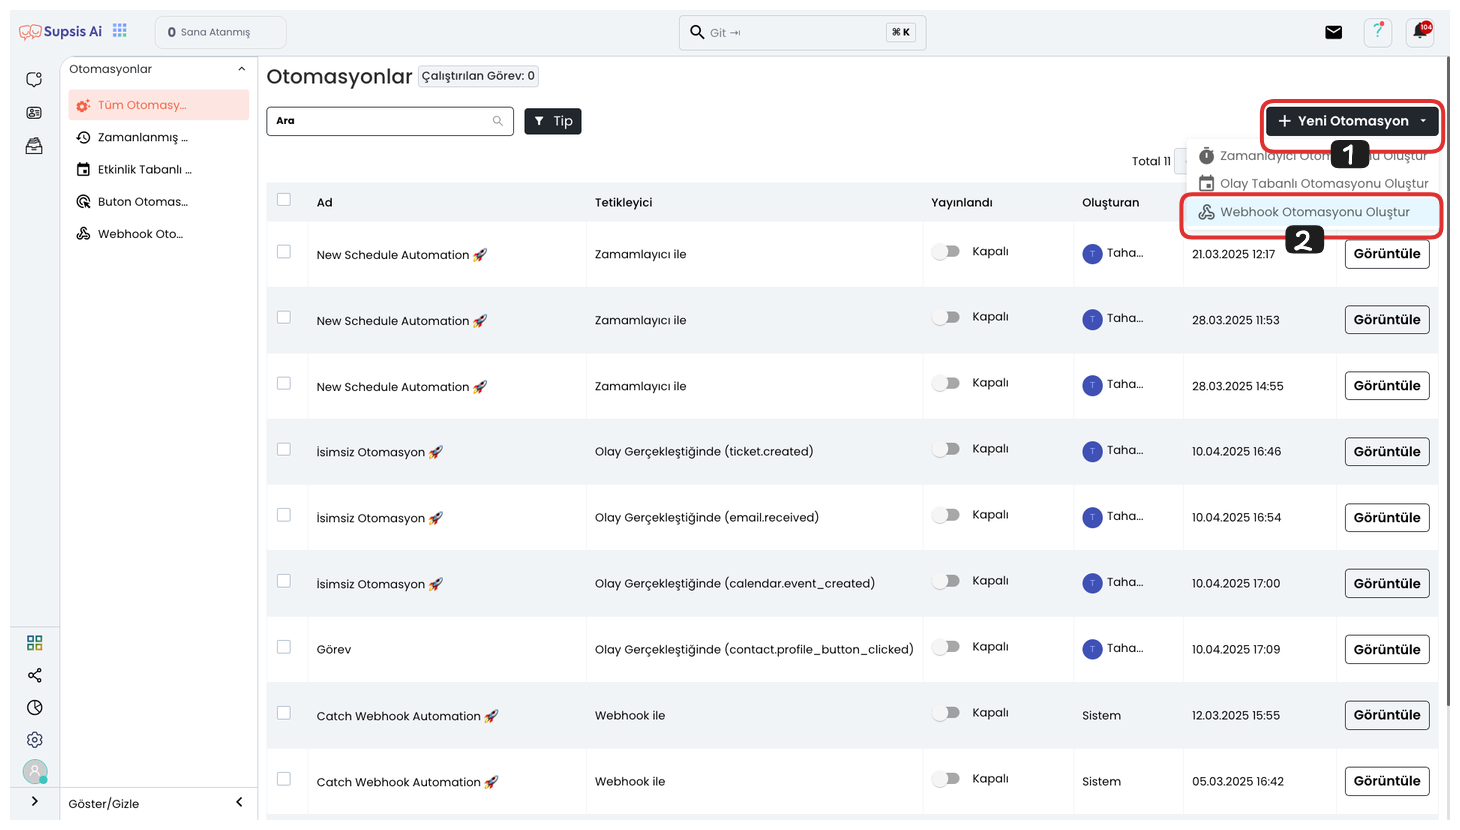
First, go to the automation page and click the "Create New Automation" button in the top right corner. Then click on "Create Webhook Automation" from the opened menu to start a new webhook-based automation.

From the opened section, first give a name to your automation. This name allows you to easily identify your automation and facilitates management in later stages.
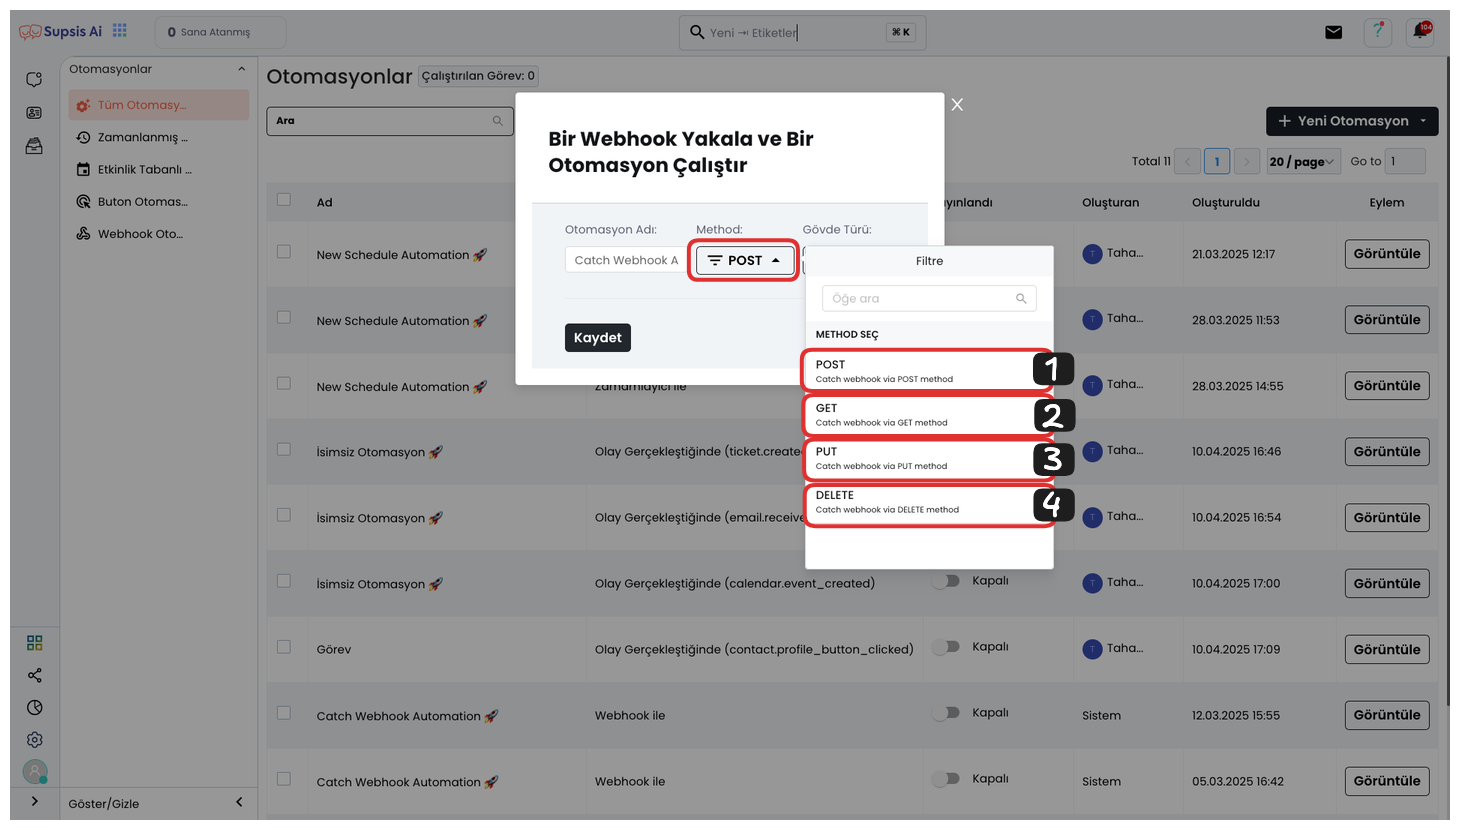
Then select a method. You need to choose one of POST, GET, PUT, or DELETE from these methods. The method you choose will determine how the data is processed and how it will be sent.
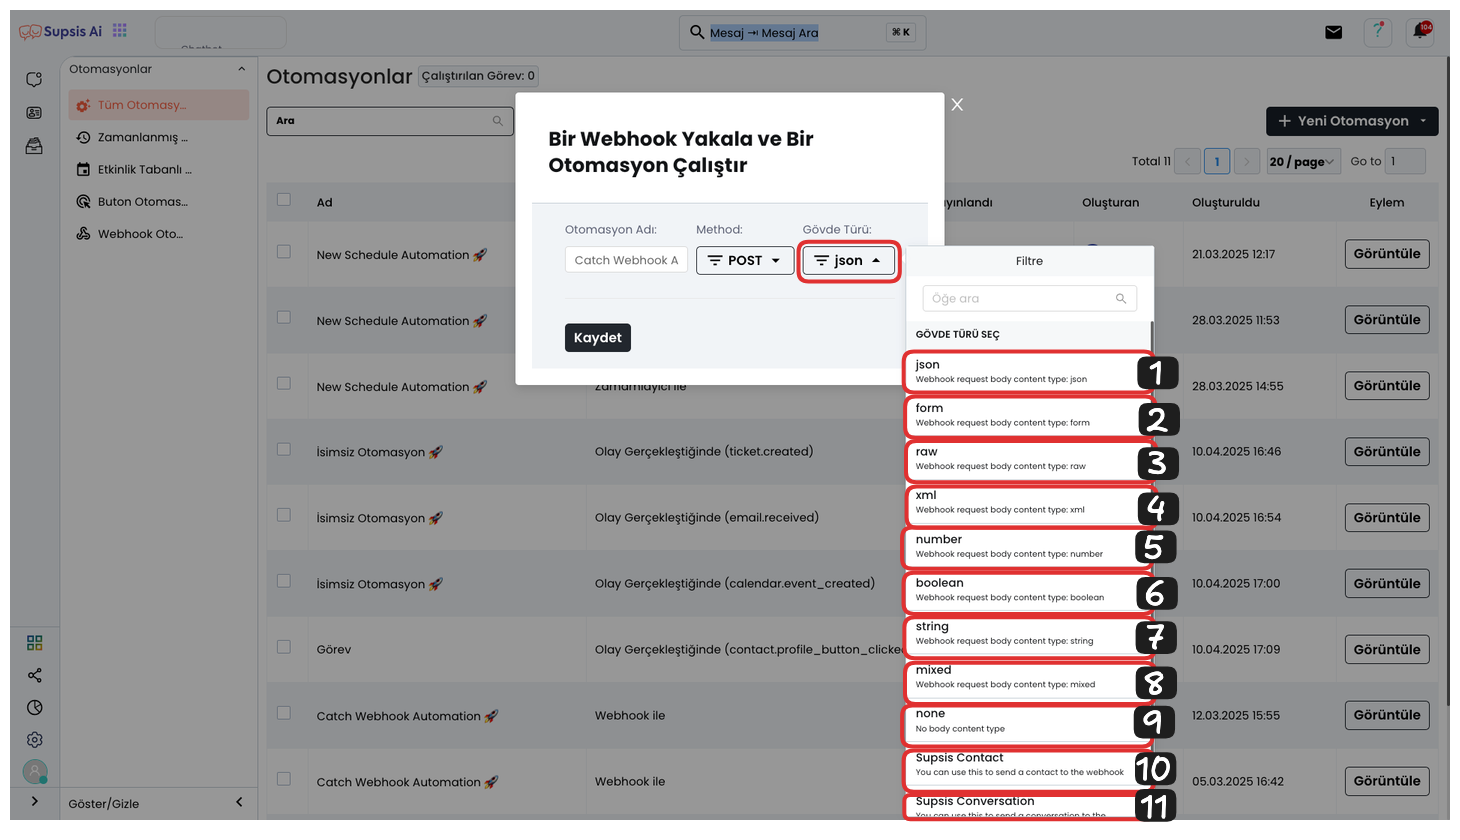
In the final step, you need to select the format of the data you are sending. Here are the options:
-
JSON: Used to send data in JSON format. Generally preferred in API integrations and modern web applications.
-
Form: Sends data as form data. It is a format generally used in web forms.
-
Row: Sends as row data, generally used in database operations.
-
XML: Used to send data in XML format. Compatible with legacy systems.
-
Number: Used to send numerical data.
-
Boolean: Used to send logical values like true or false.
-
String: Text (string) data is sent.
-
Mixed: Sends multiple different data types at the same time.
-
None: Does not send data, generally used only to send headers or metadata.
-
Supsis Contact: Sends data representing a person in the Supsis platform.
-
Supsis Conversation: Sends data belonging to a conversation in the Supsis platform.
After making your selection, you can perform a more effective operation by determining the data format.
After completing these steps, you can complete the webhook automation creation steps by saying "Save".
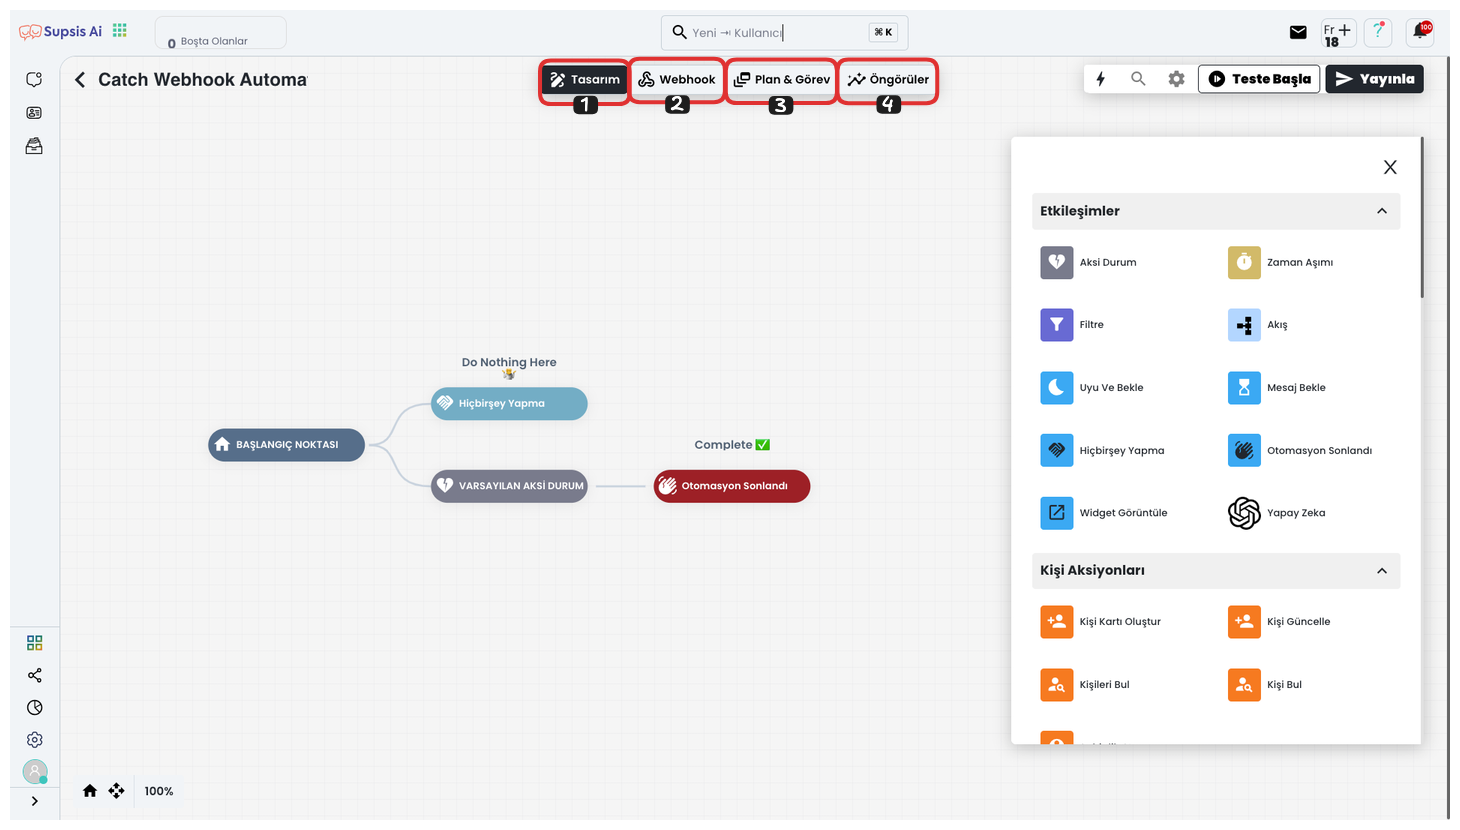
Webhook Automation Elements:
- Design
- Webhook
- Plan & Task
- Insights
1-) Design
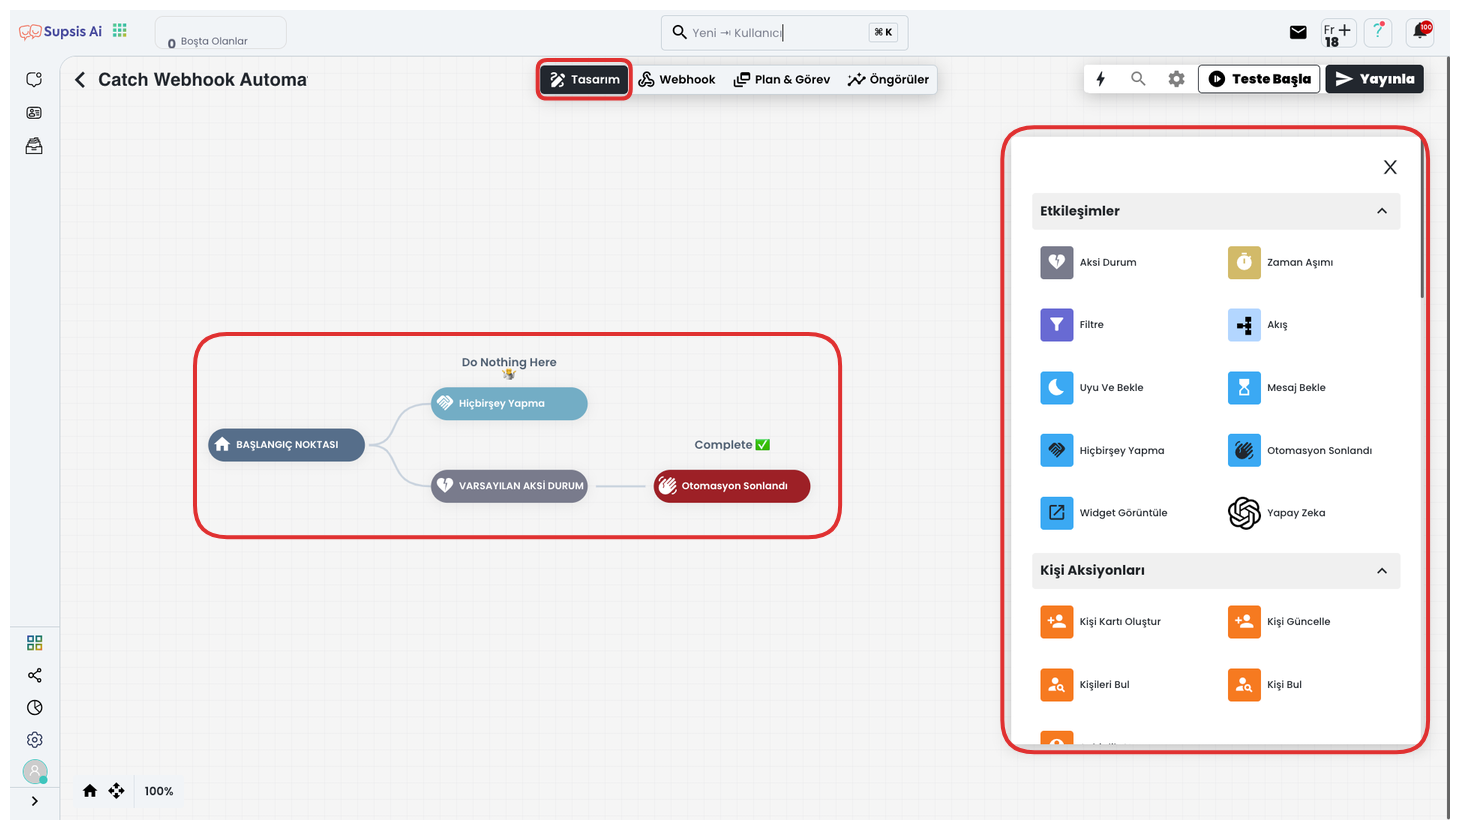
From This Design Area: You can create your automation flow and create an automation to exchange data with your webhook using the automation blocks you will use in the automation from the right side. In this area, you can configure your automation flow using the drag-and-drop method and create a dynamic workflow by receiving and sending data with webhook. By configuring each step with specific parameters, you can make your automation more efficient and effective.
2-) Webhook
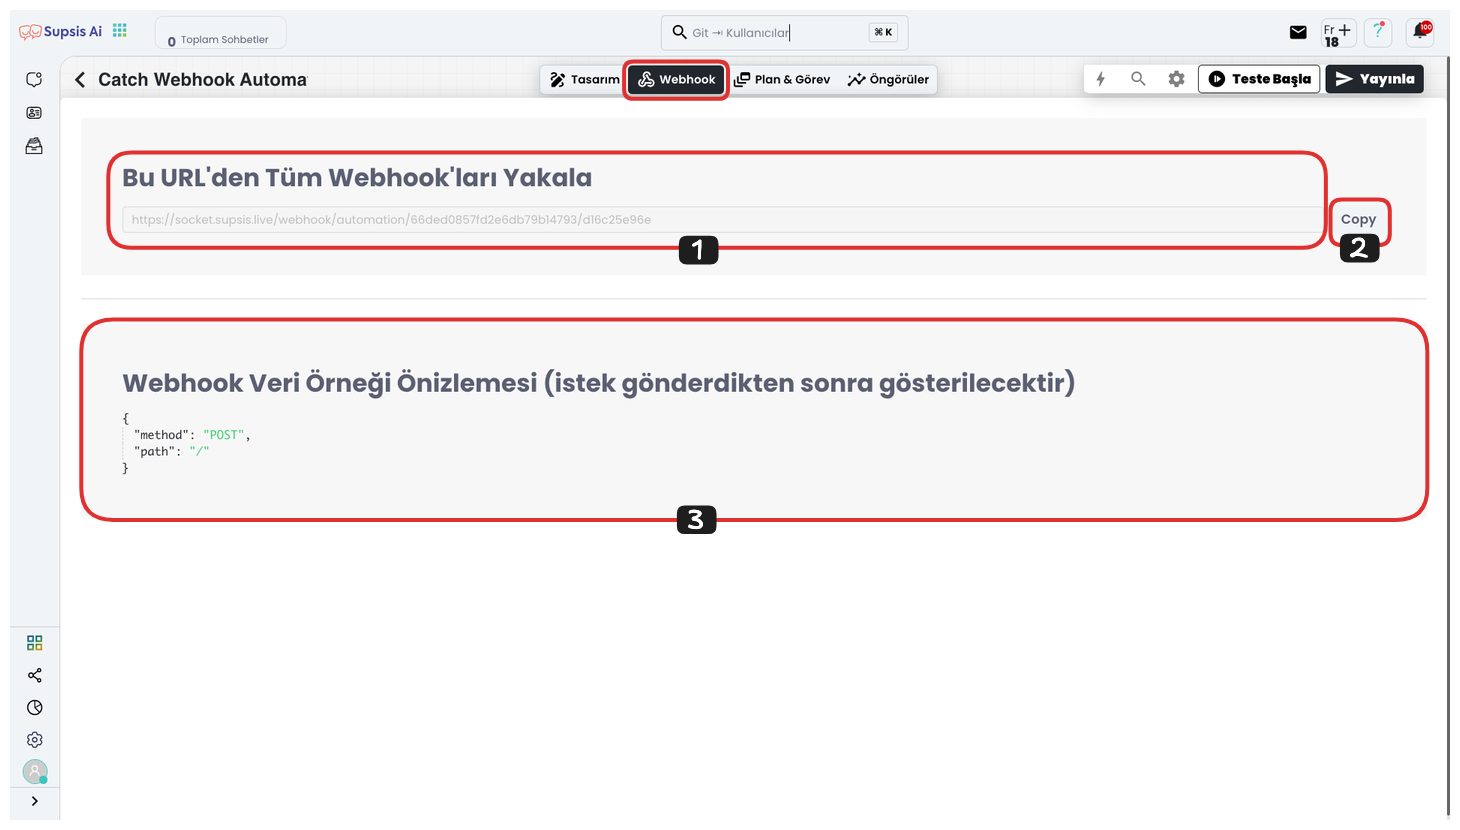
Webhook: In this area, a webhook address that you can use in the Supsis platform is provided. You can easily copy the webhook address by clicking the "Copy" button on the right side. Below, you can see the preview of this webhook. Here, you can track which data comes and goes in JSON format. If no request has been sent to the webhook block yet, the preview screen appears empty. This feature allows you to monitor your data exchange with webhook and track which data is sent.
To use the webhook, first drag and drop the Webhook block into your flow. After adding this block, you can make the necessary settings to determine the API or data that will exchange data while creating your flow. This process allows you to send data to external systems or receive data from external systems through webhook.
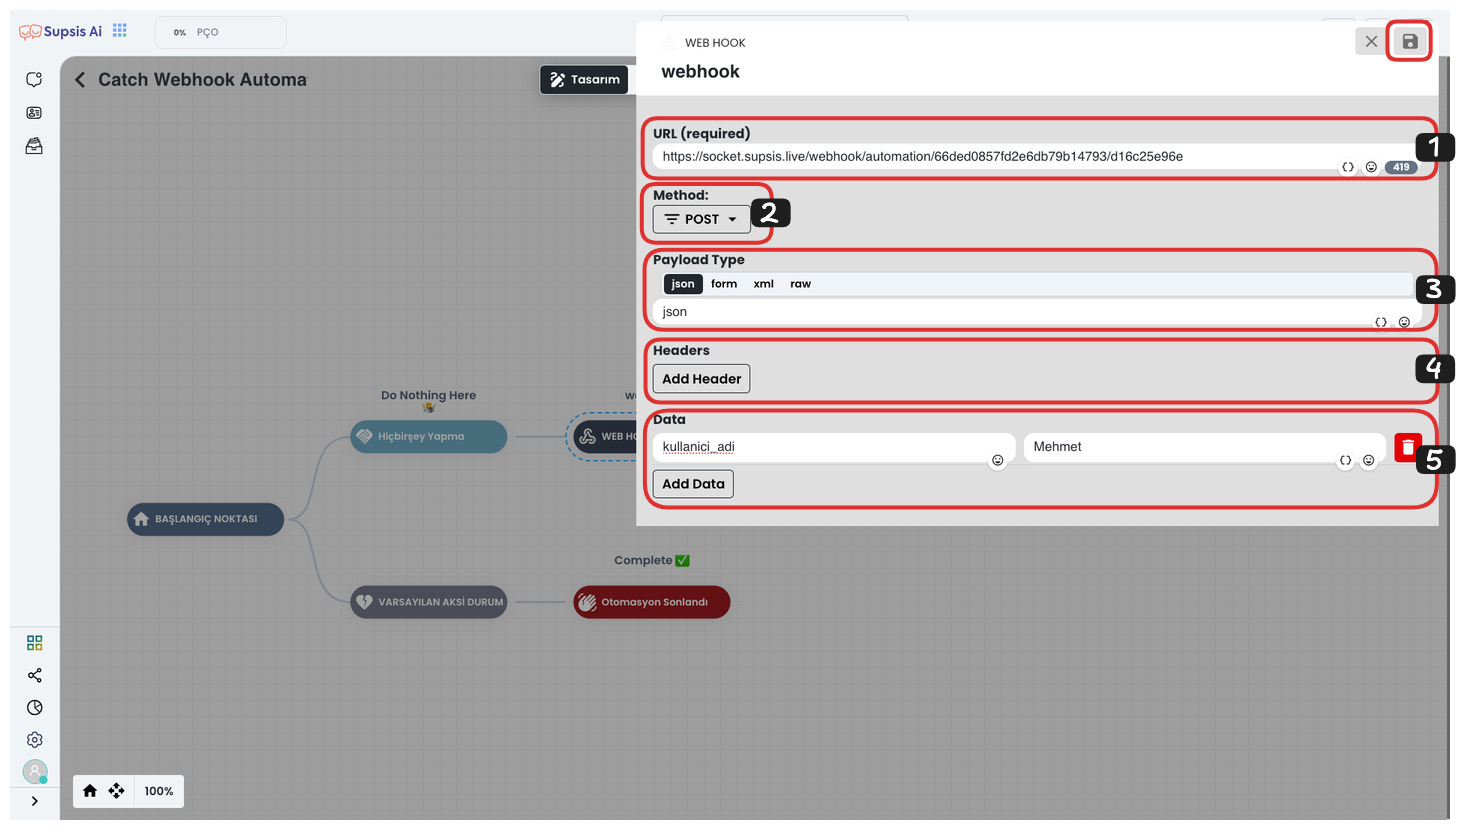
Click on the Webhook block you added and follow the steps below in the opened area:
-
Webhook URL: Paste your webhook URL that you copied earlier in the field at the top.
-
Method Selection: Then, select one of the methods such as GET, POST, PUT, PATCH, DELETE. This method will determine what type of data processing the webhook will do.
-
Format Selection: Select one of the data formats such as JSON, XML, ROW from the bottom section. This determines the format of the data being sent.
-
Header Key/Value: If you need to add special header parameters, fill in the Header Key and Header Value fields. This is generally used when sending authentication or special settings to APIs.
-
Data: In the Data section, write the key and value values of the data you will send to the webhook. These parameters can also be determined dynamically and you can define the data to be exported in this field.
-
Saving: After completing all operations, click the "Save" button in the top right corner to save your webhook settings.
By following these steps, you can ensure that your webhook block works correctly.
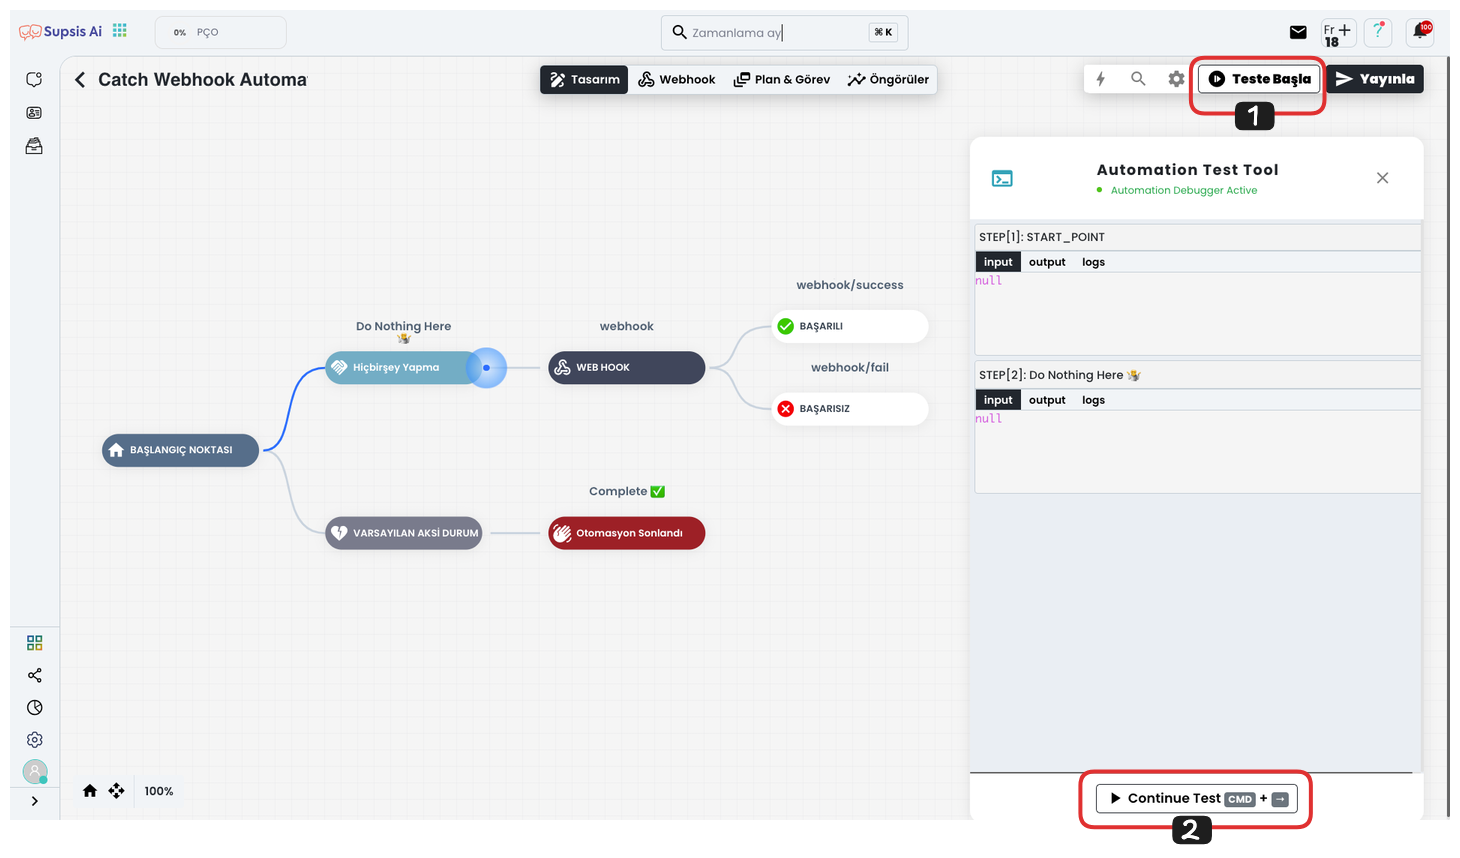
You can follow the steps below to test your webhook:
-
Start Test: After completing your webhook block settings, click the "Start Test" button in the top right corner.
-
Continue Test: In the opened window, click the "Continue Test" button to start the test process. This allows you to check if your webhook is working correctly.
During the test process, you will be able to see whether your webhook receives the correct data and whether it is sent in the correct format.
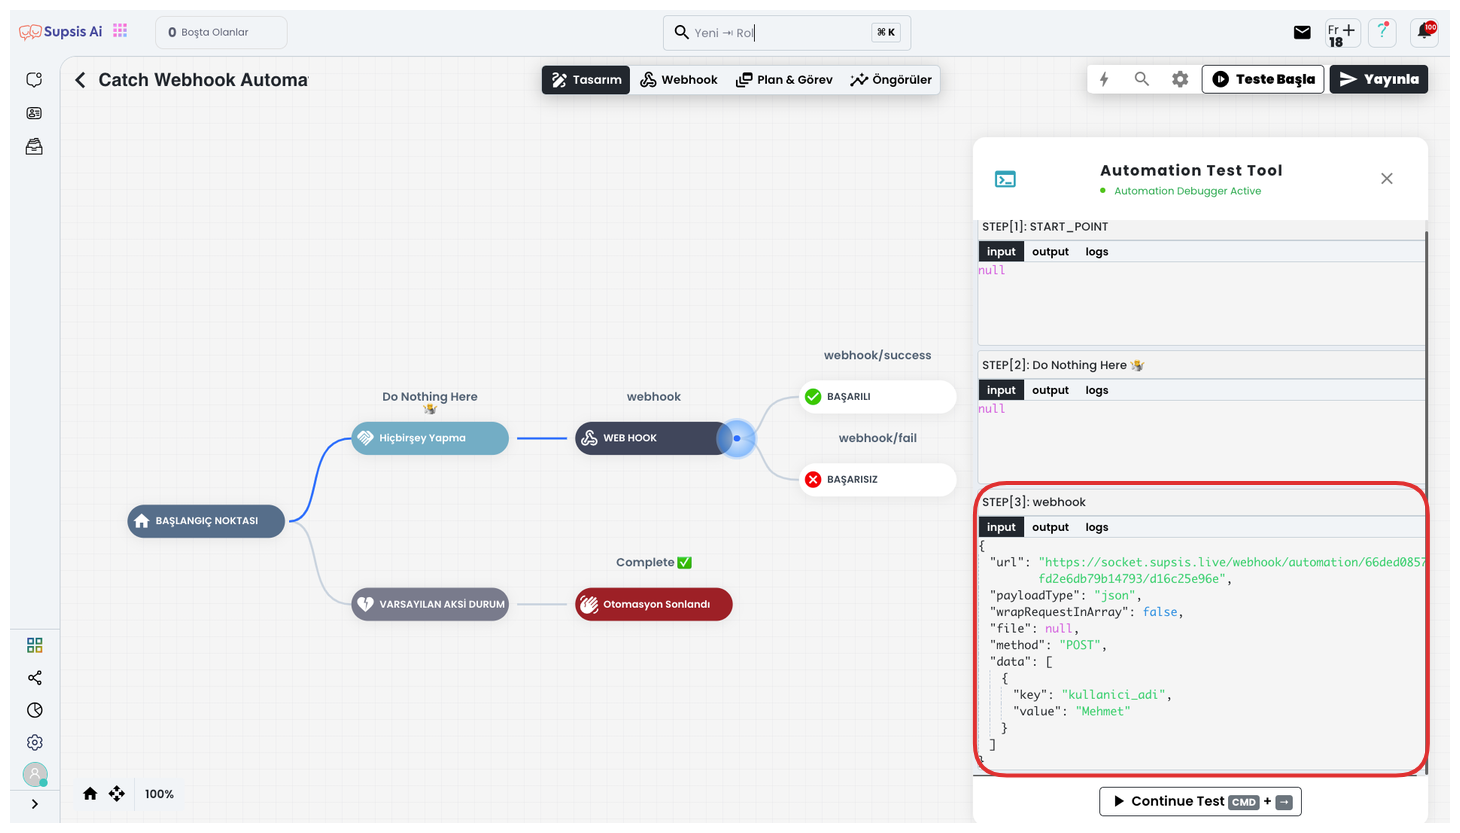
As a result, the key and value you provided is successfully saved to your webhook. This process allows you to exchange data with external systems by configuring your webhook.
By using other blocks, you can create more detailed and functional webhook automations. This provides a powerful tool not only for sending data but also for dynamically receiving, processing data, and interacting with different systems.
3-) Plan & Task
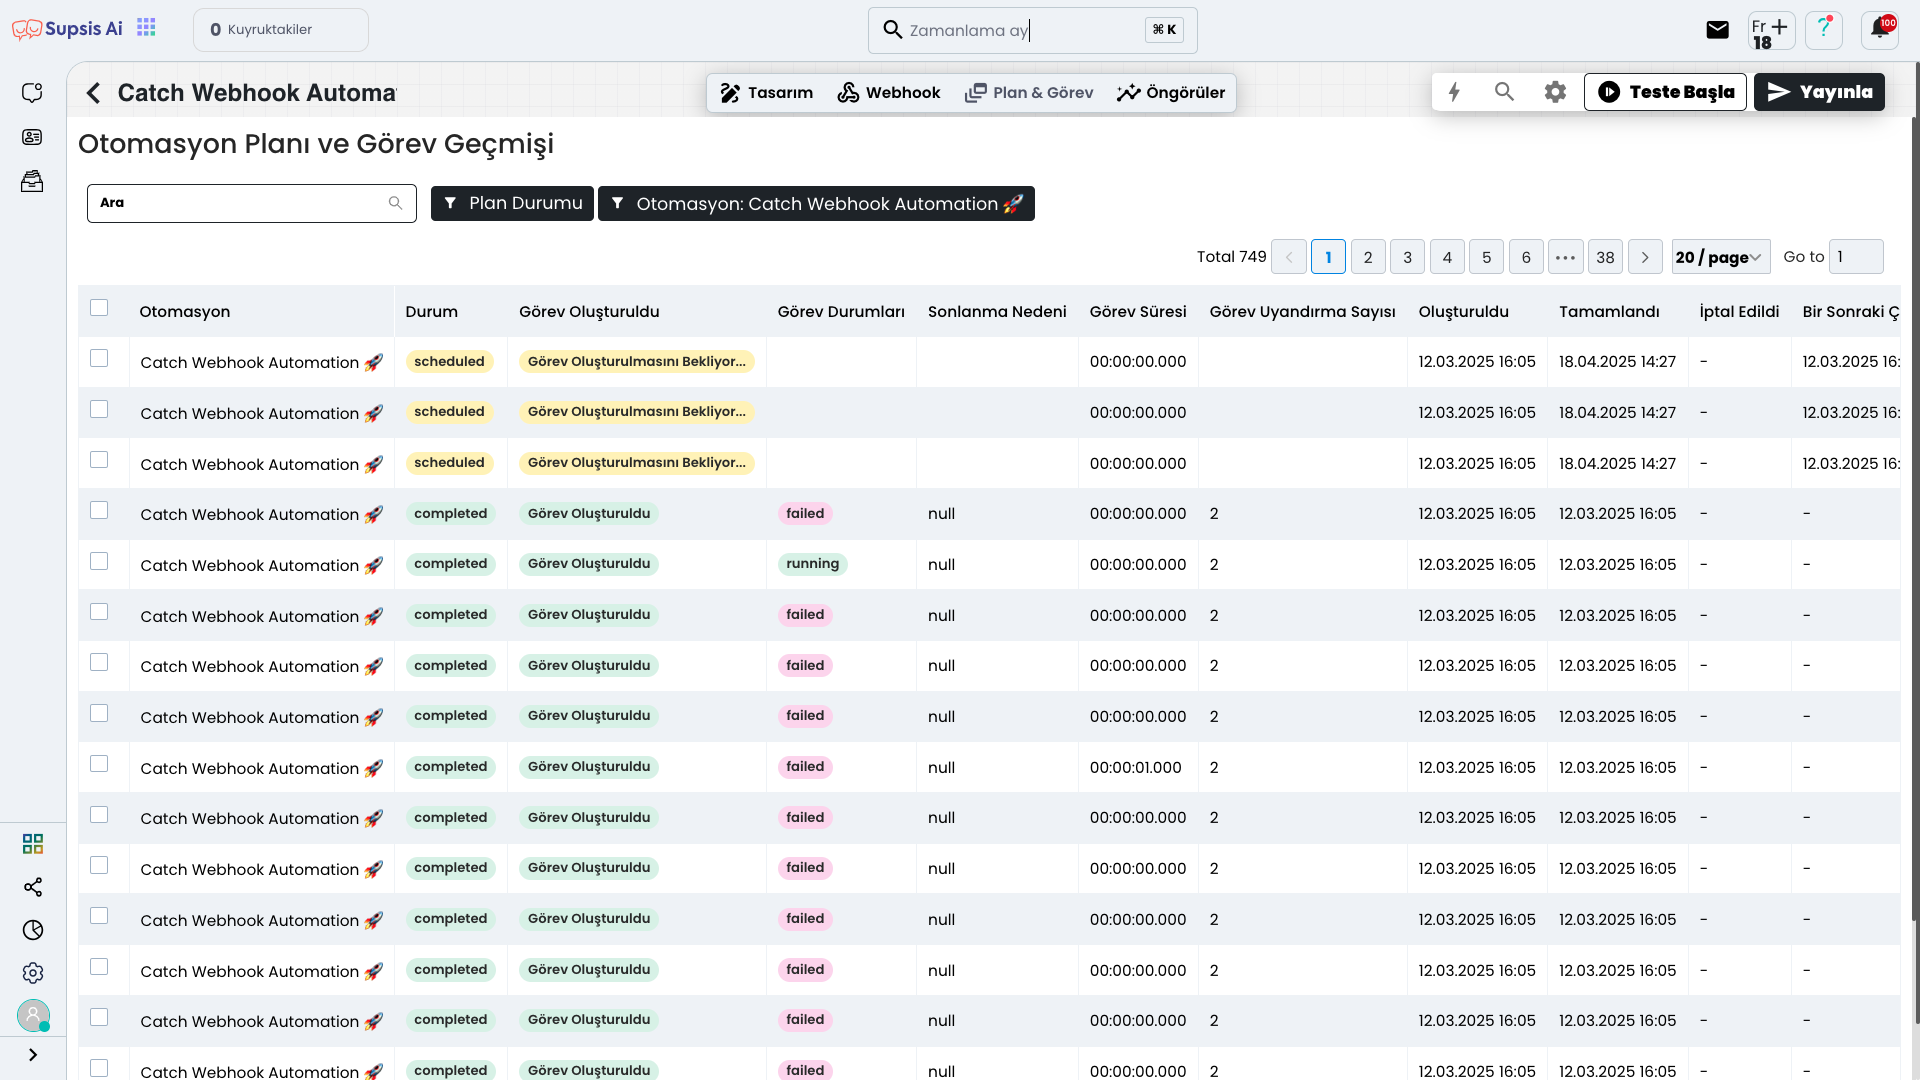
In this area, you can view the Automation Plan and Task History. However, to track this data, you need to have a "Task" block in your automation flow. Your task block allows you to view the operations performed here after running your automation.
4-) Insights
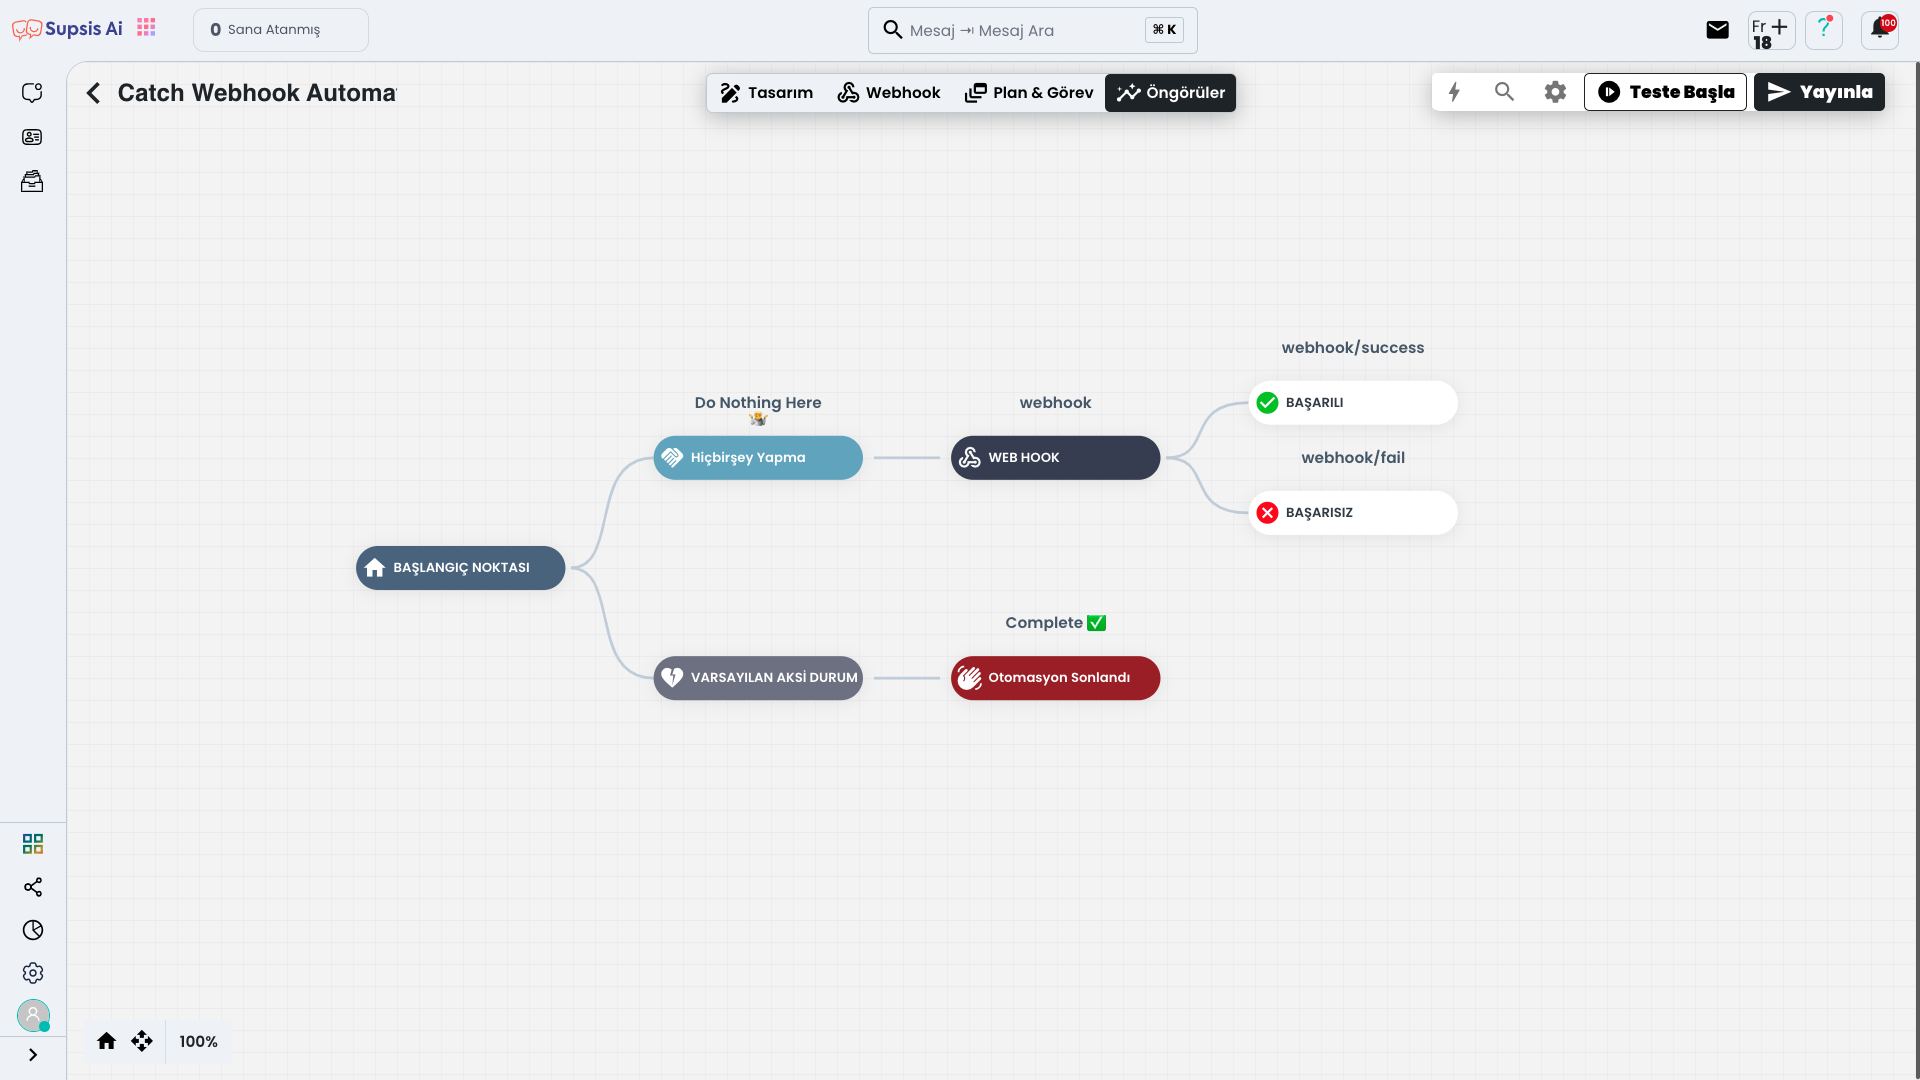
The Insights section allows you to track your automation flow more comfortably. This area allows you to better analyze your flow and make accurate predictions for future steps. By seeing what might happen at each step of the flow, you can ensure that the automation works more efficiently.