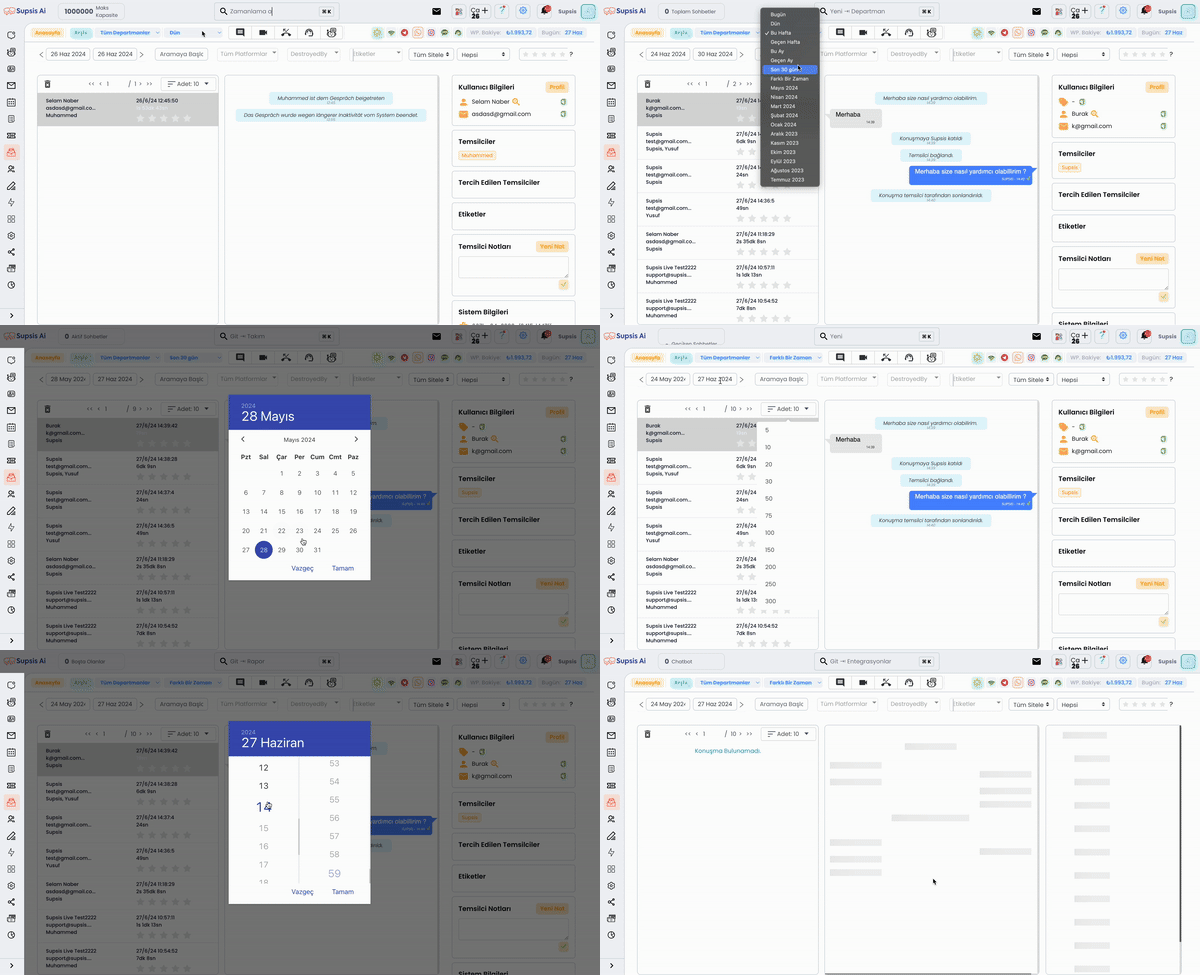
How to Use Date Filtering in Archive?
Date filtering in archive allows you to quickly and easily find conversations within a specific time period. This feature is particularly useful for analyzing customer interactions during a specific period or examining conversations that took place on a specific date. Here's a step-by-step guide explaining how you can use date filtering:

Step 1: Accessing the Archive Page
- Step 1.1: Log into your user account.
- Step 1.2: Go to the archive page by clicking on the "Archive" tab from the main menu.
Step 2: Finding the Date Filtering Section
- Step 2.1: Find the date filtering section located at the top of the archive page. Usually this section contains calendar icons and date fields.
Step 3: Selecting Start and End Dates
- Step 3.1: Click on the calendar icon to open the date picker window.
- Step 3.2: First select the start date. Click on your desired start date from the calendar.
- Step 3.3: Then select the end date. Click on your desired end date from the calendar.
Step 4: Applying the Date Range
- Step 4.1: After selecting the start and end dates, click the "Apply" or "Filter" button. This will filter the conversations in the archive according to your selected date range.
Step 5: Reviewing Filtered Results
- Step 5.1: Review the conversations listed according to your selected date range. A brief summary and date of each conversation will be displayed in the list.
- Step 5.2: You can examine the details by clicking on the relevant conversation.
Step 6: Using Additional Filters (Optional)
- Step 6.1: In addition to date filtering, you can make your search more specific by using other filters such as platform, department, tags, or customer representative.
- Step 6.2: After selecting additional filters, click the "Apply" button again to narrow down your search.