Knowledge Base
Knowledge Base, these are knowledge bases where data from URL, file, and text sources that you want your voice agents to know are kept together and ready for artificial intelligence use. These knowledge bases store the data that your voice agent will use in conversations and responses, enabling it to provide more accurate and efficient service. Knowledge bases improve the quality of service that voice assistants provide to customers and help them produce more interactive and accurate answers with data from various sources.
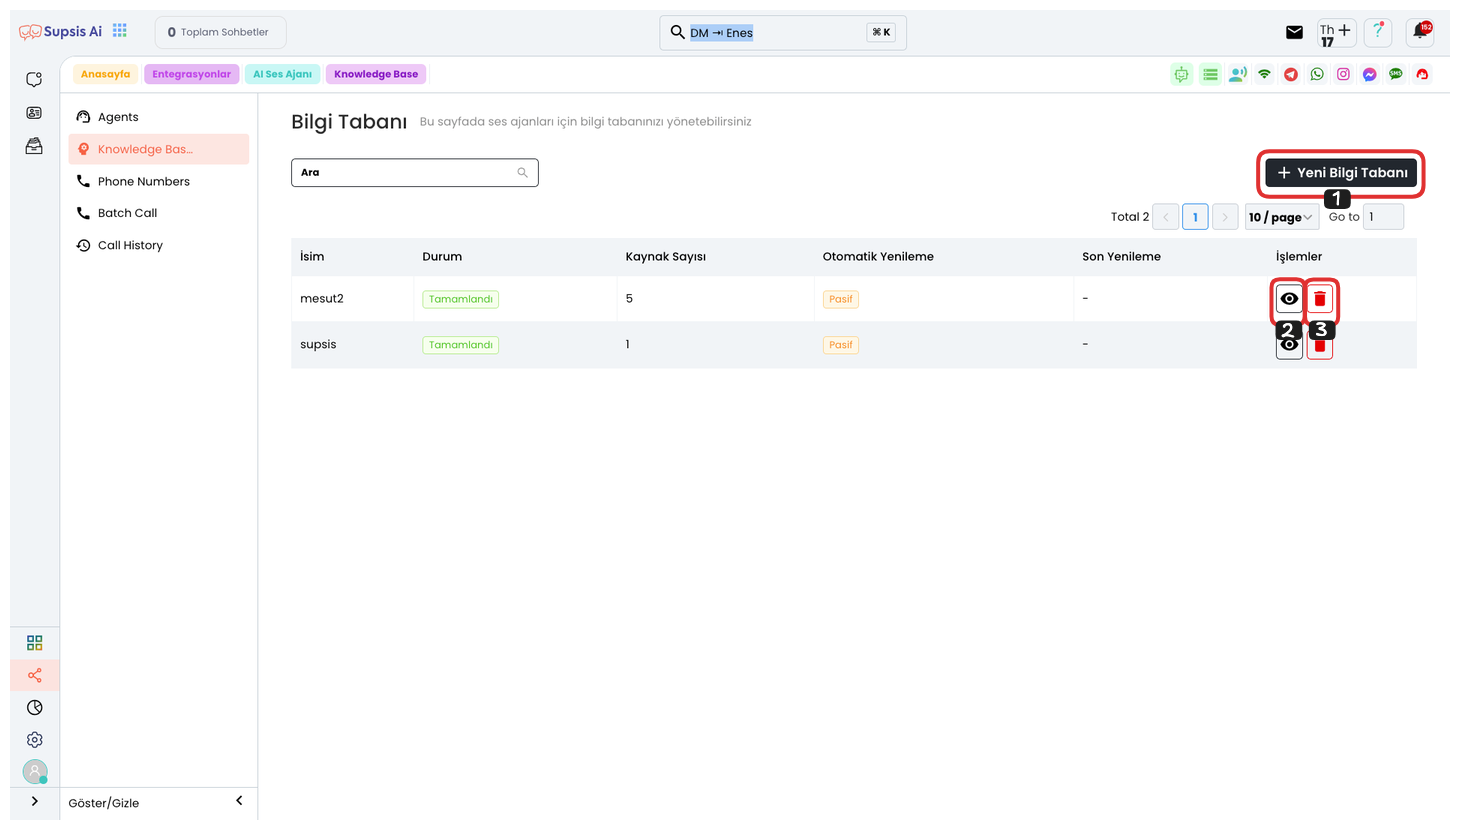
To view the knowledge bases you have created, you can click the "Eye" icon. Also, if you want to delete the knowledge base you created, you can completely delete it by clicking the "Trash" icon. To create a new knowledge base, click the "New Knowledge Base" button. After filling in the necessary information in the opened area, you can complete the process of creating your knowledge base by clicking the "Create" button. This way, you will have added a new knowledge source that you can use for your voice agent.
Creating New Knowledge Base:
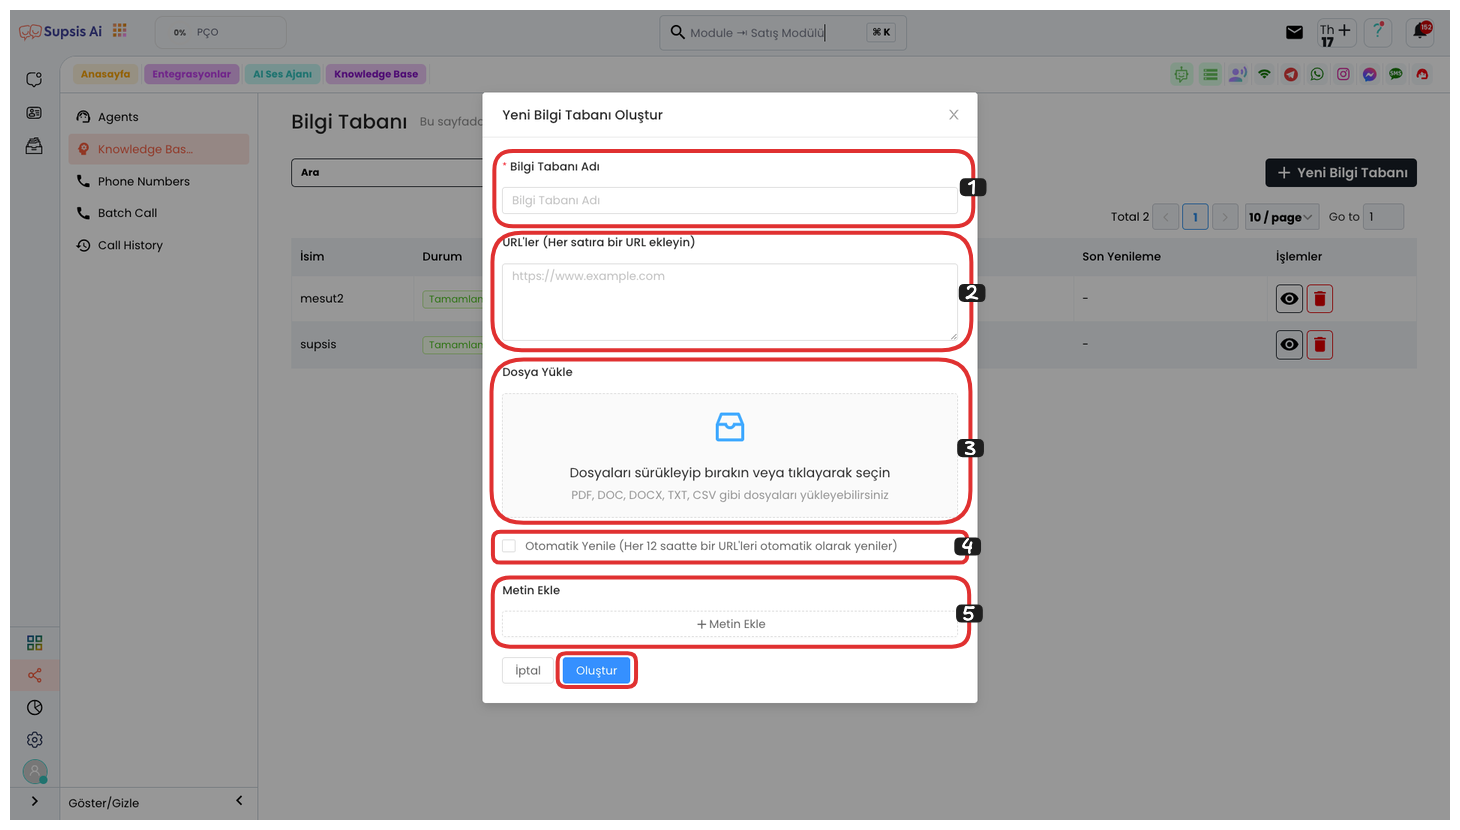
After clicking the "New Knowledge Base" button, in the opened modal, you can first give a name to your Knowledge Base. Then, you can create a knowledge base by extracting data from a website or URL. If you have multiple URLs, you can add them by writing each URL on a new line.
In the next step, you can create a knowledge base by uploading files. You can upload files such as PDF, DOC, DOCX, TXT, CSV. Data that your voice agent needs to know is collected from these files and integrated into your agent. After completing these operations, you can successfully create your knowledge base by clicking the "Create" button.
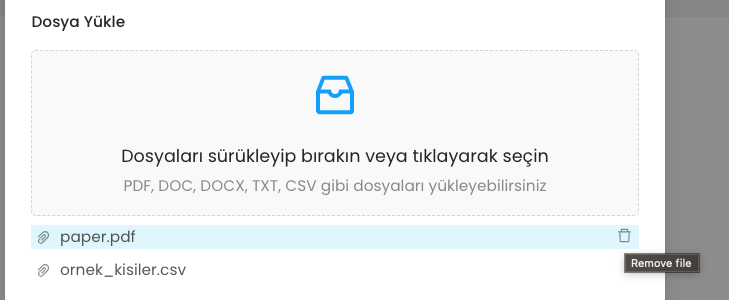
Also, if there is a file you accidentally added or want to delete, you can delete the file you added by clicking the trash can icon on the right when you hover over the file. With this operation, you can easily clean up unnecessary or incorrect files.
If you check the Auto Refresh option, your URL is automatically refreshed every 12 hours. This ensures that the content in your knowledge base stays up-to-date and helps you continuously access accurate data without needing manual updates.

In the area below, you can provide your information as text. For this, after clicking the "Add Text" button, you can edit the information you will provide to artificial intelligence by entering the title and text content in the opened section. This text will be used to ensure that artificial intelligence gives more accurate and relevant answers.
Finally, after completing all these operations, you can successfully create your knowledge base by clicking the "Create" button.
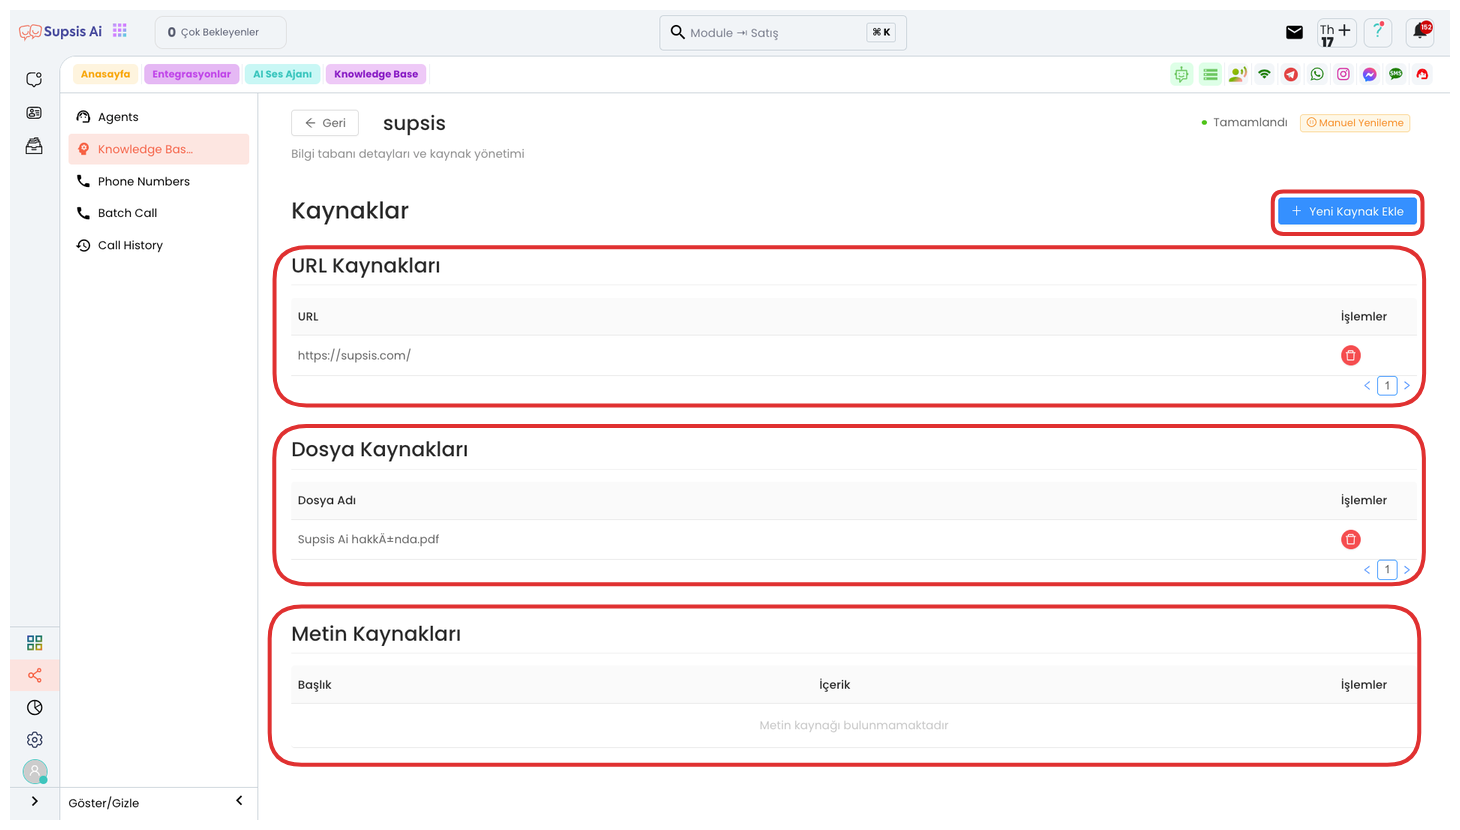
Click the "View" button to view the content of your Knowledge Base. On the opened page, you can examine your Knowledge Base's sources through different sources you have added such as URL Sources, File Sources, and Text Sources. If you want to add a new source, you can easily add the relevant sources from the opened area by clicking the "Add New Source" button.
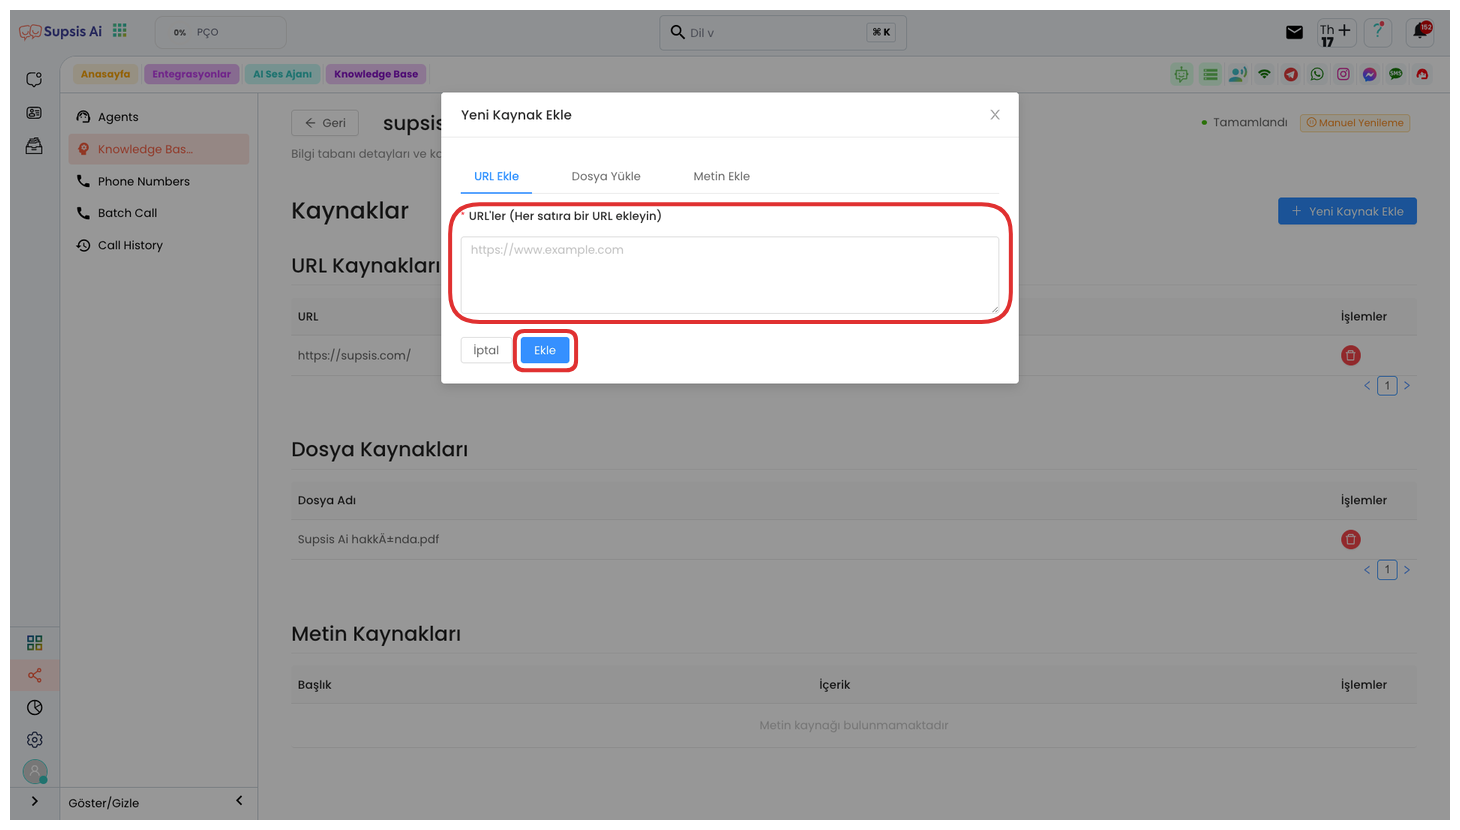
In the opened modal, you can add your URLs in the "Add URL" field, with one URL per line. By placing each URL in the correct format, you can create web-based sources for your Knowledge Base. These sources will provide your voice agent with access to information and allow it to give accurate answers.
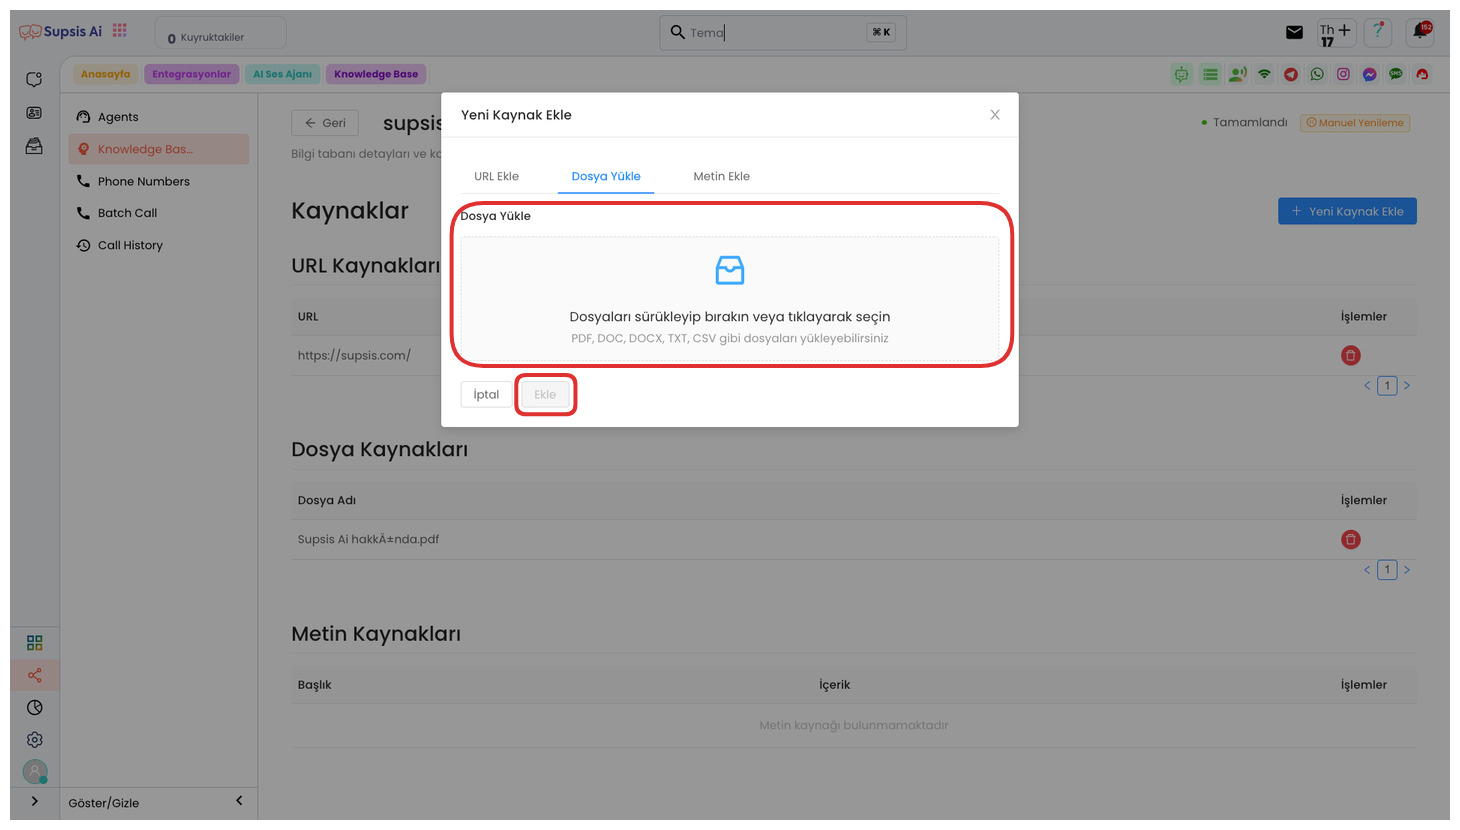
In the same modal, you can upload files such as PDF, DOC, DOCX, TXT, CSV to the file upload area that opens by clicking the "Upload File" tab. These files create additional sources for your Knowledge Base and help your voice agent provide more accurate and comprehensive information. After uploading your files, you can complete the addition process by saying "Add".
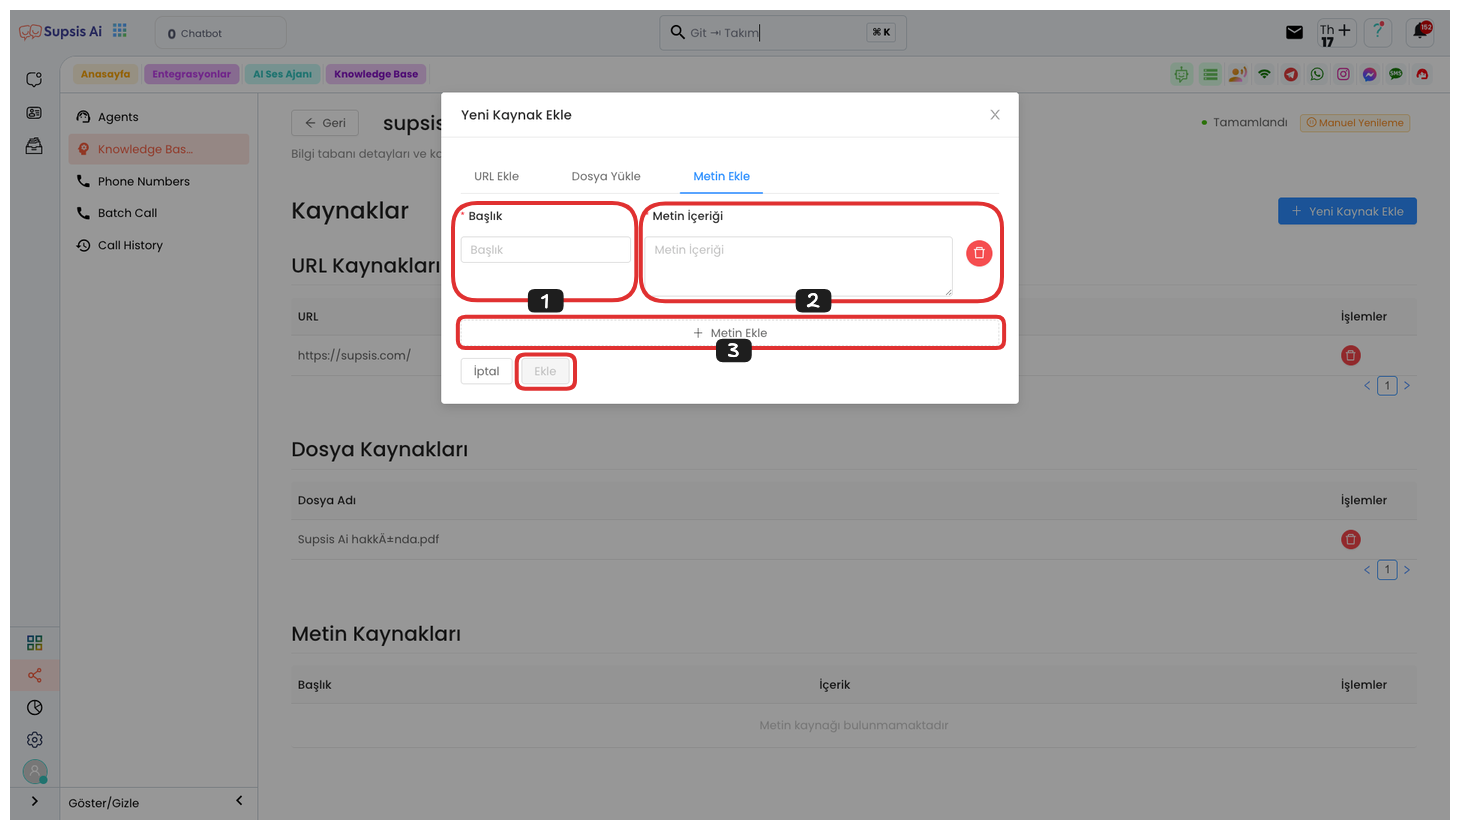
By going to the "Add Text" tab, you can add your data in text format as Title and Description. If you want to add multiple texts, you can add each text separately by clicking the "Add Text" button. After adding all your texts, you can complete the text addition process by clicking the "Save" button. By following these steps, you can effectively create text sources that your voice agent will use.