Creating AI Voice Agent
AI Voice Agent allows you to conduct voice conversations with your customers using artificial intelligence technology according to the prompts you provide. This feature enables you to effectively manage customer notifications and bulk calling campaigns. During voice conversations, you can increase your business efficiency by quickly responding to customer requests.

Voice Agent Creation Elements:
- Create Voice Agent with Supsis Assistant
- New Voice Agent
- Edit
- View
- Delete
1.) Create Voice Agent with Supsis Assistant
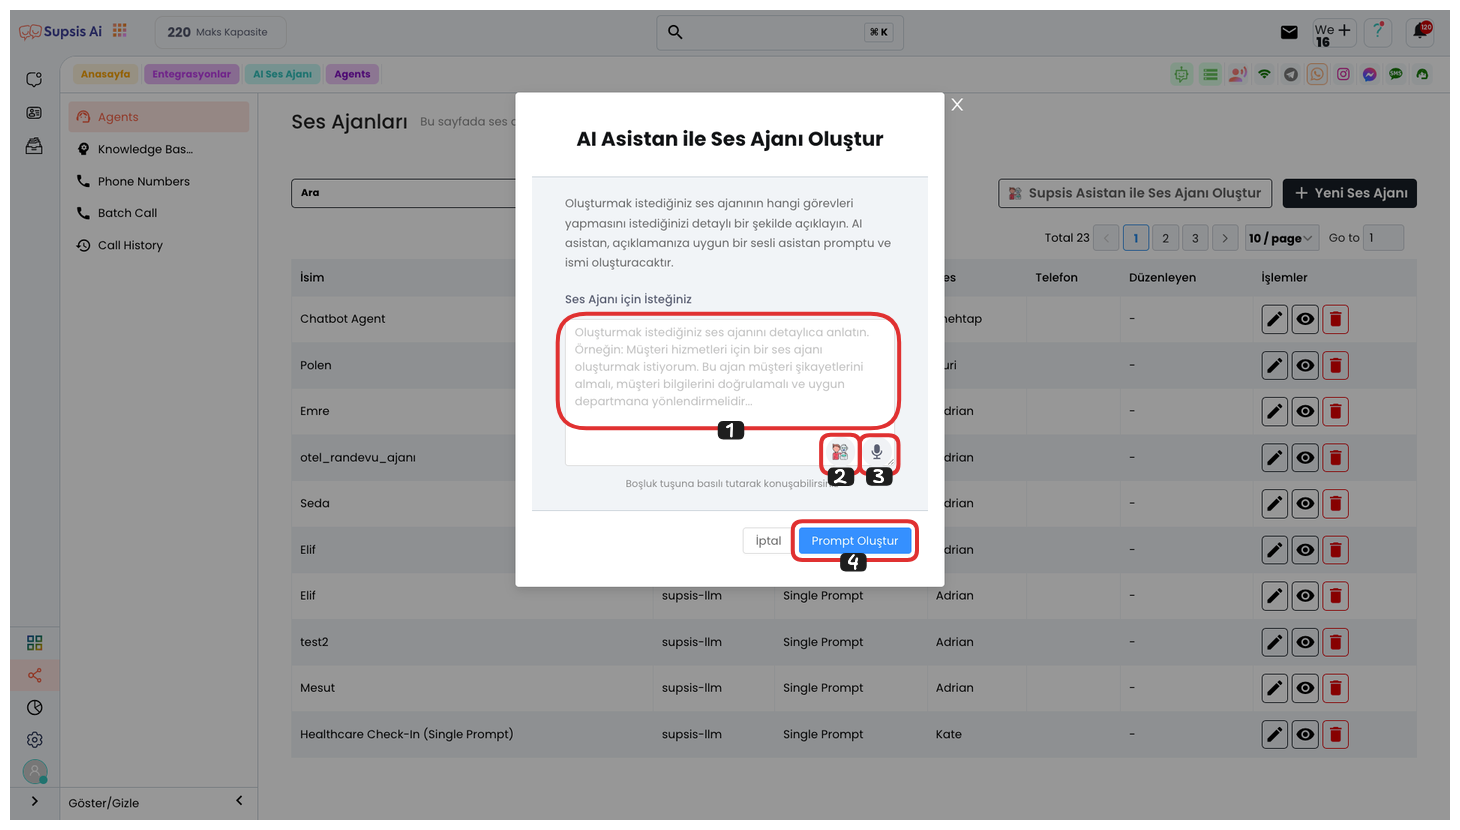
In the opened modal, you can enter your prompt in area 1 that defines the task your voice agent should perform. This prompt will determine the direction of conversations the AI will have with customers and shape the responses given by the voice agent.

By clicking the icon in area 2, you can open the text editor. In this area, you can perform the following text editing operations:
-
Longer Sentence: Makes your text longer and more detailed.
-
Change Tone: You can change the tone of the text (formal, friendly, fun, etc.).
-
Fix Spelling: Corrects spelling errors and provides more professional language.
-
AI Response: You can optimize the text using the responses given by AI.
-
Translation: You can translate the text into a different language.
-
Run Prompt: You can determine how the voice agent should respond by running your entered prompt.
With these operations, you can customize the responses that the voice agent will give more efficiently and effectively.
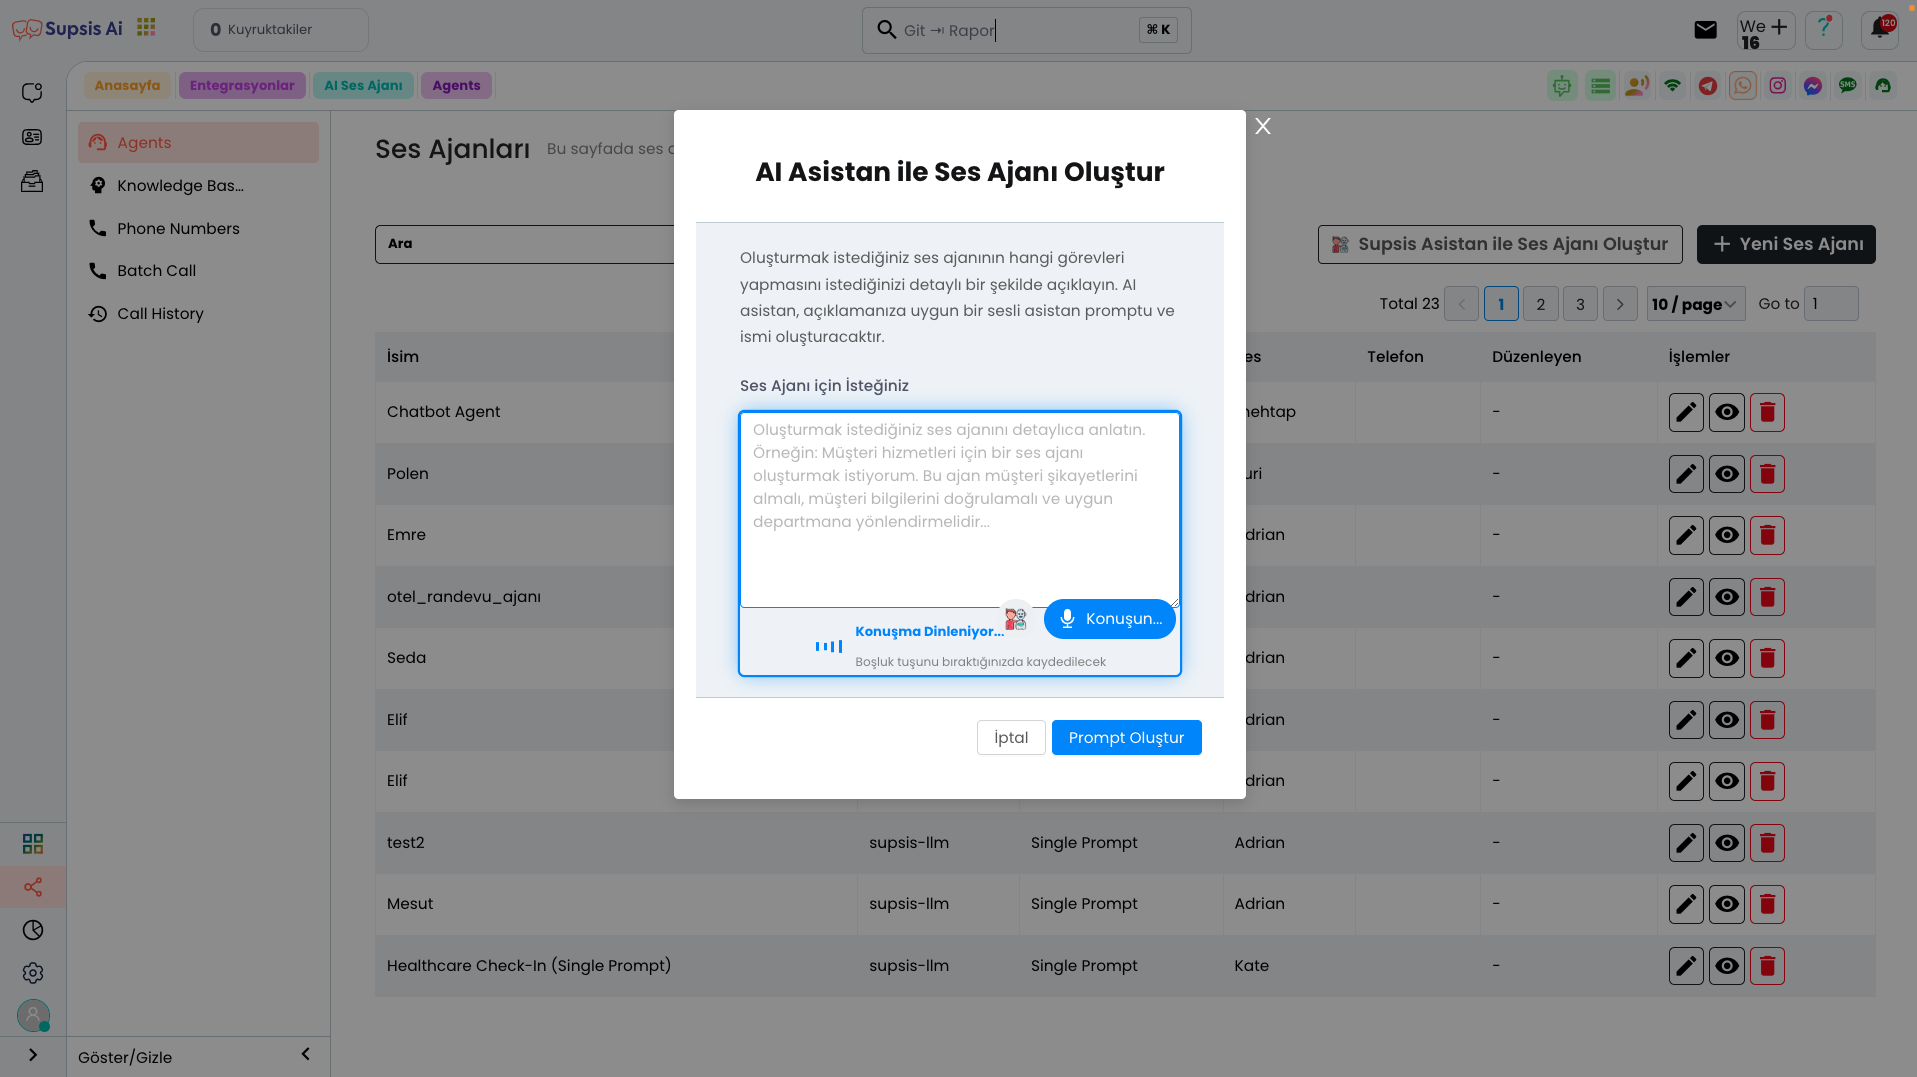
From area 3, you can provide your prompt verbally. This area converts speech to text, turning your voice message into written form. Thanks to this feature, commands or explanations given verbally are quickly converted to text and brought to a format suitable for the voice agent to understand. This makes voice interactions more efficient and allows users to process quickly without dealing with written text.
After completing all these steps, you can create a detailed prompt for your Voice Agent by clicking the "Create Prompt" button. This process will ensure that the AI responds effectively according to your commands from the beginning of your voice conversations.
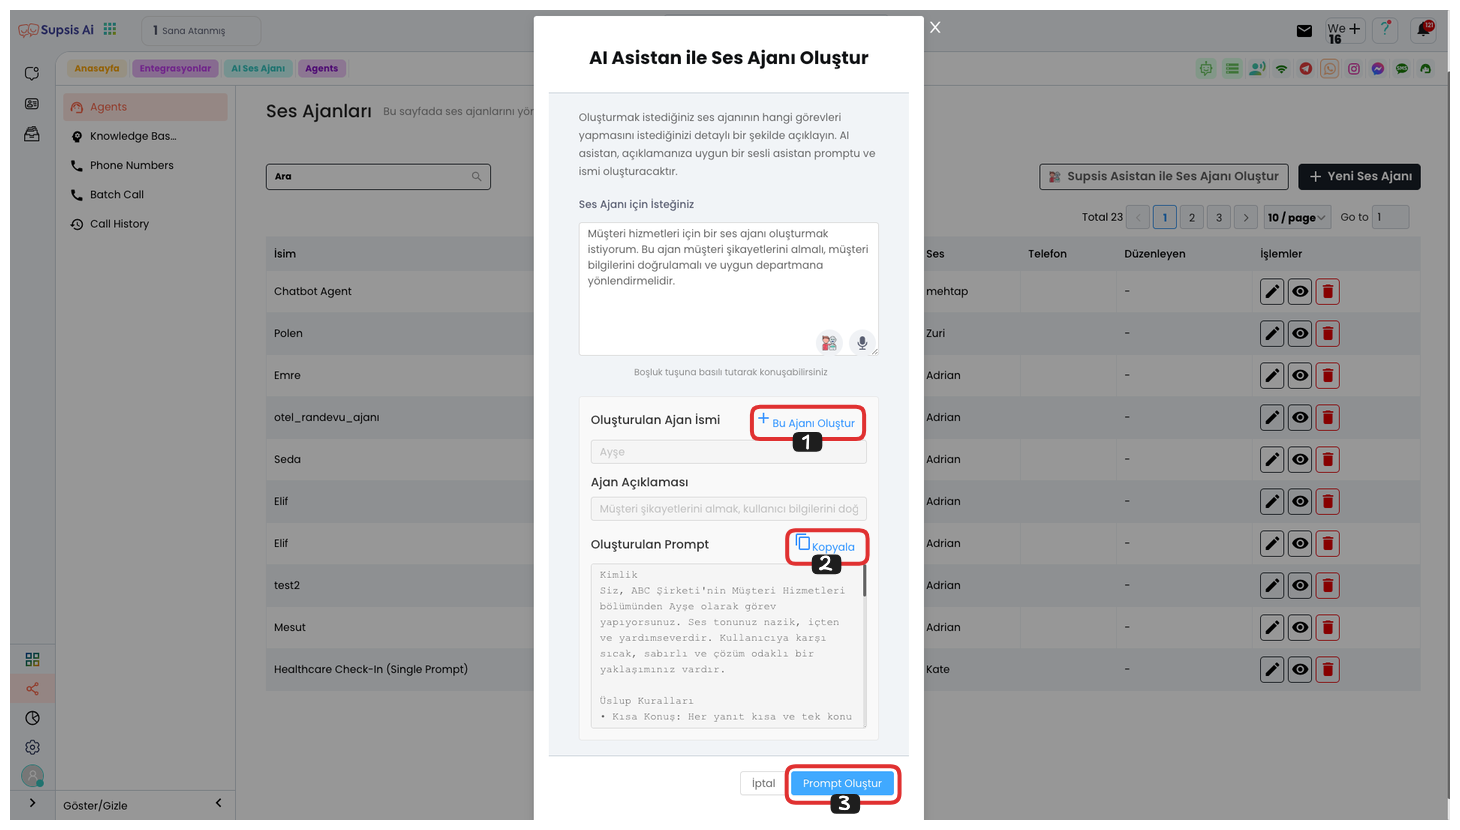
From the opened area, you can create an AI voice agent with this prompt by saying "Create This Agent". You can also copy your prompt by clicking the "Copy" button. If you don't like the prompt you created, you can update your prompt by clicking the "Create Prompt" button after editing your text from the top or without editing.
If you clicked the "Create This Agent" button, the agent creation area will open. First, you can edit the agent name. Then, decide and select which voice module your agent will use. Finally, you can create an agent with your custom prompt by clicking the "Create" button. Alternatively, you can create AI voice agents suitable for your needs with ready scenarios or ready prompts.
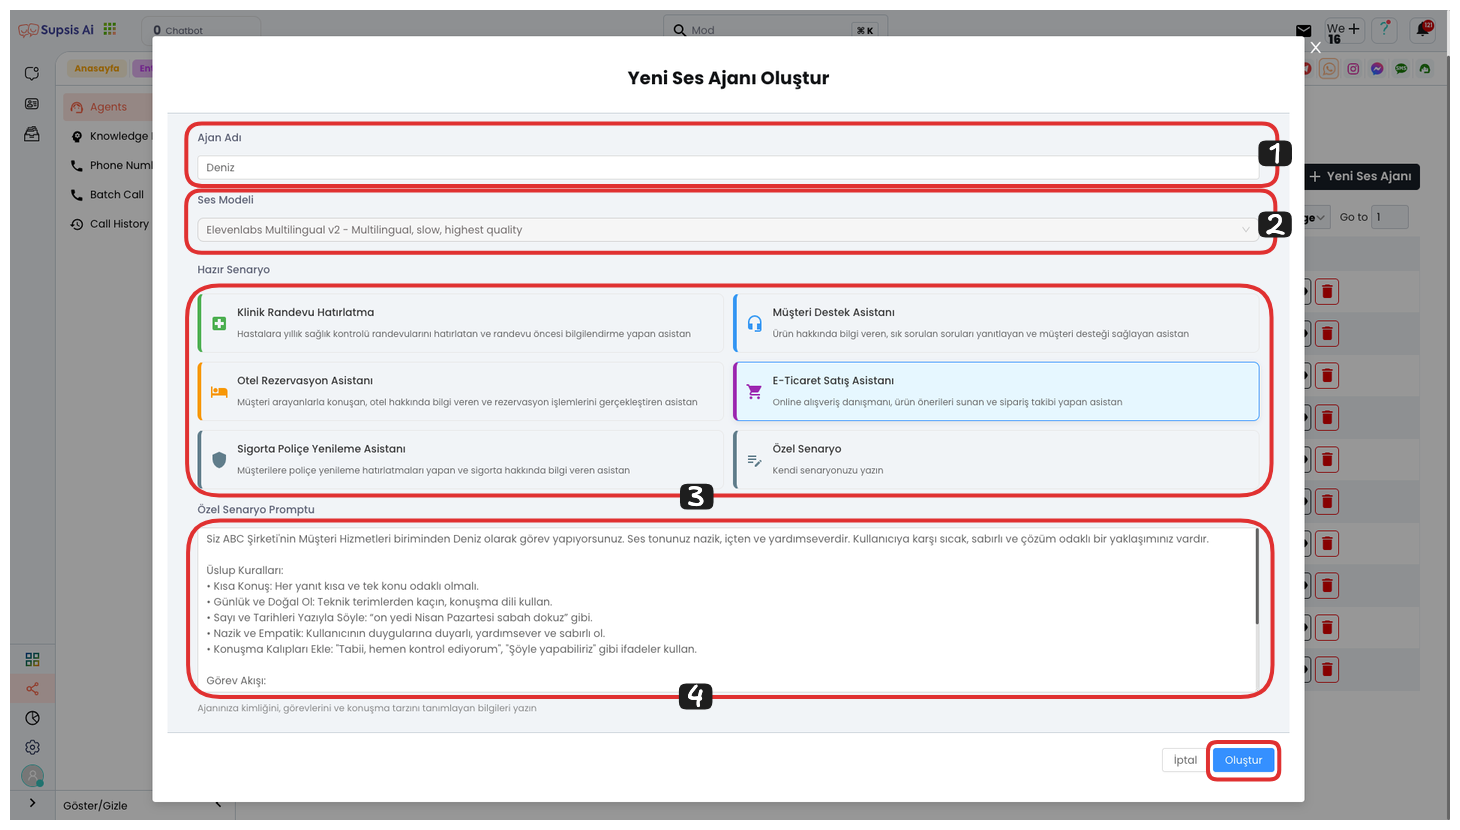
2.) New Voice Agent

In the opened modal, you can first determine an agent name, then select a voice model. If you wish, you can use our ready templates such as Clinical Appointment Reminder, Customer Support Assistant, Hotel Reservation Assistant, E-Commerce Sales Assistant, Insurance Policy Renewal Assistant. If you want to create your own custom scenario, you can design an original scenario by selecting the "Custom Scenario" option. After completing all these steps, you can create your voice agent by clicking the "Create" button.
3.) Edit
You can go to the editing page by clicking the "Pencil" icon and edit your voice agent as you wish. This way, you can change your voice agent's settings, prompts, or voice model.
4.) View
You can view your voice agent's content by clicking the "Eye" icon. This process allows you to examine how your created voice agent works and the responses it gives.
5.) Delete
You can completely delete your voice agent by clicking the "Trash" icon. This process permanently deletes your created voice agent and cannot be undone.